• Home
  • Recipe Index
    • Recipe Index
    • Breakfast/Brunch
    • Cakes and Puddings
    • Chocolate
    • Cookies and cupcakes
    • Custard and Mousse
    • Gluten Free
    • Ice Cream
    • Mains
    • Other Sweet Treats
    • Snack/Appetizers
    • Soups and Salads
    • Tarts and Pies
    • Vegetarian
  • About
  • Cookbook
  • Portfolio
  • Store
  • Press
  • Work with Me

Sugar et al

Because Life is a blend of flavours...

A Chocolate craving ! Double Chocolate Brownie, Chocolate Hazelnut Truffle and Caramelised White Chocolate Mousse

3|03|2013

I have been craving chocolate…craving for a while now. Not a bar or two. Not even a cake or an ice cream. A wicked craving. Shut myself away from the world, sitting with knees folded on the couch, my favourite music playing in the background, a rich..luscious..sinful dessert in my hands, savoring each mouthful.

I have been trying to put away this chocolate hankering for a long time now…saving it for the orange hued months that are to follow. I can only blame it on summer…I have been trying too hard to take advantage of the beautiful summer fruits. It almost saddens me to think that summer is officially over. Berries..no berries..

A little note from a cousin along similar lines was enough to ignite the fire..or should  I say an explosion. Before I could gather my thoughts together, I was weighing, whisking, stirring, piping with a vengeance. A self-proclaimed Pastry chef and Chocolate..its a bittersweet symbiotic relationship.

Dark, milk or white…I debated for a while. Then I decided to go with all three. Unsure of what the final dessert would be, I baked the brownie bases in ramekins. White chocolate is not really a favourite in its regular form but caramelized white chocolate..I could kill for that one. It is a simple technique but patience is the key. You need to be cooking it at a low temperature, checking the oven every 10 minutes till the white turns to the colour of Peanut butter. It is, I think, the most gorgeous and delicious thing on Earth…tastes and looks almost like Dulce de Leche.
One cup of caramelized white chocolate..sent my mind racing in all directions. I decided it has to be a mousse.
Quite pleased with myself, I started to think about a little surprise hiding between the brownie and the mousse. Finally I made a quick ganache and spooned out truffles.
chocolate hazelnut truffle
While the mousse and truffles were setting up in the refrigerator, I baked a batch of doughnuts to use the white chocolate as a glaze. I was in a frenzy…an overpowering chocolate madness. The colour of the glaze was almost identical to the colour of the doughnuts which I was not too happy with. So out came more dark chocolate to drizzle. I will post the recipe of baked doughnuts with the caramelised white chocolate on another day.
By the end of it, I was so drained…physically and emotionally. Too much chocolate to deal with on one day. But that was the story behind creating it. I was so looking forward to assembling it. I love piping…there were days when I piped on the entire kitchen counter to practise and perfect the art.
chocolate hazelnut truffle
And..then the much awaited moment. Time to reap the rewards of my labour.

Shut myself away from the world, sitting with knees folded on the couch,my favourite music playing in the background, a rich..luscious..sinful dessert in my hands, savouring each mouthful.

Brownies, Truffles, Mousse, Doughnuts..and a little left over gorgeous Caramelised White Chocolate. I am in Chocolate Heaven right now !
Double Chocolate Brownie, Chocolate Hazelnut Truffle and Caramelized White Chocolate Dessert

Double Chocolate Brownie (adapted from here)

Yields 4-5 brownies baked in ramekins
227 g semisweet chocolate, chopped
1/2 cup butter, cut into pieces
1 1/4 cups sugar
2 tsp. vanilla
4 large eggs
1 cup all-purpose flour
1/4 cup cocoa
1/4 tsp. salt

Preheat oven to 180C.

In a small saucepan or a bowl in the microwave, melt the chocolate and butter over low heat. Stir until smooth and if you used a pot, pour into a bowl.

Stir in the sugar, vanilla and eggs; blend well. Add the flour, cocoa and salt and stir just until blended.

Spoon the batter into buttered ramekins, filling them about half. Bake for 15-20 minutes or until just set. (A toothpick inserted will come out with lots of moist crumbs sticking to it.) Cool completely before removing from the pan.

Once completely cooled cut out the tops to get a even surface. Then refrigerate till needed.

Chocolate Hazelnut Truffles

Yields 6-7 truffles

I halved the recipe from Joy of Baking and included whole and chopped toasted Hazelnuts.

50 g Dark chocolate
60 g Milk Chocolate
60 ml (about 1/4 cup) whipping cream
1 tablespoon unsalted butter cut into small pieces
6-7 whole toasted hazelnuts.
1 cup chopped, toasted hazelnuts or any nut of your choice for coating.

Place the chopped chocolate in a medium sized heatproof bowl. Set aside. Heat the cream and butter in a small saucepan over medium heat. Bring just to a boil. Immediately pour the boiling cream over the chocolate and allow to stand for a minute or two. Stir with a rubber spatula until smooth. (If the chocolate doesn’t melt completely, place in the microwave for about 20 seconds, or over a saucepan of simmering water,just until melted). Cover and place in refrigerator until the truffle mixture is firm.(This may take several hours).

Place the chopped nuts for coating on a plate. Remove the truffle mixture from the refrigerator. With your hands, a small ice cream scoop, a melon baller or a small spoon drop 3/4 inch mounds on a parchment lined baking sheet. Place one hazelnut in the centre of each mound and roll mounds into smooth balls. Immediately roll the truffle in the chopped hazelnut coating and place them back on the baking sheet. Cover and place in the refrigerator till firm. Bring them to room temperature before serving.

Caramelised White Chocolate Mousse

Serves 4-5

I followed David Lebovitz technique for caramelising the white chocolate. The process has been explained very well and produces consistent results every time. Recipe here. Yields about a cup.

3 Egg Yolks
¼ Cup Sugar(or to taste)
1 teaspoon vanilla extract
½ Cup heavy cream for the custard (Crème Anglaise)
5 tablespoons of the caramelised white chocolate
2 teaspoons powdered gelatine
¾ Cup Heavy Cream for whipping

Soak gelatine in 1 tablespoon room temparature water. Heat the ½ cup cream and caramelised white chocolate in a saucepan. Beat the egg yolks,sugar and vanilla extract together in a bowl. When the cream reaches boiling point take it off the heat and slowly pour it over the egg mixture whisking constantly. Add the gelatine (which by now should have bloomed). Return the egg-cream mixture to the pan.

Heat the mixture under a medium-low flame, whisking constantly till the mixture thickens enough to coat the back of a spoon.

Remove from heat and pass it through a sieve into another bowl. Cool to room temperature.

While the custard is cooling, whip the remaining ¾ cup cream to stiff peaks. Store in the refrigerator till needed.

When the chocolate mixture has cooled down completely add it to the whipped cream gradually & fold in till no white streaks appear. Refrigerate till set, about 4 hours or longer.

To Assemble

Place a chocolate truffle in the centre of a brownie base. Fill up a piping bag fitted with a large plain tip with the caramelised white chocolate. Pipe all around the truffle centre. Dust with cocoa powder. Refrigerate till set

When life gives you apples…and a tree. Apple Blackberry Cake, Fish Tacos and a Parsnip Apple Soup.

24|02|2013

Have you ever experienced Nature at such close range that it almost becomes overwhelming..in a comforting sort of way? Walked on a carpet painted red by none but Nature itself? Tasted a juicy, sun-ripened fruit picked straight off the tree?

I have not…..

Until now..

A drive to the beautiful countryside with breathtaking views. Signs of an approaching autumn. A lovely weekend afternoon spent in the company of good friends, lots of sunshine and …apple trees. The kids danced with joy, running through the orchard. They set themselves to work, plucking apples and racing back to show their precious little pick. We loved their enthusiasm.

I am over the moon as I share some sweet news with you. We are now the owner of an apple tree. Sounds weird..? Its true! We adopted our little tree.. a  small step to support the Australian farmers, our way of acknowledging our gratitude for food and where it comes from.. Most importantly we did it for the boys…to teach them to appreciate God’s beautiful creation, to learn to care for the environment. Apple lovers, you are now assured of a number of of apple recipes coming your way in forthcoming posts.

I knew what I was going to bake that evening.
Apple Blackberry Cake

A apple and blackberry cake has been on my mind for a while. I couldn’t have got a better opportunity than this.

Apple Blackberry Cake

Apple Blackberry Cake

We had a Parsnip and Apple soup and Fish Tacos with Apple and Avocado salsa for dinner. Light and easy.

The soup is our current favourite. The earthy flavor of parsnip along with the tart- sweet apple makes a lovely pairing. Plus onion, garlic..cannot go wrong. Some fresh chives and cinnamon croutons. A hearty comforting dish to sit together and enjoy.

I did think of a carrot, ginger, apple soup. But I would be accused of posting ginger recipes every time. I hope to post that soon for another wonderful variation.


The fish tacos were easy to put together. A few spices, red chillis and lime. I love Mexican food but am not a fan of Guacamole. In fact I don’t like anything that is mashed up. I enjoy having food with different textures hence a avocado-apple salsa sounded great. And tasted great too. Spicy fish..a sweet-sour salsa..a dollop of sour cream and chopped cilantro.

The kids kept talking about the apple trees till they fell asleep while I went through the pictures over and over again. I wanted to pick up the phone and call family and friends to share our beautiful experience. But then I realised, they could live the entire experience on the blog. Yes, I am a blogger now..and a proud one.

Sometimes, simple things in life bring you the biggest pleasures.

Apple tree, I can’t wait to go back to you!

Apple Blackberry Cake

Apple-Blackberry Cake (adapted with a slight variation from Martha Stewart)
Yields a 8 inch round cake

Granulated sugar, for pan
1 1/2 cups all-purpose flour
2 teaspoons baking powder
1/2 teaspoon salt
3/4 cup plus 2 tablespoons packed light-brown sugar
1/2 cup whole milk
2 large eggs
2 apples (I used Red delicious), peeled, cored, and cut into 8 wedges
1 cup blackberries
1/4 teaspoon ground cinnamon
Whipped cream, for serving (optional)

Preheat oven to 180 degrees. Butter a 8-inch springform pan, and dust with granulated sugar. Whisk together flour, baking powder, and salt in a bowl. Whisk together melted butter, 3/4 cup brown sugar, the milk, and eggs in another bowl. Whisk into flour mixture.
Spread batter evenly into prepared pan. Arrange apple wedges over batter, and sprinkle with blackberries. Gently press fruit into batter. Combine remaining 2 tablespoons brown sugar and the cinnamon, and sprinkle over fruit. Dot with remaining 2 tablespoons butter. Bake until top is dark gold, apples are tender, and a cake tester inserted into center comes out clean, about 40-45 minutes. Let cool. Serve with whipped cream if desired
Parsnip and Apple Soup
Serves 4
3 medium Parsnips
1 tart-sweet apple
1/2 Onion
1 clove garlic
2 tablespoon Butter
750 ml milk (I used whole milk)
1/2 cup single cream
Salt
Ground white pepper
To serve
Fresh chopped chives
Cinnamon croutons (recipe below)
Grated Parmesan cheese
Extra virgin olive oil
Peel and quarter the parsnips, ensuring you remove any woody centres. Peel and finely chop the onion and garlic, then peel, core and quarter the apples.Heat the butter in a heavy-based saucepan until it starts to foam. Add the onions and garlic and cook gently without browning for 5 minutes, stirring occasionally. Add the parsnips and apples and continue cooking for a further 5 minutes .
Pour in the milk to cover the ingredients and bring to the boil. Reduce the heat and simmer gently for 15-20 minutes, until the parsnips are tender.
Remove the parsnip and apple soup from the heat and pour in the cream
Purée the parsnip and apple soup in a liquidizer, then pass it through a fine sieve. Season to taste with salt and pepper then serve with a sprinkle of Parmesan cheese,chives and Cinnamon croutons. Add a dash of olive oil.
Cinnamon Croutons
2 slices wholegrain bread
1 tablespoon ground Cinnamon
1 tablespoon olive oil
Slice the bread into cubes, drizzle with cinnamon and olive oil. Toast in the oven.

Spiced Ginger Cupcakes with Salted Caramel Buttercream

19|02|2013

My very first blog post! In many ways i feel like it is my first day at school. Shy, nervous, anxious, nostalgic, emotional, excited, eager, all at the same time. But above all, happy to have embarked on this journey…a journey that begins straight from the heart. I cant wait to step into this new world, make new friends, learn and grow.. one experience at a time.

Spiced-Ginger-Cupcakes-With-Salted-Carmel-Buttercream

I love cupcakes, for the diversity that they have to offer. Colours, flavours, textures…they open up a world of imagination. Frost them, glaze them, store them, pop them into a lunchbox or eat them straight out of the oven..these pretty little things are so versatile. Sprinkles, liners, toppers and there you have it…they are ready to be called your very own. If you are a cupcake addict like me, you know what i am talking about…extra cupboard space to fit in all your little accessories and pans.
Spiced-Ginger-Cupcakes-With-Salted-Carmel-Buttercream
And i love Ginger. It is possibly one of the first ingredients i have cooked with. ‘Balance of flavours’  Grandma would say carefully adding a small amount of grated Ginger into the pan of boiling water. I have so many fond memories of our bonding-over-morning tea-making ritual. A little container of grated ginger is definitely a must have in my Mother’s refrigerator. Over the years i think i have used it extensively across cuisines and it tops my list of no-fail flavours ….desserts couldn’t be far behind.


Spiced-Ginger-Cupcakes-With-Salted-Carmel-Buttercream
I chanced upon these cupcakes when i was about to bake a ginger cake from GoodFood Magazine and ran short of the appropriate sized cake pan. The extra batter landed onto my muffin pans and what resulted was the most wonderful, sticky, moist, caramely, melt in your mouth cupcakes. I varied the proportions to suit myself and played around a bit with the spice mix each time i made them. And finally i think found what i was looking for. I have combined the cupcakes with various frostings but Salted Caramel pairs the best. Treacle lends a unique flavor but if not available at hand, can be substituted with molasses.
The cupcakes are delicious even without frosting and can be stored at room temperature for 4-5 days. If eating them plain,they taste best when warm.
Spiced-Ginger-Cupcakes-With-Salted-Carmel-Buttercream


While i was taking pictures of the cupcakes, changing angles, adding & removing them from focus, my little boys placed a cup of M& M’s on the table. Mama couldn’t be playing this game alone! I was about to remove them, then realised how much colour they added to my pictures. I couldn’t help but keep them.


Spiced-Ginger-Cupcakes-With-Salted-Carmel-Buttercream


Spiced Ginger Cupcakes with Salted Caramel Buttercream.


For the Spiced Ginger Cupcakes
Yields 18

125 g butter (about 1/2 cup)
125g dark brown muscavado sugar (about 2/3 cup)
125g black treacle (about 2/3 cup)
150 ml milk (about 2/3 cup)
1 egg
180 g all purpose flour (about a cup and a half)
1 tsp bicarbonate of soda
1/3 cup glace ginger, finely chopped
1/2 tsp ground cinnamon
1/2 tsp all spice


Preheat oven to 160C. Butter or line two muffin tins with muffin cases or cupcake liners. Put the butter, sugar and treacle into a saucepan and heat gently for about 5 mins until the butter and sugar have melted. Stir in the milk. The mix should be just warm to the touch; if not, leave to cool a little longer, then beat in the egg.
Mix the chopped ginger and dry ingredients together in a large bowl and make a well in the centre. Pour the melted mix into the well, then gradually draw the dry ingredients into the wet with a wooden spoon, until you have a thick, smooth batter. Pour the batter into the prepared tin, then bake for 15 to 20 mins or until a skewer inserted comes out clean and the surface is firm to the touch.

Salted Caramel Buttercream (adapted from Chow)
Yields about 2 cups
1/2 cup granulated sugar
4 tablespoons water
1/2 cup heavy cream
1 teaspoon vanilla extract
1stick salted butter , at room temperature
1 1/2 cup icing or powdered sugar
To make the frosting, first you must make the caramel.
Briefly stir together granulated sugar and water in a small saucepan and bring to a boil over medium-high heat. Continue cooking, without stirring, until the mixture turns dark amber in color, about 6 to 7 minutes. Remove from heat and slowly add in cream and vanilla, stirring with a wooden spoon until completely smooth. Set aside until cool to the touch, about 25 minutes.
In an electric mixer or with a hand mixer, cream the butter until smooth and well blended. Add the vanilla extract.With the mixer on low speed gradually beat in the sugar and mix until completely incorporated. Turn mixer off and scrape down the sides of the bowl, then add caramel. Beat frosting on medium-high speed until airy and thoroughly mixed, about 2 minutes. Cover and refrigerate until stiff, about 45 minutes, before using. The frosting is ready to be piped onto the cooled cupcakes.

About Sugar et al.

19|02|2013

IMG_5072-4
Hello and Welcome to Sugar et al!

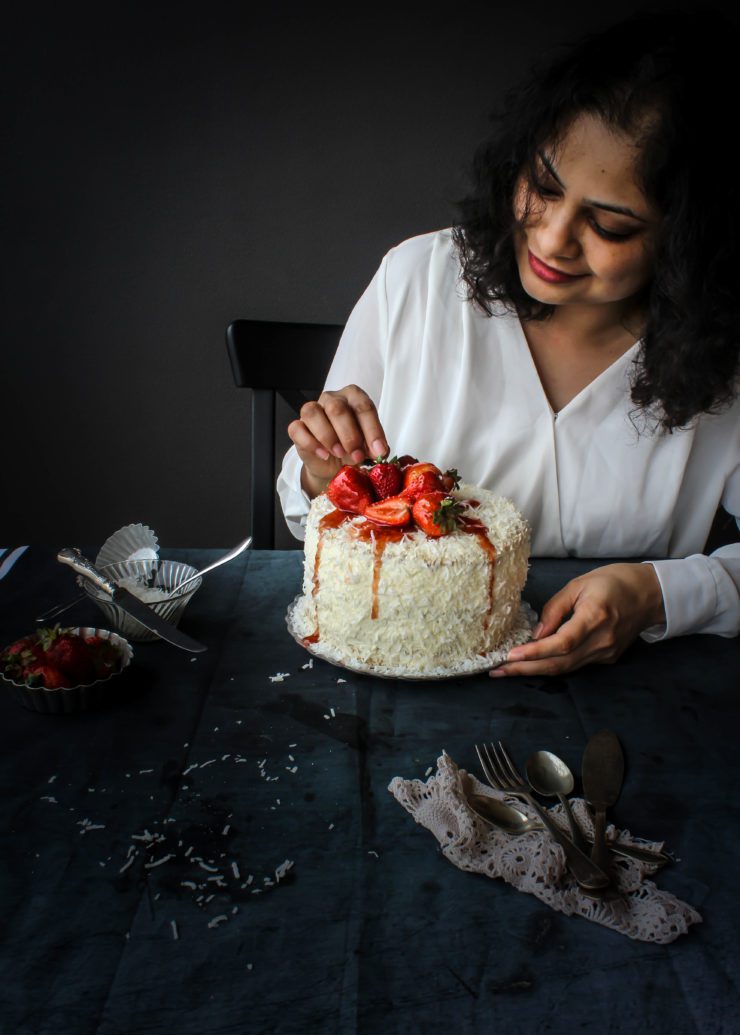
I am Sonali and I create recipes, style and photograph food for a living.

Sugar et al. is a place where I share my passion for food (mainly sweet), photography, colors and all things beautiful and creative. Sweet food is celebrated here and quick, simple, savory cooking is encouraged. We want to reserve our time and calories for the naughty treats.
I live in Sydney, Australia with my wonderful husband and amazing little twin boys.

I started this blog in early 2013, a few months after I came to live in Sydney, smitten by the passionate food industry here, the gorgeous Australian produce and my need to cook with them every single day.

What began as a humble effort to share recipes and my constant experiments in the kitchen soon turned into a full time food photography venture.  A contributor to StockFood (Photocuisine) and other stock agencies, my work has been published globally across a range of media including magazines, cookbooks and advertising. 

I love partnering with brands and businesses to create visually stunning content. Over the last two years I have collaborated with both international and local businesses to bring their creative vision to life through food photography. To have a look at some of my recent work please click here or check out my page on Instagram. If you like what you see and would like to initiate a conversation, please don’t hesitate to get in touch at sonalighosh21@gmail.com

What you can expect on my blog are sweet recipes that focus on the different flavors, textures and visual aspect of food. You may come across indulgent recipes and gluten free, low fat, healthy recipes as well. Spices are a part of my heritage so I pair them often with my sweet creations.
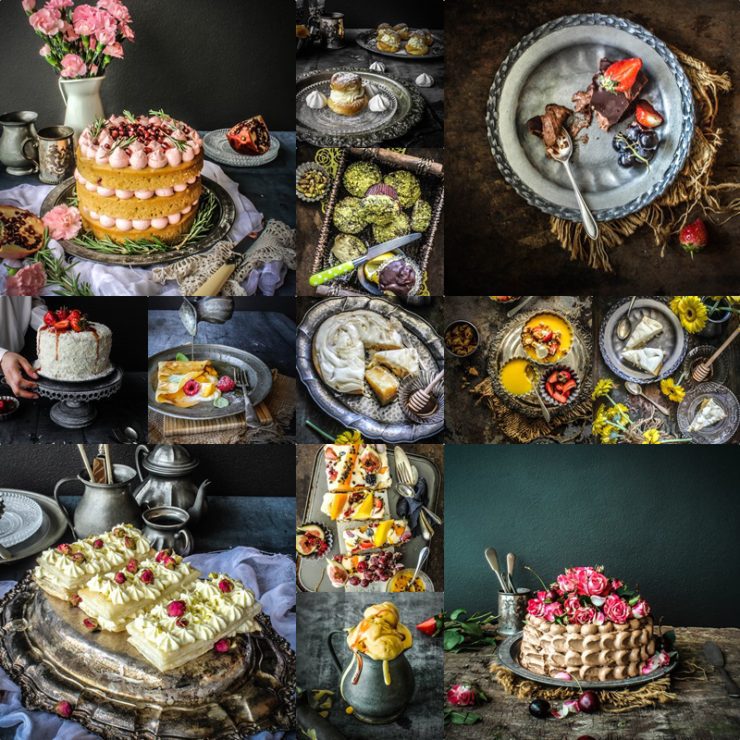
I almost always include shots from various angles to give you a clear idea of the texture, height and feel of my recipes.

My Photography is self taught and I am learning something new everyday. I love plating up and styling food and most definitely ‘eat with my eyes’ first. My style is rustic along with the usage of plenty of bold colors.

page sugaretal collage 2

More about me:

The sweet treats I make today are very different from the ones that I grew up eating though I largely draw the inspiration from my childhood favourites. I grew up in the city of Kolkata, India a place known for it’s fascinating share of Indian delicacies and gorgeous sweets.  I don’t know when and how I fell in love with baking because baking was not all that popular in India at that time, not even today. I do remember however how much I was in awe of the  little round portable oven in my house and would skip my time with friends to help my Mom. Years of reading cookbooks, watching videos on YouTube and practice helped me feed this passion and today, baking is what I enjoy the most.

In a no-so-long-ago life, I had a very successful career in the banking industry. I decided to take a career break when I became a mother to twin boys and that is when I reconnected with my passion for baking and cooking.

Sugar et al is a wonderful outlet for my creativity and I love coming back to it every day. I hope you enjoy it as much as I do.

I would love to hear from you so please don’t hesitate to write to me. My email sonalighosh21@gmail.com
Thank you for stopping by!

Disclaimer: All content in this blog are copyrighted and rights reserved. Please seek permission before use.

  • « Previous Page
  • 1
  • …
  • 109
  • 110
  • 111
Hey Sugar
Cake
Link to my Facebook Page
Link to my Instagram Page
Link to my Pinterest Page
Link to my Mail Page
Subscribe to this site
Fresh Awards
2019 Aus mumpreneur
2019 aus mumpreneur
Mumbrella

Copyright © 2025 · Sugar Et Al · Designed by Smitten Blog Designs · Log in