I couldn’t believe my eyes when I looked at my bathroom scales this morning. I lost weight! A good 2 kilos. What I’ve been trying to achieve through exercise and self restraint in pastry matters, without luck..I achieved through a few weeks of medical tests and doctor visits. If you remember this post where I shared some health concerns with you, my nightmare is finally over. I completed the last of the tests this week and to my utmost relief I was assured that I did not have the dreaded disease. I do not have cancer!
My eyes well up at the thought of what I had to put my family through during this phase. The fear, the unknown, the unspoken, the unthinkable. The horror of lying inside closed machines (has anyone experienced an MRI machine?), learning to cope without food and water every other day of the week whilst cooking for others because most tests require you to do that. The one verdict that could have changed my world..and so many more that are intertwined with mine. It’s over at last! Leaving me a bit more in love with my life and the precious beings in it.

So I am trying to bring my life back on track again. Trying to put my heart and mind in things that I love to do. This recent experience has left me so exhausted that I am finding it hard to get back the creative flow of my work. Ideas that would take me a moment to turn into a recipe earlier are a struggle to give shape to. I am hoping this is just a phase and it will pass away soon.
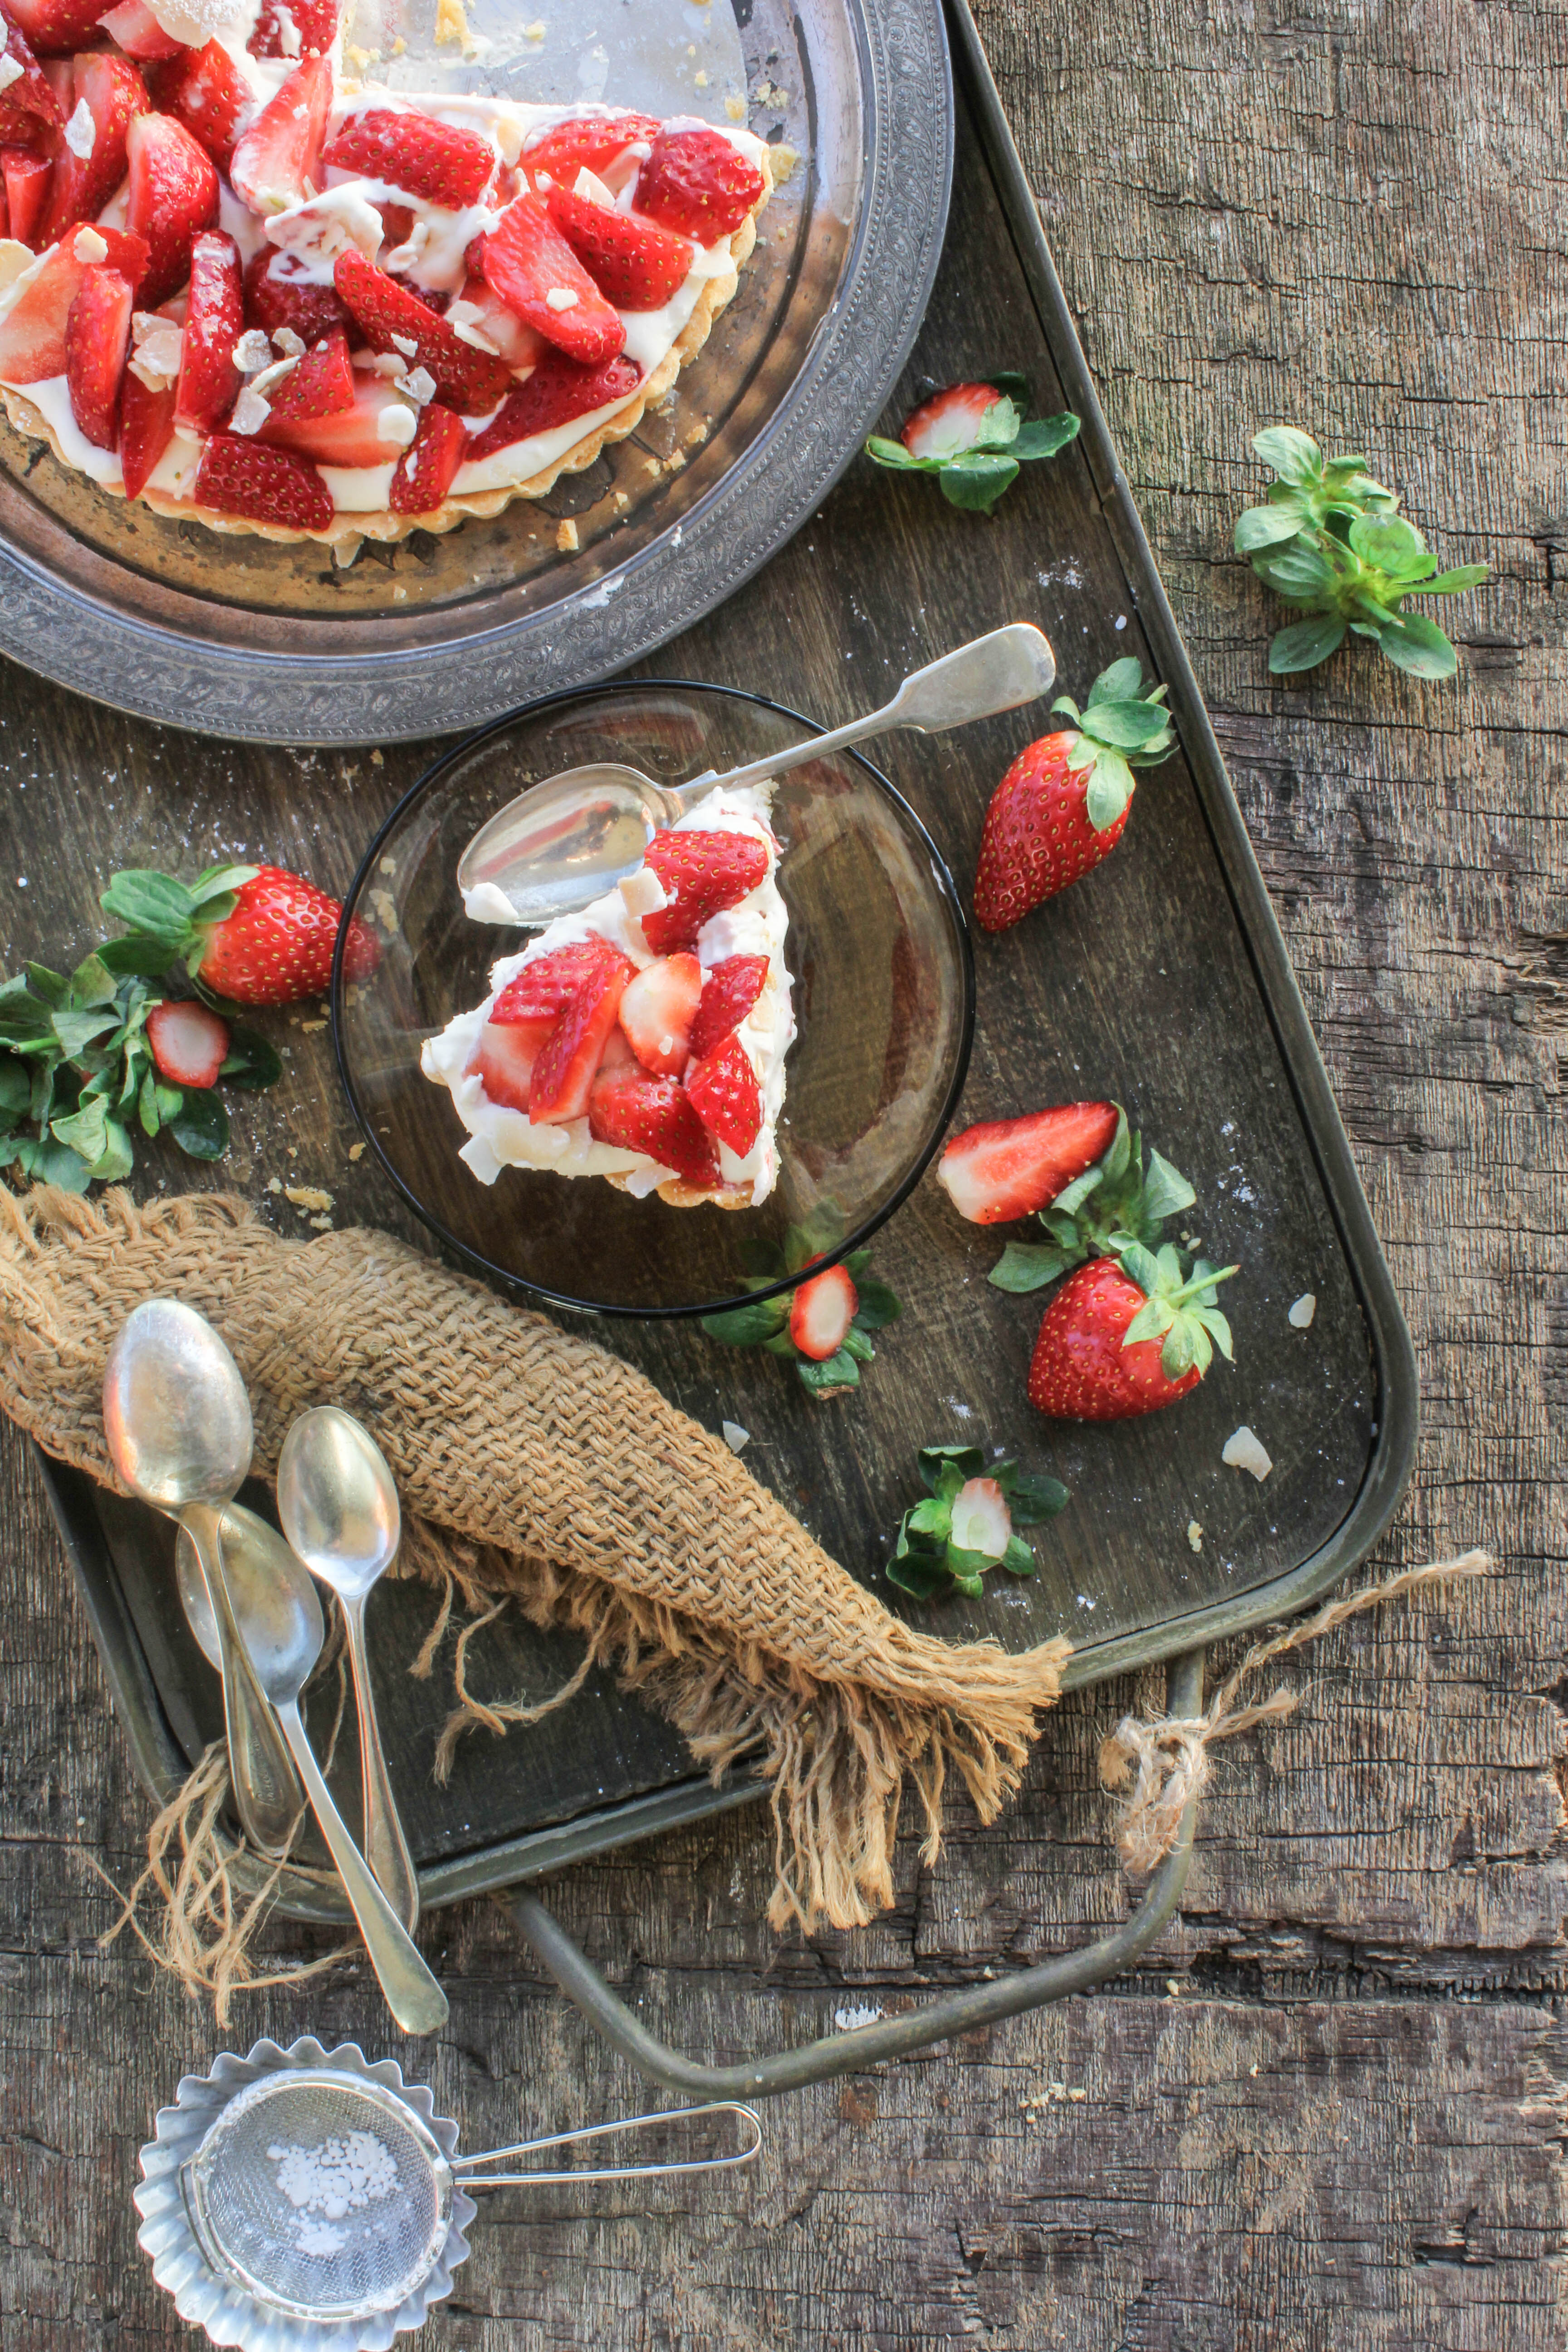
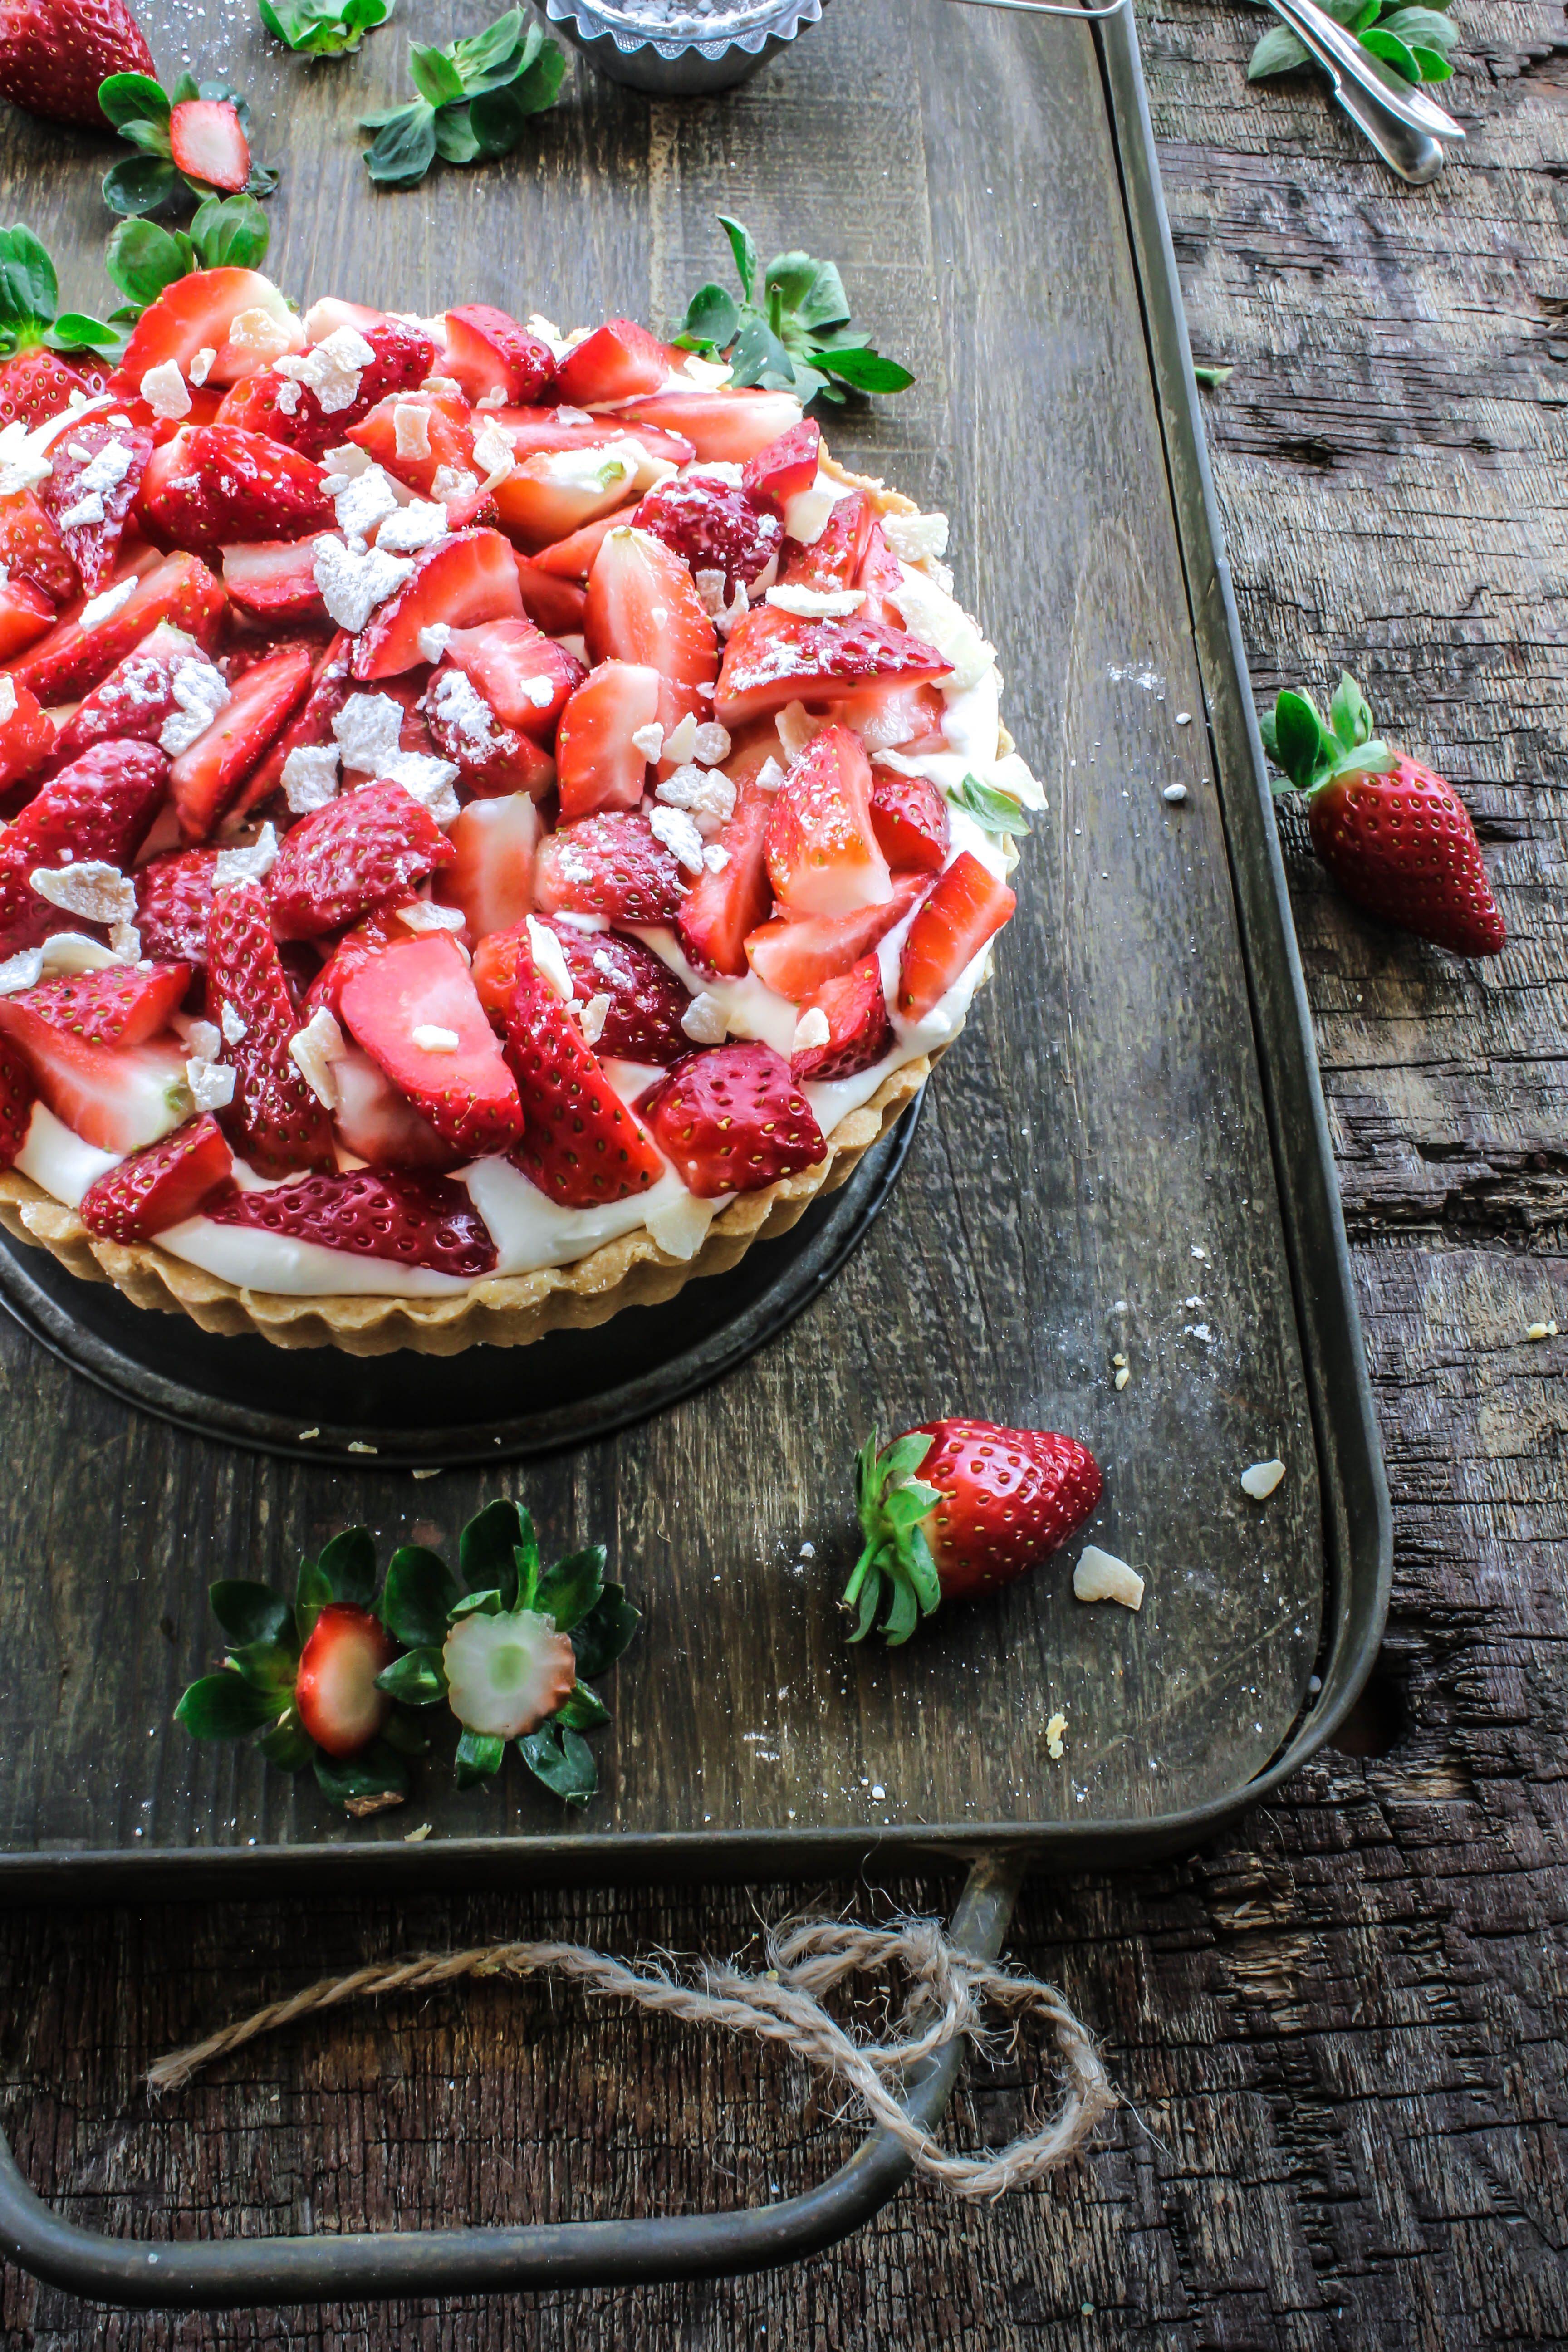
I’ve been meaning to make a tart with coconut cream in it since I discovered the ease and deliciousness of whipped coconut cream in this recipe. Top it with fresh strawberries and you have an amazing dessert in your hands. The tart pastry is quite easy to make because there is no need to roll out the dough. You just make the dough in the processor and press it with your fingers on the base and sides of your pan. Using dessicated coconut in the shell, not only gives it an extra crunch but is also a delight for any coconut lover. It is really an easy recipe that you can whip up without any fancy ingredients or a great deal of time. I have used part coconut cream and part whipped heavy cream for the recipe because I did not want the resulting cream to be too strong in coconut flavor. But if you are a coconut fan, by all means double up on the coconut cream by using two cans of coconut milk.
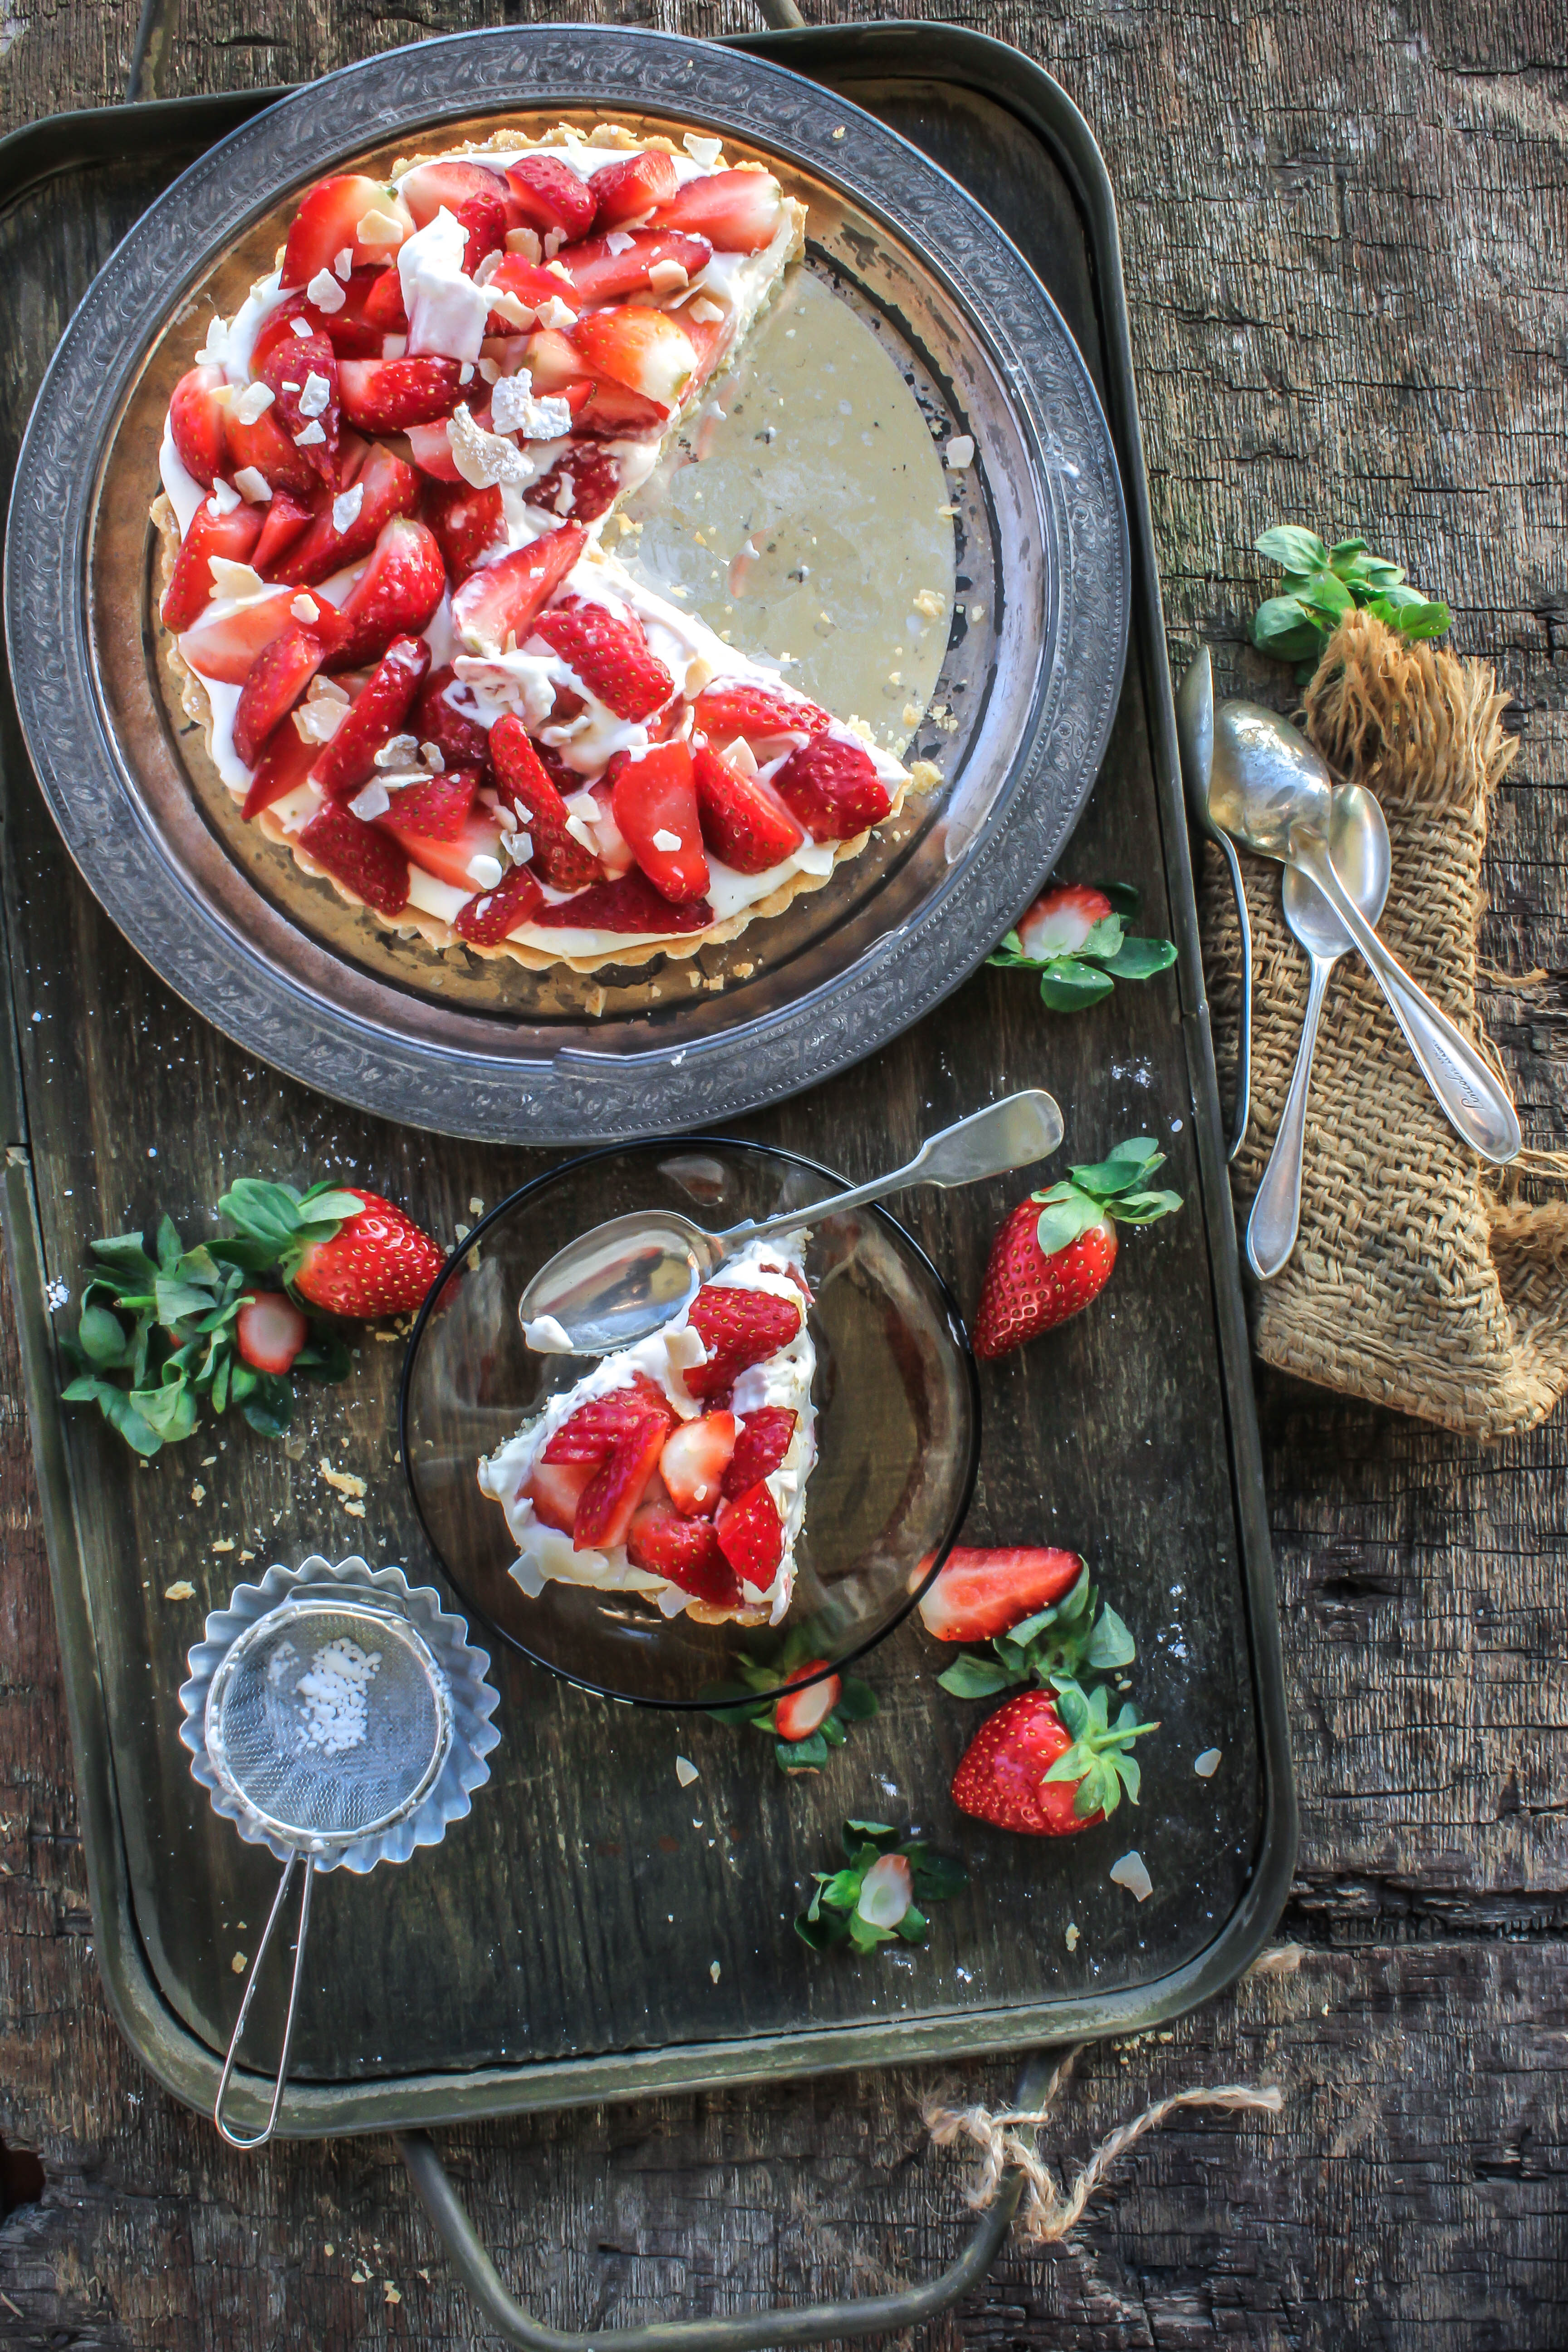
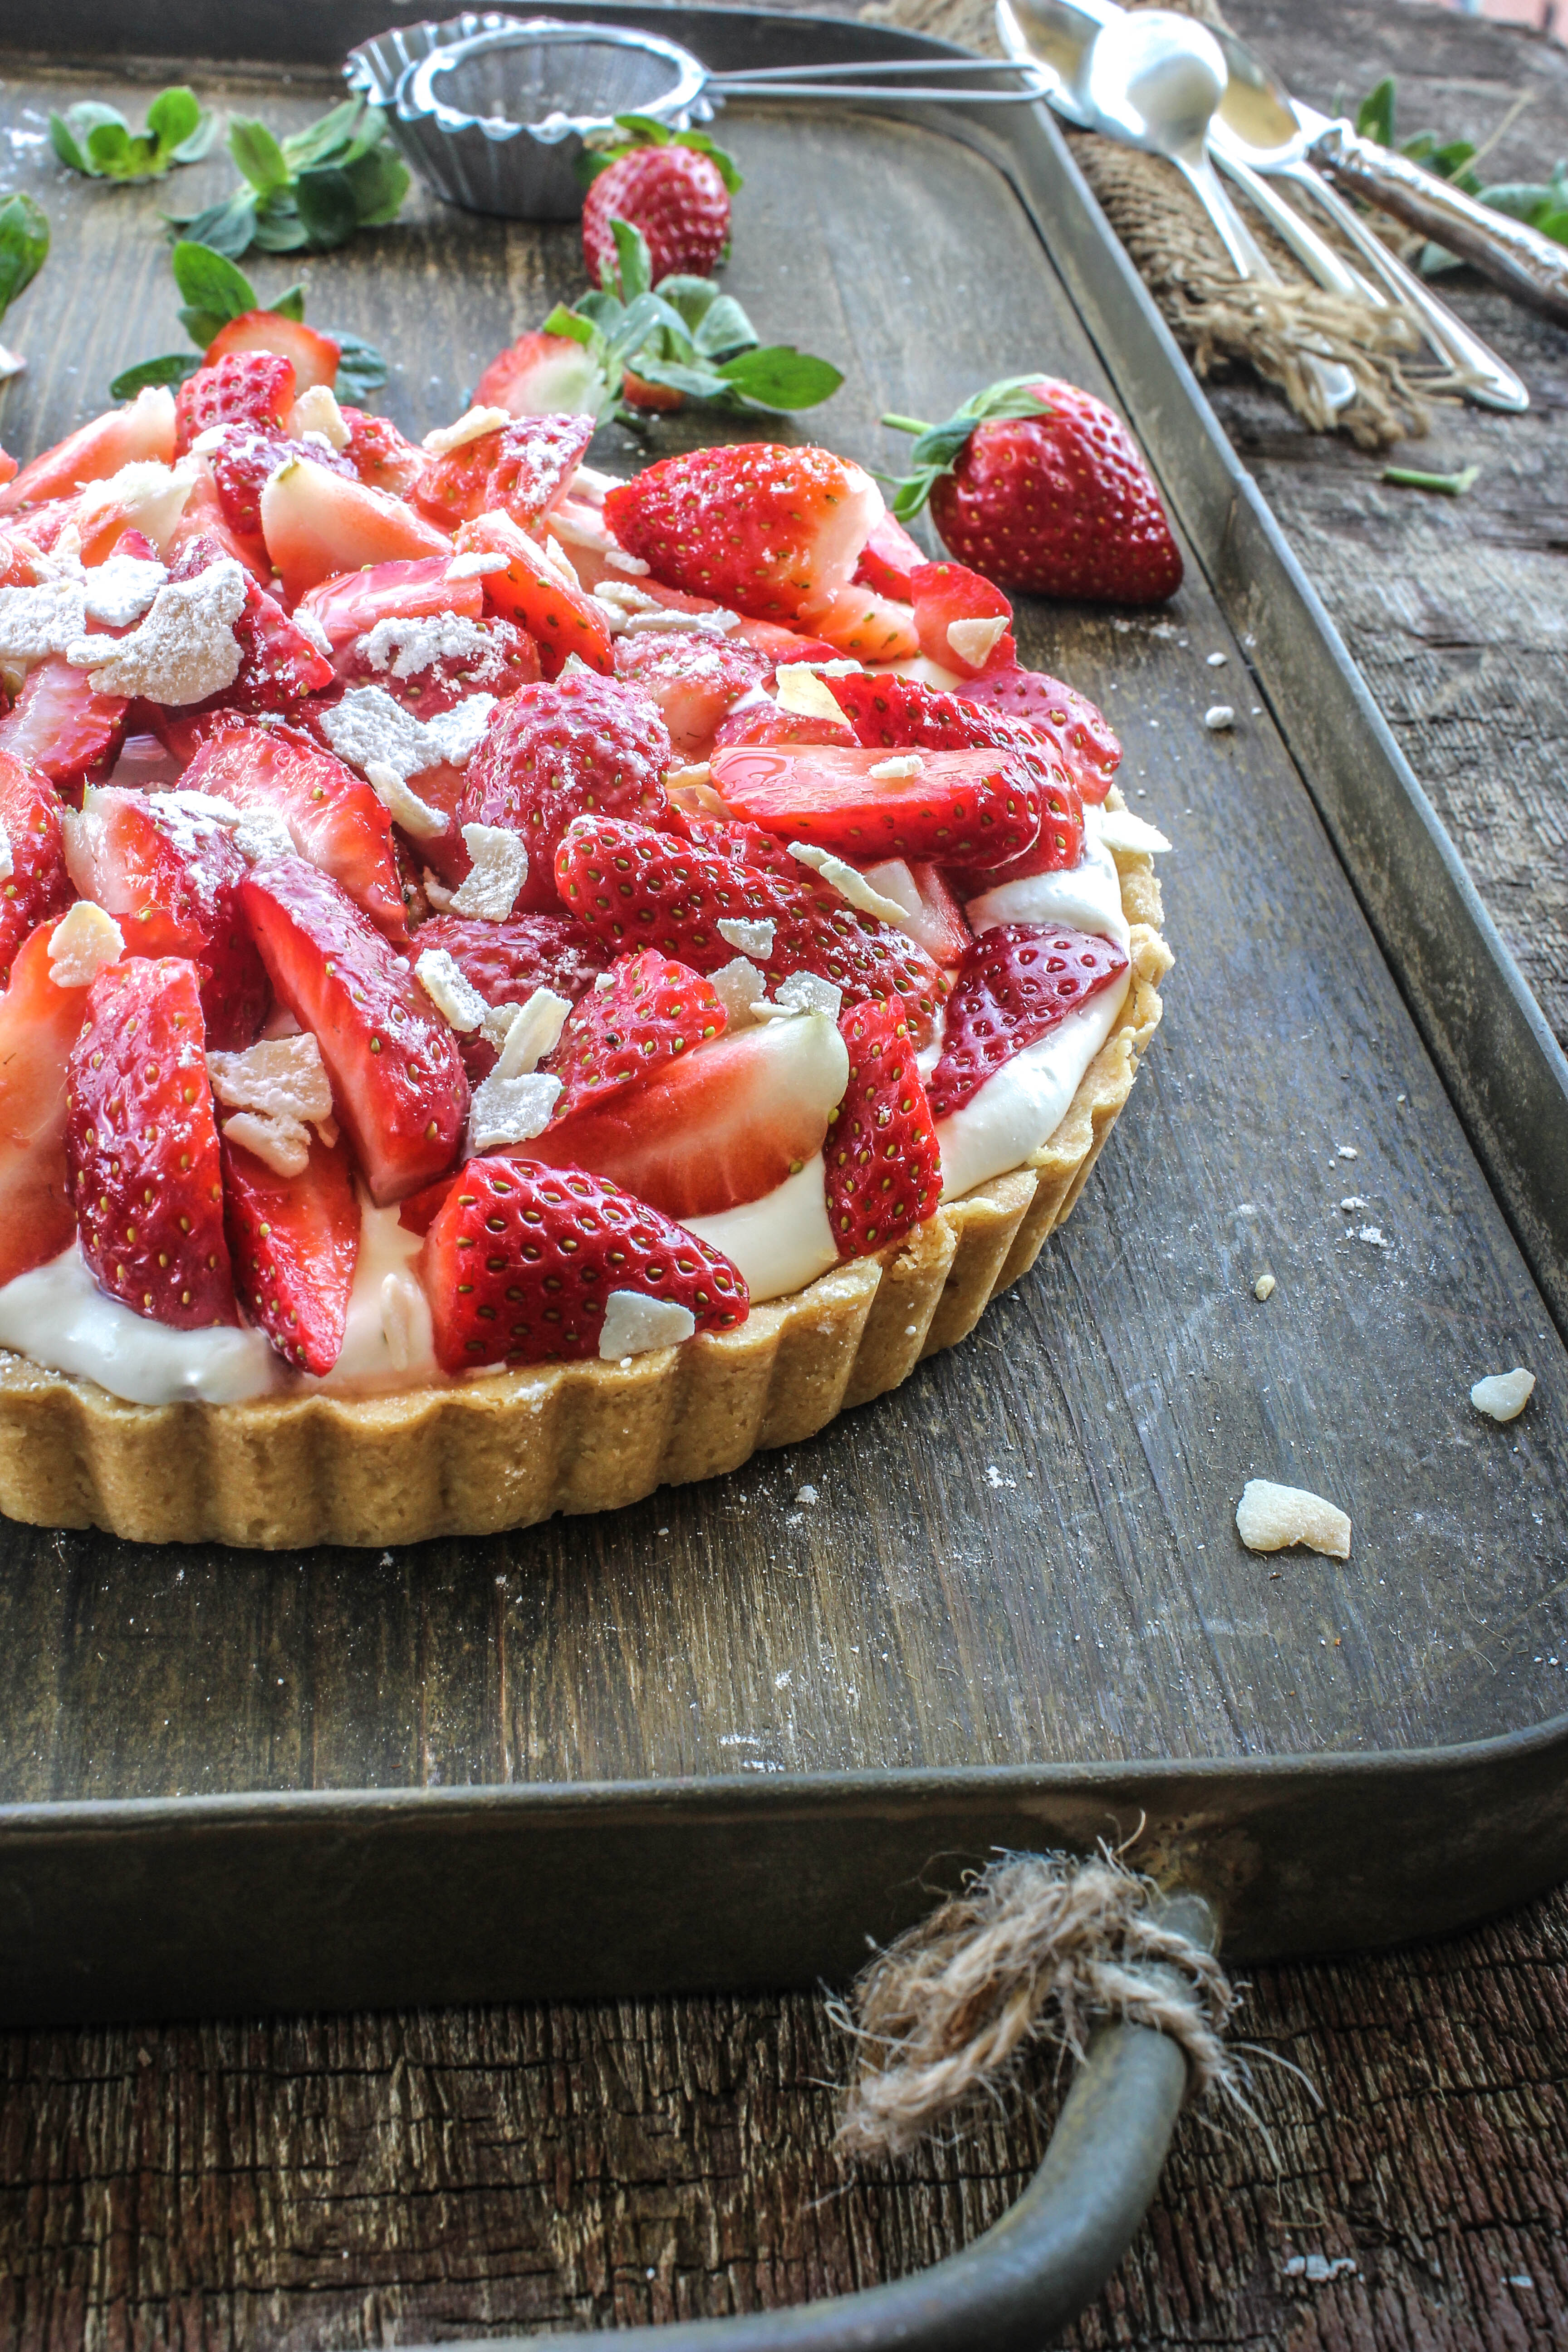
Fresh Strawberry And Whipped Coconut Cream Tart
Yields an 8-inch round tart
To make the coconut tart shell (adapted from Epicurious)
Coconut cream from this recipe (If you would like a strong coconut flavour, double up and use two cans of coconut milk/cream)
1 cup heavy cream, whipped to stiff peaks with 1/2 tsp vanilla essence and 3 tbsp castor sugar. Refrigerate until needed
Fresh strawberries, cleaned, hulled and quartered
Toasted coconut chips/flaked coconut
Icing sugar to dust
Pulse together flour, coconut, butter, confectioners sugar, and salt in a food processor until dough just begins to form a ball. Press dough onto bottom and up side of an 8 inch tart pan with floured fingers, then freeze until firm, about 10 minutes. Bake in pan on a baking sheet in middle of oven until golden, about 25 minutes, then cool completely in pan on a rack.
Gently fold in the coconut cream into the whipped cream mixture. Refrigerate until needed. Once the tart shell has cooled, spoon the cream into the shell. Top with fresh strawberries and coconut chips. You can store in the fridge until serving. Dust with icing sugar just before serving.