• Home
  • Recipe Index
    • Recipe Index
    • Breakfast/Brunch
    • Cakes and Puddings
    • Chocolate
    • Cookies and cupcakes
    • Custard and Mousse
    • Gluten Free
    • Ice Cream
    • Mains
    • Other Sweet Treats
    • Snack/Appetizers
    • Soups and Salads
    • Tarts and Pies
    • Vegetarian
  • About
  • Cookbook
  • Portfolio
  • Store
  • Press
  • Work with Me

Sugar et al

Because Life is a blend of flavours...

Curried Chicken Noodles

16|11|2013

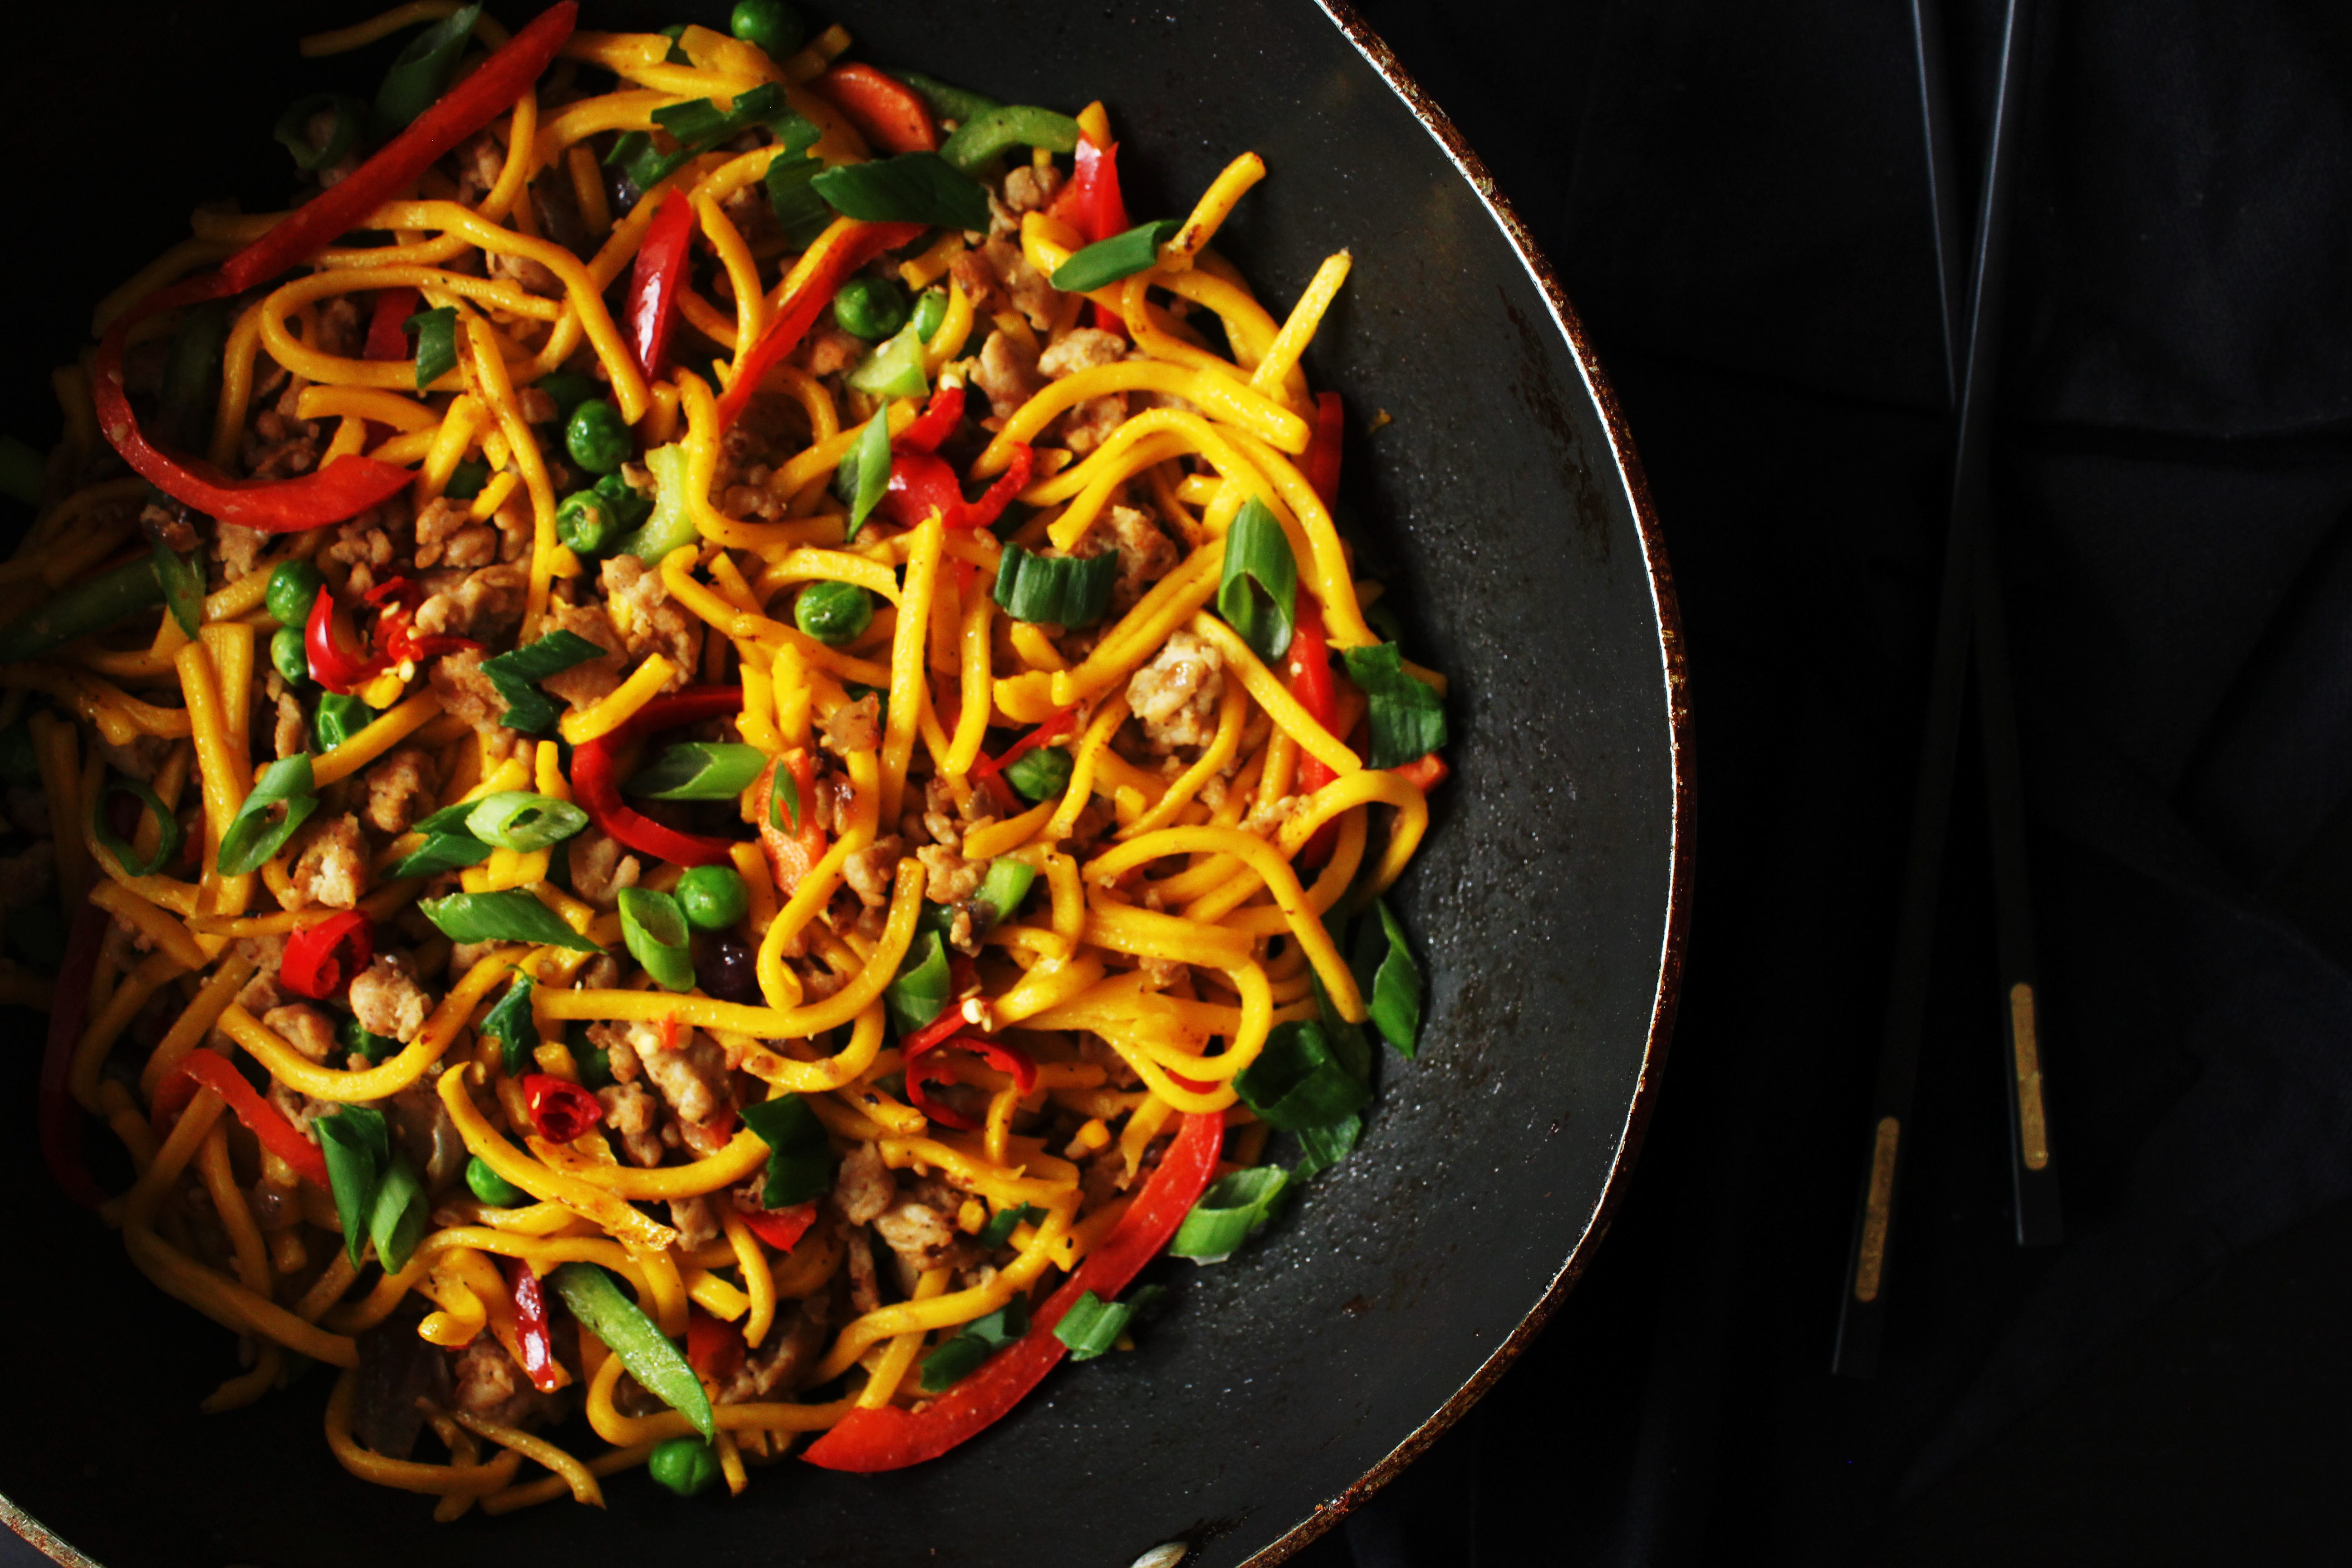
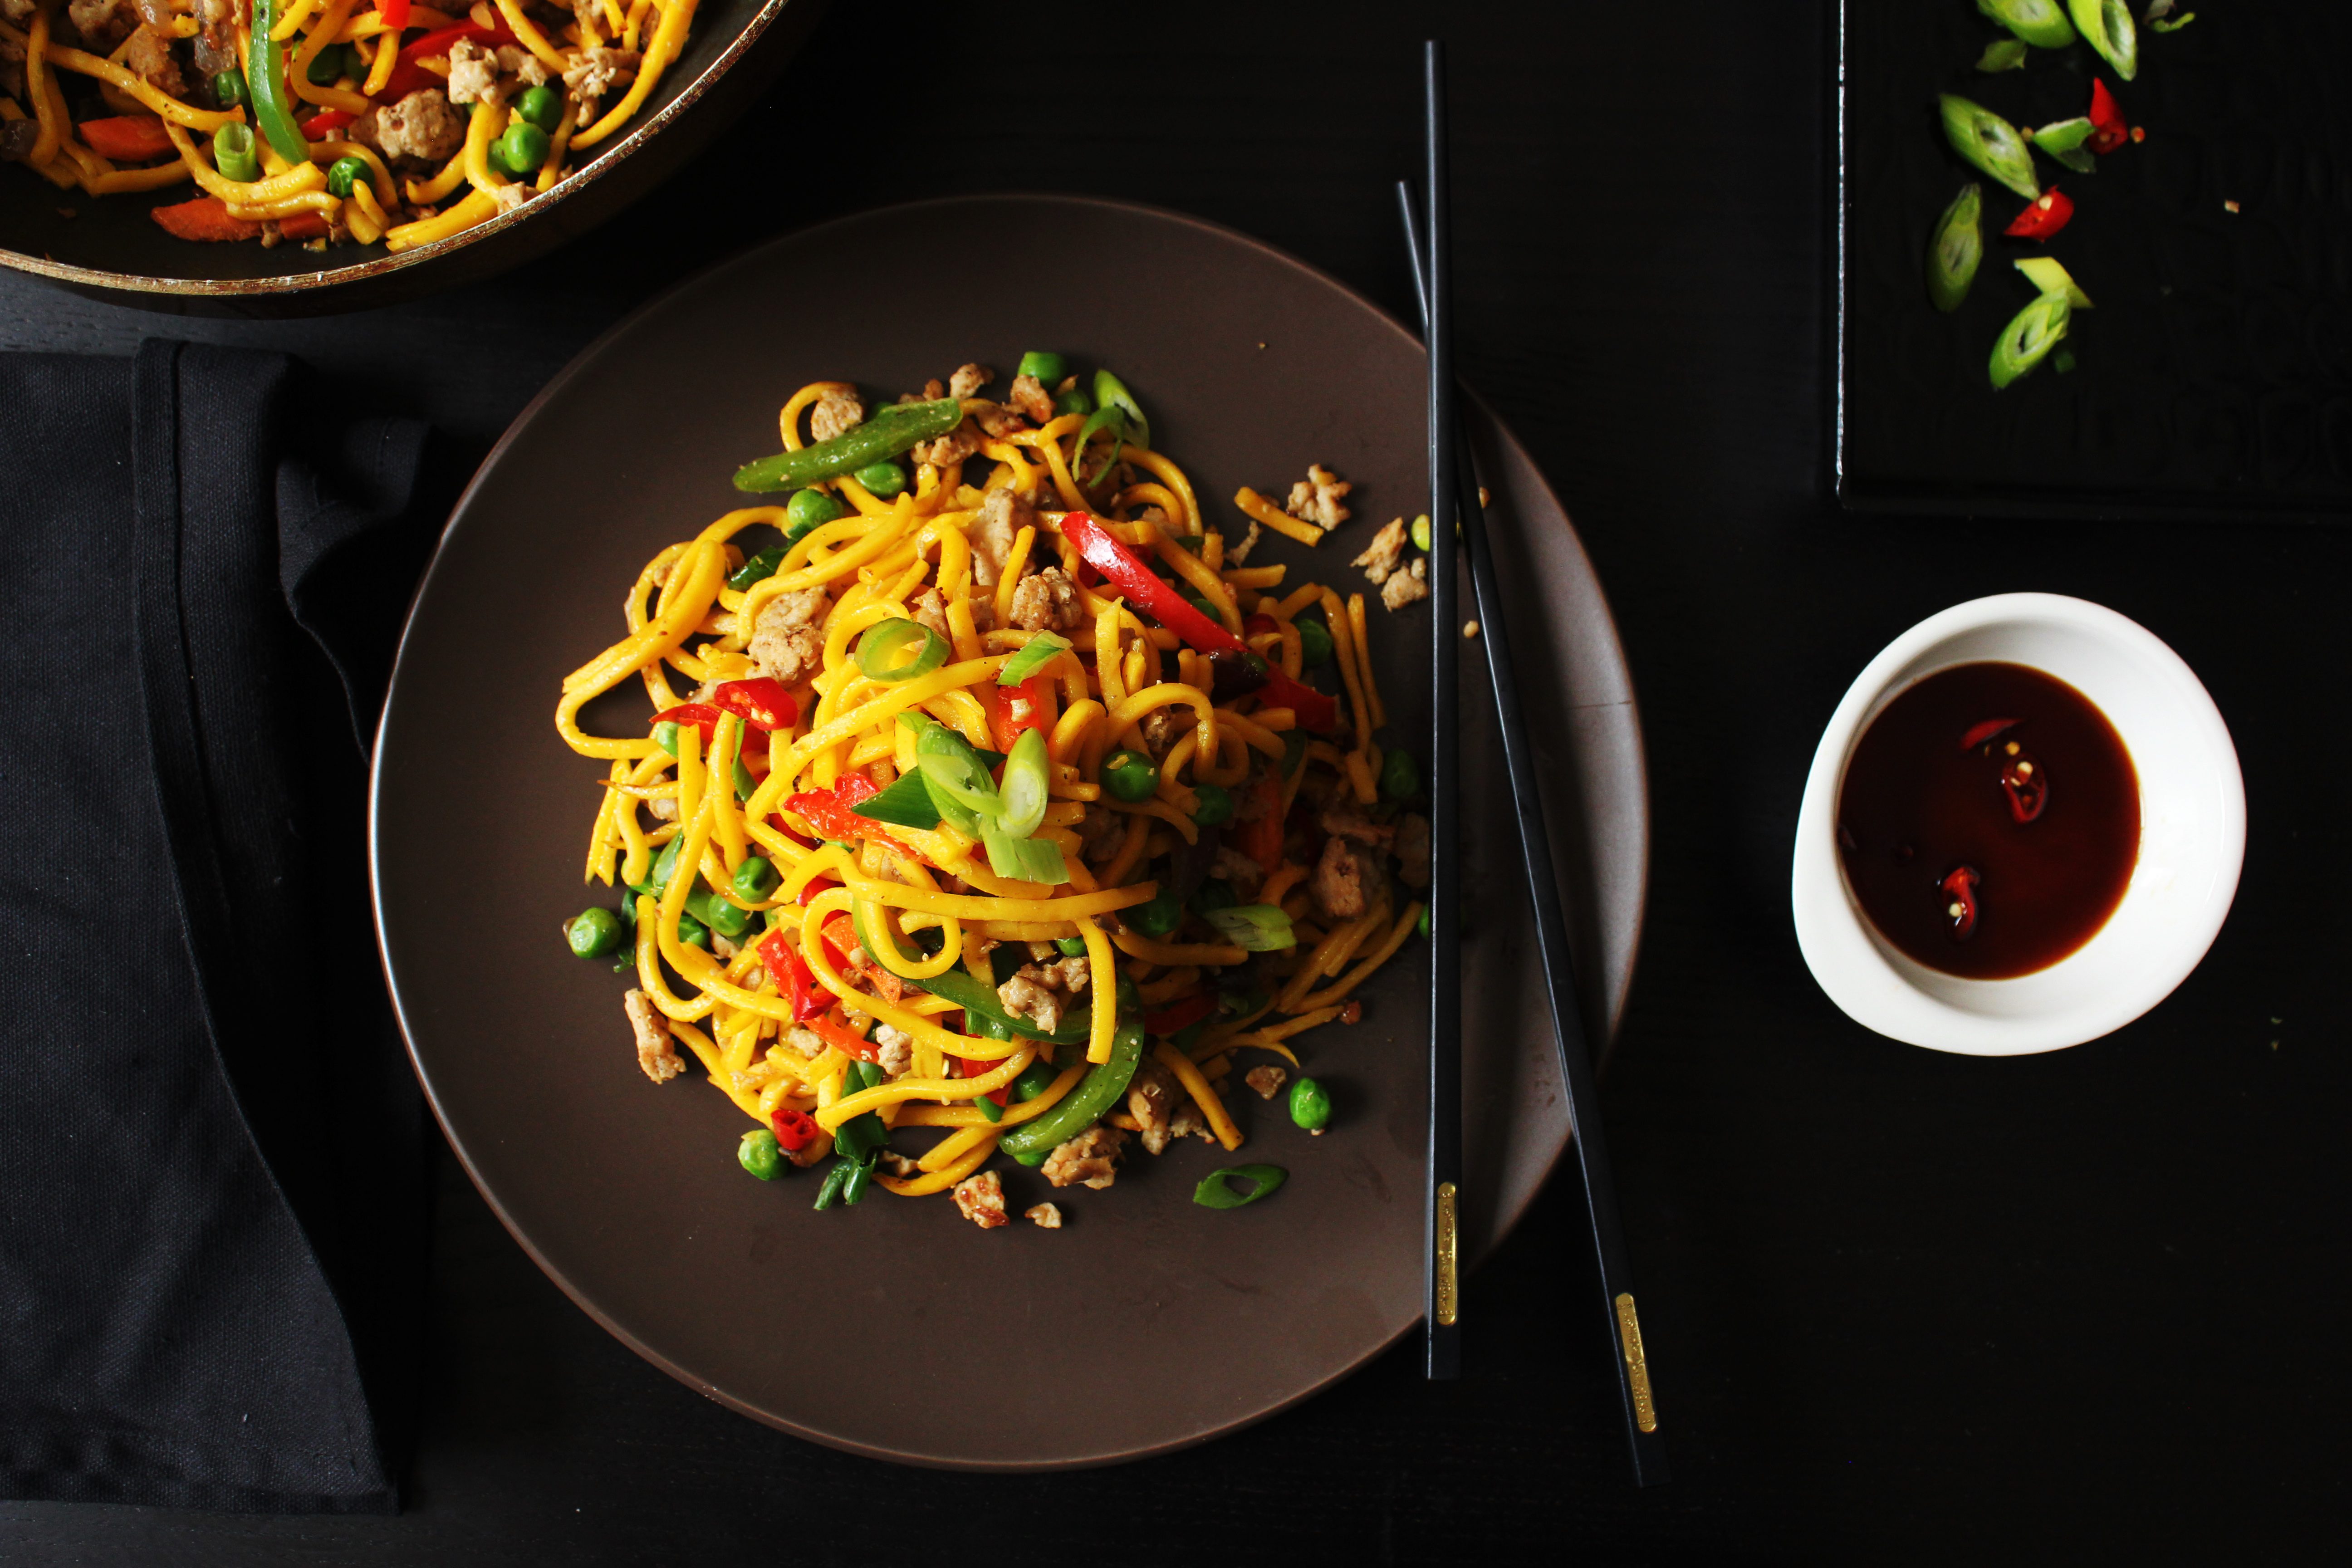
An easy and simple chicken noodle dish that is flavored with curry powder and made nutritious by adding vegetables.

I am yet to find a kid who does not like noodles. In fact it would be easier to say that kids love oodles of noodles! And then there are endless varieties to choose from. Though I love what Instant noodles have to offer in terms of flavours, pricing or time-saving options, I would generally not recommend it for my children. The simple reason for that is that is comes with preservatives and additives which can have harmful effects on the body.
curried chicken noodles

It is obvious that the flavour of the Instant Noodles lies in the seasoning mix. So replacing it with your own seasoning and adding it to home-made noodles can give you similar or better results without compromising on health. My ultimate standby seasoning is the spice blend called Curry Powder. I use it in soups, add it to rice, roasted vegetables, grilled meats and so on. Adding it to noodles enhances its taste and is a nice variation to the typical flavours. Curry powder is available in most supermarkets and Indian stores but if you want to control the ingredients in the spice blend, you can make your own. There are however many variations to this too but I prefer to use the ones without cloves or cinnamon as they otherwise taste like Garam Masala. Here’s a recipe that you can use to make it at home.

curried chicken noodles

I have used fresh, thick hokkien noodles in this recipe. I prefer to use this variety as it significantly reduces my cooking time. If you do not have access to this variety you can use any noodles of your choice but remember to follow the instructions on the pack as the cooking time would vary. The protein in the recipe is chicken mince. It can be substituted with whatever you have at hand or eliminated if you are a vegetarian. Again, for me minced meat works best as it cooks quickly and takes on flavours uniformly.

curried chicken noodles

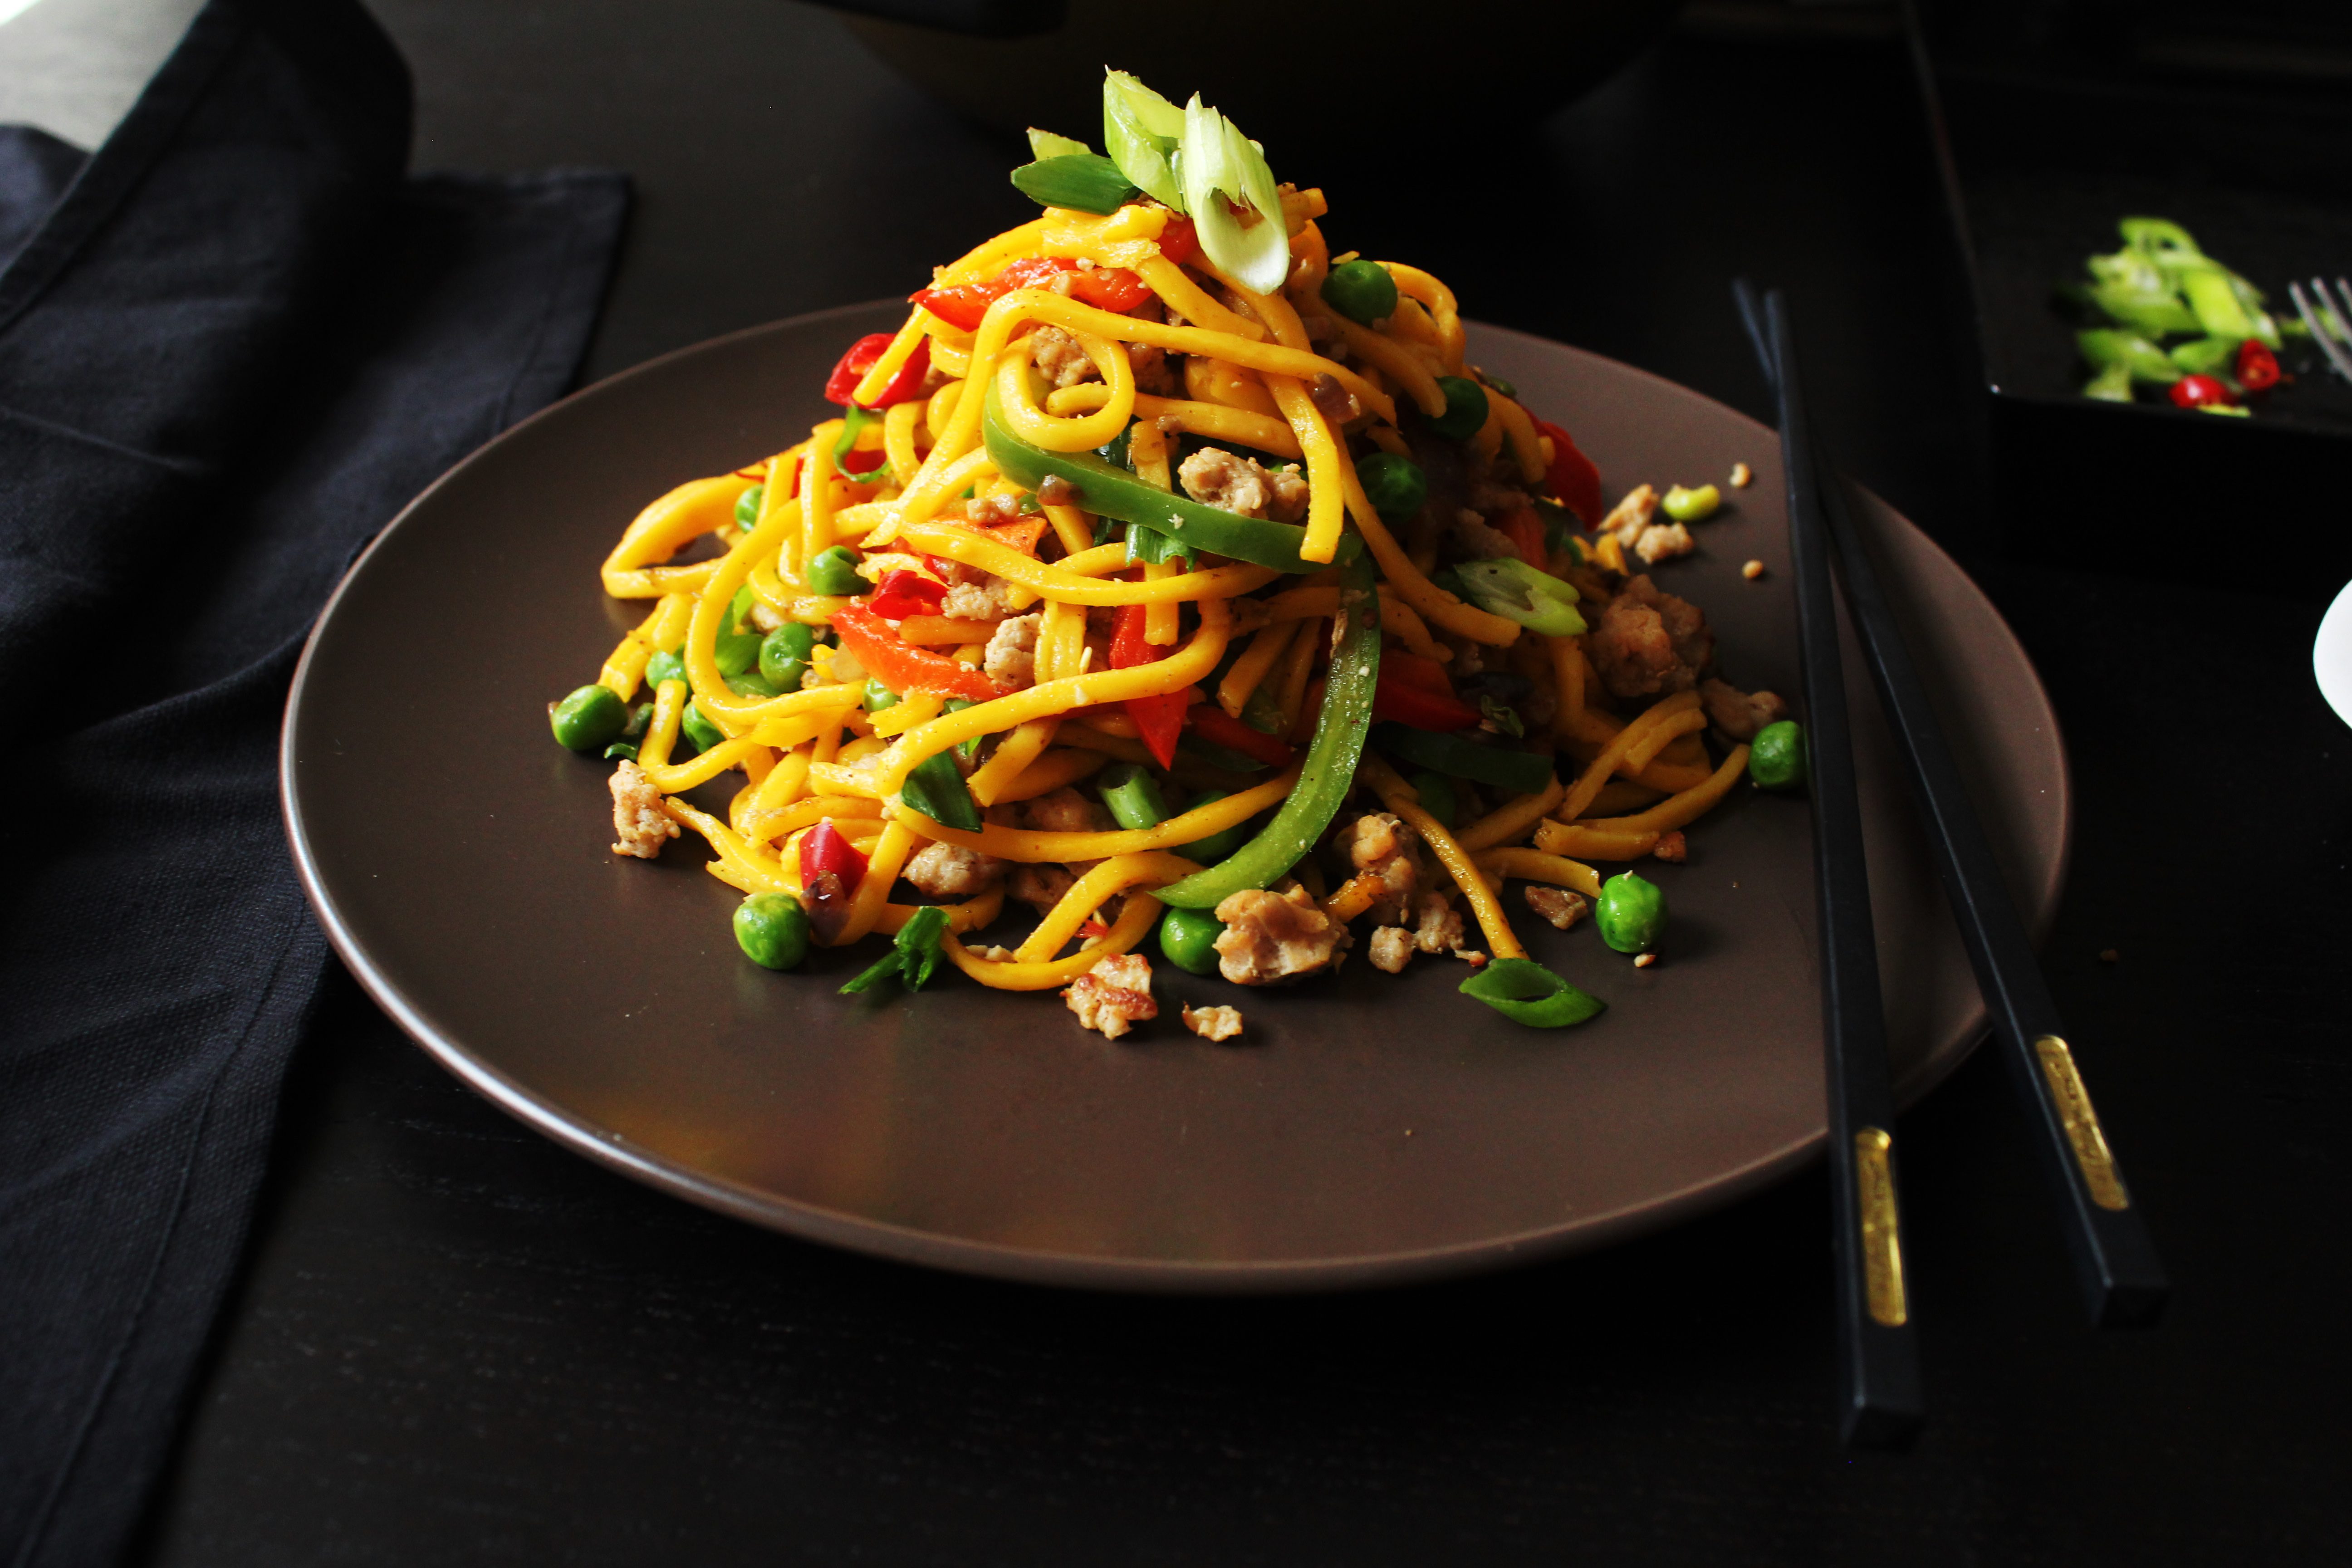
The curried chicken noodles is a favourite at our place and is a real time saver when you are busy. It is also a great way of adding vegetables to your meal. Do take care not to overcook them so they retain their shape and colour in the food. One of the reasons why my children love this dish is because of its vibrant colour.

Hope you all are having a great weekend. Ours is a wet one and quite a dampener as we had so much planned for the weekend.

curried chicken noodles


Curried Chicken Noodles (adapted with variation from Recipes+ magazine)
Serves 4

300 g chicken mince
1 tbsp vegetable oil
1 brown onion, thinly sliced
1 clove garlic, thinly sliced
1 carrot, thinly sliced
1/2 red pepper, thinly sliced
1/2 green pepper, thinly sliced
1/2 cup frozen peas
2 tsp curry powder
salt, as per taste
300 g Thick hokkien noodles
1 tbsp soya sauce
spring onions, finely shopped
red chillies, finely chopped (optional)

Soak the hokkien noodles in boiling water for a couple of minutes. Stir with a fork to separate the strands. Drain to remove water. Keep aside

In a non-stick wok or large frying pan, heat the vegetable oil over medium heat. Add the garlic and onions and fry till lightly browned. Add the chicken mince and curry powder and stir fry till browned and fragrant. Next add the carrots, peppers and frozen peas and stir for 2-3 minutes. Add in the noodles, soya sauce and salt and mix till well combined.

Garnish with chopped spring onions and red chillies (if using).


Tuna Sesame Patties

14|11|2013

A week from now, my twins will be turning 4. Watching them grow and turning into independent little boys has certainly been the most amazing part of motherhood for me. Not everything has been perfect though, and the challenges were numerous that came with twin motherhood. Having said that, if I had to talk about the rewards that I am reaping every moment, I could really shout from the rooftops about how lucky I am.

IMG_6477 (1)

I could go on and on but that is not what this is about. We are here to talk about food so let’s get going! When I asked my boys what kind of food they would like me to cook (apart from the cake) I received so many answers and names of dishes. I experienced equal amounts of surprise and pride at how much they understood of food ..of something that means the world to me!
By no means will I be able to make all of that on their birthday so I decided to make and post a few of their favourite dishes through this week and the next. In doing so, I will also be addressing the question I get asked most ‘what do your kids eat?’ or ‘do they eat the desserts on your blog?’ Trust me, you are not going to see fish and chips or spaghetti bolognaise or even pancakes (that is pretty much the kids menu we come across in restaurants here). Though the twins have very different palates and preferences, their choice of food is quite refined for 4 year olds (which again is not uncommon with the present generation).
The older twin takes a huge liking to Asian cuisine, finger food and meat. The younger one has inherited my love for sweets…loves Italian and French cuisine and is a budding chef himself. The one common thing however is that both love fresh vegetables and fruits so I have never had to deal with ‘food battles’ at home.
IMG_6494 (1)

I hope some of you will be able to find ideas that will help you make quick, nutritious meals with a few pantry ingredients and most importantly food that tastes and looks delicious.
The Tuna patties are extremely simple to put together. It is a handy recipe as it uses canned tuna, whole grain bread and a few fresh herbs. My pantry is always stocked up with canned Tuna which helps when I can’t make it to the grocer’s.  Throw everything into the processor and you have the mix. Then all you do is coat them in sesame seeds and shallow fry. The sesame seeds not only give it a nice crunch but is a powerhouse of minerals. Now, this may be a kid friendly recipe but is extremely flavourful and if you want to make it for adults, you can remove a portion of the mix and add finely sliced chillies. The pictures you notice in this post are the ones I plated for my husband..the adult version with red chillies. Please feel free to leave them out or if you have a older kid who can tolerate heat, it is entirely your call. The sweet chilli sauce I use is ‘extra mild’ without heat and my kids love it. You can substitute it with tomato ketchup.

page


Tuna Sesame Patties
Makes 14

450 g canned Tuna (in springwater or brine), drained
1/2 cup fresh breadcrumbs, from a day old wholegrain bread (to make, just run a slice of bread through the food processor)
2 cloves garlic, peeled
1/2 inch ginger, peeled
A handful coriander, mint, basil leaves
Salt, to taste
1/4 cup white sesame seeds
Vegetable Oil for shallow frying
2 Red chillies (optional)
Cucumber salad, to serve
Sweet Chilli Sauce or Tomato Ketchup, to serve
Fresh herbs, to serve

Place the tuna, breadcrumbs, garlic, ginger, herbs and salt in the bowl of your food processor. This can be done by hand too if you finely chop the ginger and garlic and herbs. Process and once throughly combined, roll them into rounds with your palms and flatten them into the shape of a cake. If you are adding chillies add them before you make the patties.

Place the sesame seeds on a plate. Press the cakes on either side on to the seeds. Repeat with the remaining mixture. Heat oil in a frying pan over medium heat. In batches cook the patties till golden brown (about 3-4 minutes) on each side. Transfer to a plate lined with paper towels to drain. Serve with cucumber salad and sweet chilli sauce.


Date Night Hot Chocolate with Chocolate Ice Cream

12|11|2013

Whether you are about to crank up the heaters in the Northern Hemisphere or heading to the beaches (I know I am…our weather is just suited for that at the moment) in the Southern Hemisphere, I’ve got you covered in this post. Of course there are things that are neither bound by season or time and are great in any form. Yes, I am talking about Chocolate and unable to contain my excitement about this interpretation of chocolate, I just dedicated an entire Category to Chocolate recipes in my Recipe Index page.

589A2332

Hot chocolate needs no introduction. I’ve added chocolate ice cream to it and the hot-cold combination is just so amazing. And to make it special or rather ‘Date Night’ worthy, I have added a splash of Kahlua. You can add any liqueur of your choice…I’m thinking Irish Cream next time!

Honestly, I was never intending to post this because my blog is about recipes that are carefully thought about and researched, experimented, given personal touches whether it is about creating them or styling them. And this one is a no-brainer! But the pleasure you derive out of this simple recipe just overrides everything else. So, whether you are on a romantic date or a busy couple looking for a quick little after dinner treat to share together after the kids have gone to bed, this one is for you. This has become our Friday night ritual..I make the hot chocolate while my husband is ready with two glasses where the Kahlua has been poured and little rounds of ice cream have been scooped out ready to go into the hot chocolate. We then race back to the couch to catch the dripping chocolate as it overflows from the glass. His glass is empty in seconds but I take my time enjoying the whole experience.

589A2333

Date Night Hot Chocolate with Chocolate Ice Cream
Serves 2

2 cups half and half (1 cup heavy cream and 1 cup milk)
100 g dark chocolate, roughly chopped
2 tbsp Kahlua or any liqueur of your choice
4 scoops of chocolate ice cream
Marshmallows/Chocolate Chips/Cocoa Powder to serve

Pour 1 tbsp Kahlua in two serving glasses and keep aside. Place the half and half and chocolate in a saucepan. Put the saucepan on medium heat and stir till all the chocolate has melted and the mixture is smooth (about 5 minutes).

Pour into the serving glasses. Top with chocolate ice cream. Serve with Chocolate wafers or chocolate chips or a dusting of cocoa powder.


Cauliflower and Broccoli Gratin

7|11|2013

When I was a little girl, I did not even differentiate between a cauliflower and a broccoli and referred to the broccoli as ‘a green cauliflower’. However, I did take a strong liking to both and whichever one was being served to me, I ate it with pleasure. And that remains unchanged as of today.

cauliflower broccoli gratin

Fast forward 30 years, roles have evolved and being a mother, I am curious to know about the nutrition value and benefits of each and every food group that is being fed to my children. While cauliflower and broccoli are no longer the same to me, they are both highly nutritious, rich in vitamin C and fiber. Whenever I find that I have both in my pantry, I tend to combine them in my dishes.

cauliflower broccoli gratin

This is a great way of eating them together where the vegetables are slightly crunchy, flavoured with herbs and covered in a delicious bechamel sauce and a caramelised cheesy crust. It makes for a nice side dish with meat or fish but can be enjoyed on its own with some crusty bread.

cauliflower gratin

I prefer to microwave the vegetables for a few minutes to soften them rather than parboiling them in water. It does help save time along with retaining the nutrition within the vegetables. It’s a simple dish really and I feel the key to making it look and taste delicious is to get a nice caramelisation on the top. You can cook it in a large baking dish or if serving as a side dish to guests, bake them in individual ramekins. In that case, the baking time will need to be reduced.

cauliflower broccoli gratin


Cauliflower and Broccoli Gratin
Serves 4

1/2 head (approx 300 g) cauliflower cut into florets
1/2 head broccoli (approx 300 g) cut into florets
50 g butter
50 g (1/3 cup) plain flour
500 ml (about 2 cups) milk
handful of baby spinach leaves
a few thyme leaves or any other herbs
1/4 cup breadcrumbs
1/4 cup cheddar cheese (or any hard cheese of your choice), grated
1 tsp parmesan cheese, finely grated
Salt and Pepper for seasoning

Place the cauliflower and broccoli florets in a microwave safe bowl, cover and microwave on high for 5 minutes. Alternately, place cauliflower and broccoli into a large saucepan. Cover with water. Bring to the boil on high. Reduce heat to low and simmer, covered, 8-10 minutes until tender.

Preheat oven to 180 degrees C. Lightly grease a baking dish/casserole dish and keep aside.
Heat butter in a saucepan over medium-high heat until foaming, then add flour and stir continuously until it turns light brown in color (1-2 minutes). Gradually add the milk, whisking continuously until smooth and incorporated. Season the sauce with salt and pepper as per taste.

Arrange the cauliflower and broccoli along with spinach and thyme leaves in the baking dish. Pour the sauce over. Sprinkle with breadcrumbs, cheddar and parmesan cheese. Bake until golden and bubbly (about 20-25 minutes). If the top does not brown after 25 minutes, change the mode to ‘broil’ for 5 minutes.


  • « Previous Page
  • 1
  • …
  • 95
  • 96
  • 97
  • 98
  • 99
  • …
  • 111
  • Next Page »
Hey Sugar
Cake
Link to my Facebook Page
Link to my Instagram Page
Link to my Pinterest Page
Link to my Mail Page
Subscribe to this site
Fresh Awards
2019 Aus mumpreneur
2019 aus mumpreneur
Mumbrella

Copyright © 2025 · Sugar Et Al · Designed by Smitten Blog Designs · Log in