• Home
  • Recipe Index
    • Recipe Index
    • Breakfast/Brunch
    • Cakes and Puddings
    • Chocolate
    • Cookies and cupcakes
    • Custard and Mousse
    • Gluten Free
    • Ice Cream
    • Mains
    • Other Sweet Treats
    • Snack/Appetizers
    • Soups and Salads
    • Tarts and Pies
    • Vegetarian
  • About
  • Cookbook
  • Portfolio
  • Store
  • Press
  • Work with Me

Sugar et al

Because Life is a blend of flavours...

Strawberries And Cream Cake

15|08|2015

So the cherry blossoms have arrived! I can feel the vibes of Spring. It is such a pleasure driving around or for that matter even walking when the roadside looks a stunning shade of pink. I know..I am obsessed with pink. The irony however is that though I have been meaning to photograph them, I am either racing back home or leaving home in a hurry. I can’t explain how busy this week has been. I have been shooting a gathering with a laid out table and several dishes going on it. It required heaps of planning, colour co-ordination, testing recipes all day and shooting close to 100 images a day…basically nothing like the single recipes I’ve worked on and shot before. My laptop started making funny noises though and gave me a warning every time I logged in. I had fun putting the whole thing together and hopefully in future I will get to share some photos with you.

Strawberries and cream cake

I am also delighted to share with you that I am now a contributor to Stockfood. What that means is…you can buy my images online! A few of you have asked me on email and Instagram so yes…it is possible (though in all honesty I never thought something like that was even possible). I will be putting up the link on my blog soon. Initially it was a bit weird for me to come out of my recipe mode and just shoot images. I had to remind myself many times over…every photo does not come with a recipe! So much for food blogging! While it all sounds very exciting and yes, it certainly is…there were technical aspects and behind-the-scenes to sort out. Now I am faced with a new challenge in my hands. Photoshop! I am sure its going to be amazing but I have to learn to use it first. Tips, anyone? It would be greatly appreciated.

Strawberries and cream cakeStrawberries and cream cake
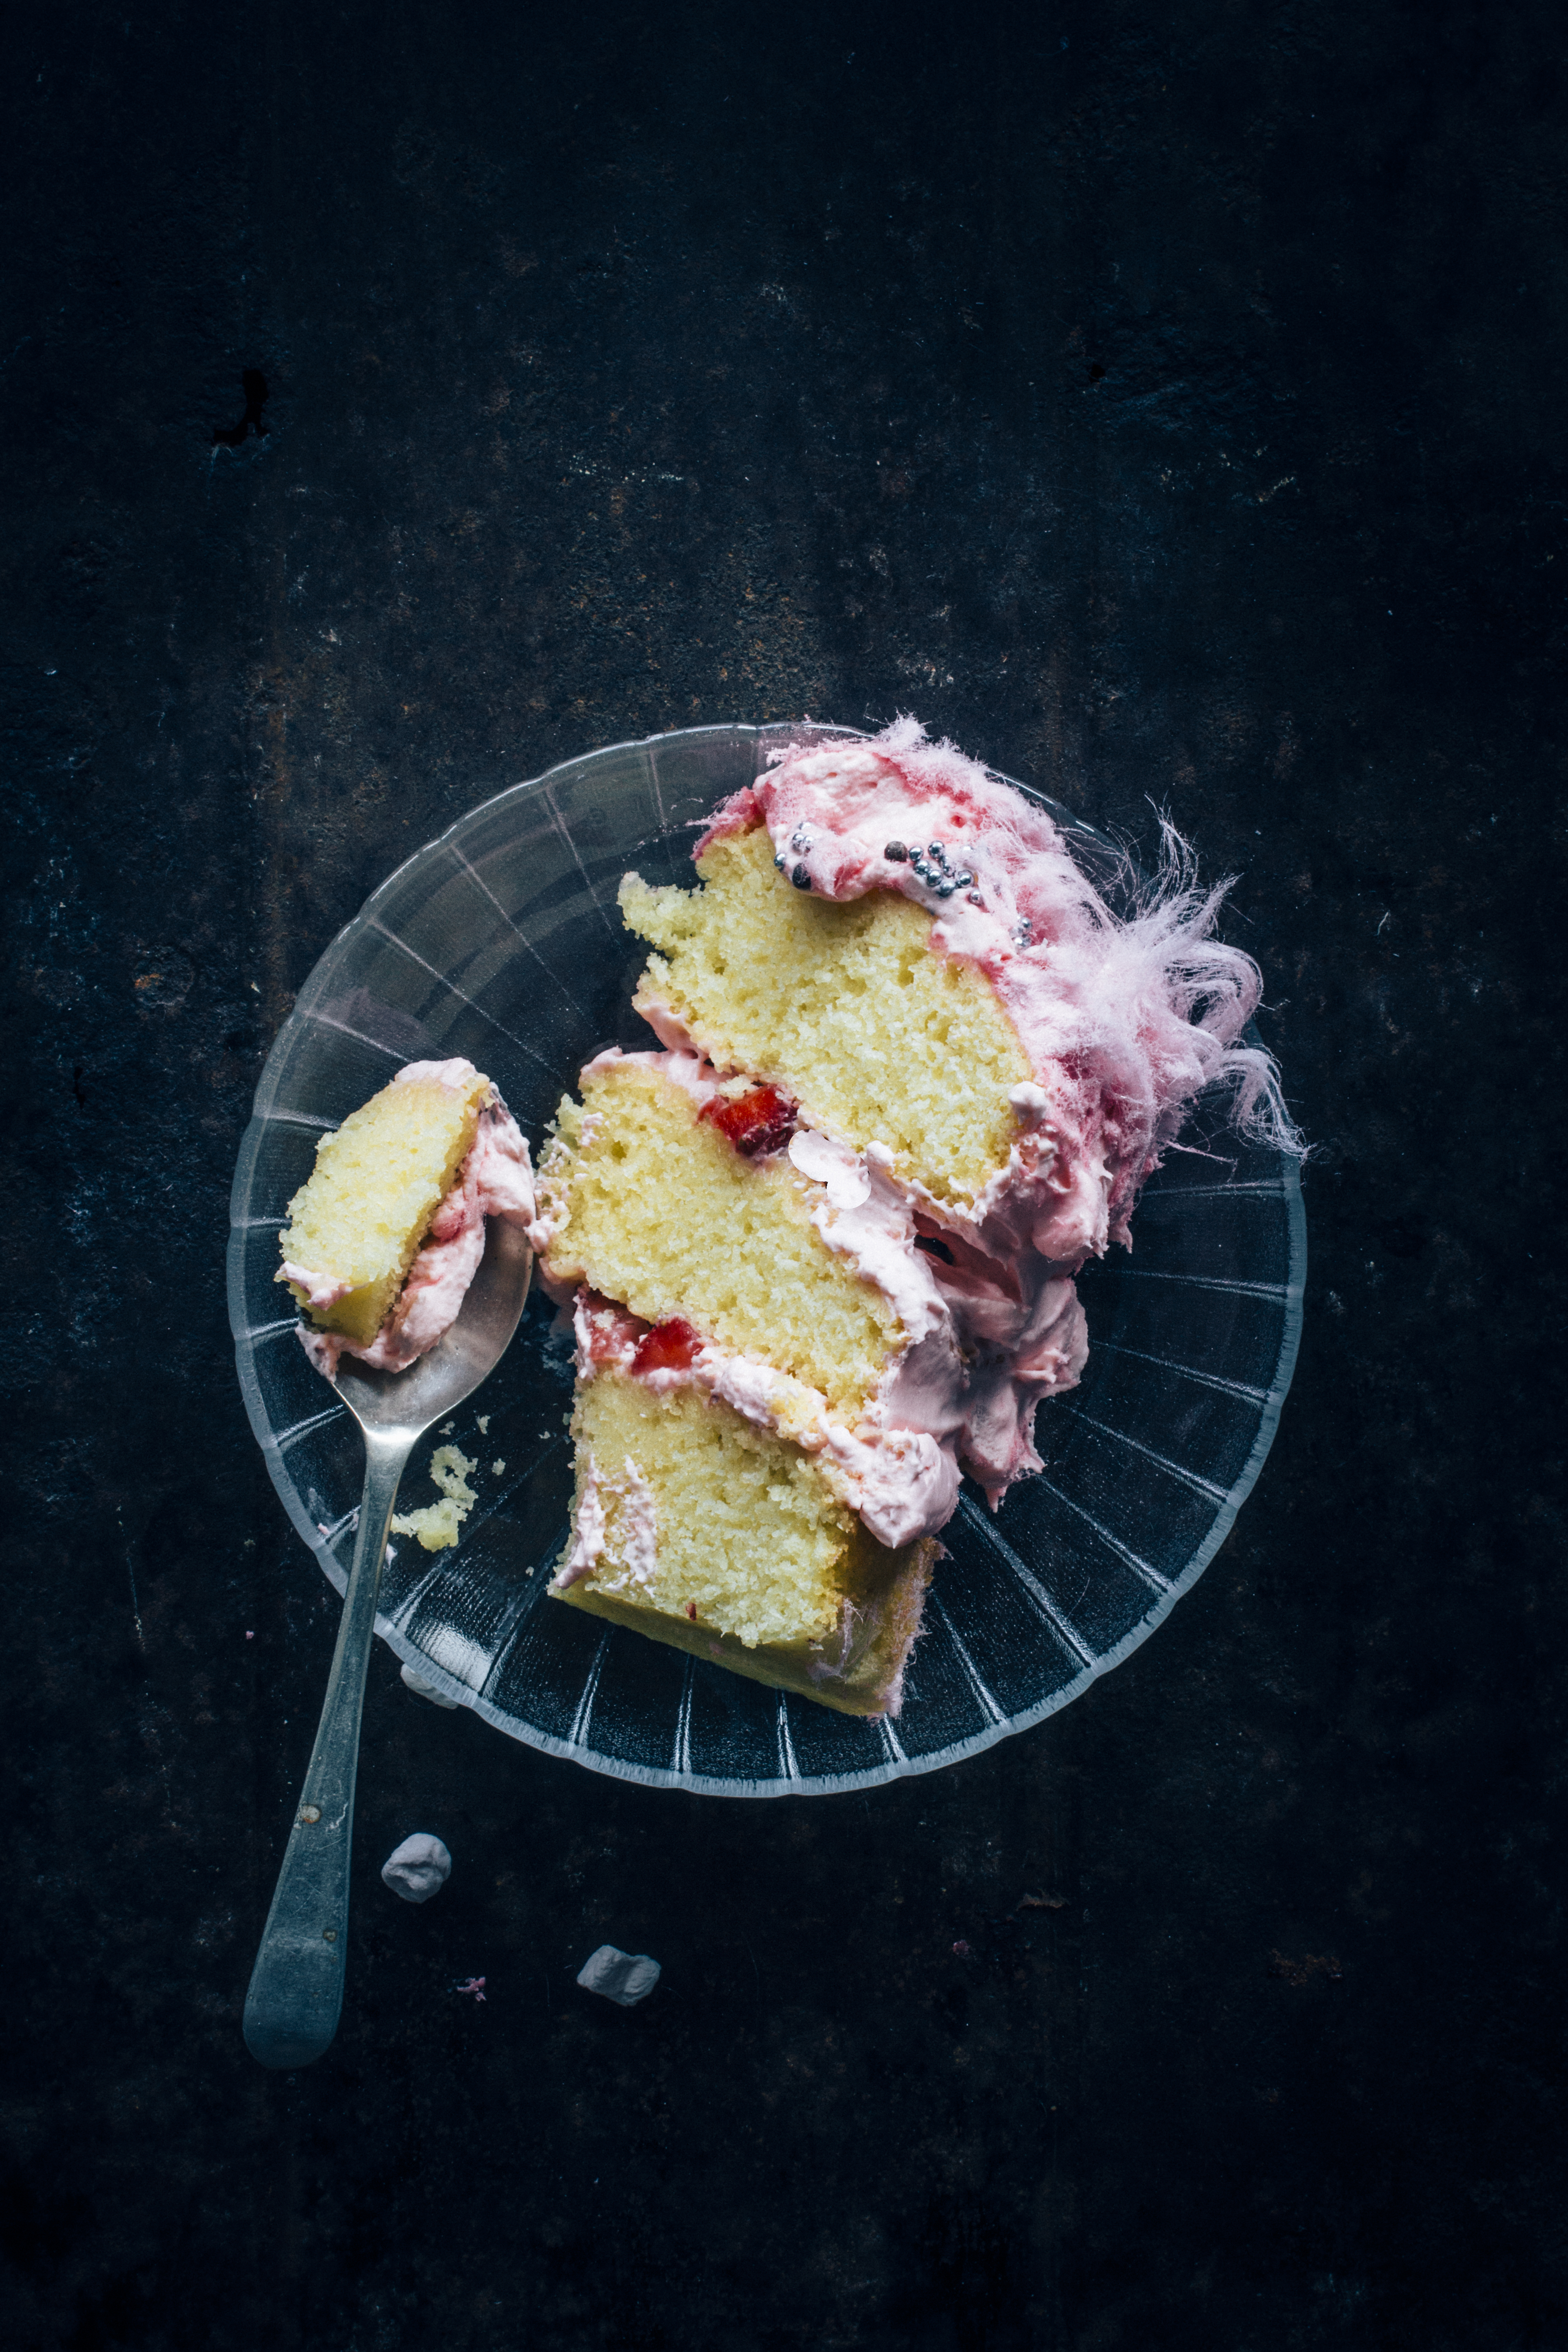
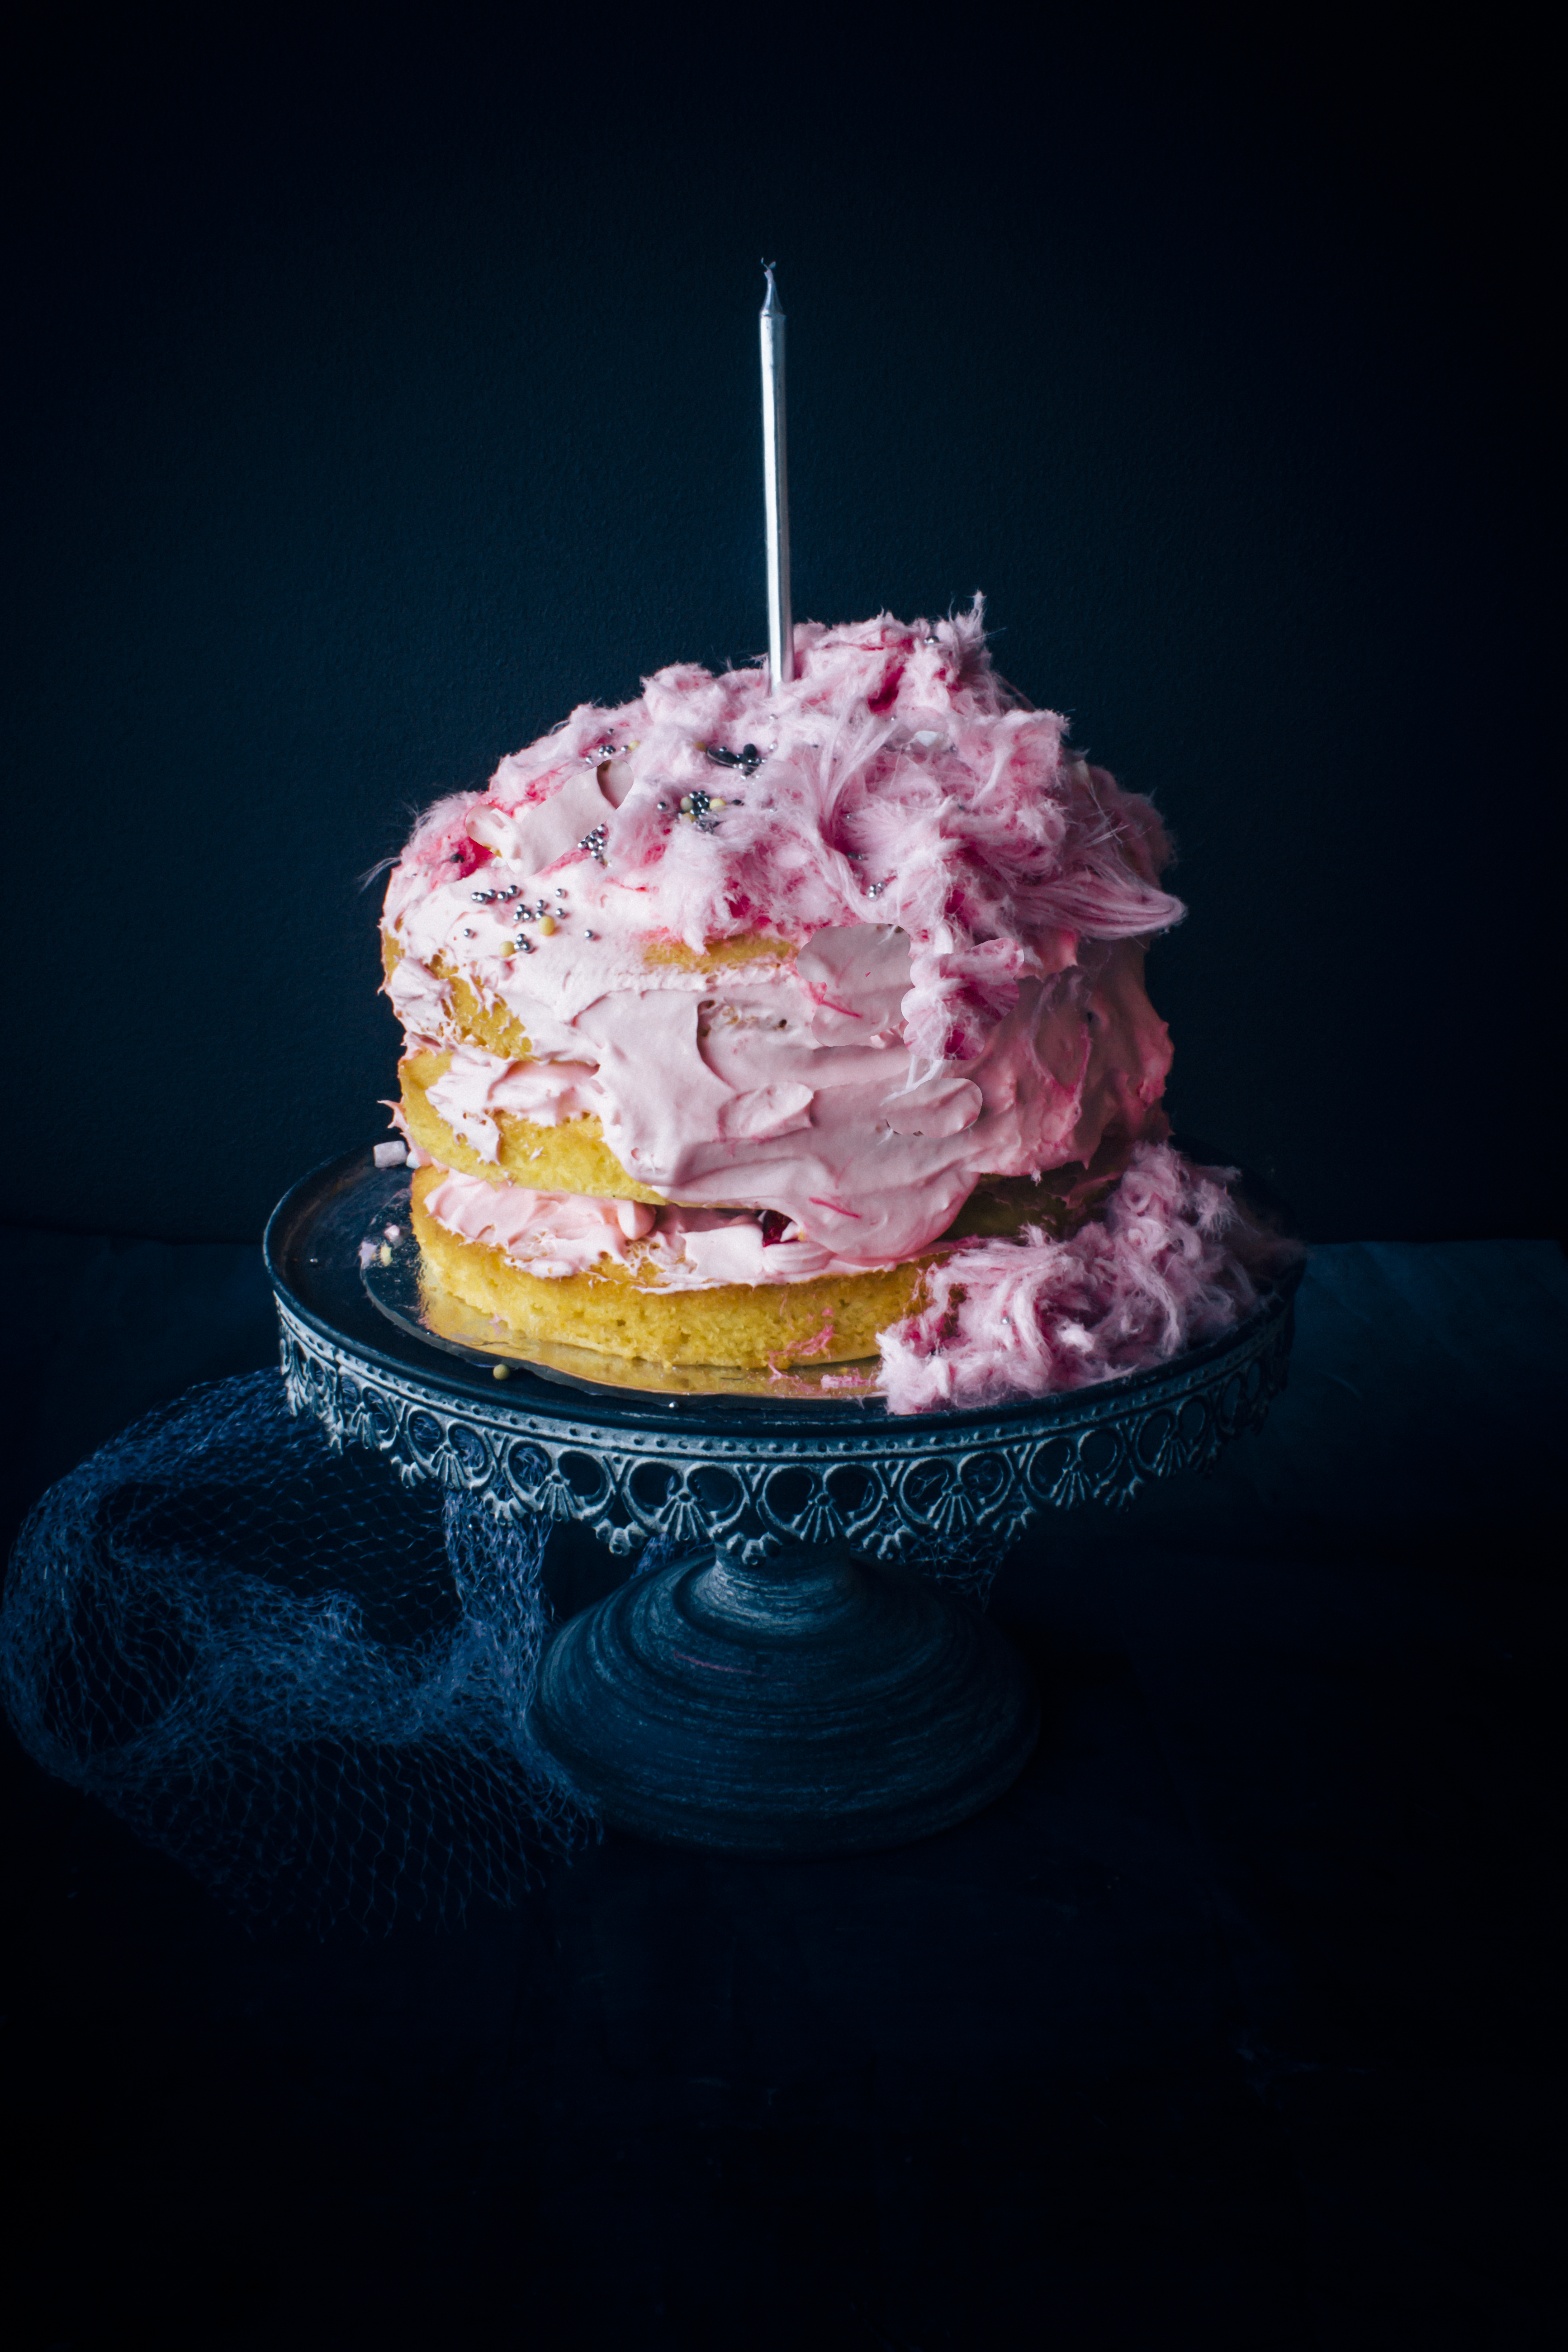
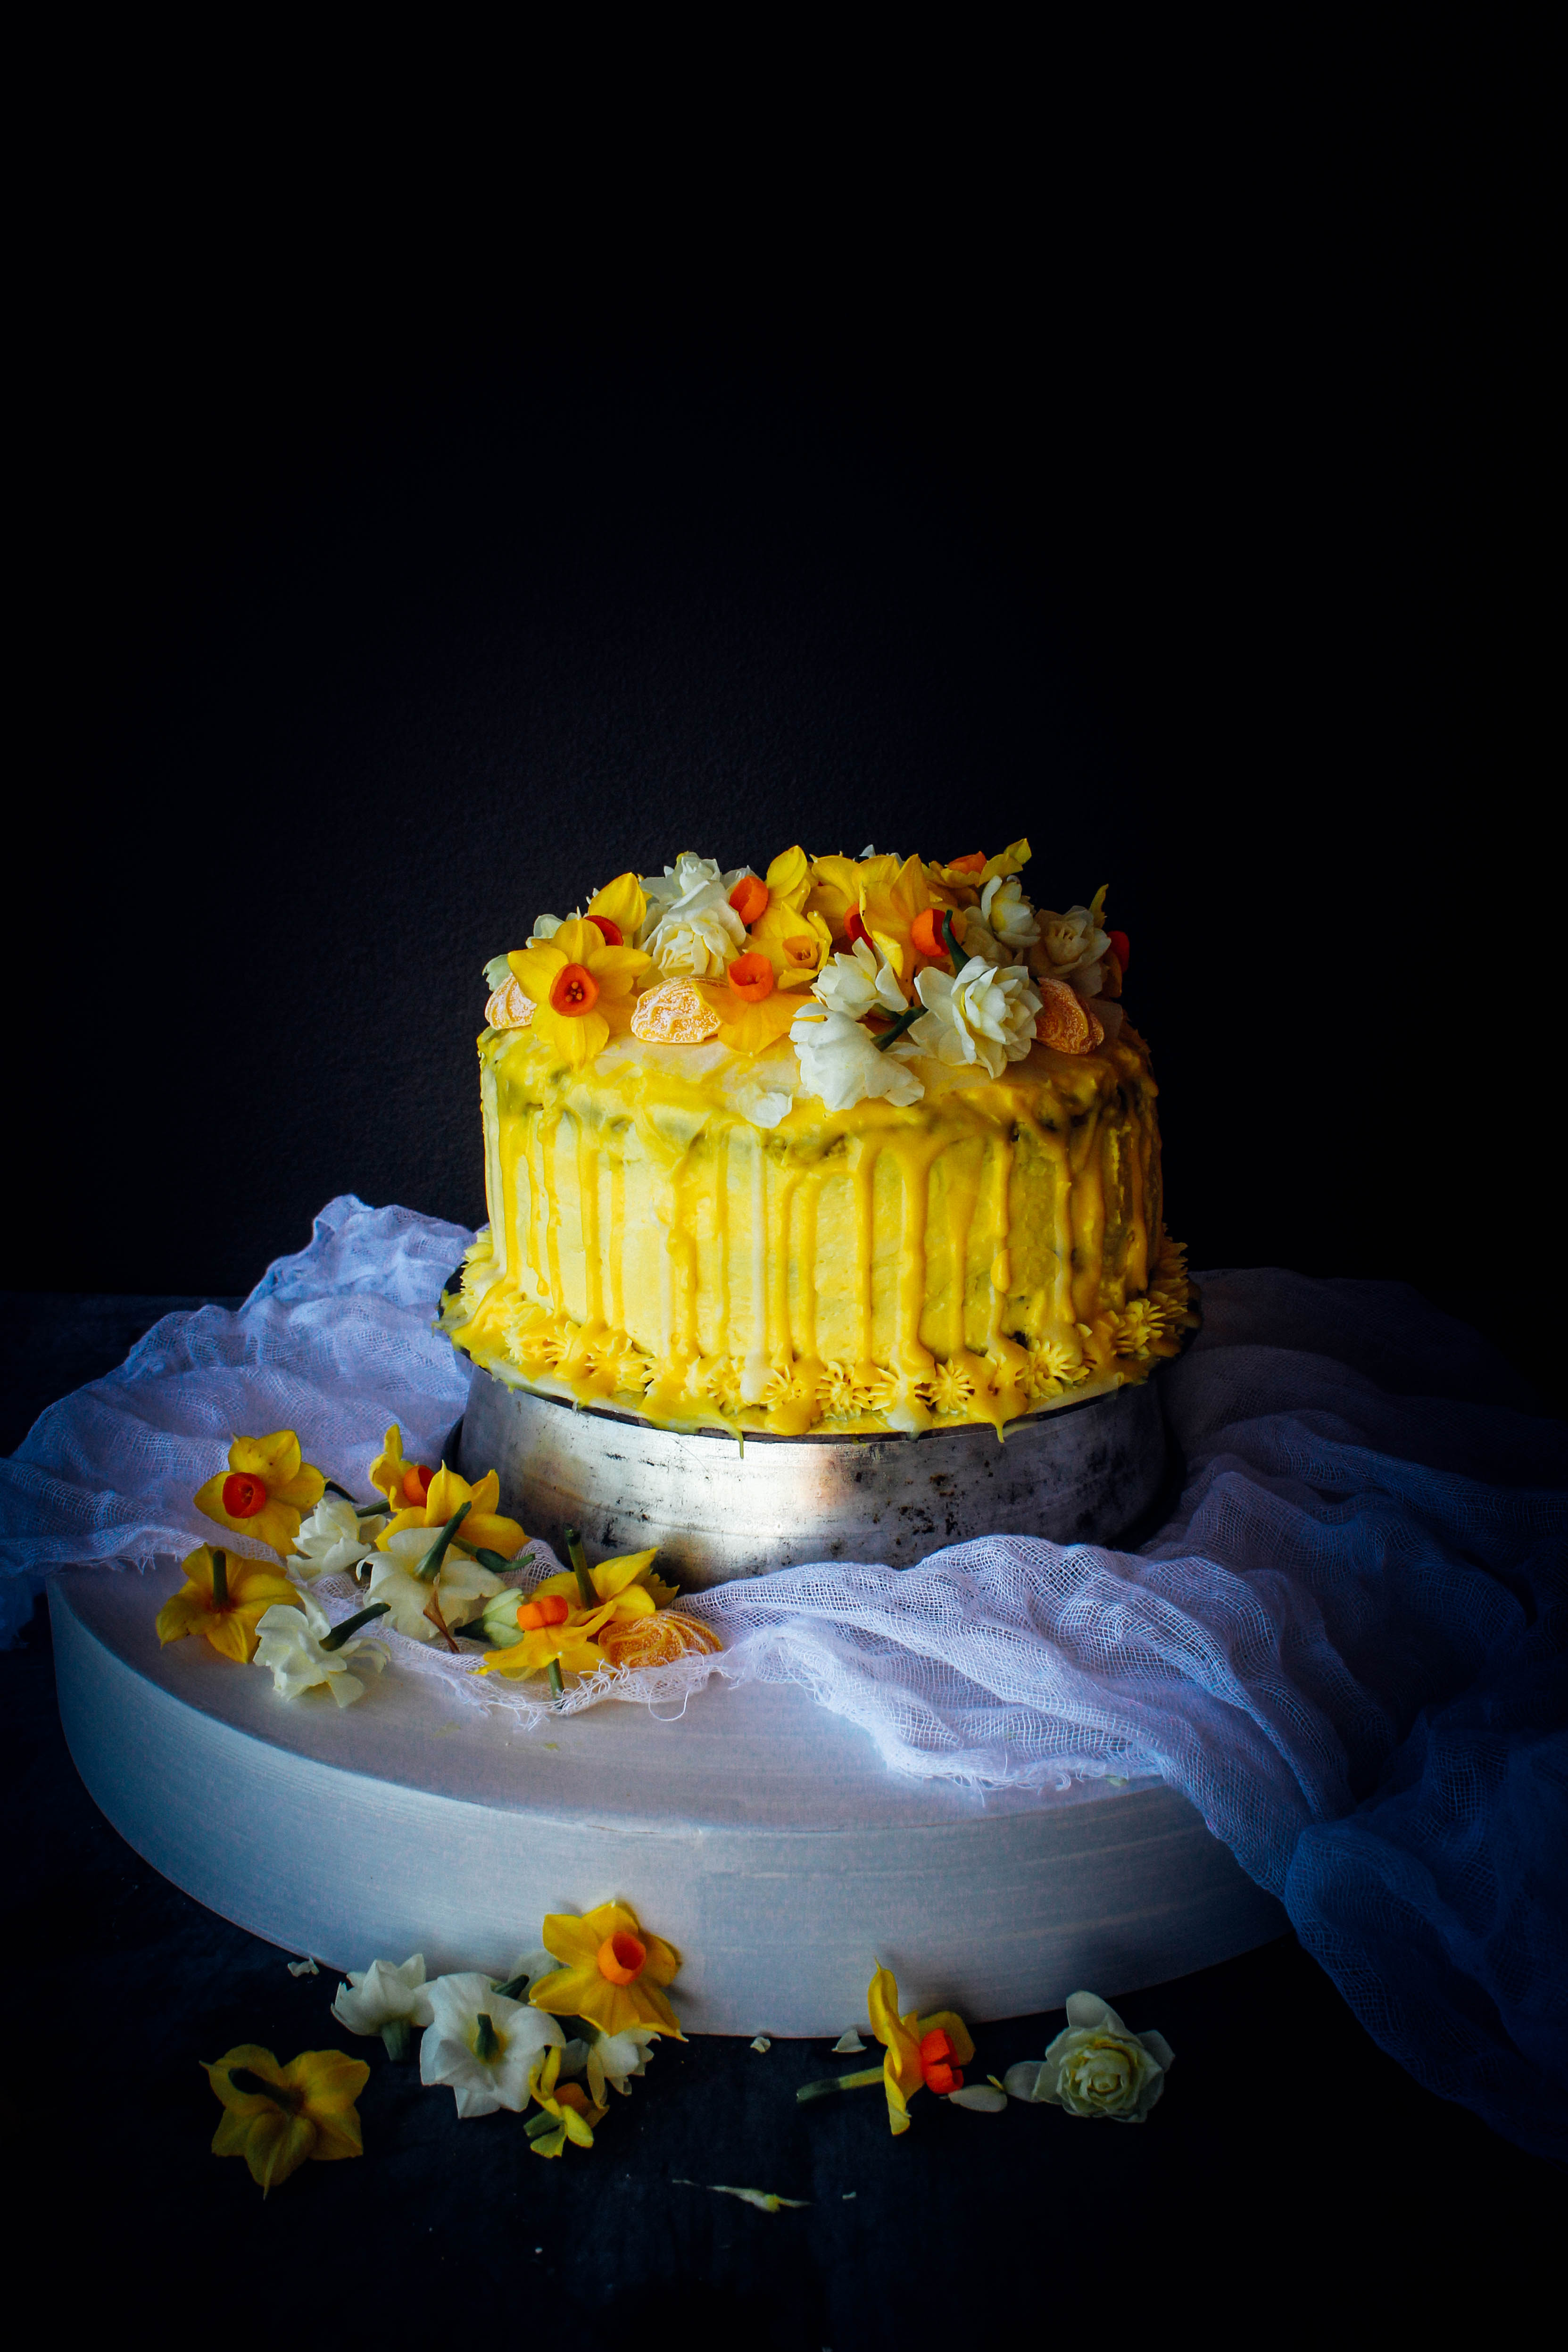
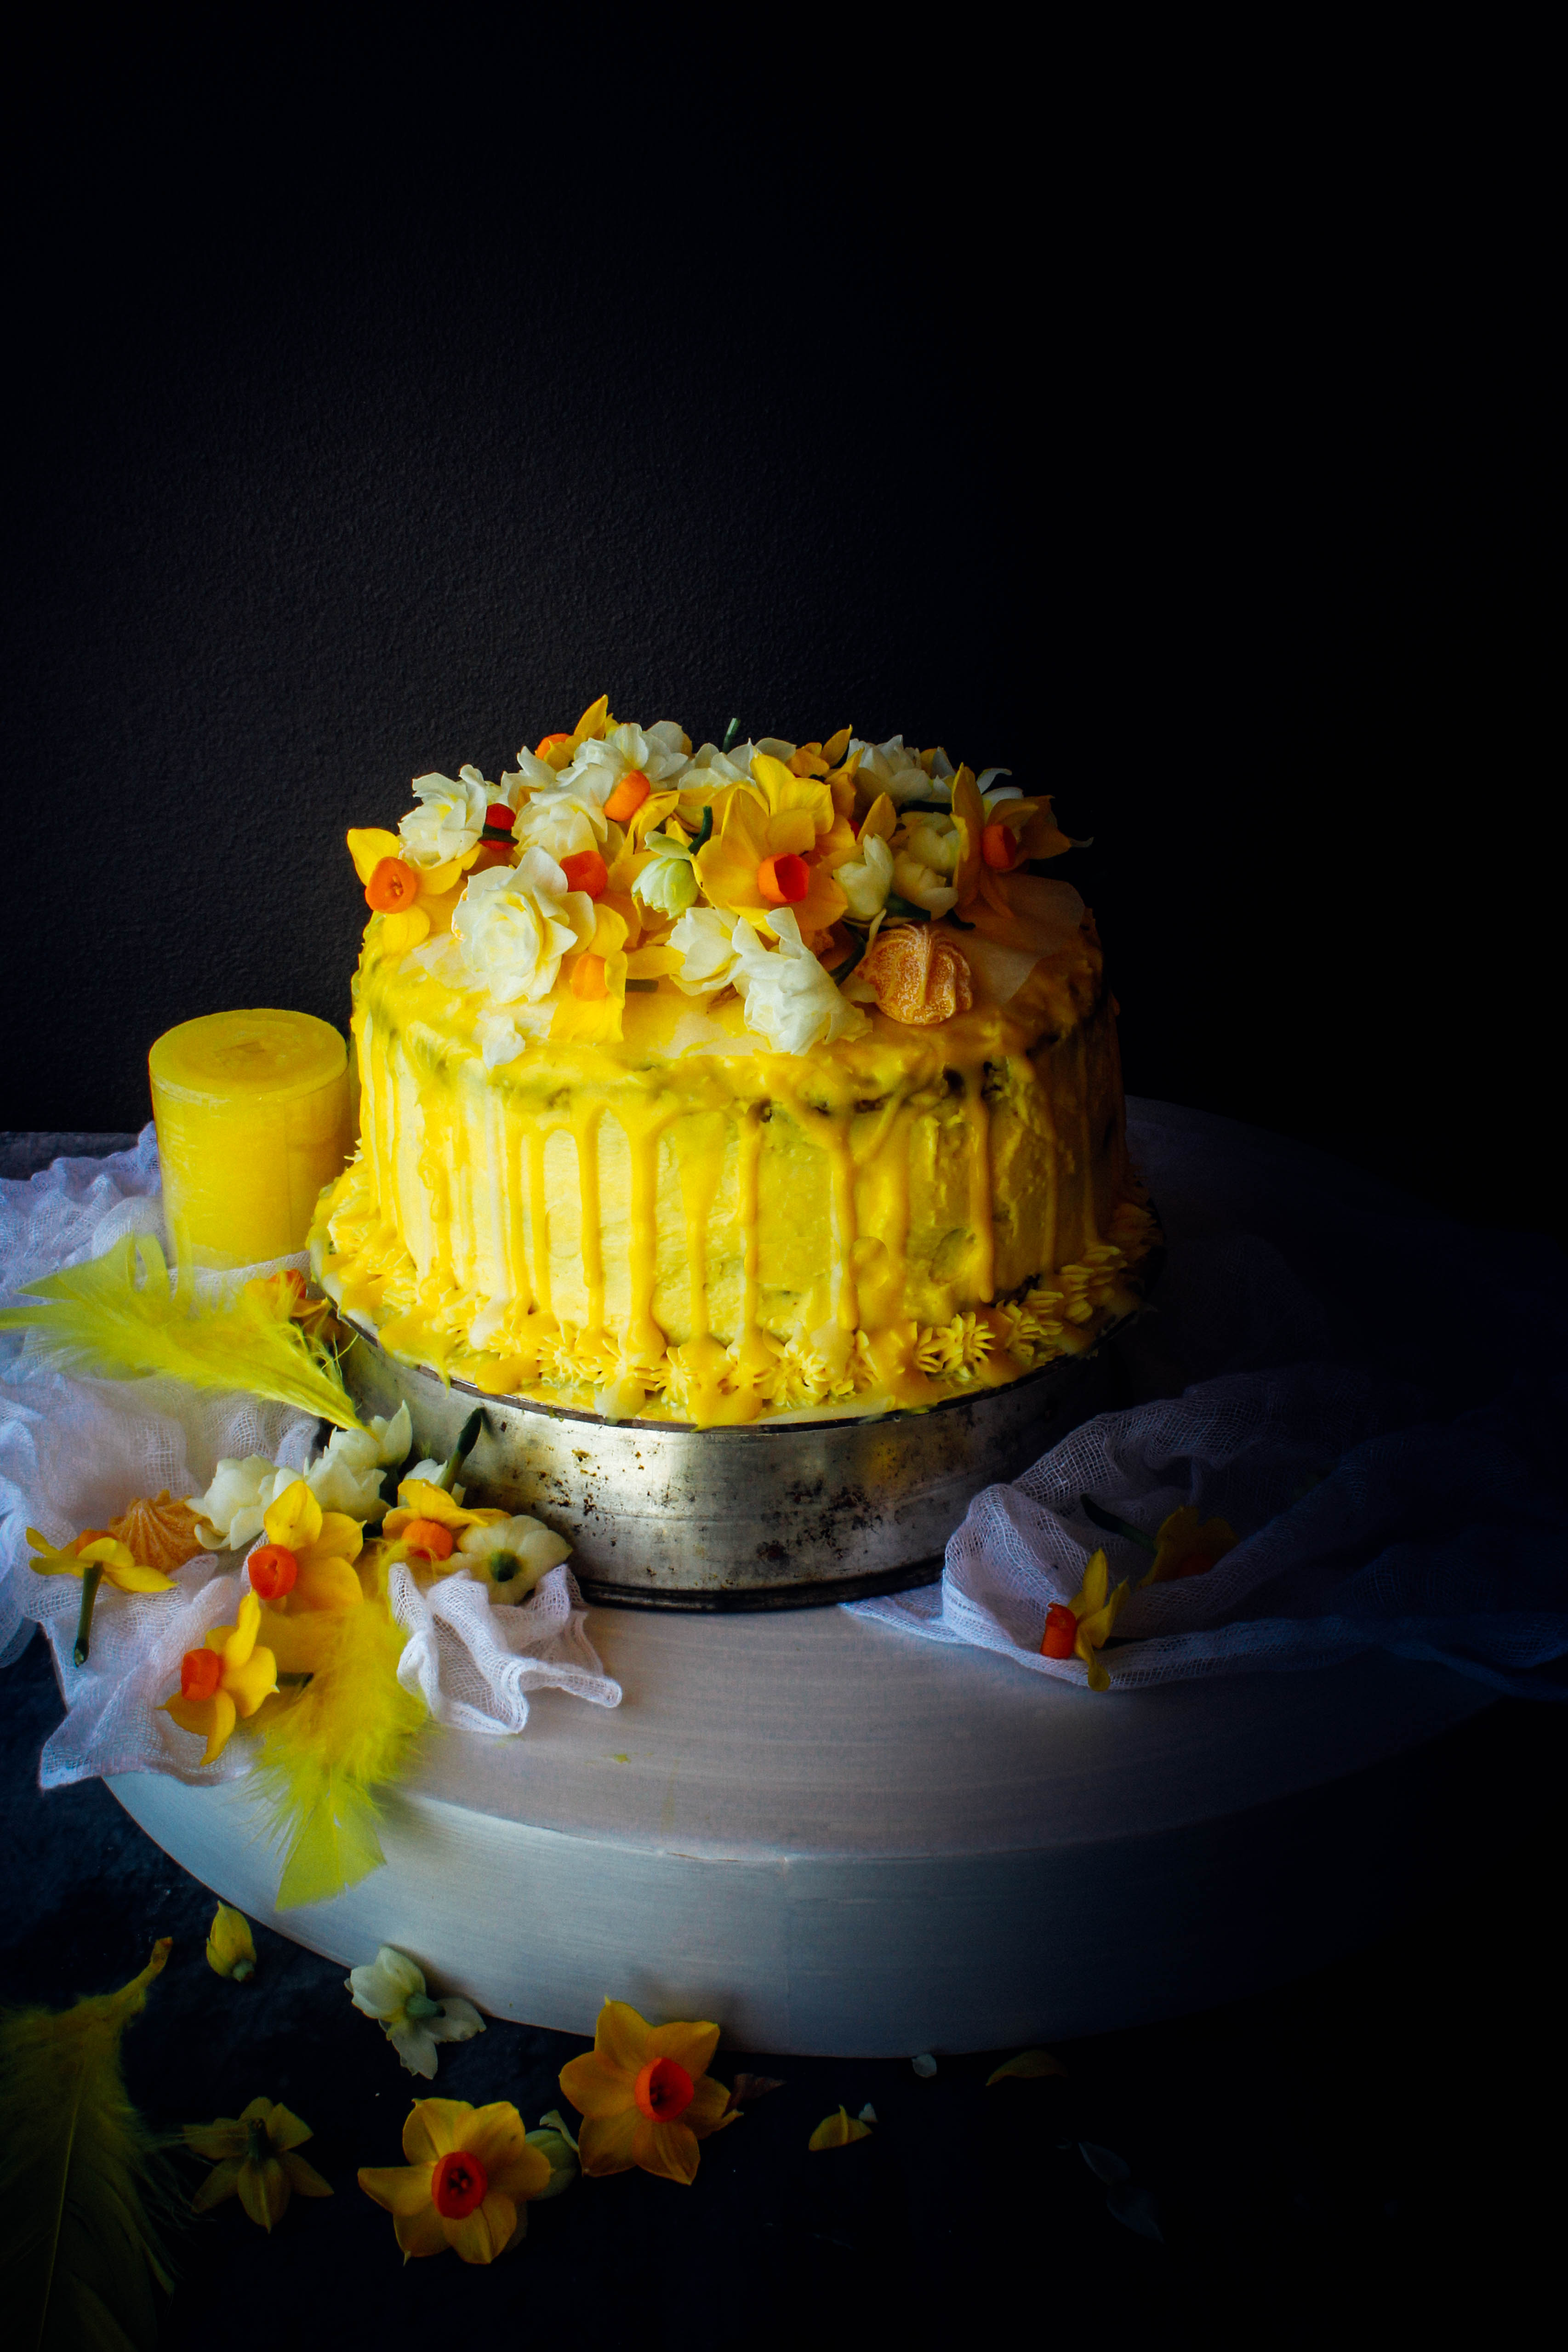
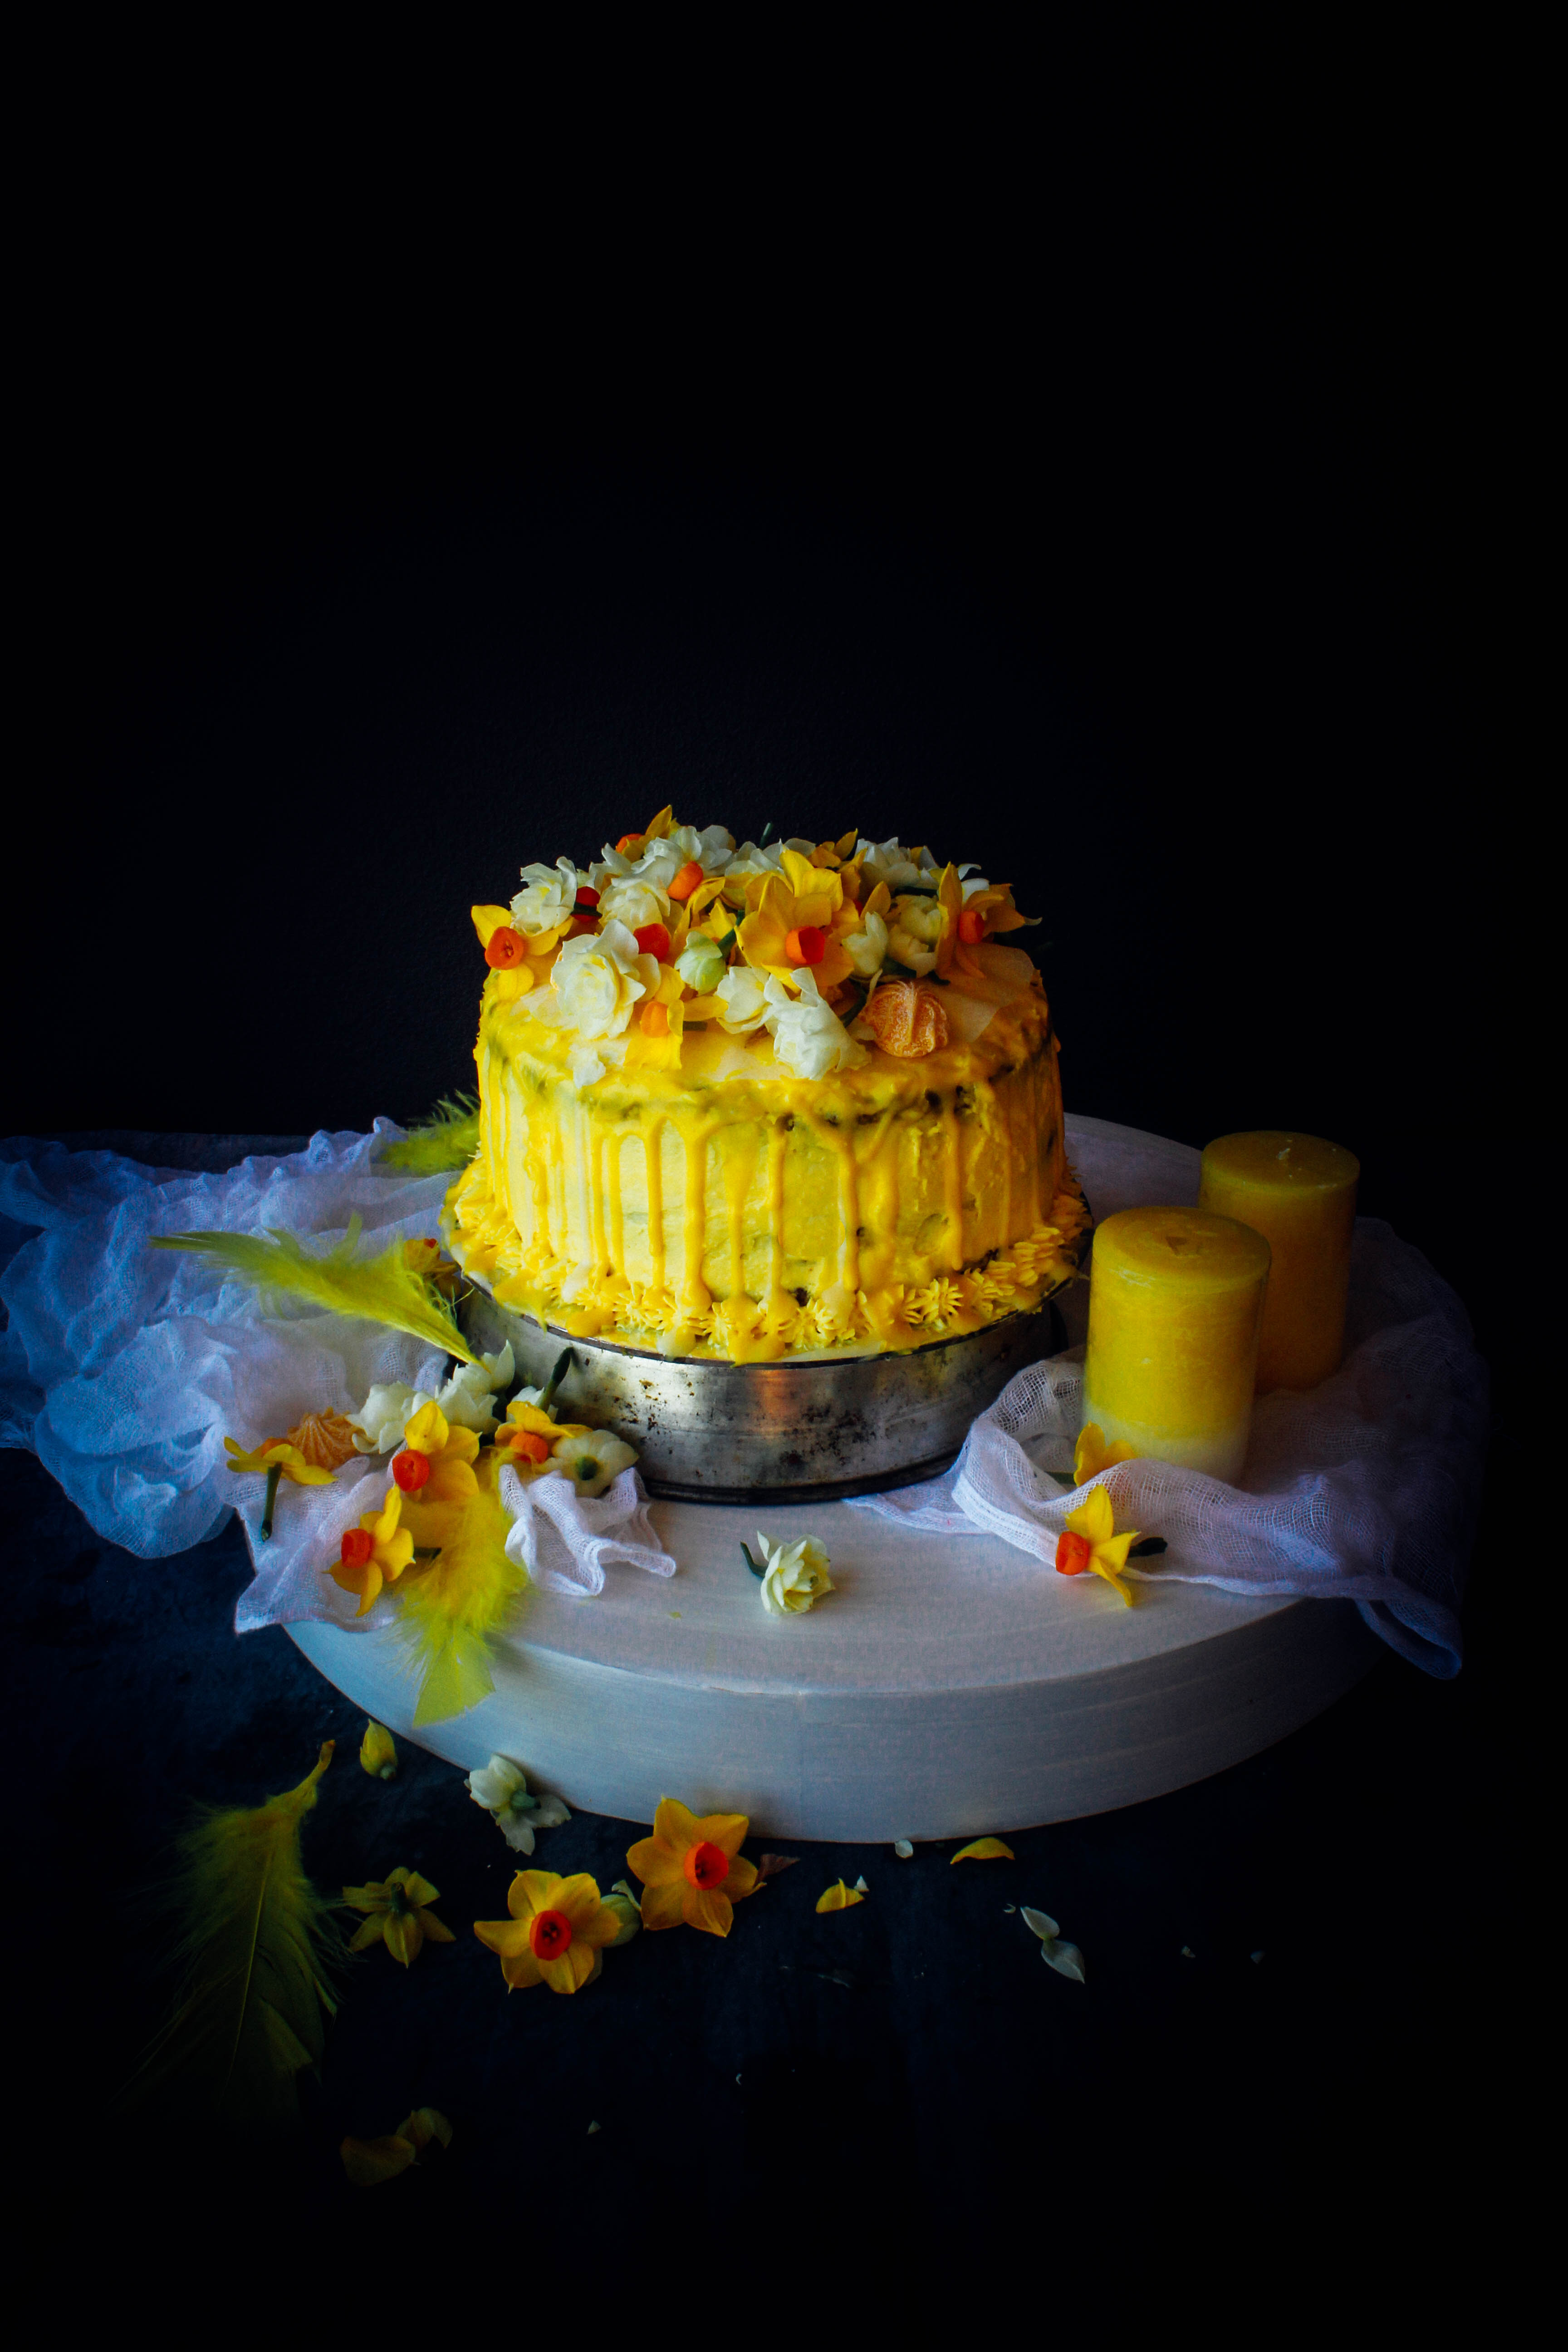
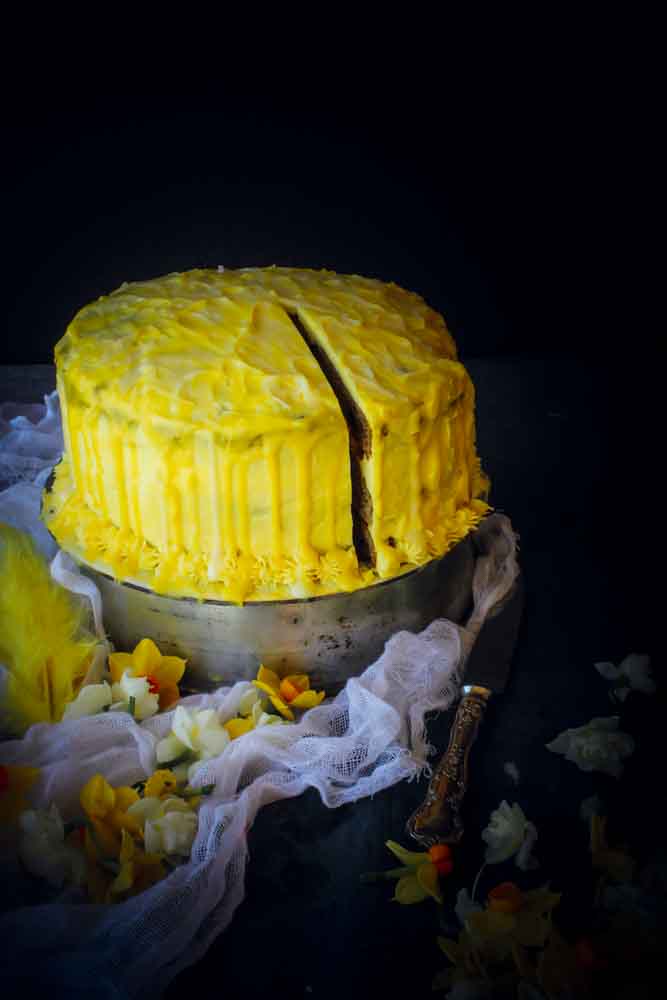
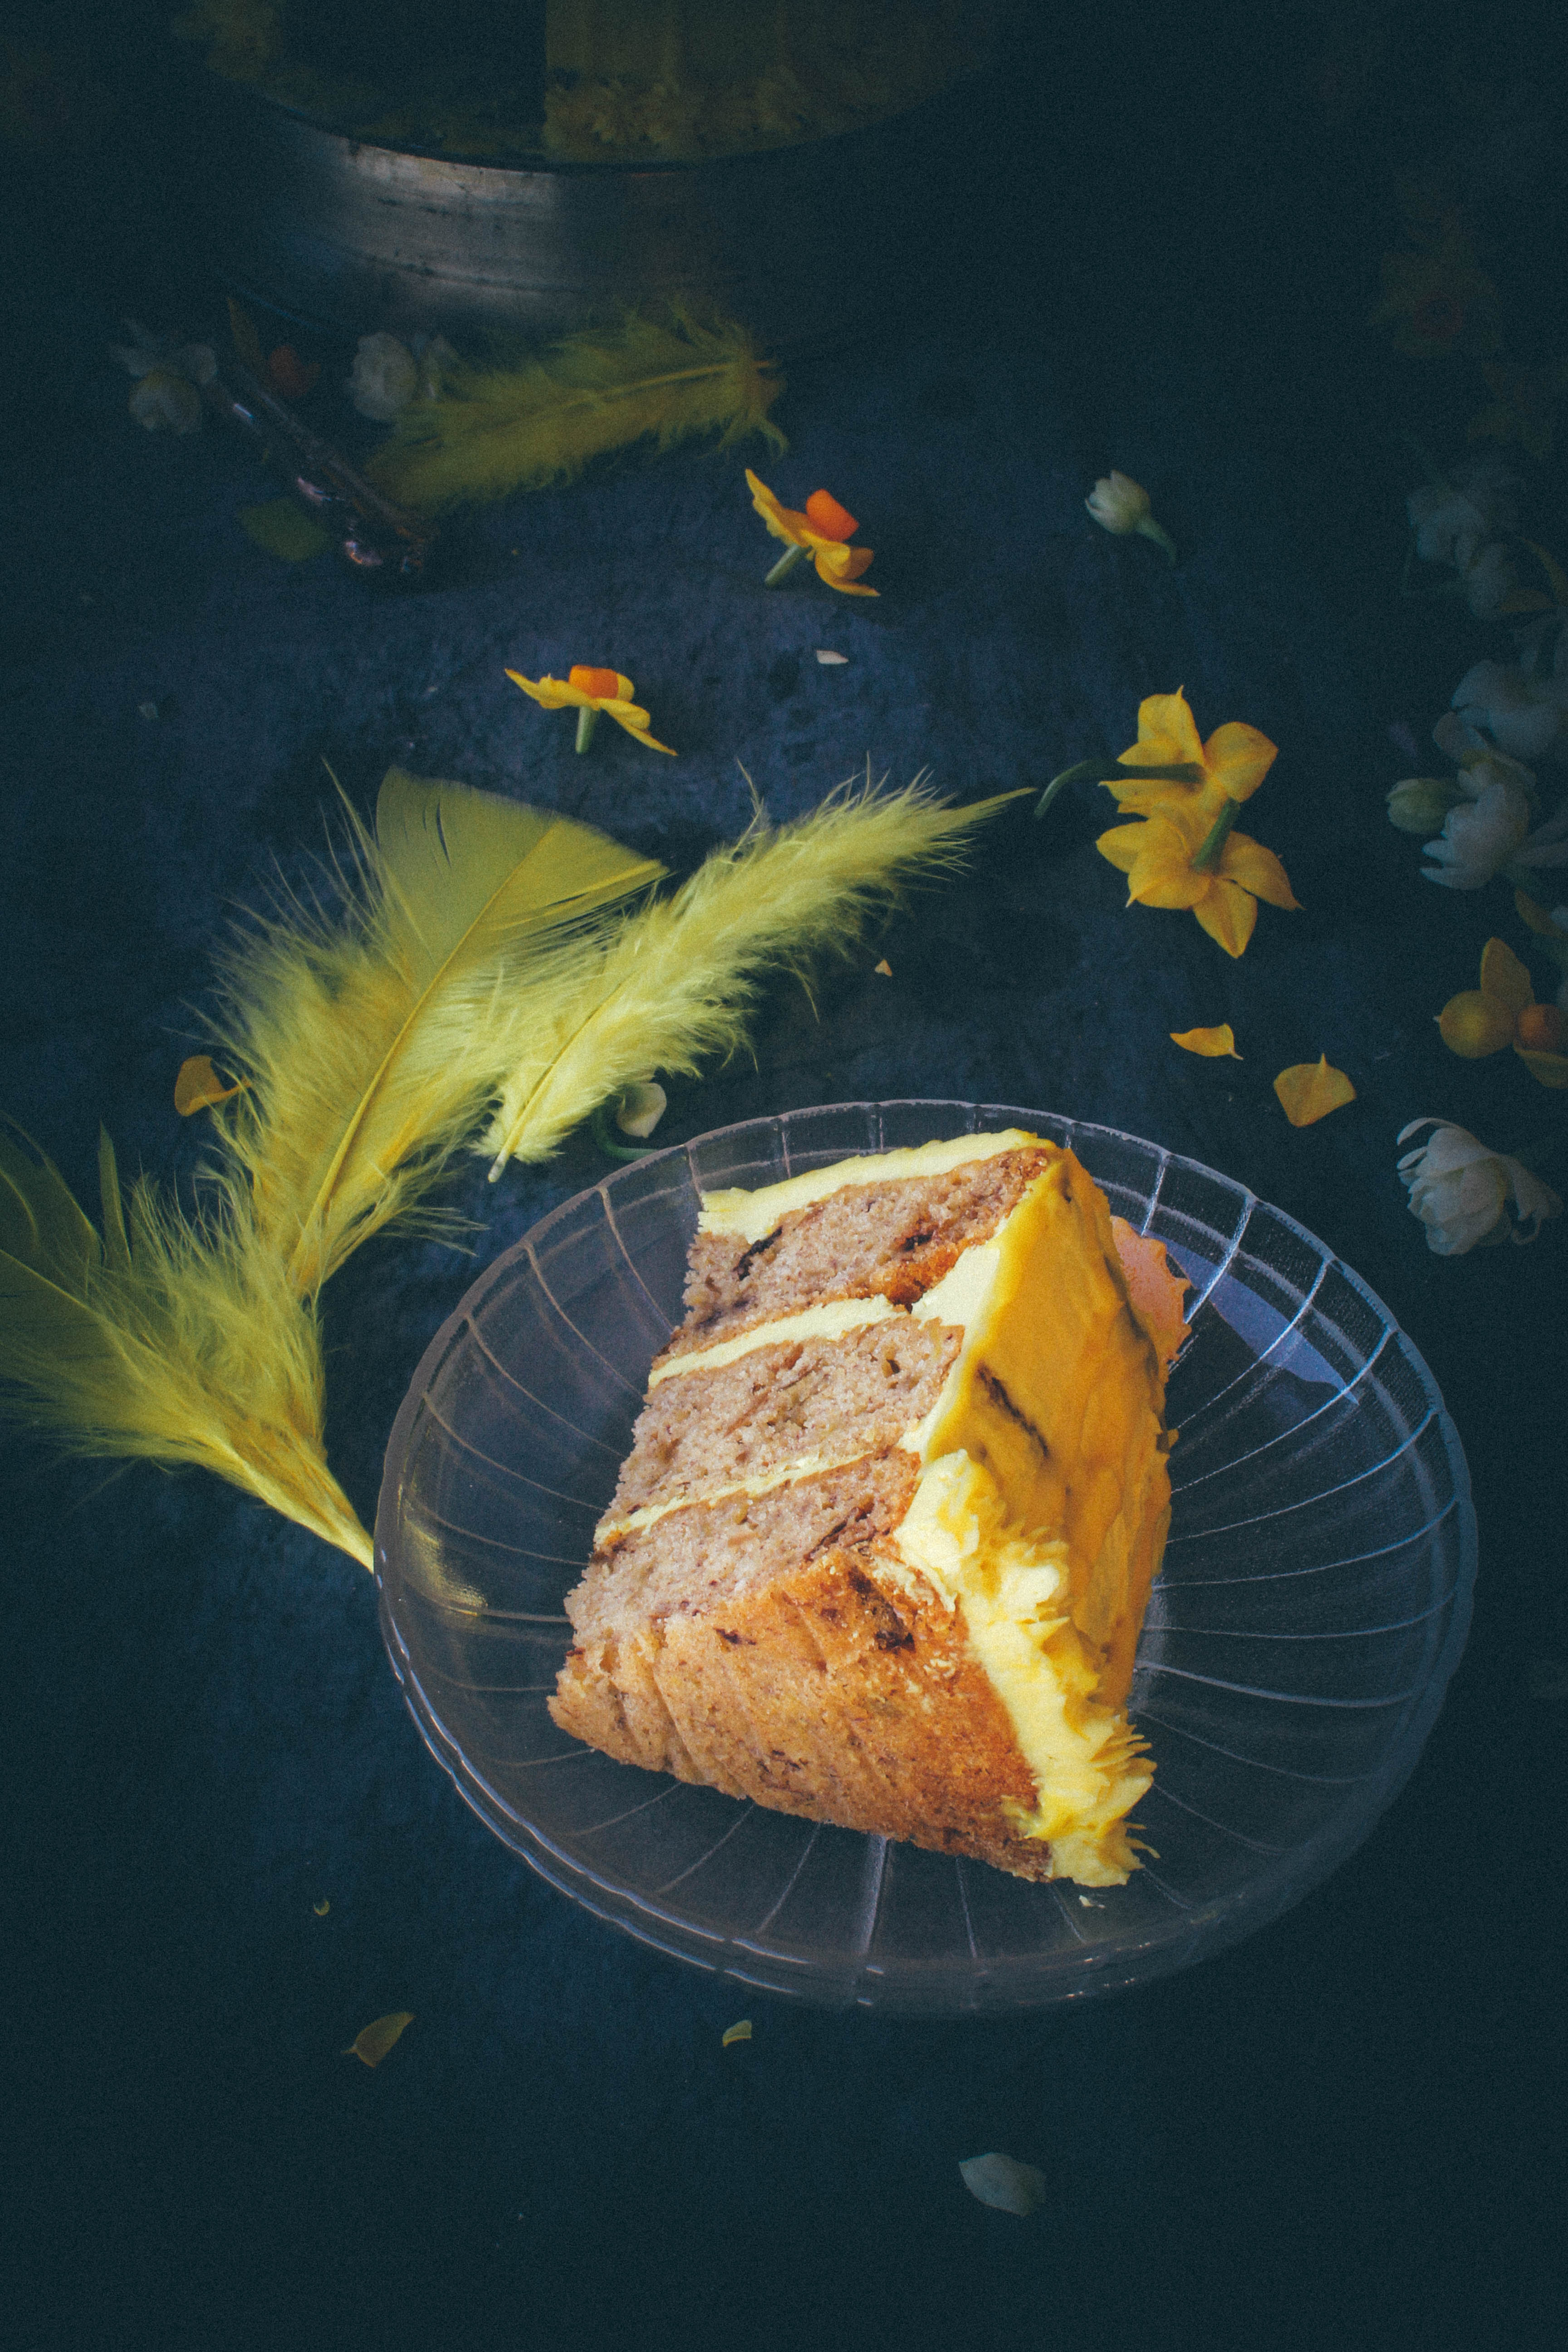
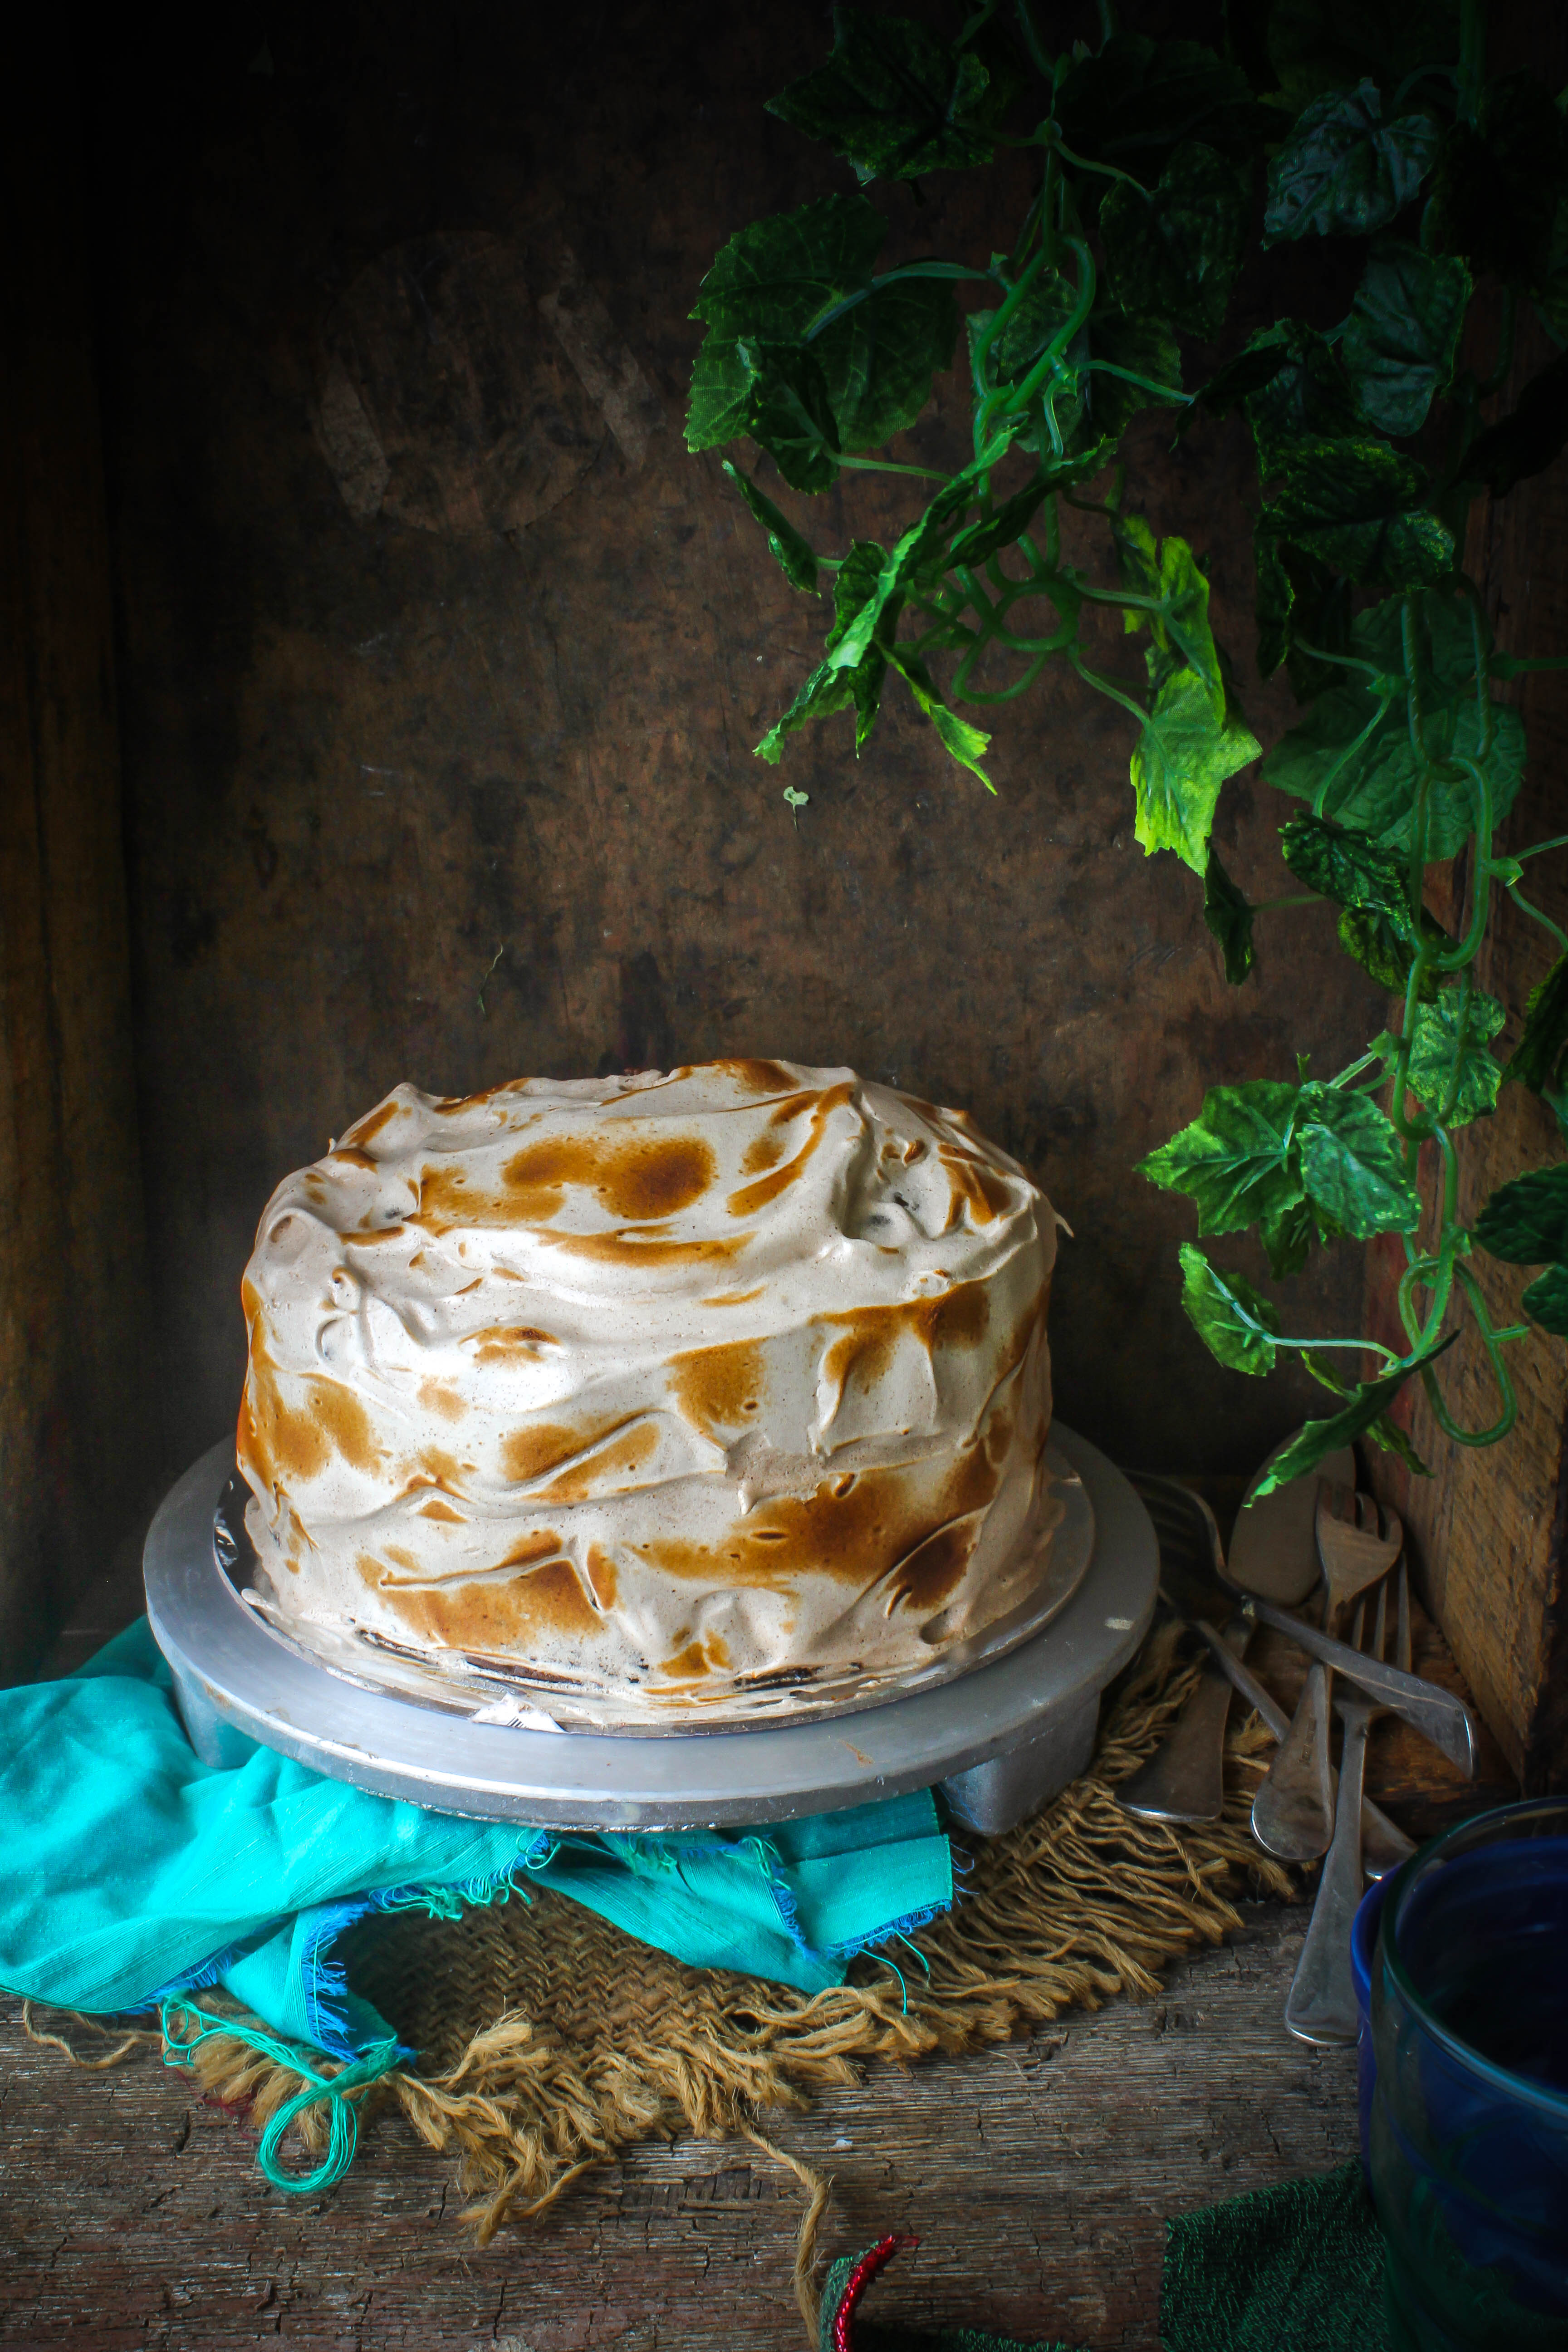
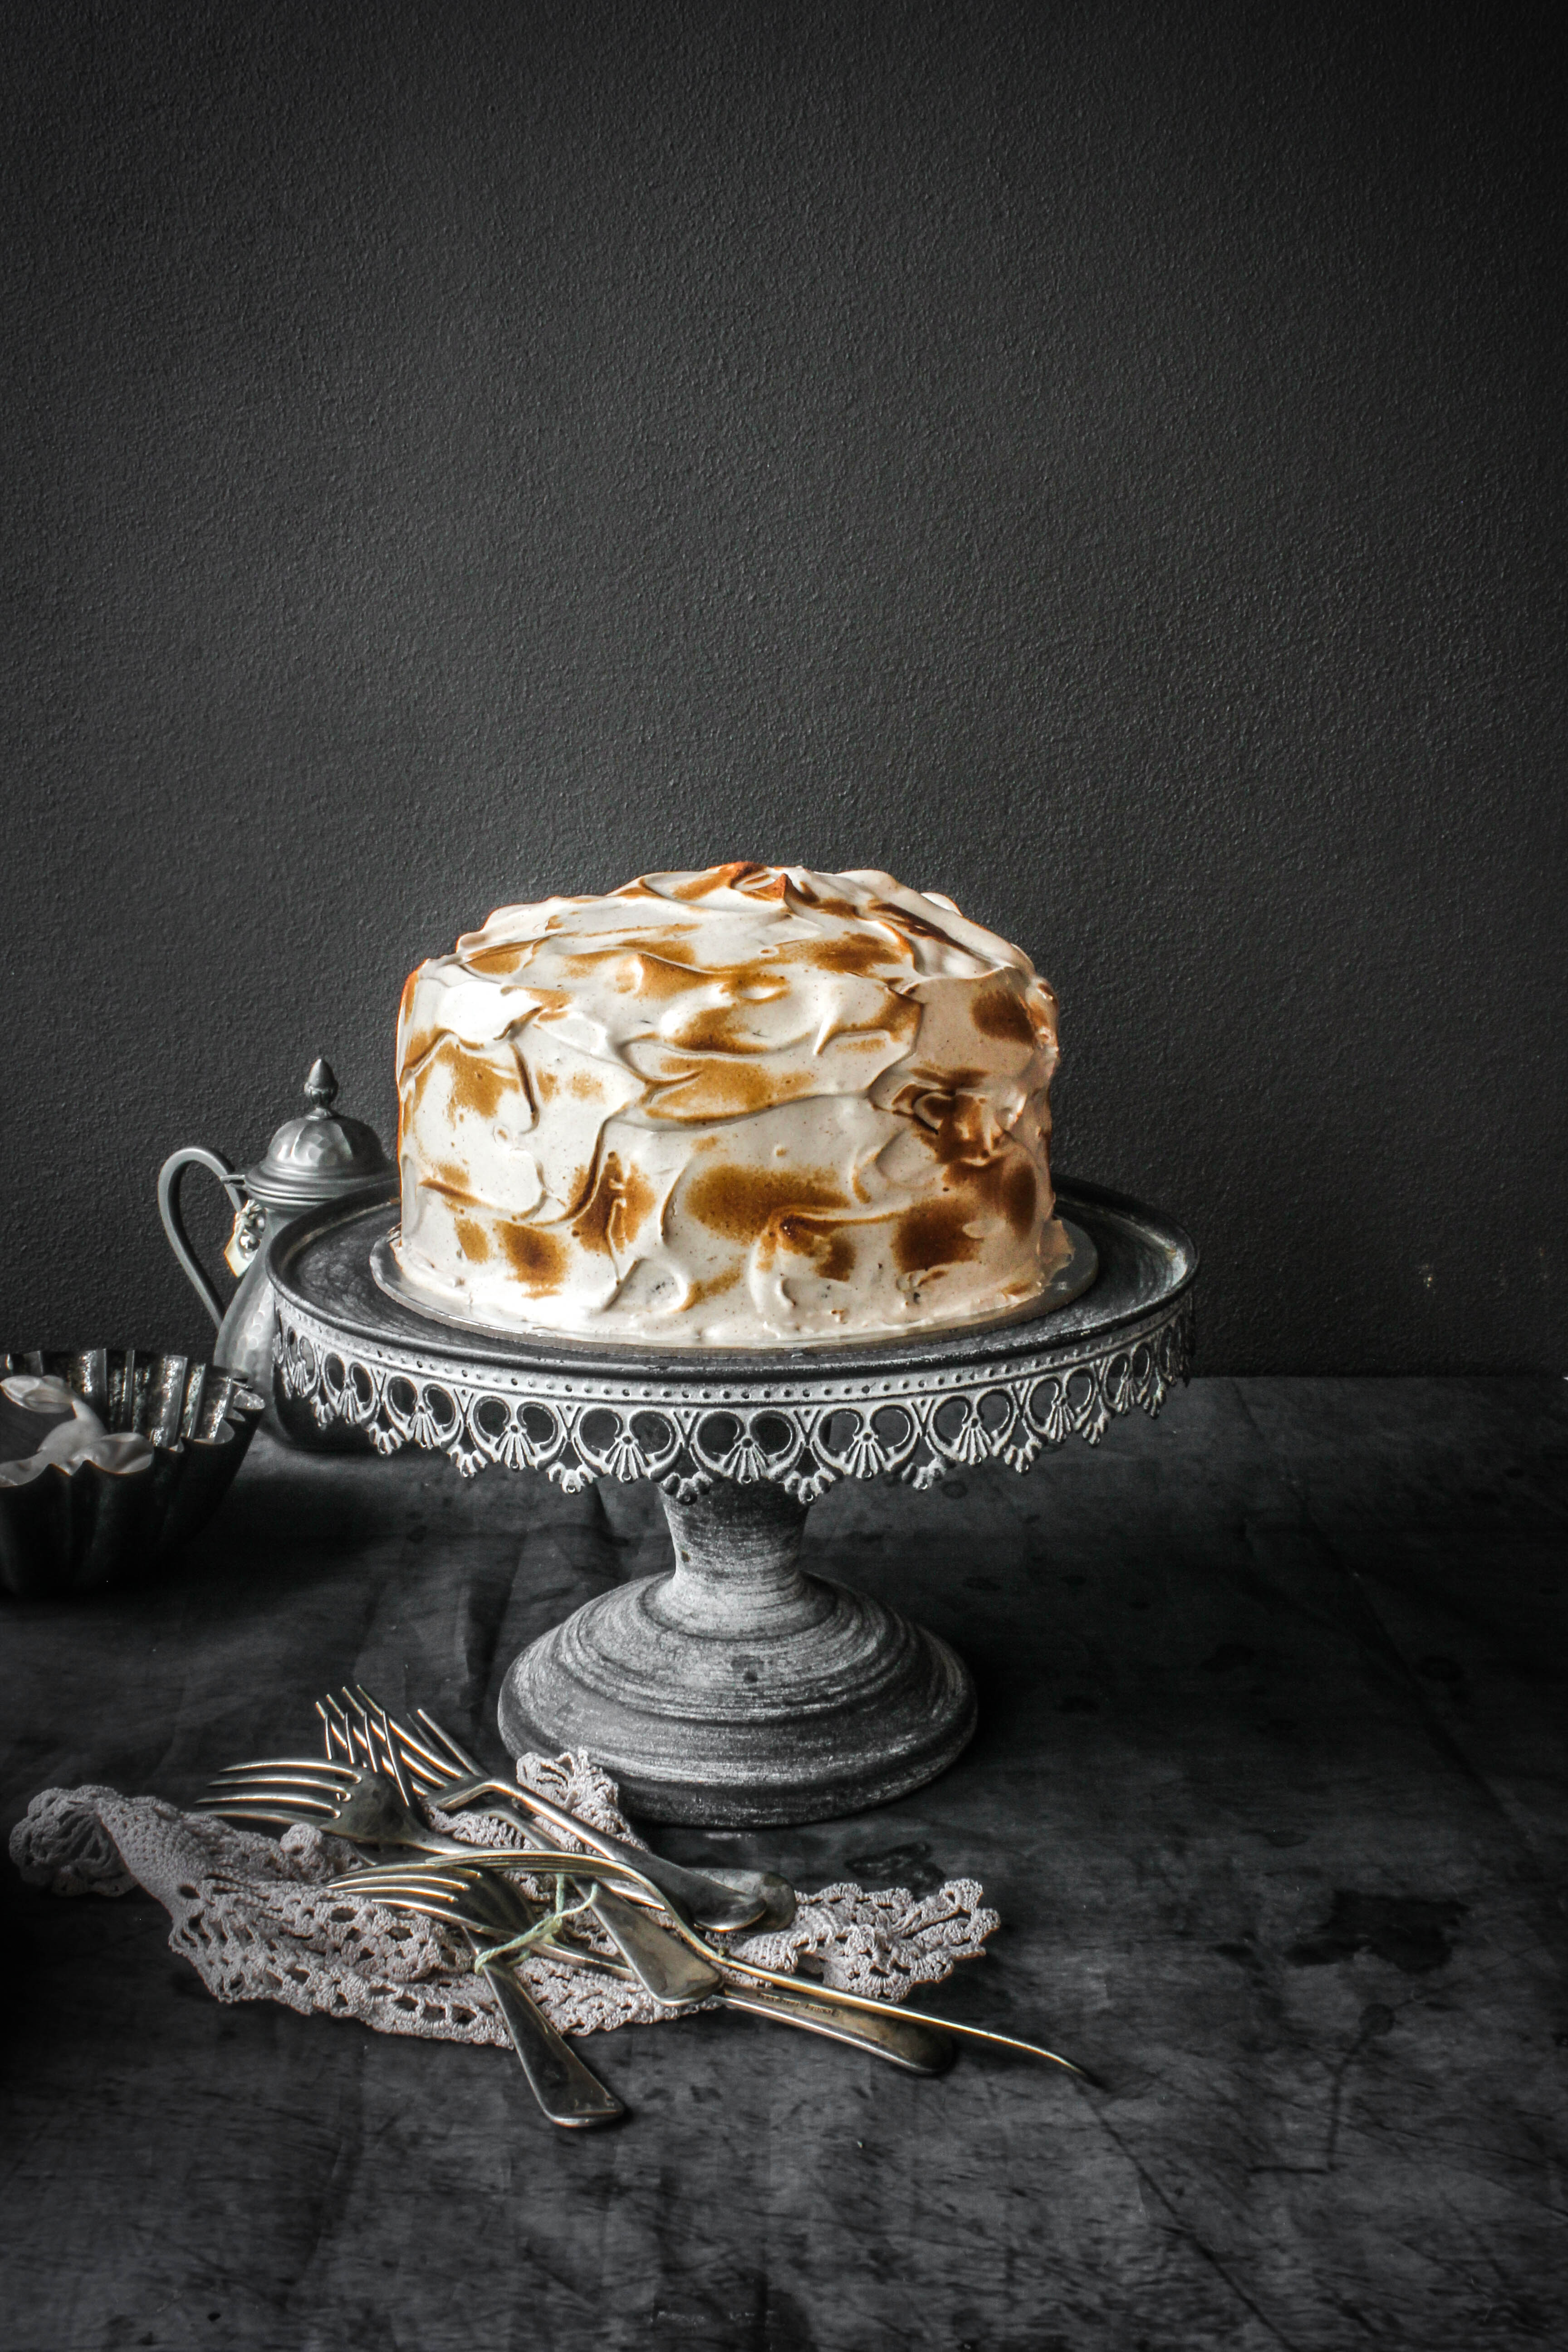
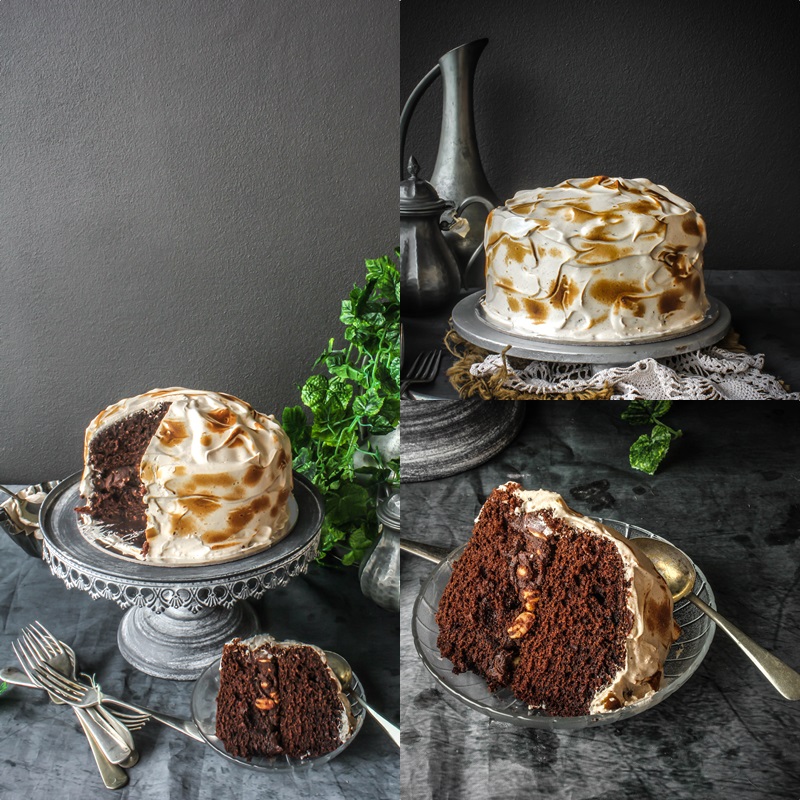
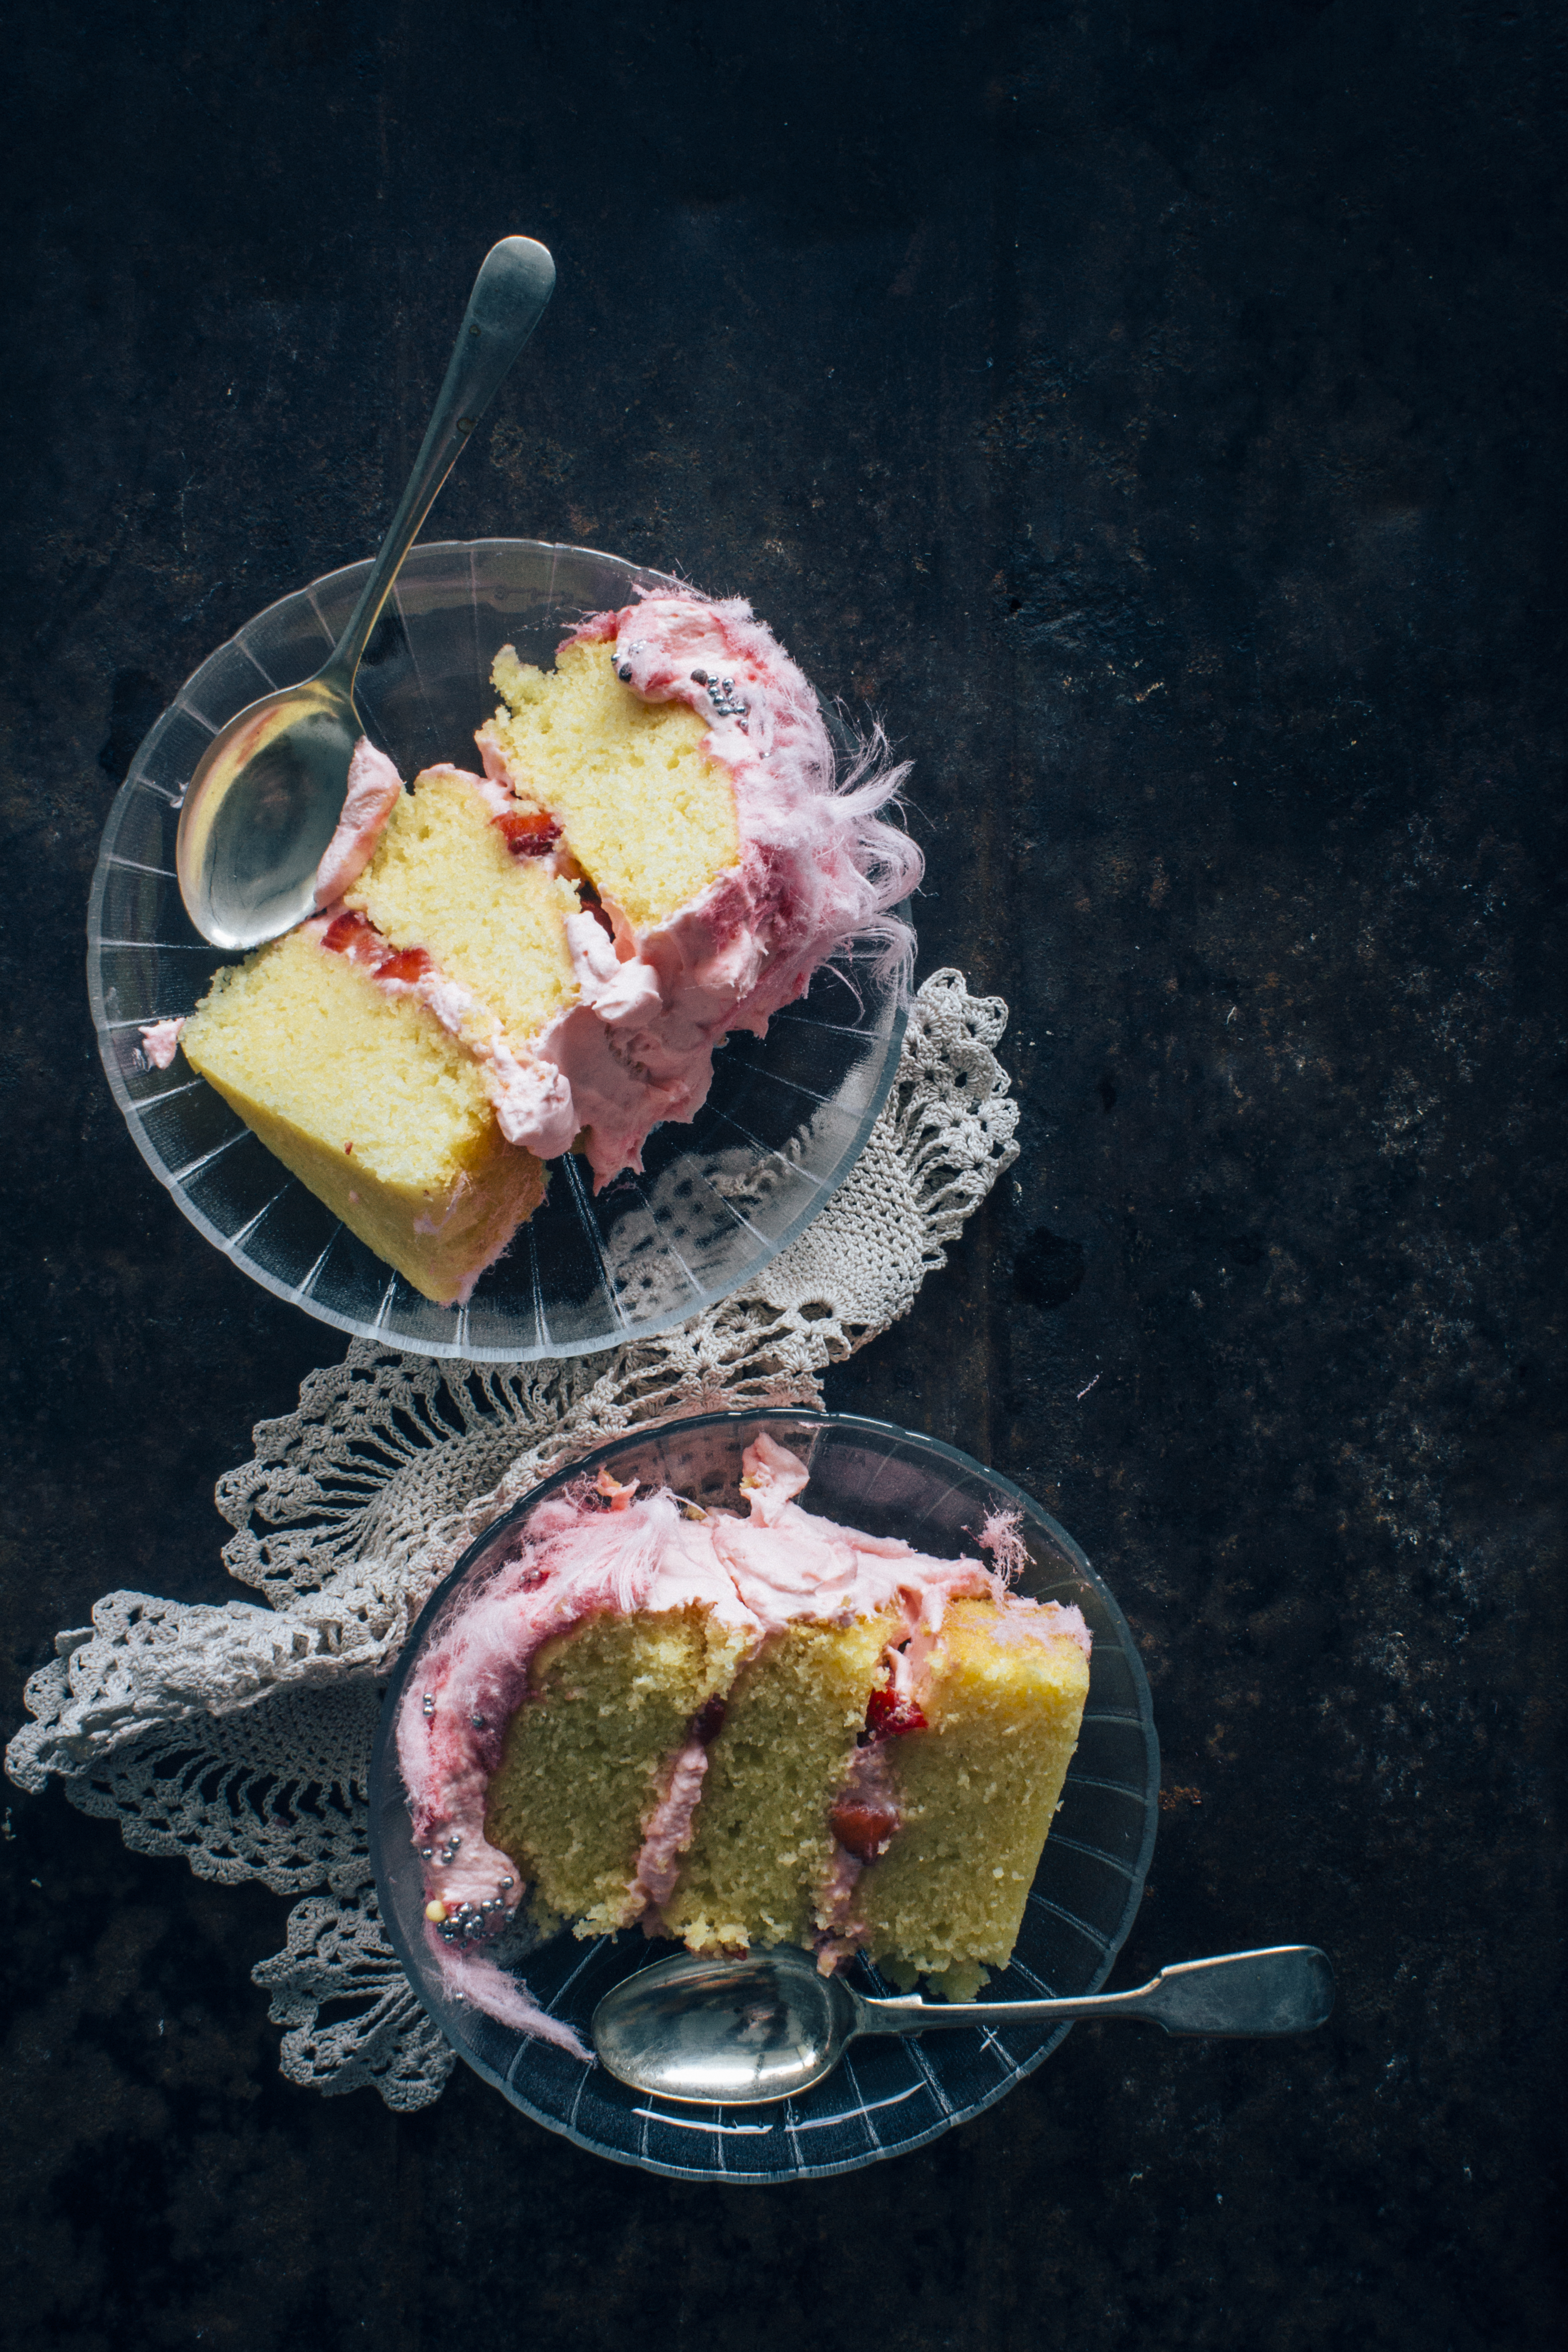
Coming to this cake…it is meant to be effortless and fun, just the way it looks. For me, making and shooting cakes is like therapy. I love this part of my job to bits. Ask me to make a cake every day..I will do it. So this is my version of a strawberries and cream cake. It is incredible tasty with a sponge like texture and fresh cream and strawberries in between. To keep the cake moist, I’ve used a strawberry infused simple syrup. You could skip this step but if you are storing the cake in the fridge since it is a cream based cake, the simple syrup will keep it moist. I frosted it like a semi naked cake with more fresh cream and topped it with pink cotton candy. I have a few friends who can bake well but are intimidated at the idea of frosting a cake. No…please! It doesn’t have to be perfect…it can still look glamorous without the pain and calories. I have worked on two more semi-naked cakes…just like this one! A bit dramatic but effortless. Stay tuned!

Strawberries and cream cake

Strawberries and cream cake

Strawberries And Cream Cake

11/4 cup (300 g) caster sugar
300 g unsalted butter
6 eggs, lightly beaten
2 1/4 cup (300 g) self-raising flour
1 tsp baking powder

Strawberry Simple Syrup
1/2 cup water
1/3 cup castor sugar
1 tsp strawberry essence

For the Filling and Frosting
3 cups heavy/thickened cream
5 tbsp castor sugar
2 tsp strawberry essence (can use vanilla as well)
Few drops pink food coloring
250 g fresh strawberries, roughly chopped
cotton candy, for decoration
mini marshmallow, for decoration
silver cachous, for decoration

Heat oven to 190 degrees C (170 degrees C for fan-forced). Grease and line the bases of three 7 in round cake pans with baking paper.. In a large bowl, beat together all the cake ingredients until you have a smooth, soft mixture. Divide the mixture equally between the pans, smoothing over the top of each with the back of the spoon. Bake in the oven for 15-20 mins or until golden and the cake springs back when gently pressed. Turn the cakes onto a cooling rack and cool to room temperature.

Meanwhile make the simple syrup. Bring the water and sugar to a boil over low heat. Remove from heat when sugar dissolves. Let cool and add the strawberry essence.
Make the whipped cream frosting..here is a guide. Add the strawberry essence in the end. Use 1/3 of the frosting for the filling and the rest for the frosting.

Once cakes has cooled completely, assemble. Place one layer on a cake stand. Sprinkle with simple syrup. Spread a little bit of the cream, layer 1/2 the strawberries evenly. Place the second layer. Repeat all the steps. Place the last layer. Sprinkle with simple syrup. Frost the sides and top starting a little bit from the second layer up for a semi-naked effect. Top with cotton candy and mini marshmallows. Store in the refrigerator until serving (the cotton candy should go on the cake just before serving). The cake is best served in a day or two.


Banana And Date Cake, Vanilla Buttercream And White Chocolate Glaze

23|07|2015

It’s been a while since I made a layer cake with the frills and the flowers. I know you love them and I love them too but I just couldn’t go beyond my quick, one pan creations  as I was so busy trying to untangle the mess in my own life. I was starting to lose focus and was probably convincing myself to be content with whatever came out of my mind and my camera. If you knew me in real life, it is quite unlike me! I really believe that in the creative space that we have chosen for ourselves, however hard it may be, there is no hiding behind a pile of papers or taking the day off from work.  You could take the day off, but taking your mind off…? I have worked for over 7 years in a large organisation handling a massive team, growing in my role. juggling a lot of work, resolving people issues, trying my best to motivate others and drawing motivation for myself. I would struggle on some days and be happy on most days. But the struggles or bad days would never show up on my work.

IMG_8243-3

What I do now, is so different! My one member team…looks up to me for drive, for ideas, for appreciation, for direction. I am my own critic. I am also my own champion. I set my benchmarks and I enjoy challenging them. My benchmarks are sometimes unreasonable but they are the reason I strive to move forward. I am far from being perfect but perfection is what I always seek. So tell me dear friends, do you set benchmarks for yourself ? Do you take life as it comes or do you push yourself towards your internal goals?

IMG_8264-3

IMG_8266

Over the last two years I set myself a few goals with respect to the blog. The funny thing is that I would work towards them and every time I would find myself on the threshold of reaching them, those goals would change. I would change! I would be a bit more confident and ready to take on a new set of goals by then. You know sometimes we can surprise ourselves with our own abilities. There were disappointments too but at the end of the day if you love something dearly, you’ll forget those. Lately, I am elbow deep in work. The kind of work I have always imagined myself doing. I don’t know where the hours fly during the day because I always wish for more.

IMG_8268-3

IMG_8277

Coming to this cake, simple flavours put together result in a moist 3 layered treat that tastes like bananas and caramel. I flavoured the buttercream with plain and simple vanilla as the cake has pretty intense flavours already. Dates are a great addition to baked goods as they not only keep them moist but also give you the impression that you are biting into a caramel flavoured dessert. I love how they totally dissolve somewhere in the batter but leave behind a strong flavor. You could make a 2 layered cake instead of 3 layers if you wish to. However, do remember to add extra baking time.

IMG_8281

Banana And Date Cake, Vanilla Buttercream And White Chocolate Glaze
Cake recipe adapted with slight variation from here)

185 ml (3/4 cup) boiling water
 

Vanilla Swiss Meringue Buttercream
4 egg whites
1 cup castor sugar
300 g unsalted butter, room temperature
1 tsp pure vanilla extract
Few drops, yellow food coloring

White Chocolate Glaze

1/3 cup heavy cream
100 g white chocolate (roughly chopped)
2-3 drops of yellow food coloring

To make the cake : Preheat oven to 190°C. Grease 3, 18 cm round cake pans with the melted butter and line the bases with non-stick baking paper. Combine the boiling water, dates and bicarbonate of soda in a medium bowl, and mix to combine. Set aside to cool slightly.

Use an electric beater to beat butter and sugar in mixing bowl until pale and creamy. Add eggs one at a time, beating well after each addition.

Combine banana and lemon juice, add to butter mixture, and stir with large metal spoon until combined. Sift together flour and baking powder in a bowl. Use the spoon to fold half the flour mixture and the butter mixture together. Stir in date mixture, then fold in remaining flour mixture.

Pour the mixture into the prepared cake pans and use the back of a spoon to smooth the surface. Bake in preheated oven for 25-35 minutes or until a skewer inserted into the centre of the cake comes out clean. Remove from oven and set aside for 10 minutes. Turn onto a wire rack to cool completely.

To make the vanilla buttercream : Place the egg whites and sugar in a large bowl that is placed over a saucepan of simmering water (over low heat), and whisk continuously, until the sugar has completely dissolved and the bottom of the bowl is warm to touch

Remove the bowl from the heat and whip on high speed until meringue holds stiff peaks and looks glossy. The bowl should have completely cooled by now.
Add the butter, 2 tablespoon at a time, until thick and fluffy. If it begins to look curdled, continue to whip until it comes back together, before adding in remaining butter.

When the buttercream has come together, add the vanilla extract and mix till smooth and well blended. Add the yellow food coloring and mix till you get the desired shade.

To make the White Chocolate Glaze Heat the cream in a small saucepan over low heat. Just before it reaches boiling point, remove from heat and pour over the white chocolate. Stir after 5 minutes until smooth. Cool the mixture slightly. Add the food colour and stir till blended. Alternately, you do do this in the microwave by heating the cream and chocolate together in a microwave proof cup or bowl for a few seconds.

To assemble: Place one layer of cake on a cake stand or plate. Spread 2-3 tbsp of buttercream on the cake. Place the second layer and repeat. Repeat with the third layer. Crumb coat the cake and place it in the fridge for 2-3 hours. Frost the top and sides of the cake. Drizzle with white chocolate glaze. Decorate with fresh (make sure they are free of pesticides) and/or sugar flowers.


Orange Almond Cake With Rhubarb Streusel

9|07|2015

Before I experienced what school was like in Australia, I had a rough idea how the school holidays were. I was not raised here so my stint with this system is as old as the time my boys have spent in school. Probably less than 6 months. But I would generally guess the school holidays going by the reduced traffic on the roads and the queues at the zoo and the museum. I would make a mental note of complying with these practices when the time came aka. queue up with my kids at various educational and historic locations around the city.

IMG_8016-5


IMG_8007-2

So far I’ve encountered 2 holiday breaks and but I have done none of that. Honestly. it never occurs to me (please don’t judge me) except on two occasions…when I see or hear someone taking their kids to these places and when I remember their school homework. Which is about writing down all the things they did during the holidays. But hey, I have a justification…okay, excuse! Getting a 5 year old to write…and write anything that makes sense is quite a thing.
‘Hold you pencil correctly…
…finger space please..noooo..between the words not letters..
Gosh..that was meant to be a full stop not a flower…don’t chew the pencil…
‘the red car flu to the moon???!!!’
Oh hello..where’s the paper….are you sitting on it?

Sigh! How do you expect them to spell museum then? Well, they can spell farm so farm is where I took them. This time it was the orange farms. We all love the outdoors so this was our perfect holiday outing.

IMG_8025-2

The sunshine was abundant, the trees drooping with the weight of their ripe bounty and our buckets were full in no time. We gave away quite a bit to friends but they just don’t seem to get over. I utilized the zest of three oranges to make this cake. It has mild orange flavour, predominantly tasting of almonds. I had rhubarb at home which can be seen at our markets pretty much round the year. The tart rhubarb was a great addition to the dense almond cake and the sreusel gave the cake another level of texture. The cake recipe is easy where you mix everything together in a large bowl. Then you layer the streusel, rhubarb and the flaked almonds on top.

IMG_8031-4


Orange Almond cake with Rhubarb Streusel (concept slightly adapted from here)
Serves 8-10

350 g young rhubarb stalks
240 g (1 1/2 cups) icing sugar
50 g (1/2 cup) plain flour
finely grated zest of two oranges
185 g unsalted butter, melted
6 egg whites
1 1/2 tablespoons demerara sugar

For the sreusel

For topping, combine sugar and flour in a bowl, then rub in butter until mixture forms clumps. Rub through the orange zest until evenly combined.

Trim leaves and ends from rhubarb and discard, then cut into 2 cm lengths.

Preheat oven to 190°C. Grease a 20 cm round cake pan and line the base with baking paper. Place sugar, flour, orange zest and almond meal in a large bowl, then stir in butter and egg whites until just combined. Spoon into tin, scatter with half the crumb topping, then rhubarb, then remaining topping. Sprinkle with sliced almonds and demerara sugar and bake for 50 minutes or until firm. Cool in tin for 10 minutes.

Best served warm or at room temperature with ice cream on the side.

Chocolate Cake With Salted Peanut Chocolate Ganache And Chocolate Meringue

17|06|2015

Let’s celebrate! Celebrate what? Nothing…something…everything? Today I want to celebrate nothing. That nothing is wrong with me or my loved ones. That my life is extremely ordinary, normal…chaotic and beautiful. That I have a lot to delight in and plenty to fret about. That I am able to eat, sleep, run, laugh, argue, feel, plan, hope and dream, like anyone else. We don’t realize but when we plan, hope and dream, in some ways we acknowledge that life will still be somewhat the same or perhaps be better. A virtual certainty! But tomorrow could be different.  Life could change in moments! What we have is today and NOW! We do take life for granted, don’t we? It is so easy to get caught in the flow of our daily grind and forget to appreciate life for what it is. But life sometimes, has it’s own way of jolting you upright. Like speed bumps on the way. Sometimes you see them coming and sometimes they sneak up on you. And your otherwise smooth ride turns into a bumpy, messy experience.

IMG_7549-2

I recently found myself on one such speed bump and my world turned upside down. A casual health checkup throwing up certain abnormalities, never ending tests, sleepless nights, an anxious family and me, living in denial for most part of it. Successive tests very very thankfully and to my utmost relief did not confirm any of it. I have the last few to go but I am hopeful. I have a strong support system around me and I couldn’t be more grateful. Amidst the chaos, I braved myself to stay put and lead a normal life to the extent possible. I continued to post though fewer posts and my photos and words definitely reflected my state of mind. I apologize if I have disappointed you lately. This blog, baking and most importantly your time and visit to my space means the world to me. This blogging community and my blogger friends mean the world to me. Staying away from this is hard for me as much as coming here and sharing a difficult situation with you. I’ve always liked it to be a happy, vibrant place filled with positivity and colours.

IMG_7540-2

So I made a chocolate cake with a chocolate ganache and salted peanut filling. Something different. Don’t be surprised if you see that combination come up soon again because I am pretty obsessed with the salted peanut thing at the moment. I covered the cake in chocolate meringue (cocoa infused) and that made for a light, creamy, melt-in-your-mouth frosting, mildly tasting of chocolate. The cake is moist, chocolatey and intense with the presence of coffee in it and this totally complements the frosting. You will need a blow torch to brown the exterior which in my opinion is an inexpensive but good investment if you are into baking and desserts.

IMG_7479

I hope to bake more and flood my blog with decadent treats in the forthcoming weeks. Thank you for bearing with me and giving me a reason to come back:-)

chocolate Peanut Meringue cake

Chocolate Cake With Salted Peanut Chocolate Ganache And Chocolate Meringue.
Serves 8-10

Chocolate Cake (recipe adapted from Food And Wine)

1 3/4 cups all-purpose flour, plus more for dusting
2 cups sugar
3/4 cup unsweetened cocoa powder
2 teaspoons baking soda
1 teaspoon baking powder
1 teaspoon kosher salt
1 cup buttermilk
1/2 cup vegetable oil
2 large eggs
1 teaspoon pure vanilla extract
1 cup freshly brewed hot coffee

Preheat the oven to 180 degrees C. Grease two 7-inch round cake pans and line them with baking paper. Dust the pans with flour, tapping out any excess.

In the bowl of an electric mixer fitted with a paddle, mix the flour with the sugar, cocoa powder, baking soda, baking powder and salt at low speed. In a bowl, whisk the buttermilk with the oil, eggs and vanilla. Slowly beat the buttermilk mixture into the dry ingredients until just incorporated, then slowly beat in the hot coffee until fully incorporated.

Pour the batter into the prepared pans. Bake for 35 minutes, or until a toothpick inserted in the center of each cake comes out clean. Let the cakes cool in the pans for 30 minutes, then invert the cakes onto a rack to cool. Peel off the baking paper.

Salted Peanut Chocolate Ganache Filling 

150 g dark chocolate
1/3 cup thickened cream
1 cup salted roasted peanuts

Place chocolate and cream in a microwave-safe bowl. Microwave on medium for 2 to 3 minutes, stirring every 30 seconds with a metal spoon or until smooth. Alternately, place the ingredients together in a saucepan over low heat. Stir in intervals till smooth and blended. Add the salted peanuts and mix.
Stand at room temperature until thickened (or pop it into the fridge for 10 minutes, if you are in a hurry)

Chocolate Meringue (adapted from the Food network)

3 egg whites, at room temperature
1/4 teaspoon cream of tartar
3/4 cup granulated, superfine sugar
1 teaspoon vanilla
4 tablespoons unsweetened Dutch process cocoa, sifted

In a large bowl with an electric mixer beat the egg whites until frothy. Add the cream of tartar and granulated sugar 1 tablespoon at a time. Beat until the egg whites are stiff and shiny and the sugar granules cannot be felt in the whites. Beat in the vanilla, reduce speed to low and add cocoa until combined

To assemble, place one cake layer on a cake stand or plate. Spread a thick layer of the chocolate-peanut filling. Place the second cake layer on top. Cover with meringue frosting. Brown the frosting with a blow torch.

  • « Previous Page
  • 1
  • …
  • 28
  • 29
  • 30
  • 31
  • 32
  • …
  • 46
  • Next Page »
Hey Sugar
Cake
Link to my Facebook Page
Link to my Instagram Page
Link to my Pinterest Page
Link to my Mail Page
Subscribe to this site
Fresh Awards
2019 Aus mumpreneur
2019 aus mumpreneur
Mumbrella

Copyright © 2025 · Sugar Et Al · Designed by Smitten Blog Designs · Log in