• Home
  • Recipe Index
    • Recipe Index
    • Breakfast/Brunch
    • Cakes and Puddings
    • Chocolate
    • Cookies and cupcakes
    • Custard and Mousse
    • Gluten Free
    • Ice Cream
    • Mains
    • Other Sweet Treats
    • Snack/Appetizers
    • Soups and Salads
    • Tarts and Pies
    • Vegetarian
  • About
  • Cookbook
  • Portfolio
  • Store
  • Press
  • Work with Me

Sugar et al

Because Life is a blend of flavours...

White Chocolate and Strawberry Tart

20|06|2017

Delicious White chocolate and Strawberry tart with a cookie crust and an orange infused white chocolate ganache filling. No baking and easy to put together.

Posting after a while now. How has everyone been? I had a lot going on these past few weeks, the first being a house move which I was totally unprepared for. We were renting this place for almost 3 years now when the owner just sold the property. The new owners wanted to move in quickly and we were asked to vacate. With a huge number of commitments and client work already scheduled for the beginning of June, I had no choice but to book the closest available house and move my entire setup into a new place. Since, I could only afford to take the weekend off from work, I figured out that there was no way I could bubble wrap all my stuff,  box them and unwrap them later. So I made close to 30 trips back and forth loaded with props, backgrounds and a hundred other things so I could place them in shelves (in the new place) just the way they were before. By Monday, I couldn’t move. And then realizing the greatest fear of all, food photographers  would relate to. Light!!! The angle and direction of light was entirely different and I spent a few frustrated days trying to figure out the best solution.Finally, things have settled down…well, sort of, and life is getting back to normal again.

white chocolate and strawberry tart

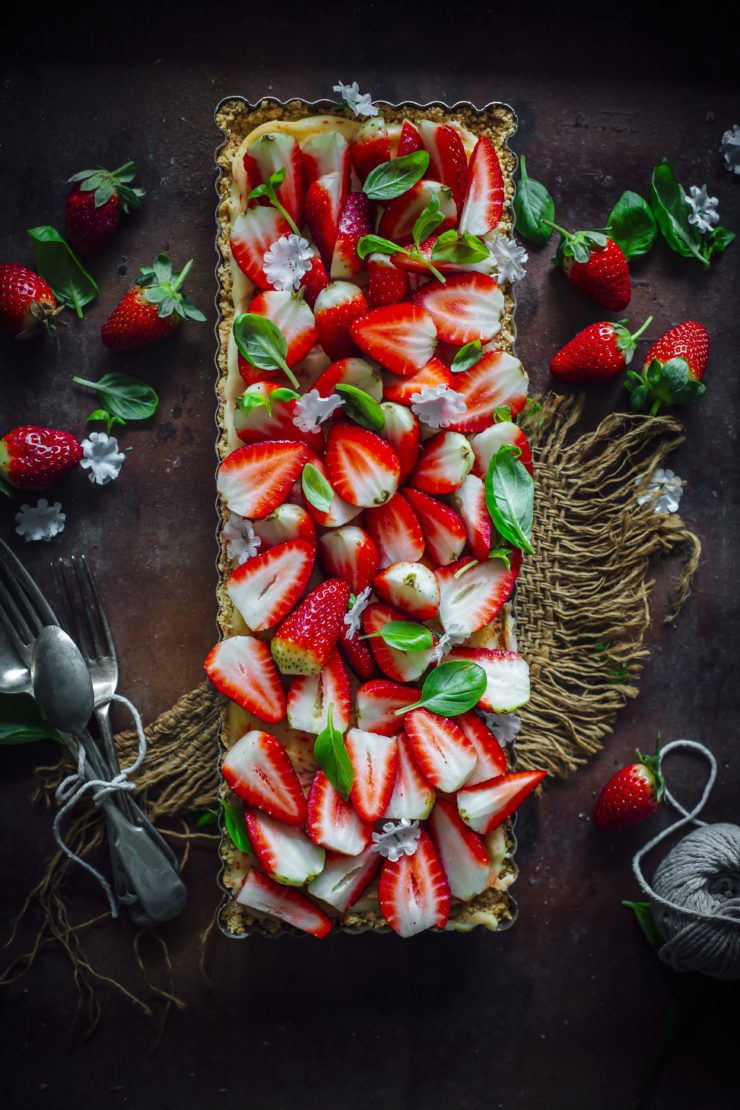
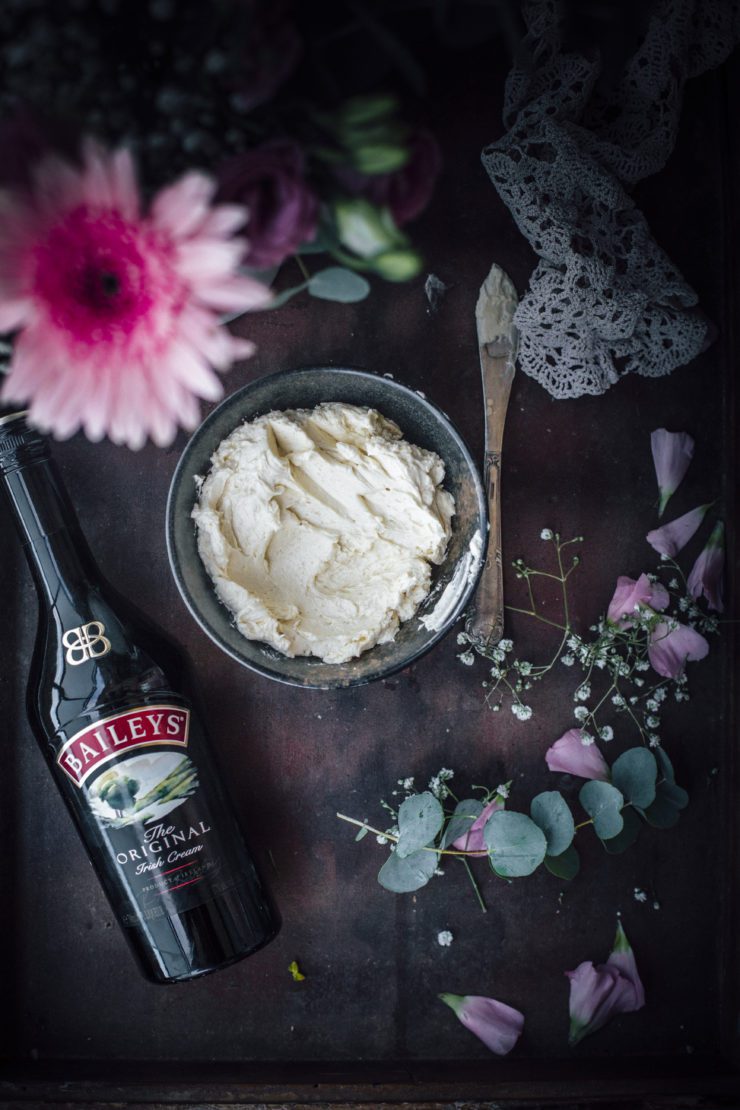
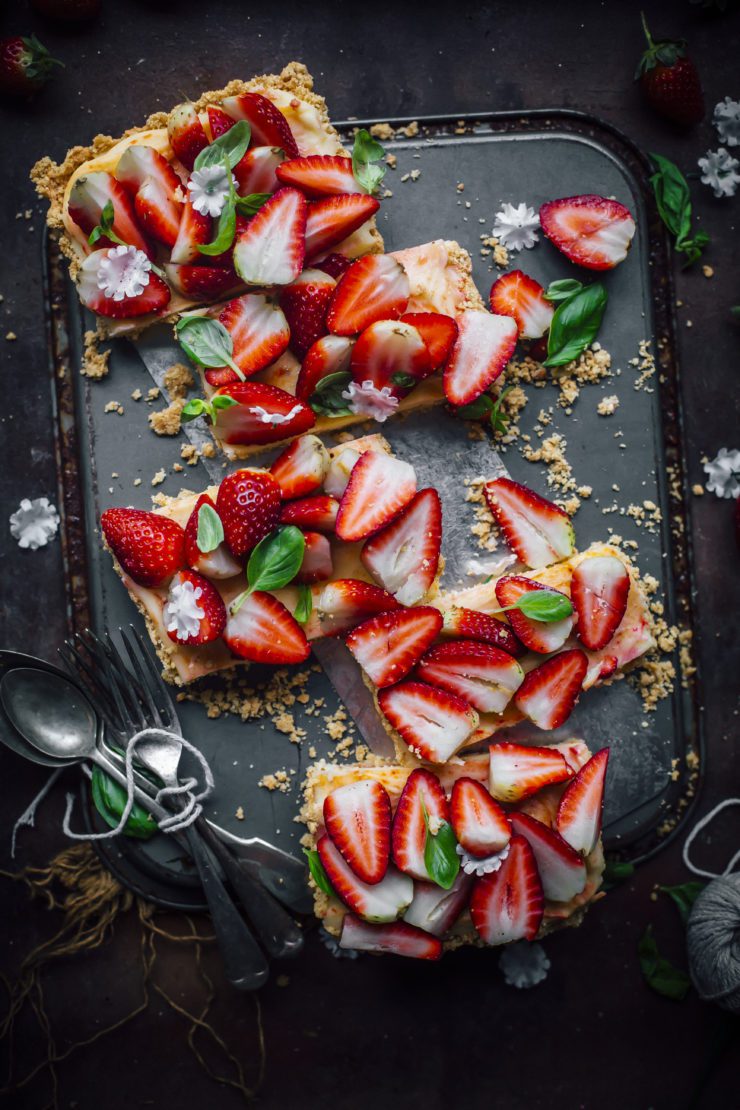
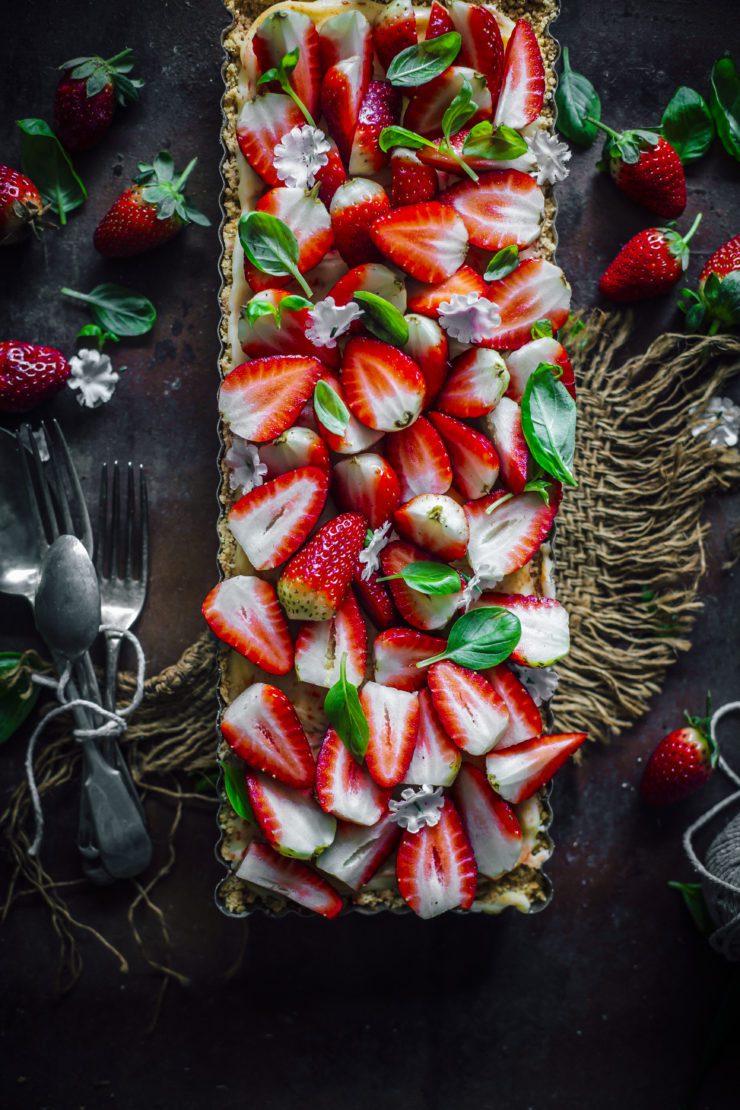
In the middle of all this chaos, the oven in the new house gave me a bit of trouble as well so I just gave up temporarily and started creating no-bake recipes. Always think positive, right? When it comes to desserts, there are enough options, thankfully. Yay! This White Chocolate Tart has a cookie crust made with digestive cookies. I’ve experimented with a number of cookies before and digestive cookies were on my mind for some time, just to find out if they would be a lighter version of the rest. Oreos are generally the best bet when it comes to a no bake cookie crust but I didn’t want a chocolate crust for this tart. The filling is white chocolate ganache infused with freshly grated orange zest that balances out all the sweetness. The idea initially was to create an orange tart until I discovered on that day that our winter strawberries had hit the markets. We are so lucky to have two strawberry seasons in Australia. Look how big, juicy and red they are! The White Chocolate and Strawberry tart comes together quickly and needs no special skills to make. If you’ve always hesitated to make a tart the traditional way, give this a go for sure. There is hardly a thing that could go wrong here. Play around with seasonal fruits that are available near you or simply decorate with grated white or dark chocolate.

white chocolate and strawberry tart

white chocolate and strawberry tart

White Chocolate and Strawberry Tart
Makes a 14 x 5 inch rectangular tart or a 9 inch round tart.

250 g pack of digestive cookies
100 g unsalted butter, melted
250 g white chocolate, roughly chopped
130 ml heavy/thickened cream
40 g unsalted butter, roughly chopped
1 tsp finely grated orange zest
Fresh strawberries to top

Process cookies in a food processor until fine crumbs form. Add the melted butter and mix till well blended.

Press the cookie mixture into the bottom and edges of a rectangular tart pan (14 inch x 5 inch) with a removable base. Use the back of a spoon (and your fingers where necessary) to evenly spread out into a neat tart crust. Place the tart pan onto a plate (this makes it easier to move the tart in and out of the fridge.). Refrigerate for 30 minutes or until crust is firm.

While the crust is in the fridge,  heat the cream in a medium saucepan over low heat until it just comes to a a boil (do not boil). Remove from heat and add the chopped white chocolate. Leave aside for 5-10 minutes until chocolate melts. Add the butter and the orange zest. Mix.

Cool the white chocolate mixture slightly and pour onto the prepared crust. Refrigerate until set (about 2 hours). Serve with fresh strawberries and fresh basil leaves.

Marshmallow Mousse

24|05|2017

Mousse is a massive, huge, immense, enormous, gigantic, mammoth (okay, add all the adjectives) favorite of this blog:-) Needless to say, I’ve tried out every possible technique under the sun to create this delicious dessert. In this blog itself, there are all kinds of mousse recipes…some with egg yolk, some with white, some with both, others with chocolate and cream and with gelatine. The ones I’ve tested out recently are the marshmallow mousse and the aquafaba mousse (both are egg less). I’ll share the second one soon but now let’s talk about Marshmallow Mousse.

The reason for taking so long to experiment with this was because the idea of having marshmallows meant it would taste sweet. Like really sweet. I like marshmallows but not everyone can tolerate something so sickly sweet that too in quite a big amount. Enter yogurt! My go to for all culinary balancing needs.  The tartness of yogurt would balance out the sweetness to a great extent. So the base recipe for this mousse is nothing but marshmallows, half and half and yogurt. There are so many ways of diversifying upon this base recipe.
Want to cut down the sweetness further? Serve with raspberry or strawberry coulis or a slightly tart fruit compote. Or add lots of citrus zest..like lemon or lime. Or add spices like powdered ginger or cinnamon.

If you’ve made Marshmallows at home, they are nothing but hot sugar syrup and gelatine. When we melt them, we basically activate the gelatine once again. The texture of this kind of mouse is light, and tight. It does not have the kind of aeration or richness that eggs would provide. Then why make them you may ask? Well, I would make them

– when I want a dead easy, no fail recipe with few ingredients.
– when I’m creating something special for an event that requires desserts at room temperature (Egg and dairy based mousses generally need refrigeration). This one does not.
– When I’m allergic to eggs or will not eat eggs
– when I just want to create fancy looking mousse without toiling for hours. (So many of you commented on how neat the layers are).

I’ve created quite a few versions of this in the past few weeks but these are the two I shared on Instagram. The layering bit is my favourite. Typically in layered desserts, you have to wait for each layer to set up before you add another one. The good news is that for this one you just wait for 5-10 minutes only. So basically, in under 30 minutes you have a gorgeous dessert ready to serve. Regarding taste, they taste like marshmallows (YUM) unless you infuse them with some other flavours.

As you can see I’ve used food color and both fresh flowers and gum paste flowers in the two versions. Make them your own by adding decorations, sprinkles, flowers, dark chocolate chips or anything else you like. I hope you give them a try.
Stay tuned for for more mousse recipes coming your way.

Marshmallow Mousse 
Makes 4-6

250 g marshmallows (use white if you are planning on colouring them)
200 ml half and half (half milk, half cream)
1/2 cup Greek yogurt

Over low heat, slowly cook the marshmallows and 2 tbsp of the half & half  in a small saucepan whilst stirring continuously. They can burn easily so keep an eye on them. Remove from heat and continue to stir if they look like they might burn. (You could also do this in the microwave on low in short bursts of 10 seconds). Once marshmallows have melted and the mixture is smooth, allow to cool for 5 minutes. Add the remaining half and half and yogurt and mix to blend.

Depending on the number of layers, divide the mixture between bowls and colour. To layer, gently spoon first layer into serving glasses. Chill for 5-10 minutes. Repeat with the rest of the layers. Refrigerate until needed. When serving, allow to stay in room temperature for 15 minutes.


Spiced Apple Cake

21|05|2017

Our lives are full of choices and we are so lucky to have them. Whether it is the way we lead our lives or the food we eat, our options are abundant. When I was little, I knew the apple as a favourite fruit at home. As I grew older I learnt about a few different varieties and today we have apples that are nothing short of a marvel. An apple that is grown to suit our modern day, busy lifestyles.

Spiced Apple Cake

I had the pleasure of tasting the new Envy™ apple at the their launch recently and they were everything one could wish for in a fruit. Sweet with the perfect crunch and a tender flesh that remains white for a really long time. As a Mum to two young school going children this was a great find and as a huge lover of apples (I eat apples almost every single day) I wanted to experiment immediately. They tasted great but how would they respond to baking, is what I kept thinking. As it turned out, they held their texture and shape even after being baked which is exactly what you want when baking a cake like this one.

Spiced Apple Cake

I’ve been meaning to create apple roses and apple art on my cakes all along Autumn. Finally I got my chance when I got my hands on these gorgeous apples. The cake is quite simple to put together with a mix of sweet and spice, so perfect for the cold season. It tasted really good when warm with a scoop of vanilla ice cream on the side. The apple pattern is honestly not difficult at all. All it requires is a bit of patience and a great apple that wont break down in the oven.

Spiced Apple Cake

Spiced Apple Cake

Have a great week guys! What’s your favourite apple recipe?

Spiced Apple Cake

Spiced Apple Cake
Makes a 7 inch round cake

125 g unsalted butter, softened
1/2 cup brown sugar
1 tsp vanilla extract
1 tsp powdered cinnamon
1 tsp crystallized ginger, finely chopped
2 eggs
1 cup self-raising flour
1/2 cup plain flour
3/4 cup milk
2 large apples
2 tbsp orange marmalade

Preheat oven to 180 degrees C (160 degrees C for fan forced ovens). Lightly grease the base and sides of a 7 inch round baking pan and line the base with non-stick baking paper.

Place butter, sugar and vanilla in a bowl. Using an electric mixer, beat for 5 to 6 minutes or until light and creamy. Add eggs, 1 at a time, beating after each addition. Mix self-raising flour, plain flour, powdered cinnamon and crystallized ginger in a separate bowl.

Add half the flour mixture to butter mixture. Add half the milk. Fold through. Repeat with the rest of the flour and milk. Fold until just combined. Pour into prepared pan. Core and quarter apples. Thinly slice. Arrange apples in 3-4 circles on batter, starting from the edges moving to the middle, pressing down gently.

Bake for 35 to 40 minutes or until a skewer inserted in the centre comes out clean. Stand in pan for 10 minutes. Remove side from pan. Slide cake onto a wire rack to cool.

Place marmalade in a microwave-safe bowl. Microwave on high (100%) for 30 seconds to 1 minute or until runny. Brush cake top with jam. Serve with whipped cream or ice cream..

Hazelnut Cake with Baileys Buttercream for Mother’s day

11|05|2017

Layers of Hazelnut Cake with a delicious Baileys Original Irish Cream Buttercream, White Chocolate Glaze, topped with Baileys Truffles. A dream cake for Mother’s Day.

Hazelnut cake with Baileys buttercream

I am a firm believer in hand made presents for my loved ones. A gift made with love is more meaningful than something purchased. When the occasion is Mother’s Day, the motivation to get into action is ten folds. Mum gives us the world while growing up. Isn’t it fair that we try and give back a little bit to the most special, most irreplaceable person in our life? A painting, handmade candles or a pretty cake. Mums adore these sentiments. If you ask me, baking a cake is one of the sweetest gestures because it shows that you have spent time in creating something. To make that cake unique this year, I’ve added something I know is loved by the entire world. Baileys Irish Cream.

Hazelnut cake with Baileys buttercream

The Heavenly combination of hazelnuts in the cake layers and Baileys in the buttercream makes it a treat for the taste buds. And of course, it’s Mother’s Day so flowers are a must. Don’t you just love the idea of a cake as a vehicle for pretty flowers?

Hazelnut cake with Baileys buttercream

Baileys liqueurs are a dream to work with. They blend well in frostings or glazes whilst retaining their presence in a subtle, delicious way. Like all my cakes, the layers can be made ahead and are quite simple to put together. Naked cakes have a level of intrigue and rustic charm that appeals to many. They are also lighter as we forgo quite a bit of frosting which is perfect for Mummy-s. Lastly, I highly recommend the Baileys truffles. They are irresistible and something you could present on top of the cake as well as wrapped in a small box with cute ribbons around it.  Anything to impress Mummy, right?

Hazelnut cake with Baileys buttercream

Hazelnut cake with Baileys buttercream

Happy Mother’s Day to all you beautiful Mums, GrandMums and soon to be Mums out there. I hope your day is filled with unlimited love and joy.

Hazelnut cake with Baileys buttercream

Disclaimer: This post is brought to you by Baileys. As always, all opinions expressed in this post are entirely mine.

Hazelnut Cake with Baileys Buttercream
Makes a 6 inch, 3-layered round cake

Hazelnut Cake

250 g unsalted butter, softened
11/4 cup castor sugar
4 eggs
1 tsp vanilla essence
21/2 cups self-raising flour
1 cup hazelnut meal (ground hazelnuts)
1 cup milk

Preheat oven to 160 degrees c (140 degrees C). Grease and line the base of 3, 6 inch pans with baking paper.

Using an electric mixer whisk together butter and sugar till fluffy and combined. Add the eggs, one at a time and beating after each addition. Add the vanilla, flour, hazelnut meal and milk and beat till mixture is smooth.

Divide uniformly between prepared pans and bake for 25-30 minutes or until a skewer inserted into the centre comes out clean. Remove pans from oven. Leave aside for 10 minutes. Gently turn out cakes on to a wire rack. Cool completely to room temperature.

Baileys Buttercream

125 g unsalted butter, softened
11/2 cups icing sugar
1/3 cup Baileys Original Irish Cream

Beat the butter in a bowl using an electric mixer until light and fluffy. Gradually add icing sugar and beat till combined. Add Baileys Irish Cream and beat for another 2-3 minutes till mixture is smooth and blended.

White Chocolate Glaze

100 g white chocolate, roughly chopped
3 tbsp heavy cream
1-2 drops pink food colour

Heat the white chocolate and heavy cream over low heat in a small saucepan. When cream just reaches boiling point, remove from heat and leave aside. Stir with a spoon to make a smooth mix. Add the food colour and stir to blend.

Baileys Truffles

½ cup thickened cream
140 g white chocolate, roughly chopped
2 tbsp Baileys Original Irish Cream
½ cup shredded coconut

Place chocolate in a heat proof bowl. Heat cream over low heat until it just reaches to a boil (do not boil).  Pour the hot cream over the chocolate and leave aside for 5 minutes. Stir mixture with a spoon until smooth. Add Baileys Irish Cream and mix till blended. Chill for 6 hours or until firm enough to roll into truffles. Using hands, roll into balls, then roll into plate of coconut. Keep chilled until needed.

 To assemble: On a cake plate or stand, spread a little buttercream and place the first cake layer (so the cake does not move about while frosting). Spread a little Baileys Buttercream (about 1/3 cup). Place the second layer. Repeat. Place the last layer upside down (so you get a flat top to work with). Spread buttercream on top and sides. If you are after a naked look, a thin layer of frosting is good enough.
Stick the cake into the refrigerator for 10 minutes.

Make the white chocolate glaze 5 minutes before you take the cake out from the fridge. Once the glaze is cool but still flowing freely when you lift it with a spoon, spoon it onto the cake very gently. This will create the drippy effect. Let the glaze set for 30 minutes.
Decorate with Baileys truffles and fresh flowers. Make sure the stems of the flowers are wrapped in baking paper or foil so they don’t touch the cake directly.


  • « Previous Page
  • 1
  • …
  • 14
  • 15
  • 16
  • 17
  • 18
  • …
  • 57
  • Next Page »
Hey Sugar
Cake
Link to my Facebook Page
Link to my Instagram Page
Link to my Pinterest Page
Link to my Mail Page
Subscribe to this site
Fresh Awards
2019 Aus mumpreneur
2019 aus mumpreneur
Mumbrella

Copyright © 2025 · Sugar Et Al · Designed by Smitten Blog Designs · Log in