• Home
  • Recipe Index
    • Recipe Index
    • Breakfast/Brunch
    • Cakes and Puddings
    • Chocolate
    • Cookies and cupcakes
    • Custard and Mousse
    • Gluten Free
    • Ice Cream
    • Mains
    • Other Sweet Treats
    • Snack/Appetizers
    • Soups and Salads
    • Tarts and Pies
    • Vegetarian
  • About
  • Cookbook
  • Portfolio
  • Store
  • Press
  • Work with Me

Sugar et al

Because Life is a blend of flavours...

Orange and Carrot Cake

27|07|2016

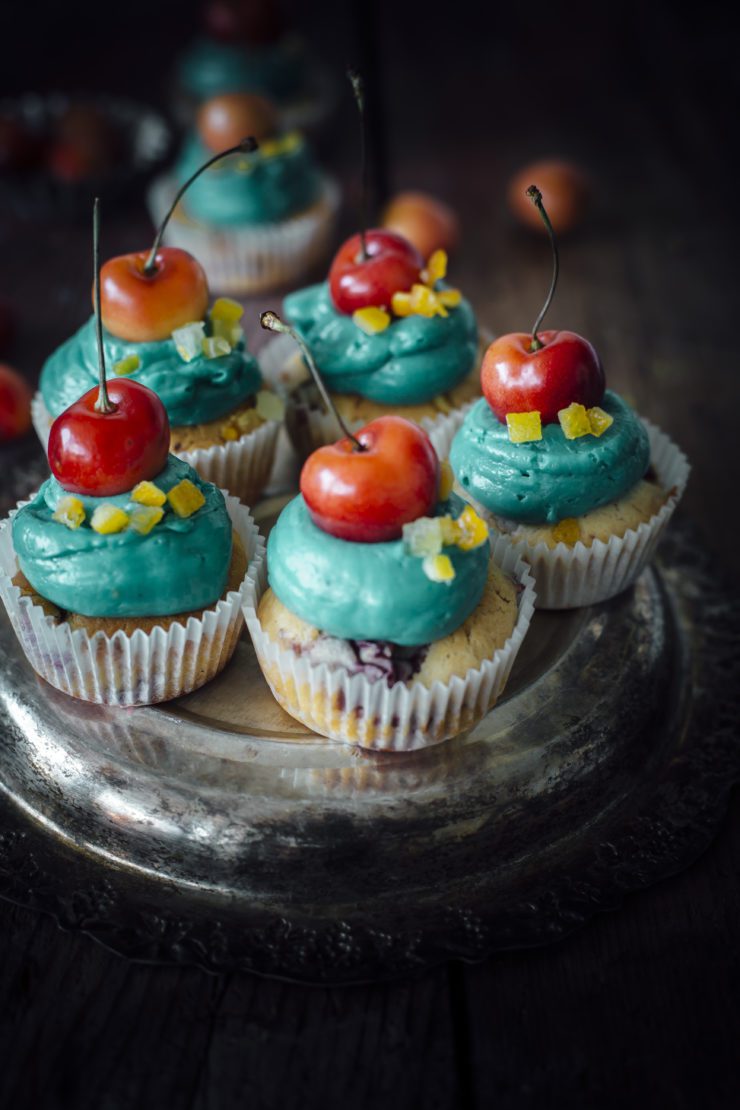
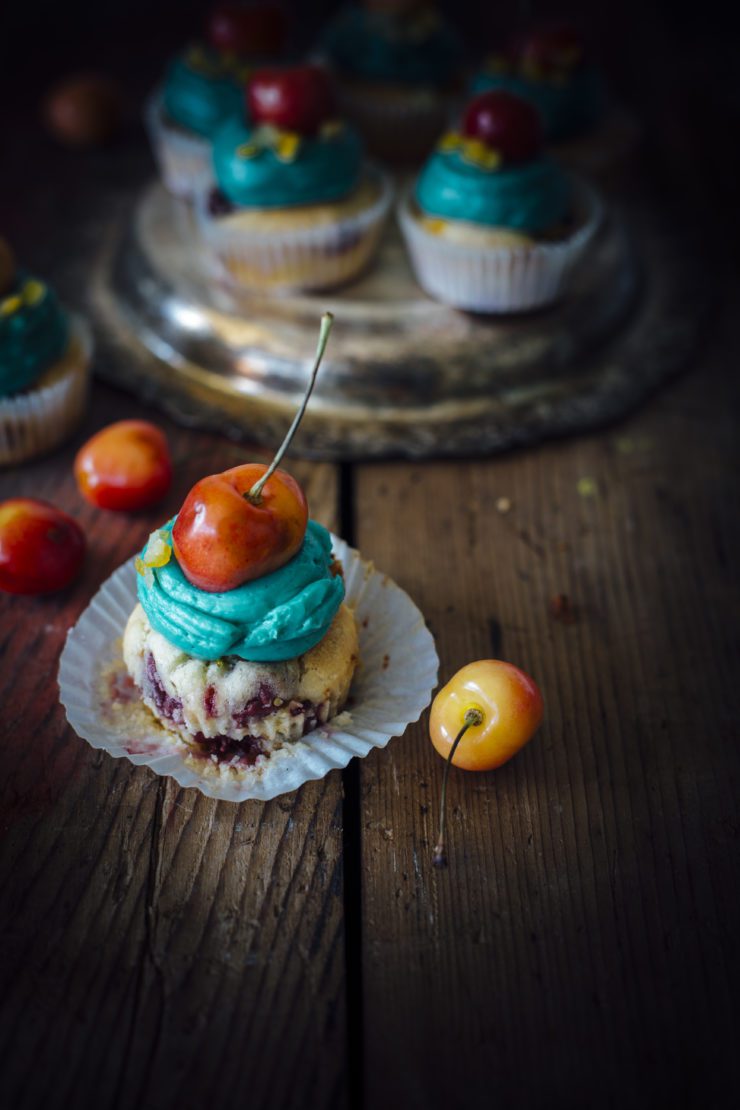
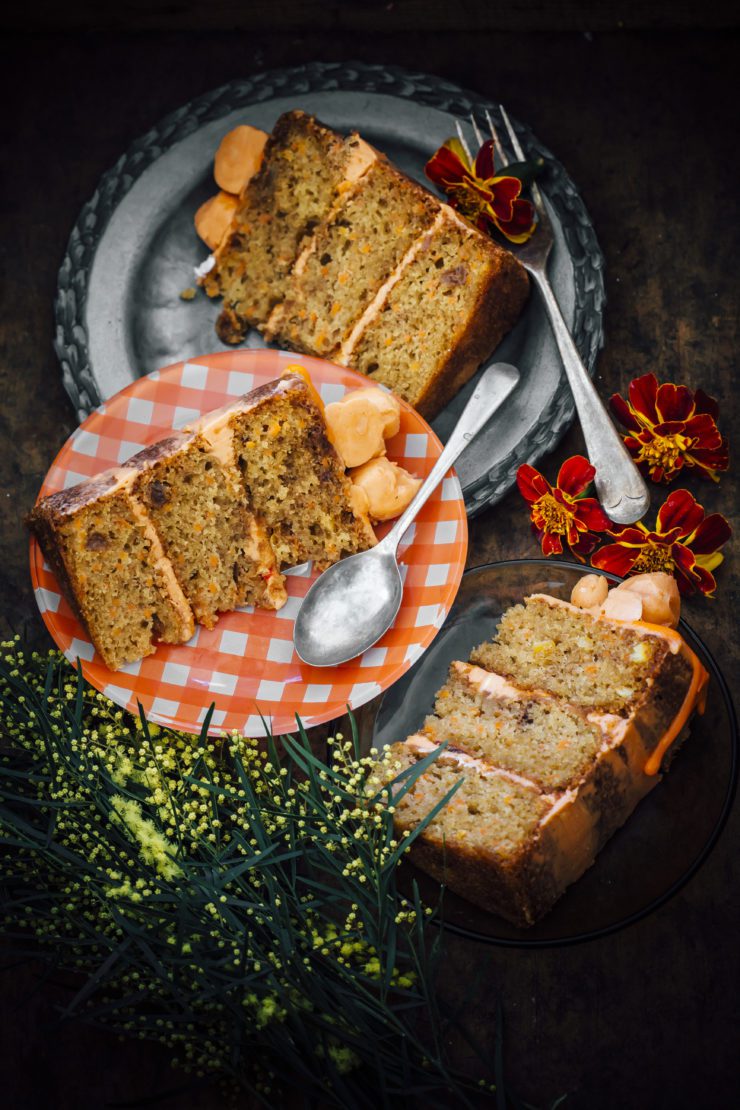
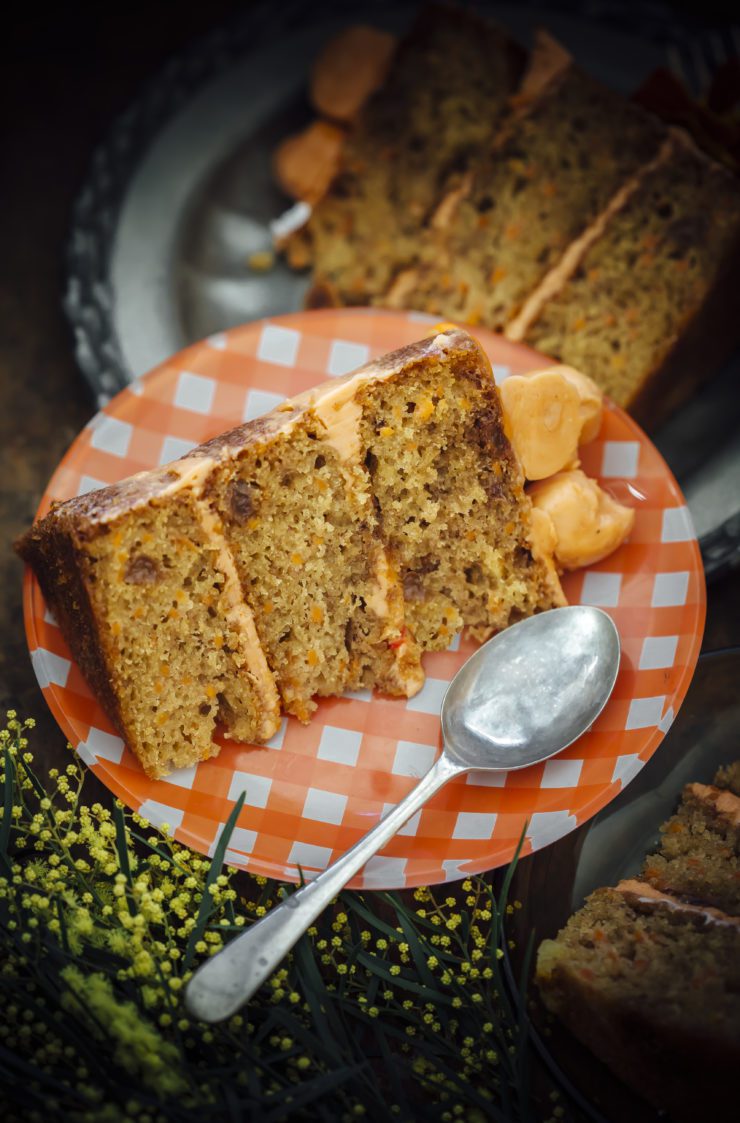
The best part about winter for a person like me who does not really enjoy the cold is definitely the food. I like a bit of spice in everything, sweet or savory! I noticed that I’ve been using nutmeg a lot this winter as compared to the rest of the year when the spice is lying quietly in one corner of my cupboard.  What is a Winter without Carrot Cake? The Internet is flooded with Carrot cake recipes and there is no point in me adding just another one. So I’ve combined the flavours of a classic carrot cake with zesty oranges and the marriage is nothing short of a flavour explosion! Think of warm spices, soft caramel kissed Carrot Cake, the bitterness of orange marmalade and just a touch of sweet white chocolate. I’ll let the pictures do the talking for you.

Orange and Carrot Cake

Orange and Carrot Cake

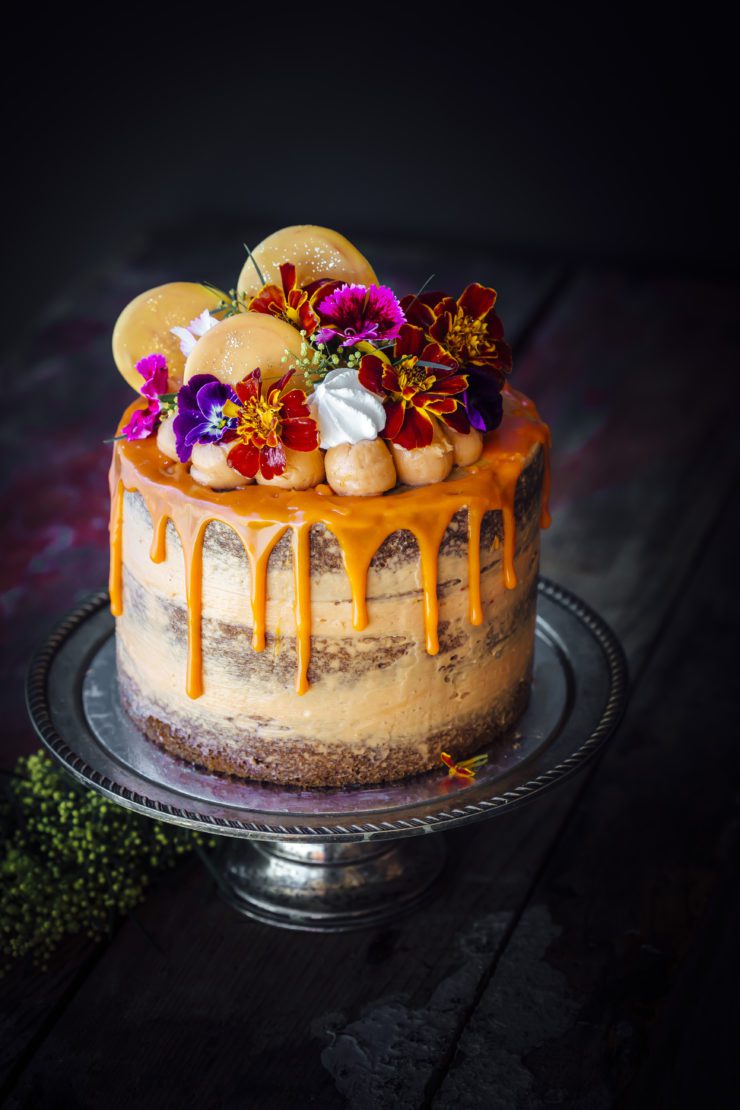
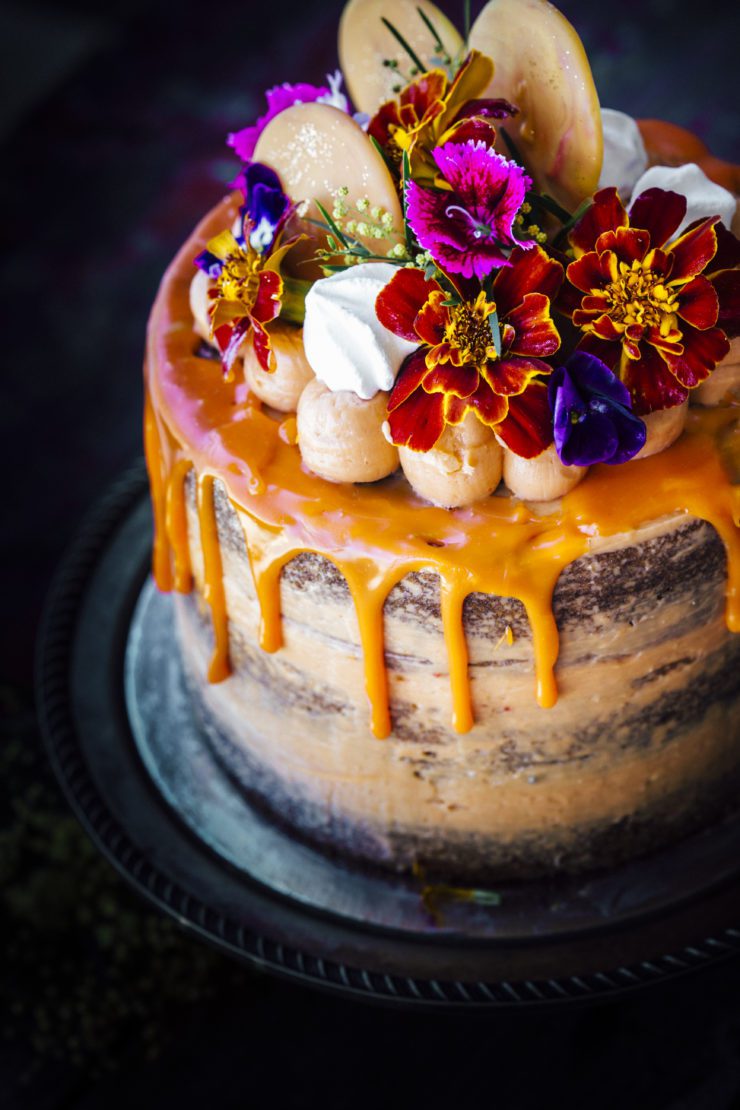
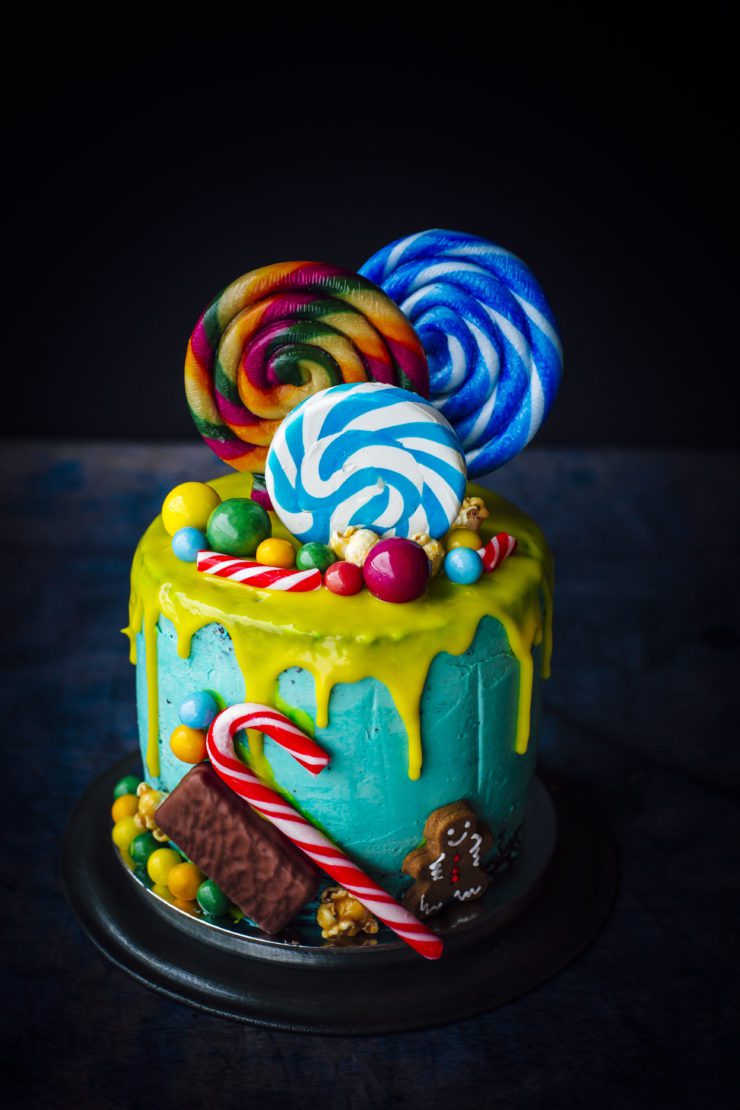
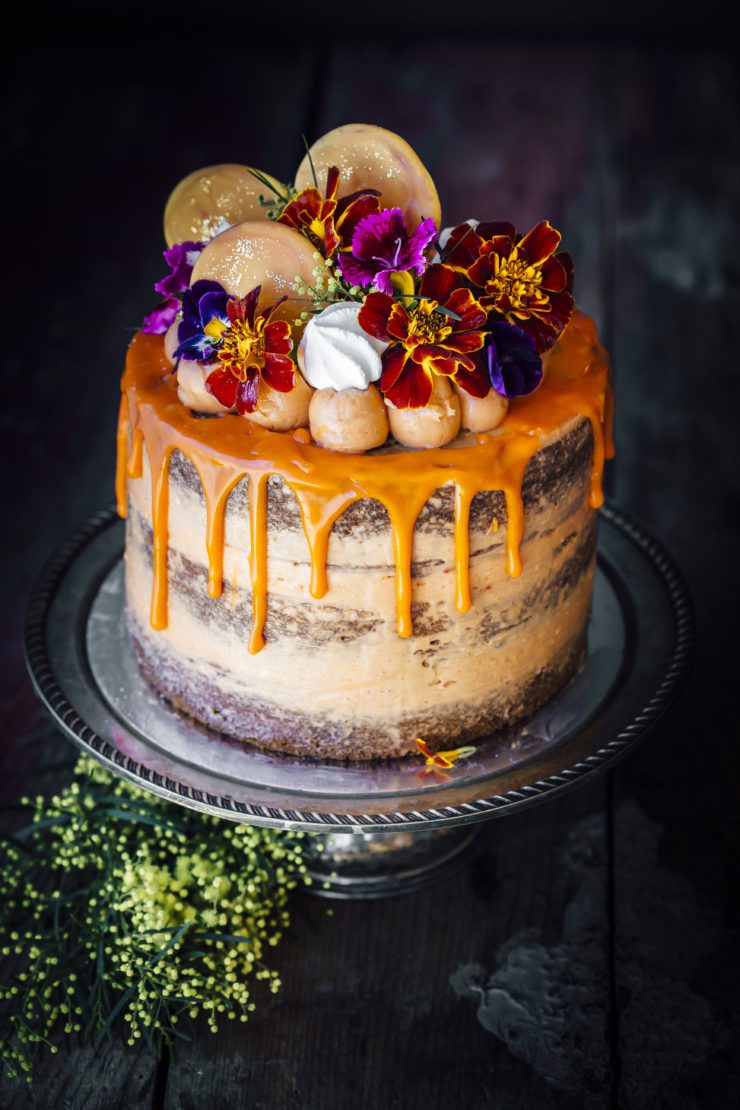
Cakes like these don’t need tonnes of buttercream. It is there in the cake to cement the flavours and the layers together. So I have applied a thin coat of swiss meringue buttercream and a generous amount of orange marmalade to complement the cake. One important factor that I always stress on is that making a cake should not mean toiling away in the kitchen or an elaborate prep. I did not even grate the carrots at home this time. The supermarkets sell shredded carrots that obviously differ in thickness. I’ve been meaning to try them out as I was pretty sure they would add a bit more texture to the soft cake. I was right! So I easily skipped the longest step in making a carrot cake. The top as quite a few of you asked me on Instagram is entirely edible. There are meringues, edible flowers and little candy discs that I created in a two-tone effect using candy melts. I sprinkled a bit of gold dust on them. They are are my favourite new experiment and they just take your desserts to a whole new level. You know what, I can’t wait till Christmas. I am all about sprinkles, chocolate and candy already.

Orange and Carrot Cake


Orange and Carrot Cake

Orange and Carrot Cake

Orange And Carrot Cake (carrot cake adapted with variation from Epicurious)
Makes a 6 inch, 3 layered round cake

1 1/2 cups vegetable oil
|1 cup (packed) golden brown sugar
3/4 cup castor sugar
4 large eggs
1/3 cup orange juice
1/4 cup citrus peel (or 1 tbsp freshly grated orange peel)
2 cups self-raising flour
11/2 tsp baking soda
1 tsp ground cinnamon
1 tsp ground ginger
1/2 tsp ground nutmeg
1/2 teaspoon salt
2 cups finely grated peeled carrot
1/2 cup raisins
Cinnamon swiss meringue buttercream (recipe below)
1/2 cup Orange Marmalade
Decorations- meringue kisses, edible flowers, candy discs, grated chocolate

Cinnamon Buttercream
4 egg whites
1 cup castor sugar
300 g unsalted butter, room temperature, cubed
1 tsp powdered cinnamon
1 tsp vanilla essence
2-3 drops of orange food colouring (I used a mix of red and yellow coloring)

For the orange colored, white chocolate ganache
100 g white chocolate, roughly chopped
3 tbsp heavy cream
3-4 drops of a mix of red and yellow food colour

Preheat oven to 170 degrees C. Lightly grease the sides and bottom and line the bottoms of 3, 6-inch pans with non-stick baking paper.

Using an electric mixer (or by hand), beat oil and both sugars in large bowl until well blended. Add eggs 1 at a time, beating well after each addition. Beat in orange juice and peel. Sift flour, baking soda, cinnamon, ginger, nutmeg and salt into large bowl; add to sugar mixture and beat to blend. Stir in carrots and raisins.

Pour batter into the prepared pans. Bake until a wooden skewer inserted into center of cake comes out clean, about 25 minutes. Remove from oven. Cool cake for 10 minutes. Turn cake out onto a wire rack. Remove baking paper and cool. (Can be prepared 1 day ahead. Wrap tightly in plastic and store at room temperature.)

To make the cinnamon swiss meringue buttercream
Place the egg whites and sugar in a large bowl that is placed over a saucepan of simmering water (over low heat), and whisk continuously, until the sugar has completely dissolved and the bottom of the bowl is warm to touch

Remove the bowl from the heat and whip on high speed until meringue holds stiff peaks and looks glossy. The bowl should have completely cooled by now.
Add the butter, 2 tablespoon at a time, until thick and fluffy. If it begins to look curdled, continue to whip until it comes back together, before adding in remaining butter.
When the buttercream is smooth and has come together, add the cinnamon, vanilla and  food color and whip gently again to blend.

To make the orange colored, white chocolate ganache: Heat the white chocolate and heavy cream over very low heat in a small saucepan. When cream just reaches boiling point, remove from heat and leave aside. Stir with a spoon to make a smooth mix. Add the food colour and stir to blend.

To assemble 
Once the cake layers are completely cool, start assembling..
On a cake plate or stand, spread a little buttercream in the centre and place one layer of the cake (so that the cake does not move about while frosting). Spread about 1/2 a cup of cinnamon swiss meringue buttercream. Spread half the quantity of orange marmalade. Place the second layer. Repeat. Place the last layer upside down (so you get a flat top). Spread buttercream on the top and sides. If you want to make it look like a naked cake, a thin layer of frosting is good enough.
Stick the cake into the refrigerator for 15-20 mins.
Make the white chocolate ganache 5 minutes before you take the cake out from the fridge.Once the ganche is cool, but still flowing freely when you lift it with a spoon, spoon it onto the cake slowly. Be gentle on the edges to create the drippy effect.
Decorate with meringues, candy and edible flowers.


Caramel Pumpkin Pots De Creme

21|07|2016

July is turning out to be such a crazy month. Many things happening at the same time. The boys had winter holidays and that meant that I kept work to a minimum. But when do things go to plan? Do they work for you? I always tell myself that it’s me…I have to be more in control. And I set deadlines. I stick to them to the best of my ability. But from somewhere, something else will pop up. The irony is that, the ‘something else-s’ are things I love to do. So there’s so choice really. Being a Mum is so great, being able to do what I love is equally great! But there is no balance. I want to be perfect in both my roles but that is close to impossible in my situation. So it’s a struggle but there is some satisfaction and joy at the end of the day. At least, the fact that I am able to work from my own home is comforting. I am there for my children on most afternoons and I am able to help them with homework is great. They are fortunate to be taking lunch from home. So yes, I think I am still luckier than many others. Anyway, don’t bother with my ranting. I think documenting it here is making me feel less overwhelmed.

589A2235-2

So we are halfway into winter! Our winters are different from the rest of the world. It’s sunny on some days, rainy on others. There are trees with no leaves, trees with red, yellow leaves and there are trees which are bright green. We have a bit of everything. Pumpkin is my latest favourite thing to add to desserts and after I ate this, I felt that even non-pumpkin lovers would find it delicious. Brown sugar is a magical ingredient. Even though it is regarded as ‘sugar’, it actually is a lovely flavouring agent. It lends a butterscotch or caramel sort of taste to baked goods. Once again I added the chocolate coated honeycomb to the pumpkin pots. If you remember it was on my cake in the last post. It is such a wonderful addition to spiced up desserts. Be prepared to see it often in my upcoming posts:-)

589A2238

To those of you who follow this blog, I mentioned to you about some good news in a past post. Well, news doubled up and now I have more news. Let’s start with my work last year for Spoonful Mag. I created a bunch of recipes for them alongside a gathering that was about a girlfriends lunch get-together. I chose that theme because you know I love pretty food. I had all the opportunity to style them with vibrant colours, flowers and very girl-y flavours. I loved working with them as they were extremely passionate like me. In this big, wide world, isn’t it amazing that you run into people who you click with instantly? I am very excited to be working on their forthcoming issues as well. The Summer issue is out now!  The other news is that I was invited to design apparel for a gorgeous brand using my own art, that is desserts. How crazy does that sound? I found it weird in the beginning, but I assure you it is coming together well. Can’t wait to share my online shop with you! 2 days ago something incredible happened as well. I got to meet one of my food heroes at an event hosted by Bulla Family Dairy, a major dairy company in Australia. Imagine my shock when I realized my seat was next to Kirsten Tibballs, one of the best pastry chefs in the world. Oh my God! She had created an exceptionally beautiful and delicious dessert for the occasion (I shared it on Instagram). I have to admit I was a bit star struck at the start and didn’t know what to say to her but she was such a sweet woman.

I hope you all have a wonderful weekend. I love that Spring is not far away in Australia.

589A2244


Caramel Pumpkin Pots De Creme
Serves 5-6

1/2 cup milk
11/2 cup heavy/thickened cream
4 egg yolks
1/3 cup firmly packed brown sugar
1/2 cup home made (or store bought) pumpkin puree
1/4 tsp powdered cinnamon
1/4 tsp powdered ginger
1/4 tsp ground nutmeg
Crushed honeycomb, to serve

Preheat oven to 160 degrees C ( 140 degrees for fan-forced ovens) .Combine cream and milk in a saucepan over medium heat. Cook, stirring constantly, for 5 minutes or until hot (do not allow to boil). Remove saucepan from heat.

Whisk egg yolks and sugar in a heatproof bowl until well combined. Add the pumpkin puree and spices and mix till blended. Pour the warm cream mixture over the egg yolk mixture, little at a time whisking constantly until smooth. Take care not to add the entire cream to the eggs together as it can overcook the eggs resulting in scrambled eggs.

Divide the custard into five or 6 lightly-greased, ramekins or ovenproof cups. Place in a deep baking tray. Pour boiling water into baking tray until halfway up sides of ramekins.

Bake custards, uncovered, for 45 minutes or until just set (while the centers are slightly jiggly when shaken). Remove from the oven and take the ramekins out of the water bath. Leave to cool to room temperature. Refrigerate for at least 2 hours. Serve with crushed honeycomb.

Orange Cupcakes With Cherries

4|07|2016

It is so easy to forget that it is winter here in Australia when you gaze at the vibrant summery posts across the blog-o-sphere and certainly when you see lush red cherries and colourful berries on Instagram. Living in Sydney, we are fortunate to have access to every kind of fresh produce at any time of the year whether local or imported. Usually I won’t even look at imported produce and believe in eating fruits in season because they are not only fresher and cheaper but it also means supporting our wonderful farm community that I am a die hard fan of. There are however, two instances when I find myself deviating from this. Either when I am working for a publication on the other side of the globe and I am shooting summer in winter (speaking of which, I have some wonderful news to share soon) and when I spot CHERRIES! Sorry, can’t resist! No matter what!

orange cupcakes with cherries

I haven’t met my little brother and darling cousins who live in the USA and UK for years and I’ve kind of made a mental note to be there only during cherry season. Who doesn’t want to enjoy 2 cherry seasons in the same year? But that has to wait and this at least is easier. Buying it from from the supermarket! I couldn’t stop staring at them last week when I saw them. They were 5 times the regular price but no, there was no thinking twice when so many combinations were racing in my mind. Oh the possibilities!

orange cupcakes with cherries

orange cupcakes with cherries

I decided to make orange flavored cupcakes and add cherries to the batter. It was delicious. The best of winter and summer in a cupcake! I had some leftover vanilla frosting from a cake I made for a dear friend’s son’s birthday and I thought the colours would looking amazing together. To add extra tang to the cupcakes, I’ve used citrus peel that you could either make at home or use store bought. They are inexpensive and a great addition to your pantry if you like baking. You could add them to pretty much anything a get a nice little citrus boost in your baked goods. The birthday cake, I mentioned earlier (Chocolate Mud Cake with Pineapple Tim tams and vanilla frosting) was a huge success so I am sharing a photo of that as well at the end of the post.

orange cupcakes with cherries

orange cupcakes with cherries

Do you ever buy produce that is not in season? What is that one fruit or vegetable you would be ready to defy the seasons to bring home?

589A2192-2

Orange Cupcakes With Cherries (partly adapted from Taste.com)
Makes 12

Vanilla Swiss Meringue Buttercream
4 egg whites
1 cup castor sugar
300 g unsalted butter, room temperature
1 tsp pure vanilla extract
1-2 drops, food coloring of your choice (optional)(I used teal)

To make the cupcakes : Preheat oven to 200 degrees C (180 degrees C for fan forced ovens). Line a 12-hole muffin pan with paper cases.
Combine flour and caster sugar in a bowl. Make a well in the center.
Add milk, butter, eggs, orange rind, vanilla and 1/2 cup of orange juice to flour mixture. Using a large metal spoon, stir gently to combine. Gently fold in 1/4 cup of the citrus peel and the chopped cherries.
Spoon mixture into prepared muffin pan. Bake for 12 to 15 minutes, or until a skewer inserted into the center comes out clean. Stand in pan for 5 minutes before transferring to a wire rack to cool.

To make the Vanilla Swiss Meringue Buttercream : Place the egg whites and sugar in a large bowl that is placed over a saucepan of simmering water (over low heat), and whisk continuously, until the sugar has completely dissolved and the bottom of the bowl is warm to touch

Remove the bowl from the heat and whip on high speed until meringue holds stiff peaks and looks glossy. The bowl should have completely cooled by now.
Add the butter, 2 tablespoon at a time, until thick and fluffy. If it begins to look curdled, continue to whip until it comes back together, before adding in remaining butter.

When the buttercream has come together, add the vanilla extract and food coloring (if using) and mix till you get the desired shade.

To assemble: Once the cupcakes have cooled completely, pipe a swirl of buttercream on the tops or could dollop it with an ice cream scoop. Decorate with fresh cherries and the leftover citrus peel.

Peanut Butter Mousse And Raspberry Chia Jelly Trifle

16|06|2016

Peanut Butter and Jelly!! I know you, you and you do it but in my defence, I have not grown up eating peanut butter nor is it very popular in my side of the world. But though I discovered this totally mind blowing, delicious and addictive combo late in life, I just feel now that I should compensate by putting it into everything I am making. I have a silly logic that anything that tastes great should be turned into mousse. So that’s what I did! I did not use eggs in the recipe as the peanut butter and cream whipped together are fluffy and intense enough to hold together with no compromise on taste.

Peanut Butter Mousse And Raspberry Chia Jelly Trifle

My boy’s school does not allow for nuts or nut based food to be taken to school so peanut butter is making it’s way into their afternoon snack when they get home. My favourite part is the texture of the jelly on account of the chia seeds. It’s amazing! Chia seeds are great for everyone and this is a good way of including them in your diet. I have substituted the sugar in the jelly with maple syrup to make it a bit healthy. You could replace it in the mousse as well if you like. The jelly is such a versatile thing that I can think of so many amazing combinations to go with peanut butter. Pomegranate comes to my mind first. What are your favourite jelly flavours with peanut butter?

Peanut Butter Mousse And Raspberry Chia Jelly Trifle

Peanut Butter Mousse and Raspberry Jam Trifle

Makes 2-3

Peanut Butter Mousse

1/2 cup smooth peanut butter
3/4 cup heavy/thickened cream
1/4 cup castor sugar (more if you like it sweeter)

Raspberry Chia Jelly

1 cup raspberries(I used frozen)
2 tbsp water
1 tbsp chia seeds
2 tbsp maple syrup (or honey)

To make the Peanut Butter Mousse In the bowl of your stand mixer or with an electric hand mixer, whip the cream and sugar until thickened and just about to form stiff peaks. Add the peanut butter and whip again at low speed for a few seconds till no white streaks appear and the mixture has blended well.

To make the Raspberry Chia Jelly :Place all the ingredients into a medium saucepan over low heat. Bring to a boil. Add a little more water if required. Once the mixture starts bubbling, whisk constantly till mixture is thickened. Remove from heat and let cool completely. The jelly will thicken further upon cooling.

To assemble: Layer the peanut butter mousse and raspberry chia jelly in serving glasses (as shown in the photos) alternating with each other. Serve with caramel popcorn or shaved chocolate or fresh raspberries.

  • « Previous Page
  • 1
  • …
  • 22
  • 23
  • 24
  • 25
  • 26
  • …
  • 57
  • Next Page »
Hey Sugar
Cake
Link to my Facebook Page
Link to my Instagram Page
Link to my Pinterest Page
Link to my Mail Page
Subscribe to this site
Fresh Awards
2019 Aus mumpreneur
2019 aus mumpreneur
Mumbrella

Copyright © 2025 · Sugar Et Al · Designed by Smitten Blog Designs · Log in