• Home
  • Recipe Index
    • Recipe Index
    • Breakfast/Brunch
    • Cakes and Puddings
    • Chocolate
    • Cookies and cupcakes
    • Custard and Mousse
    • Gluten Free
    • Ice Cream
    • Mains
    • Other Sweet Treats
    • Snack/Appetizers
    • Soups and Salads
    • Tarts and Pies
    • Vegetarian
  • About
  • Cookbook
  • Portfolio
  • Store
  • Press
  • Work with Me

Sugar et al

Because Life is a blend of flavours...

Earl Grey Cupcakes

7|06|2016

When we moved countries a few years ago, the one big lifestyle change that happened to us as a couple was that we gave up drinking Chai. The milk-added version of tea. It’s kind of sad. Because tea was one of the first things that was taught to girls in Indian homes when I was growing up, it brings back a great deal of nostalgia. I learnt to make a good cup of chai from my grandmother. Good quality tea leaves with a great milk-water-sugar ratio and a hint of cardamom and ginger is the secret to a rejuvenating cup of tea. Like my Dad would say ‘ good cup of tea in the morning is a great start to the day’. Alas! In the last few years I became totally Australian in my love for coffee.

IMG_1919-2

It all started during our first few months in Australia. Moving out of your comfort zone in to a new country means starting life anew. What we brought with us for the kitchen was minimal and most often, everything was cooked in either in the single frying pan or single saucepan we had with us. So boiling tea the traditional way didn’t seem like a good idea when the cleaning was quite a task. So we switched over to tea bags. I experimented with all  varieties of tea I could find but never fell in love with any. Coffee was instead what I got hooked on to. The tea bags were soon used to flavour desserts. Tea is a wonderful flavour infuser. And Earl Grey is a classic! These cupcakes have a strong dose of Earl Grey tea and they are fabulous. They use the tea inside the bags to not only add flavour but texture as well. Unlike infusing milk ,cream or water with the tea bags, this recipe uses the actual leaves in the batter.

IMG_1924

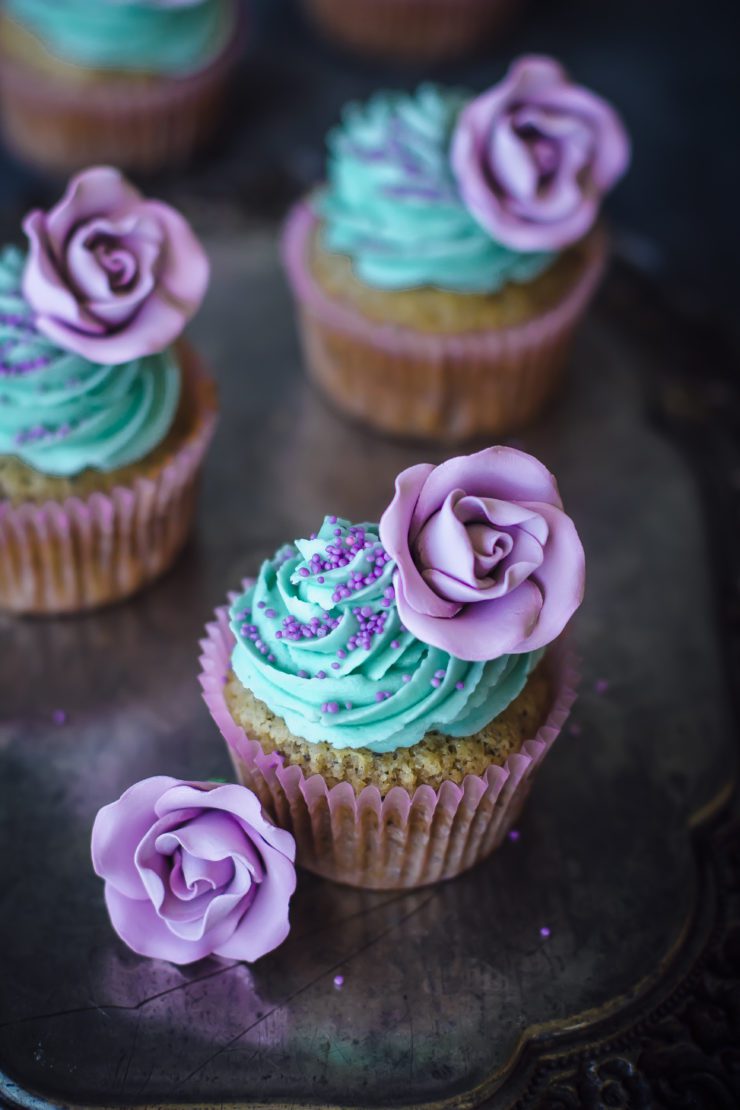
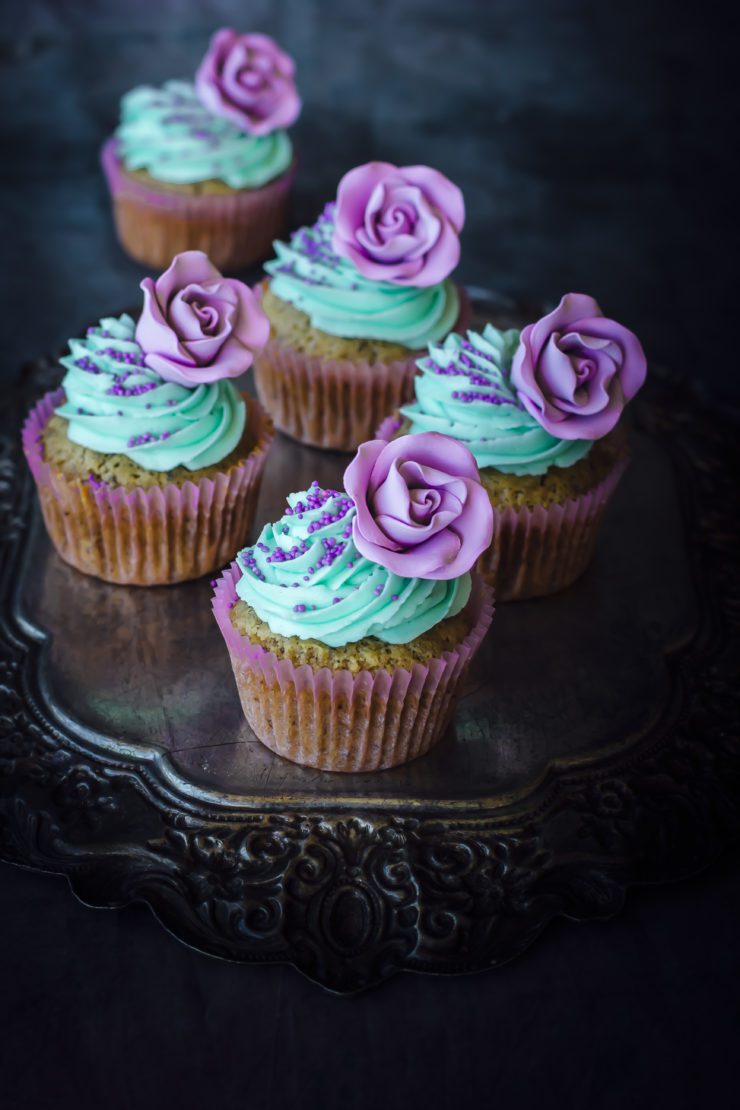
I’ve used an orange buttercream to frost the cupcakes to stick to the citrus notes in the cupcake. Did you know the flavour in Earl Grey is actually from the rind of Bergamot Oranges? Well, I’ve never seen that variety but how gorgeous is the flavour!

IMG_1927

Earl Grey Cupcakes With Orange Buttercream 
Makes 12 (cupcakes adapted from here)

Preheat oven to 180 degrees C. Line a 12-hole muffin pan with paper liners

Empty the tea leaves from the tea bags into a cup and add the boiling water. Set aside for 3 minutes. Stir in the milk and then transfer to a large bowl.

Add the butter, eggs, sugar and flour to the tea mixture. Use electric beaters on low speed to beat until just combined. Increase speed to medium and beat until the mixture is pale and creamy (the mixture may look slightly curdled).

Spoon the mixture evenly into the greased pans. Bake in preheated oven for 20-22 minutes or until golden and a skewer inserted in the cakes comes out clean. Remove from the oven and set aside for 2-3 minutes before turning onto a wire rack to cool.

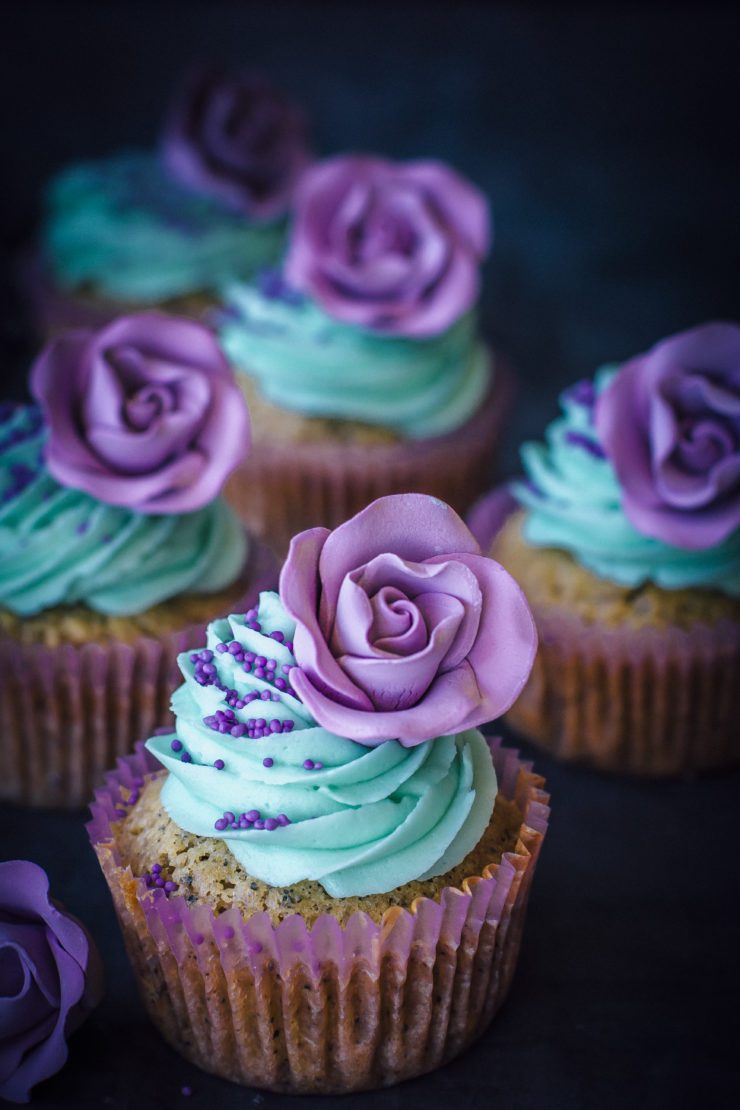
Once completely cooled, frost them with orange buttercream using a piping bag and a star nozzle. Decorate with sugar flowers.

Orange Swiss Meringue Buttercream
4 egg whites
1 cup castor sugar
300 g unsalted butter, room temperature
Finely grated zest of one orange
2 tbsp freshly squeezed orange juice
1 tsp Orange liquor (I used Cointreau), optional

To make the Buttercream : Place the egg whites and sugar in a large bowl that is placed over a saucepan of simmering water (over low heat), and whisk continuously, until the sugar has completely dissolved and the bottom of the bowl is warm to touch

Remove the bowl from the heat and whip on high speed until meringue holds stiff peaks and looks glossy. The bowl should have completely cooled by now.
Add the butter, 2 tablespoon at a time, until thick and fluffy. If it begins to look curdled, continue to whip until it comes back together, before adding in remaining butter.

When the buttercream has come together, add the orange zest and juice (and liquor, if using) and mix till smooth and well blended.


Eggless Chocolate Cake

27|05|2016


Eggless Chocolate Cake

Many times when I go to a gathering, I’m introduced to people who are new to me as the ‘one who makes cakes!’. I am pretty sure, if you are a blogger, you can relate. You’ll probably be the one ‘ with a food blog’ or the ‘great cook’ or one who ‘knows everything about food’. After that there are so many questions. I’ll share the ones I get asked the most. Who eats your creations? Do you sell your cakes? Why don’t you? Do you make gluten free, fat free, sugar free, eggless cakes? Well honestly the first few cannot be answered in a word or two. Sometimes I explain, sometimes I just give them a smile. The last one, I am happy to answer. Gluten free, yes, fat-free, yes, Sugar free, never!, Eggless..?? That gets me thinking. I come from that part of the world where being vegetarian or vegan is not uncommon. Though my immediate family is not, throughout my growing up years I have come across people who don’t eat eggs. Yet, I was always the one to advocate for eggs in cakes. Cakes need eggs, I would tell myself! Then one day I was invited to someone’s house who happened to be a non-egg eater and treated to chocolate cake. ‘Try it’ they said ‘It’s quite nice’. I didn’t want to be rude but I didn’t like it. The hostess sensed my displeasure and said to me’ Why don’t you come up with a good eggless chocolate cake. You are the baker!’ I thought about it and thought of the number of times people have requested me for an eggless cake recipe. It is true! I bake almost everyday, I play with ingredients all the time, If I am not able to crack this, what’s the point in me doing what I do? So I took it upon myself to test out recipes for a good egg-free cake recipe. Not just a recipe that is made without eggs and is edible but a recipe that can measure up to a great chocolate cake. After a few attempts and failures, I found my Eggless Chocolate Cake!

Eggless Chocolate Cake


Like most of my recipes, the focus has been to keep it simple and as easy as possible. The cake is moist, dense and fudgy. This is not a sponge cake but it is not rich either. It is actually like a warm hug of chocolate and incredibly delicious. The core ingredient that gives the cake it’s amazing texture is Ricotta Cheese. The cooking time is a bit long as it is cooked slowly over a low temperature. The Eggless Chocolate Cake is great even with a dusting of icing sugar if you want to skip the ganache. The cake tastes best when served warm or at room temperature.

Eggless Chocolate Cake

IMG_1901-2

Eggless Chocolate Cake

Eggless Chocolate Cake
Makes an 8 inch round cake

200 g dark chocolate, roughly chopped
100 g unsalted butter

Preheat oven to 160 degrees C (140 degrees C for fan-forced ovens). Grease the base and sides of an 8 inch round cake pan and line the base with baking paper.

In a large saucepan  that is placed over a pot of boiling water melt the butter and chocolate together. Alternatively this can be done in short bursts in the microwave in a microwave safe bowl. Mix to blend well, remove from heat and leave aside to cool slightly (about 10 minutes). Add the sugar, ricotta cheese, water and self raising flour and mix well.

Pour the mixture into the prepared baking pan. Place in the oven and bake for 1 hour 15 minutes or until a skewer inserted into the middle of the cake comes out clean. Stand in the pan for 10 minutes. Then turn out on to a wire rack to cool completely. Once cooled, serve with a dusting of icing sugar or top with chocolate ganache (recipe below).

Drizzle or slowly spoon ganache over the cake. Decorate with shaved chocolate, chocolate chips, berries, edible flowers or nuts.

Chocolate Ganache

150 g dark chocolate, roughly chopped
1/4 cup heavy/thickened cream

Microwave method : Place chocolate and cream in a glass or ceramic microwave-safe bowl. Microwave on medium (50%) for 2 to 3 minutes, stirring every 30 seconds with a metal spoon, or until smooth. Stand at room temperature until thickened.

If cooking on the gas, heat the cream over low heat until it just begins to boil. Remove from heat, add the chopped dark chocolate and leave aside. After 10 minutes, mix to blend. Stand at room temperature until thickened.

Rose And White Chocolate Mousse

21|05|2016

There are few things in life as exquisite as a tall glass of luscious chocolate mousse. It is one of those things that may not really be hard to whip up, but not many would do it at home. Nothing makes my friends more happy than the mention of mousse for dessert. Many years ago I used to dream of owning a mousse shop that would sell every flavour of mousse under the sun. I also set out to test recipes and flavors. The testing continued even as of today but the mousse shop of my dreams was long forgotten. Much the same way the cupcake shop, a cake shop, a handmade chocolate shop, candles,  flowers, a store all about cake decorating tools came about existing and then disappeared. In my dreams:-) Who said life doesn’t give you options! There are so many to choose from. I tell my husband that maybe some day I’ll bundle everything together and open up a store. Even if it doesn’t have all of it, mousse is definitely going to be there. Rose flavoured mousse will be on top of my list.

Rose And White Chocolate Mousse

If you have been following me on Instagram, you might have heard me ranting all the time about my obsession with rosewater. That bottle occupies a place on the top rack of my cupboard at eye level. The only others that share that space are milk and white chocolate, orange blossom water, culinary lavender, gold dust and some cupcake decorating items. So basically these are my absolute favorite things.  I have quite a few mousse recipes on the blog but not with white chocolate. Also, all my recipes until now are egg yolk based as I am a fan of the rich, decadent mousse variety. This one is different. This chocolate mousse is actually easier to make and uses egg whites only. The rest is just cream, white chocolate, rosewater and sugar.

Rose And White Chocolate Mousse

Rose And White Chocolate Mousse

To get the ombre effect, once I whipped up the mousse, I divided them into 3 bowls and tinted them with pink food colour. I think the appearance of the mousse takes it to a different level. If you are not fond of white chocolate, I would recommend adding a bit of orange zest or orange liquor (or even lemon) or fresh berries or anything tart to cut down the sweetness. This is one dessert that is really sweet (typical of white chocolate). If you are fond of white chocolate, you are in for the biggest treat of your life!

Rose And White Chocolate Mousse

Rose And White Chocolate Mousse

Rose And White Chocolate Mousse

Rose And White Chocolate Mousse 
Serves 4 

Place the chocolate in a heatproof bowl over a saucepan half-filled with simmering water (make sure the bowl doesn’t touch the water). Use a metal spoon to stir for 3-4 minutes or until the chocolate melts. Remove from heat.

Use an electric beater to beat the egg whites in a medium, clean, dry bowl until firm peaks form. Add half the sugar and beat until the sugar dissolves. Add the remaining sugar and beat until glossy. Add the cream and beat until the mixture thickens. Add the white chocolate and rosewater and use a metal spoon to fold until just combined.

Divide the mixture between two or 3 bowls and tint with a desired shade of food colour (preferably pink since we are using rose). Layer them in serving glasses pouring each layer gently so as not to deflate the mousse. Place in the refrigerator to set for about 3-4 hours.

Serve with shaved white chocolate, candied rose petals or meringues.


Raw Berry Cheesecake

17|05|2016

raw berry cheesecake

Let me tell you at the beginning that I am not vegan or following any sort of diet. I have only recently stepped into the world of raw desserts and I am hooked. If you haven’t eaten a raw dessert or new to the term, these are basically desserts made out of raw, unprocessed ingredients like nuts, fruits and dried fruits. They are mostly vegan, gluten free and do not require baking. Sugar is replaced by natural sweeteners so they are extremely healthy.Yes, you would need to arm your pantry with a few ingredients which are pretty much standard for these kind of treats but I would say they are worth it. So does a raw cheesecake (which is basically without the cream cheese) taste like a regular cheesecake? My honest answer is no! Not to me, a big fan of baked and no-bake cheesecakes. But they taste great! The use of wonderful ingredients would obviously create something delicious. I especially love the textural quality of what a handful of raw ingredients create together.  These raw berry cheesecakes are pretty easy to whip up. Plus I made them in little glass jars so they made for a lovely treat on the go.

raw berry cheesecake

In other news, my horrid tooth is out. Hurray! A visit to the dentist had always seemed daunting to me even since I was a child. My Mum has horror stories to share with my children about how much I hated the whole experience.  But this time, I obviously had no choice. I had put up with that painful wisdom tooth for a very long time and what a relief it was when the wonderful surgeon announced to me that it was gone. Gone and done away with for good! Actually he was amazing! He made me laugh during the entire procedure with his terrible jokes. This experience was like a lesson to me in believing that most of our fears are in our head. They may not even exist or seem as bad when you gather up the courage to face them. You just need to take the first few steps. The rest will follow.

You know what is the best part? I can eat raw cheesecakes and all kinds of nutty things without worry of triggering off that pain in my mouth.
My edible pansies and violas were in full bloom so I had to show them off as well. So many reasons to celebrate! Without feeling guilty:-)

raw berry cheesecake

raw berry cheesecake

Raw Berry Cheesecakes
Serves 6

For the crust
1 cup almonds
4 dates, pitted
2 tbsp coconut oil, liquified
pinch of salt

For the cheesecake filling
2 cups raw cashews, soaked in water for 4-6 hours (preferably overnight)
1 cup frozen mixed berries (if you do not like the seeds in raspberries or blackberries, go for only blueberries and/or strawberries)
juice of 1 lemon
1/3 cup coconut oil, liquified
1/3 cup pure maple syrup
1/3 cup coconut cream (or milk)

For the coconut cream
1 can coconut cream
2 tbsp pure maple syrup (or as per desired sweetness)

To make the crust: process all the ingredients together until the nuts have become crumbs and the mixture sticks together when you press it. Press into the bottom of 6 serving glasses or jars and place in the fridge.

To make the cheesecake filling : Blend all he ingredients in your high speed blender or food processor and blend until very smooth. Spoon the filling uniformly between the 6 serving glasses on top of the nut-date crust. Place in the refrigerator to set.

To make the whipped coconut cream, use this link. The process is explained really well.


  • « Previous Page
  • 1
  • …
  • 23
  • 24
  • 25
  • 26
  • 27
  • …
  • 57
  • Next Page »
Hey Sugar
Cake
Link to my Facebook Page
Link to my Instagram Page
Link to my Pinterest Page
Link to my Mail Page
Subscribe to this site
Fresh Awards
2019 Aus mumpreneur
2019 aus mumpreneur
Mumbrella

Copyright © 2025 · Sugar Et Al · Designed by Smitten Blog Designs · Log in