• Home
  • Recipe Index
    • Recipe Index
    • Breakfast/Brunch
    • Cakes and Puddings
    • Chocolate
    • Cookies and cupcakes
    • Custard and Mousse
    • Gluten Free
    • Ice Cream
    • Mains
    • Other Sweet Treats
    • Snack/Appetizers
    • Soups and Salads
    • Tarts and Pies
    • Vegetarian
  • About
  • Cookbook
  • Portfolio
  • Store
  • Press
  • Work with Me

Sugar et al

Because Life is a blend of flavours...

Brown Sugar Pavlova With Lychees And Candied Rose Petals

10|10|2015

IMG_9711-2

I am enjoying a quiet morning after weeks. No impending deadlines, no light to chase..no children to cater to..no errands to run. Not today. How have you been, my dear friends? I know you are wondering what I have been up to….suddenly disappearing from blog world. And thank you so much for your beautiful messages and emails expressing concern on my absence. Well, life’s been good. But crazy busy!

IMG_9700

You know ‘good’ is great and that’s what we want but ‘good’ shouldn’t come in troops. It’s like the rains. You love the rains. You love it when it falls slowly on your face. You love the smell of fresh earth it brings with along. The patterns it creates on the glass window. The way it makes the leaves glisten in the sunlight. When the same rain results in a torrential downpour, you still love it. You don’t savour it! You are drenched. You are running to save your head.  The last couple of months have been like that. If you have been reading my posts for a while, I went through a really low phase during June-July. I was living a nightmare of uncertainties that engulfed my entire family. So one day the nighmare ends. I open my eyes and I find myself in a dream. The transition from a nightmare to a dream…so beautiful yet so abrupt. Blogging itself is a journey in self discovery for many of us. Who would think we’d enjoy it so much…we want it for a career! I remember telling my husband at the start of the year ‘ I wish I could style and shoot from dawn to dusk and do it for a living’ It came true! It came like the torrential downpour. All of a sudden I am surrounded by work and amazing people. Travelling through time. Shooting Summer in winter…shooting Christmas…shooting outdoors….shooting…shooting till I coudn’t bear to look at images any more. I am currently involved in 3 different projects that I am absolutely thrilled to be a part of. Unfortunately, I cannot share more at this time. They will unfold over the next few months. But yes, you will be able to see some of my work shortly for Styling magazine. Cakes? Yes..quite a few of them that I have styled in different ways!

IMG_9713-2

I hope to post frequently…hope to! Our weather has been funny. Some really warm days…some rainy…and some perfect. Now I am confused which ones I like the most.

As long as it doesn’t pour….

IMG_9729

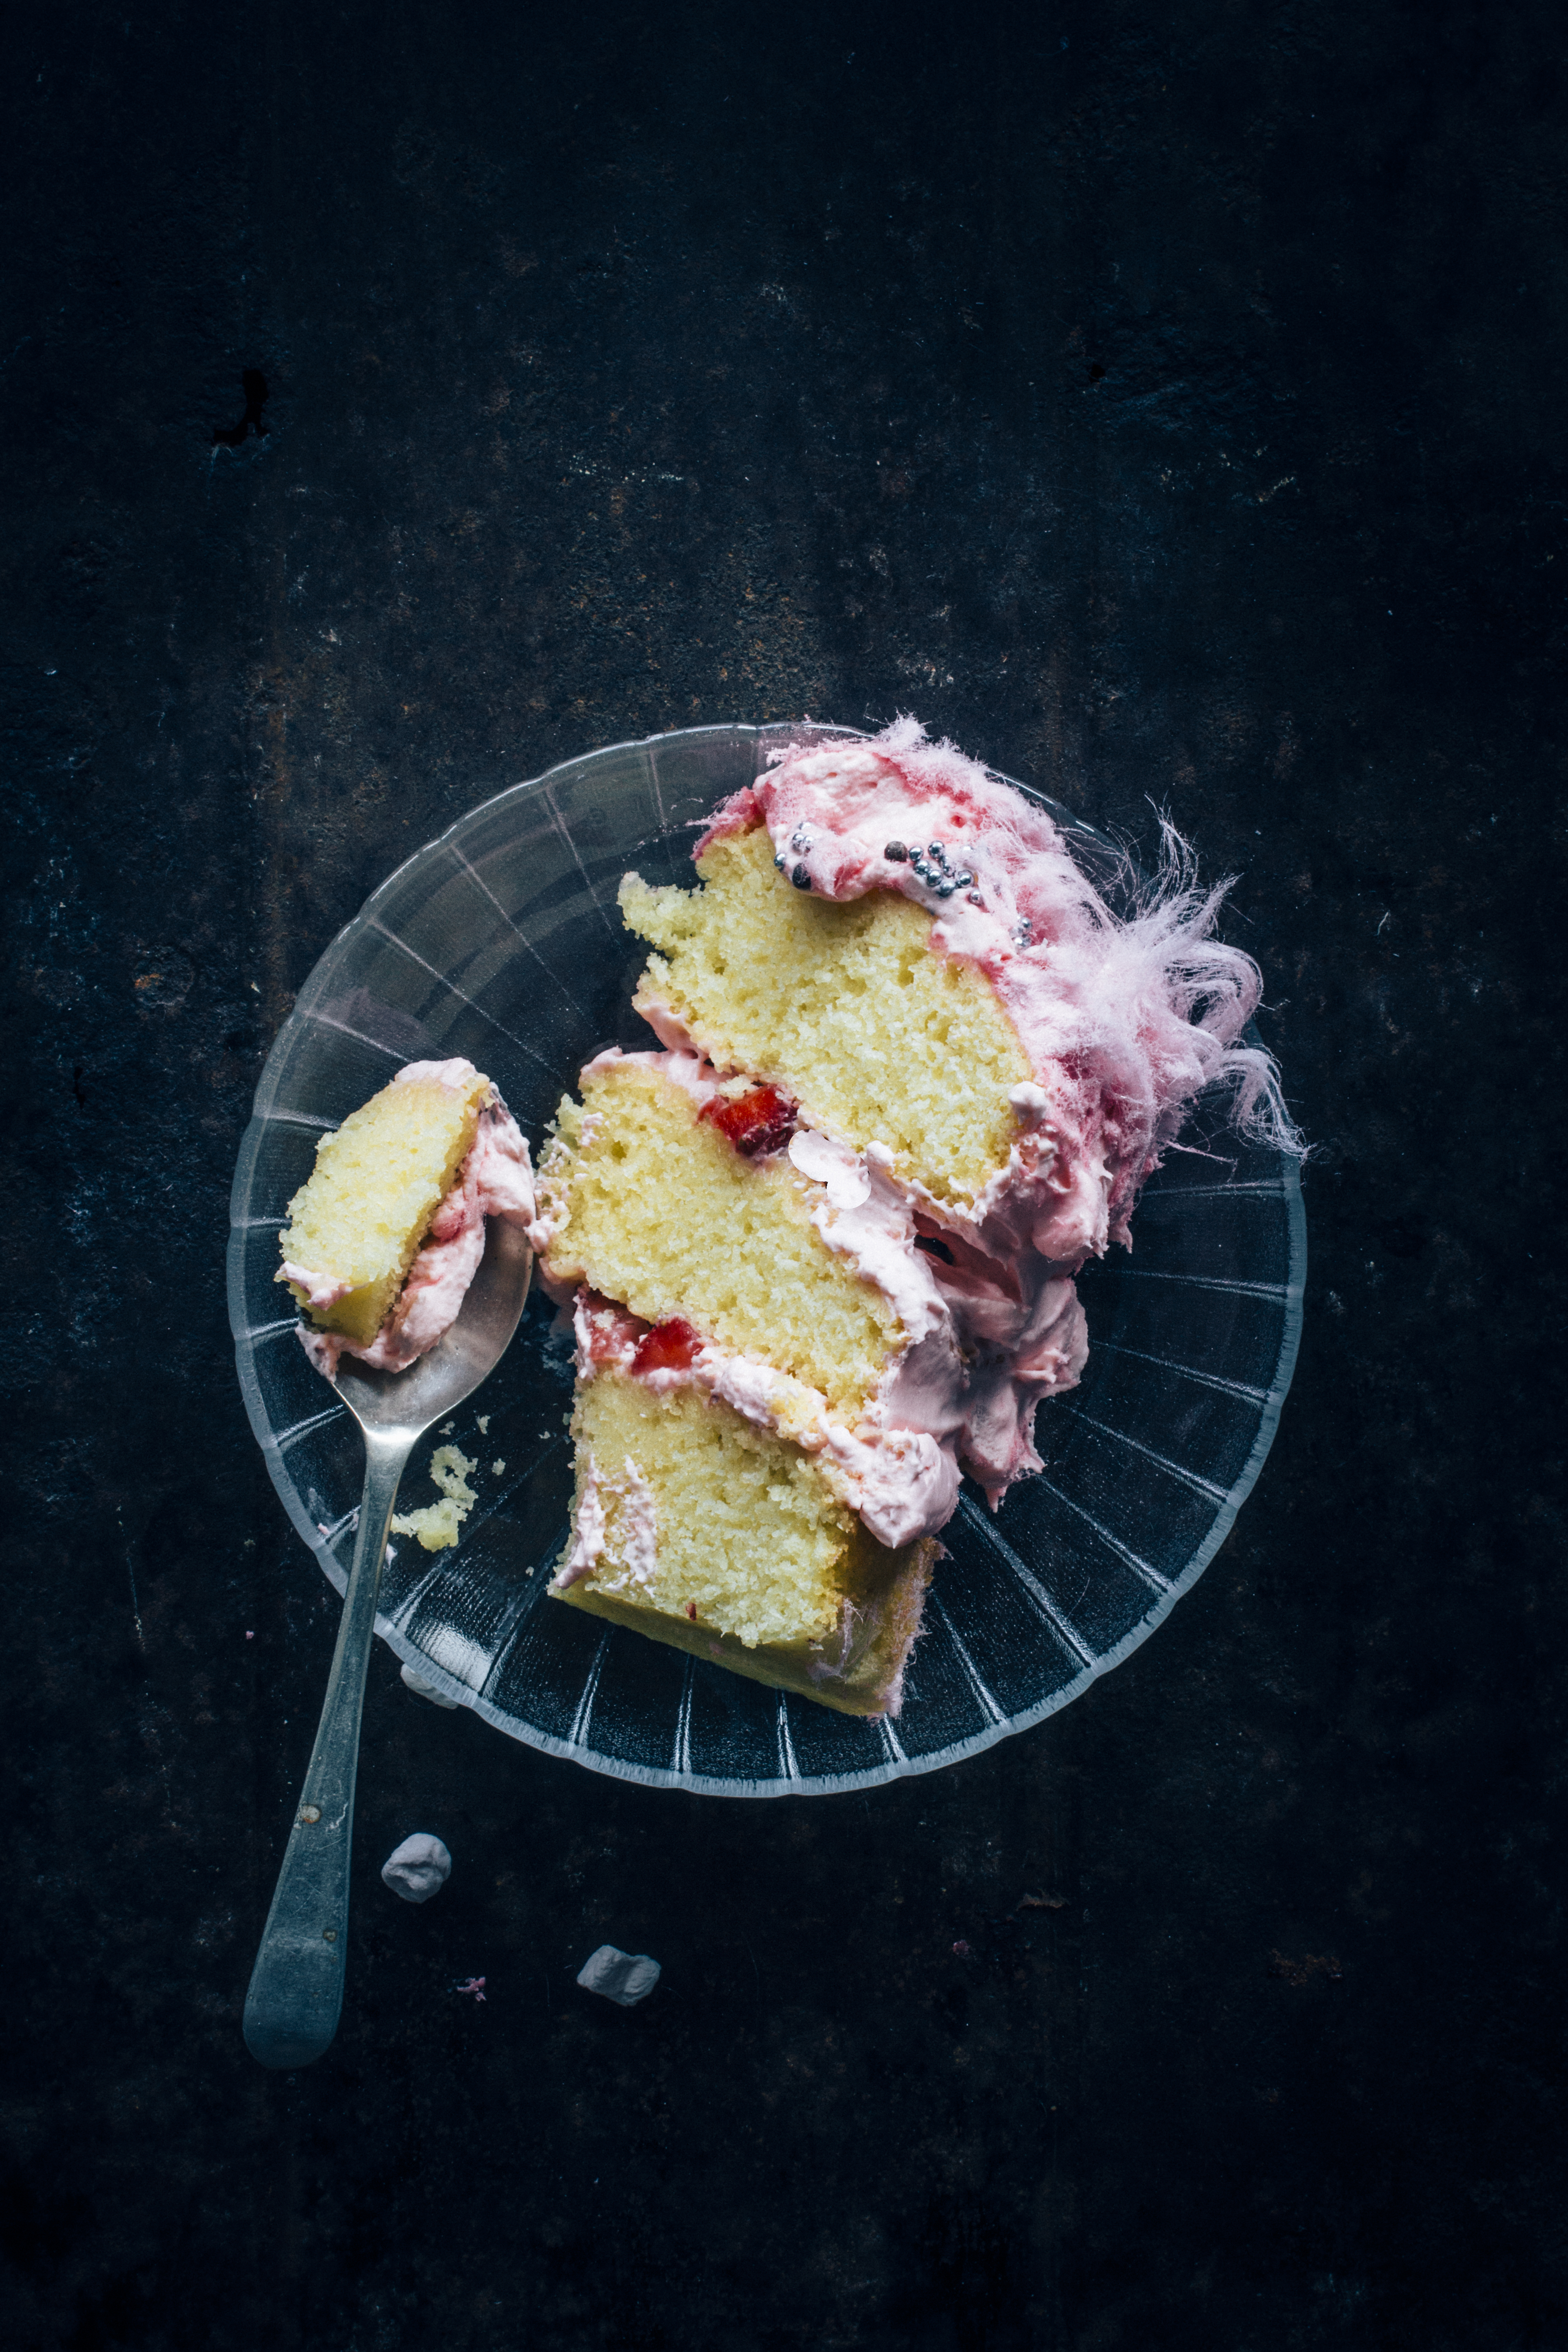
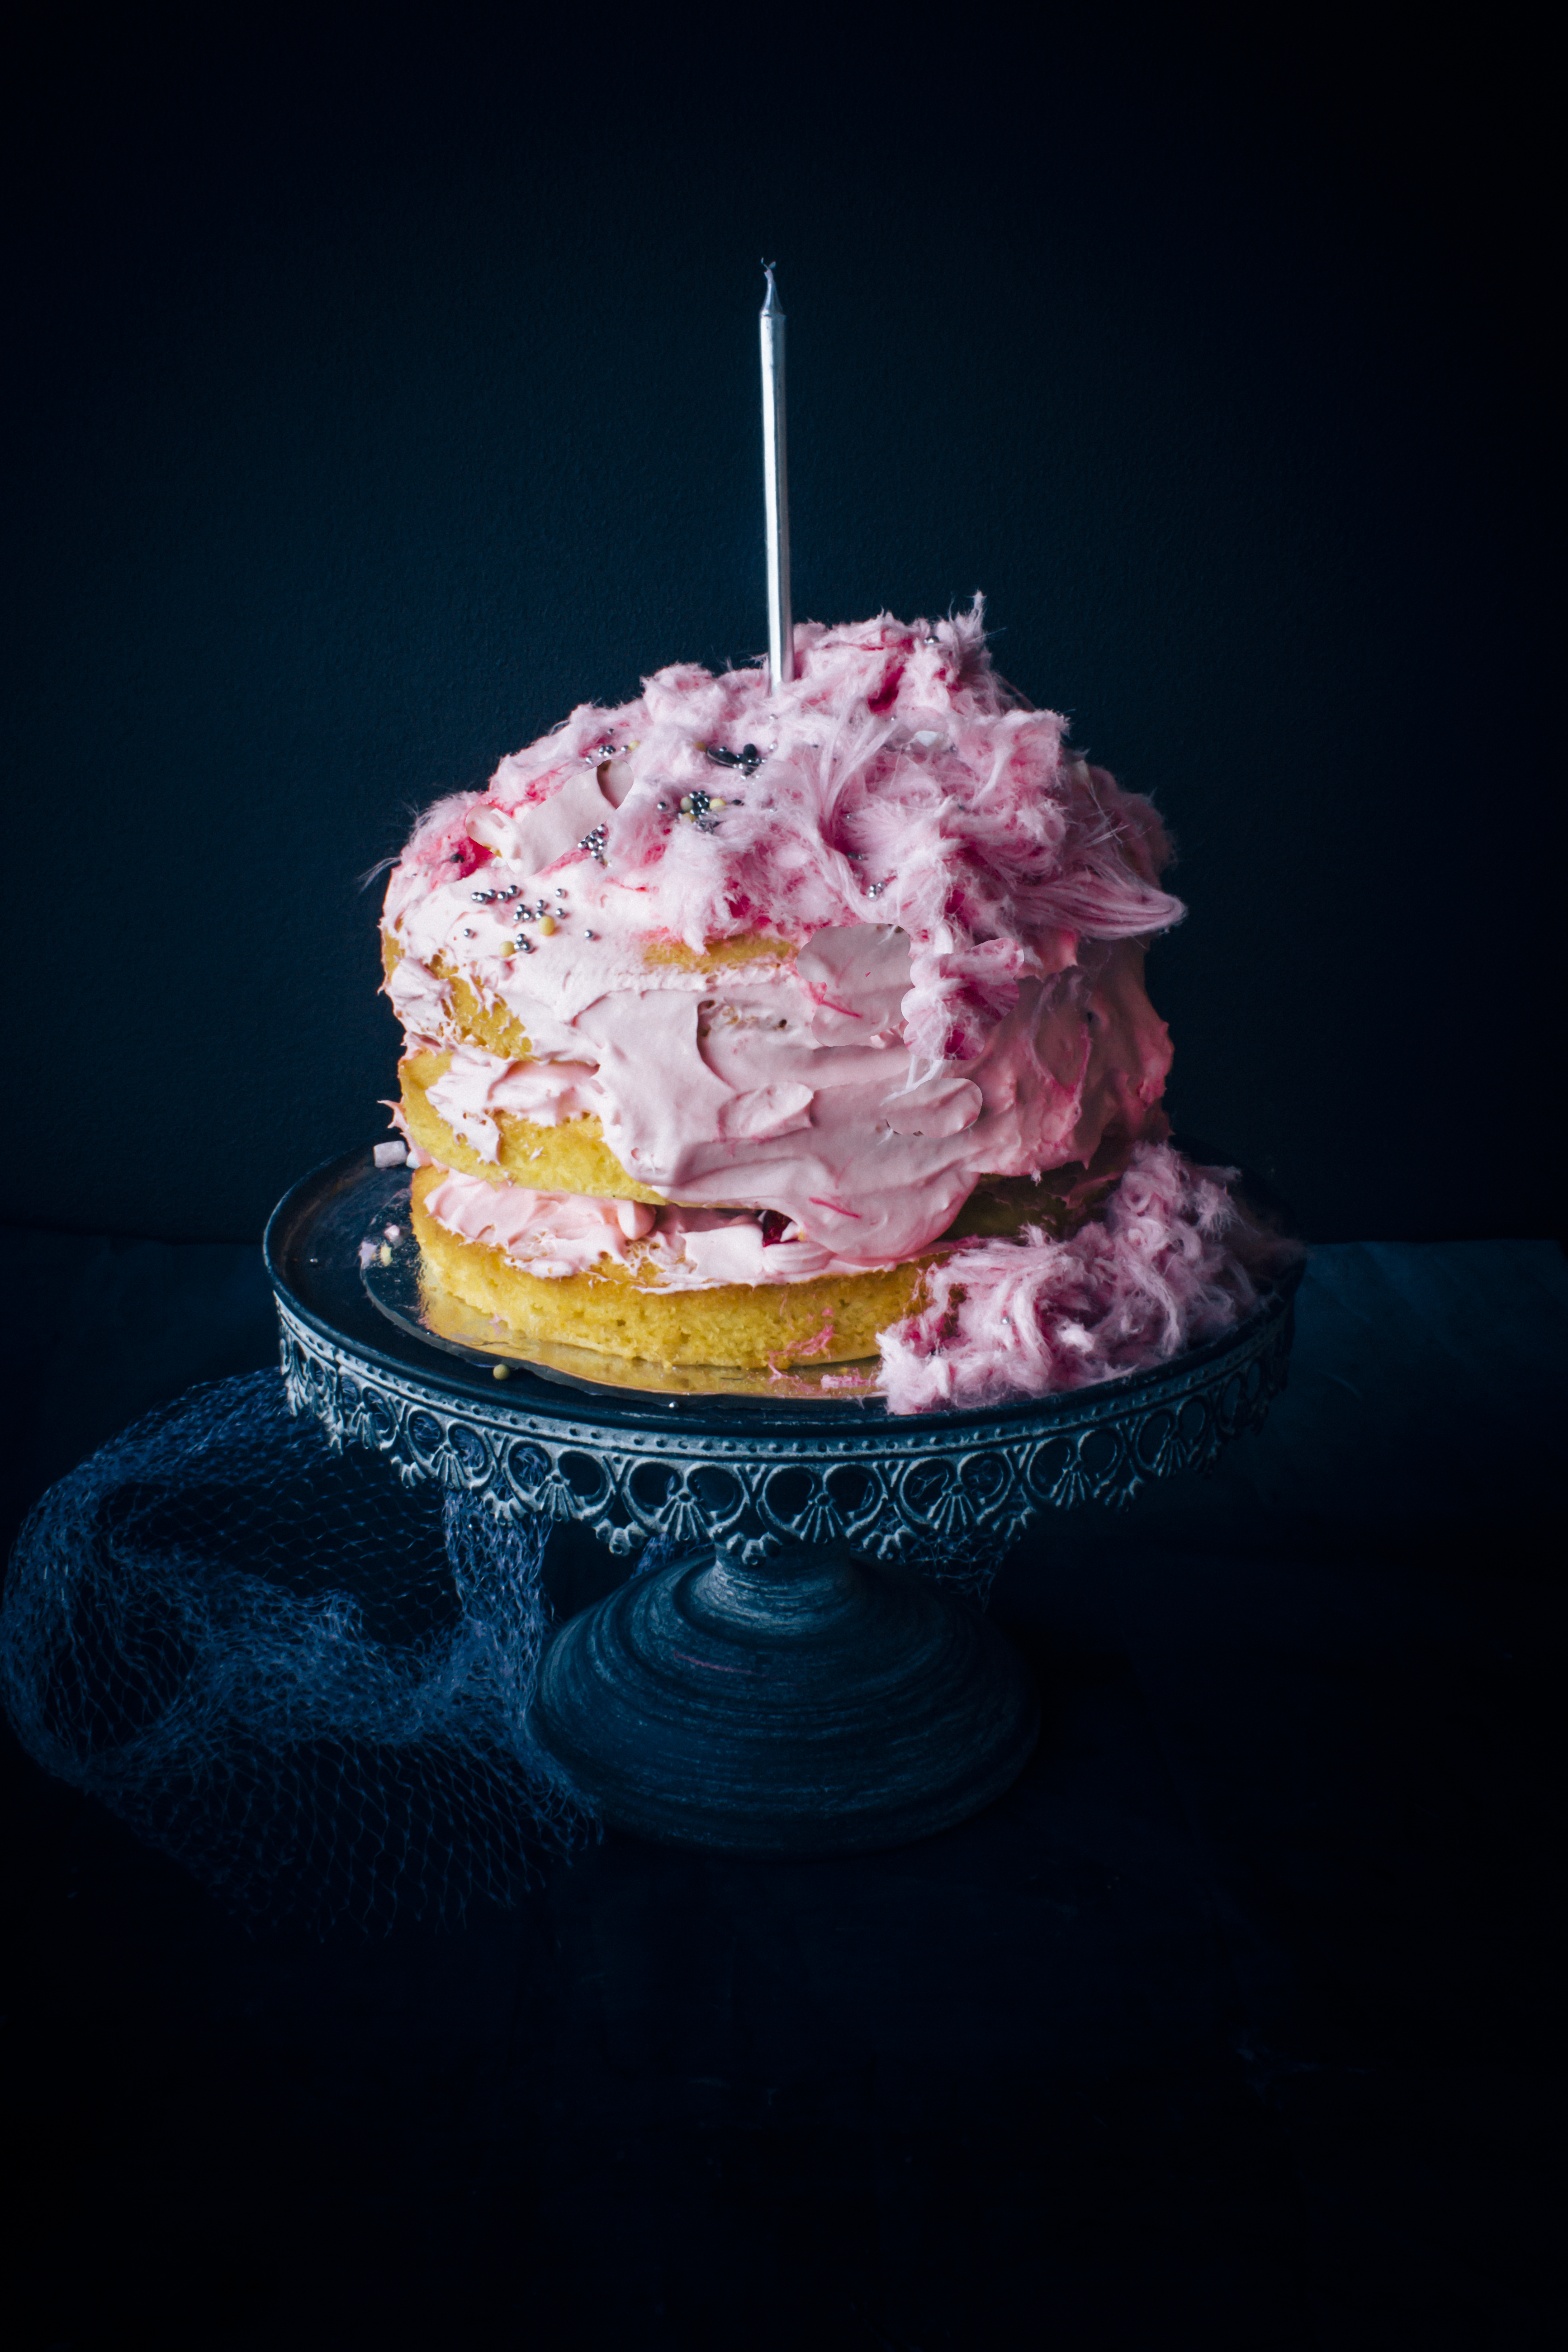
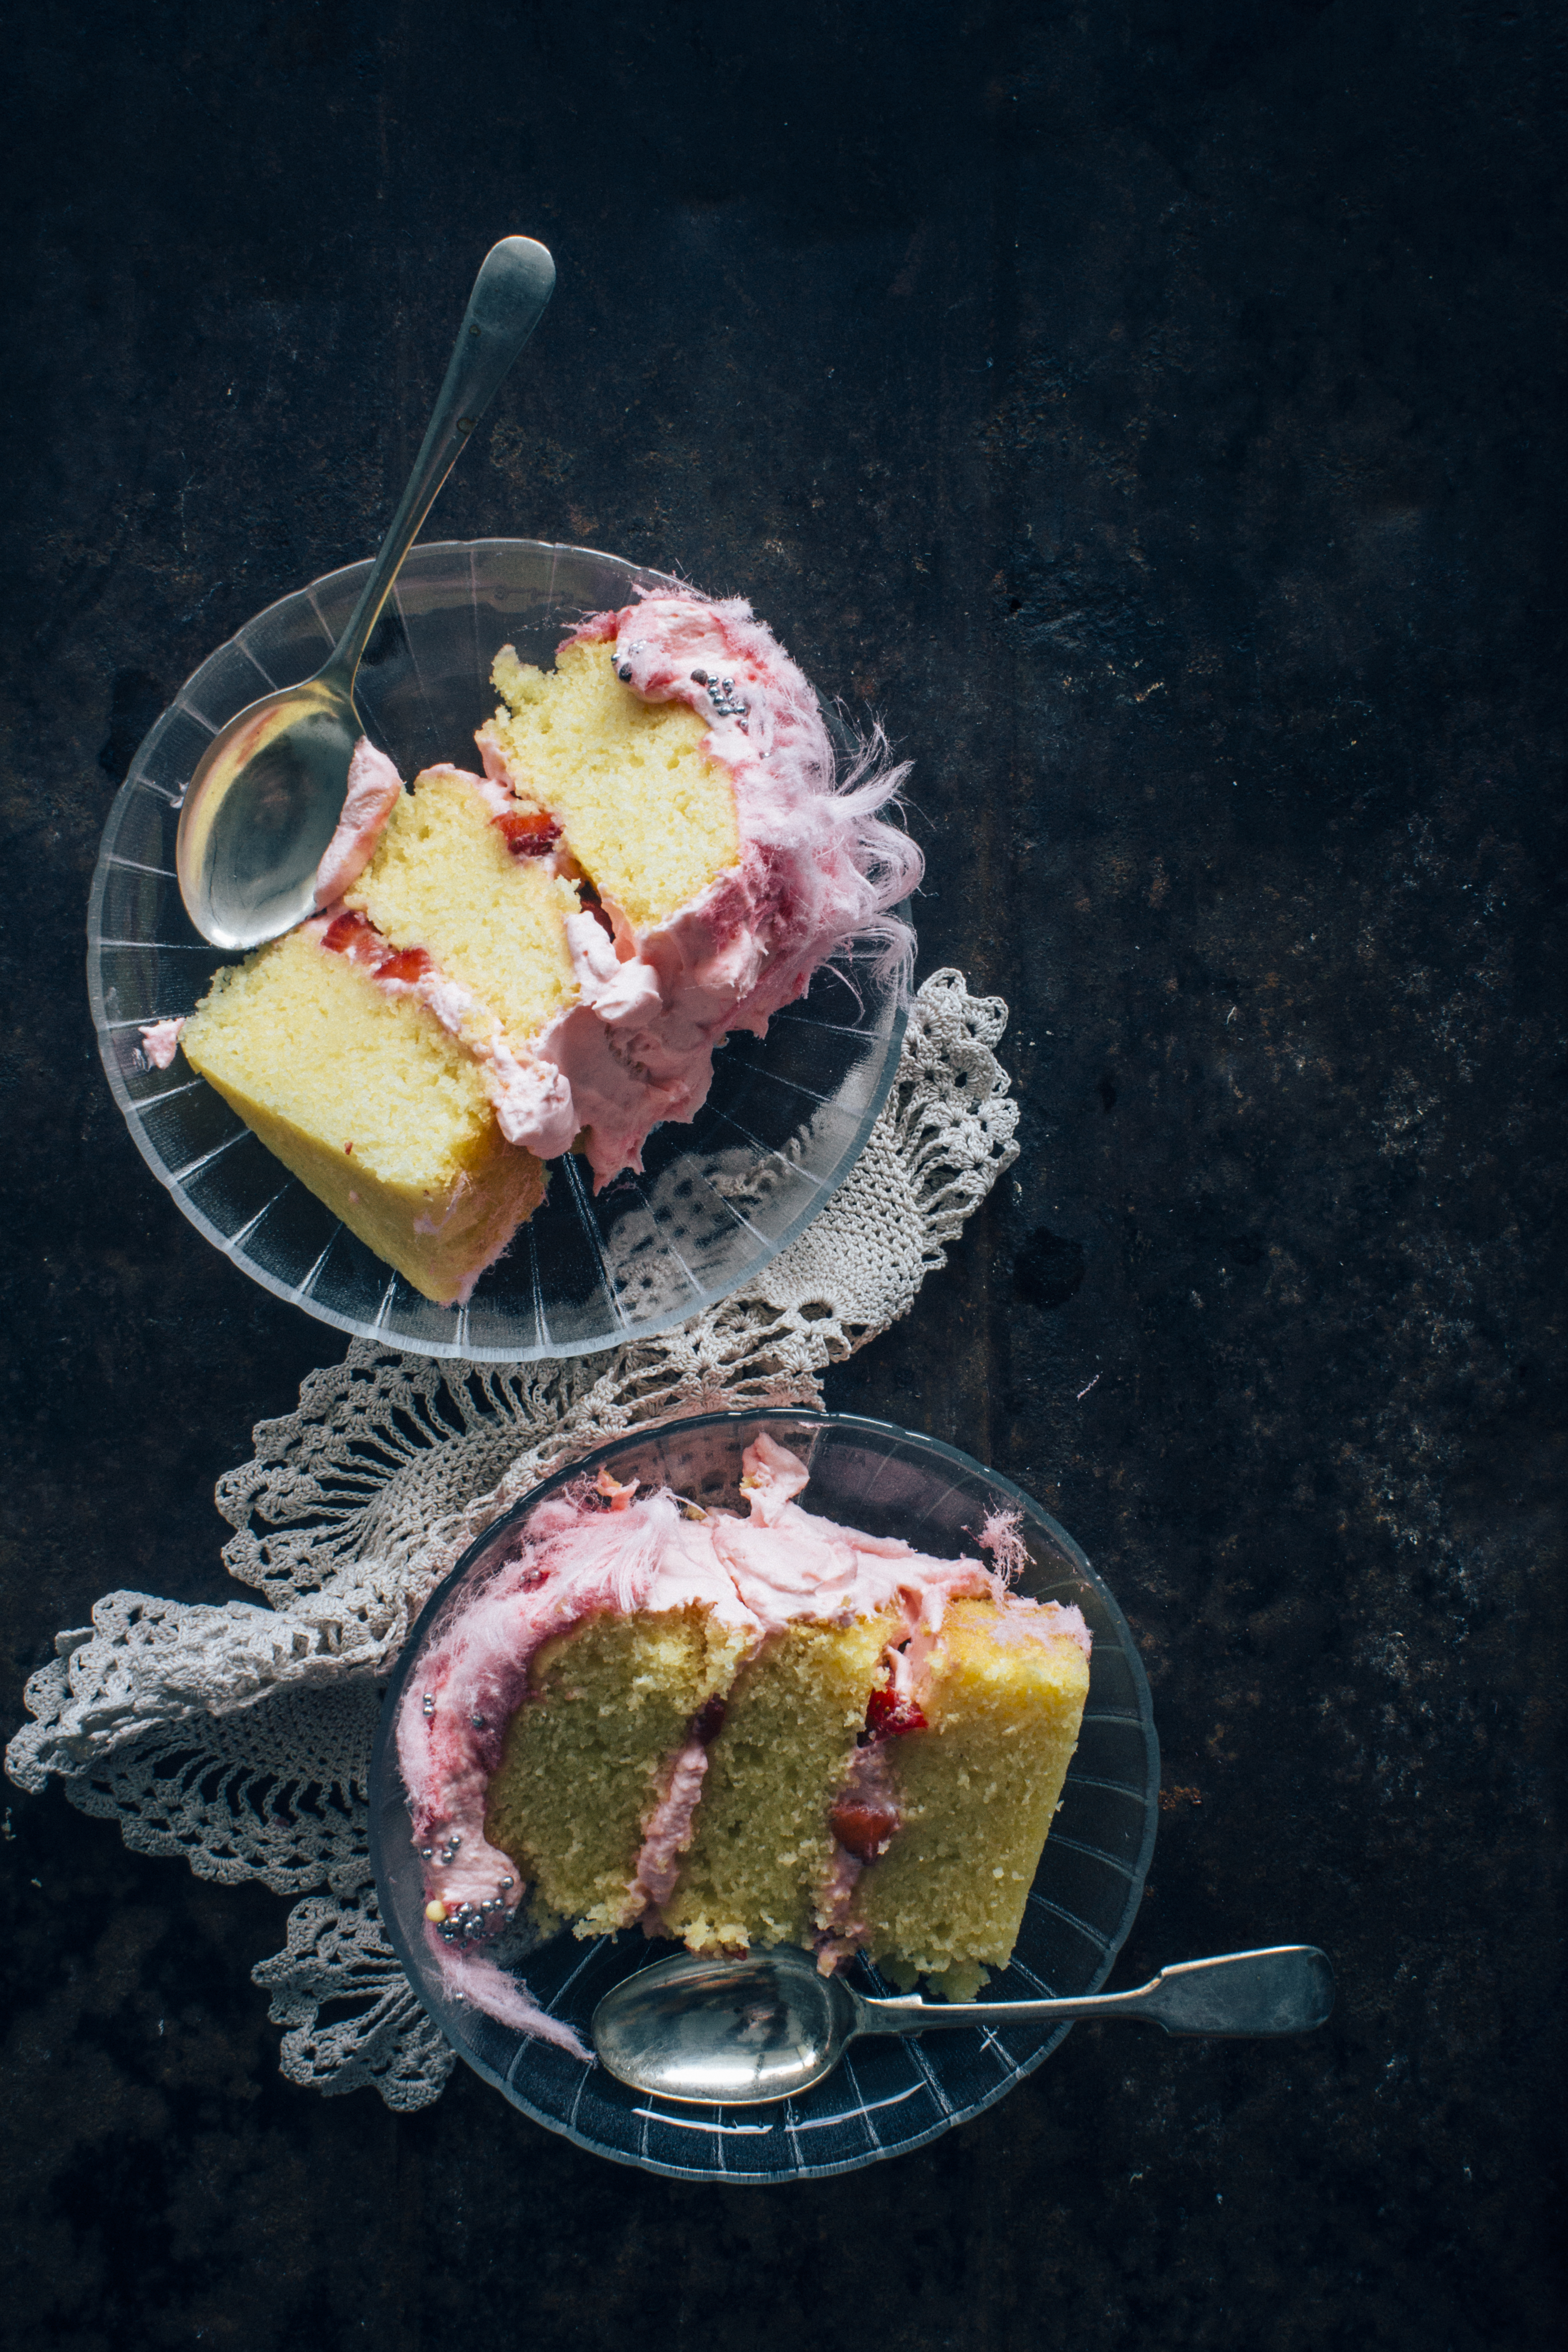
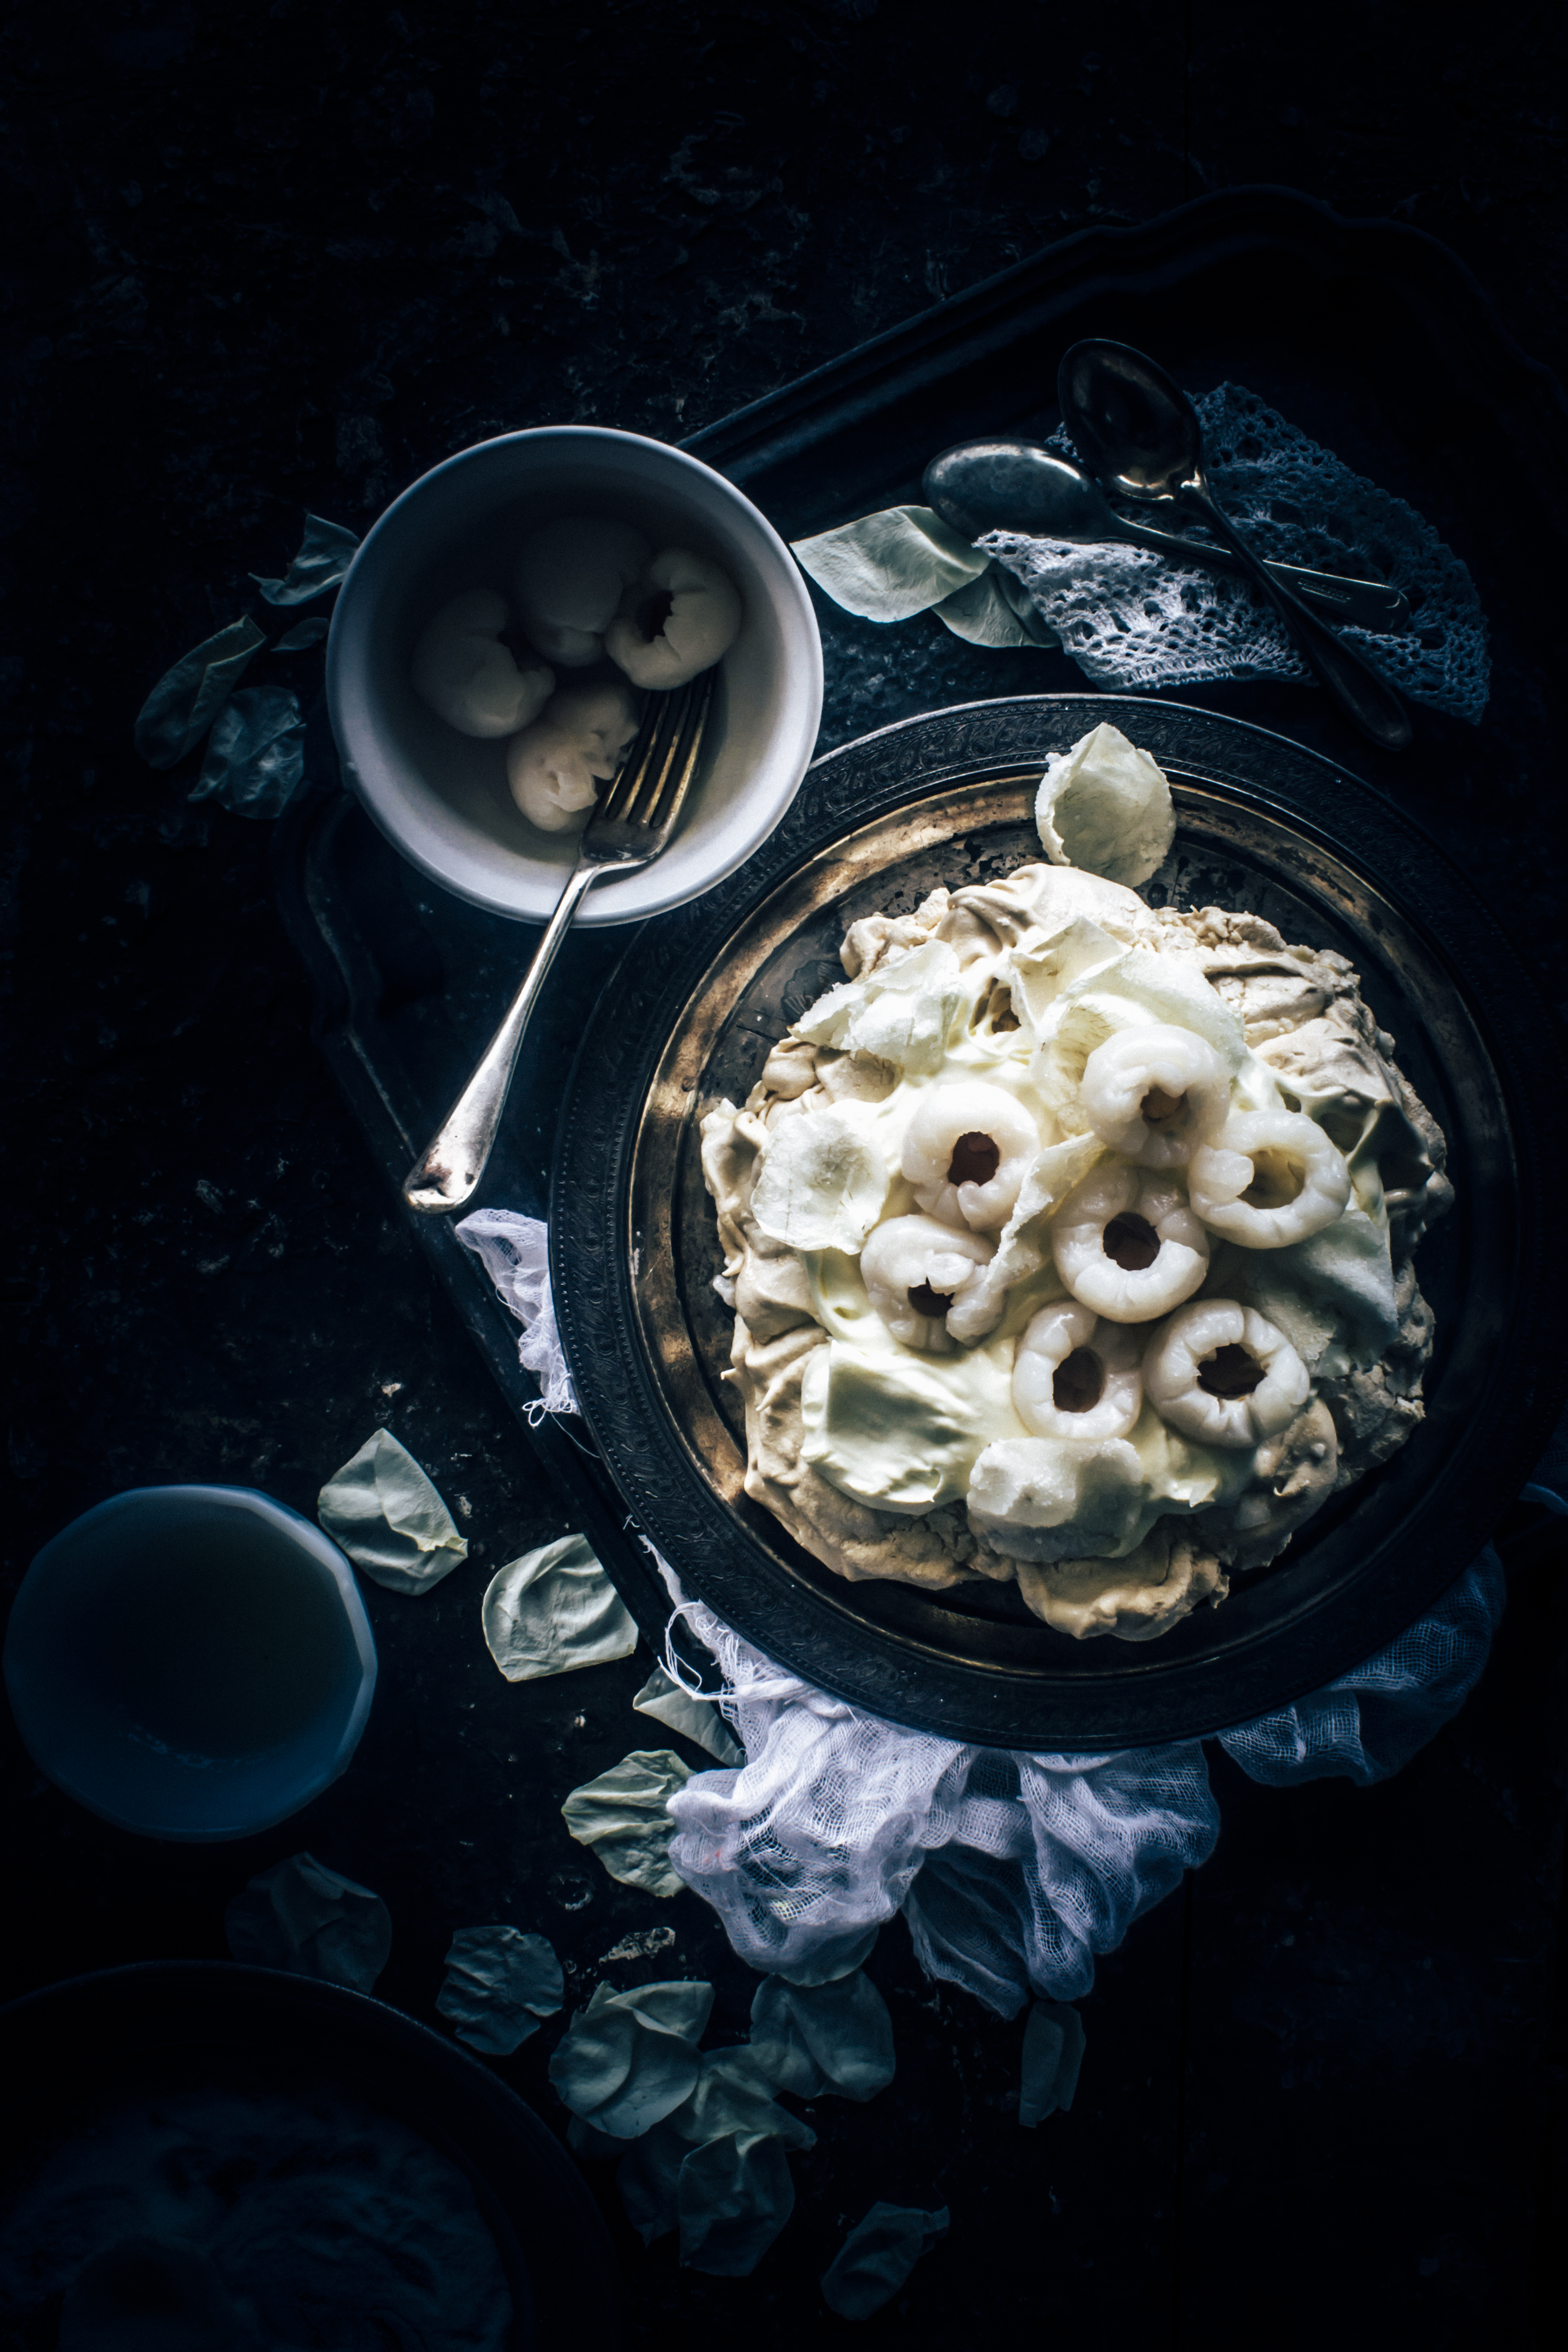
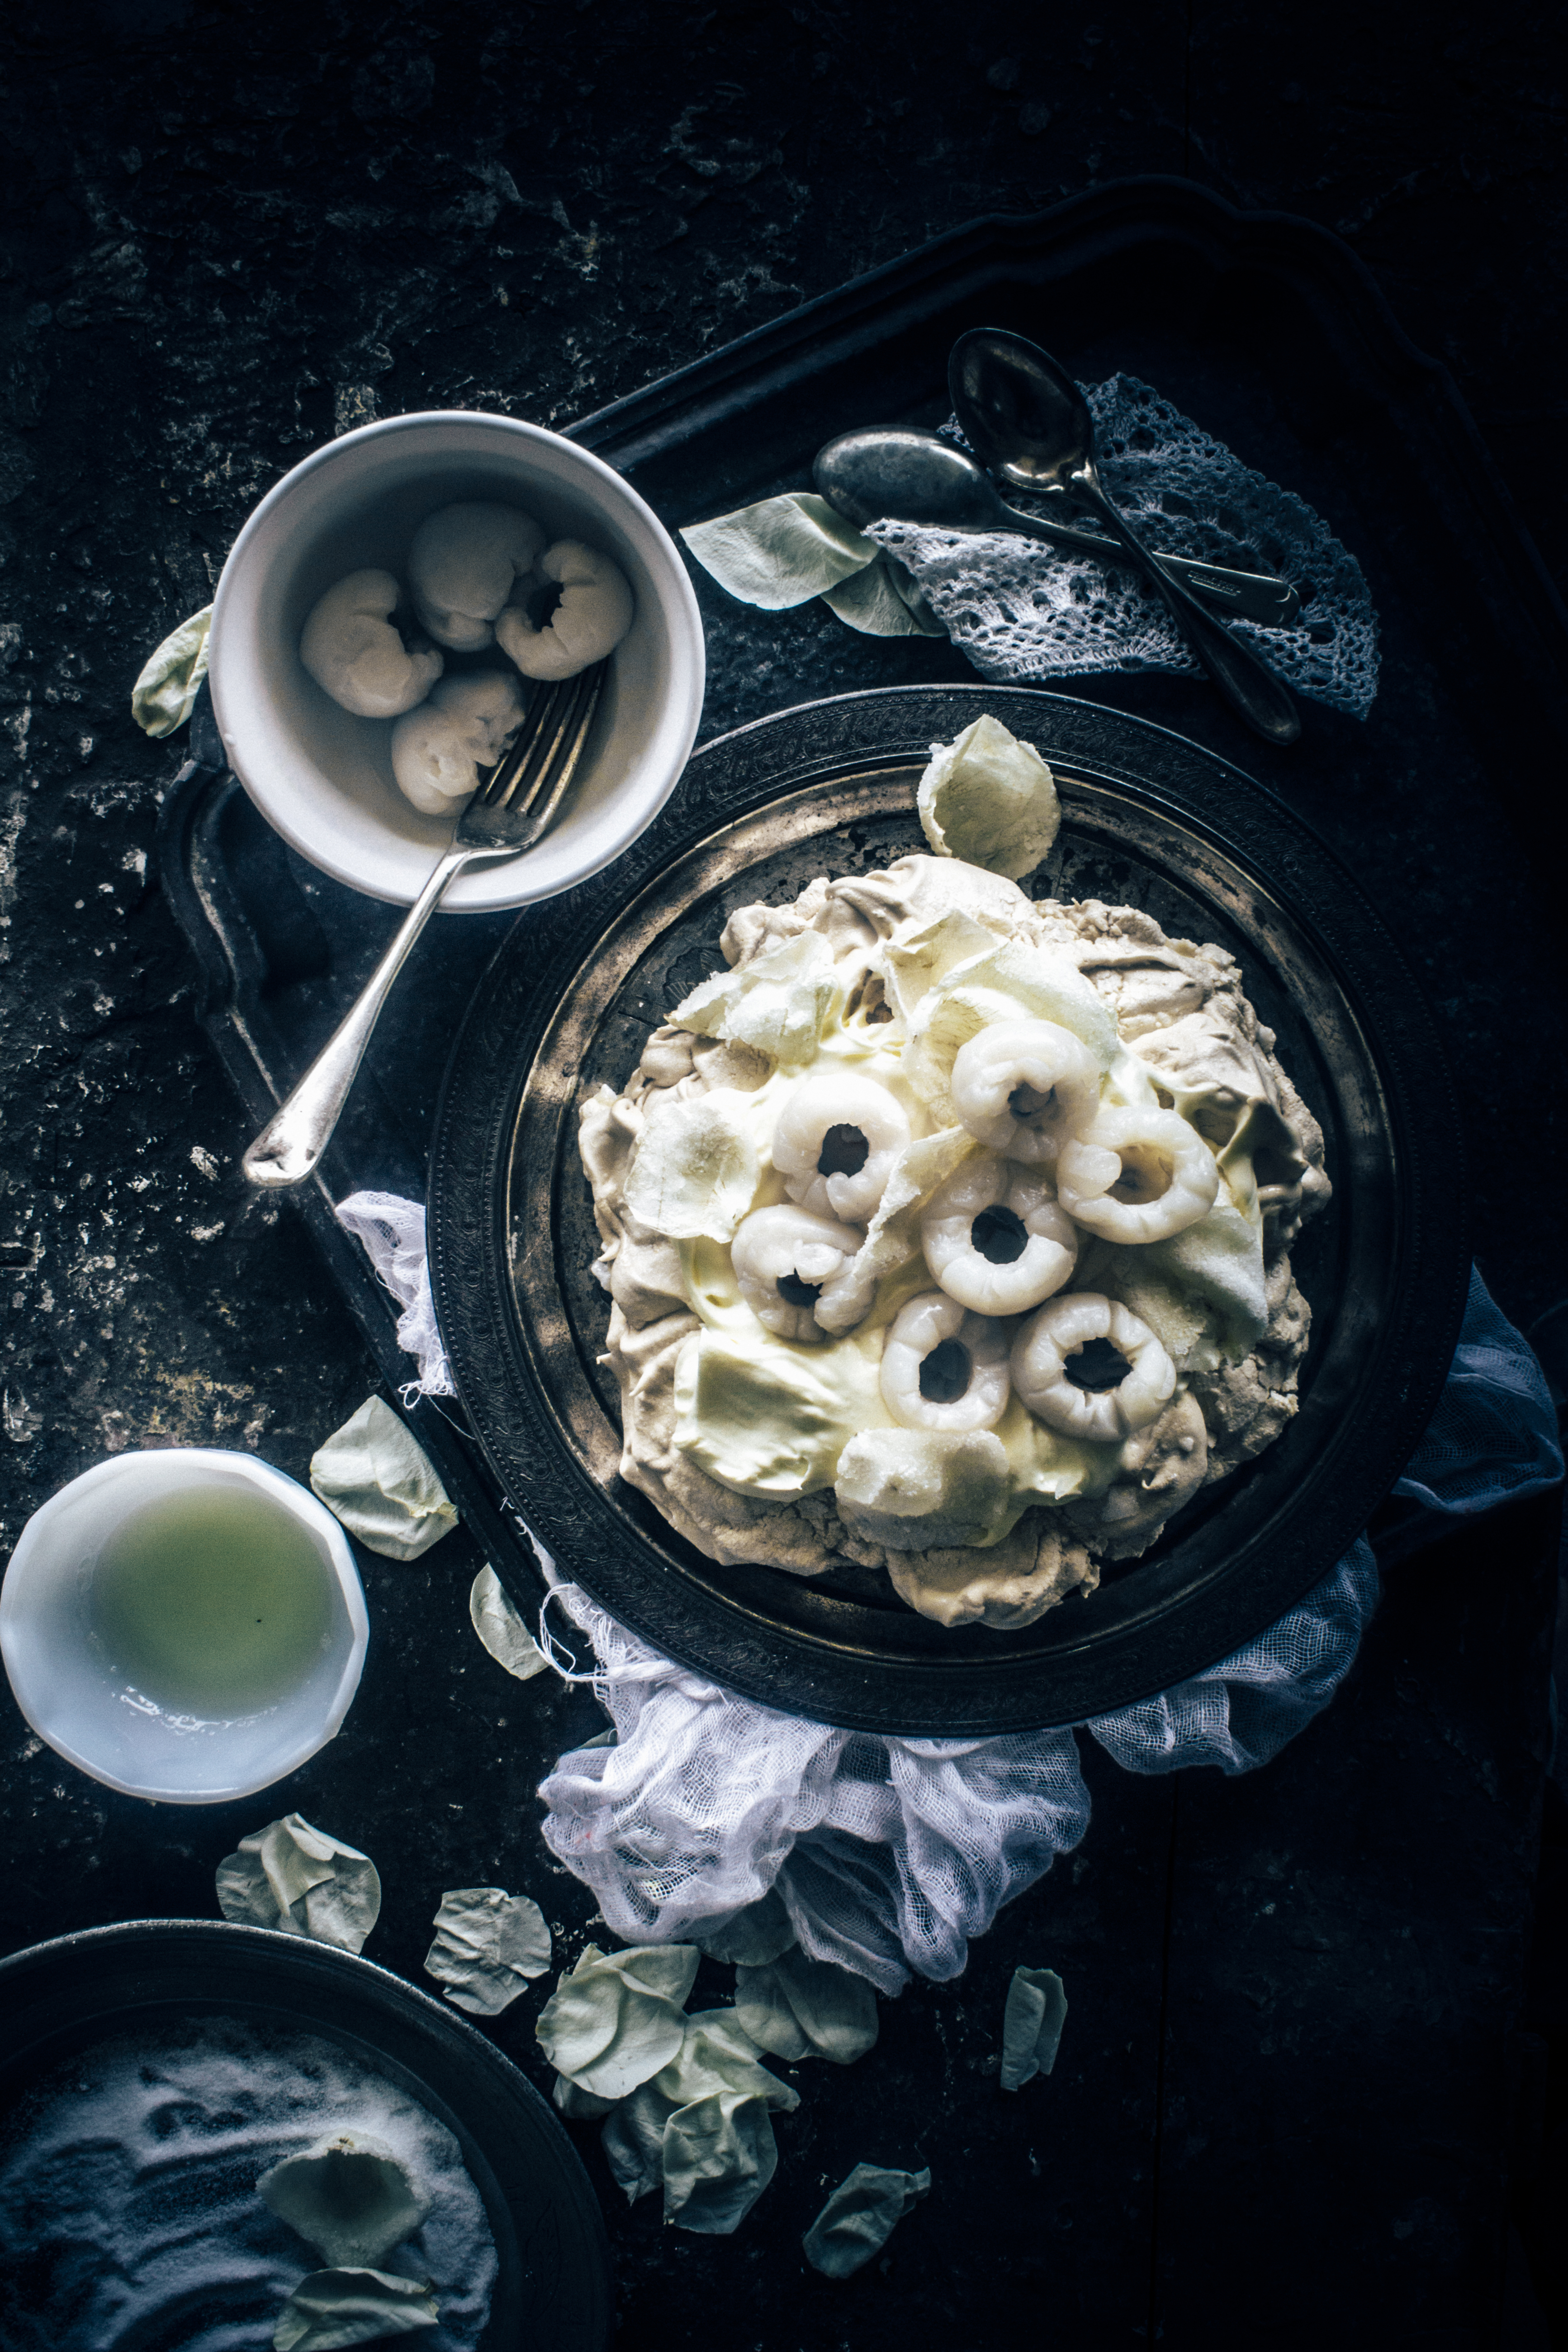
Brown Sugar Pavlova With Lychees and Candied Rose Petals (adapted from Lifestyle Food)
Serves 6

6 egg whites
1/4 teaspoon cream of tartar
1 teaspoon vanilla extract
225 g (1 cup) caster sugar
80 g (⅓ cup) soft brown sugar
1 tablespoon cornfl our
2 tablespoons arrowroot
2 teaspoons white vinegar
1 cup heavy/thickened cream, whipped to stiff peaks
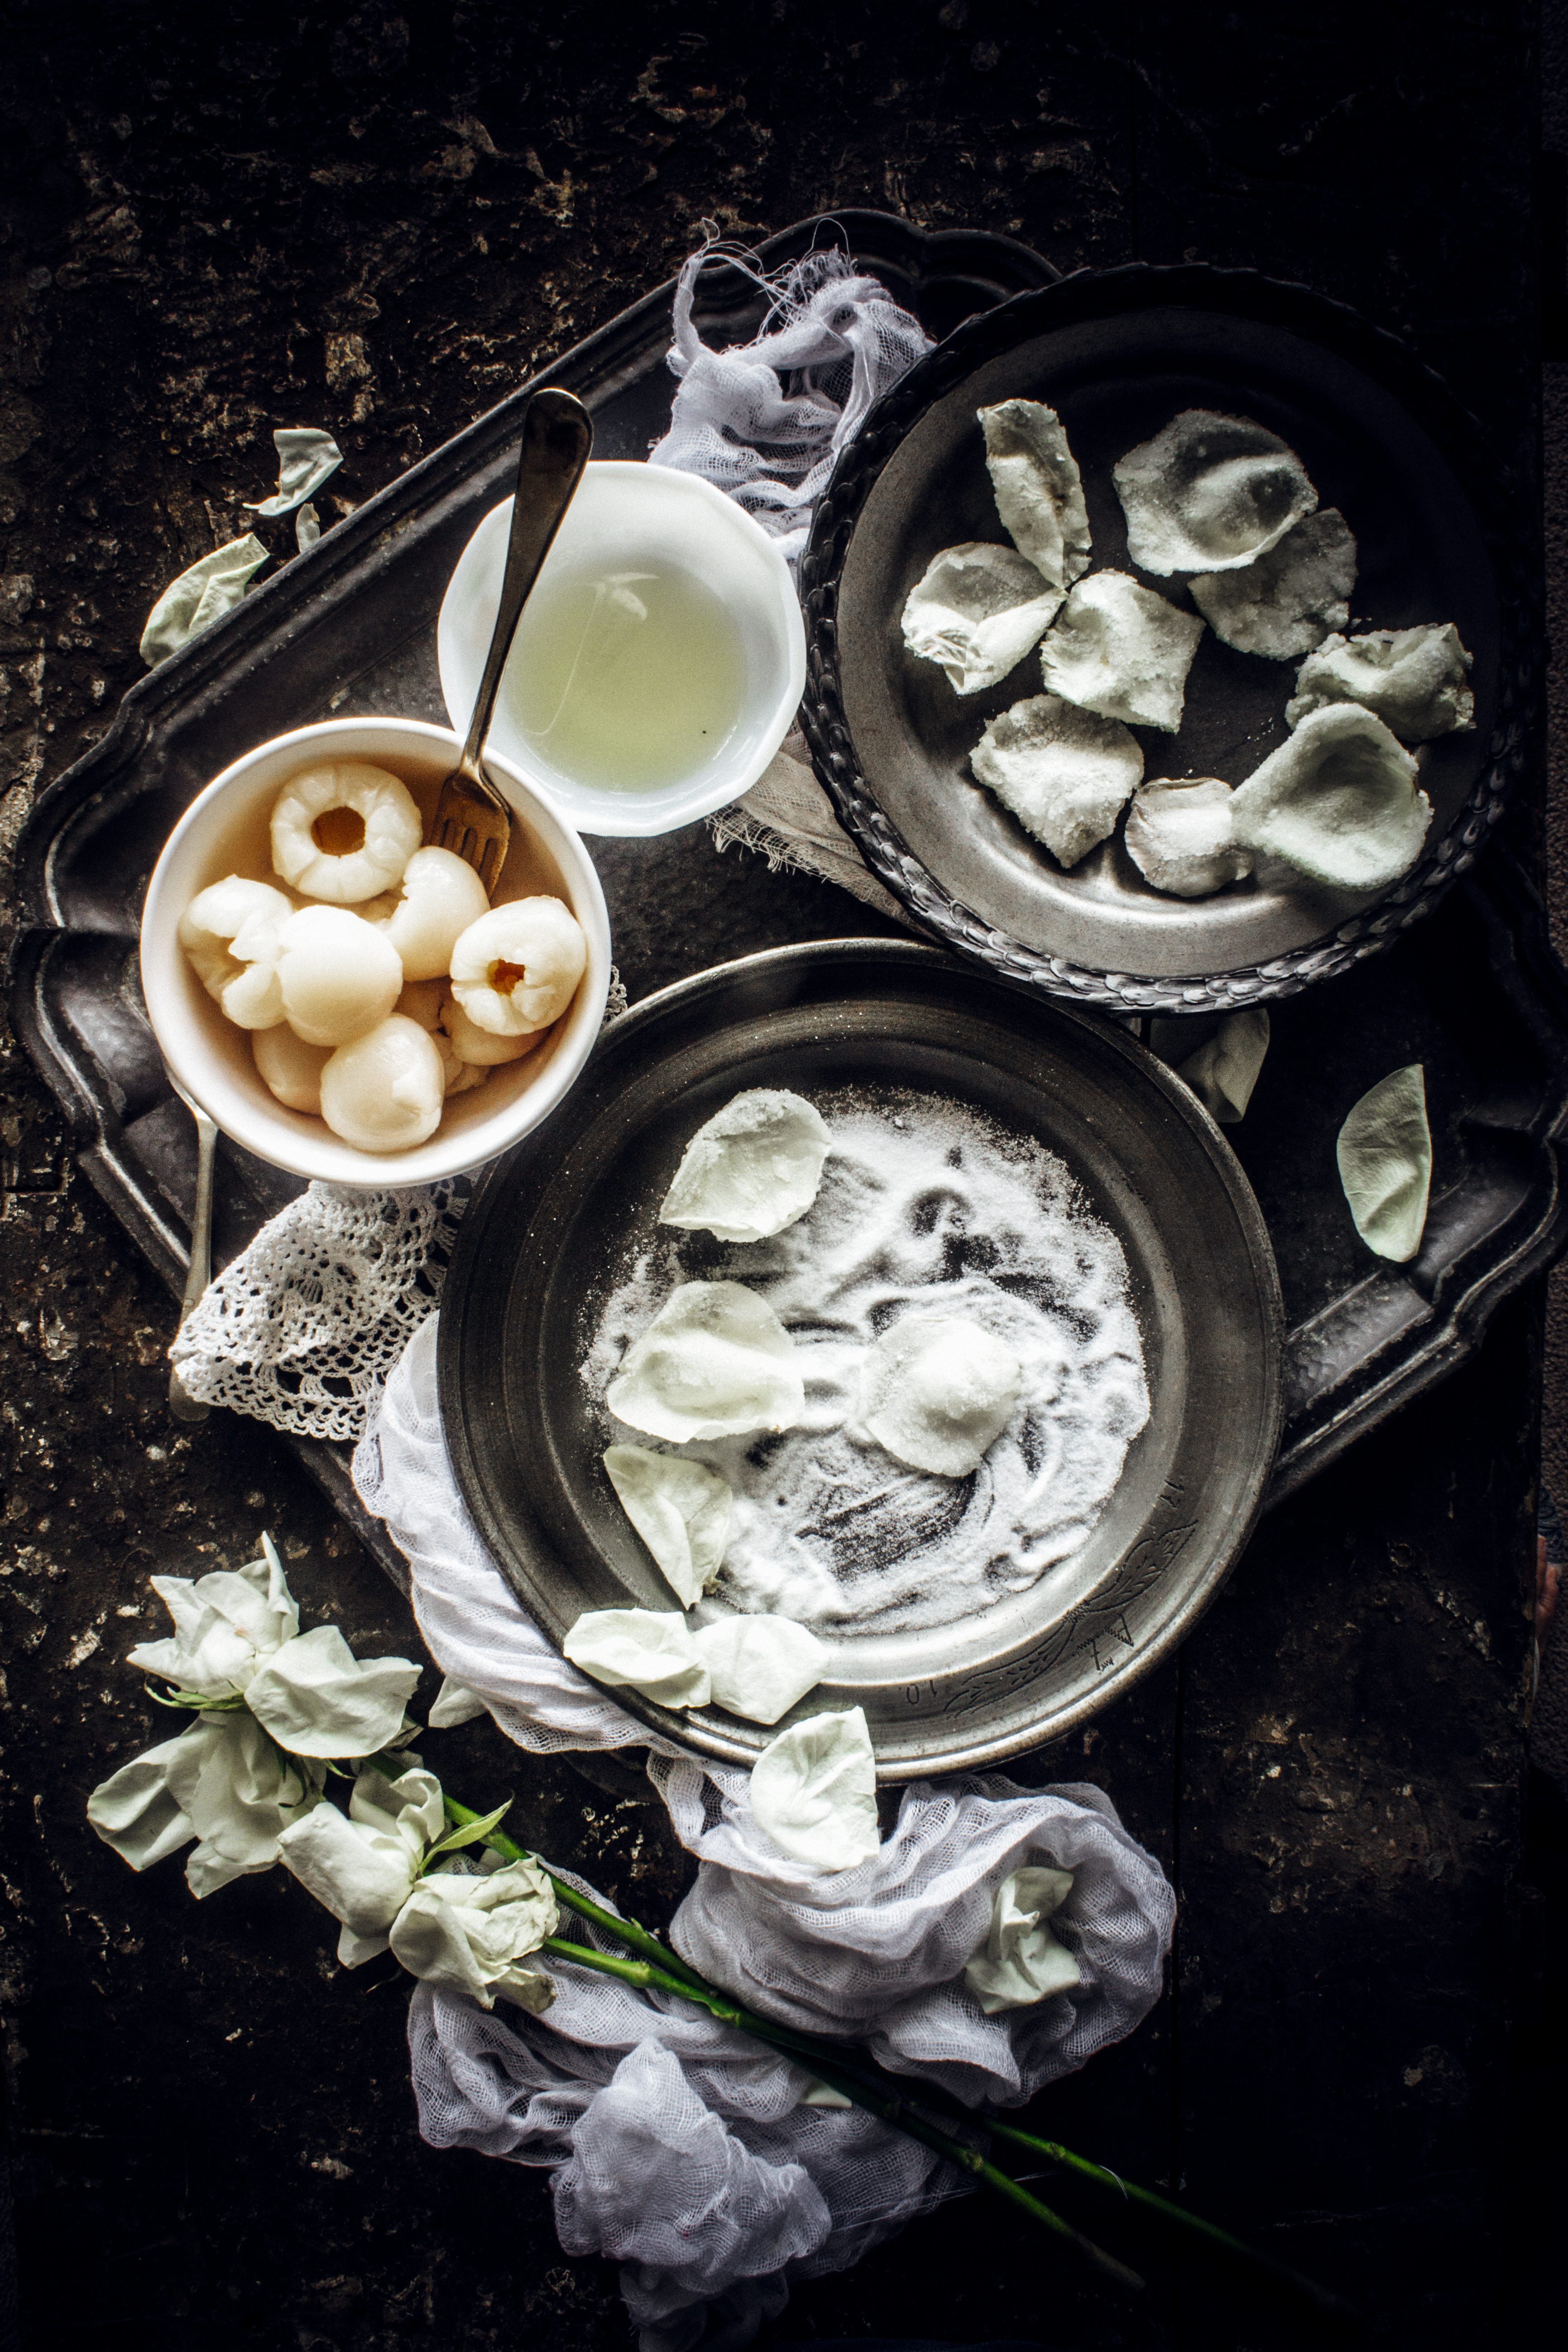
Canned pitted lychees, drained
Candied white rose petals, follow this process

Preheat the oven to 200°C. Draw a 20 cm circle on a sheet of baking paper and place the paper on a large baking tray.

Beat the egg whites with the cream of tartar and vanilla until stiff peaks form. Add the caster sugar and brown sugar, 1 tablespoon at a time, beating until all the sugar is incorporated and dissolved and the mixture is thick and glossy.

Stir in the cornflour, arrowroot and vinegar. Pile the mixture into the circle on the baking paper and spread gently into shape with a spatula. Put in the oven and reduce the temperature immediately to 130°C. Bake for 1 hour 20 minutes, then turn off the oven, prop the door ajar and leave the pavlova inside until completely cooled.

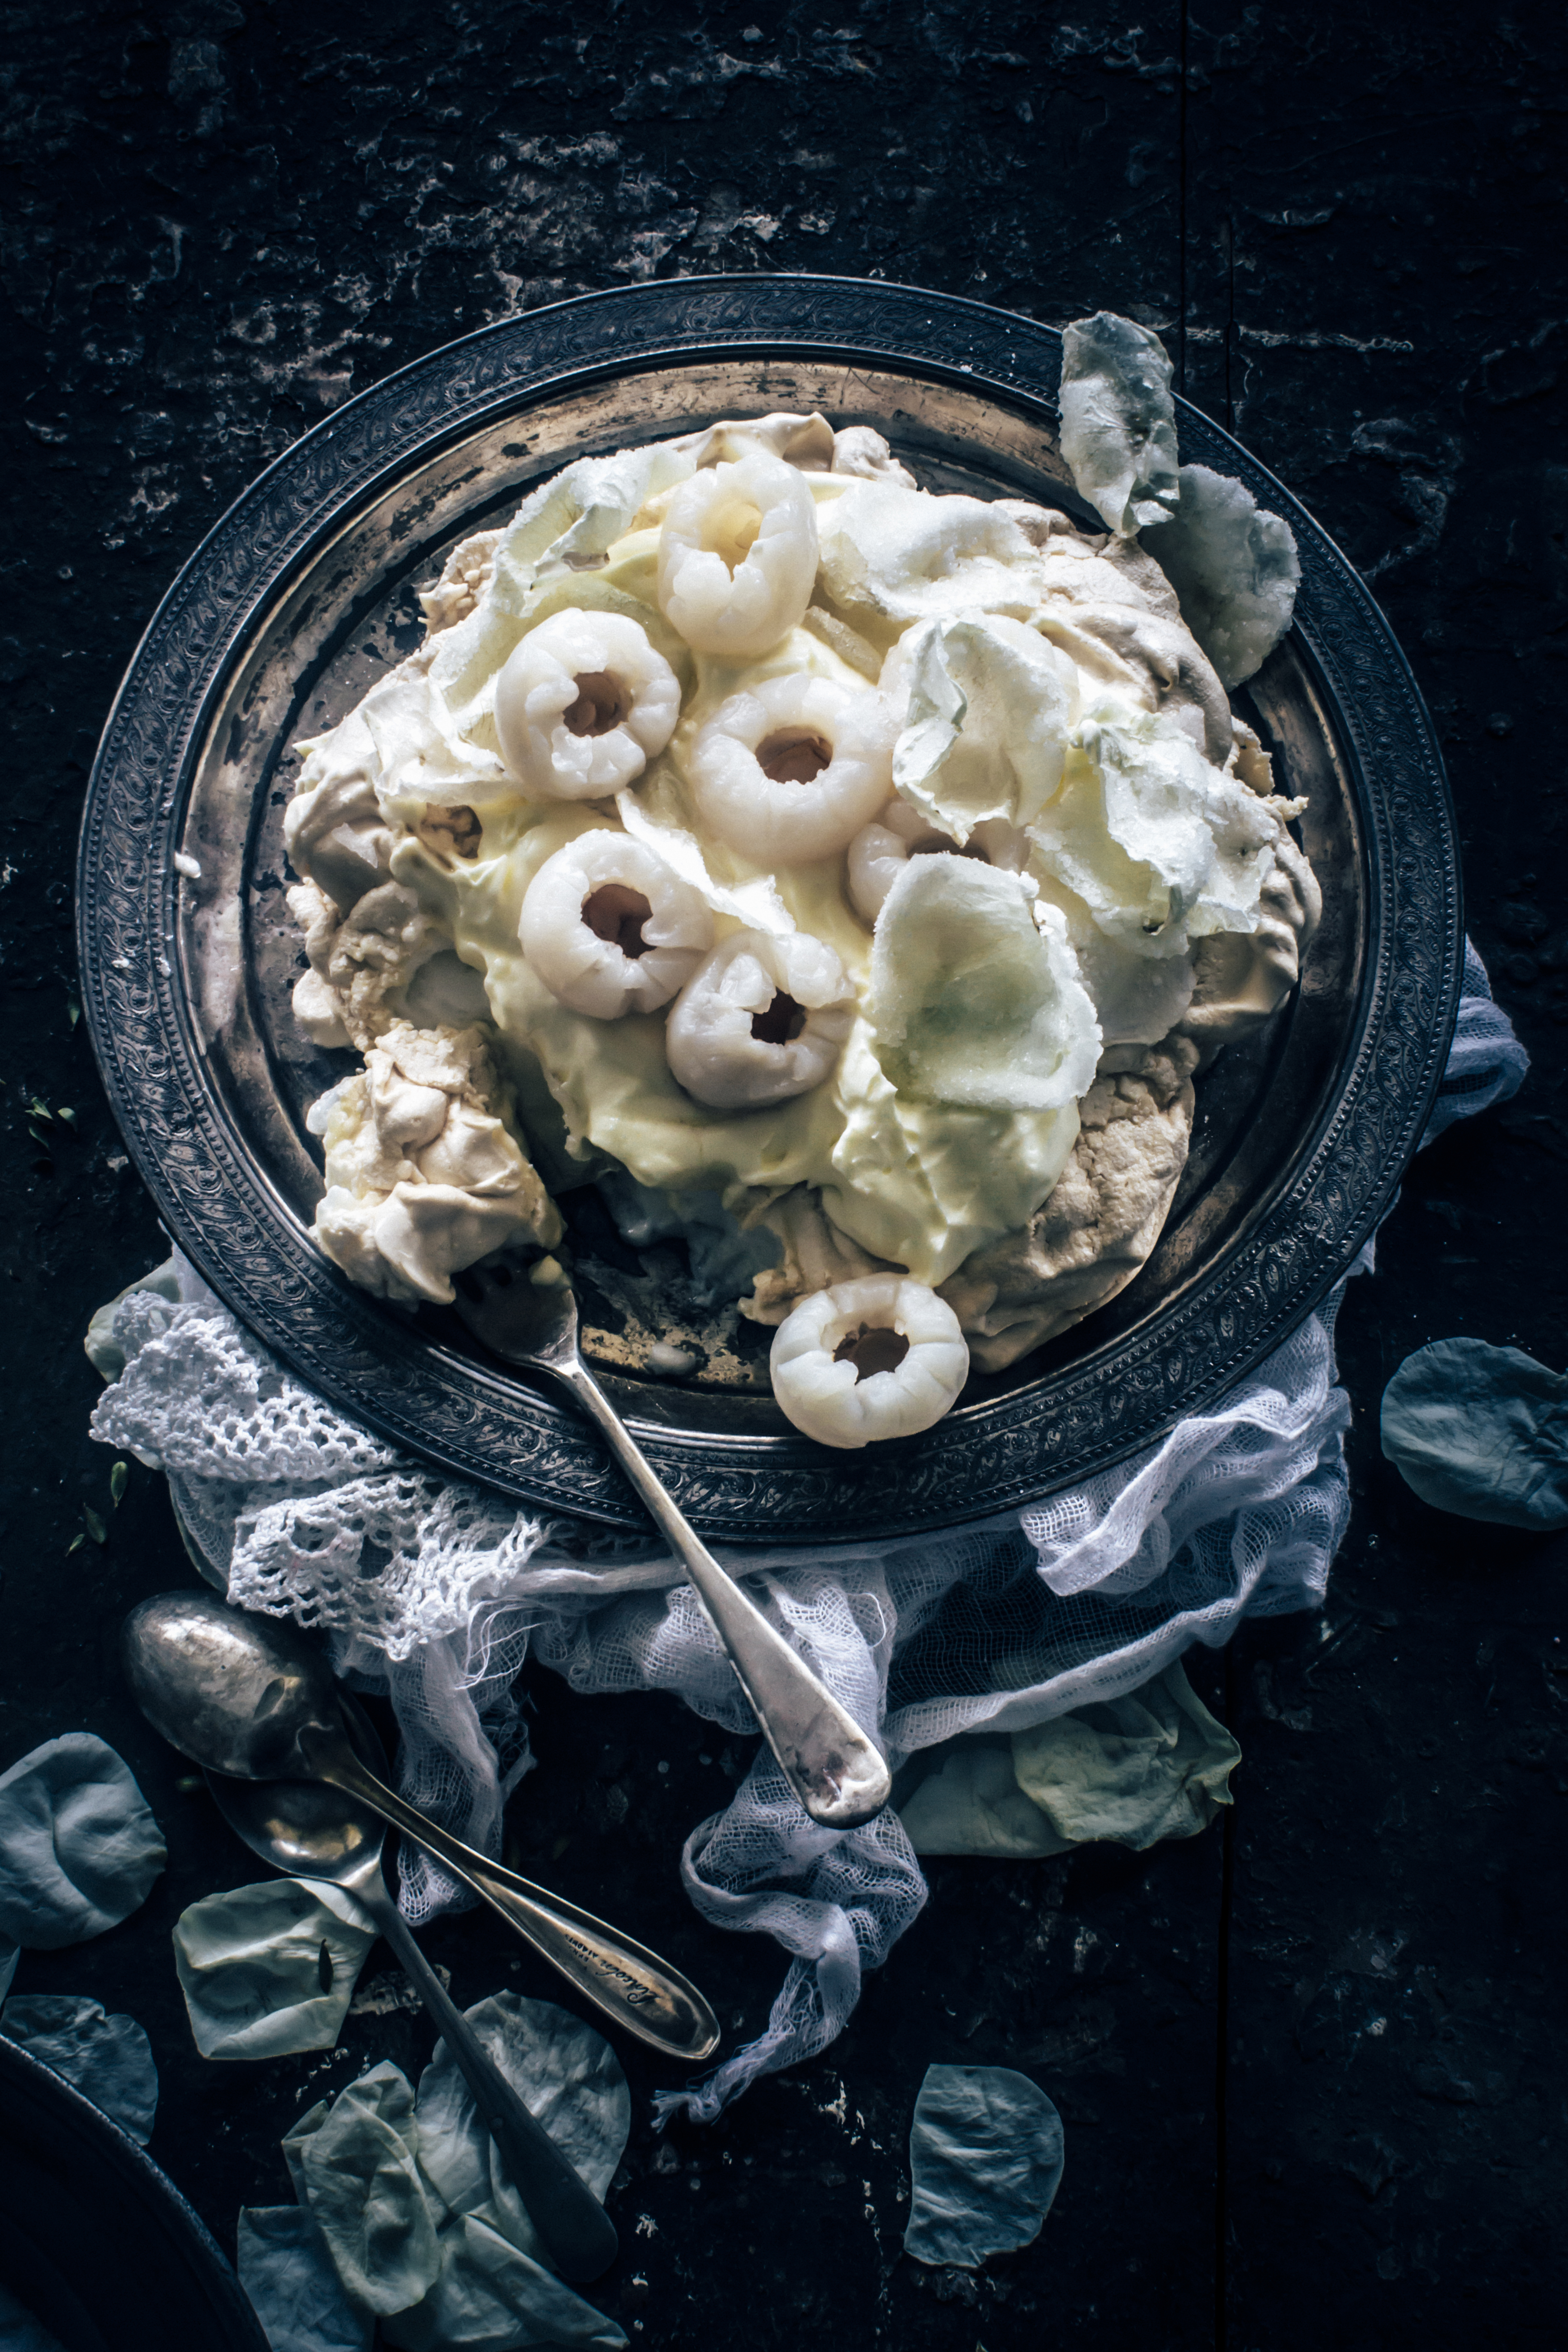
Just before serving, layer with whipped cream, lychess and candied rose petals.

Neapolitan Cake

31|08|2015

I think I am having too much fun with frosting! It is evident from the stains on my favourite pair of jeans. The other day, I wanted to hide somewhere when I saw myself in the large mirror at the shopping centre. The boys were with me so that’s a huge relief. Blame it on motherhood! Busy and tired mums have their fair share of excuses. Though the truth actually is that I am loving this whole idea of messy frosted cakes (even though it finds it’s way on my clothes).

neapolitan cake

I don’t remember making a single batch of buttercream this month. It’s been whipped cream all the way along with cheese based frosting. For this cake I’ve used whipped cream and chocolate ganache.  I’ve made the cake batter in one bowl. That’s right! Unlike many Neapolitan cake recipes that require you to make 3 different batters, this one uses a large bowl for mixing. Then all you do is divide the batter into 3 cake pan. For the first one, you just add a few drops of vanilla extract. The second one, strawberry extract and a few drops of pink food colour. The third one requires cocoa powder and milk. I’ve mixed the colours and flavours gently in the cake pan itself.  Otherwise, you can imagine the amount of dishes one would end up with for this kind of cake. On the texture front, the cake is moist and soft…thanks to the sour cream in the cake.

neapolitan cake

In between the layers there is creamy chocolate ganache. For the two-tone effect, I first applied chocolate ganache to the top and sides of the cake. Then I spread a bit of pink tinted whipped cream unevenly on the sides and top and ran my spatula around the cake to blend the frosting.  Quite easy but very tempting though. It’s hard to resist licking it off the cake straightaway. Chocolate and Cream…is there anything better than that?

neapolitan cake

In other news, today is the last day of winter in Australia. It’s Spring tomorrow and it’s also September, my favourite month. I have many hopes for September because I will be able to see some of my work on print. Call it luck or coincidence, I have worked on different projects with different sets of people but the release dates have somehow been assigned to September. I am also excitedly looking forward to spending time with my Mum and sister who will be in Sydney shortly.
Come on September…faster please..I just can’t wait for you!

neapolitan cake


neapolitan cake

Neapolitan Cake 
Makes a 3 layered 7 inch cake

32 

For the frosting
300 g dark chocolate, chopped
3/4 cup + 1/2 cup heavy/thickened cream
2-3 drops of pink food colouring
2-3 drops Strawberry extract

Preheat oven to 180 degrees C (160 degrees C for fan forced). Grease and line the bases of  3, 7-inch cake pans with non-stick baking paper.

Using an electric mixer (or by hand) beat together the butter, sugar and vanilla in a bowl until pale and creamy. Add the eggs, one at a time, beating well after each addition until combined. Add half the flour to the butter mixture and stir until just combined. Add the sour cream and remaining flour, in batches, and stir until just combined. Divide the batter among 3 bowls.

Add a few drops of vanilla essence to the first. Mix gently
Add a few drops pink food colouring and strawberry extract/essence to the 2nd pan portion and mix gently to combine.
Combine the cocoa powder and milk in a small bowl and add to the 3rd portion of batter. Mix gently to combine.
Bake in the preheated oven for 20- 30 minutes (or until a skewer inserted in the middle of the cake comes out clean). Remove from the oven. Leave aside in the pan for 5 minutes, then carefully tun onto a wire rack. Let cakes cool completely before frosting them.

To make the chocolate ganache frosting, place chocolate and cream in a saucepan over low heat. Cook, stirring, for 3 to 4 minutes or until smooth. Cover. Refrigerate for 30 minutes or until a spreadable consistency. To make the strawberry cream frosting, whip up the heavy cream with an electric mixer till stiff peaks. gently fold in the colouring and extract.

To assemble, place the vanilla cake in the centre of a cake stand or plate. Spread about 1/4 cup of frosting. Top with the strawberry layer cake. Repeat. Place the chocolate cake layer on top. Frost the sides and top with chocolate ganache. Take a small amount of the strawberry whipped cream frosting on your spatula and spread unevenly around the cake in gentle strokes. Smoothen out with a clean spatula. Decorate with chocolate curls, piped ganache or strawberries.

Strawberries And Cream Cake

15|08|2015

So the cherry blossoms have arrived! I can feel the vibes of Spring. It is such a pleasure driving around or for that matter even walking when the roadside looks a stunning shade of pink. I know..I am obsessed with pink. The irony however is that though I have been meaning to photograph them, I am either racing back home or leaving home in a hurry. I can’t explain how busy this week has been. I have been shooting a gathering with a laid out table and several dishes going on it. It required heaps of planning, colour co-ordination, testing recipes all day and shooting close to 100 images a day…basically nothing like the single recipes I’ve worked on and shot before. My laptop started making funny noises though and gave me a warning every time I logged in. I had fun putting the whole thing together and hopefully in future I will get to share some photos with you.

Strawberries and cream cake

I am also delighted to share with you that I am now a contributor to Stockfood. What that means is…you can buy my images online! A few of you have asked me on email and Instagram so yes…it is possible (though in all honesty I never thought something like that was even possible). I will be putting up the link on my blog soon. Initially it was a bit weird for me to come out of my recipe mode and just shoot images. I had to remind myself many times over…every photo does not come with a recipe! So much for food blogging! While it all sounds very exciting and yes, it certainly is…there were technical aspects and behind-the-scenes to sort out. Now I am faced with a new challenge in my hands. Photoshop! I am sure its going to be amazing but I have to learn to use it first. Tips, anyone? It would be greatly appreciated.

Strawberries and cream cakeStrawberries and cream cake
Coming to this cake…it is meant to be effortless and fun, just the way it looks. For me, making and shooting cakes is like therapy. I love this part of my job to bits. Ask me to make a cake every day..I will do it. So this is my version of a strawberries and cream cake. It is incredible tasty with a sponge like texture and fresh cream and strawberries in between. To keep the cake moist, I’ve used a strawberry infused simple syrup. You could skip this step but if you are storing the cake in the fridge since it is a cream based cake, the simple syrup will keep it moist. I frosted it like a semi naked cake with more fresh cream and topped it with pink cotton candy. I have a few friends who can bake well but are intimidated at the idea of frosting a cake. No…please! It doesn’t have to be perfect…it can still look glamorous without the pain and calories. I have worked on two more semi-naked cakes…just like this one! A bit dramatic but effortless. Stay tuned!

Strawberries and cream cake

Strawberries and cream cake

Strawberries And Cream Cake

11/4 cup (300 g) caster sugar
300 g unsalted butter
6 eggs, lightly beaten
2 1/4 cup (300 g) self-raising flour
1 tsp baking powder

Strawberry Simple Syrup
1/2 cup water
1/3 cup castor sugar
1 tsp strawberry essence

For the Filling and Frosting
3 cups heavy/thickened cream
5 tbsp castor sugar
2 tsp strawberry essence (can use vanilla as well)
Few drops pink food coloring
250 g fresh strawberries, roughly chopped
cotton candy, for decoration
mini marshmallow, for decoration
silver cachous, for decoration

Heat oven to 190 degrees C (170 degrees C for fan-forced). Grease and line the bases of three 7 in round cake pans with baking paper.. In a large bowl, beat together all the cake ingredients until you have a smooth, soft mixture. Divide the mixture equally between the pans, smoothing over the top of each with the back of the spoon. Bake in the oven for 15-20 mins or until golden and the cake springs back when gently pressed. Turn the cakes onto a cooling rack and cool to room temperature.

Meanwhile make the simple syrup. Bring the water and sugar to a boil over low heat. Remove from heat when sugar dissolves. Let cool and add the strawberry essence.
Make the whipped cream frosting..here is a guide. Add the strawberry essence in the end. Use 1/3 of the frosting for the filling and the rest for the frosting.

Once cakes has cooled completely, assemble. Place one layer on a cake stand. Sprinkle with simple syrup. Spread a little bit of the cream, layer 1/2 the strawberries evenly. Place the second layer. Repeat all the steps. Place the last layer. Sprinkle with simple syrup. Frost the sides and top starting a little bit from the second layer up for a semi-naked effect. Top with cotton candy and mini marshmallows. Store in the refrigerator until serving (the cotton candy should go on the cake just before serving). The cake is best served in a day or two.


3 Easy And Delicious Recipes to Use Up Leftover Ricotta Cheese

30|07|2015

3 easy and delicious recipes to use up leftover ricotta cheese, both sweet and savory. Ricotta fritters, baked ricotta and ricotta doughnuts.

Every time I do a fridge clean, I have the same problem. Leftover dairy. A tub of half finished Ricotta or Mascarpone or sour cream or a quarter filled carton of buttermilk will be lying in some corner of my fridge. Most often, it would have been bought for a recipe and the unfinished tub will go back into the fridge until I remember that it is nearing expiry date or at times when it is already too late. I hate wastage and throwing away something I really love to cook with makes me rethink my organisational skills.

ricotta cheese recipes

Ricotta is a soft cheese so it has shorter shelf life than many other cheeses. It’s mild creamy texture makes it ideal for using it as fillings with different kinds of pastry, to thicken up sauces, to create lighter versions of cheesecake and so on. Since we are dealing with left over ricotta here, we will not get into complicated recipes. The objective is to finish it up using recipes that are easy, can be scaled down and we can work with regular pantry ingredients. I have been facing a slightly bigger problem though. These recipes are my favourite. At home we love what ricotta can do on busy days so we are eating these all the time. I have actually photographed one of them months ago and wondered if anybody would have the same problem as me. Recently, I served baked ricotta to a friend on a gluten free diet and she kept asking me for the recipe. Recipe..? It is just mix and stir. So I decided to put them all here.

ricotta cheese recipes


Whether you are looking for an indulgent recipe, or a healthy one..I’ve got you covered! Most of Sugar et al. readers have a sweet tooth so we will start with sweet. I also have similar recipes with sour cream and buttermilk which I will share soon.

ricotta cheese recipes

Chai Spiced Ricotta Doughnuts With Salted Caramel Sauce: Easy peasy comfort food. Use whichever spice you have at home if Chai is not available at hand. I have tried all kinds of combinations and it really tastes good nevertheless. I use this salted caramel recipe a lot of times because it is super easy. No burning sugar and no need for thermometer.

ricotta cheese recipes


Chai Spiced Ricotta Doughnuts With Salted Caramel Sauce (makes about 16 medium sized ones)

1 cup smooth ricotta cheese
1/4 cup castor sugar
1 egg, lighlty beaten
1 cup self raising flour
3 tbsp milk,
1 tsp chai spice (if you don’t have chai spice, powdered cinnamon or ginger or cardamom will work fine as well)
1 tsp grated orange/lemon zest
vegetable oil for deep frying
icing sugar to dust

Salted Caramel Sauce
50 g butter
1 cup (220g) brown sugar
1 cup (250ml) cream
1 tsp vanilla extract
1/2 tsp salt

To make the doughnuts, Mix all the ingredients together in a bowl. If you find the consistency too thin, add a tbsp of flour.
Heat oil a heavy bottomed frying pan over medium heat With wet hands, rolls out balls of about 1 heaped tbsp of batter. Once the oil is hot, deep fry the balls until golden on all sides and cooked through. Keep turning them for an even browning. If you find the batter sticky, dropping them directly with a spoon into the oil will also do.
Drain on paper towels. Cool slightly. Dust with icing sugar. Serve warm with salted caramel sauce.

To make the salted caramel, combine butter, sugar, cream, vanilla extract and salt in a saucepan over low heat until butter melts and sugar dissolves. Bring sauce to a boil, reduce heat and cook for 5-6 minutes or until sauce thickens slightly.

Baked Ricotta With Seasonal Fruits: This is a perfect dessert when you want to have something light or on a gluten free diet. There are two ways to bake the ricotta, in a water bath (like a creme brulee) or directly in the oven. I prefer the first method though it involves an additional baking tray as the final dish is much firmer, set and creamier in texture. Serve it with fresh fruits or dessert sauces. I’ve used poached rhubarb, passion fruit, grapes, kiwi fruit and strawberries. I know, colour fanatic!  Give this recipe a try…you’ll be hooked forever.

ricotta cheese recipes

Baked Ricotta With Seasonal Fruits (Serves 2-3)

1 cup smooth ricotta
1/4 cup castor sugar
2 tbsp thickened cream
1 tsp grated orange zest
1 tsp vanilla extract

To make baked ricotta, preheat your oven to 170 degrees C (150 degrees C for fan forced). Grease two ramekins/baking molds with melted butter. Line the bases with a small piece of baking paper (need not be perfect).
Place the ricotta, sugar, cream, eggs, orange zest and vanilla extract in a large bowl and mix well until smooth. Pour into the prepared pans and smooth the surface with the back of a spoon.

Place pans in a deep baking dish. Pour boiling water into dish to come halfway up side of the pans. Bake for 30-40 minutes or until firm. Set aside to cool, then refrigerate for 1 hour.

Ricotta Fritters: These make a great breakfast or snack option. Serve them with a fresh salad, smoked salmon, bacon or even eggs. I have served them with an heirloom tomato salad here. The fritters tend to stick to the pan so make sure the batter is not runny, the pan is greased well.

ricotta cheese recipes

Ricotta Fritters (Serves 2)

250 g ricotta cheese
1 egg
1/4 cup sun-dried tomatoes, finely chopped
1 clove garlic, crushed
1/4 cup plain flour (more if batter is runny)
2 tbsp vegetable oil, for frying

Place ricotta, tomatoes, basil, garlic and eggs in a bowl. Mix until well combined. Stir in flour. Season with salt and pepper.
Heat 1 tbsp of the oil in a large, non-stick frying pan over medium heat. Using 1/4 cup of mixture per fritter, spoon mixture, 3 fritters at a time, into hot oil. Cook for 3 minutes each side or until golden and firm to touch in the centre, adding remaining oil as required. Transfer to a paper towel before serving. Serve warm with salad.


  • « Previous Page
  • 1
  • …
  • 29
  • 30
  • 31
  • 32
  • 33
  • …
  • 57
  • Next Page »
Hey Sugar
Cake
Link to my Facebook Page
Link to my Instagram Page
Link to my Pinterest Page
Link to my Mail Page
Subscribe to this site
Fresh Awards
2019 Aus mumpreneur
2019 aus mumpreneur
Mumbrella

Copyright © 2025 · Sugar Et Al · Designed by Smitten Blog Designs · Log in