• Home
  • Recipe Index
    • Recipe Index
    • Breakfast/Brunch
    • Cakes and Puddings
    • Chocolate
    • Cookies and cupcakes
    • Custard and Mousse
    • Gluten Free
    • Ice Cream
    • Mains
    • Other Sweet Treats
    • Snack/Appetizers
    • Soups and Salads
    • Tarts and Pies
    • Vegetarian
  • About
  • Cookbook
  • Portfolio
  • Store
  • Press
  • Work with Me

Sugar et al

Because Life is a blend of flavours...

Cream Puffs With Orange Whipped Mascarpone

18|03|2015

Today we attended a cross country carnival at the twin’s school. This was a first for my boys who have just started school this year. A first among the innumerable races they will perhaps run through childhood and adulthood and the many ‘finishing lines’ they will persue in real life. To say that they were excited would be an understatement. One of them was up way past bedtime yesterday. ‘I can’t sleep. What if I don’t win?’ I was surprised, happy and a wee bit disappointed that my baby boy appeared to have grown up in leaps and bounds in the past one month. I told him what my mum told me as a child ‘It is more important to give your best’.

Cream-Puffs-with-Orange-whipped-Mascarpone

It was evident that he was not convinced with my answer and continued to fret till he fell asleep holding his teddy bear who in recent times has been lovingly named after their school house. In the morning, everyone was in high spirits at the school. Mums and Dads had decided to wear respective house color clothes to support their children and the school pretty much resembled (for lack of a better description, sorry!) a giant box of mobile Nestle Smarties (can’t stop thinking about food, eh?)

Cream-Puffs-with-Orange-whipped-Mascarpone

The race began. Despite being forbidden by the Housemaster to come close to the running track and causing distraction to the boys, the parents made a mad dash after the little ones with their mobile phones. ‘OMG he is running for the first time’, ‘OMG he is running first time in his house t-shirt’ ‘OMG I have taken the day off for this landmark event’ You know what I mean! As much as I love photography, I am actually terrible at using my phone camera. So I don’t even make an attempt and leave that bit for my husband who is quite a pro in taking pictures with the phone. I stood in one corner and thoroughly enjoyed the race and watching frantic parents running uphill and downhill alongside the boys.

Cream-Puffs-with-Orange-whipped-Mascarpone

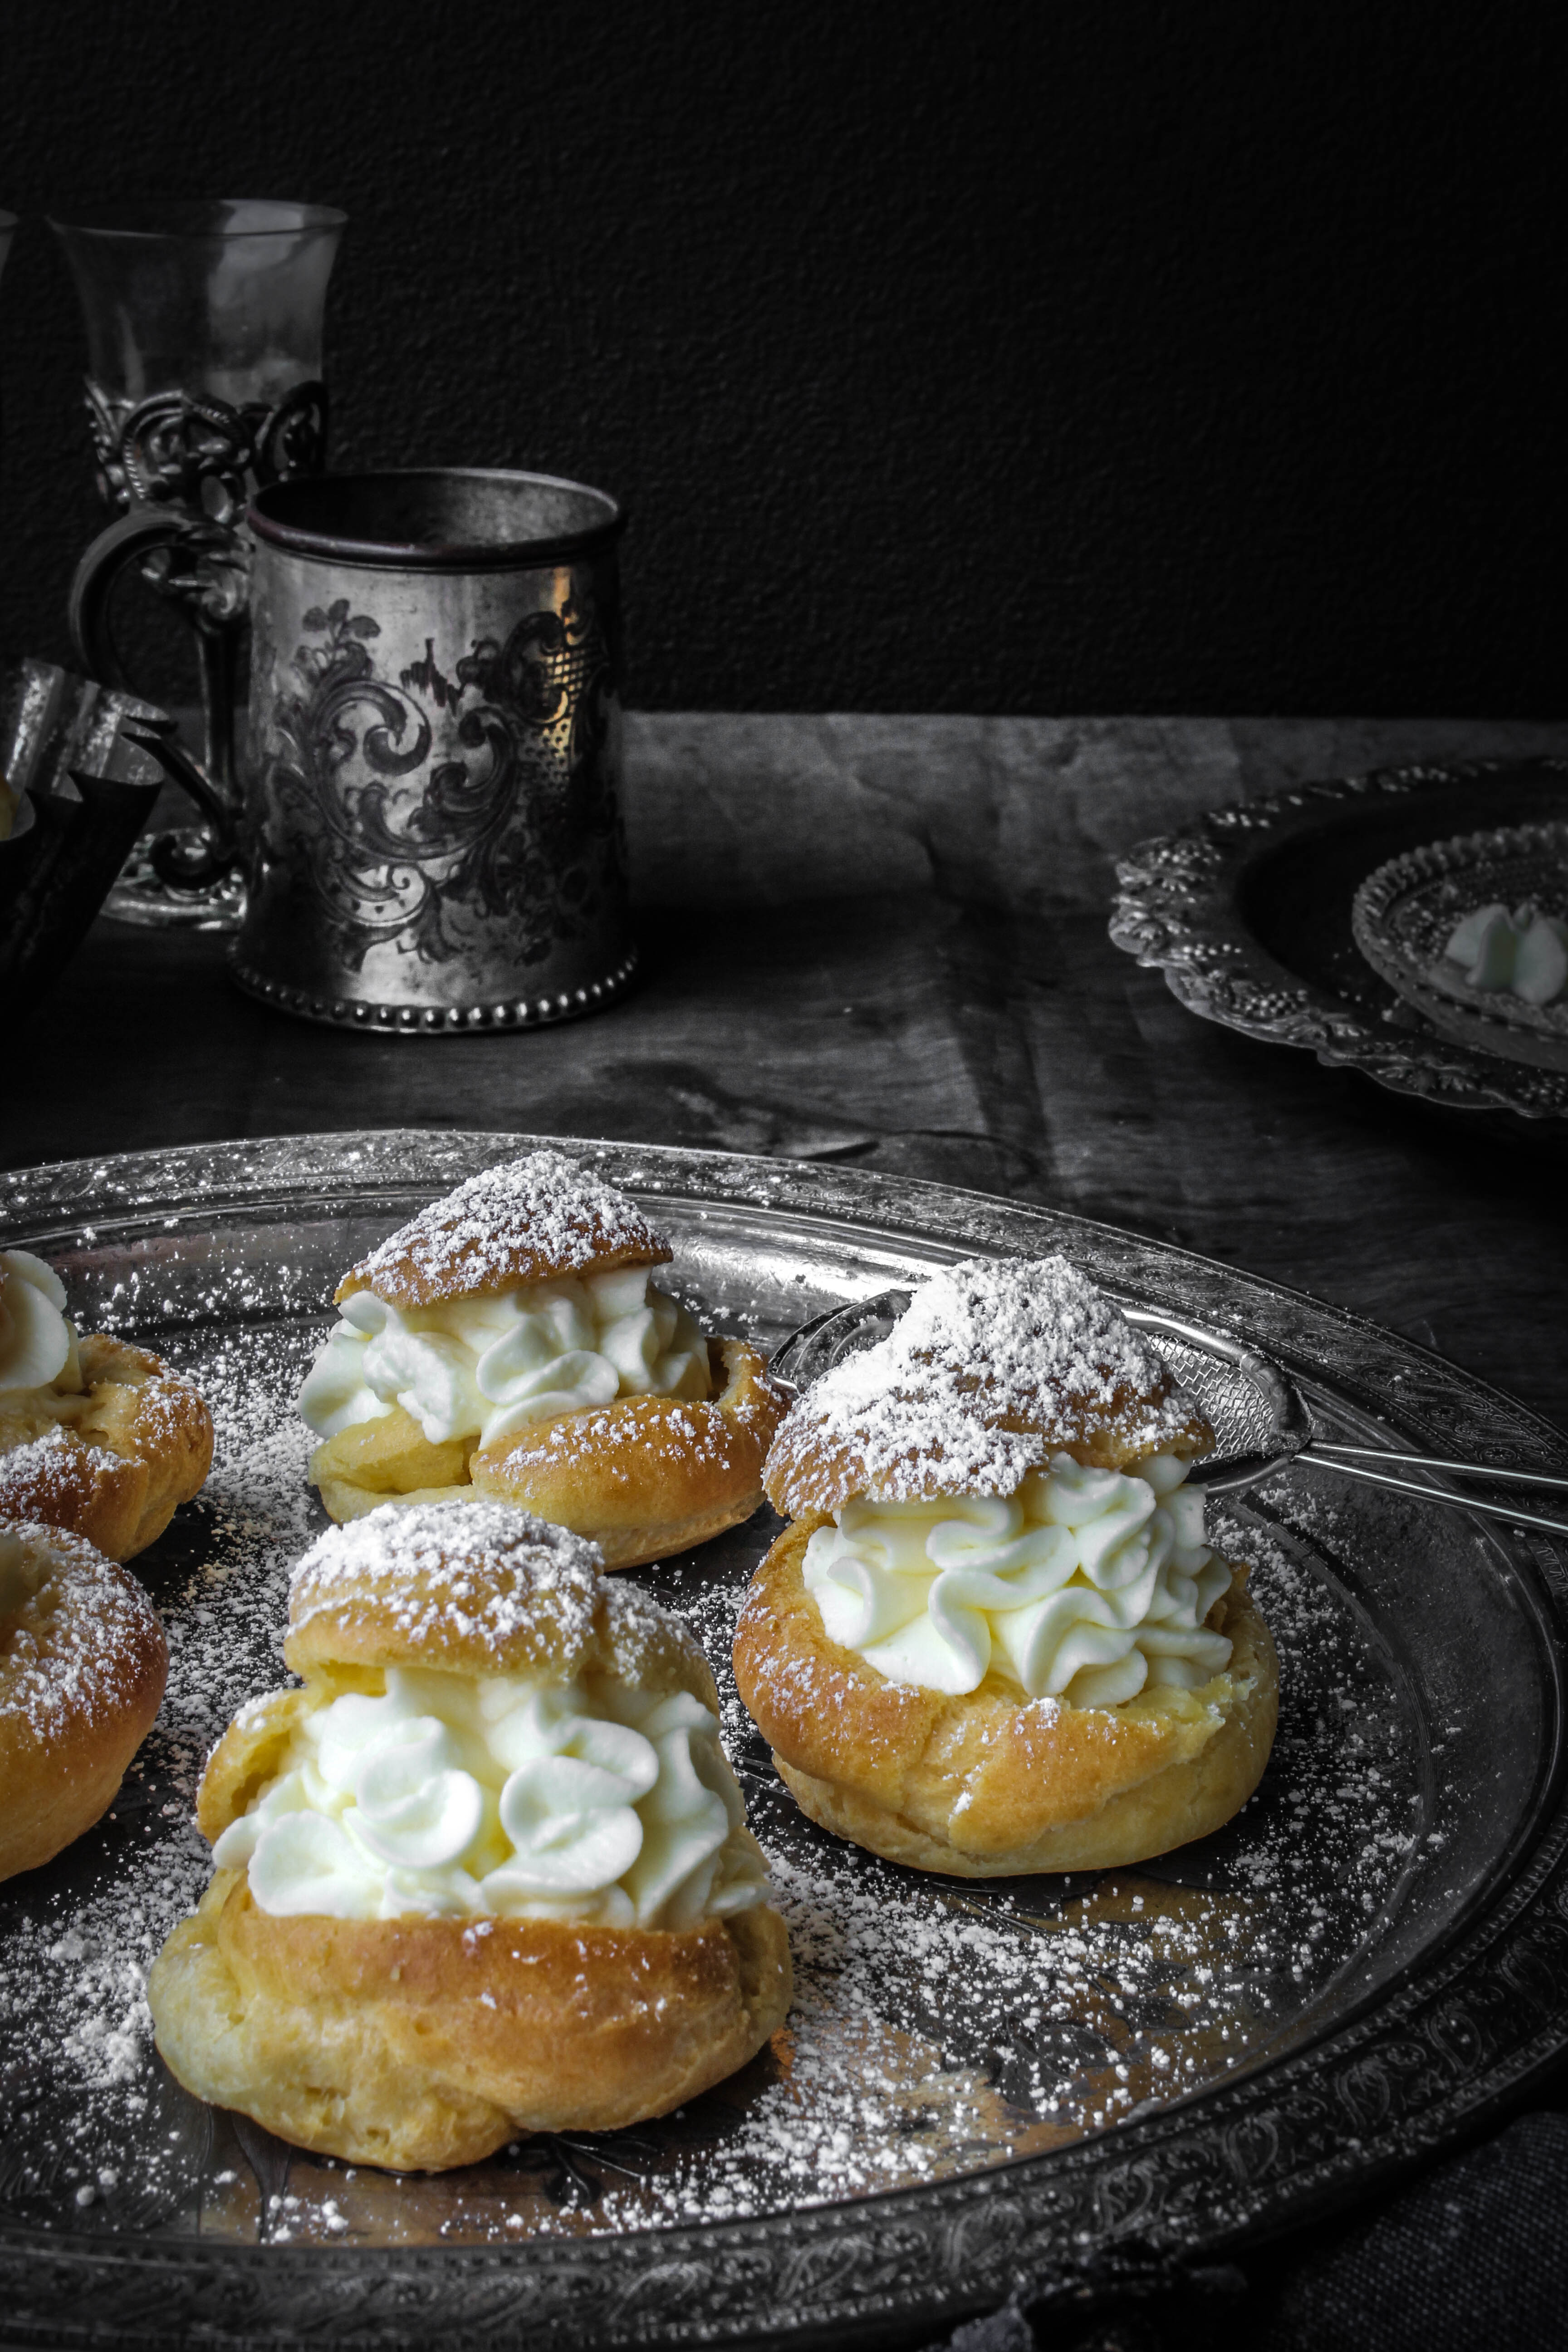
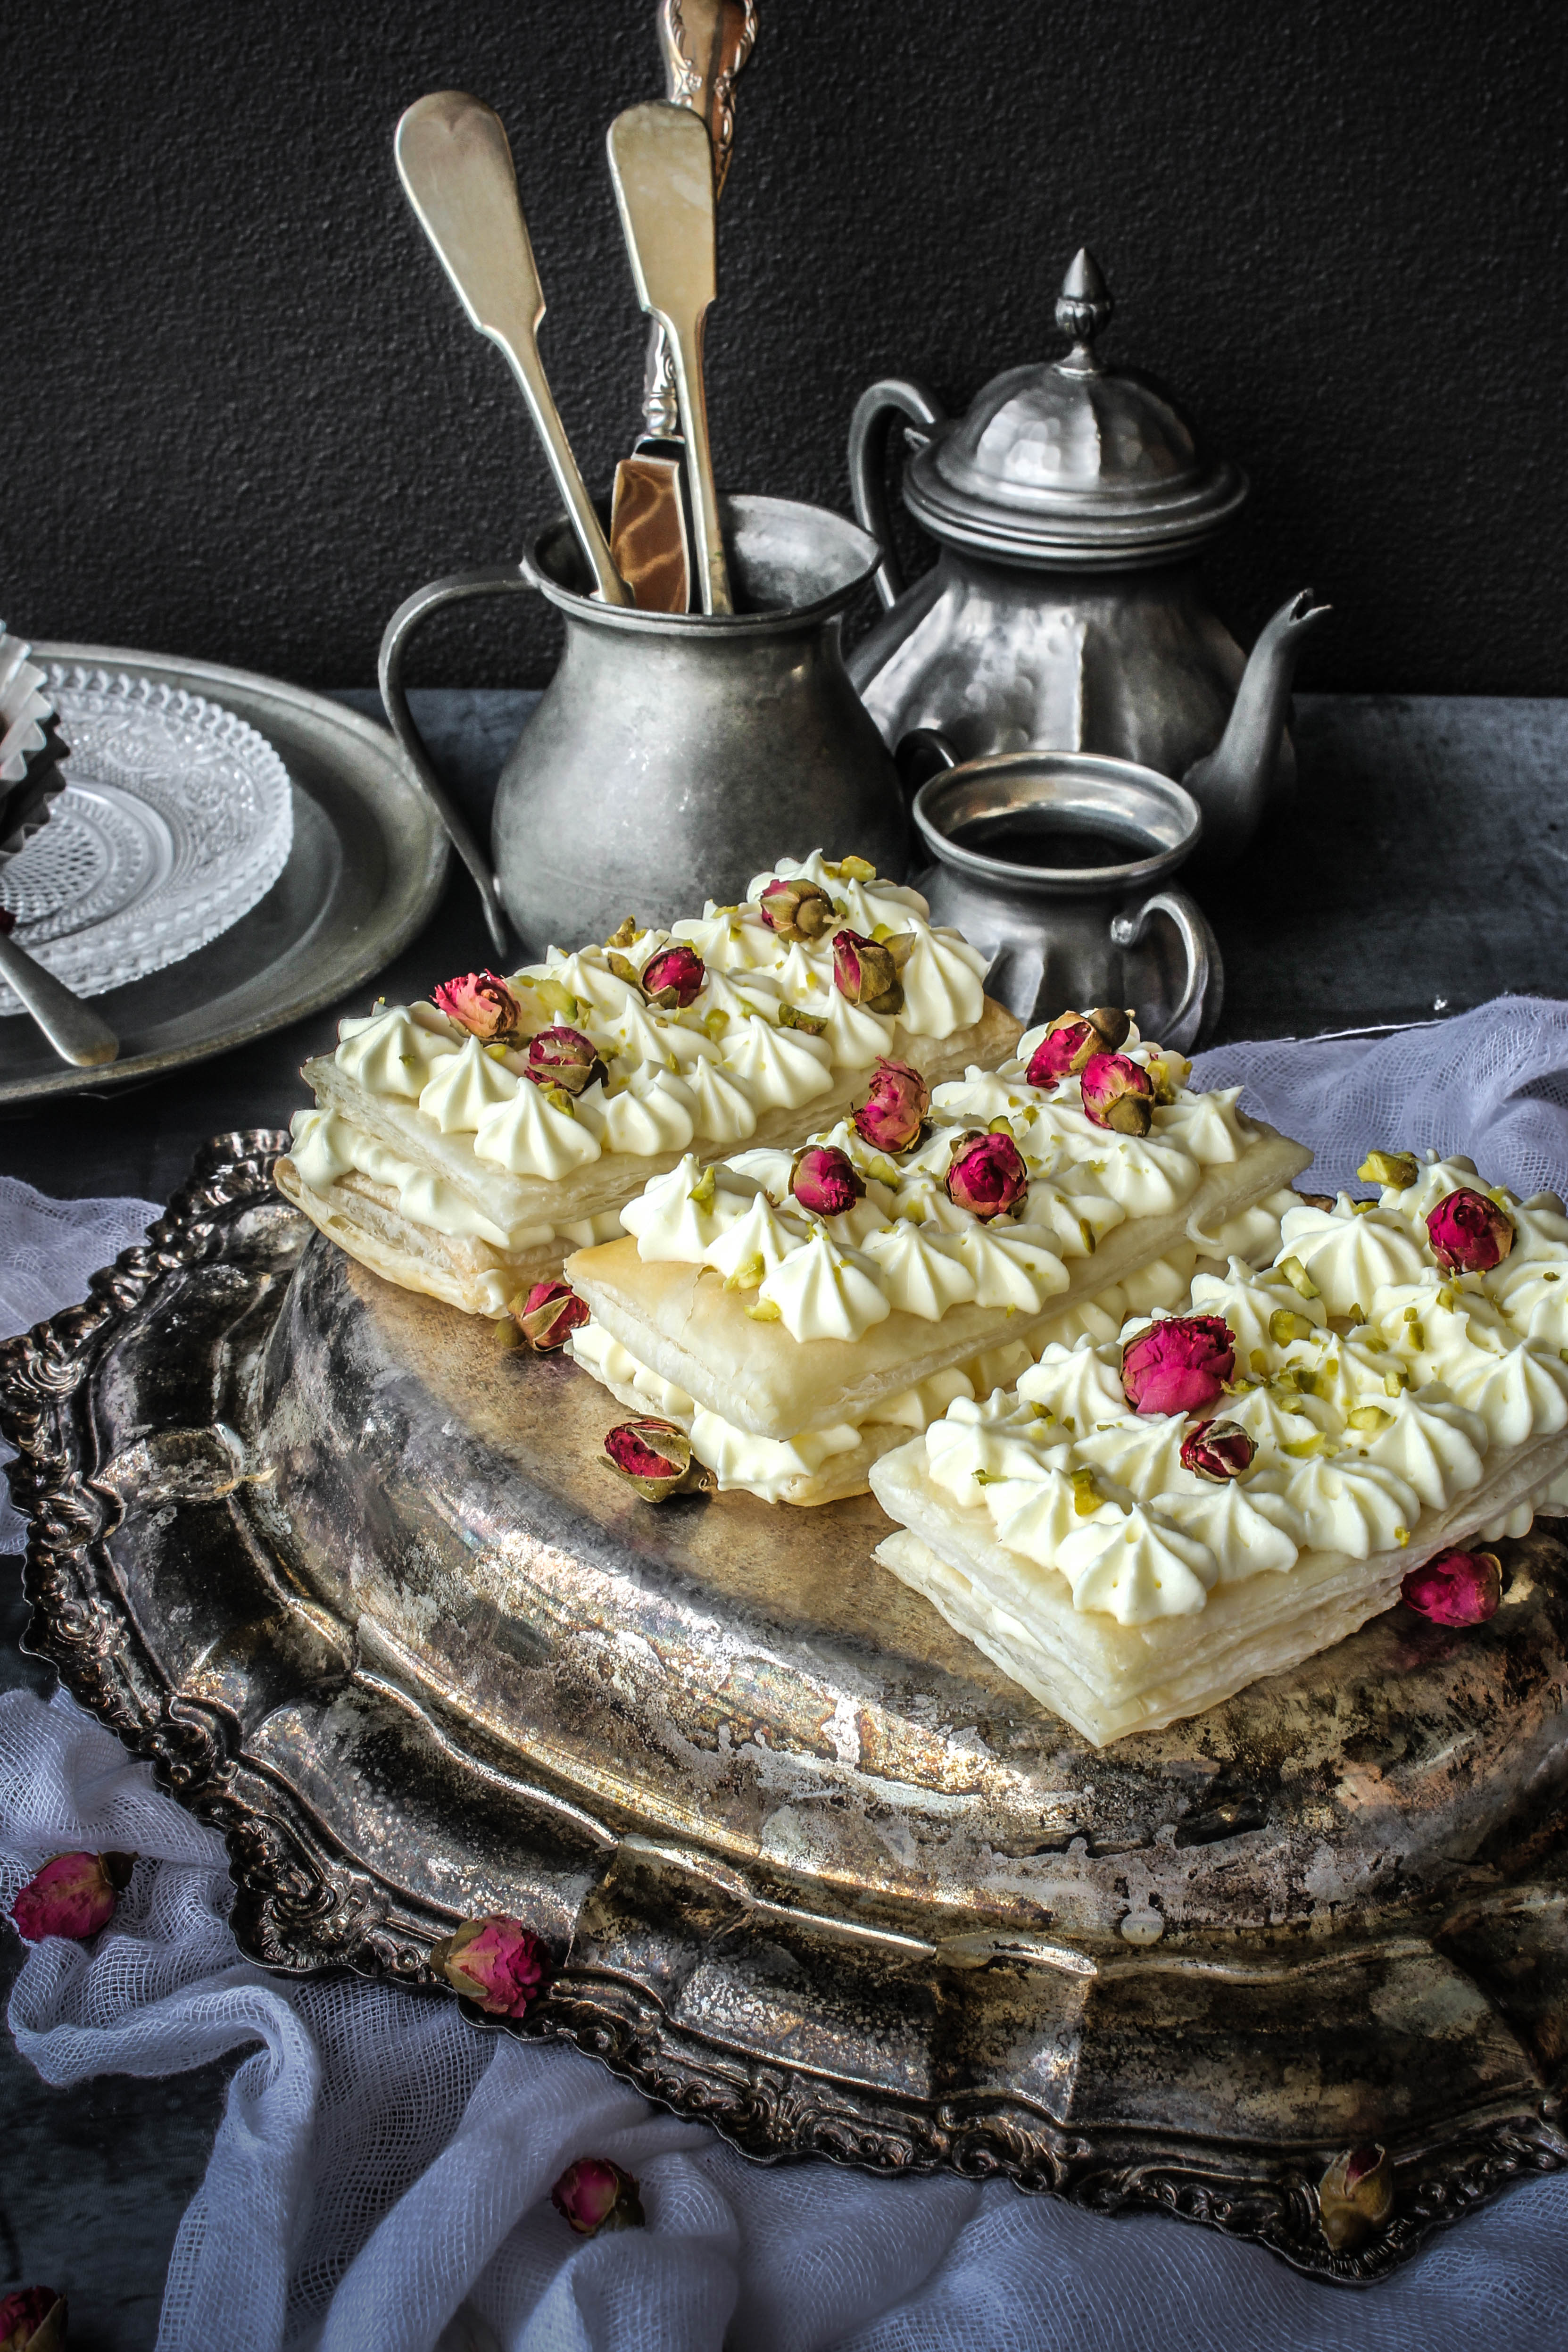
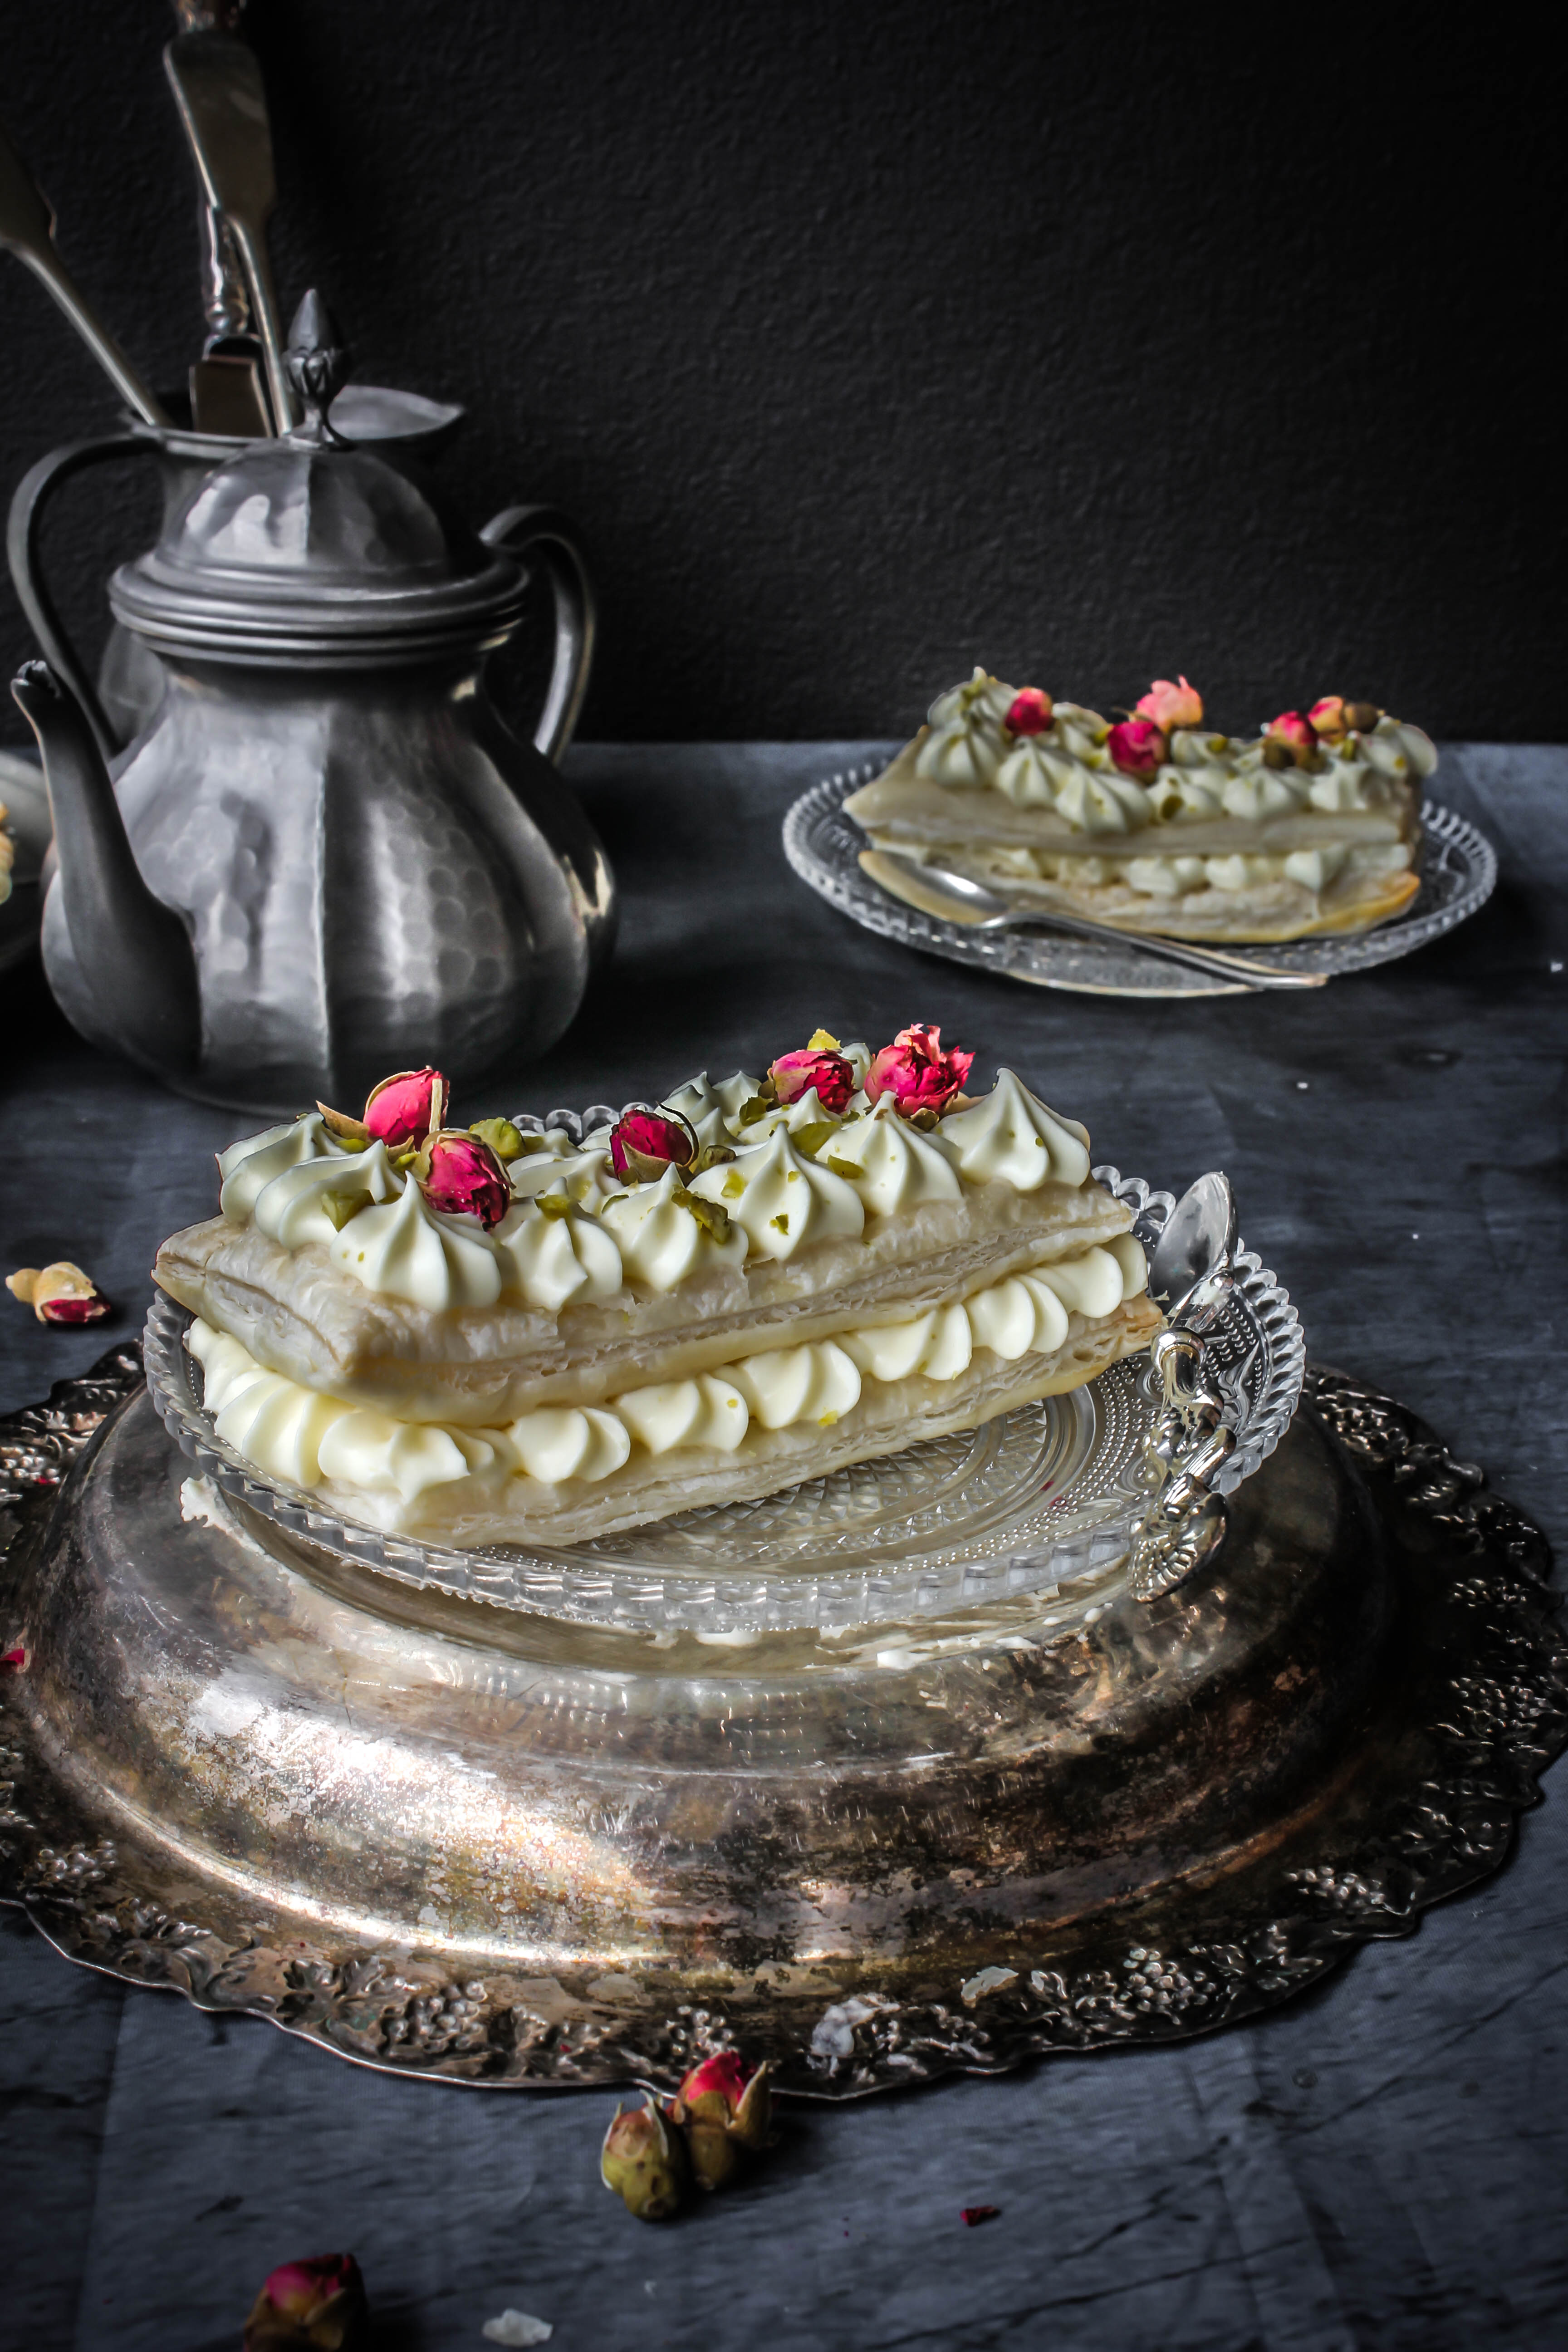
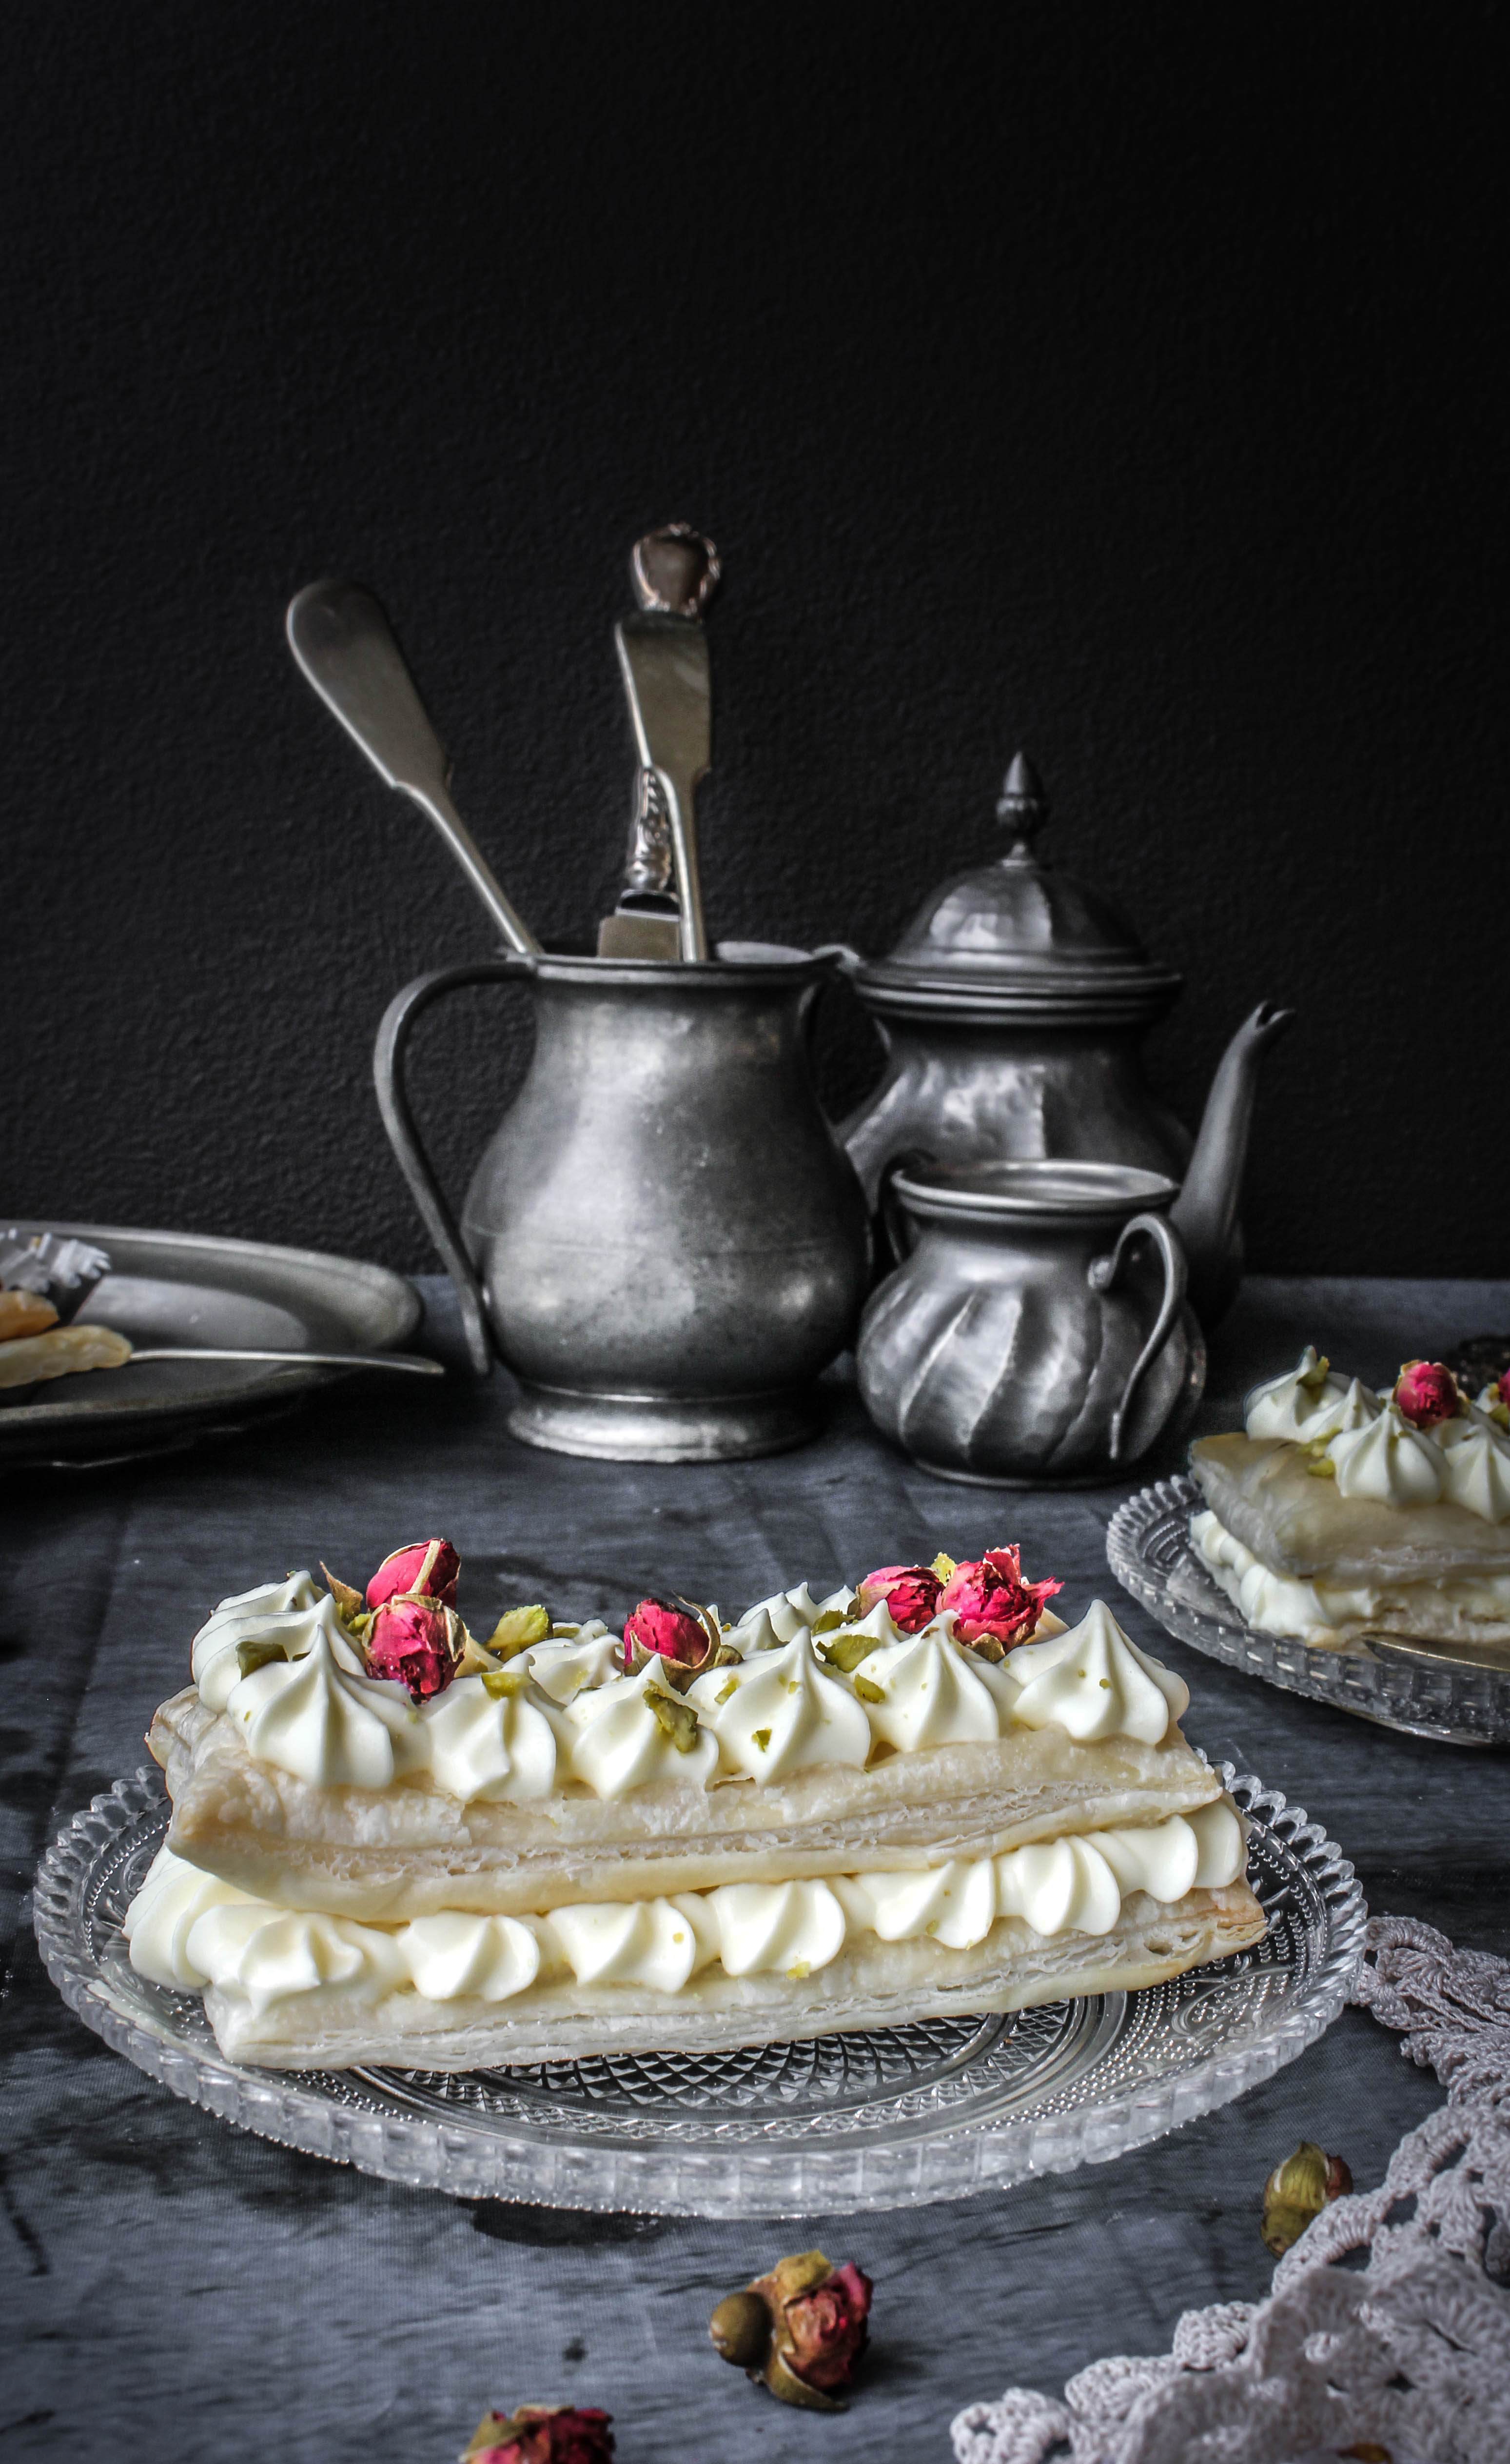
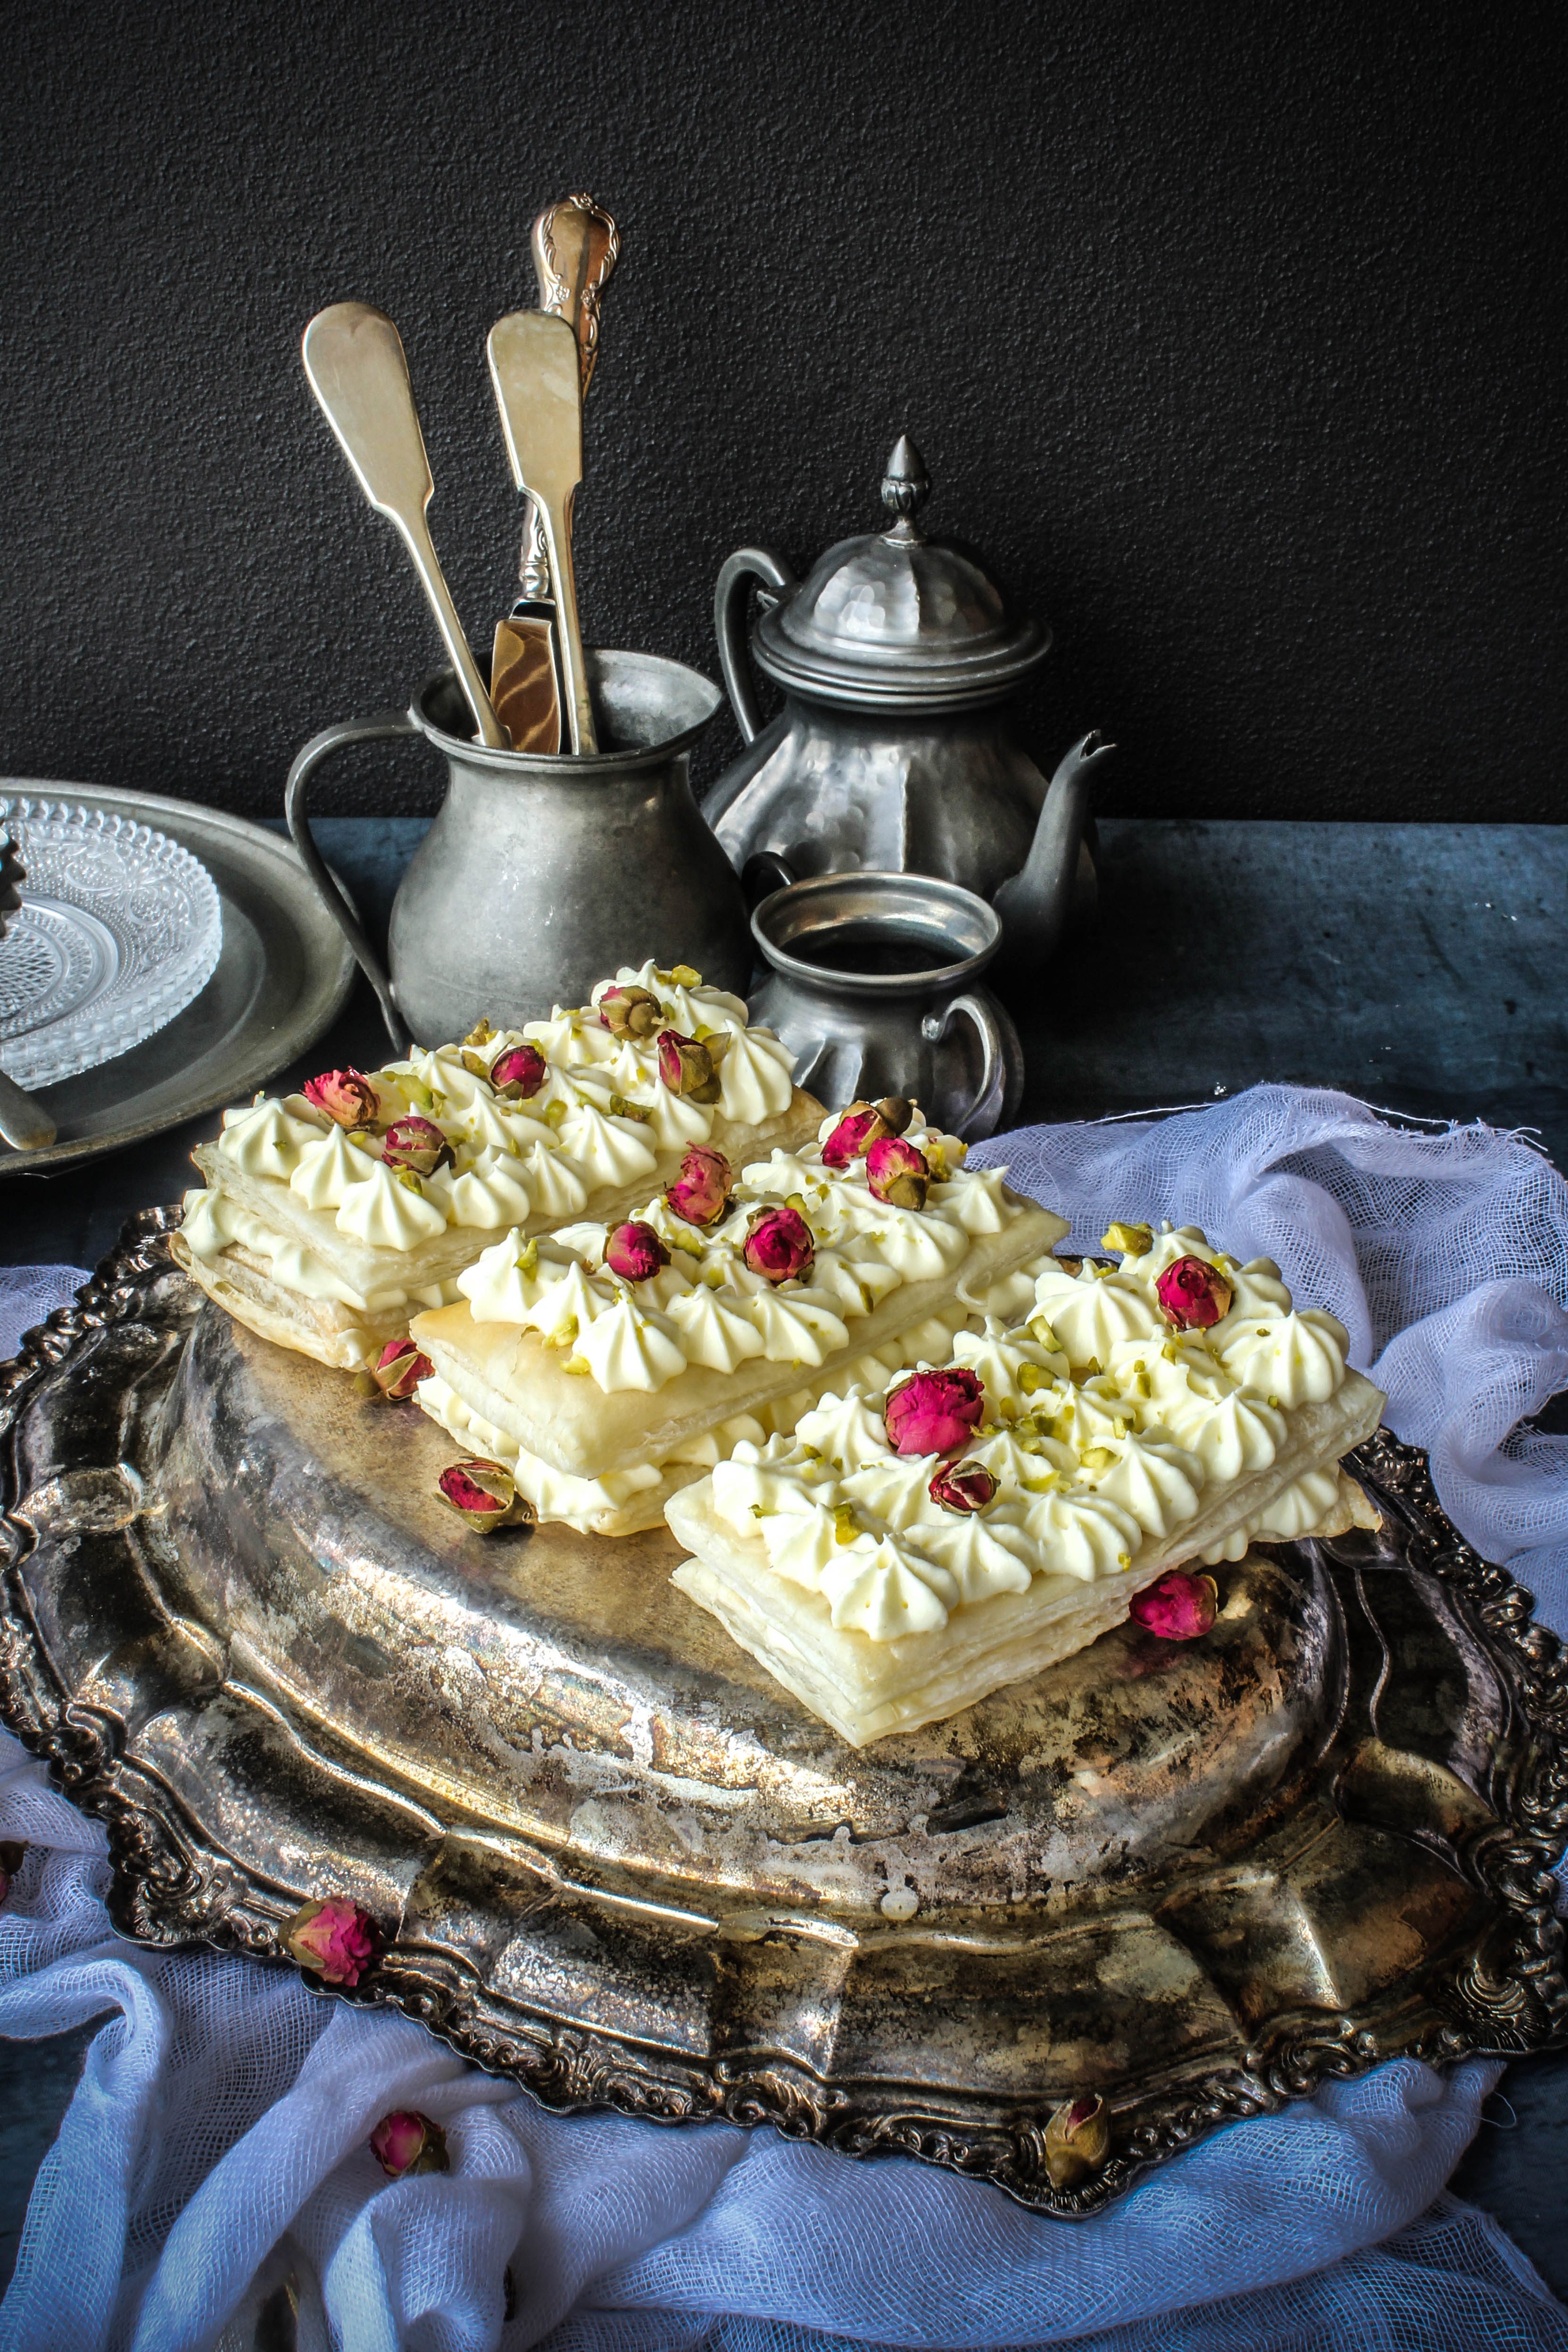
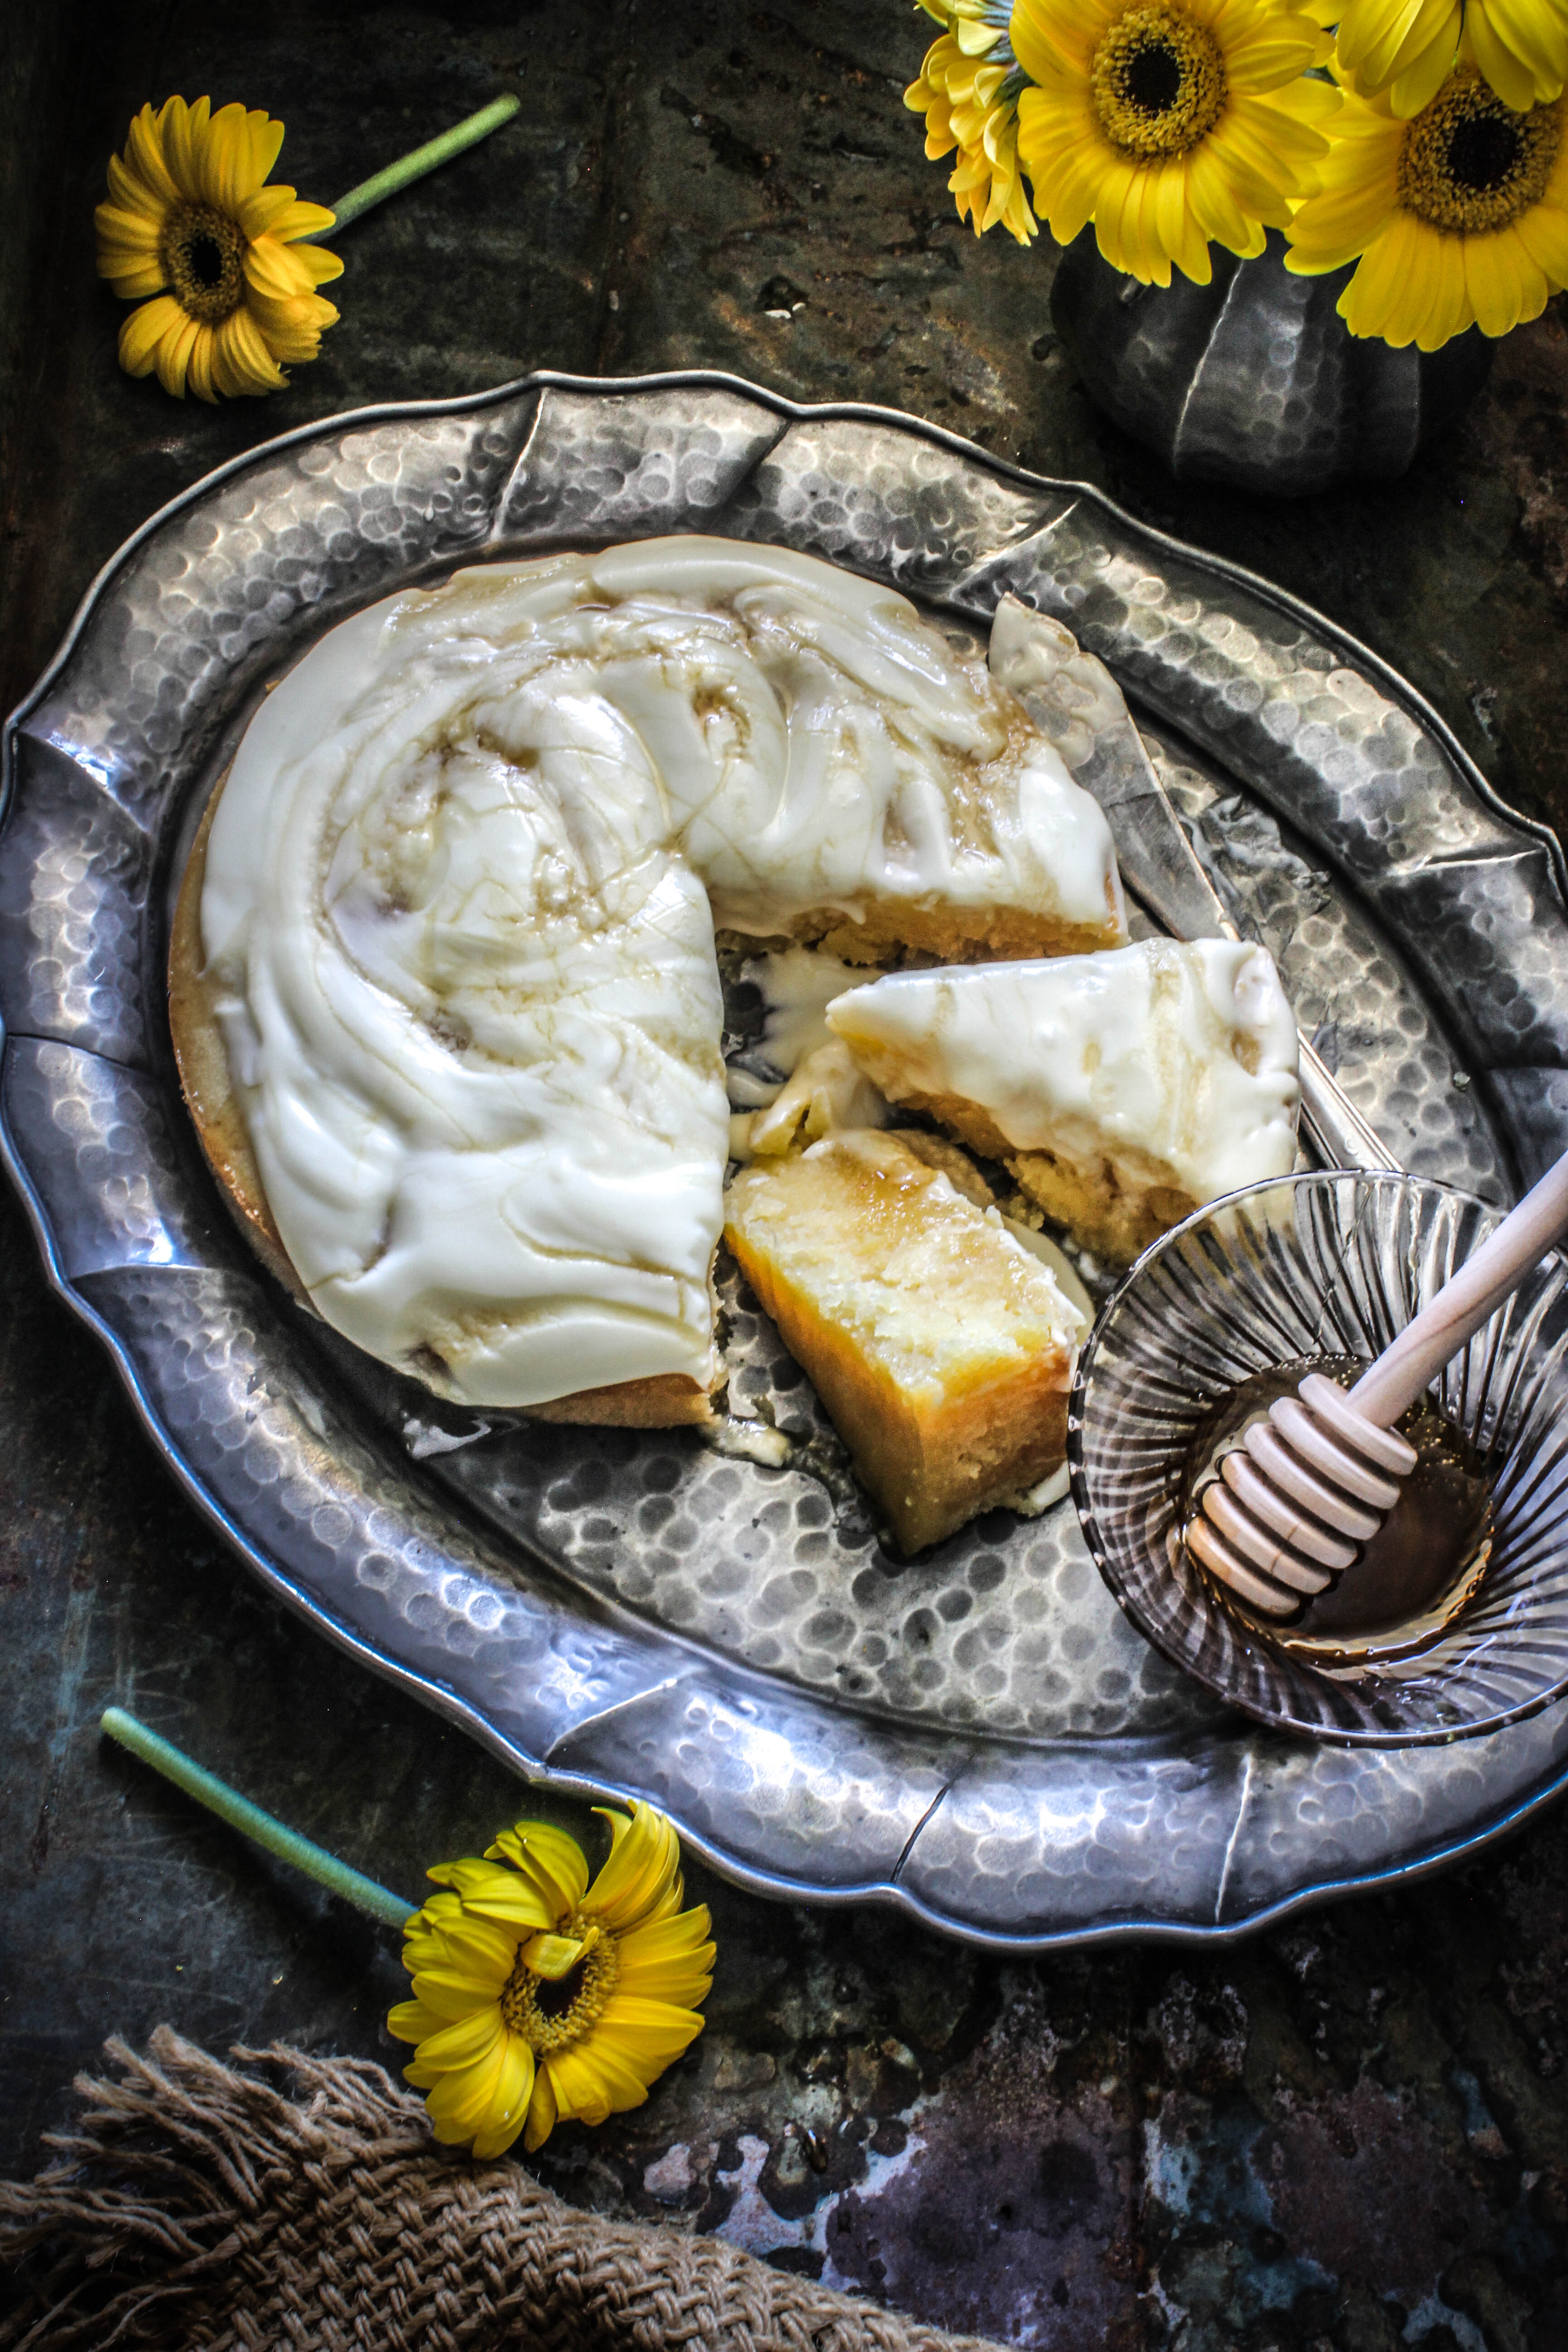
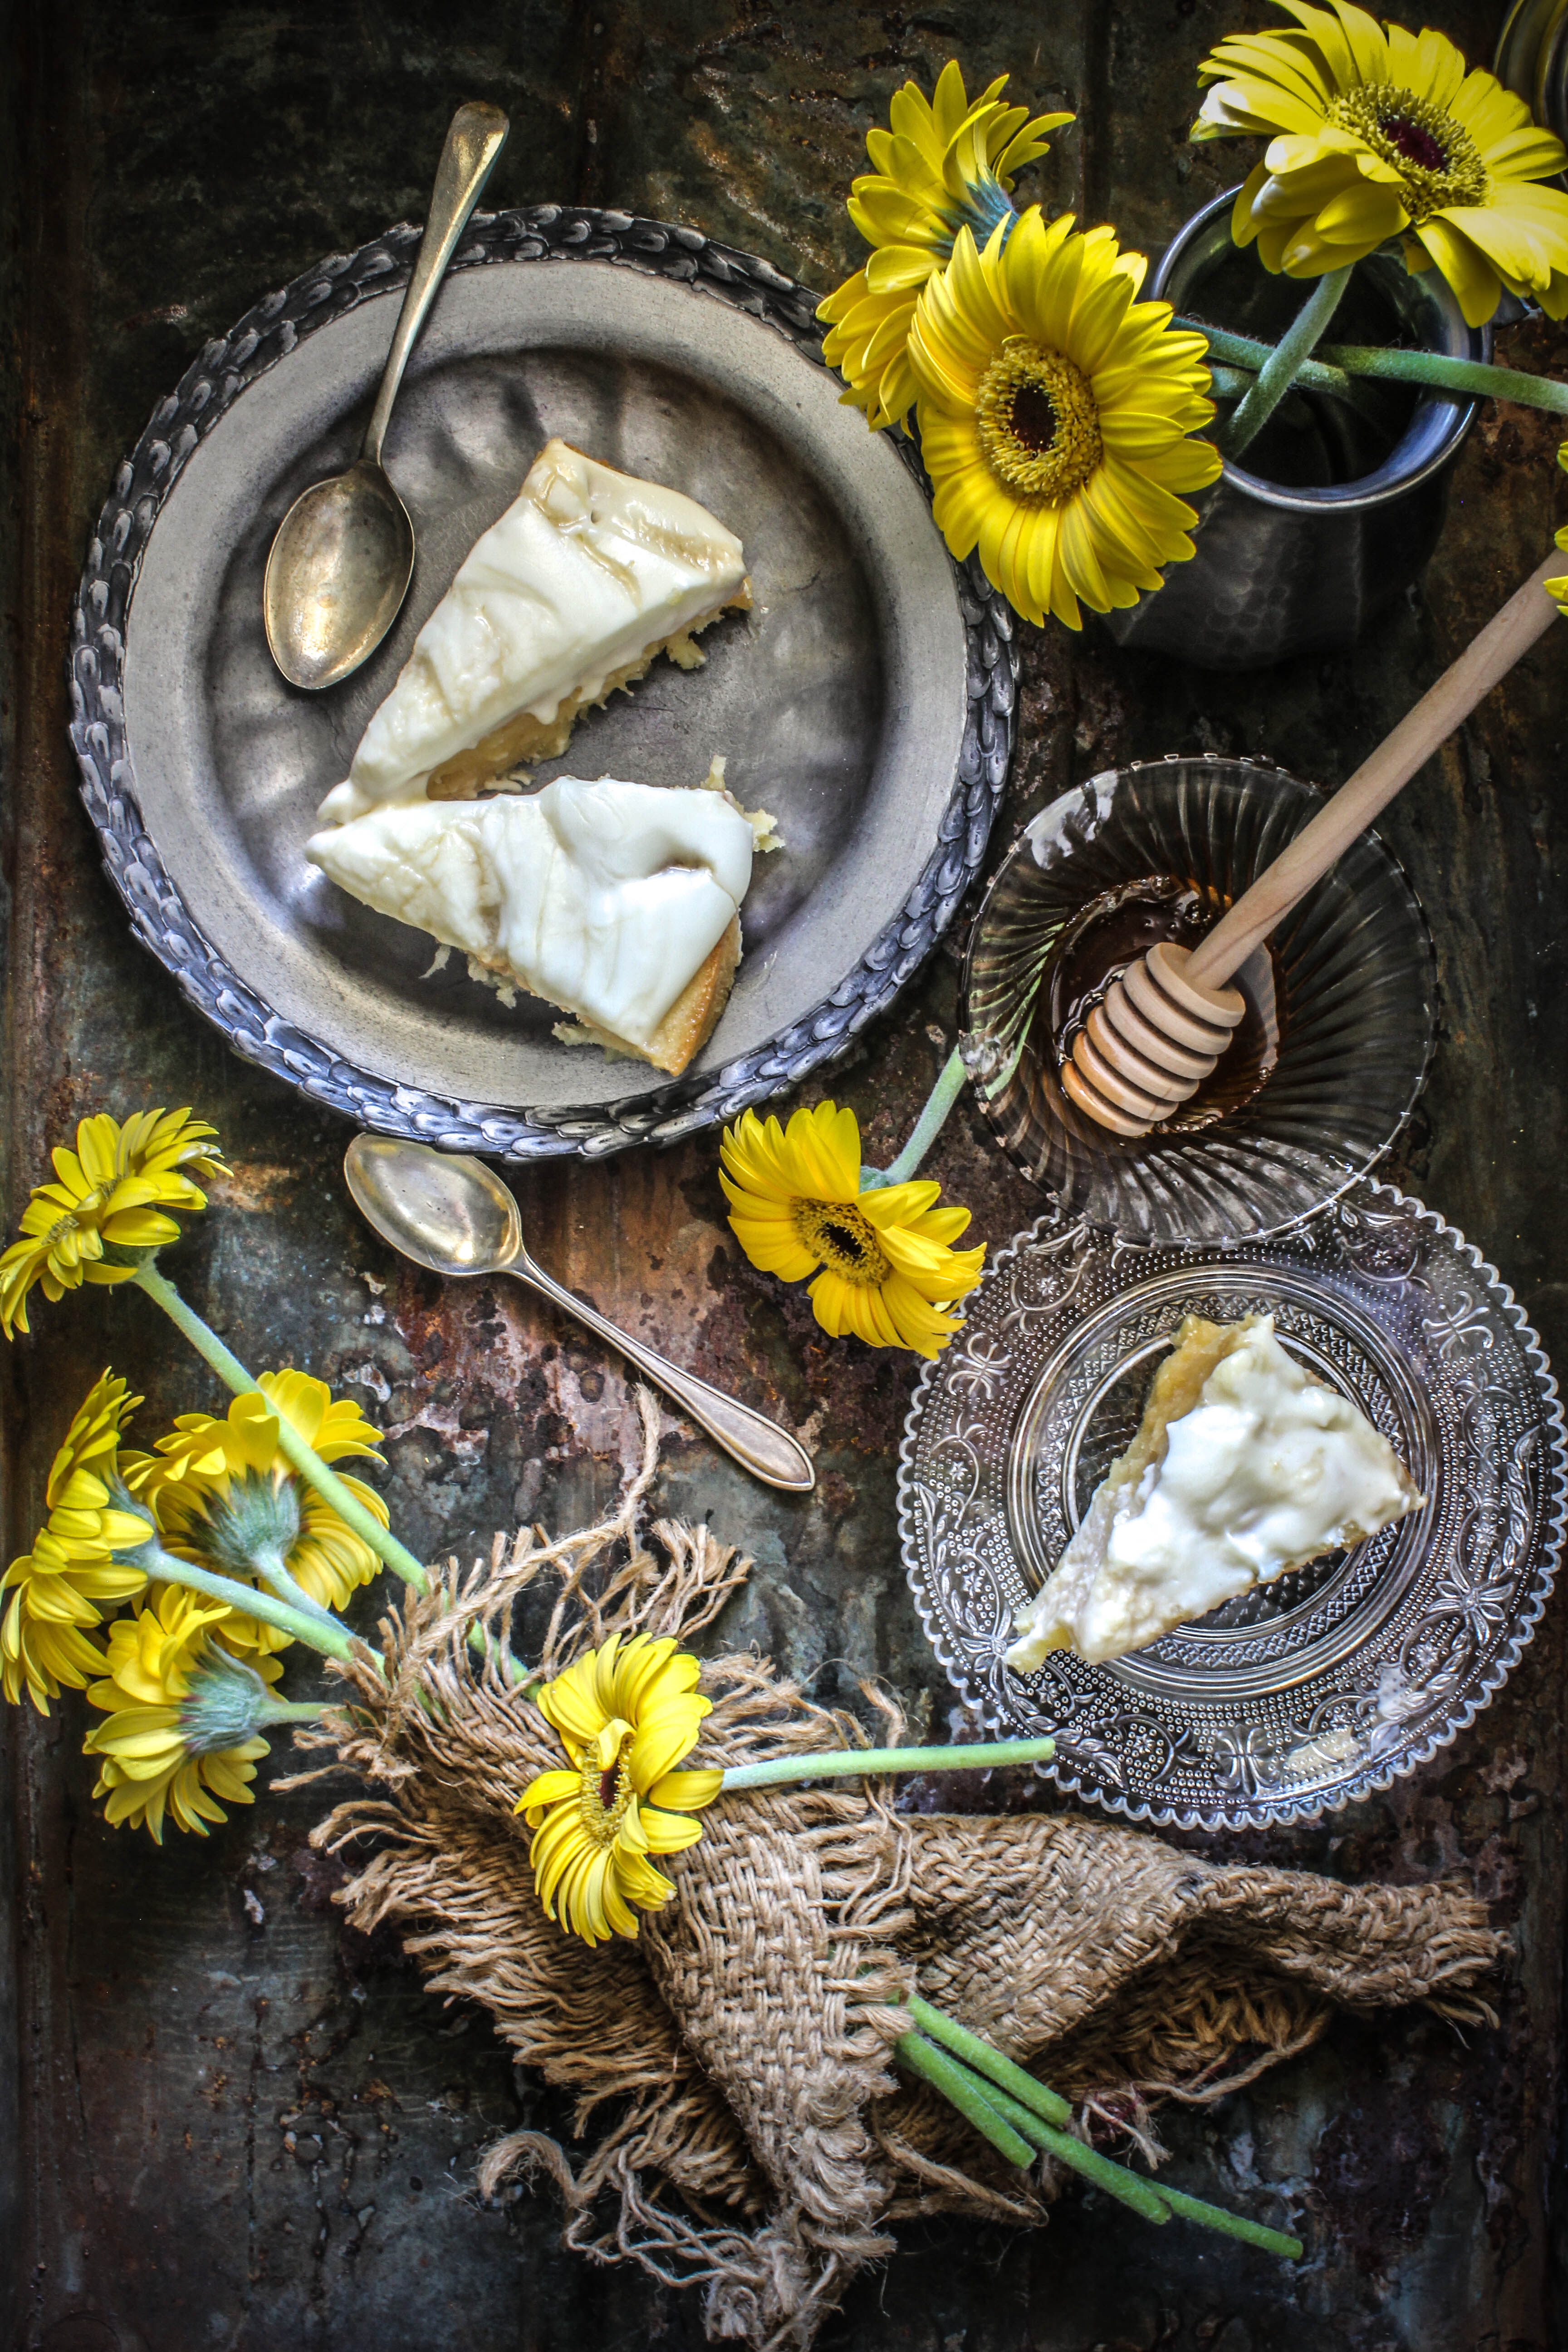
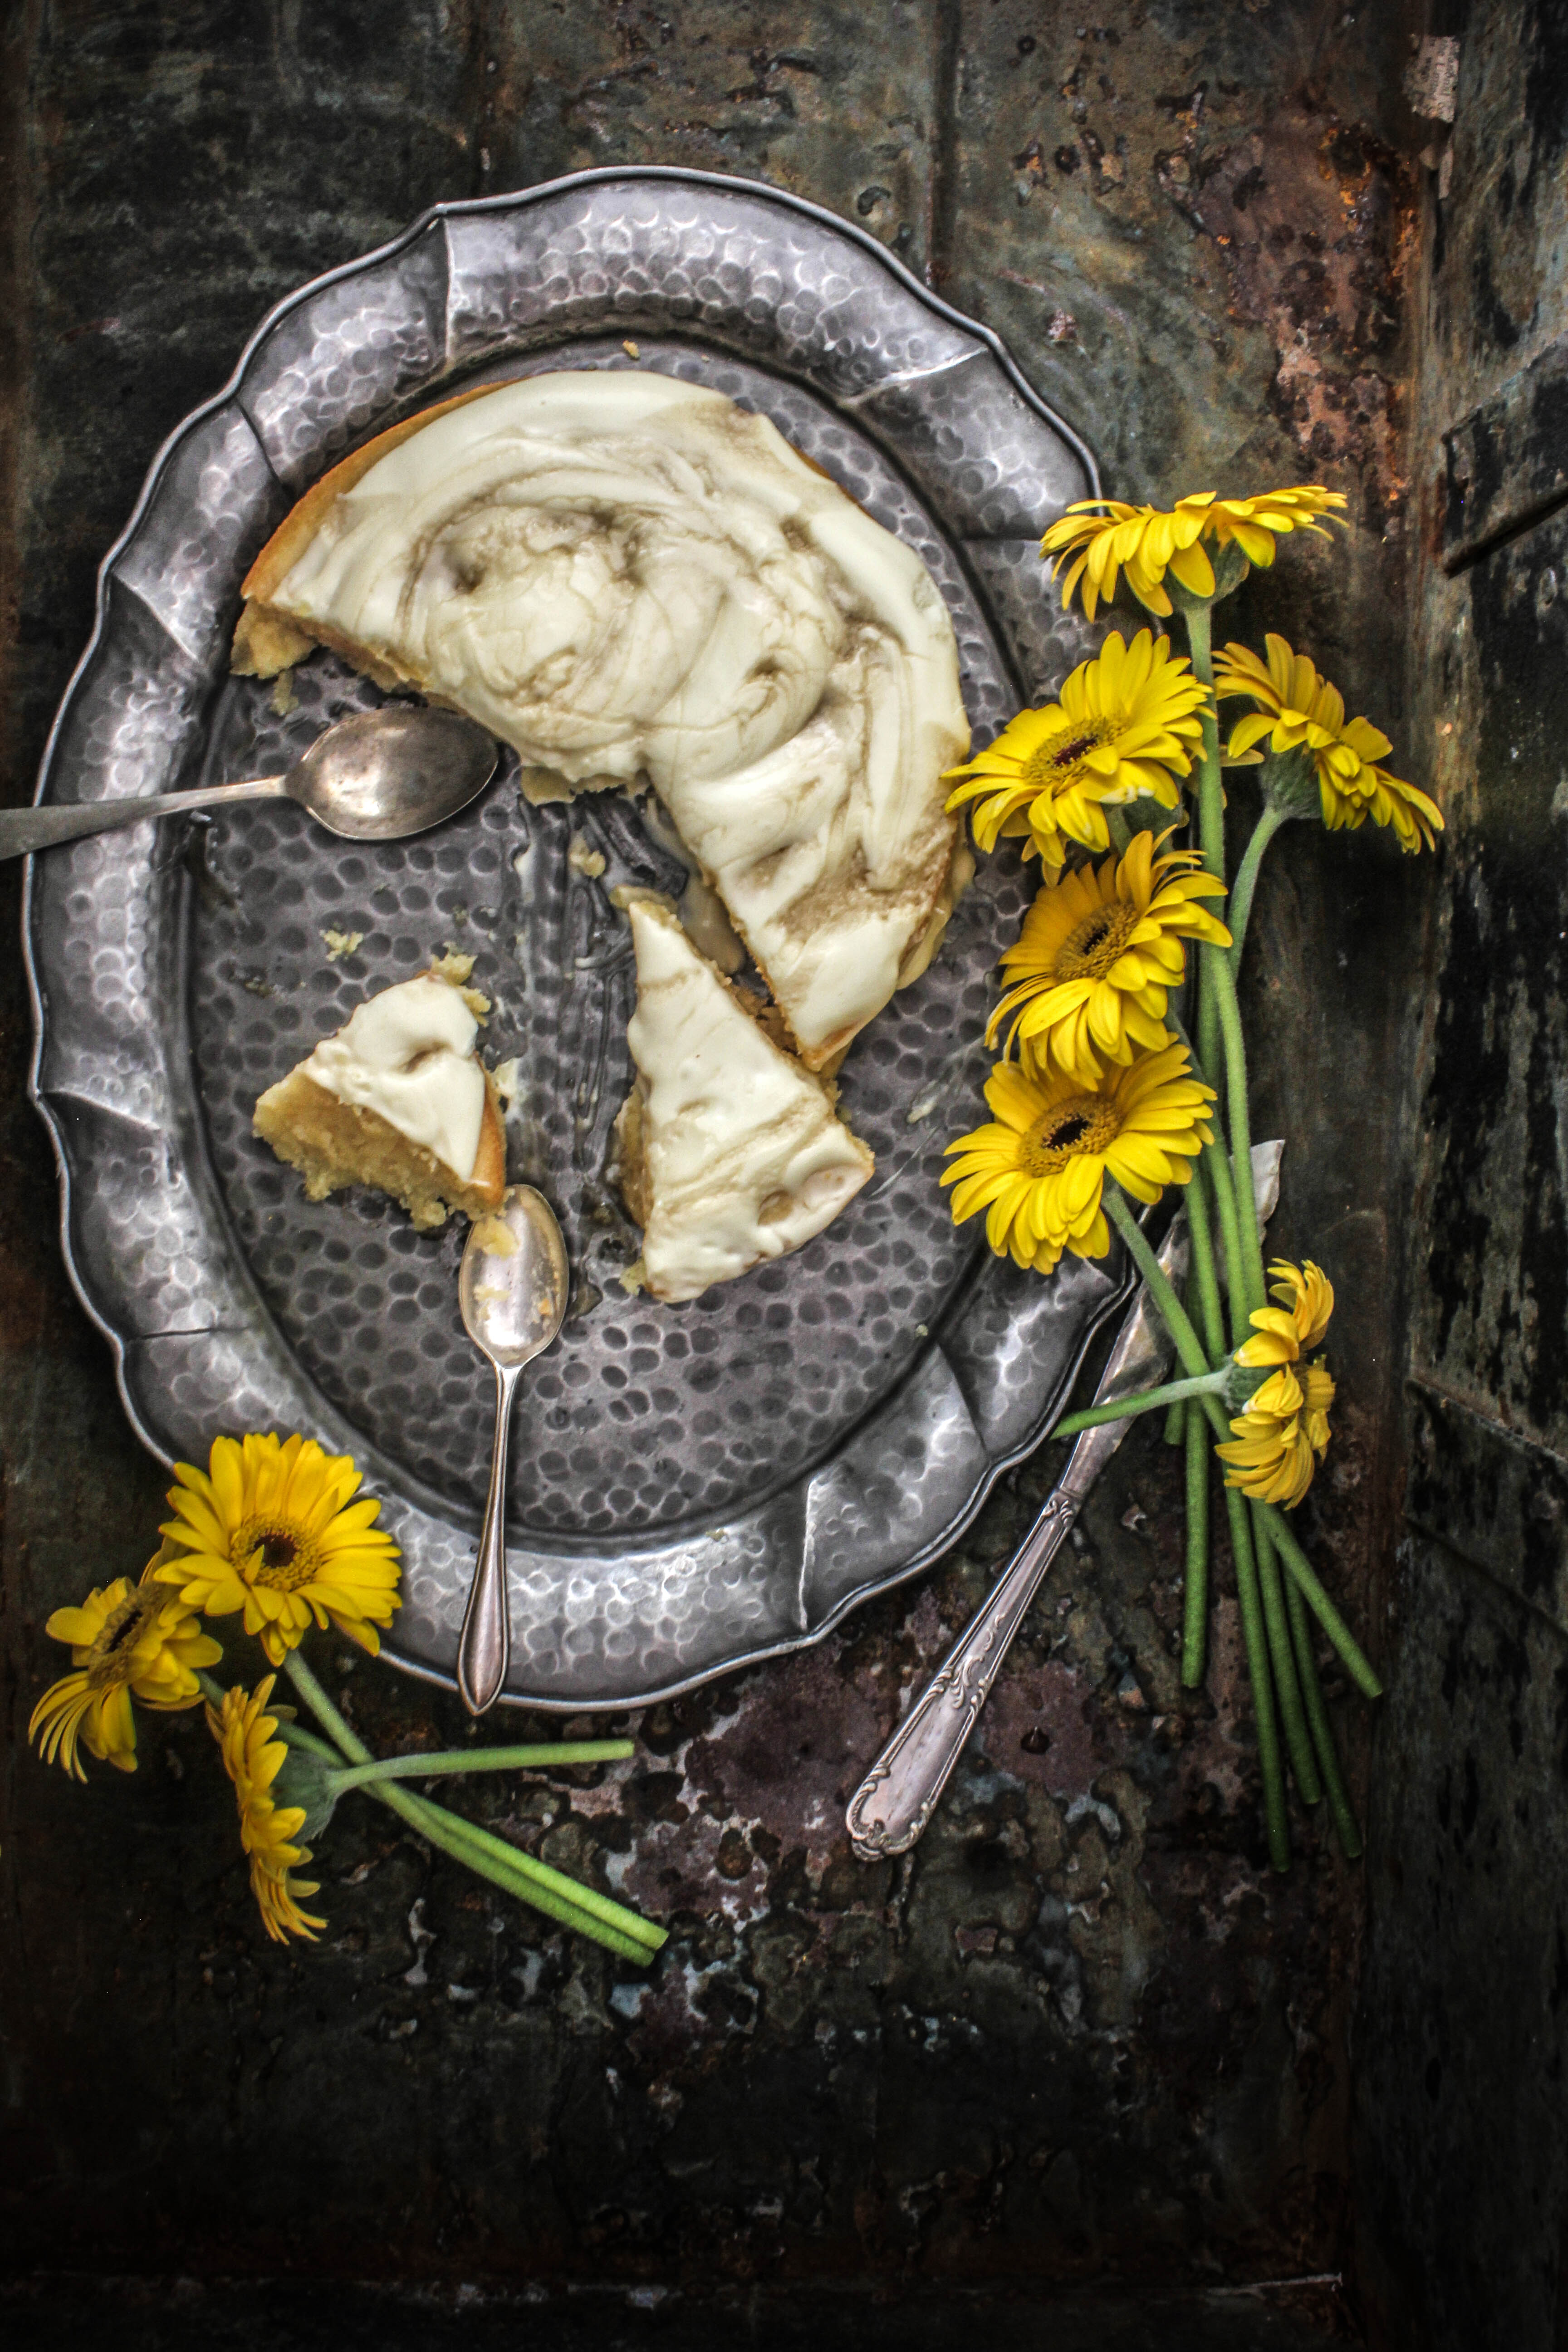
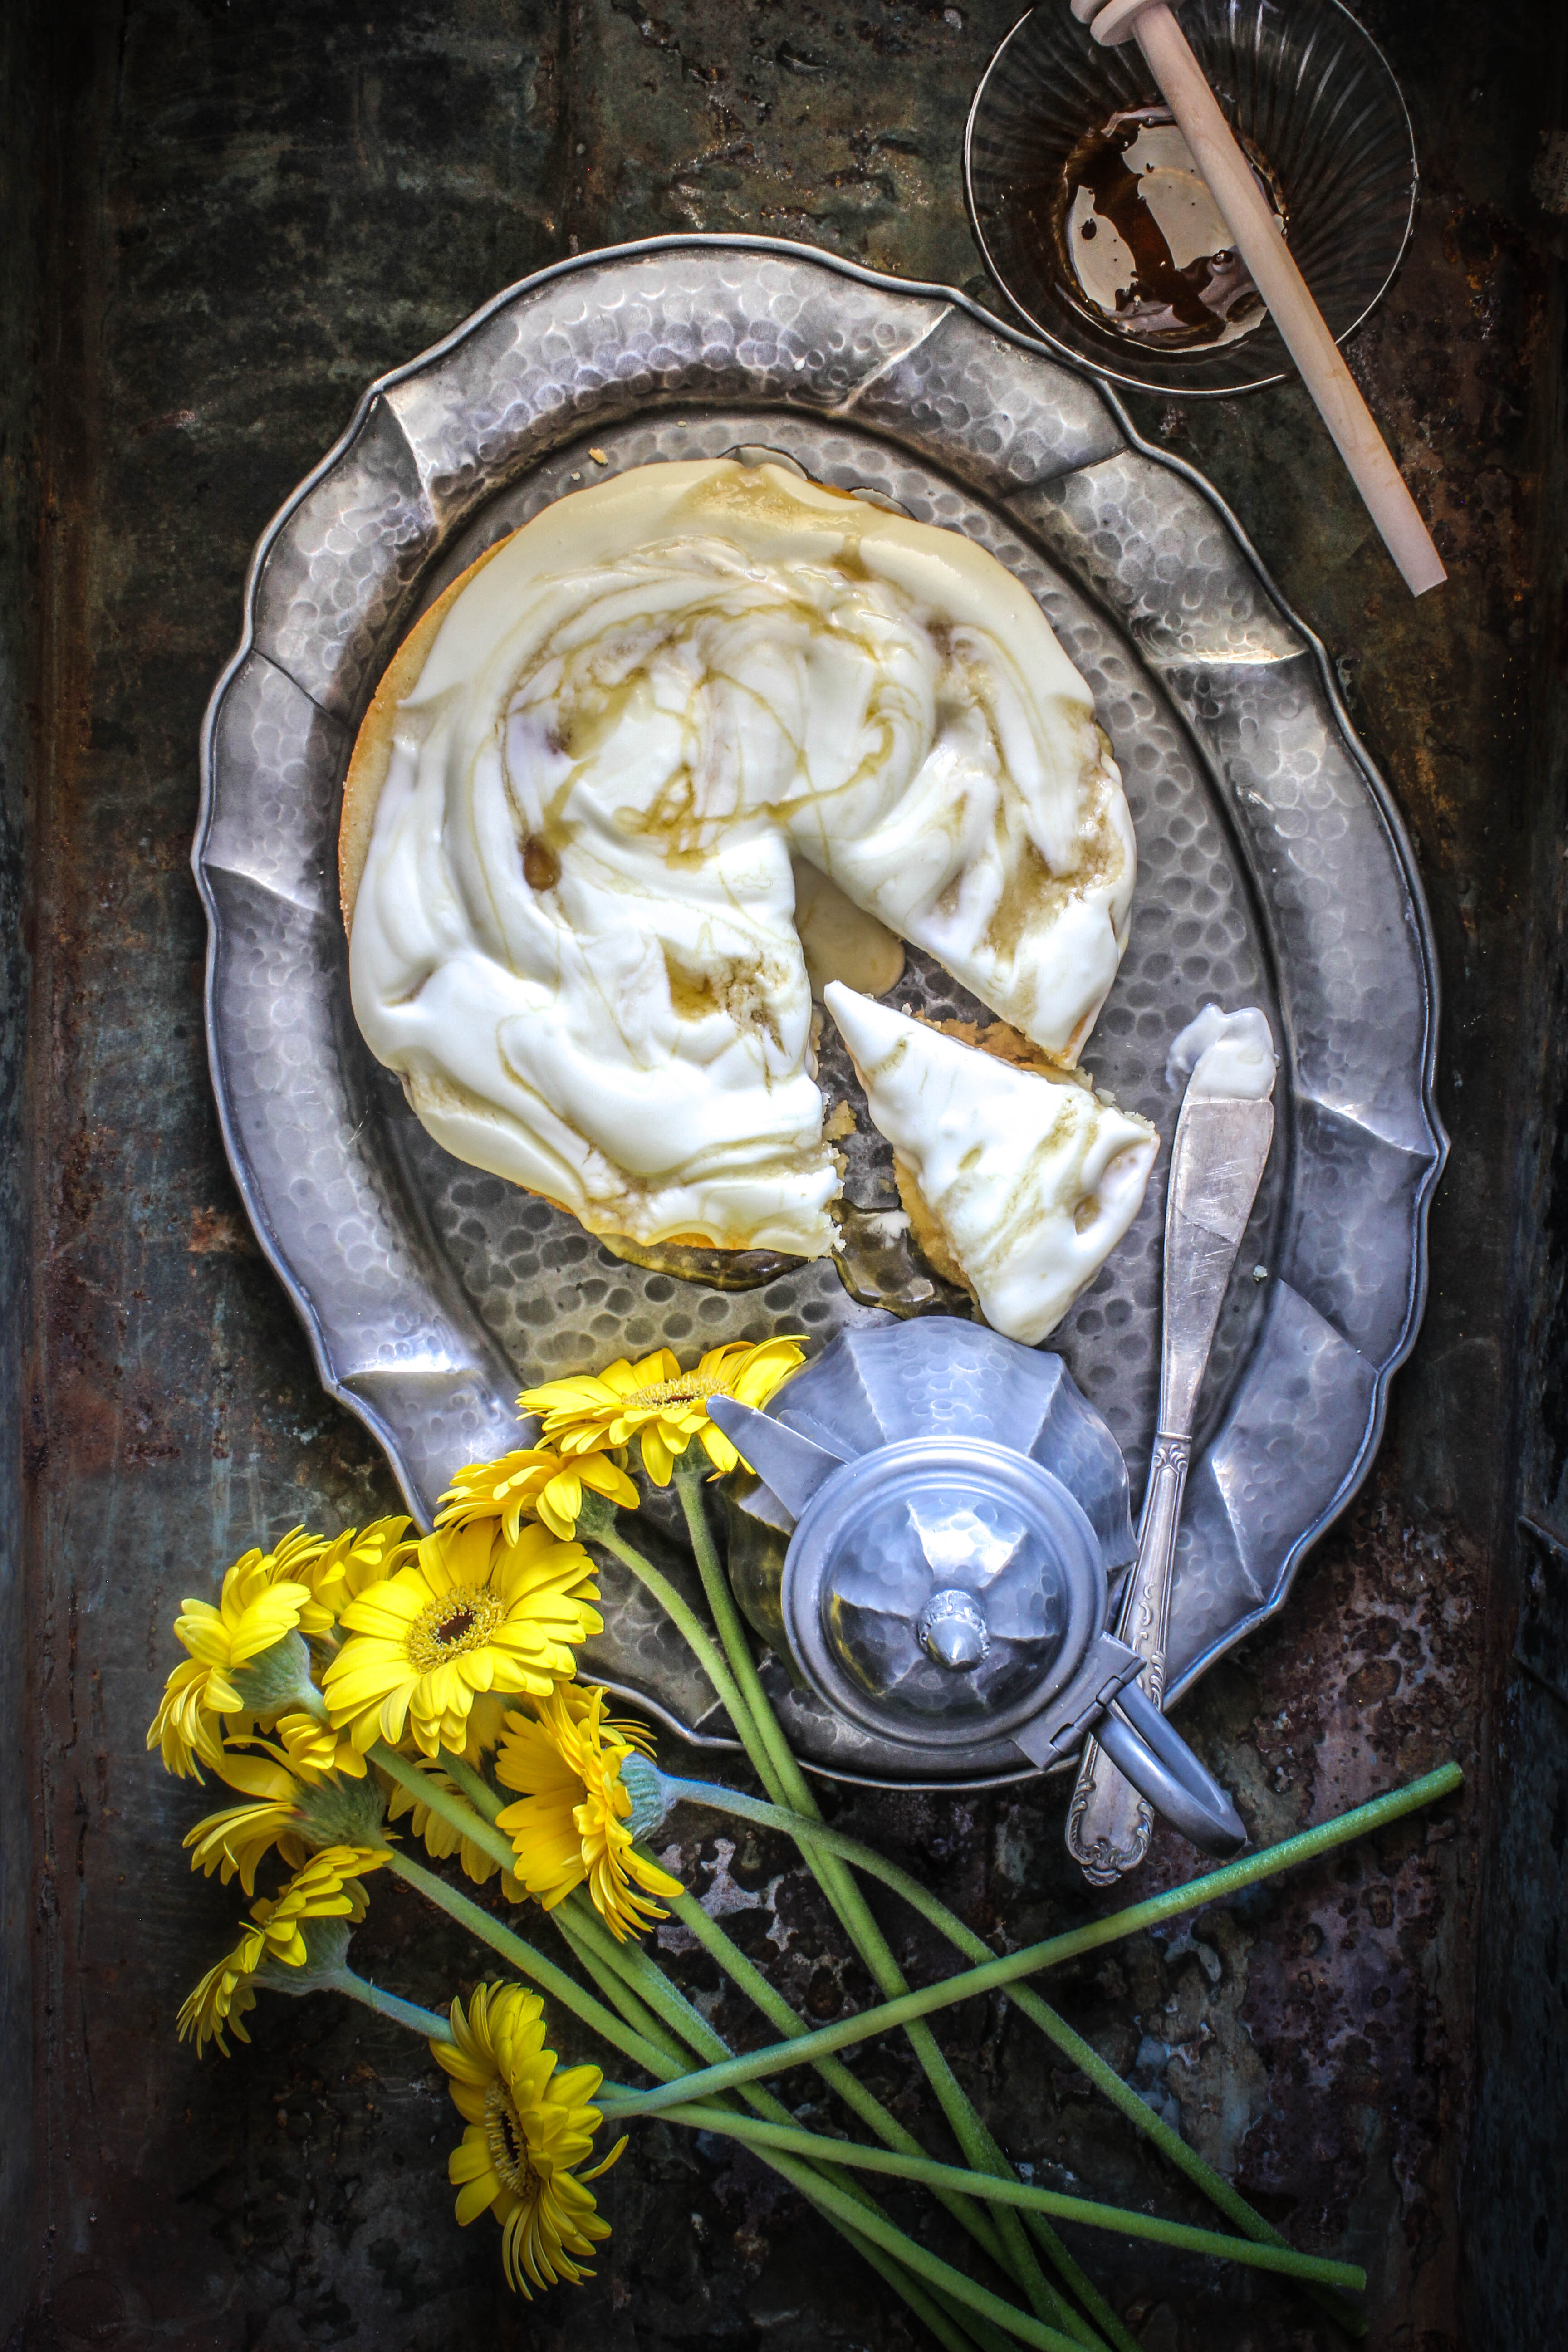
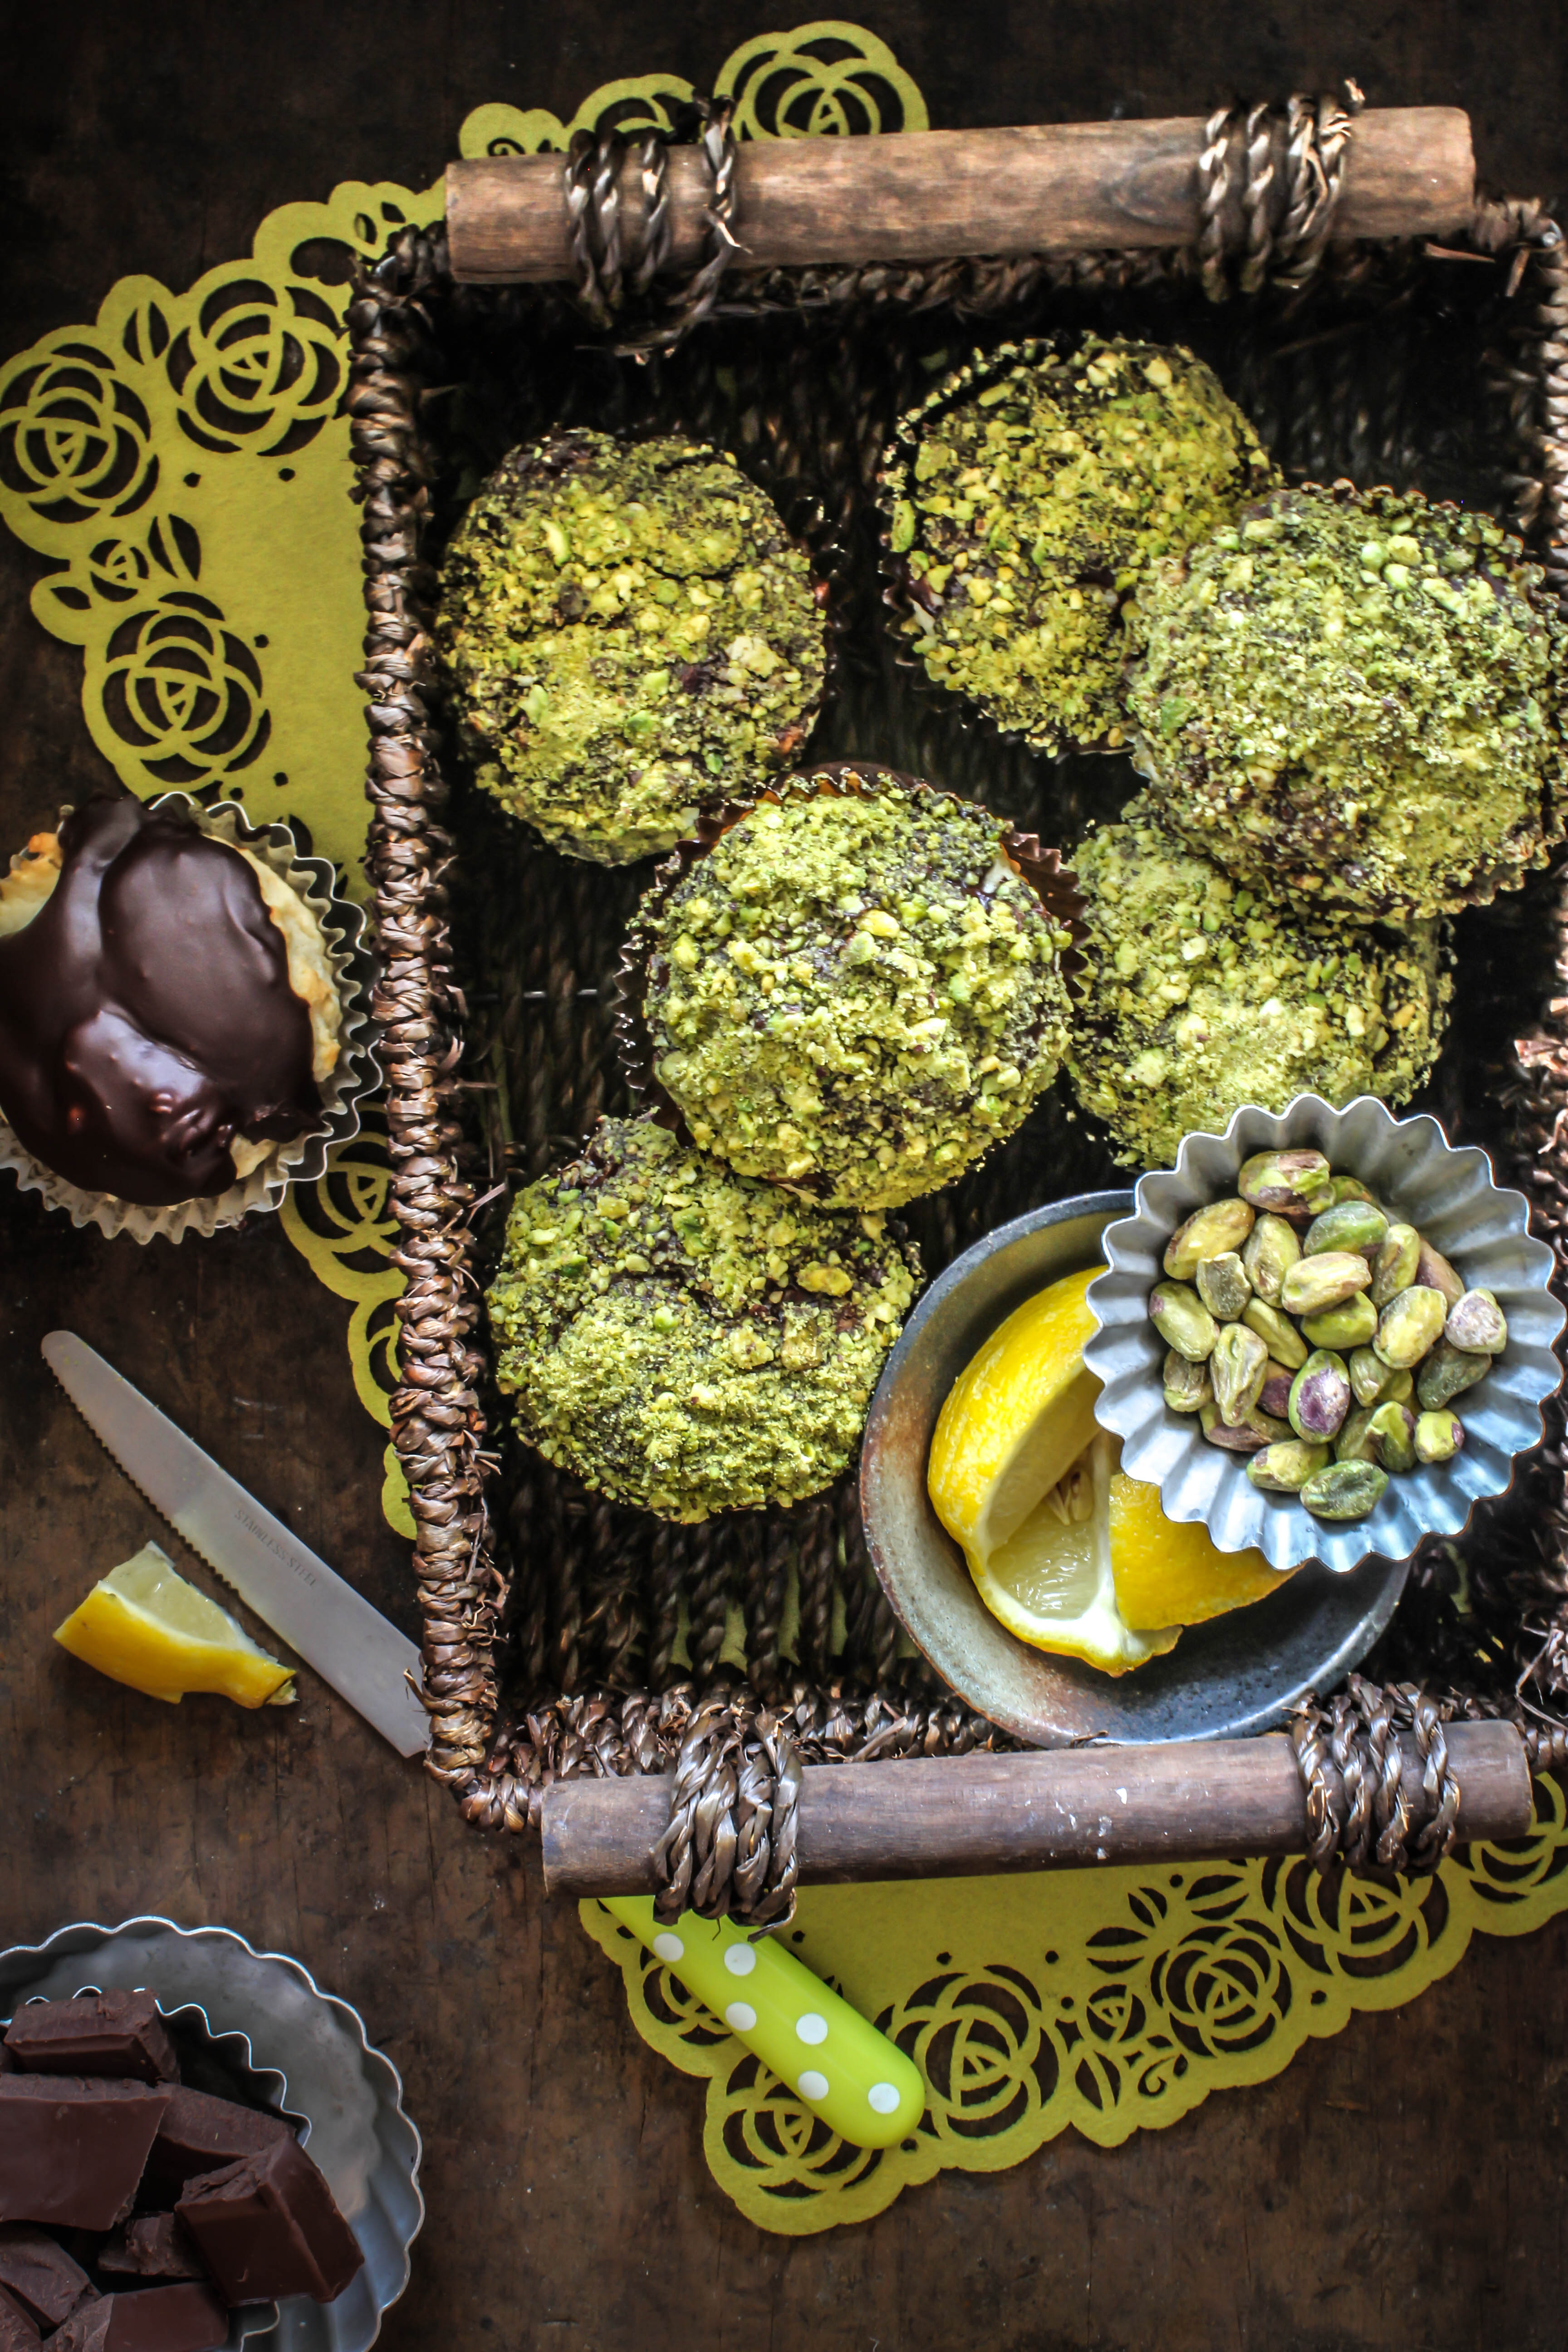
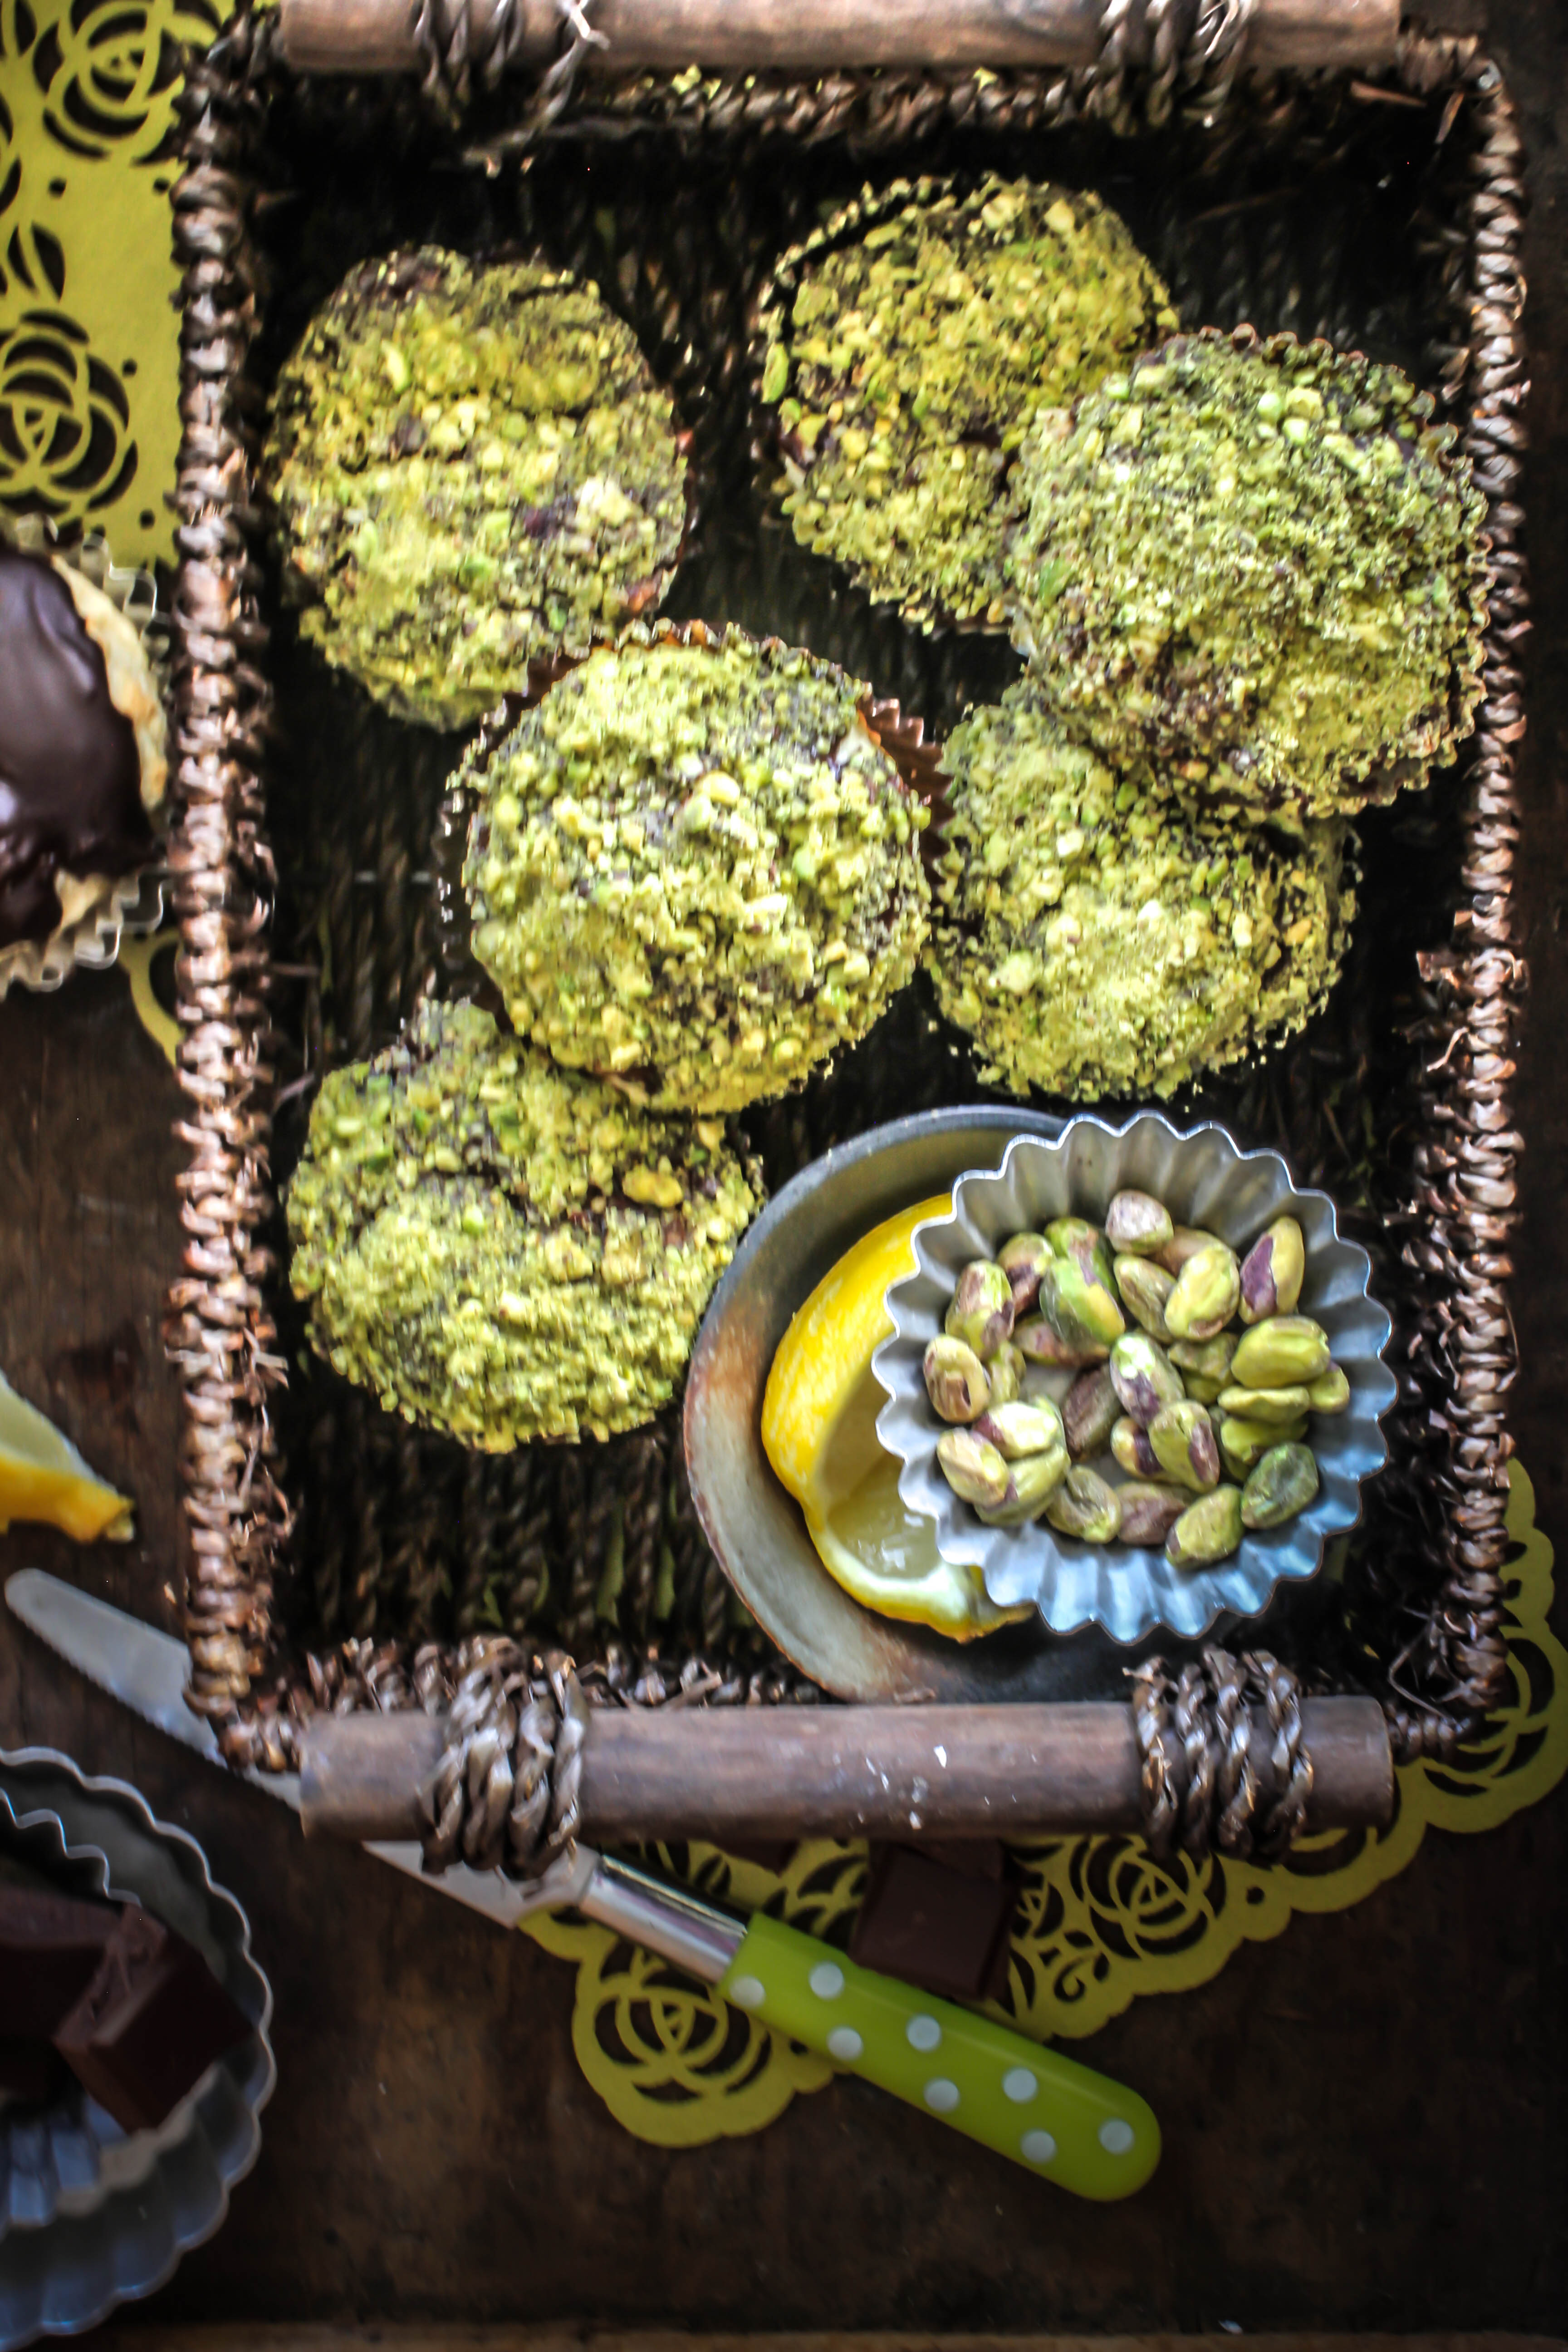
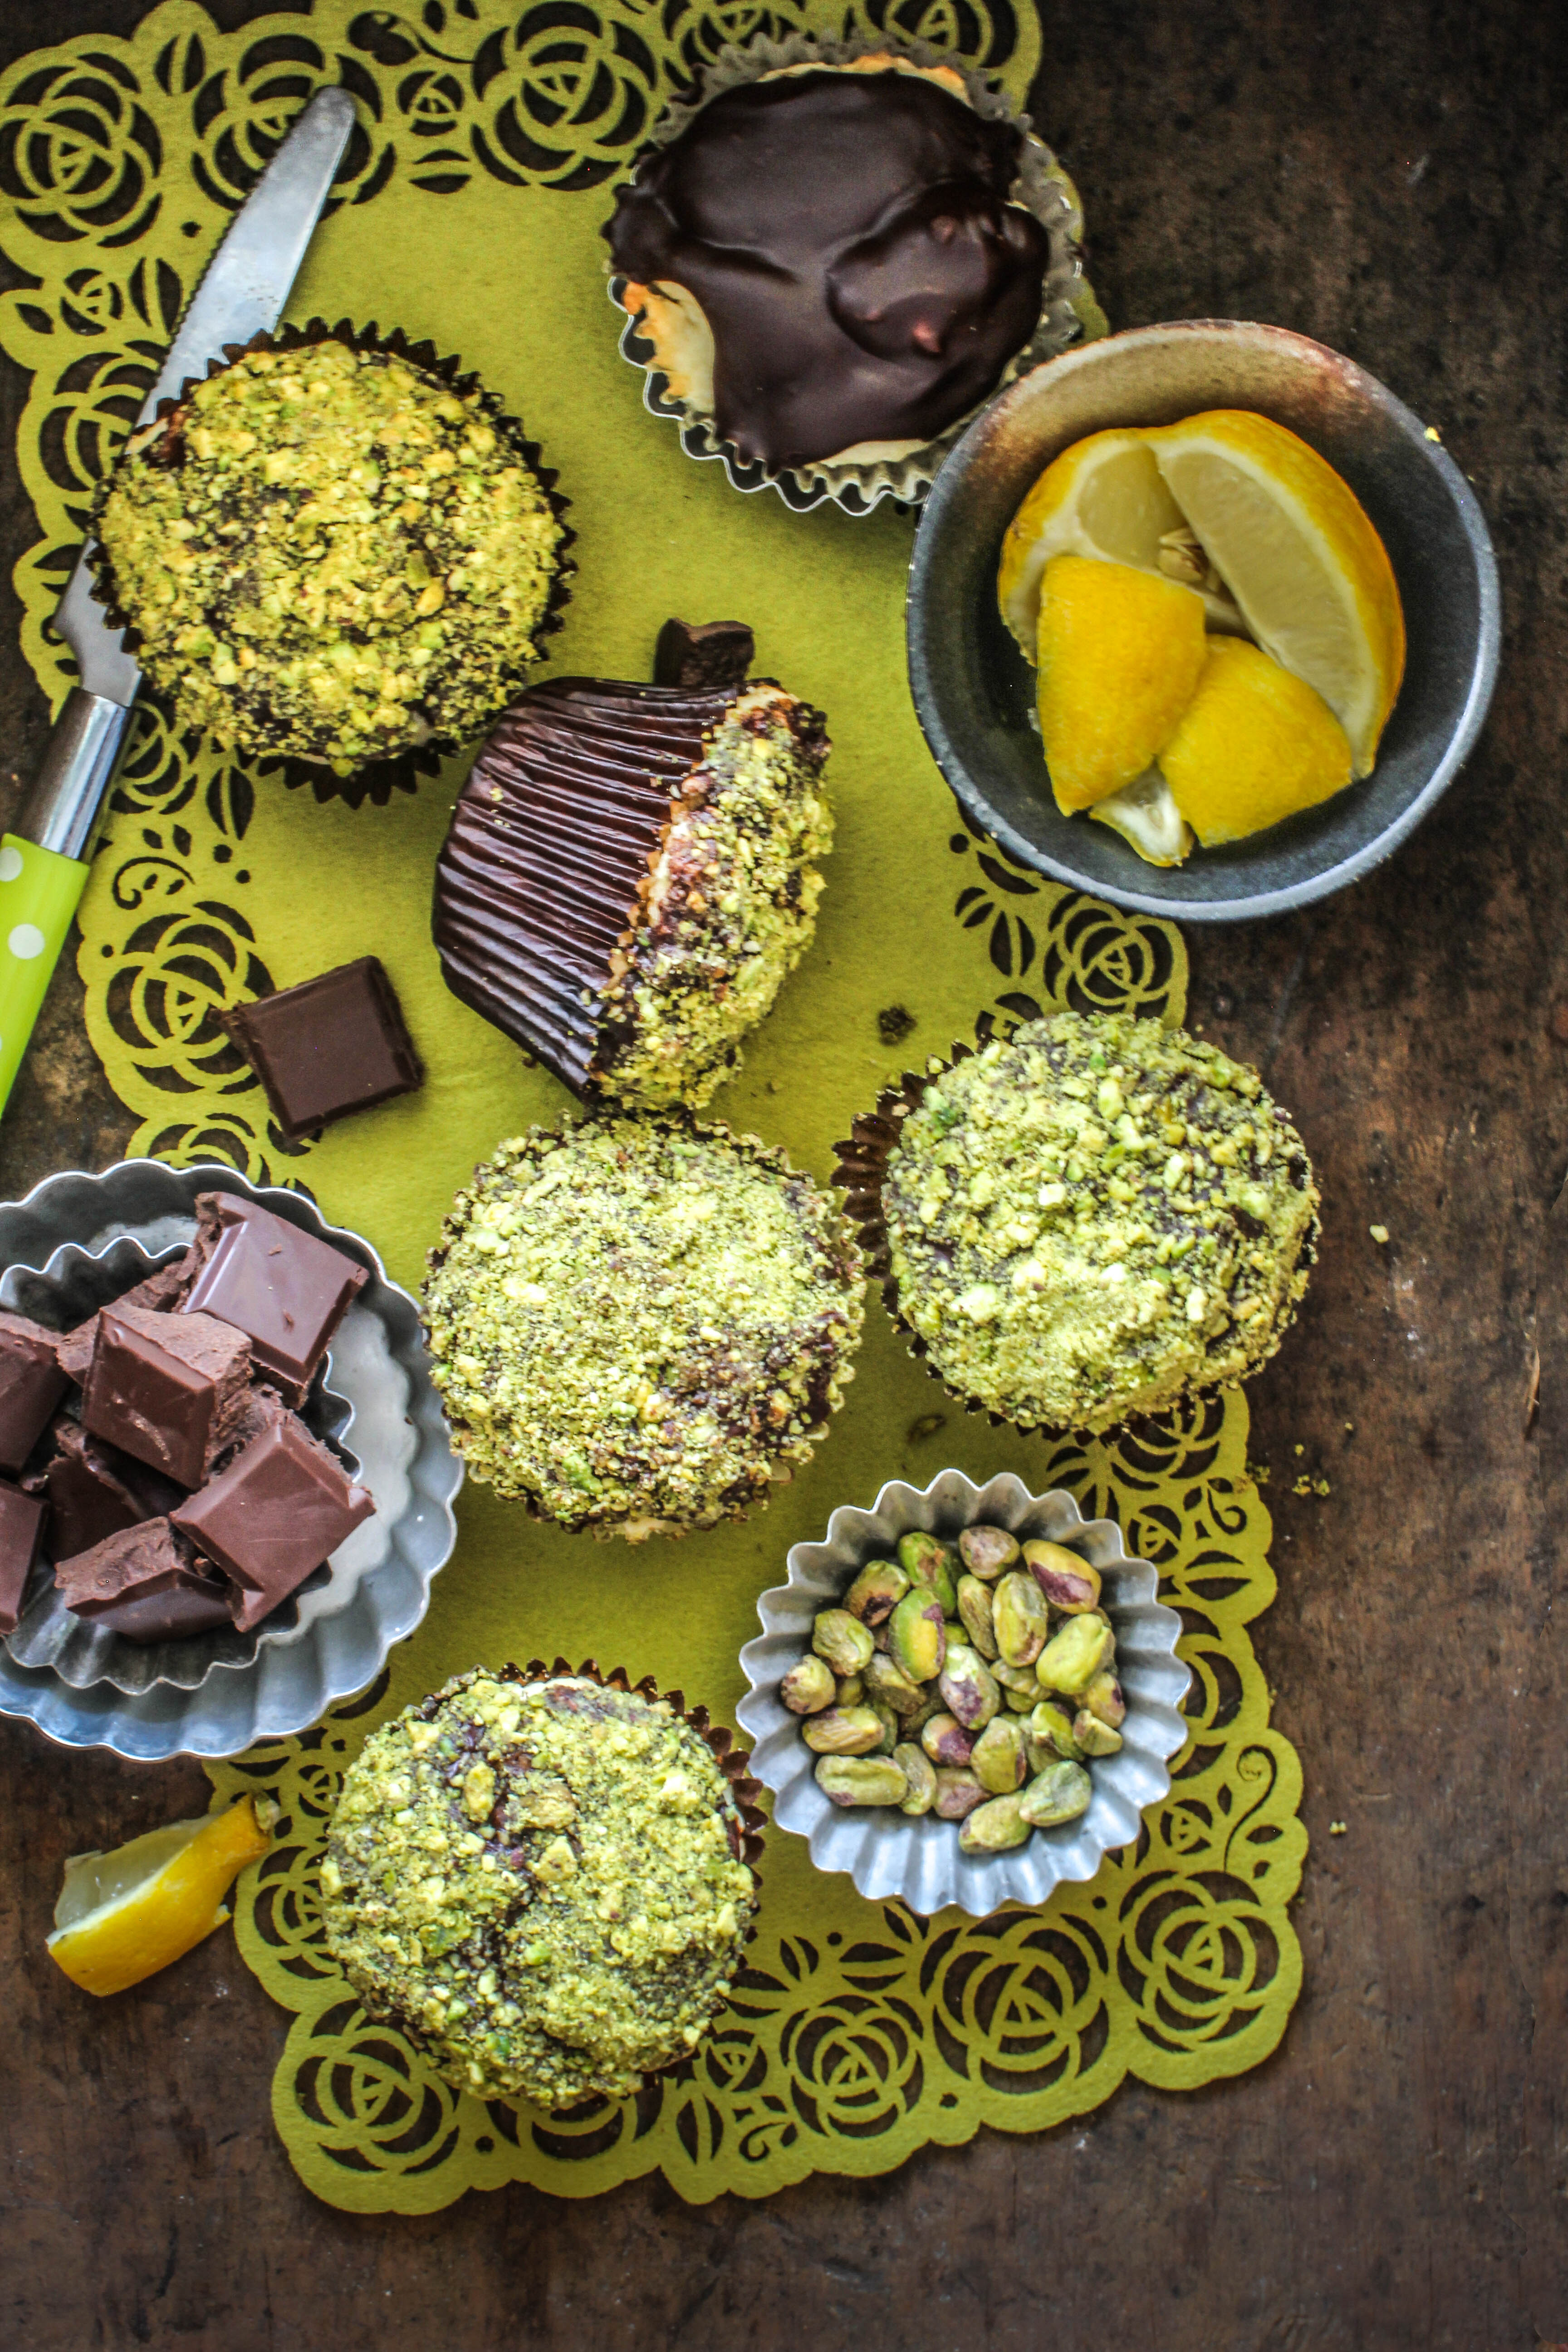
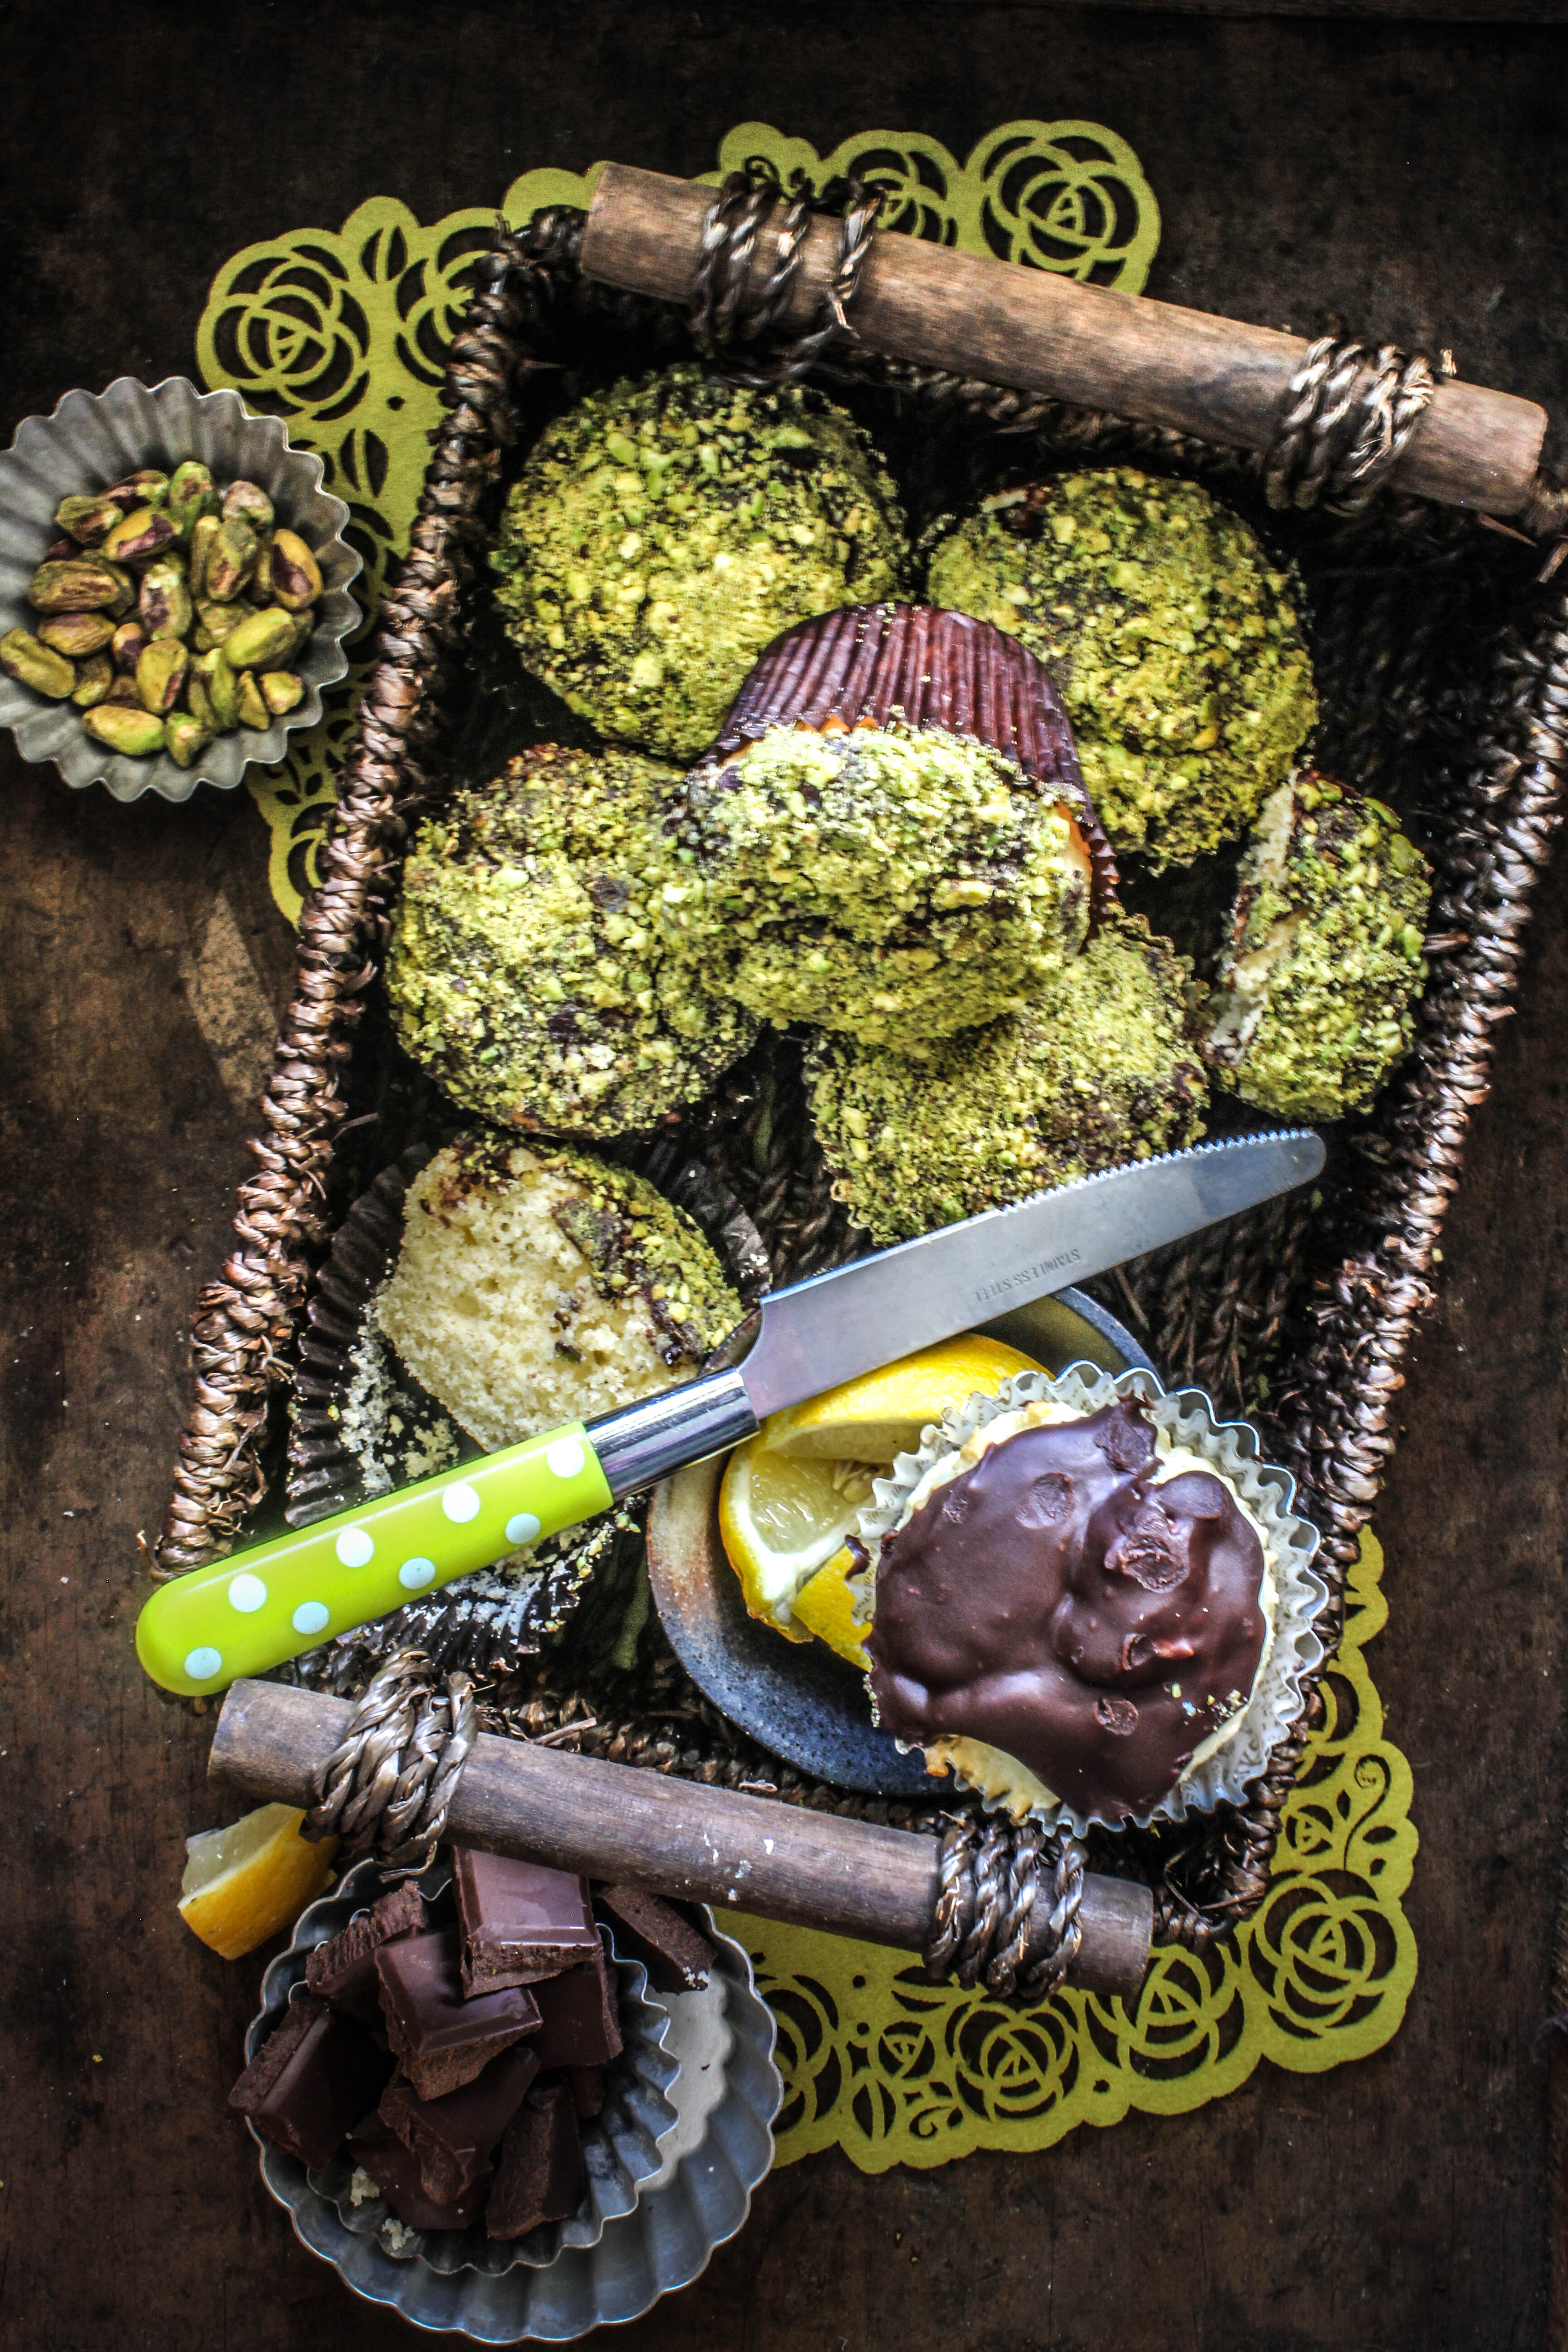
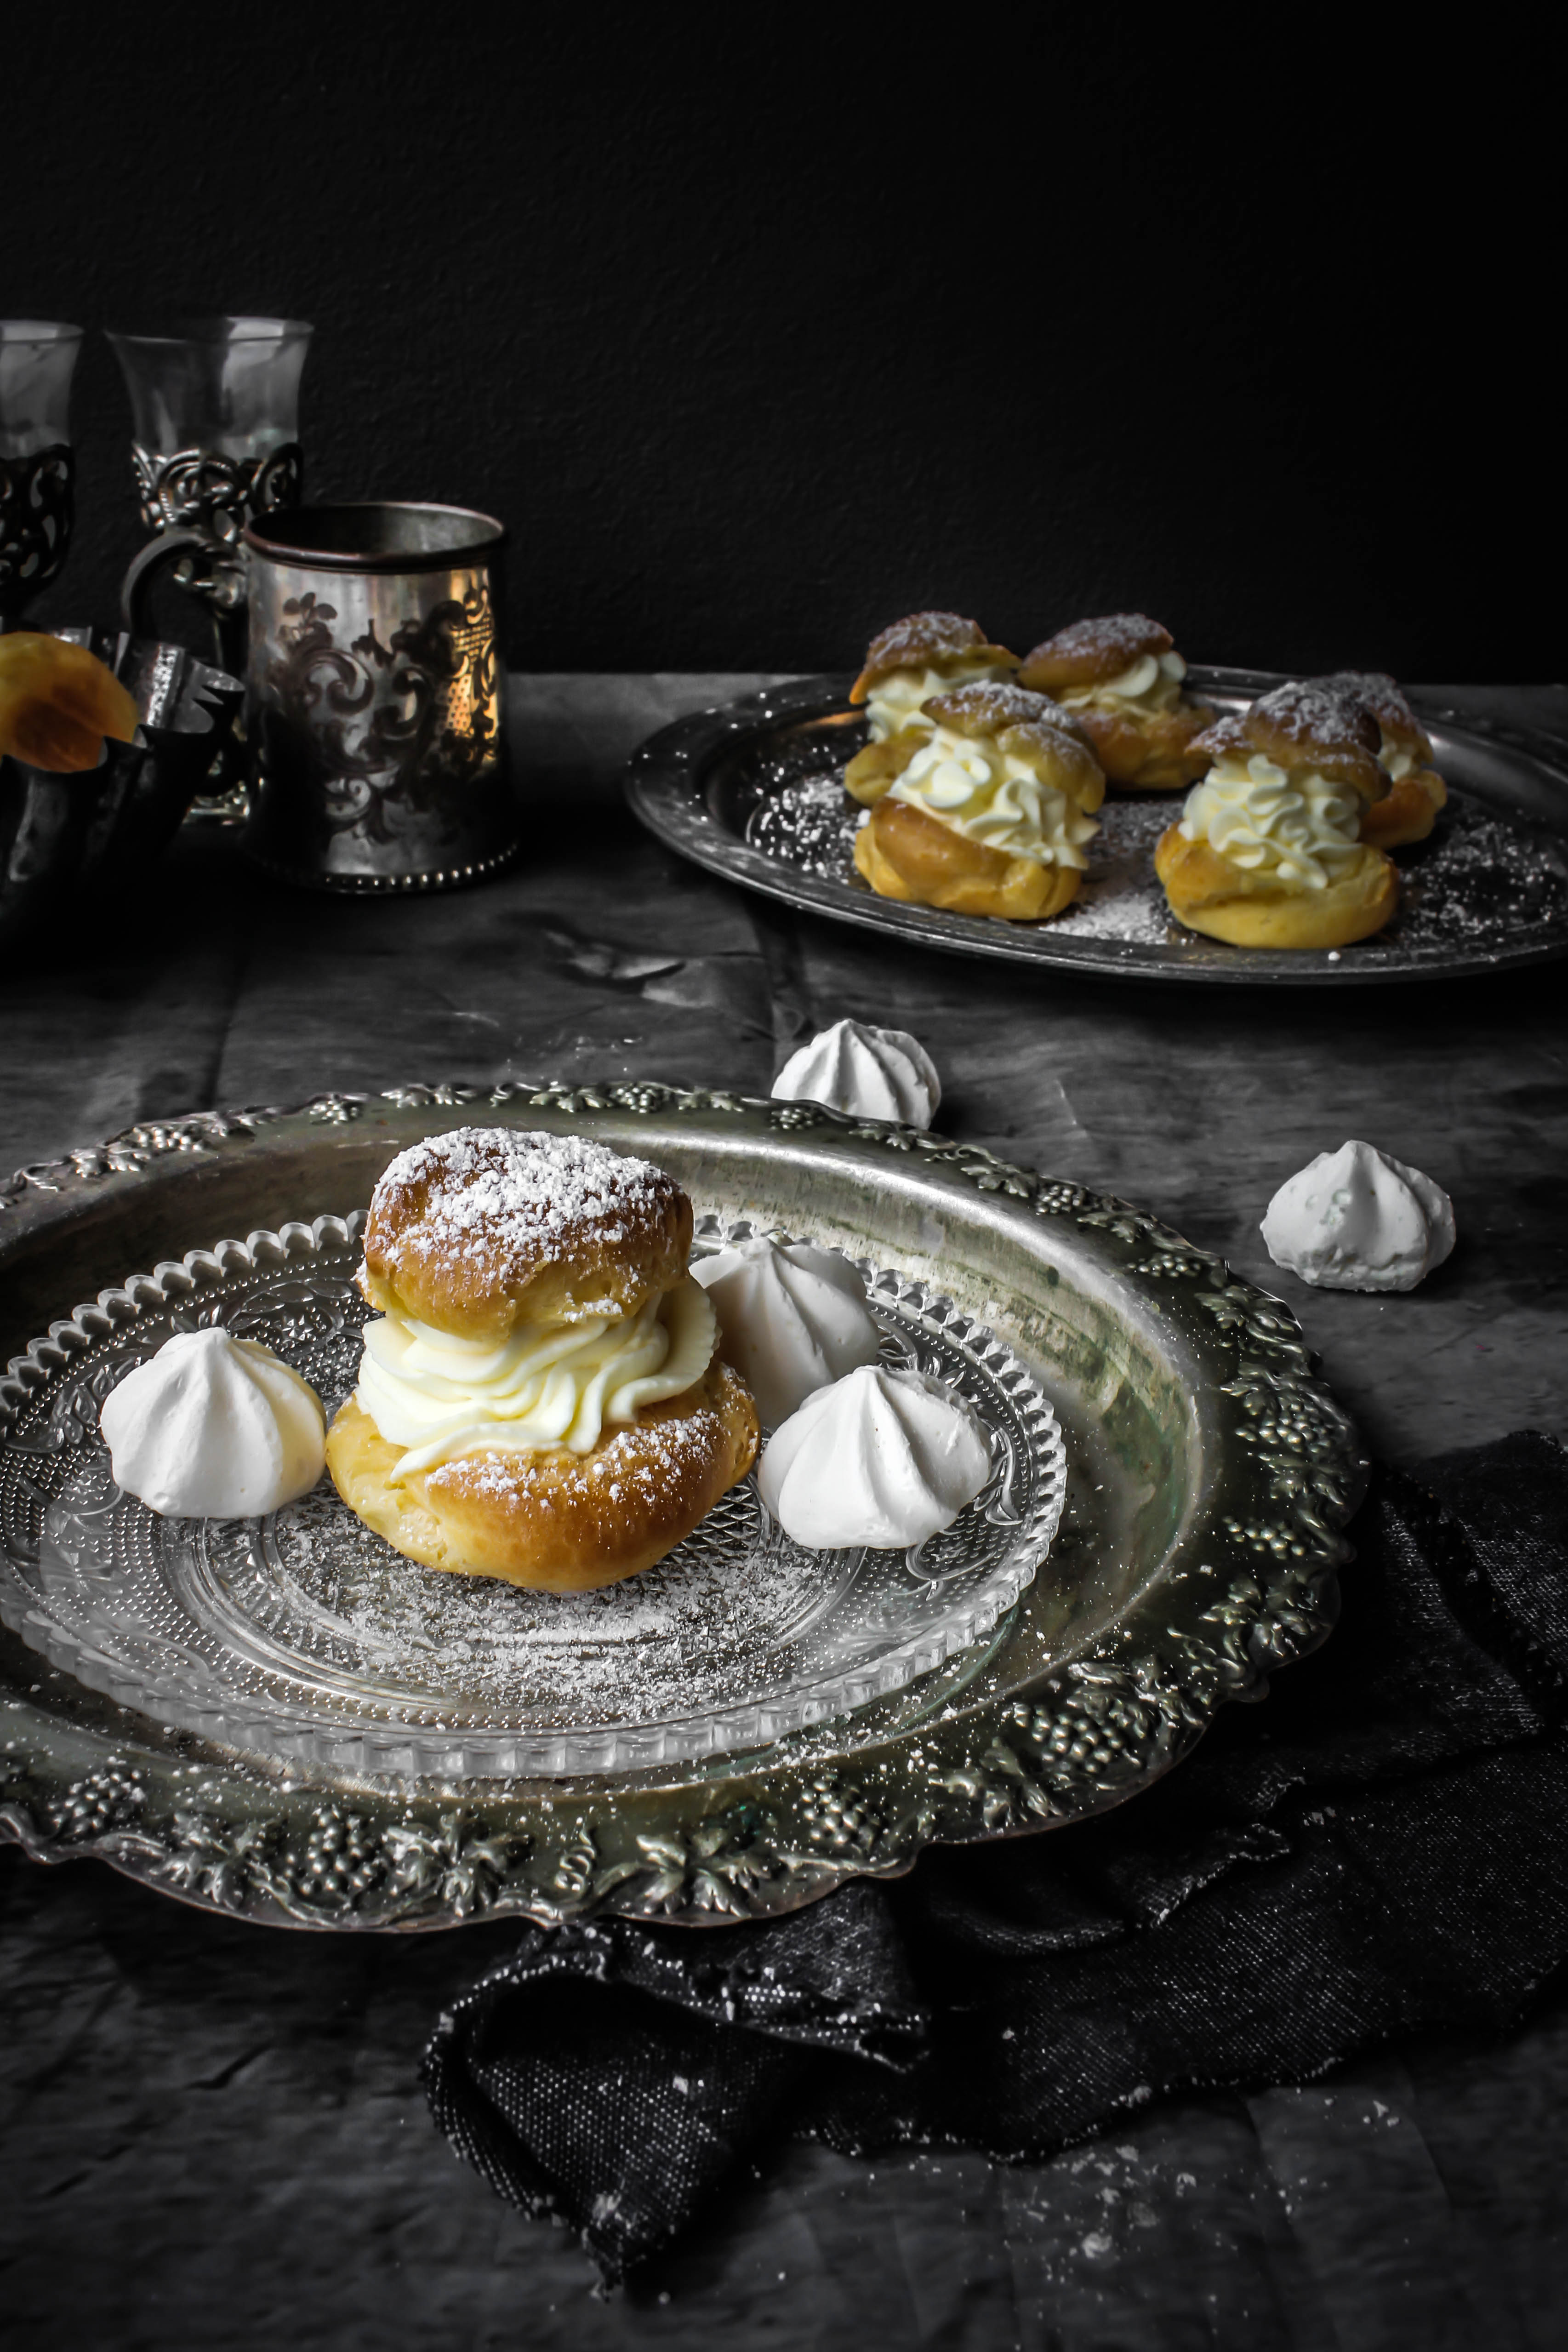
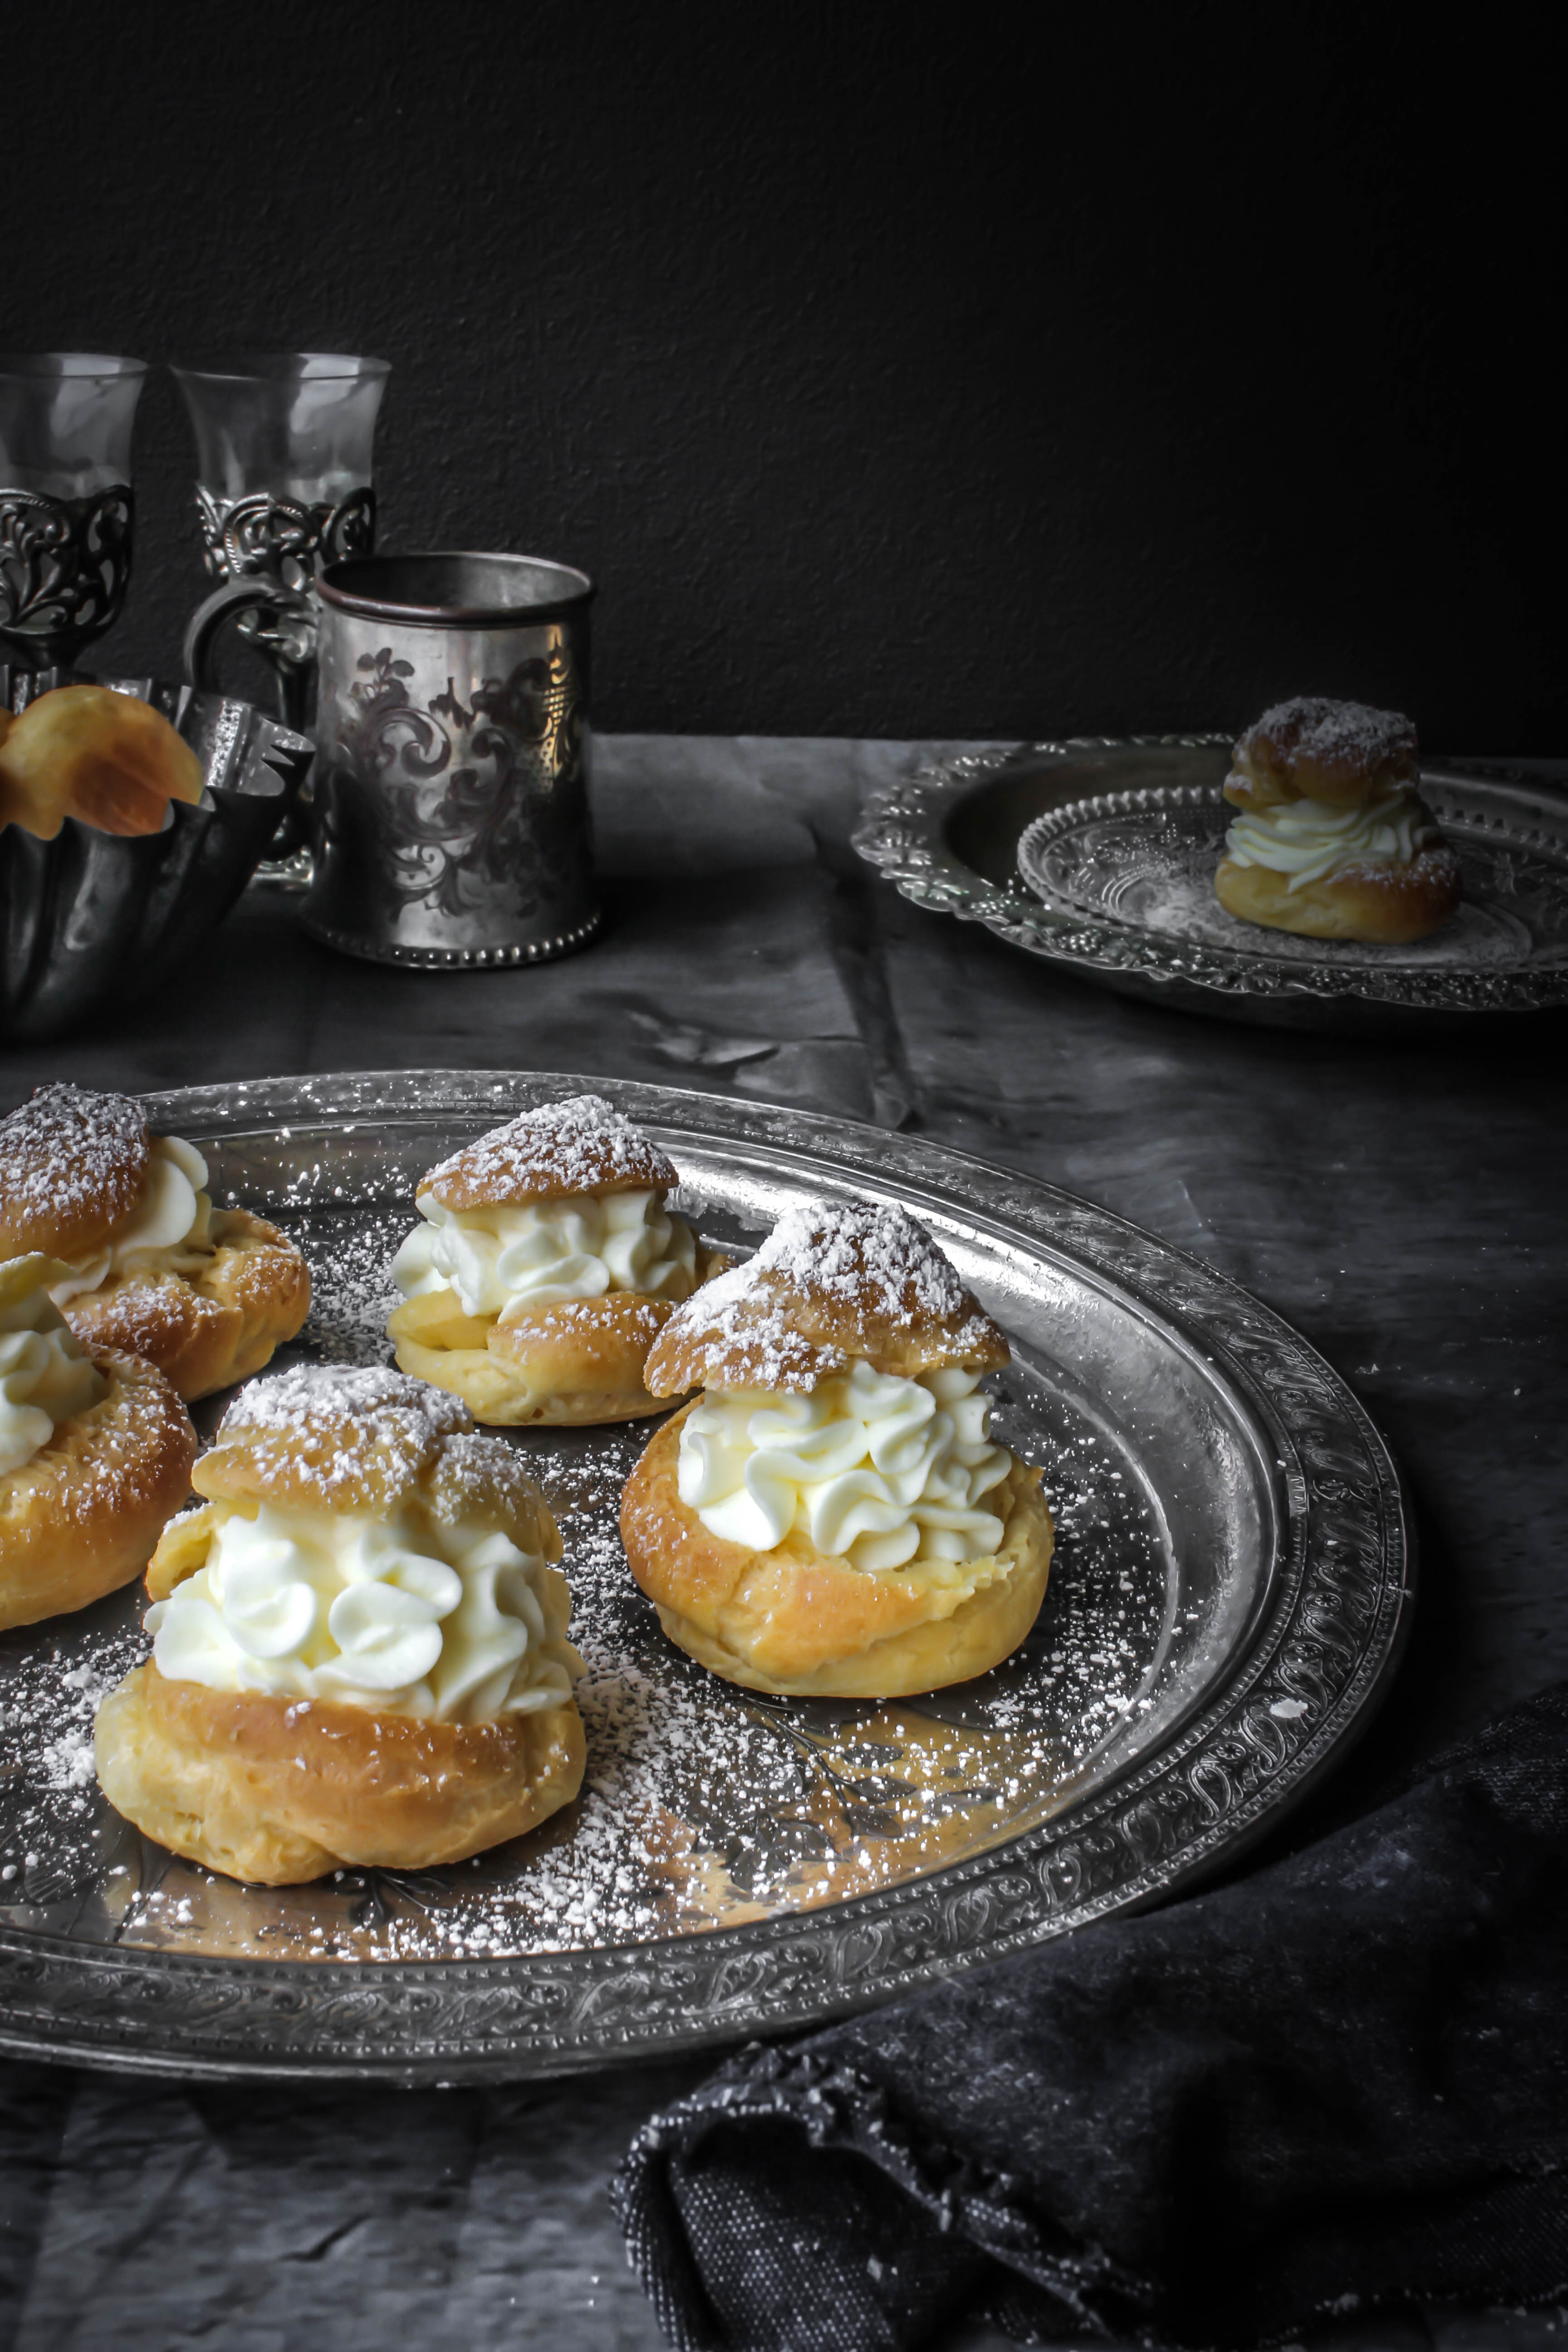
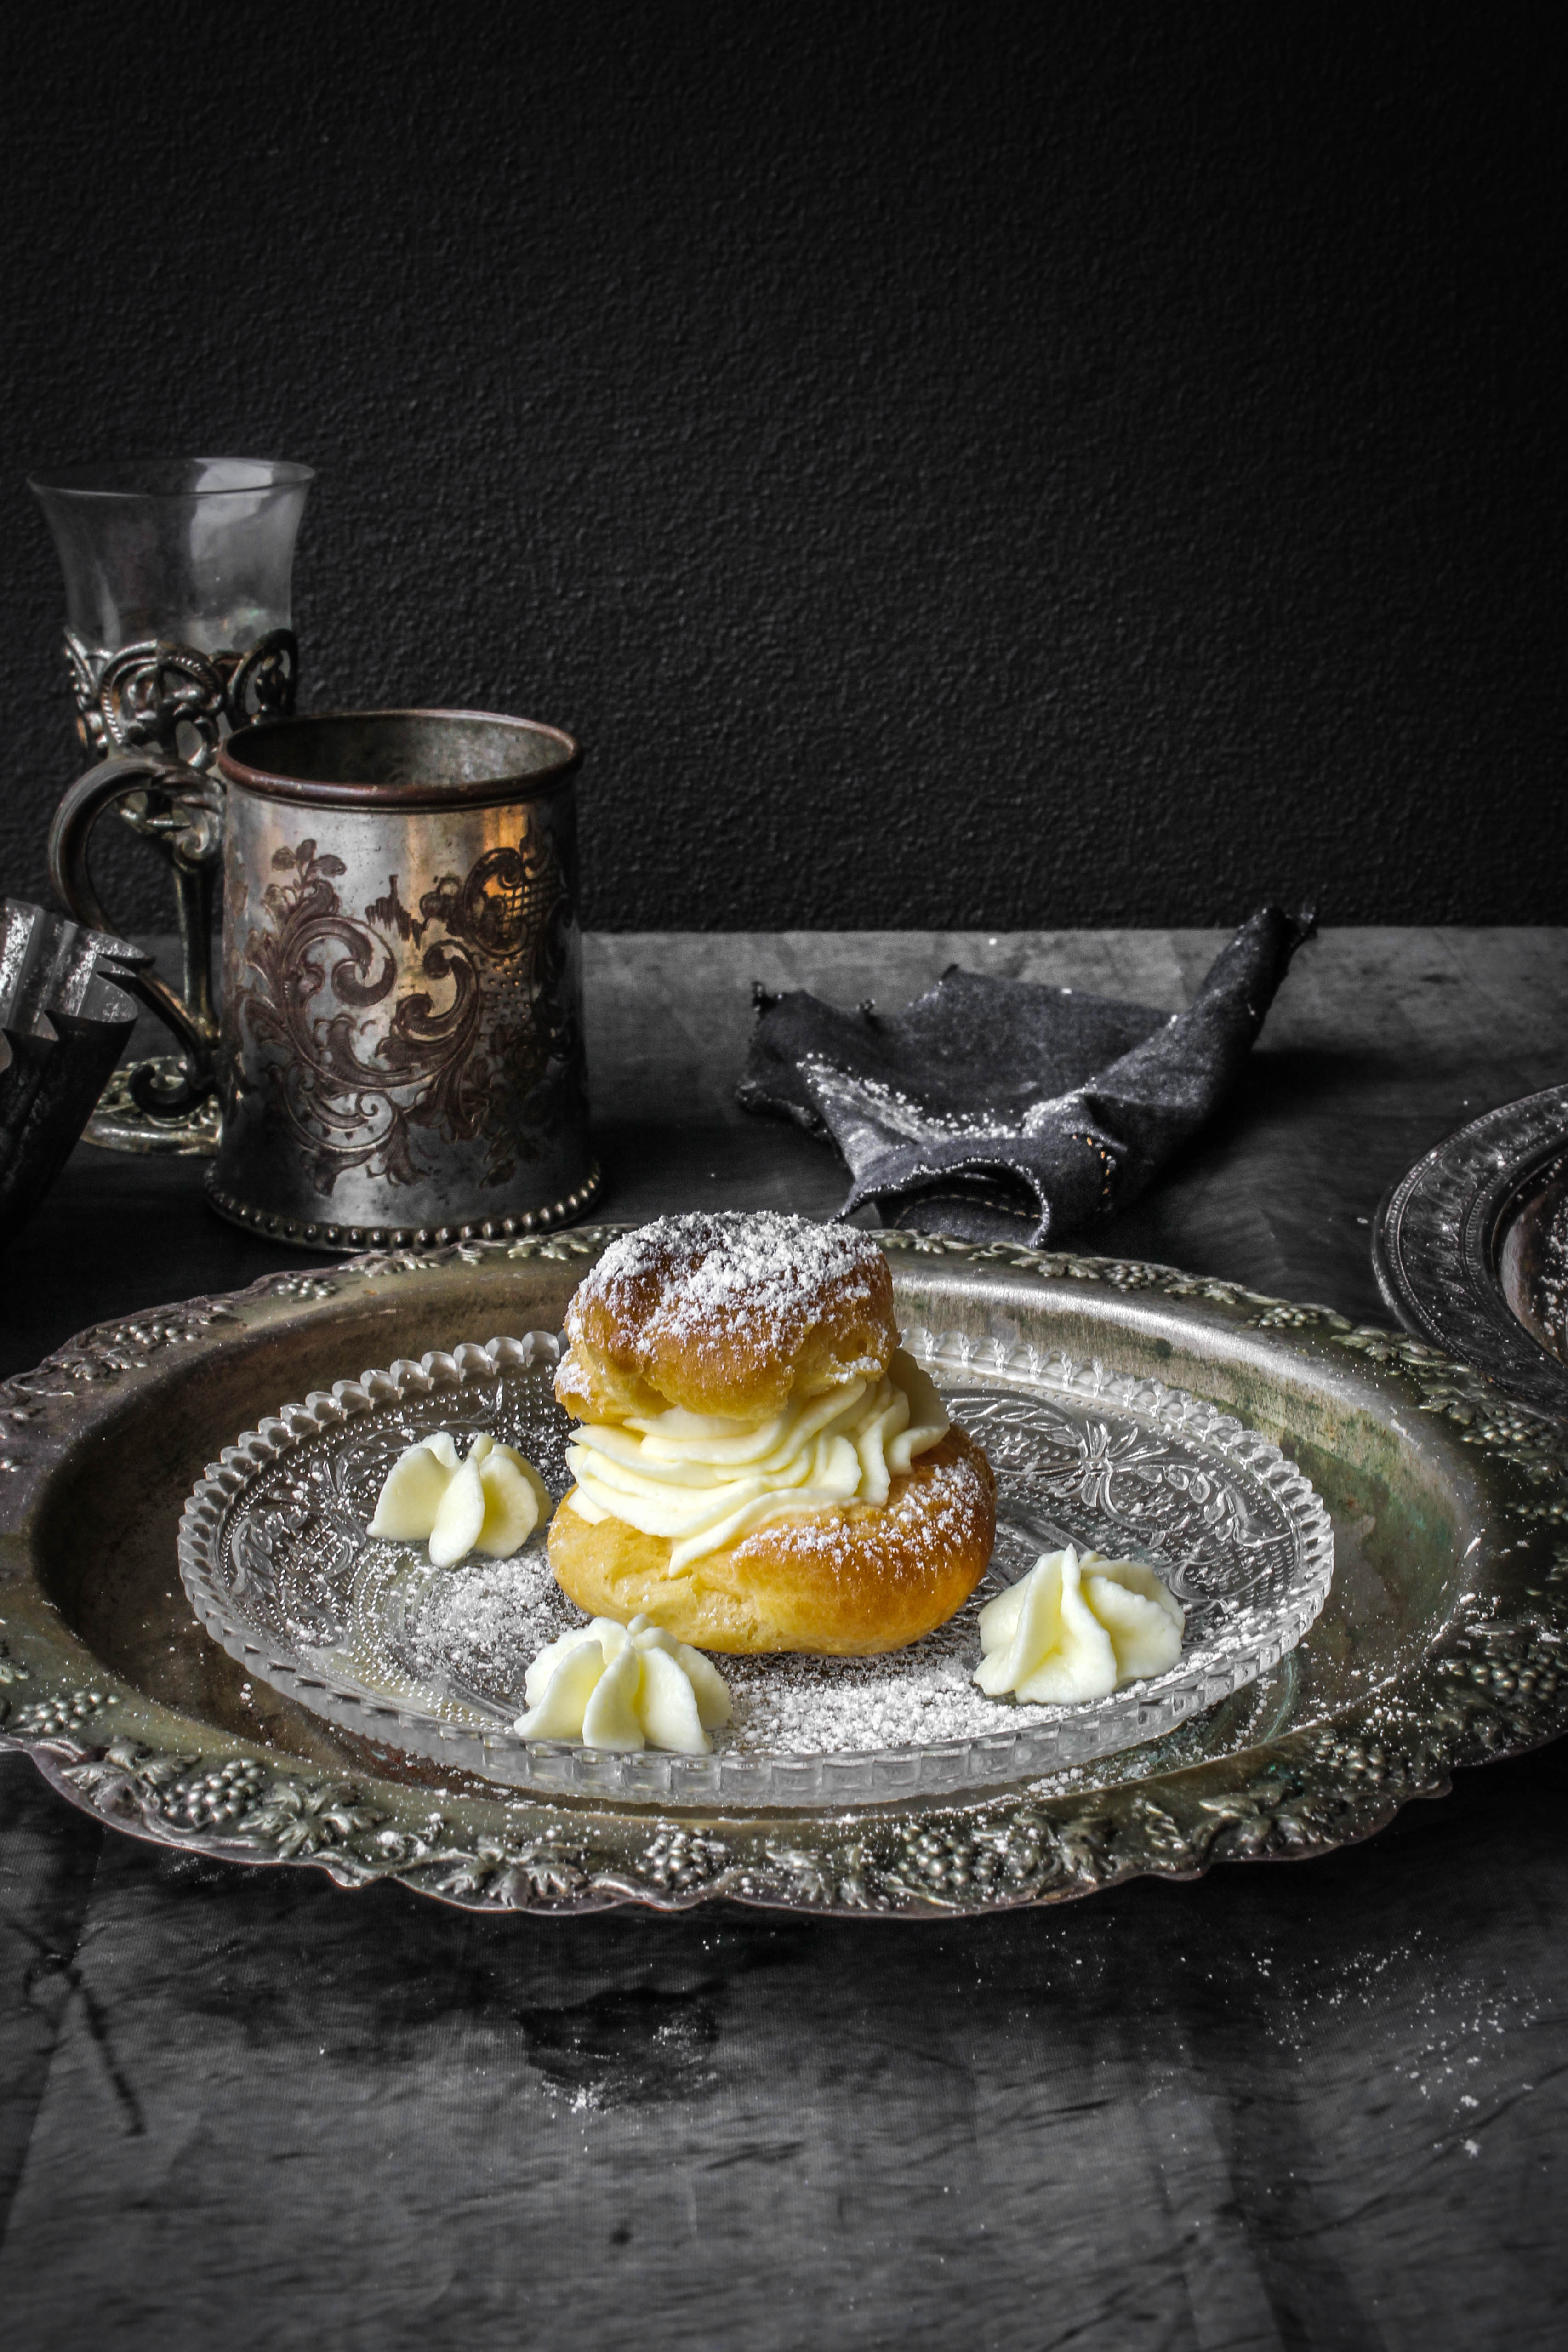
I had made these cream puffs for an after school treat. I am crazy for choux pastry! I thoroughly enjoy making it and almost always use the same batch to make cream puffs or profiteroles and eclairs at the same time and at home every one loves to eat 2 or 3 at a time. They are such light, delicate, addictive little treats. If you haven’t made choux pastry before, do give them a try. They aren’t difficult to make. The only thing is that you will need to pay attention to details the first time. Once you get a feel of things, you will want to make them over and over again. When they raise their little brown heads in the oven, you will feel a sense of excitement. They are in fact creating a little hollow inside for you to fill up with your favorite cream, custard or chocolate filling. I have filled these with whipped mascarpone that has been infused with orange zest. Easy peasy but very tasty.

You may want to serve them with a chocolate sauce but here, since the filling is slightly rich, I thought a dusting of icing sugar is good enough.

Cream-Puffs-with-Orange-whipped-Mascarpone


Cream Puffs With Orange Whipped Mascarpone
Makes 15 

60 g butter, chopped
3/4 cup (185 ml) water
3/4 cup (115 g) plain flour
3 eggs

Preheat oven to 200 degrees C (180 degrees C for fan-forced). Line a baking tray with non-stick baking paper.

Heat the butter and water in a medium saucepan over medium heat until butter melts and the mixture comes to the boil. Remove from heat. Sift in the flour. Use a wooden spoon to beat for 1-2 minutes or until mixture comes away from side of pan. Transfer mixture to a heatproof bowl. Set aside, stirring occasionally, to cool slightly.

Using an electric mixer, beat in the eggs, 1 at a time, beating well after each addition, until mixture is thick and glossy.

Pipe the mixture or place tablespoonfuls of mixture on the prepared baking tray 3 cm apart from each other. Use wet hands to pat down any peaks of dough. Sprinkle trays with water to create steam. Bake for 30-35 minutes or until puffed and golden.

Turn off the oven. Use a knife to pierce the base of each puff. Place the puffs in oven for 20 minutes to dry out. Transfer to a wire rack to cool.

To assemble, using a serrated knife, slice through the top third of the choux puff. Leave the top aside. Pipe or fill up the base with whipped orange mascarpone (recipe below). Put the top back. Dust with icing sugar. Repeat with all the choux puffs.

Orange Whipped Mascarpone

1 cup mascarpone cheese
1/3 cup heavy cream
1/4 cup castor sugar
1 tbsp finely grated orange zest

To make the orange whipped mascarpone, place all the ingredients in a medium bowl and beat with an electric mixer until cream is thickened and smooth. Keep refrigerated till needed. Place mascarpone mixture in a piping bag fitted with a star tip just before assembling.


Rose And Cardamom Cheesecake Mille-feuille

13|03|2015

With puff pastry, I think the sky is the limit when you think of recipes. Remember my story about my fridge overload. One of the things I always stock up on is puff pastry. I stopped making my own a couple of years ago. It is not difficult to make at all but time consuming. With two little boys on tow, I would never remember to take the dough out on time after it had rested between the different stages of rolling. When I would remember, it would be too hard to roll. I would leave it on the counter and forget again. But now that I keep the rolled sheets at home, I find it really helpful to make sweet and savory food in a jiffy.

IMG_5952

Mille feuilles are a great way of using puff pastry. Layers of pastry cream or even whipped cream and fruit sandwiched between crumbly layers of pastry. Visually, they are beautiful in their little rustic stacks and the perfect marraige of contrasting textures. Here I’ve use whipped cream cheese between the layers for a no-bake cheesecake kind of dessert. So basically it is a fusion of two desserts that come together in minutes. I’ve infused the cheesecake with rose water and tiny bit of cardamom powder and sprinkled them with with ground pistachios. You could go with vanilla, orange or even lemon if you do not have rose water at home.

IMG_5978-2

Piping the cheesecake certainly makes them look pretty but if you are not comfortable with piping, you could spread the cheesecake mixture on the layers. I would insist though that you give piping a try. A plain round tip will work nicely too or if you do not have nozzles and piping bags at home, just cut a tiny opening at one corner of a zip-lock bag and use that to pipe on the pastry layers. These mille feuilles can be stored in the fridge but is best assembled just before serving.

IMG_5970-2

IMG_5949

Rose And Cardamom Cheesecake Mille-feuille
Makes 4

1 sheet (25 x 25 cm) frozen ready-rolled butter puff pastry, just thawed
250 g cream cheese, room temperature
1/2 tsp vanilla extract
2/3 cup icing sugar, sifted
1/2 cup cold whipping cream or heavy cream
1 tbsp rose water (or 1 tsp rose essence)
1/2 tsp cardamom powder
1 handful pistachios, skinned and finely chopped

Line a baking tray with non-stick baking paper. Using a pizza cutter or knife, cut the pastry sheet vertically and horizontally. You will have four squares. Cut each square equally to get 8 rectangles.

Place the pastry rectangles on the lined tray. Top them with another sheet of baking paper and another baking tray. Bake in oven for 12-15 minutes. Turn the trays over and bake for a further 5-10 minutes or until the pastry is crisp and golden. Set aside for 30 minutes to cool completely.

Meanwhile, make the cheesecake filling. In the bowl of your electric mixer, or with a hand mixer, beat the cream cheese  until smooth. Add the icing sugar and beat until smooth. Gradually add the heavy cream, rose water and cardamom powder and whip until the frosting is thick enough to pipe. In case you are using a brand of heavy cream that does not whip easily, then whip the cream separately to stiff peaks and fold it gradually into the cream cheese mixture. Refrigerate till needed.

To assemble, pipe the cheesecake filling onto one pastry rectangle. Sandwich with another pastry rectangle. Pipe filling again. Sprinkle with pistachios. Decorate with edible rosebuds.

White Chocolate Mud Cake With Pineapple

11|03|2015

White Chocolate Mud Cake made extra delicious and moist by the addition of pineapple. A simple honey whipped cream completes the frosting.

Growing up in the tropics, pineapple flavored sweets were a prominent part of my childhood. I don’t think I had ever spotted canned pineapple back then. Fresh pineapple was the way to go and despite the work involved, prepping the pineapple never seemed daunting to anyone as much as it is to me today. My mum’s favorite thing to make was a fresh pineapple chutney with a generous squeeze of lime and two big dried red chillies. The blend of sweet, sour and spicy flavors would make my palate dance. Another flavoring agent was the pineapple essence. Pretty common and more popular than orange or strawberry. I would love to eat the tea cakes that were flavored with this essence and speckled with dried pineapple. I was a bit disappointed not to find the pineapple cake as popular in Australia when I came to live here.

White Chocolate Mud Cake With Pineapple

Mud cakes however are pretty popular in Australia. Though I have never come across a white chocolate mud cake with pineapple before I made one, I could envision quite clearly how it would taste. Since mud cakes are rich and dense, I could foresee the pineapple totally blending with the texture and turning into a pineapple enriched fudge. Biting into the fudgy cake, you could taste tiny bits of crunchy pineapple. Mud cakes almost always have chocolate in them and here I’ve used white chocolate. It definitely adds to the sweetness of the cake but the primary flavor is pineapple.

White Chocolate Mud Cake With Pineapple

Since the cake is quite rich, I chose a simple whipped cream frosting swirled with honey. With this recipe, I baked  two cakes. Which means, I divided the batter between two cake pans. Then I served the first one with whipped cream while I dusted icing sugar on the other one to eat with tea. The cake on it’s own is not very sweet so I preferred the frosted one over the plain one, You could bake the cake in one pan as well but the baking time will increase. Or simply use half the recipe for the size and thickness of the cake you see in the picture. Mud cakes do take a long time to bake as they are cooked under low temperatures.

White Chocolate Mud Cake With Pineapple

The cake keeps well for quite some time (about 4-5 days) even when stored outside the refrigerator. I find that it actually tastes better the next day. Frost the cake just before serving.

White Chocolate Mud Cake With Pineapple

White Chocolate Mud Cake With Pineapple
Serves 8-10

350 g butter, chopped
150 g white chocolate, chopped
1 cup castor sugar
400 g can of crushed pineapple in syrup
1 teaspoons vanilla extract
3 eggs
2 cups plain flour, sifted
3/4 cup self-raising flour, sifted
1 cup heavy cream/whipping cream, whipped to stiff peaks.
1/4 cup honey (or more)

Preheat oven to 160 degrees C ( 140 degrees C for fan-forced) Grease two 19 cm round cake tins and line the base with baking paper..

Place butter, white chocolate, sugar and vanilla in a saucepan over low heat. Stir until smooth. Transfer to a large bowl. Leave aside for 15 minutes to cool.

Add the crushed pineapple and mix till blended. Add eggs one at a time and stir to combine. Add plain flour and self-raising flour. Stir to combine. Divide mixture equally between prepared pans. Bake for 50 minutes-1 hours or until a skewer inserted in the centre has moist crumbs clinging. Stand in pan for 10 minutes. Turn out onto a wire rack to cool.

Fold in the honey gently with the whipped cream. Once the cake has cooled completely, spread the honey-cream frosting over the cake. Slice and serve.


Lemon, Chocolate And Pistachio Muffins

7|03|2015

Delicious Pistachio Muffins with a lemon cake base, dipped in chocolate and topped with ground pistachios.

‘You can lift up the lids now’ the voice echoed across the large hall as anxious hands moved in unison. I said a quick prayer ‘Please let there be lemon…please..please!’ With bated breath I peered inside.
There was lemon! A whole lemon! Bright yellow, gleaming in the light. But..there was a problem! There was chocolate. As well. Now what! I was in a fix. Without a doubt Chocolate is my favorite ingredient but I wasn’t expecting it. It just seemed too unlikely to have such an easy and versatile ingredient to work with. I ran through all the chocolate recipes in my mind..cooking times, accompanying ingredients and such. I looked at the mammoth clock hanging on the wall. 50 minutes to go. How on earth was I going to make my famous chocolate ginger torte in such a limited time? Show skill..show technique..understanding of flavors..multitask…was all over my mind. Scaling down a recipe? How would I make it look pretty inside a ramekin..Oh no! Panic.  I looked around. Gigantic saucepans….large baking pans. A single serve dessert was my only option but in monster baking gear..how? More panic.
’30 minutes to go’..the voice sent a chill down my spine. Nope. Sorry Chocolate! I decided to stick with Lemon. Lemon and Meringue…Yesss! Meringue spells technique. Add more elements. Lemon Curd…Lemon custard…Candied Lemon. I leaped forward and grabbed a zester.

pistachio muffins with chocolate and lemon

Well, does this sound like the sets of a reality show? A cooking competition, maybe? For some of us who love cooking/baking and cooking shows, to be on one is like a dream. Except this was real. Except it was turning into a nightmare. Nothing quite I had pictured before. And every movement..every expression..helplessness being captured on what looks like a hundred professional cameras. This was many moons ago but truly the experience of a life time. Cooking in the comfort of your own kitchen is different from cooking for the first time in a commercial kitchen under the watchful eyes of professionals and celebrities. Anyway, I did put up a decent dessert that I saw the staff and crew photograph even on mobile phones. But maybe that was not enough.Maybe things would be different if I had some control on my nerves. Maybe I was always meant to be behind the lenses. The last one actually, I am sure of. I can see things through my camera that I may not notice otherwise.

pistachio muffins with chocolate and lemon

Back to the present, I totally loved how these muffins tasted. They are lemon muffins with thier tops covered in dark chocolate ganache and ground pistachios.The citrus is not overpowering, neither is the chocolate. They are in complete harmony while the pistachios add life and texture to these muffins.To be honest, I wasn’t very happy with the muffin batter. While spooning them into the muffin cases I felt that they might turn out dry just as they did. If you have an alternate lemon muffin recipe..feel free to go with that. If you are using this recipe, take care not to over-bake. They taste amazing but are not as moist as some of the other muffins I have made before. I am a bit of a perfectionist so perhaps I could be a tad bit critical. My family loved them. The combination of lemon, chocolate and pistachio however, is sensational. Which is why I am sharing this recipe.  I would probably add sour cream or yogurt next time instead of milk to test them out.

pistachio muffins with chocolate and lemon

So, when life gives you lemons, make sure it doesn’t give you Chocolate!
If it does, well, you know now what to do:-)

pistachio muffins with chocolate and lemon

Lemon, Chocolate And Pistachio Muffins (lemon muffin recipe adapted from here)
Makes 8 large muffins

2 1/2 cups self-raising flour
1/2 cup caster sugar
1 tbsp lemon zest
1 1/4 cups milk
1 egg, lightly beaten
90 g butter, melted
chocolate ganache, to coat
ground pistachios, to coat

Preheat oven to 180 degrees C (160 degrees C for fan-forced). Lightly grease a 12-hole, 1/3-cup capacity non-stick muffin pan.

Sift flour into a large bowl. Add caster sugar and 1 tablespoon of lemon rind and stir to combine. Make a well in the centre. Combine milk, egg and butter in a jug. Pour milk mixture into the well. Using a large metal spoon, stir until just combined (don’t over-mix).

Spoon mixture into muffin holes until three-quarters full. Bake for 20 minutes or until a skewer inserted into the centre comes out clean. Allow to cool in pan for 1 minute. Turn out onto a wire rack to cool. Once cooled dip the tops into chocolate ganache and then onto a plate of ground pistachios. Leave aside for 15 minutes to set.

Dark Chocolate Ganache

110 g dark chocolate, coarsely chopped
1/4 cup heavy cream

Heat the heavy cream in a small saucepan. Before it reaches boiling point, remove from heat, add the chocolate. Leave aside for 10 minutes. Mix till chocolate is well blended and smooth. Alternately, you could place the cream and chocolate together in a microwave safe bowl and microwave for a few seconds.


  • « Previous Page
  • 1
  • …
  • 34
  • 35
  • 36
  • 37
  • 38
  • …
  • 57
  • Next Page »
Hey Sugar
Cake
Link to my Facebook Page
Link to my Instagram Page
Link to my Pinterest Page
Link to my Mail Page
Subscribe to this site
Fresh Awards
2019 Aus mumpreneur
2019 aus mumpreneur
Mumbrella

Copyright © 2025 · Sugar Et Al · Designed by Smitten Blog Designs · Log in