• Home
  • Recipe Index
    • Recipe Index
    • Breakfast/Brunch
    • Cakes and Puddings
    • Chocolate
    • Cookies and cupcakes
    • Custard and Mousse
    • Gluten Free
    • Ice Cream
    • Mains
    • Other Sweet Treats
    • Snack/Appetizers
    • Soups and Salads
    • Tarts and Pies
    • Vegetarian
  • About
  • Cookbook
  • Portfolio
  • Store
  • Press
  • Work with Me

Sugar et al

Because Life is a blend of flavours...

Upside Down Chocolate Trail-Mix Cake

9|10|2014

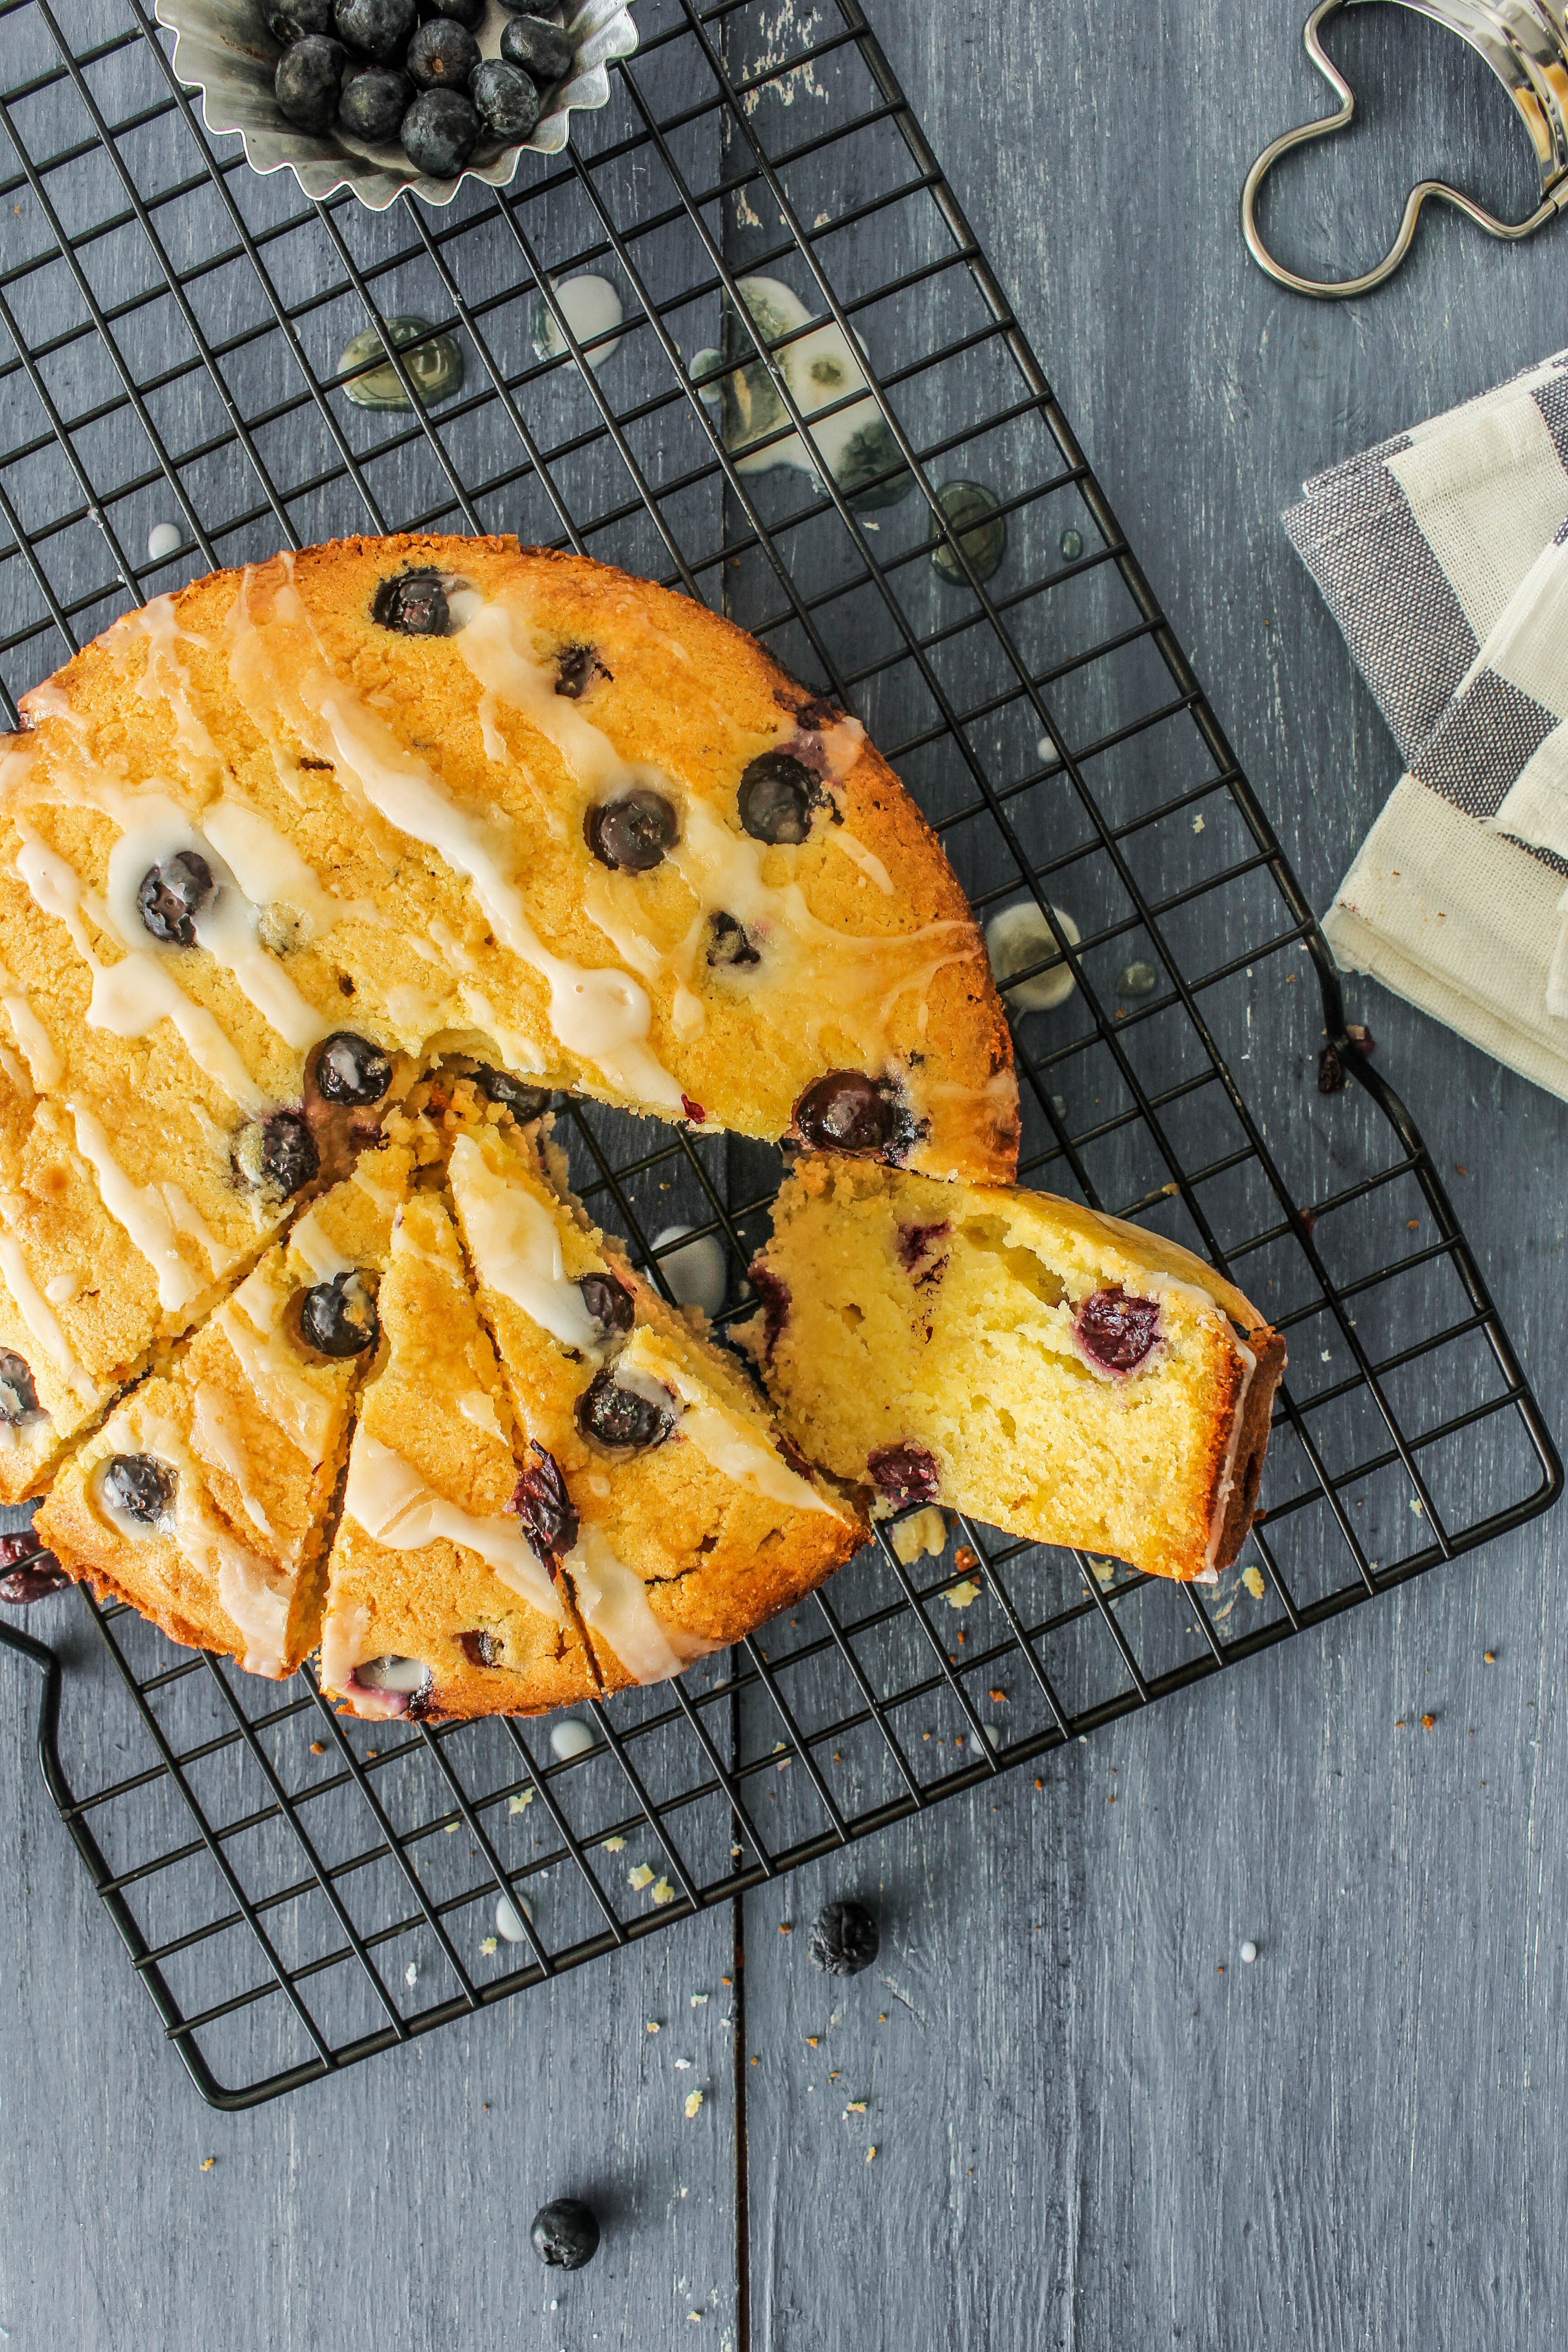
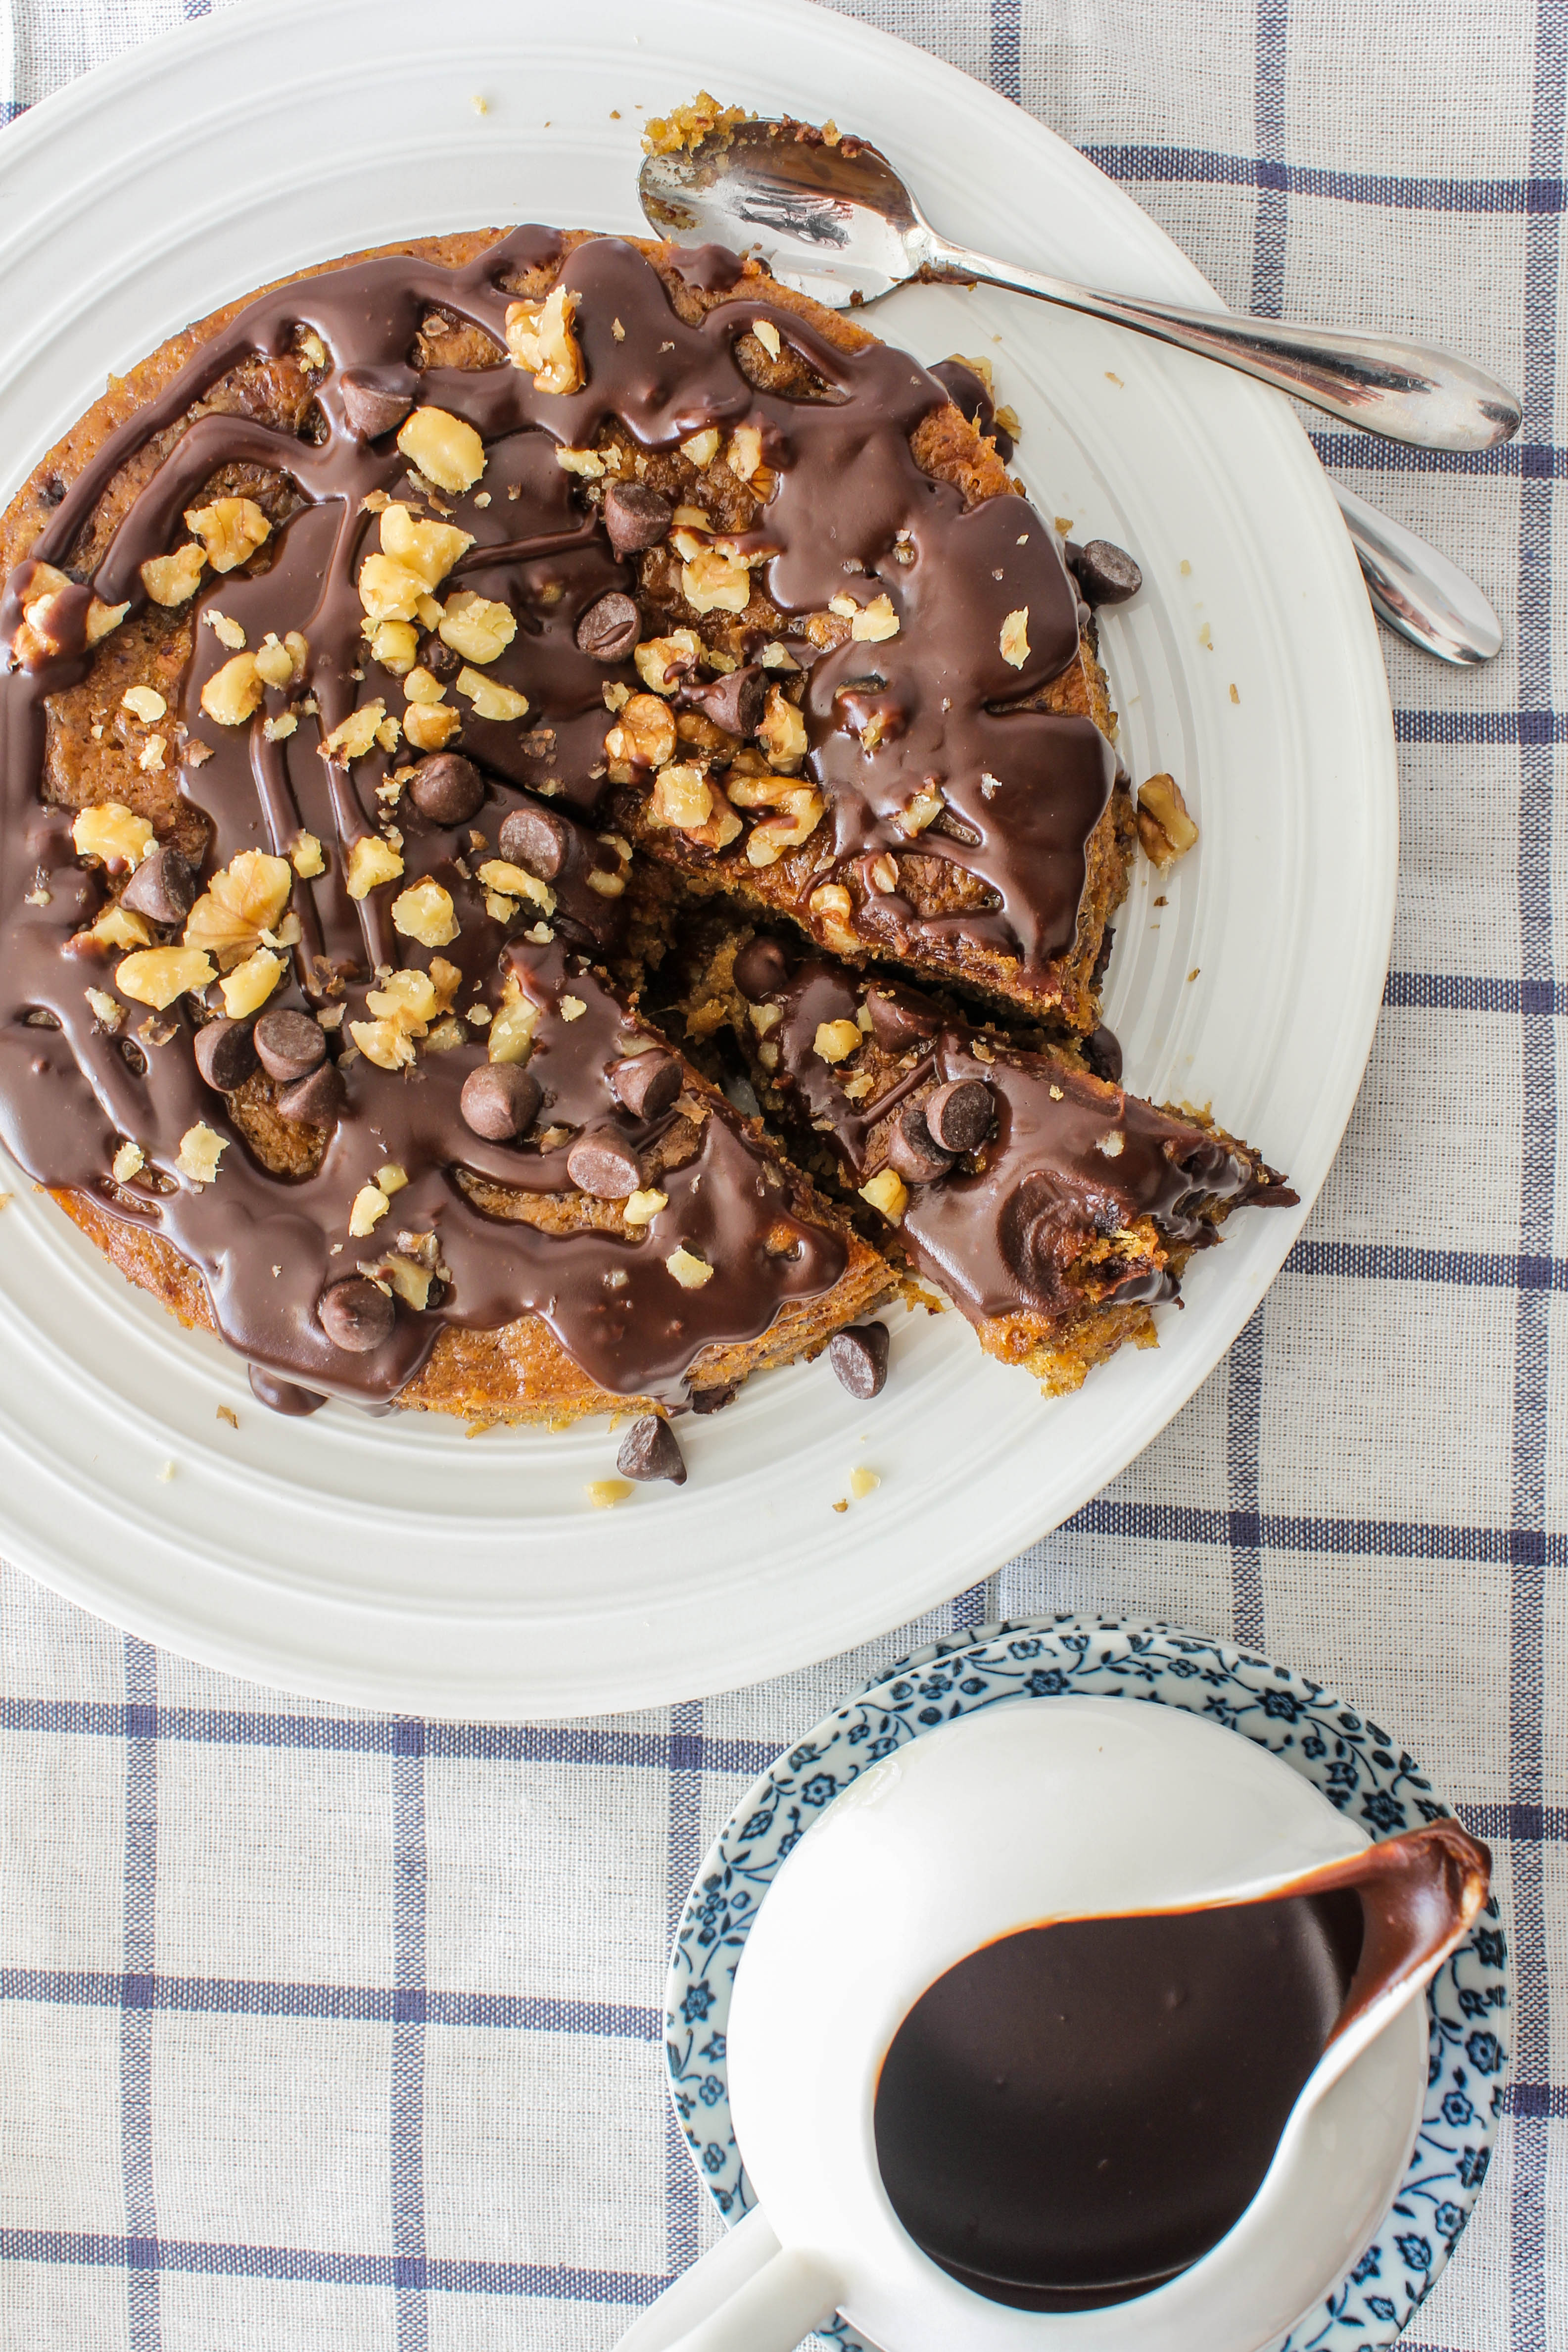
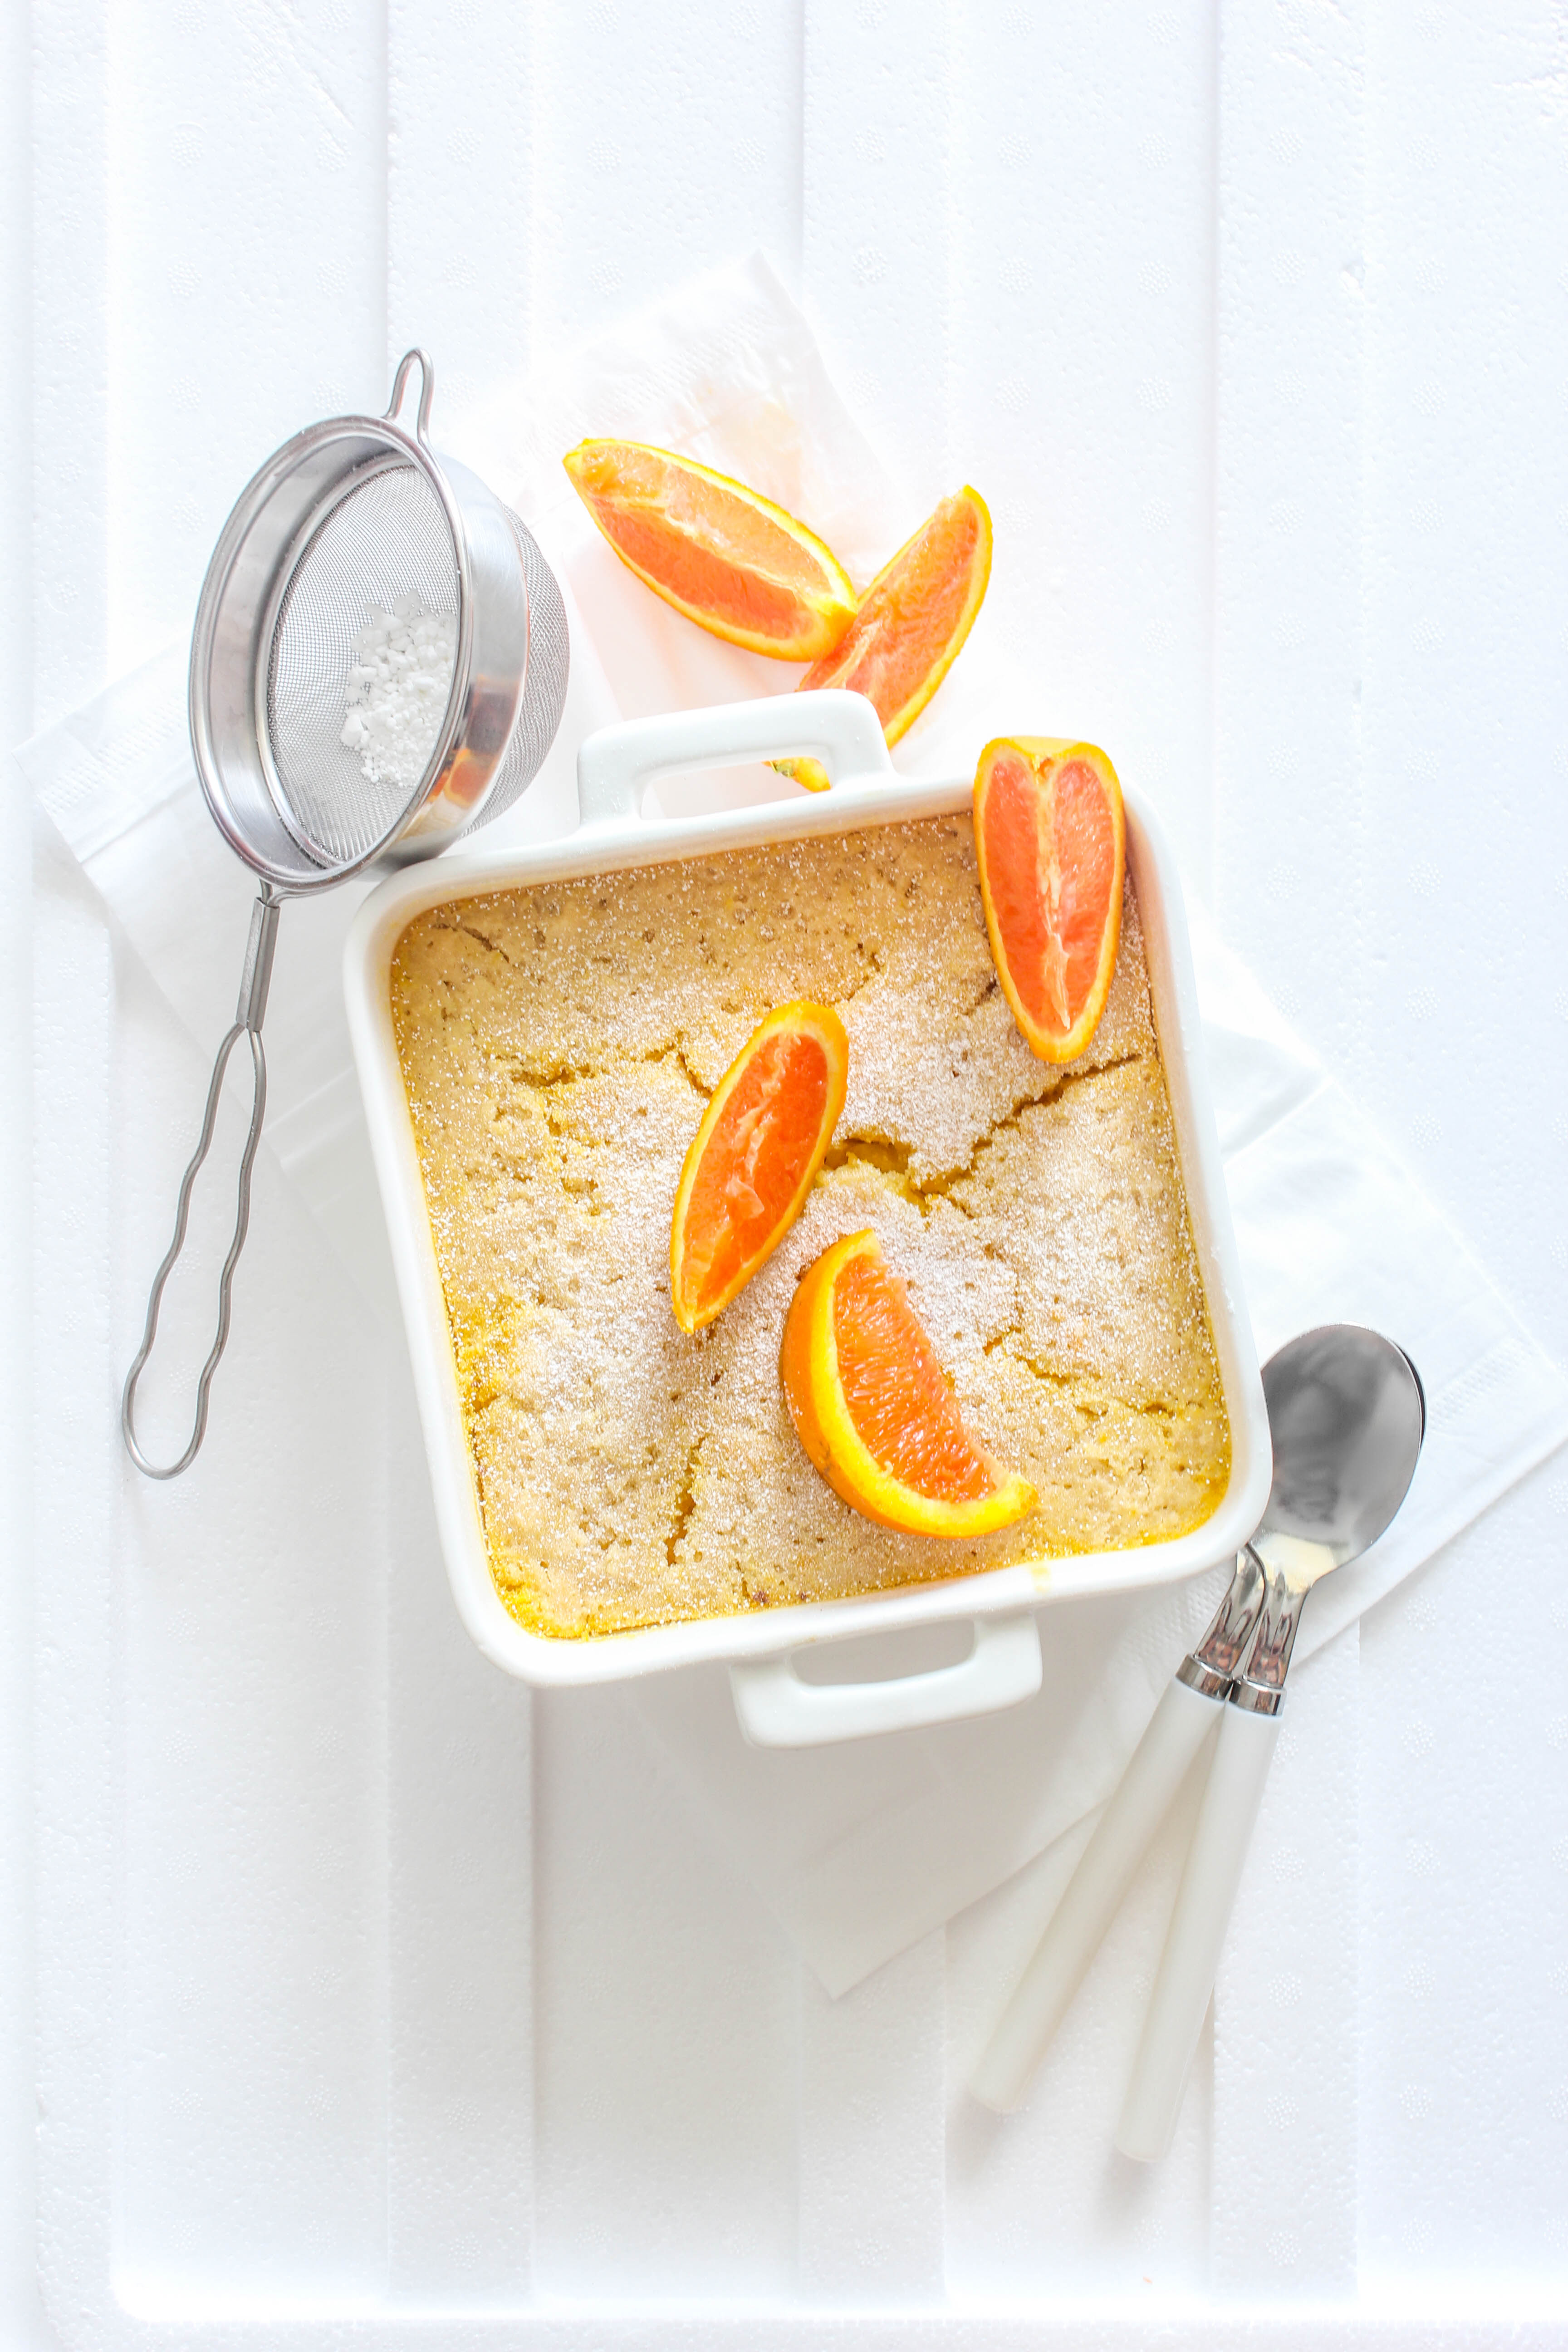
Life is not always magical and not all days are the same. There are days when you will run out of brown sugar by as little as a quarter of a cup when you have every other ingredient to make your favourite chocolate cake. You will then make your way to the shops to get some as the cake has to be made that day and you don’t want to compromise. (Please don’t tell me that you will substitute with castor sugar…that doesn’t make me happy!) Then just when you think that everything is going well, the cake sinks in the centre leaving you wondering where you went wrong.. There are days when you will swear that your bathrooms scales are inaccurate and your mobile network will tell you ‘you are not connected’ when you so want to see the response to your latest post on Facebook. There are days when you will splurge for a little ‘feel good’ and end up regretting every purchase you made. Everyone has these days. Perhaps changing perspective helps or even better a bar of chocolate. Then why not cake! Yes, cake all the way for me.. So here is a cake to turn your frown upside down. An upside down chocolate cake!

IMG_2274-2

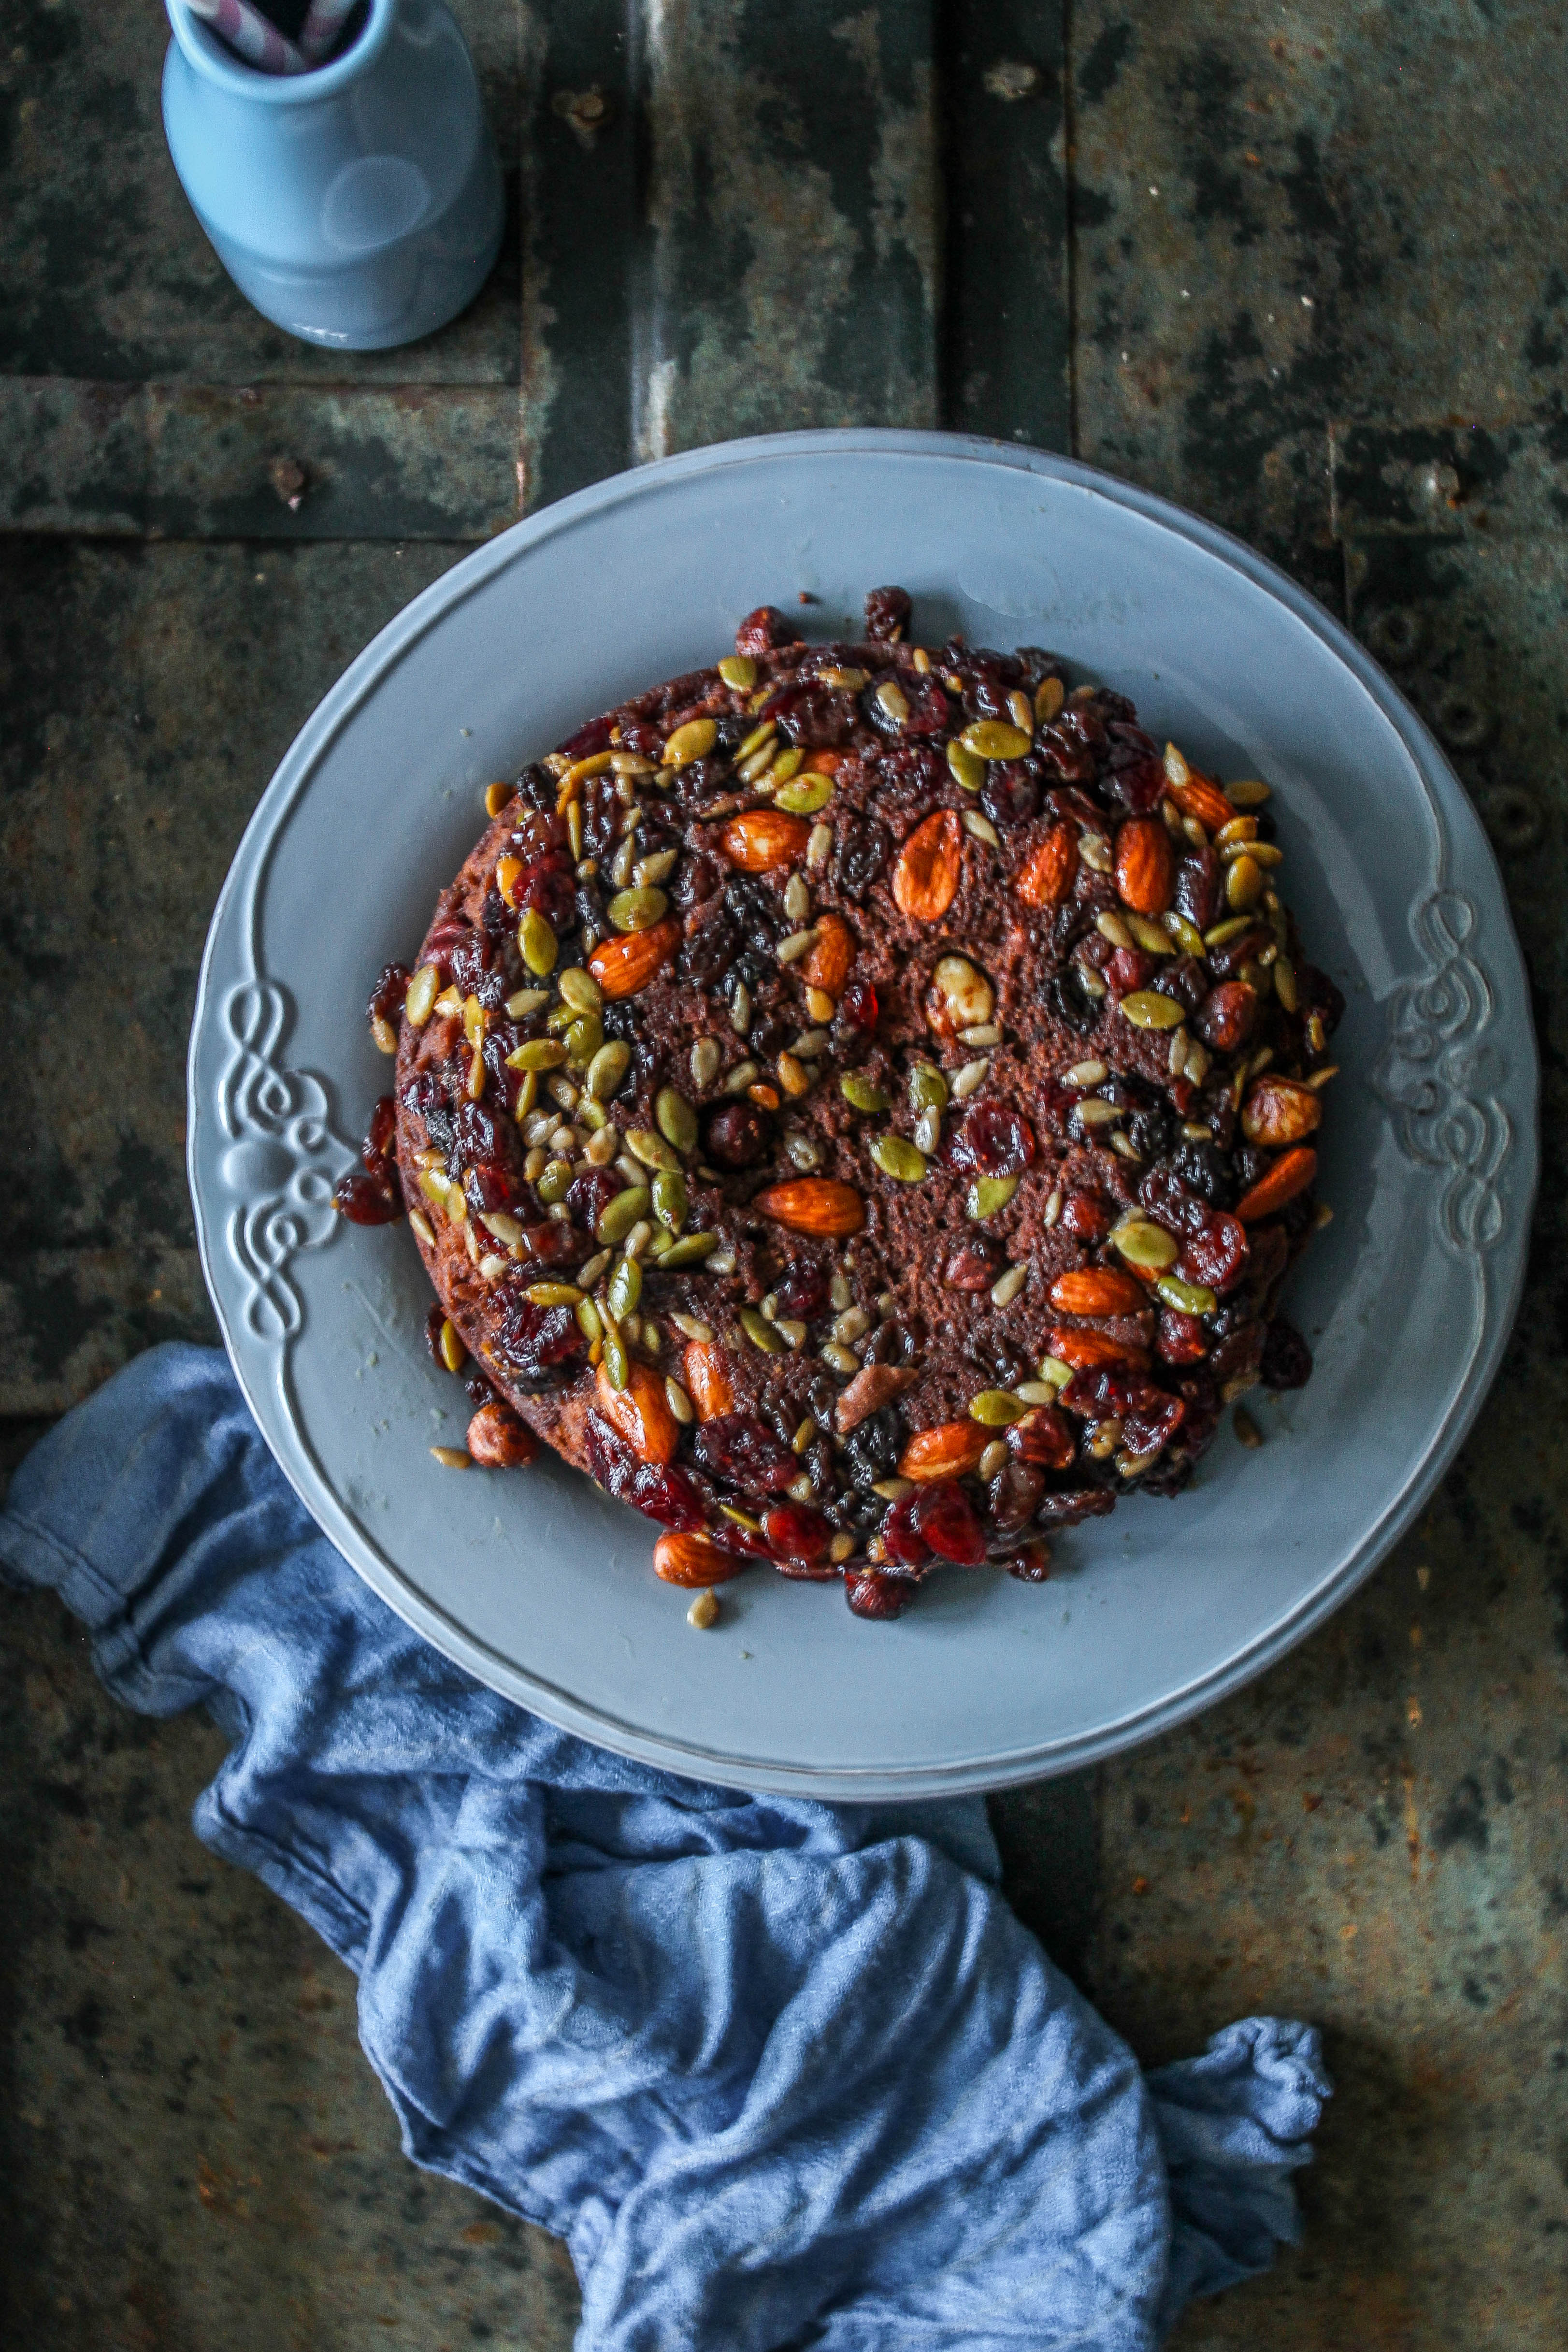
There are no fresh fruits in this cake unlike the usual upside down cakes. But there are dried ones along with nuts. You can pick any nut of your choice or leave out the dried fruits. I found it very easy to use Trail mix as the assortment is prepped, mixed and ready to pour into the cake pan. Mine had whole almonds, hazelnuts, macadamia, sunflower and pumpkin seeds, cranberries and raisins. I experimented with this cake without cocoa, the first time. My family liked it and I took photos. But for some reason, the urge was too strong to give it another shot for a chocolate version.

IMG_2264-2


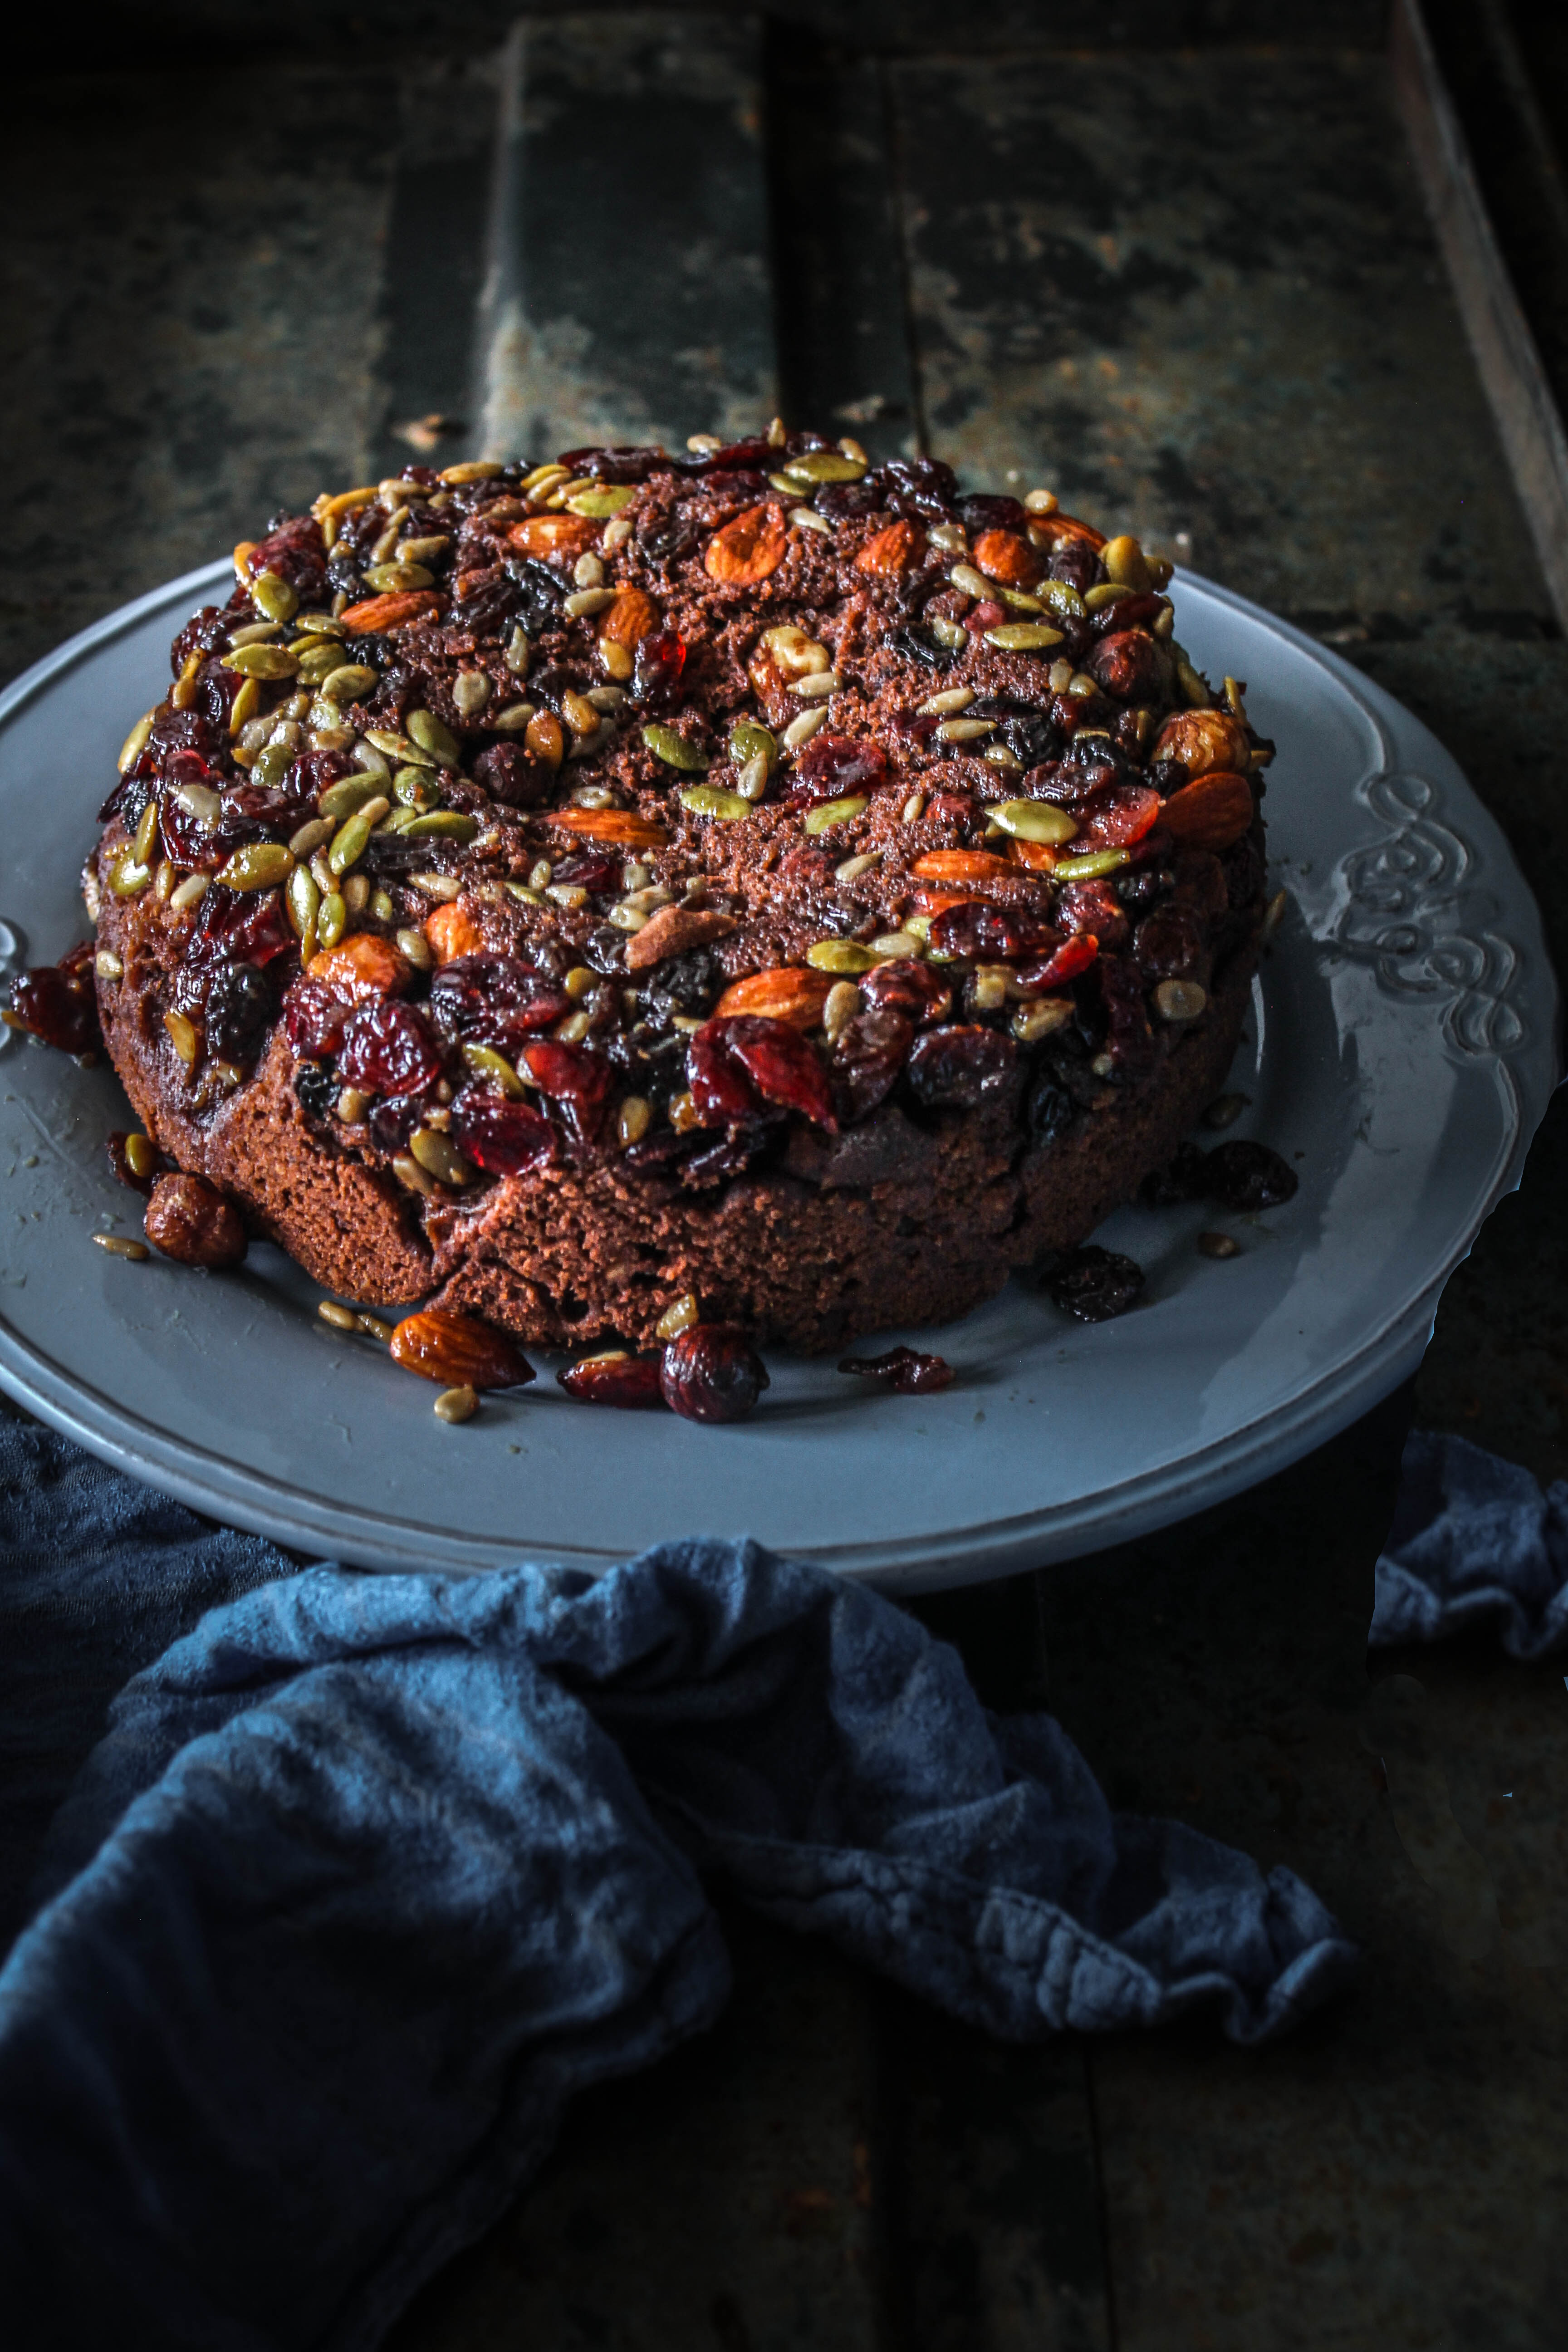
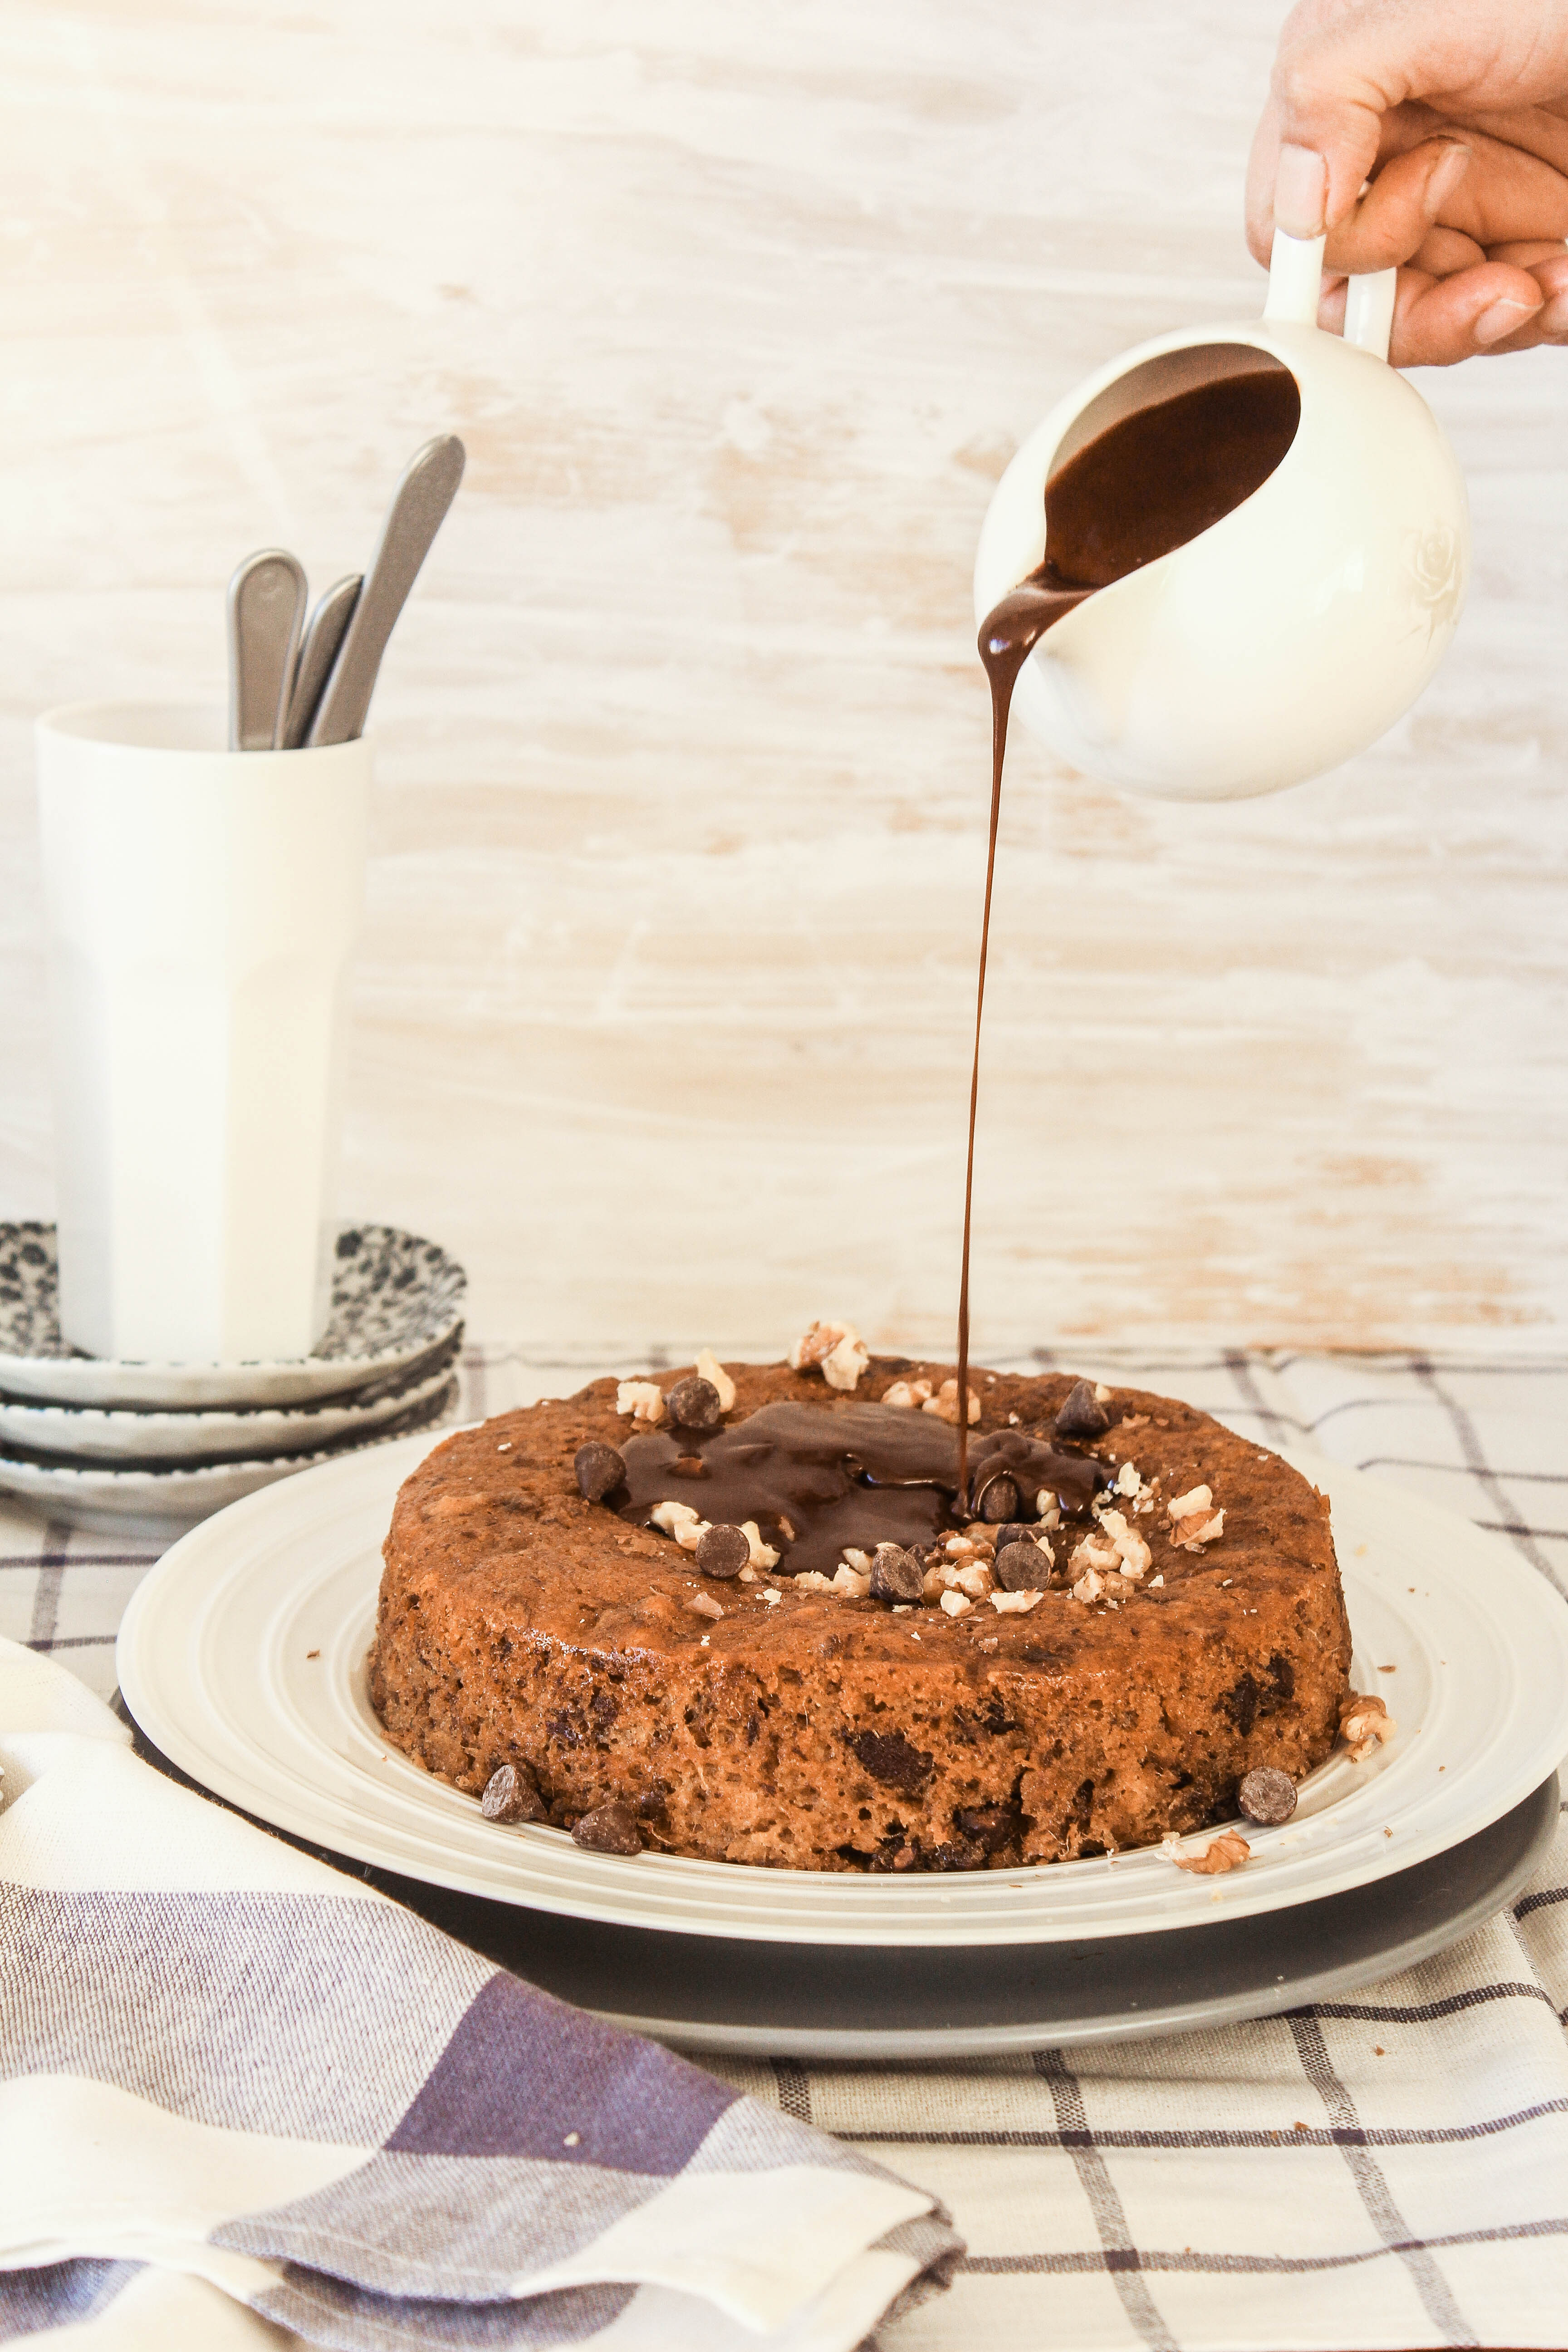
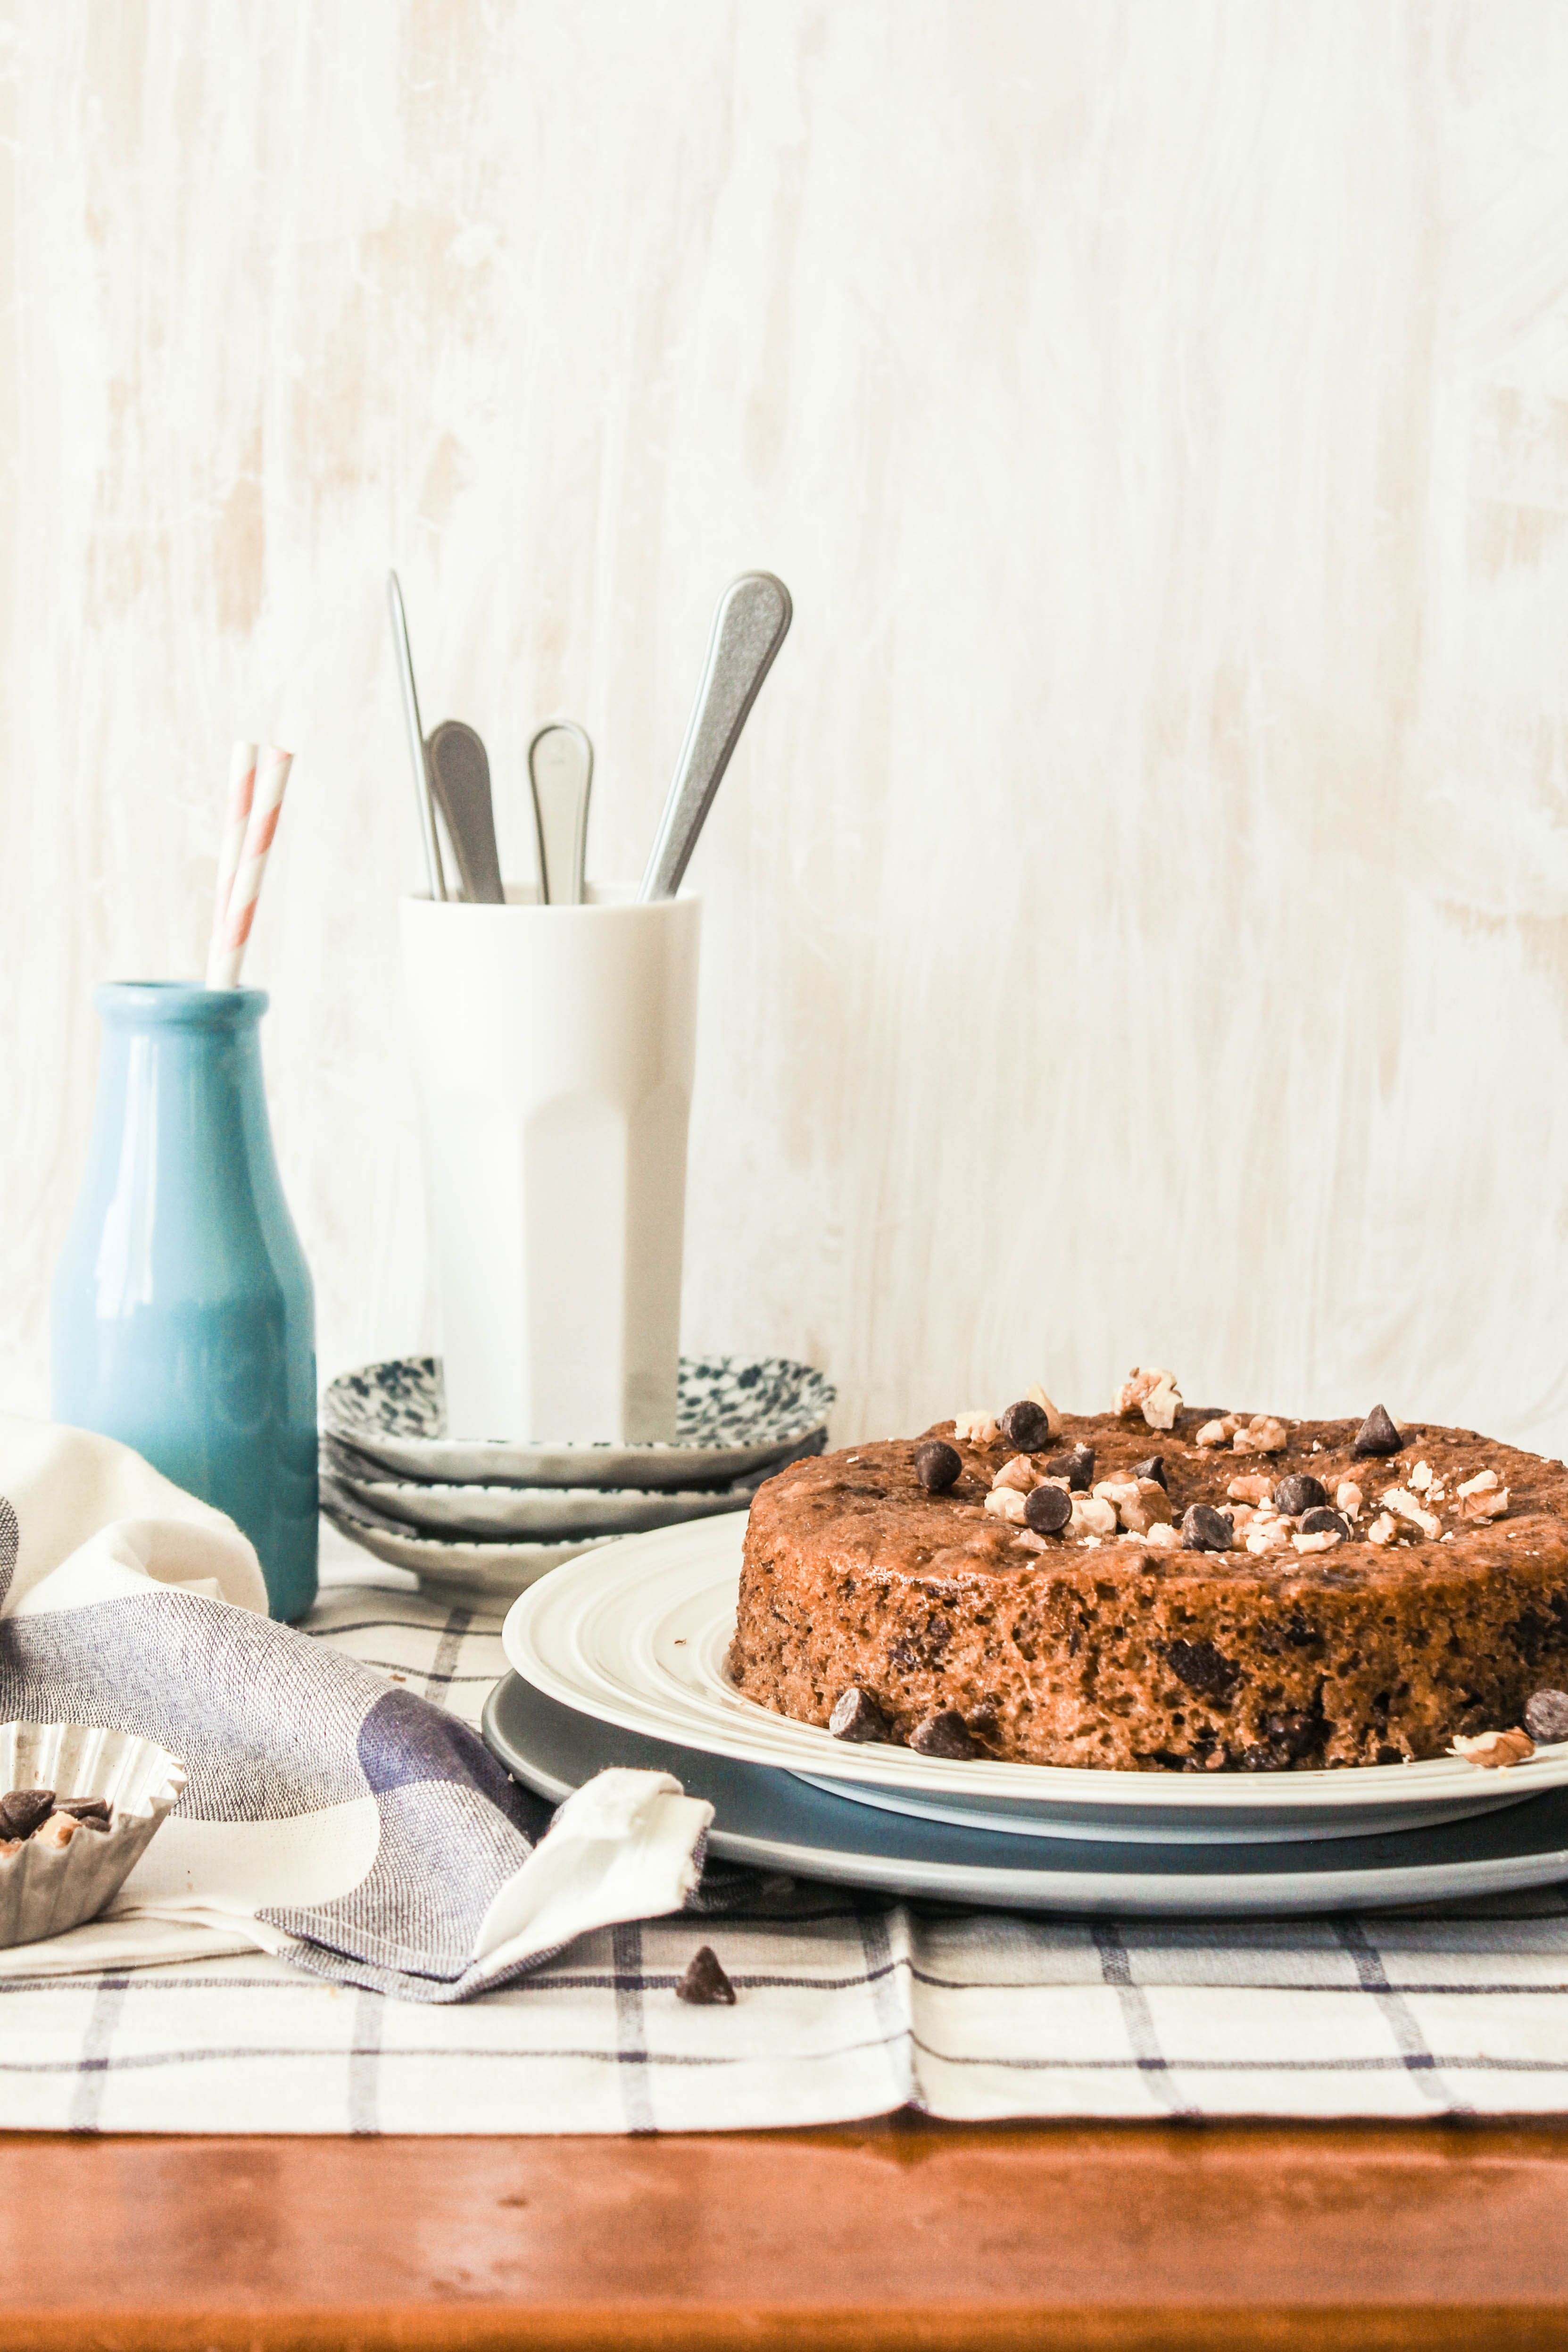
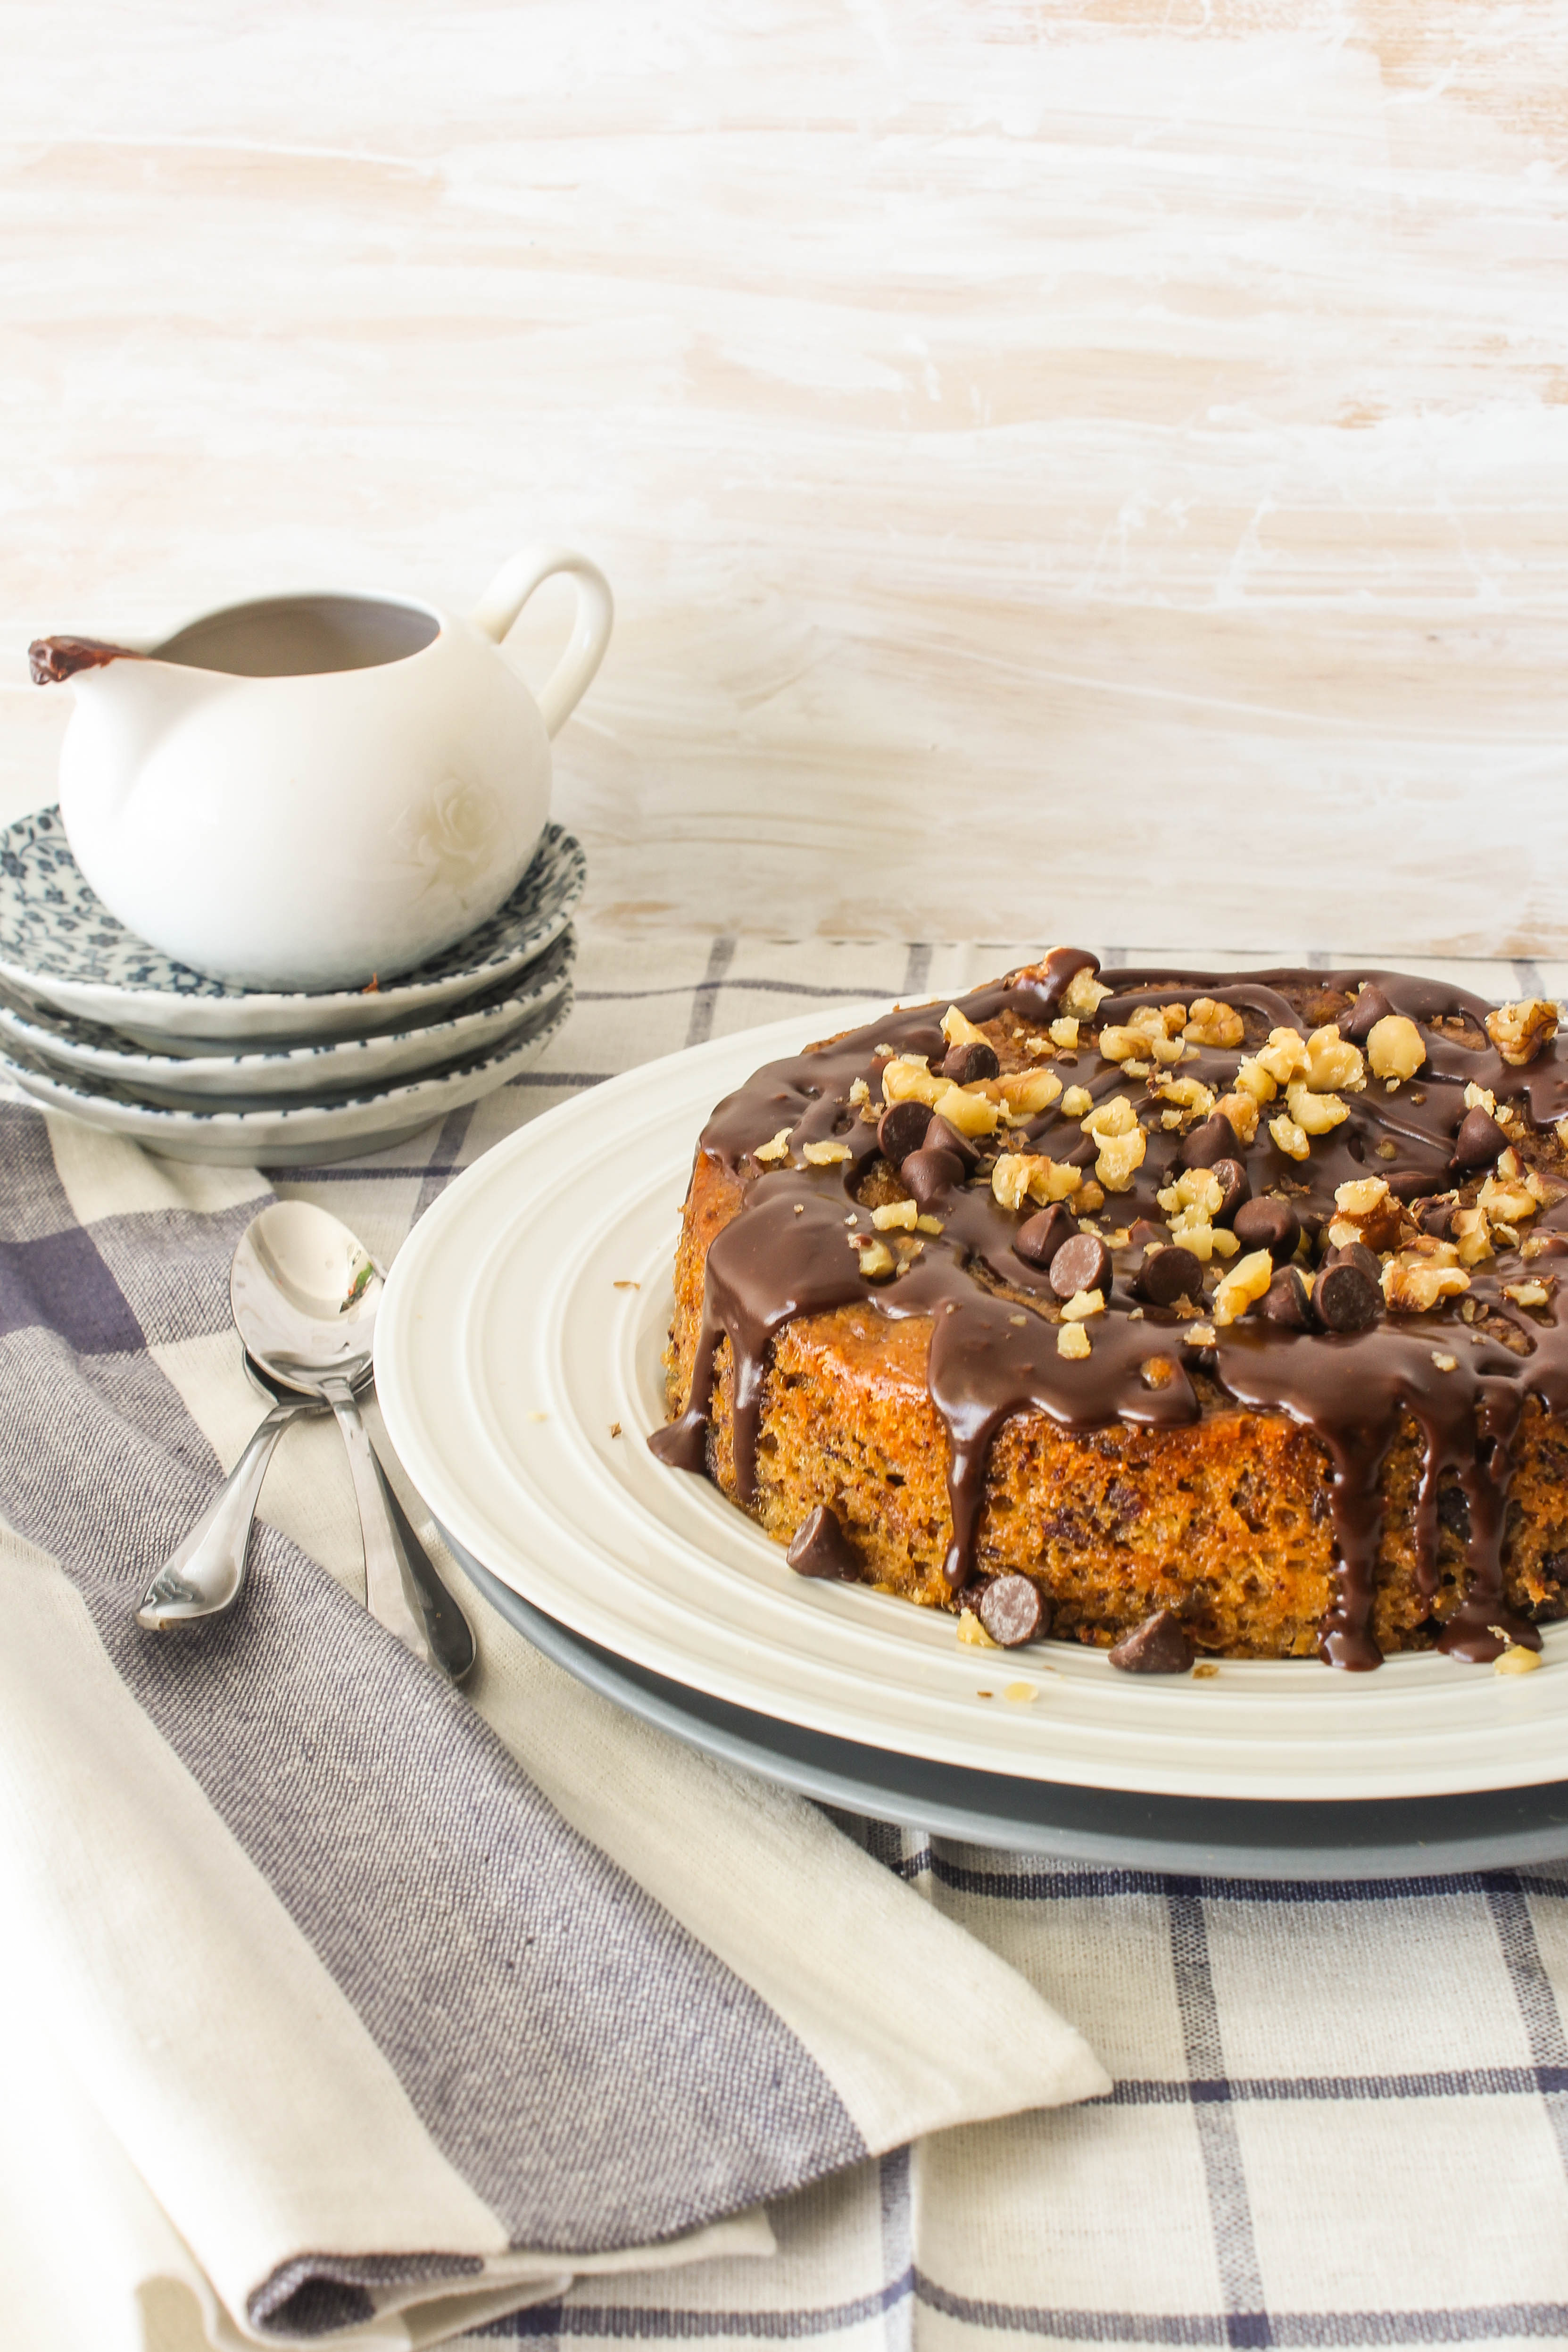
I love the simplicity of this cake. So delicious like a good chocolate nut cake. Fabulous texture, rich chocolate flavour and a caramelised nutty topping. Coming to think of it, you can achieve the same look my topping a regular chocolate cake with trail mix. But there is a difference. The toffee sauce in the bottom of the cake pan gives the nuts a luscious caramel like flavour and much of the sauce is soaked up by the raisins and cranberries that become plump with toffee.
Making the cake is a breeze but you will need to ensure the cake is thoroughly cooked at the bottom and centre before turning it upside down.

IMG_2249-2


Upside Down Chocolate Trail Mix Cake
Serves 8

For the topping
75 g butter
1/3 firmly packed brown sugar
1 cup trail mix (or nuts and dried fruits of your choice)

For the cake
1 cup self-raising flour, sifted
2 tablespoons plain flour, sifted
1 1/3  cups, firmly packed) brown sugar
3/4 cup milk
125 g butter, cubed
1/2 cup cocoa powder, sifted
1/4 teaspoon bicarbonate of soda, sifted
3 eggs, lightly whisked

Preheat oven to 160 degree C. Grease the base and sides of a 18 cm round cake pan and line the base with non stick baking paper. Heat the butter and brown sugar over low heat in a small saucepan till mixture is smooth. Pour into prepared pan. Sprinkle trail mix over the mixture to evenly cover the base of the pan.

Place the two flours together in a bowl. Place the sugar, milk and butter in a large saucepan. Add the cocoa and bicarbonate of soda into the pan. Place the pan over medium-low heat and use a whisk to stir until the mixture is smooth (don’t boil the mixture). Remove the pan from the heat and set aside for 5 minutes to cool slightly.

Add the flour mixture in slow additions gradually whisking to mix. Add the eggs and continue to mix till well combined. Pour slowly on top of the trail-mix mixture in the prepared pan. Smooth surface with the back of a spoon. Bake in the oven for 45-55 minutes or until a skewer inserted in the centre of the cake comes out clean. Set aside for 10 minutes before turning onto a wire rack. Serve warm or at room temperature with whipped cream or vanilla ice cream on the side..


Parmesan and Blueberry Pound Cake with Lemon Icing

1|10|2014

For many years, on the last day of September I partied hard. I put on my brand new outfit, painted my lips, let my hair down and danced. Well actually, I did no such thing. Yes, I partied. With all my favourite people. I woke up to deep love, the sort of selfless affection that can come only from family. I got to hear familiar voices on the telephone that I wouldn’t normally hear all year round. I came back from work with flowers and presents that would fill up the entire backseat and boot of my car. I ate my favourite breakfasts, splurged on lunches and dinners were a thing to commemorate in the precious folders of my memory forever. I expected…and I received. Basically, I was spoilt. IMG_2712

In the last few years, since I became a mother, so much has changed. Yet a lot hasn’t. My birthday is still a day I start with the brightest of faces, the warmest of hugs, fewer phone calls but more heartfelt wishes. I eat what we all love as a family. My brand new outfit, matching shoes and lip colour have been replaced with comfortable wear that allow me to chase two little boys around the house. Instead of flowers, the backseat of my car is occupied by car seats where the two of my most precious beings sit, loudly singing ‘Happy Birthday’ for me in the cutest of voices. Thanks to technology, messages flow in from various different apps. I make sure I have checked all of them and replied. Some of them need an upgrade which I realise only at that instance. I still feel very celebrated, pretty overwhelmed and reflective in the last few hours of the day. But there is a difference. I don’t expect. I understand..appreciate and acknowledge. I feel gratitude more than ever, with each passing year. Quite a few times I tell my husband ‘I don’t believe it’s the same ‘me”. He nods understandingly.

IMG_2737

There is no birthday without a cake. Though this really wasn’t the cake I ate (I mean, my birthday cake), I made it because I’ve been meaning to for a long time. This was my second attempt at making a parmesan cake. The first time, the flavour wasn’t strong enough and I baked it in a bundt cake pan. So I increased the parmesan, added blueberries, a lemon icing and honey drizzle this time. This is a fun cake. Quite easy to make but the flavours are a play on your senses…sweet…savoury…sweet…savoury..tart! Parmesan adds an extra something which is hard to describe. A hint of cheesy goodness and a slight acidity to the cake. If you are a fan of the sweet-savoury combination in food, this is a must-try. The lemon icing and honey drizzle balances out the acidity. You may want to cover the entire cake in icing if you don’t enjoy the saltiness in the cake. Overall, it is a delicious cake and best enjoyed warm or at room temperature with vanilla ice-cream on the side. IMG_2733

Parmesan and Blueberry Pound Cake with Lemon Icing
Serves 6-8

11/2 cups plain flour, sifted
1 tsp baking powder
75 g parmesan cheese, finely grated
180 g unsalted butter, room temperature, roughly chopped
3/4 cup castor sugar
3 large eggs, room temperature
1 tsp vanilla essence
1 cup fresh or frozen blueberries (I used a mix of both) Lemon Icing, to drizzle
Honey, to drizzle

Lemon Icing 1 tbsp. lemon juice
1/2 cup icing sugar, sifted (another 1/4 cup if you want a thick icing)

Preheat oven to 180 degrees C. Butter and line the base the of a 19 cm round cake pan with baking paper. In a medium bowl, place the flour, baking powder and parmesan cheese and mix gently together. In the bowl of your electric mixer or with a hand mixer, beat the butter till soft and fluffy. Add the sugar, little at a time till fully incorporated. Add the vanilla essence and eggs one at a time, beating well after each addition. Slowly add in the dry ingredients and beat on medium speed till mixture is smooth and well blended. Gradually fold in the frozen blueberries with a wooden spoon. Pour the batter into the prepared pan. Smooth the top with the back of the wooden spoon. Bake in the oven for 50-60 minutes or until the top is golden brown and a skewer inserted in the centre of the cake comes out clean. Remove carefully from the oven. Stand in the pan for 10 minutes, then transfer onto a wire rack to cool completely. Once the cake has cooled down, drizzle or ice with lemon icing (recipe below). The icing thickens on cooling.

To make the Lemon Icing, place the ingredients together in a bowl and stir until combined.

Double Chocolate Sticky Date Pudding

27|09|2014

The only thing better than a sticky date pudding is a sticky date pudding with a double dose of chocolate. Spring is starting to set in and it’s filling my life with many new excitements. Spring for me, is the time to take a good look at life and remark ‘Yes, it’s time to detox..its time for change!’. Normally what people would do at the start of New Year. Somehow leaving winter behind gives me a burst of energy. I wake up with a list of things to do pretty much every morning. One of the resolutions I had made for this Spring was to improve my photography and pick up some new skills. I have been working hard in doing so. If you follow me on Instagram, you would know that I was very excited when I shared my first ever ‘pour shot’ recently. As a lover of all things sweet, nothing spells ‘food porn’ to me than a sauce dripping dessert.  I chose the sticky date pudding with chocolate chips to be the subject of my pour. Again, raising the bar to my creativity is one more journey I have embarked on. I have to admit, I have always been a bit fearless in the kitchen. It is a very spontaneous thing for me. Rarely have I entered the kitchen with a fixed outcome in mind or followed a recipe to the T. This time around I have decided to fuel this passion and try my hand at as many things as possible. You may get to see a lot of pouring, drizzling, sprinkling and such on the blog in future.

IMG_2488-4


The sticky date pudding is such a gorgeous thing to share with friends and family. Especially on a special get-together when comfort and pleasure over-rides any form of calorie induced guilt. I wanted to make the pudding a centrepiece. There is already a recipe for individual sticky date puddings in my blog archives which is quite luscious with a butterscotch sauce. But chocolate is different, it just  works with everything. It gives an extra oomph to anything and everything. This version of the pudding has chocolate chips and toasted walnuts inside the batter, on top and dressed up in a rich, bittersweet chocolate sauce. Frankly, there is no major innovation in this, just that you want to convince yourself if you really want to play around with a dessert that is already so beautiful to taste and look at. Yes, you want to! Trust me, you will love to eat it and share it.

IMG_2484-3

If this is the first time you are going to make a sticky date pudding, there is very little date-like taste in your mouth. I know quite a few people who don’t enjoy dates in desserts. This is far from being chewy or munchy and all the textures you associate with dates. The dates are broken down right at the start and what you get is actually a rich caramel like sauce that flavours the pudding. You can make this recipe in 8 individual cups instead of one large. As you can see, the pudding holds shape beautifully, almost like a cake. It is very gooey inside however and the centre might sink a tad bit. Which actually formed the base to catch my chocolate sauce during the shoot. I could not take pictures of the insides like I normally do as I was jumping with excitement when I blew up the image on my screen. I wish I could show you the number of images I had with sauce hanging in mid-air and of course the blurry ones. Kind of spooky!
We just had to celebrate and all we wanted was a mouthful of the Sticky date pudding.

IMG_2539-3


IMG_2548-2

Double Chocolate Sticky Date Pudding
Serves 8

180g dates, pitted and roughly chopped
1 1/4 cups (310ml) water
1/2 tsp bicarbonate of soda
3/4 cup (165g) firmly packed brown sugar
60g butter, softened chopped
2 eggs
1 cup (150g) self-raising flour
1/2 cup dark chocolate chips
1/4 cup toasted walnuts

For the dark chocolate sauce
100g dark chocolate, chopped
1/2 cup pouring/single cream
2 tablespoons brown sugar

Preheat oven to 180 degrees C (160 degrees C fan-forced). Lightly grease an 18 cm round cake pan and line base with baking paper.. Place dates and water in a saucepan and bring to the boil over a high heat. Remove from the heat. Add bicarbonate of soda, stir until dates start to break down, set aside to cool, stirring occasionally.               
Place the chocolate chips, walnuts and flour together in a bowl. Beat butter and sugar in a bowl using a hand beater, gradually add eggs one at a time, beat until light and fluffy. Add date mixture, stir to combine. Carefully fold through the flour and chocolate chip mixture, pour into prepared cake pan. 

Place cake in a baking tray, carefully pour water in tray until it comes up 1/3 of the sides of the pan. Bake in the oven for 40 minutes or until golden and skewer comes out clean. Leave in pan for 10 minutes. then carefully turn out pudding onto a serving plate or tray. Serve warm with Chocolate Sauce, extra chocolate chips and toasted walnuts.

Make the Dark Chocolate Sauce :  Combine chocolate, cream and sugar in a saucepan over a low heat. Cook, stirring, for 5 minutes or until mixture is smooth. Set aside to cool. To store, pour into a cup/jar, cover and store in the refrigerator till needed. Warm up before using.

Orange Almond Self Saucing Pudding

22|09|2014

The whole of last week, I thought I was craving pie. A good Aussie meat pie with chunks of meat in a rich gravy encased in buttery flaky pastry. I saw it somewhere and then somewhere else and then I craved it. Several times during the week at dinner and even breakfast I told my husband ‘I wish I was having pie, instead’. Yet when I stood in the bakery facing the most fabulous choices of pies, my eyes travelled to the cakes, muffins and tarts on the shelves next to them. ‘Carrot cake’ I told the lady at the counter , much to my husband’s surprise. In my mind, I told myself  ‘Carrot cake with cream cheese icing and toasted walnuts…YUM! Sometimes for me, the line between what I think I want to eat and what I really want to it can get a little blurry. Possibly the little side-effects that come with dealing with food all the time. Possibly I am eating too much with my eyes lately.

IMG_1772

But there are some things that I know will never fail to satisfy my innermost cravings and those that I can eat with my eyes, mouth and heart wide open. Like the curries of my childhood (heady with the smell of ginger, garlic and Garam masala), heavily buttered toast, cupcakes over muffins (any day) loaded with sprinkles, chocolate chips (instead of pepitas or cranberries) on my oatmeal, at least half a cup of parmesan cheese on my pasta and gooey warm puddings that hide sauces underneath. Agreed that I have to shed of some of (okay, a lot of) the winter weight I have gained but it’s Spring, it’s still cold and puddings are very much on.
IMG_1798

This pudding excites me over any other pudding I have ever made because it has almond milk in it. Regular milk will work just as fine but if you have almond milk at home or planning to get some, try this pudding. It is every bit citrus-y as much as it is nutty and livened with a gorgeous sauce beneath. I was already a big fan of the orange-almond combo and could have loved the cake alone. The thick sauce is an added bonus. Comfort food at it’s best!
It is quite an easy pudding to make. The only thing you need to take care of is to not to over-cook the pudding or you will not have enough sauce left. A tad bit undercooked is better than making a cake out of the pudding. The basic pudding recipe was adapted from here. When I made it the first time, I thought it could do with more sauce which is the true essence of a self-saucing pudding. So I made some adjustments to the recipe, experimented with almond milk and it turned out the way I wanted it to be. I baked the pudding in two baking dishes as I did not have a large one. In that case, you may need to reduce the baking time by 10 minutes.

IMG_1820-3


Orange Almond Self-Saucing Pudding
Serves 6

Melted butter, to grease
1 cup self-raising flour
1/2 cup castor sugar
1/2 cup almond meal
1 tablespoon finely grated orange rind
3/4 cup almond milk
1 egg
50g butter, melted, cooled
1 tablespoon  cornflour
1/2 cup castor sugar, extra
2 cups fresh orange juice
1 tbsp. Cointreau (or any other orange liqueur, optional)
Icing sugar, to dust

Preheat oven to 180 degree C (fan-forced 160 degrees C)  Brush a 1.5L (6-cup) capacity oven-proof dish with melted butter. Place on a baking tray lined with non-stick baking paper. Sift flour into a large bowl. Stir in the sugar, almond meal and orange rind.

Whisk the almond milk, egg and butter in a jug until combined. Add to the flour mixture and use a wooden spoon to stir until smooth and combined. Pour into the prepared dish. Use the back of a spoon to smooth the surface.

Combine cornflour and extra sugar in a bowl. Sprinkle over the pudding mixture. Place orange juice in a small saucepan over medium heat. Bring just to the boil. Remove from heat and add the Cointreau (if using). Gradually pour over the back of a spoon onto the mixture.
Bake for 45-50 minutes or until a cake-like top forms and a skewer inserted halfway into the centre of the pudding comes out clean.

Set aside for 5 minutes to stand. Dust with icing sugar and serve hot with custard or vanilla ice cream.


  • « Previous Page
  • 1
  • …
  • 41
  • 42
  • 43
  • 44
  • 45
  • …
  • 57
  • Next Page »
Hey Sugar
Cake
Link to my Facebook Page
Link to my Instagram Page
Link to my Pinterest Page
Link to my Mail Page
Subscribe to this site
Fresh Awards
2019 Aus mumpreneur
2019 aus mumpreneur
Mumbrella

Copyright © 2025 · Sugar Et Al · Designed by Smitten Blog Designs · Log in