• Home
  • Recipe Index
    • Recipe Index
    • Breakfast/Brunch
    • Cakes and Puddings
    • Chocolate
    • Cookies and cupcakes
    • Custard and Mousse
    • Gluten Free
    • Ice Cream
    • Mains
    • Other Sweet Treats
    • Snack/Appetizers
    • Soups and Salads
    • Tarts and Pies
    • Vegetarian
  • About
  • Cookbook
  • Portfolio
  • Store
  • Press
  • Work with Me

Sugar et al

Because Life is a blend of flavours...

Sauteed Apricots with Honey, Goat’s Cheese and Pine Nuts

15|07|2014

Where did I find apricots at this time of the year? I would love to give so many different answers, my favourite being..the farmer’s markets. Alas! That is a hardly a possibility in the dead of winter. I am constantly dreaming of Spring and Summer, of juicy stone fruits, sunny beaches, of ice pops and every kind of summery treat. I have been doing the last two, though (beaches and ice pops). Being in Sydney, you can’t escape the beaches but it’s never like Summer.

IMG_8334

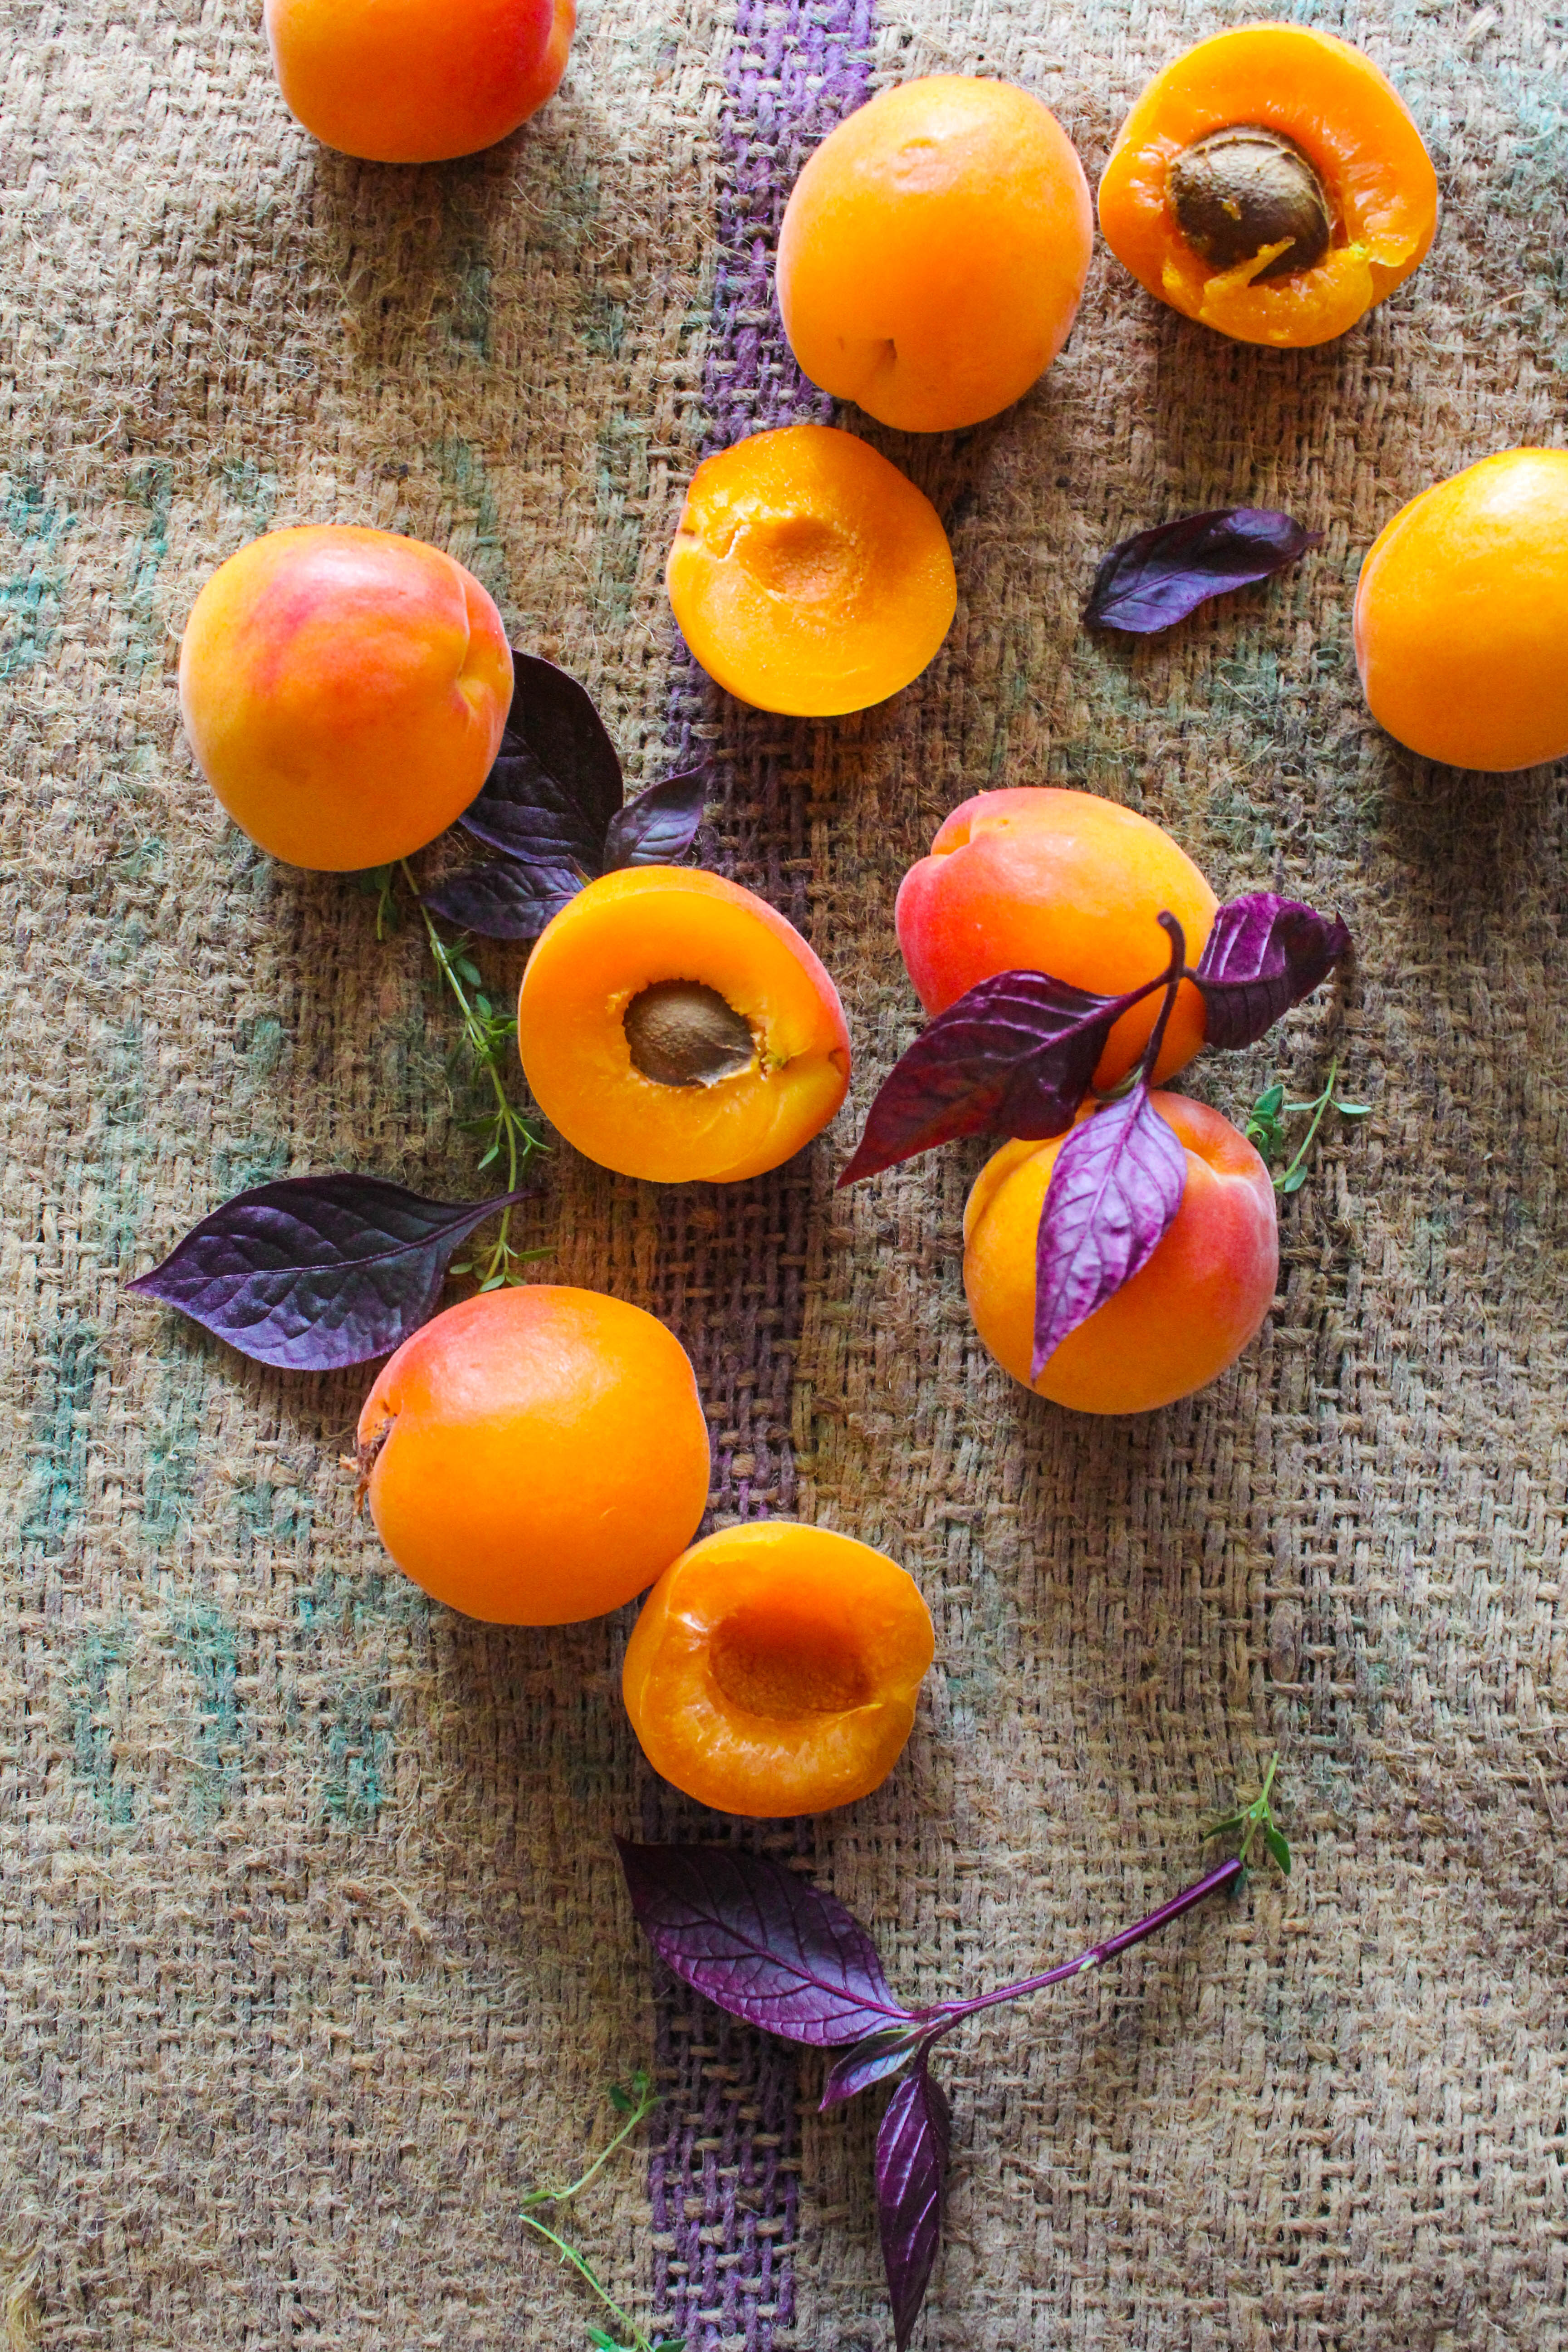
I had a glut of apricots last summer and that is when I had cooked with these. I think, I liked them so much from a photography perspective that I wanted to keep them as simple and intact as possible. Apricots in season are so sweet and juicy by themselves that I best enjoy them plain.

IMG_8322

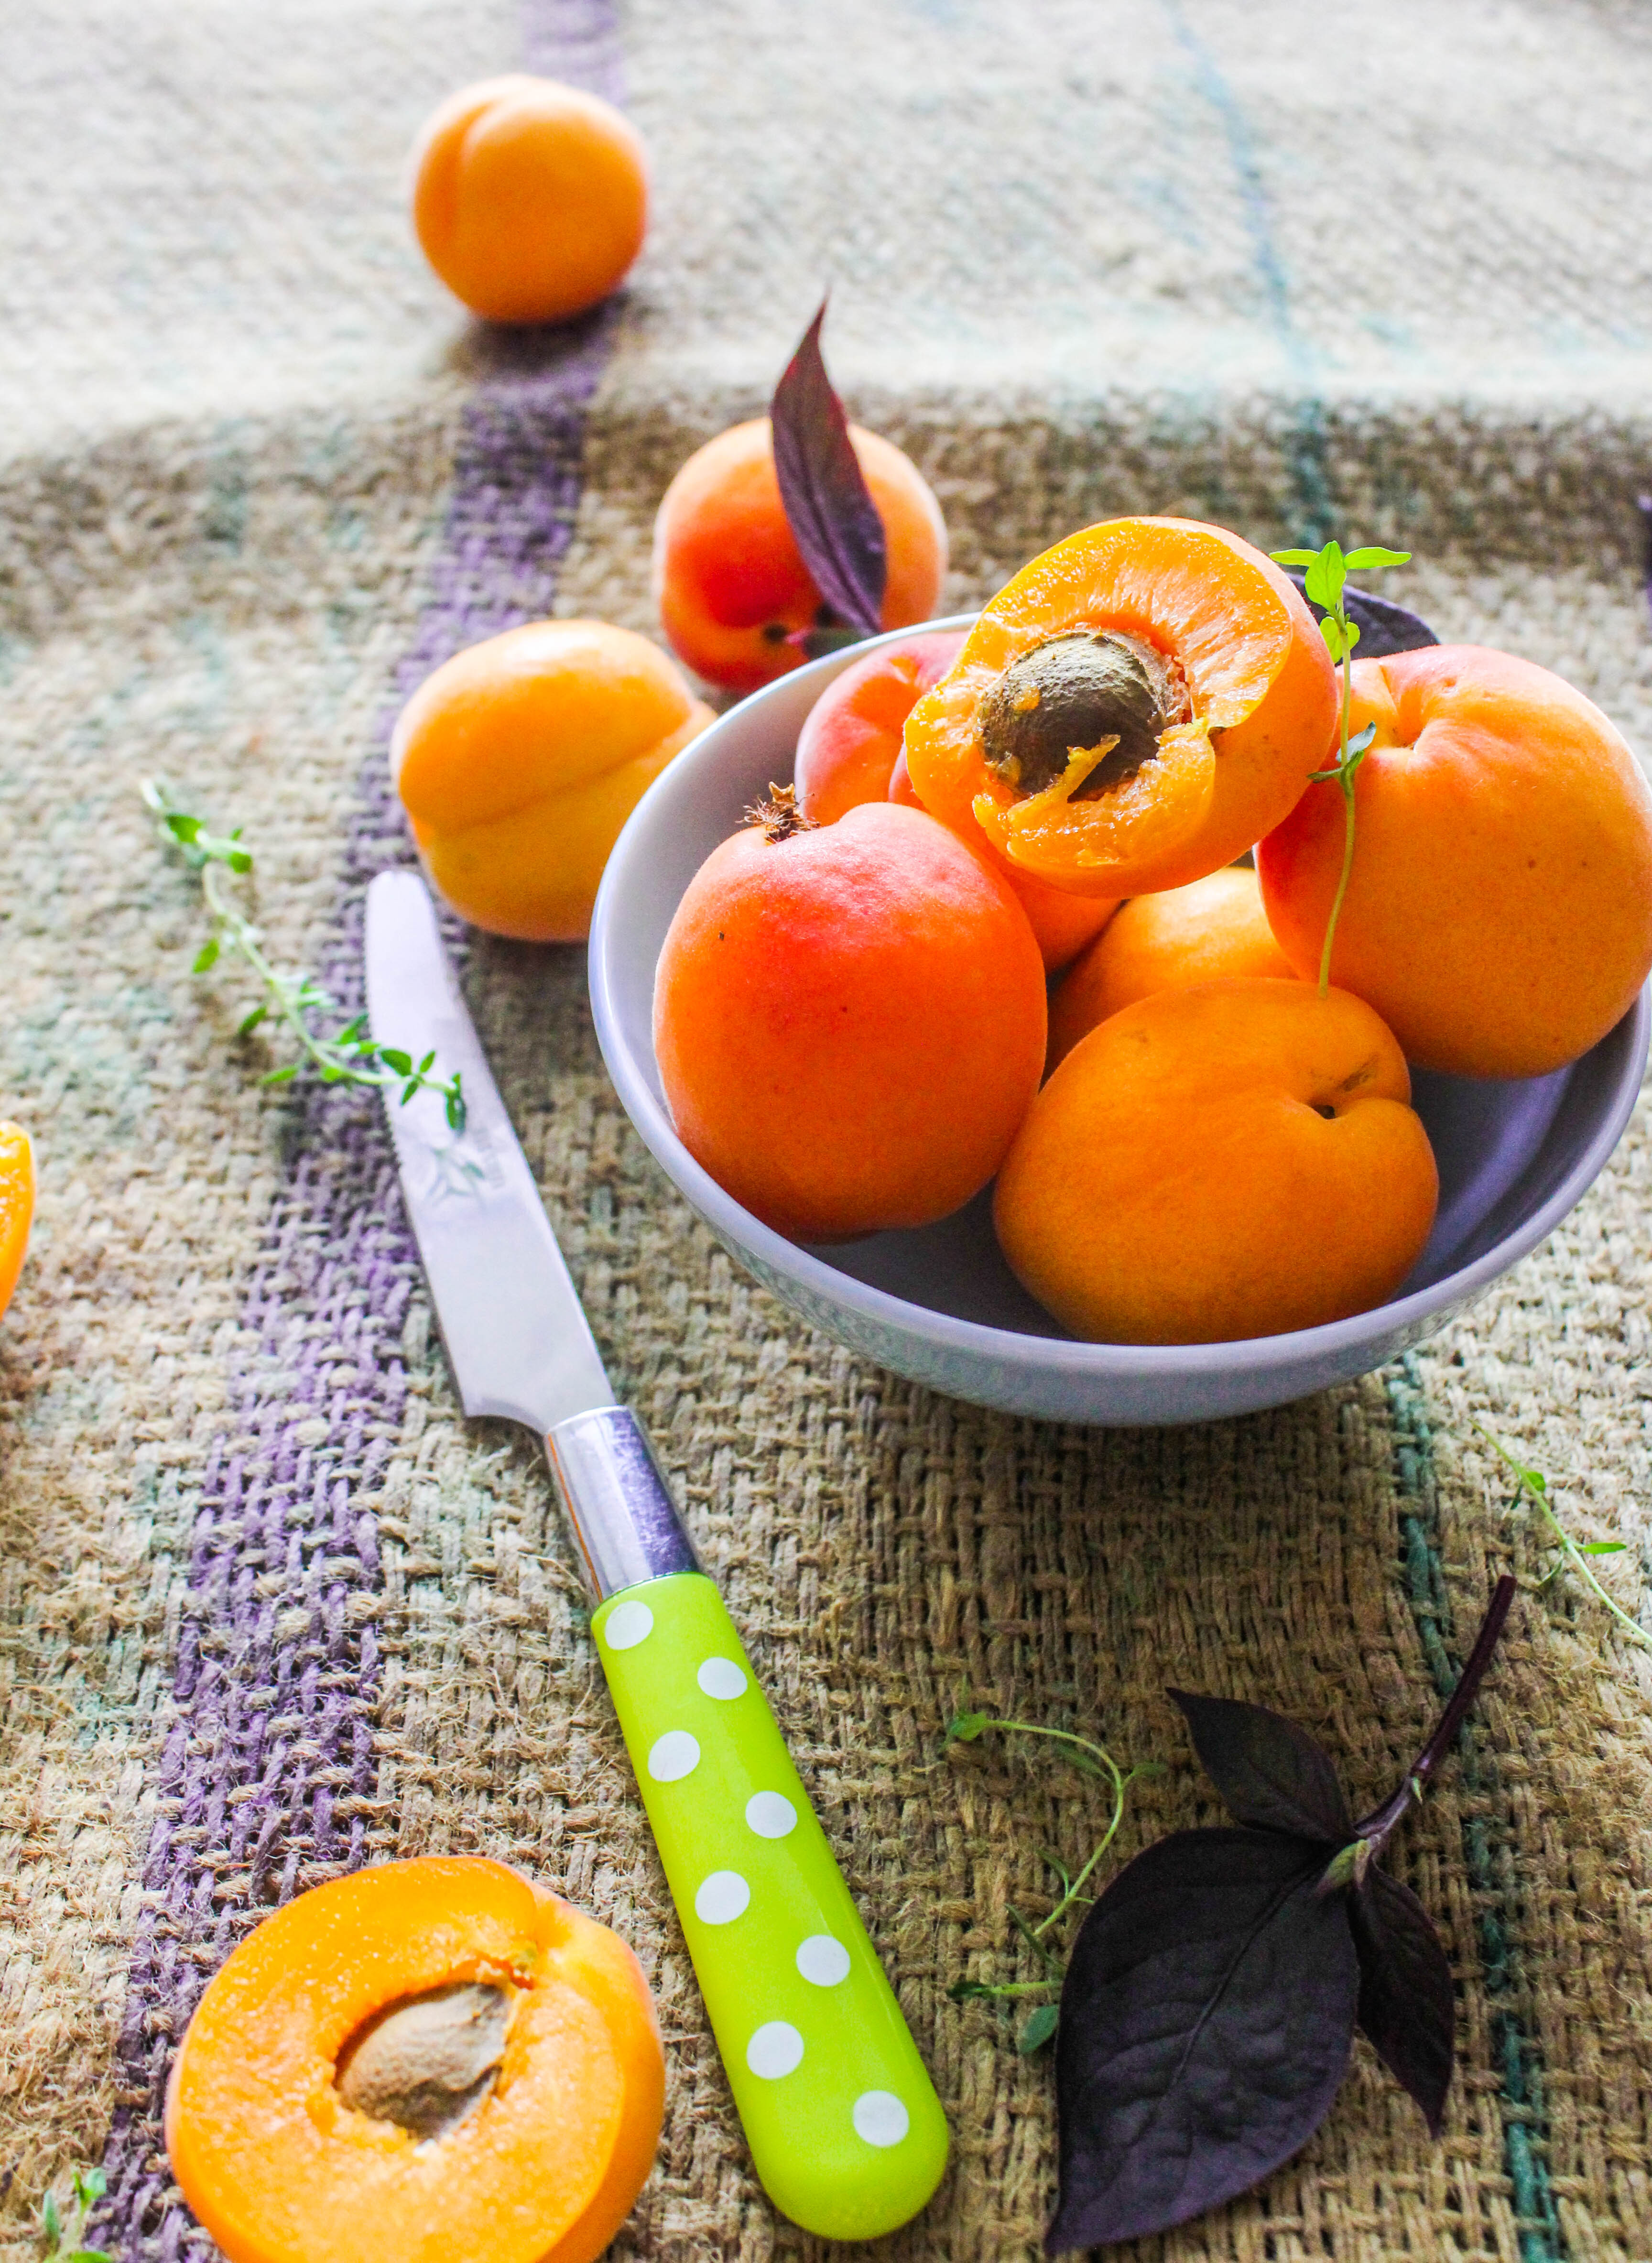
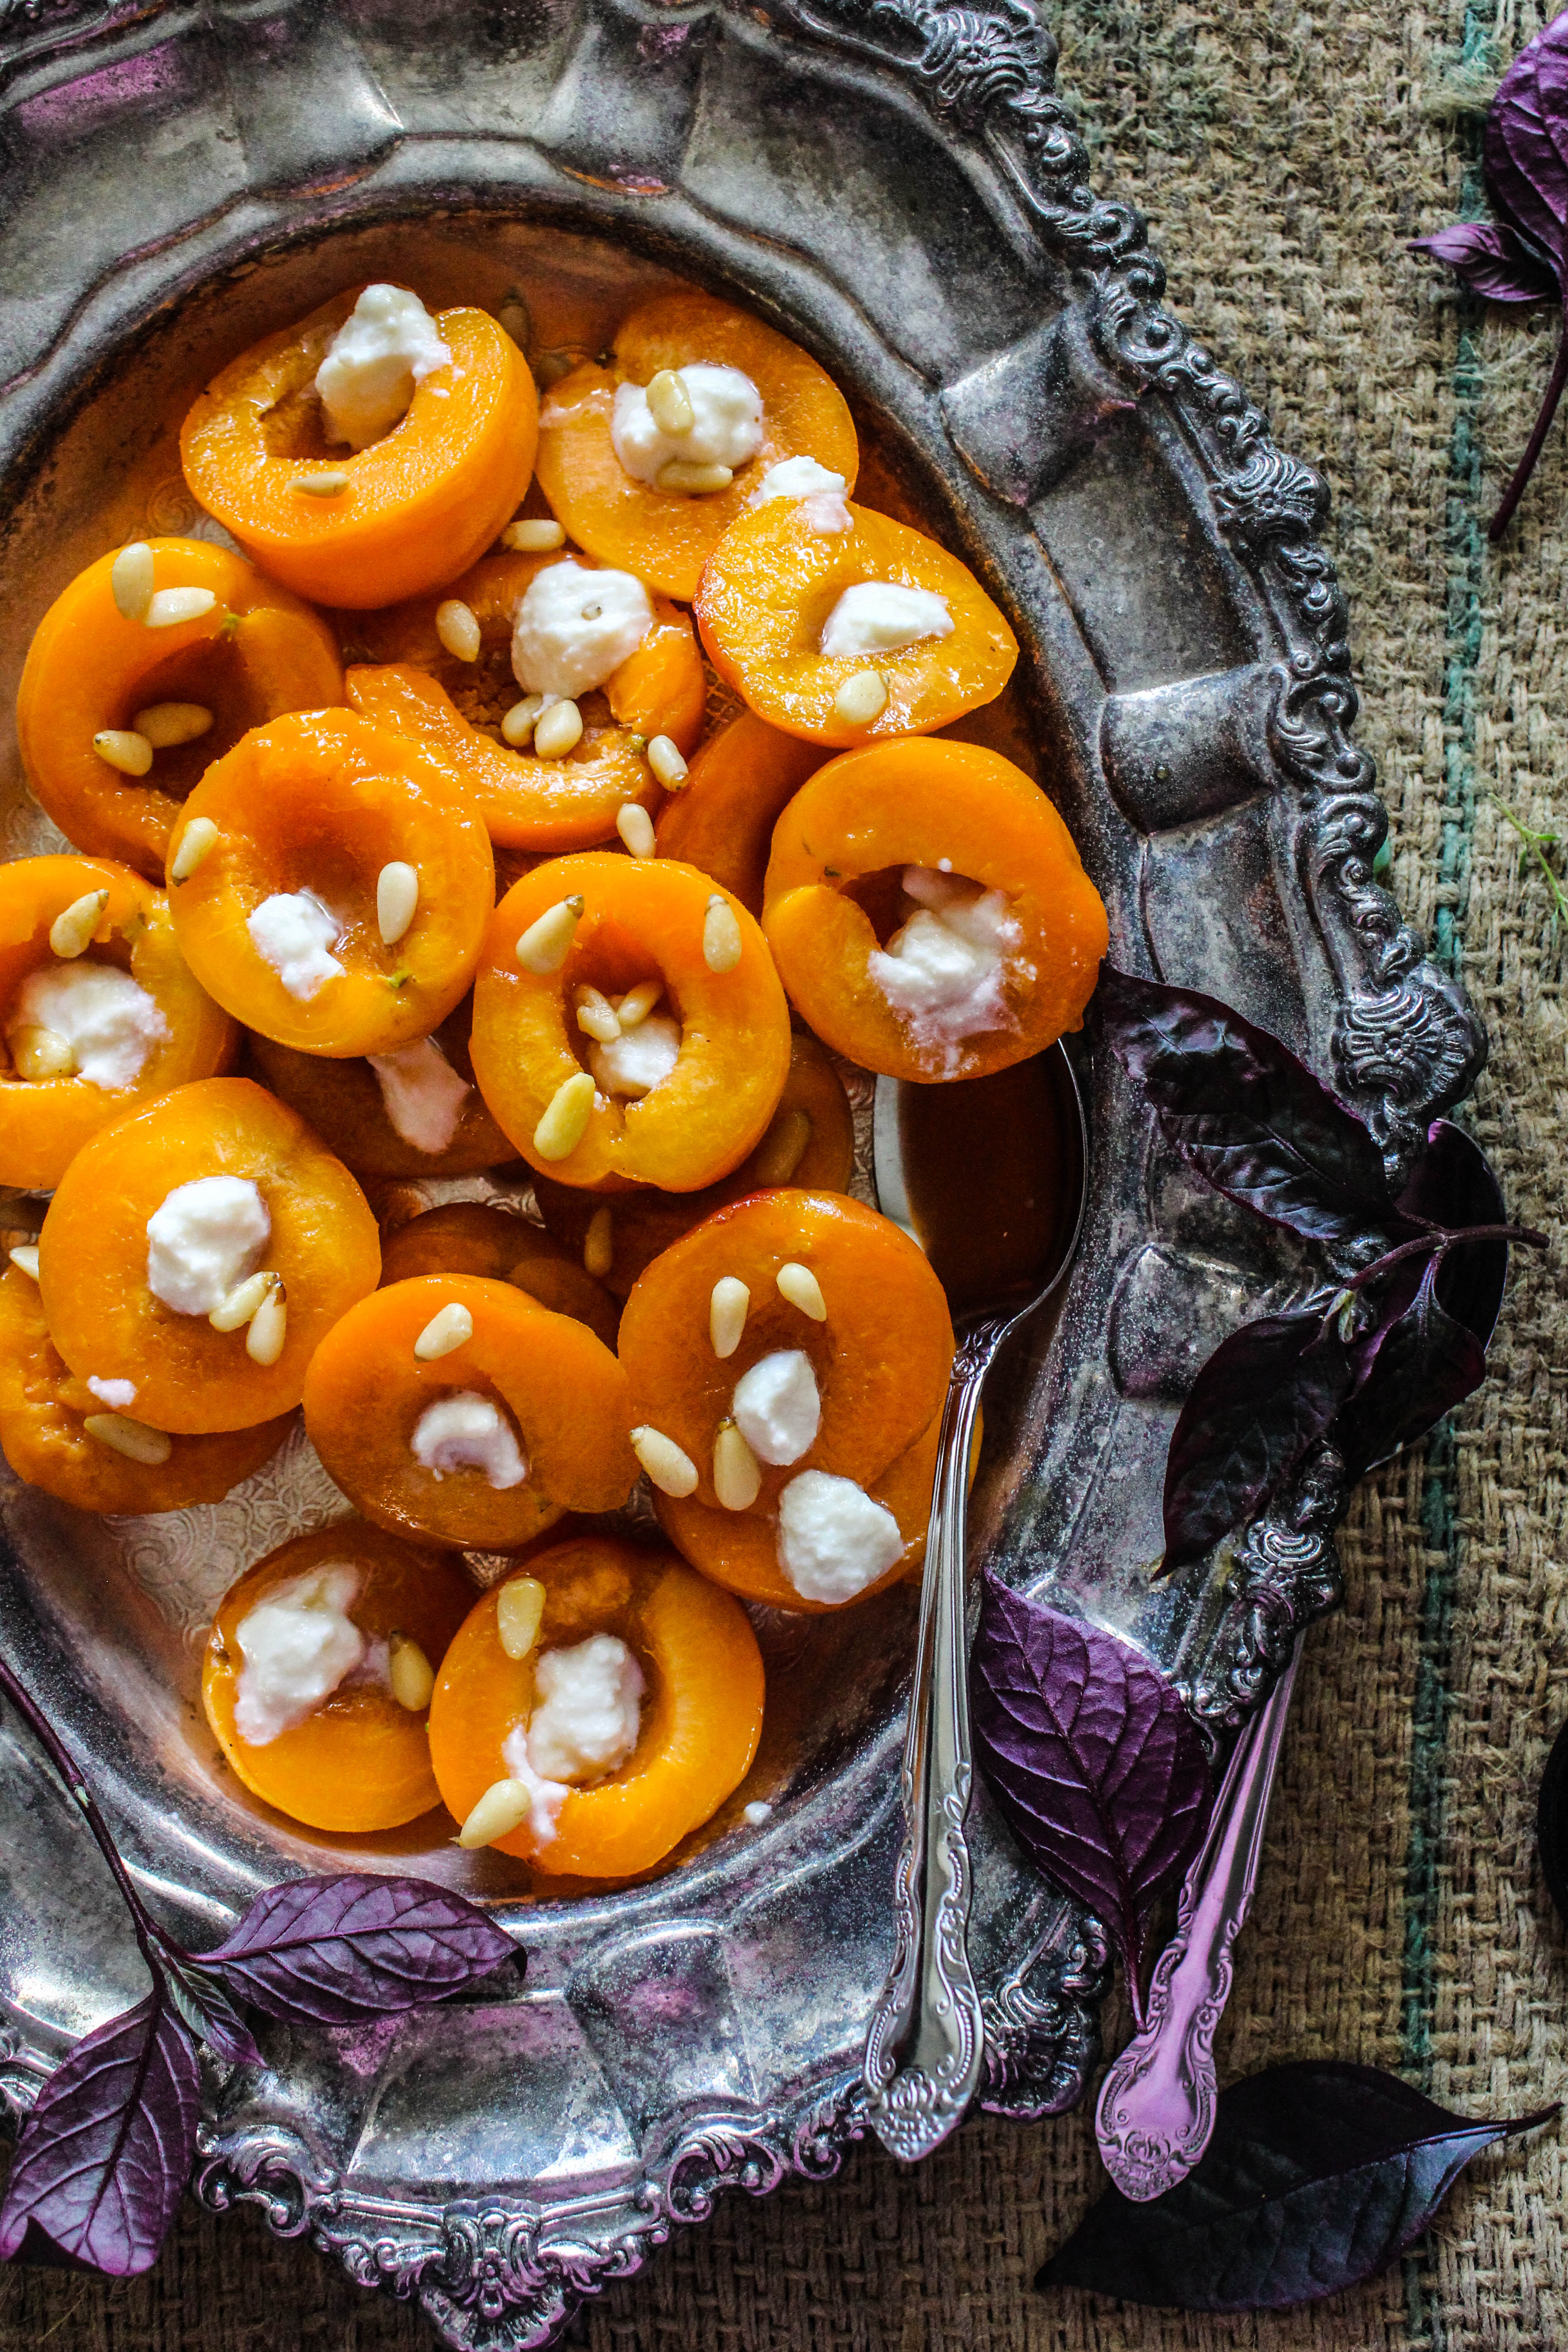
There is really no recipe. You wouldn’t need one. I halved the apricots and removed the stones. I sautéed them in a little butter till they were slightly golden. On removing from the heat, I placed them on a serving tray. Drizzled a bit of honey (whilst they are warm), spooned over goat’s cheese and scattered with toasted pine nuts.

IMG_8338

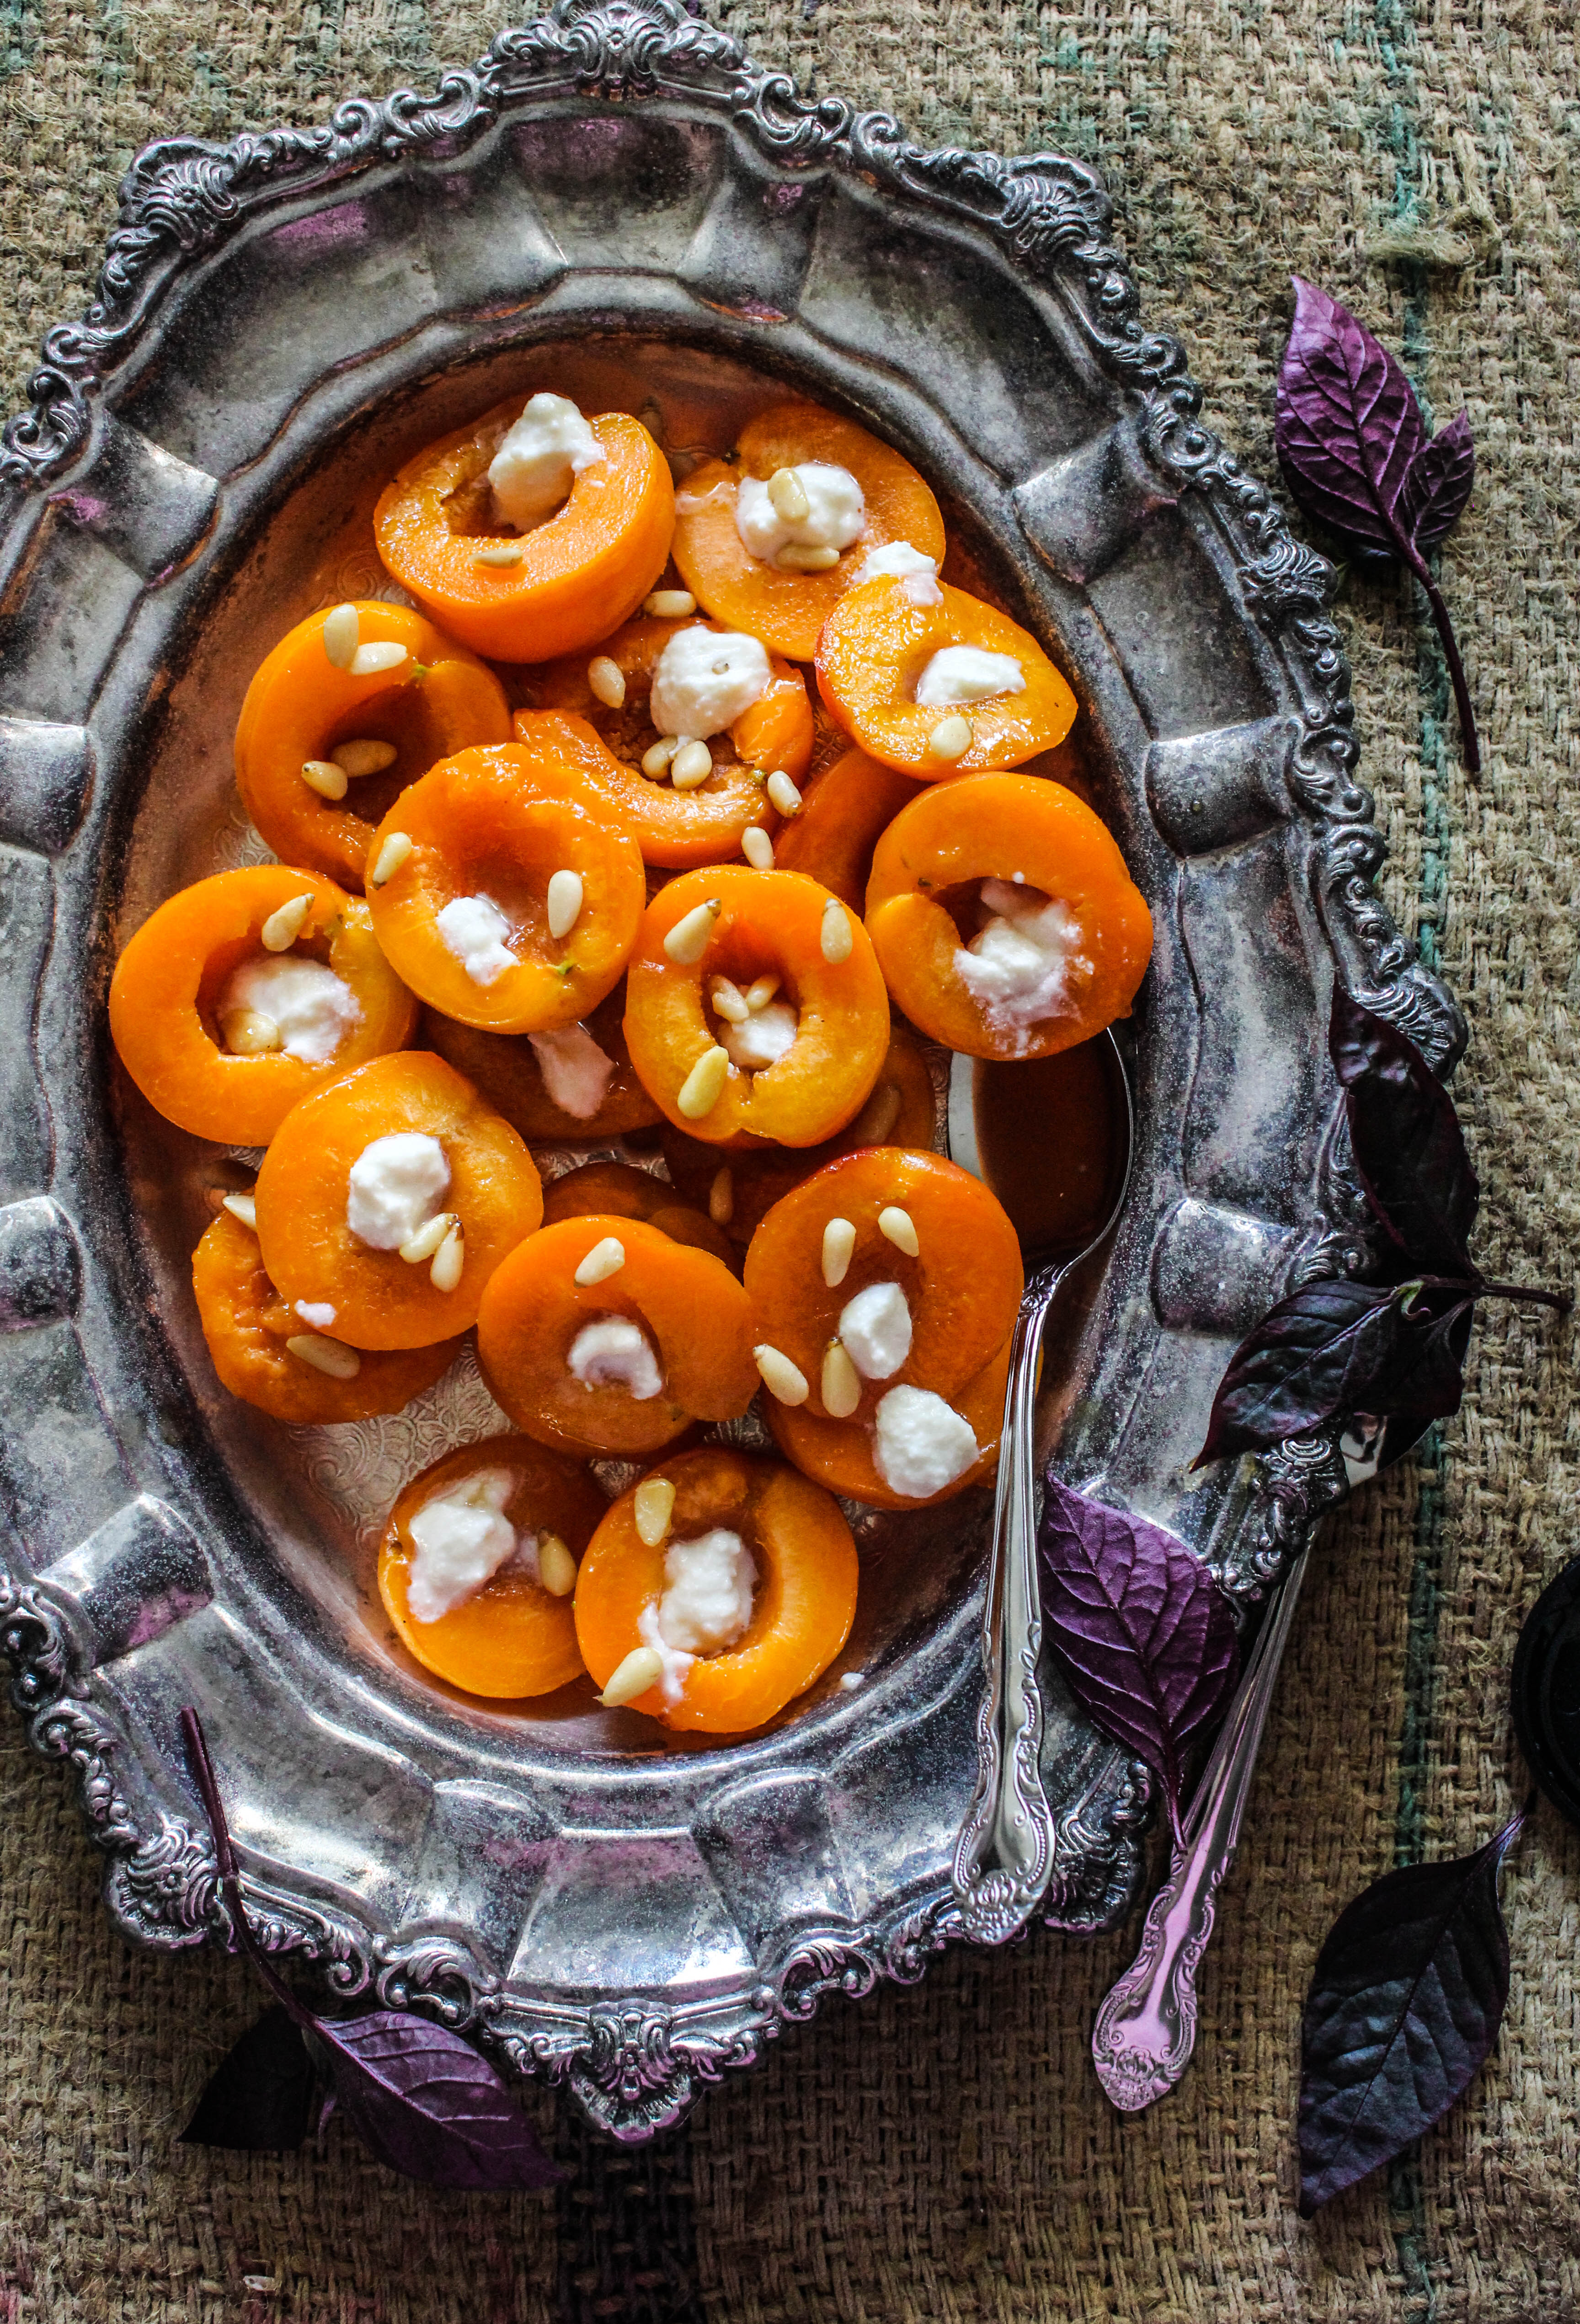
Apricots are versatile so this dish is open to all possible variations. Mascarpone or Ricotta can be used in place of goat’s cheese. Replace pine nuts with almonds or pistachios. Add mint or basil for an extra herby punch. Spice works too. A sprinkling of powdered cinnamon, ginger or cardamom elevates the flavours to a whole new level.

IMG_8337


Rice with Spring Onion Pesto and Tuna Meatballs

12|07|2014

Perhaps the very best taste, I have enjoyed of Spring Onions have been in Chinese Spring Onion/scallion pancakes. Until now.
This pesto has changed that and it has assumed an important place in my weeknight menu lately. It is no secret how much I love making and eating Pesto. While I absolutely love the traditional basil-pine nut pesto, I find that there is plenty of room for variation in the classic ingredients for convenience, preference or variety. I’ve already shared it with you here and here.

IMG_0858

IMG_0863


The mild onion flavour of spring onions along with garlic, almonds, some basil, thyme, parsley (basically any herb that you have at hand), a bit of parmesan and olive oil yields a pesto that is so versatile and flavourful that you can spoon it over any savoury dish to make it taste delicious. The vibrant green reminds me of spring. So aptly called Spring Onion.

IMG_0875-3


IMG_0870-2I like to stock up on canned Tuna for rainy days. Unopened, it stays for months and there is no prep required to cook with it, which is great for dishing out meals under 30 minutes. The Tuna meatballs take less than 10 minutes to put together and are then baked in the oven. Both the Pesto and meatballs can be made ahead. Then dinner is just a matter of cooking the rice with pesto and adding in the meatballs.
The recipe will yield more pesto than needed for the rice. You can store leftover pesto it in the refrigerator and use it on pasta, soups, sandwiches or as a marinade for chicken skewers like I did.

IMG_0881-3

 Rice with Spring Onion Pesto and Tuna Meatballs
Serves 4

1 tbsp. olive oil
1 brown onion, finely chopped
1 cup long grain rice
11/2 cups chicken stock
1/2 cup spring onion pesto (recipe below)
1/2 cup frozen peas
Tuna meatballs (recipe below)
salt and pepper, to season

Spring Onion Pesto
1 bunch spring onions, white part removed, roughly chopped
3 cloves garlic
1/4 cup fresh basil
1/4 cup fresh parsley
2 sprigs thyme
1/2 cup whole almonds
1/2 cup grated parmesan
1 tsp sugar (optional)
1 tsp lemon juice
1/2 cup olive oil

Tuna Meatballs
450 g canned Tuna (in spring water or Brine), drained
1/2 cup fresh breadcrumbs, from a day old whole grain bread (to make, just run a slice of bread through the food processor)
1 tbsp. Spring Onion Pesto
2 tbsp. grated parmesan
1 tbsp. grated lemon zest
1 egg lightly beaten
Salt and pepper to season

Make the pesto: Place the spring onions, garlic, basil, parsley, thyme, almonds, parmesan and sugar in the bowl of your food processor. Process until finely chopped. With the motor running, gradually add the lemon juice and oil in a thin steady stream until well combined. Season with salt and pepper. Refrigerate till needed.

Make the tuna meatballs: Preheat oven to 200 degrees C. Brush a baking tray with olive oil
Place the canned tuna, breadcrumbs, parmesan, pesto, lemon zest, salt and pepper and mix with your hand until well combined. Add egg and mix well. Roll into medium meatballs between your palms.
Place on the oiled baking tray and brush with oil. Bake for 15 minutes or until form and slightly golden brown. Once cooked, set aside.

Make the rice: Heat oil in a large sauce pan. Add onion, cook, stirring for 5 minutes or until onion softens. Add rice and stir to combine. Add chicken stock and bring to the boil. Reduce heat to low; cook, covered, for 12 minutes or until stock is absorbed and rice is tender.  Add pesto and peas and gently fold through. Remove from heat, add the meatballs. Divide rice and meatballs among serving bowls. Garnish with fresh herbs (basil, parsley, rocket) and parmesan. Serve warm


Beetroot and Feta Tart

9|07|2014

When I was a little girl, my mother would cook a beetroot stew. I am not sure if there was a recipe or her own creation but I didn’t quite like the look of it. Beetroot was cooked in the pressure cooker with other vegetables and the resulting colour wasn’t very appealing. The potatoes would turn orange, spinach looked black, the onions were lost somewhere and then we would stand facing the mirror with our tongues out after consuming it . Without a doubt it tasted delicious, but that colour! Today, I love beetroot. I love the way it stains my hands and my kitchen counter. I love the way it looks and tastes. I use this root vegetable to pack variety and nutrition into the meals I make for my children. I feel an irresistible urge to take out the camera every time I notice it’s powerful purplish existence in a dish. It has the natural ability to make food look vibrant and attractive.

Beetroot-And-Feta-Tart

Beetroot is often paired with goat’s cheese. In tarts, especially. I think it’s an amazing combination but it does pair well with other cheeses as well.  I like how it tastes with feta, mascarpone and ricotta. The saltiness and creamy texture of feta is just perfect to balance the sweet, moreish flavour of beetroot. Balsamic vinegar adds a lovely depth to the filling in this tart and thyme makes it aromatic. I adapted the concept of this tart from here but pretty much changed everything from the ingredients to the method of making it.

Beetroot-And-Feta-Tart

This is one tart that you would want to make over and over again. There is so much flavour in it. It makes for an impressive starter or a snack. If you are not comfortable making the tart shell, use a premade shell for the sake of the tart. You wont be disappointed. The filling can be made the day before and stored in the refrigerator. The tart is best baked the same day.

Beetroot-And-Feta-Tart

Beetroot And Feta Tart
Serves 8-10

2 large beetroot (about 400g), trimmed, peeled and coarsely grated
1 tbsp. olive oil

1 red onions thinly sliced
1/4 cup balsamic vinegar
2 teaspoons thyme leaves
1 tablespoon brown sugar
150g smooth feta
2 eggs, lightly beaten
150ml thickened cream
Extra thyme springs, to scatter
Fresh herbs, to serve

For the pastry
1 1/3 cups (200g) plain flour
100g chilled unsalted butter, chopped

To make the pastry, place flour, butter and  a pinch salt in a food processor and whiz until the mixture resembles breadcrumbs. Add 1/4 cup (60ml) chilled water, then process until the mixture comes together in a ball. Enclose in plastic wrap and chill for 30 minutes. Lightly grease a 23 cm loose-bottomed tart pan. On a lightly floured surface, roll out pastry to 5mm thick, then use to line the tart pan. Chill for 15 minutes.

Preheat oven to 180 degree C. Line pastry with baking paper and fill with pastry weights or uncooked rice. Bake for 10 minutes. Remove the paper and weights, then bake for 5 minutes or until dry and pale golden. Remove from oven and leave aside to cool.

Heat the oil in a fry pan over medium heat. Add onions and 1 teaspoon salt, then cook, stirring occasionally, for 6-8 minutes until softened. Add beetroot, vinegar, thyme, brown sugar and 1 cup water, then cook for 12-15 minutes (stirring in between to prevent burning) until thickened and tender. Cool the mixture.

Spread beetroot mixture over the tart base, then crumble over feta cheese. Whisk egg and cream together, then pour into tart case. Scatter with extra thyme. Bake for 35 minutes or until set. Slice and serve with a leafy green salad.

Whole Spice Roasted Cauliflower

4|07|2014

This winter seems so long. And colder than I like it. I think I say this every year and by July I am almost desperate to get to the other side of winter. I can’t wait to feel the rays of the sun on my bare skin and the daylight to linger on till it’s time to go to bed. I can’t wait for the change in scenery and the spring blooms. Having said that, there are some joys of winter that I treasure. Catching up with friends over cups of hot chocolate. Bowlfuls of steaming hot Laksa. And sharing a hearty winter roast with family.

IMG_0677

I have roasted cauliflower florets in so many different ways before…basically experimenting with a variety of marinades. Roasting an entire cauliflower head not only sounded interesting but such an amazing dish to share on the table. Roasting not only sweetens the florets but gives it a crispy, nutty texture that is absolutely delicious. The chilli flakes provide the perfect amount of heat to balance the sweetness.The recipe involves cooking the cauliflower head in two stages. First, boiling it in a flavourful stock to tenderise it. Then finishing it in the oven to get the charred caramel brown crispy exterior.

IMG_0680

There are many recipes that involve only the roasting method and parboiling is not necessary but I can say that the flavours are so much more intense in this two-stage recipe. The florets are crunchy yet melt-in-your mouth. The resulting dish not only looks but tastes spectacular as well. This would make a great side to go with meat or fish dishes or a delicious main for vegetarians served on its own with a light salad.

IMG_0679

Whole Spice Roasted Cauliflower (adapted with variation From Donna Hay magazine, June edition)
Serves 4-6

1.5 litres vegetable stock
50 g unsalted butter
1/4 cup extra virgin olive oil
2 tsp dried chilli flakes
1 bay leaf
1 tbsp. fennel seeds
Salt and pepper to taste
1 large cauliflower head (approx. I kg)
fresh sprigs of thyme

Place the stock, butter, olive oil, chilli, bay leaf, fennel seeds, salt and pepper in a medium saucepan over high heat and bring to a boil. Add the cauliflower, reduce the heat to medium, cover with a tight fitting lid and cook for 20-25 minutes or until the cauliflower is just tender when tested with a skewer. Drain, reserving the cooking liquid (I had about a cup left).

Preheat oven to 200 degree C. Place the cauliflower and thyme sprigs in a deep baking dish that has been lined with non-stick baking paper or aluminium foil. Pour half the reserved cooking liquid over the cauliflower and roast for 20 minutes. Pour over the remaining cooking liquid and roast for a further 20-25 minuts or until golden.

  • « Previous Page
  • 1
  • …
  • 79
  • 80
  • 81
  • 82
  • 83
  • …
  • 112
  • Next Page »
Hey Sugar
Cake
Link to my Facebook Page
Link to my Instagram Page
Link to my Pinterest Page
Link to my Mail Page
Subscribe to this site
Fresh Awards
2019 Aus mumpreneur
2019 aus mumpreneur
Mumbrella

Copyright © 2025 · Sugar Et Al · Designed by Smitten Blog Designs · Log in