• Home
  • Recipe Index
    • Recipe Index
    • Breakfast/Brunch
    • Cakes and Puddings
    • Chocolate
    • Cookies and cupcakes
    • Custard and Mousse
    • Gluten Free
    • Ice Cream
    • Mains
    • Other Sweet Treats
    • Snack/Appetizers
    • Soups and Salads
    • Tarts and Pies
    • Vegetarian
  • About
  • Cookbook
  • Portfolio
  • Store
  • Press
  • Work with Me

Sugar et al

Because Life is a blend of flavours...

Cheddar and Chive Beignets

24|12|2013

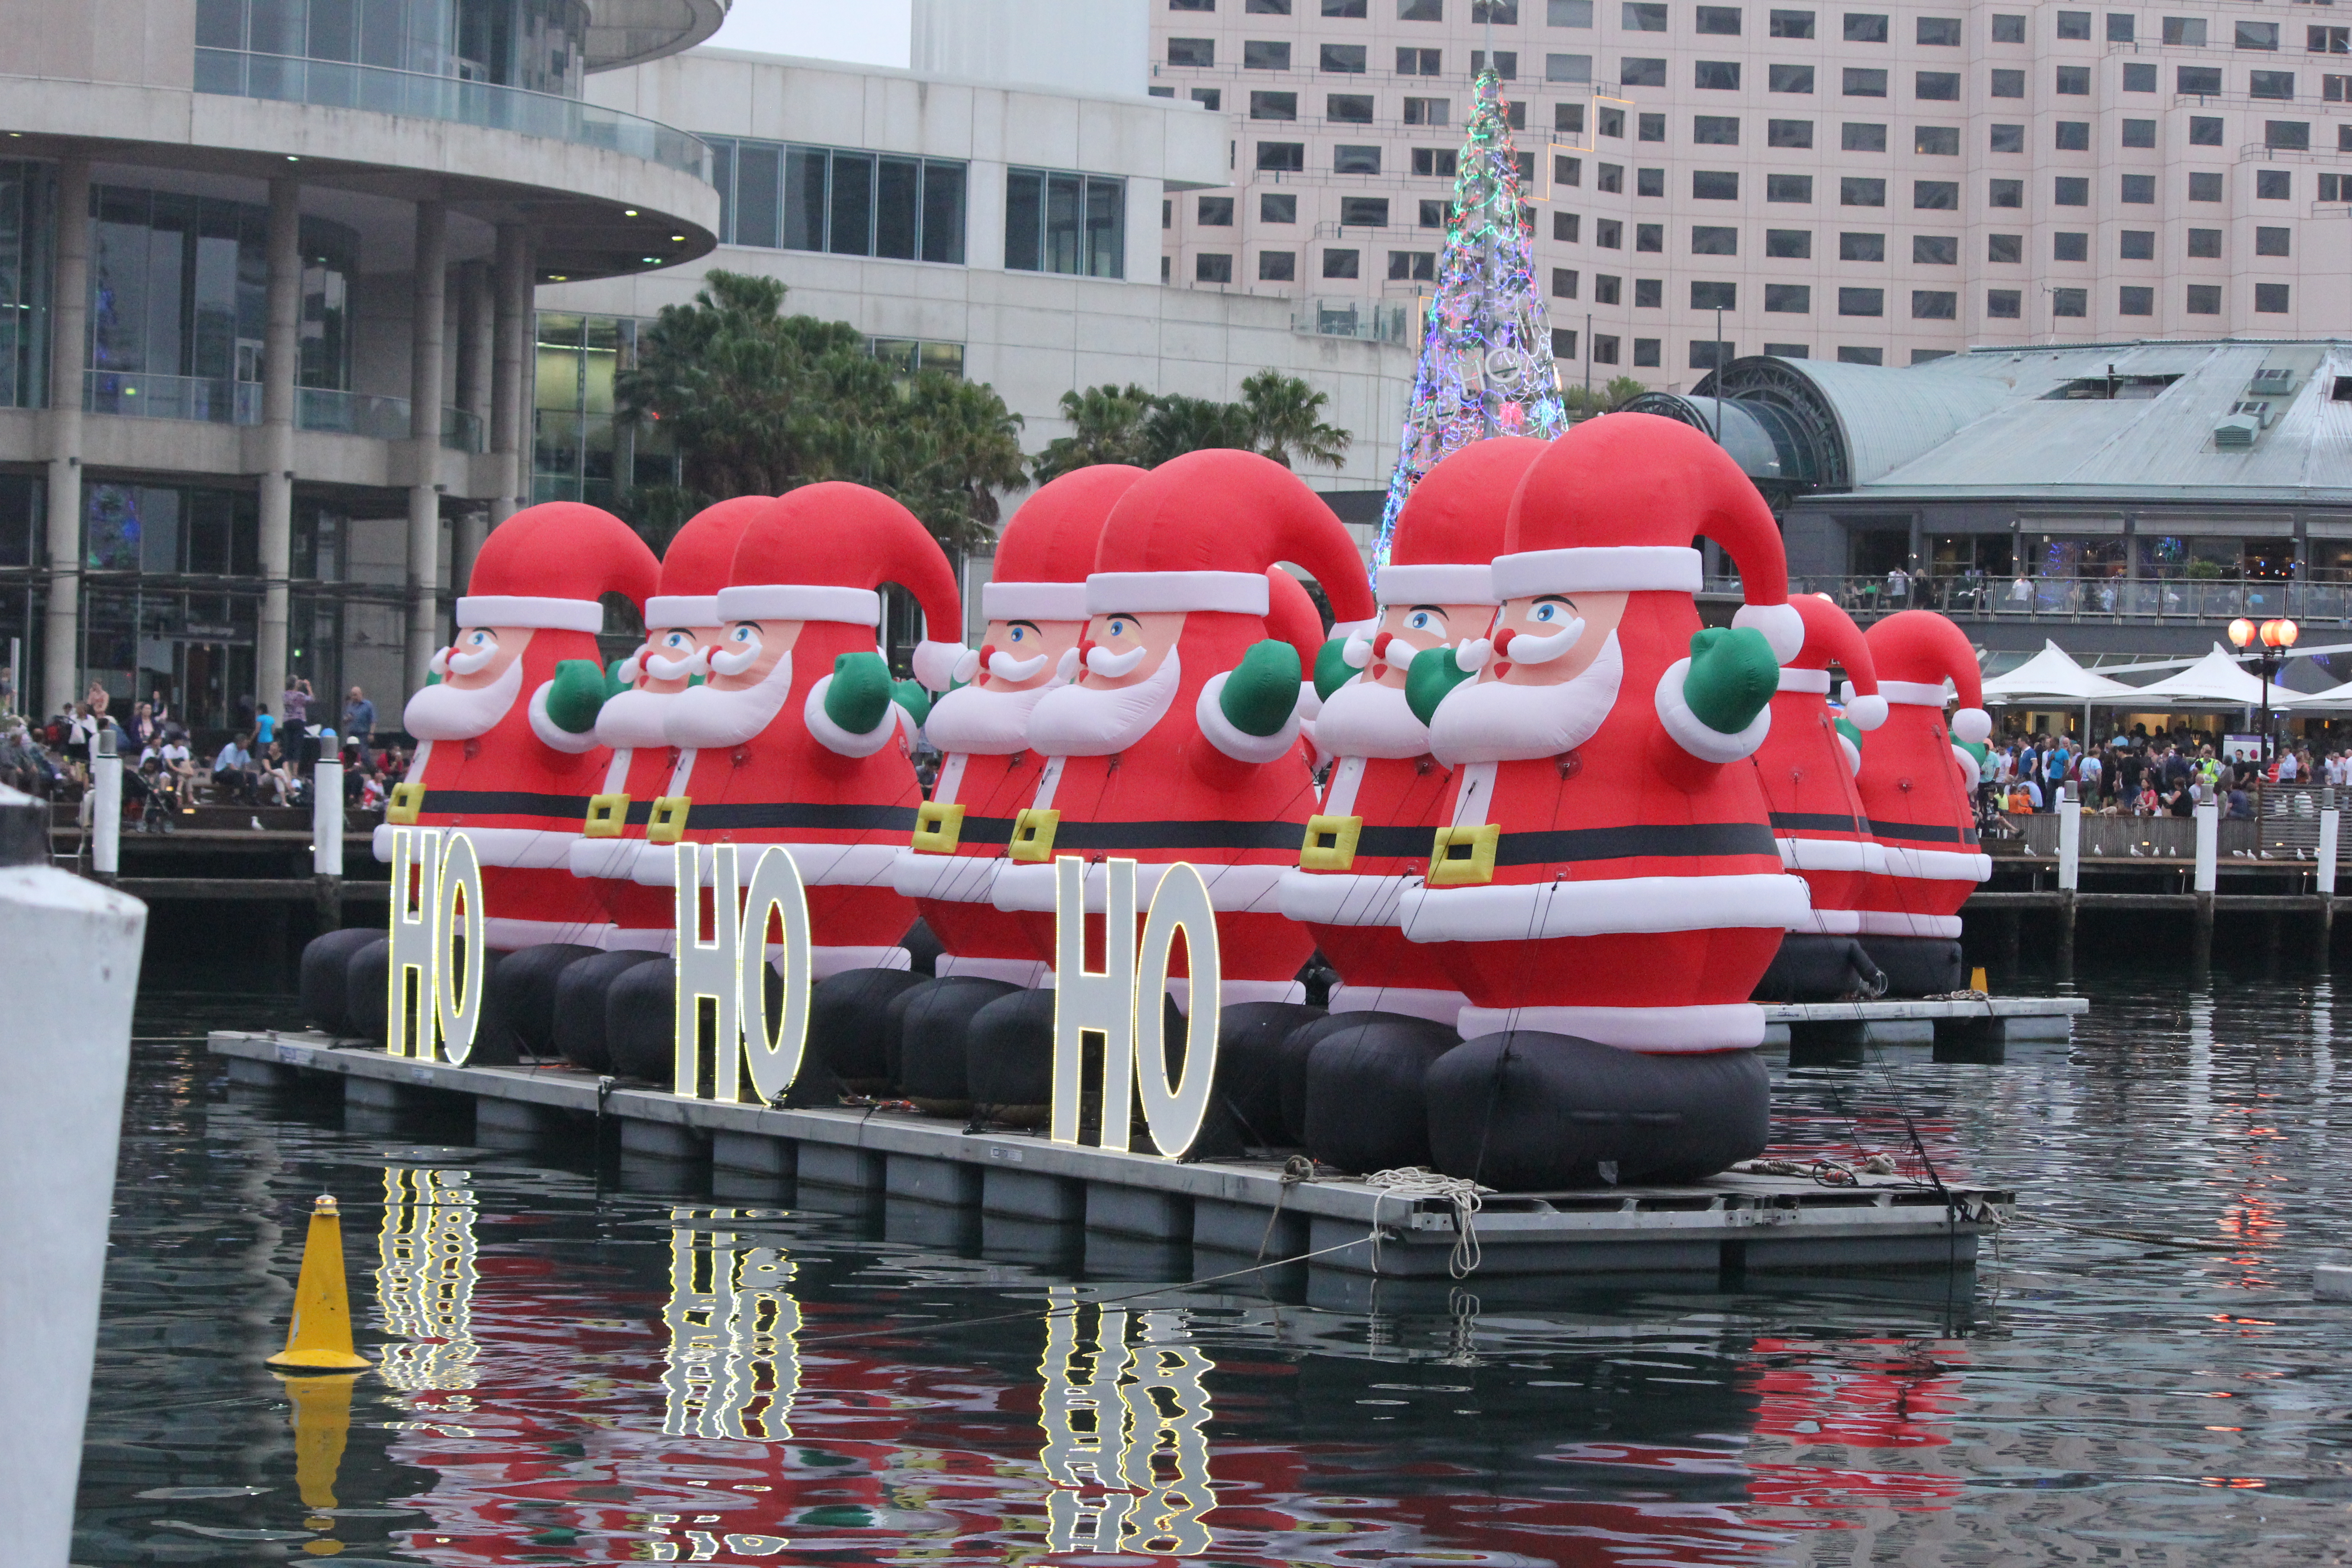
1 more sleep before Christmas. How are you all doing? I’ve had the most amazing weekend with my family. Apart from a lovely Christmas party hosted by the Day Care centre that my boys go to, we did a bit of touring around the city. We came back really late on Saturday night after watching the fireworks display around Cockle Bay, Darling Harbour which was transformed into the most amazing Christmas wonderland I’ve ever seen. The kids loved the 21 large inflatable Santas bobbing about in the waters. I was not surprised to see the number of people gathered around the foreshores, hours ahead in time with family and food. What else would you need sitting by the waters, amidst twinkling fairy lights, carols in the background, watching the sun set in the horizon..? Your camera of course! I could see a lot of people placing themselves with tripods at vantage points, none of which was possible at my end with two impatient little boys.

IMG_7310 (1)
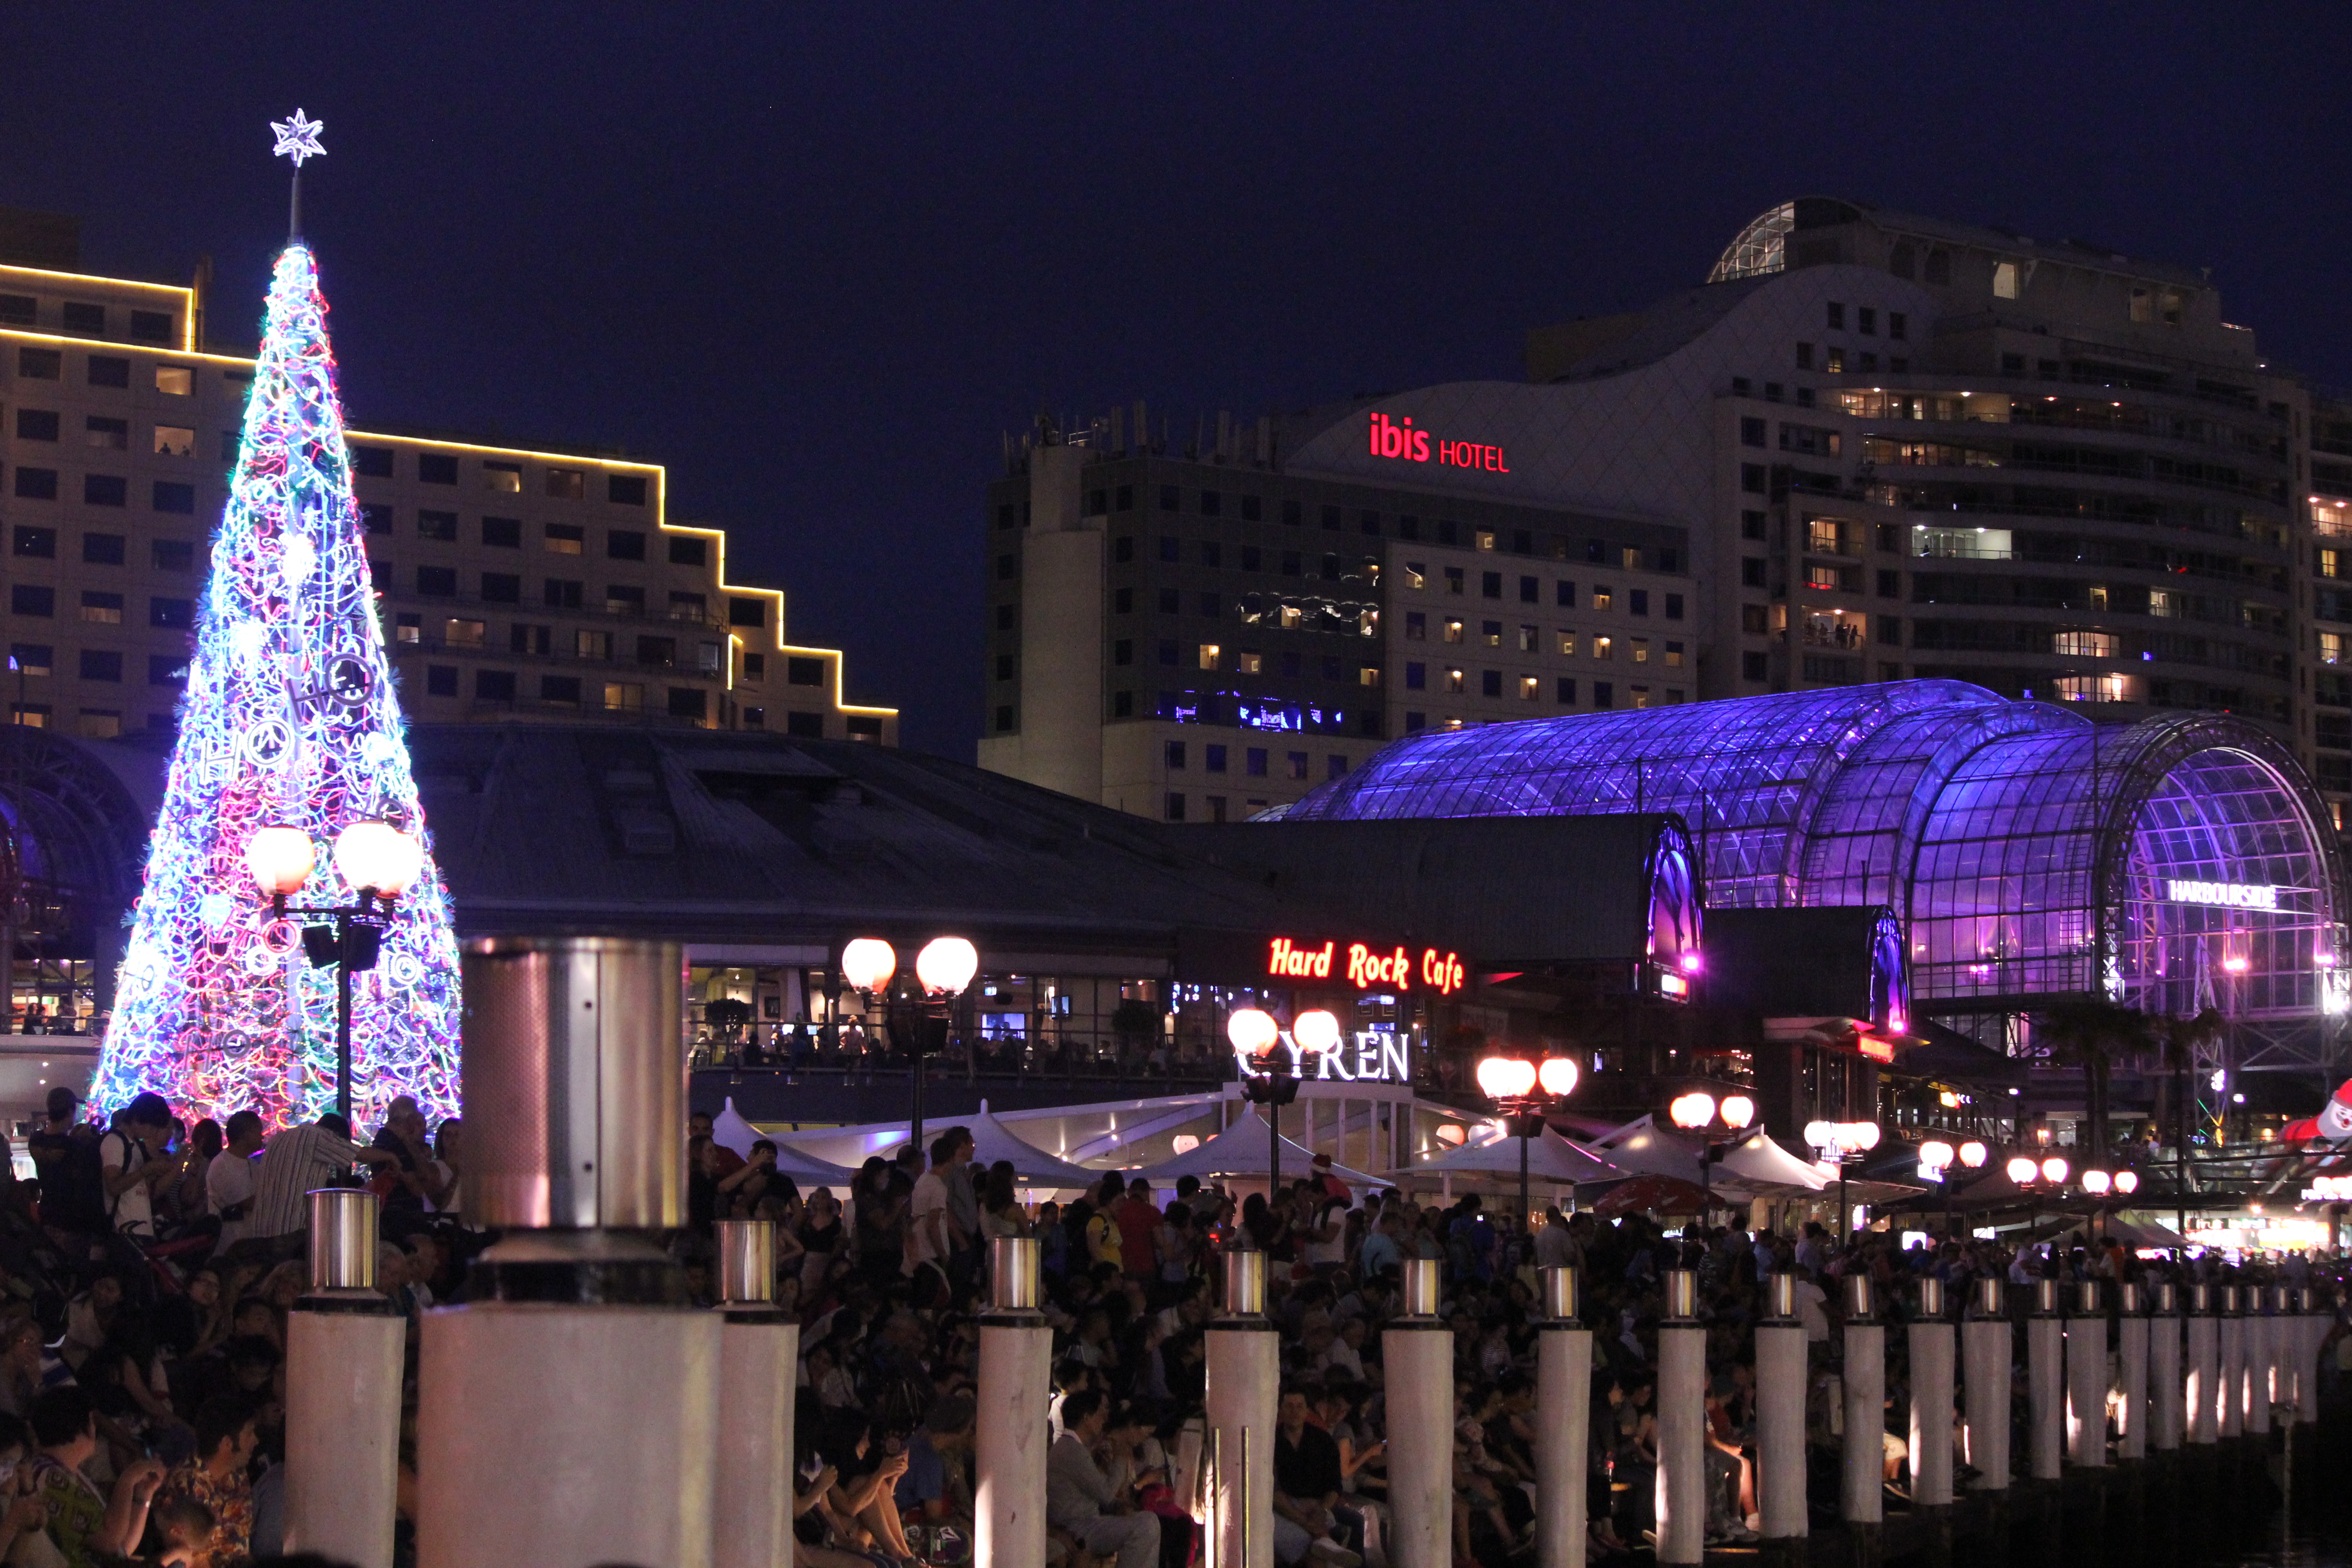
The first round of fireworks took off exactly at 9 pm. It was beautiful, though I had seen better…during the International Fleet review that took place this year. I heaved a huge sigh of relief that this year no one was scared and they rather enjoyed the colourful display above. We got up immediately after the first round and walked over to Martin’s Place, another iconic location in Sydney to see the mammoth ‘Tree of Brightness’. Though tired and hungry the boys didn’t mind the walk at all. The streets looked so dressed up and totally festive. The highlight of this Christmas tree, other than it’s size and decoration was it’s interactive nature. Send a festive text to the tree and you will see your message travel up the branches of the tree for everyone to see. That was fun!

IMG_7363

IMG_7388

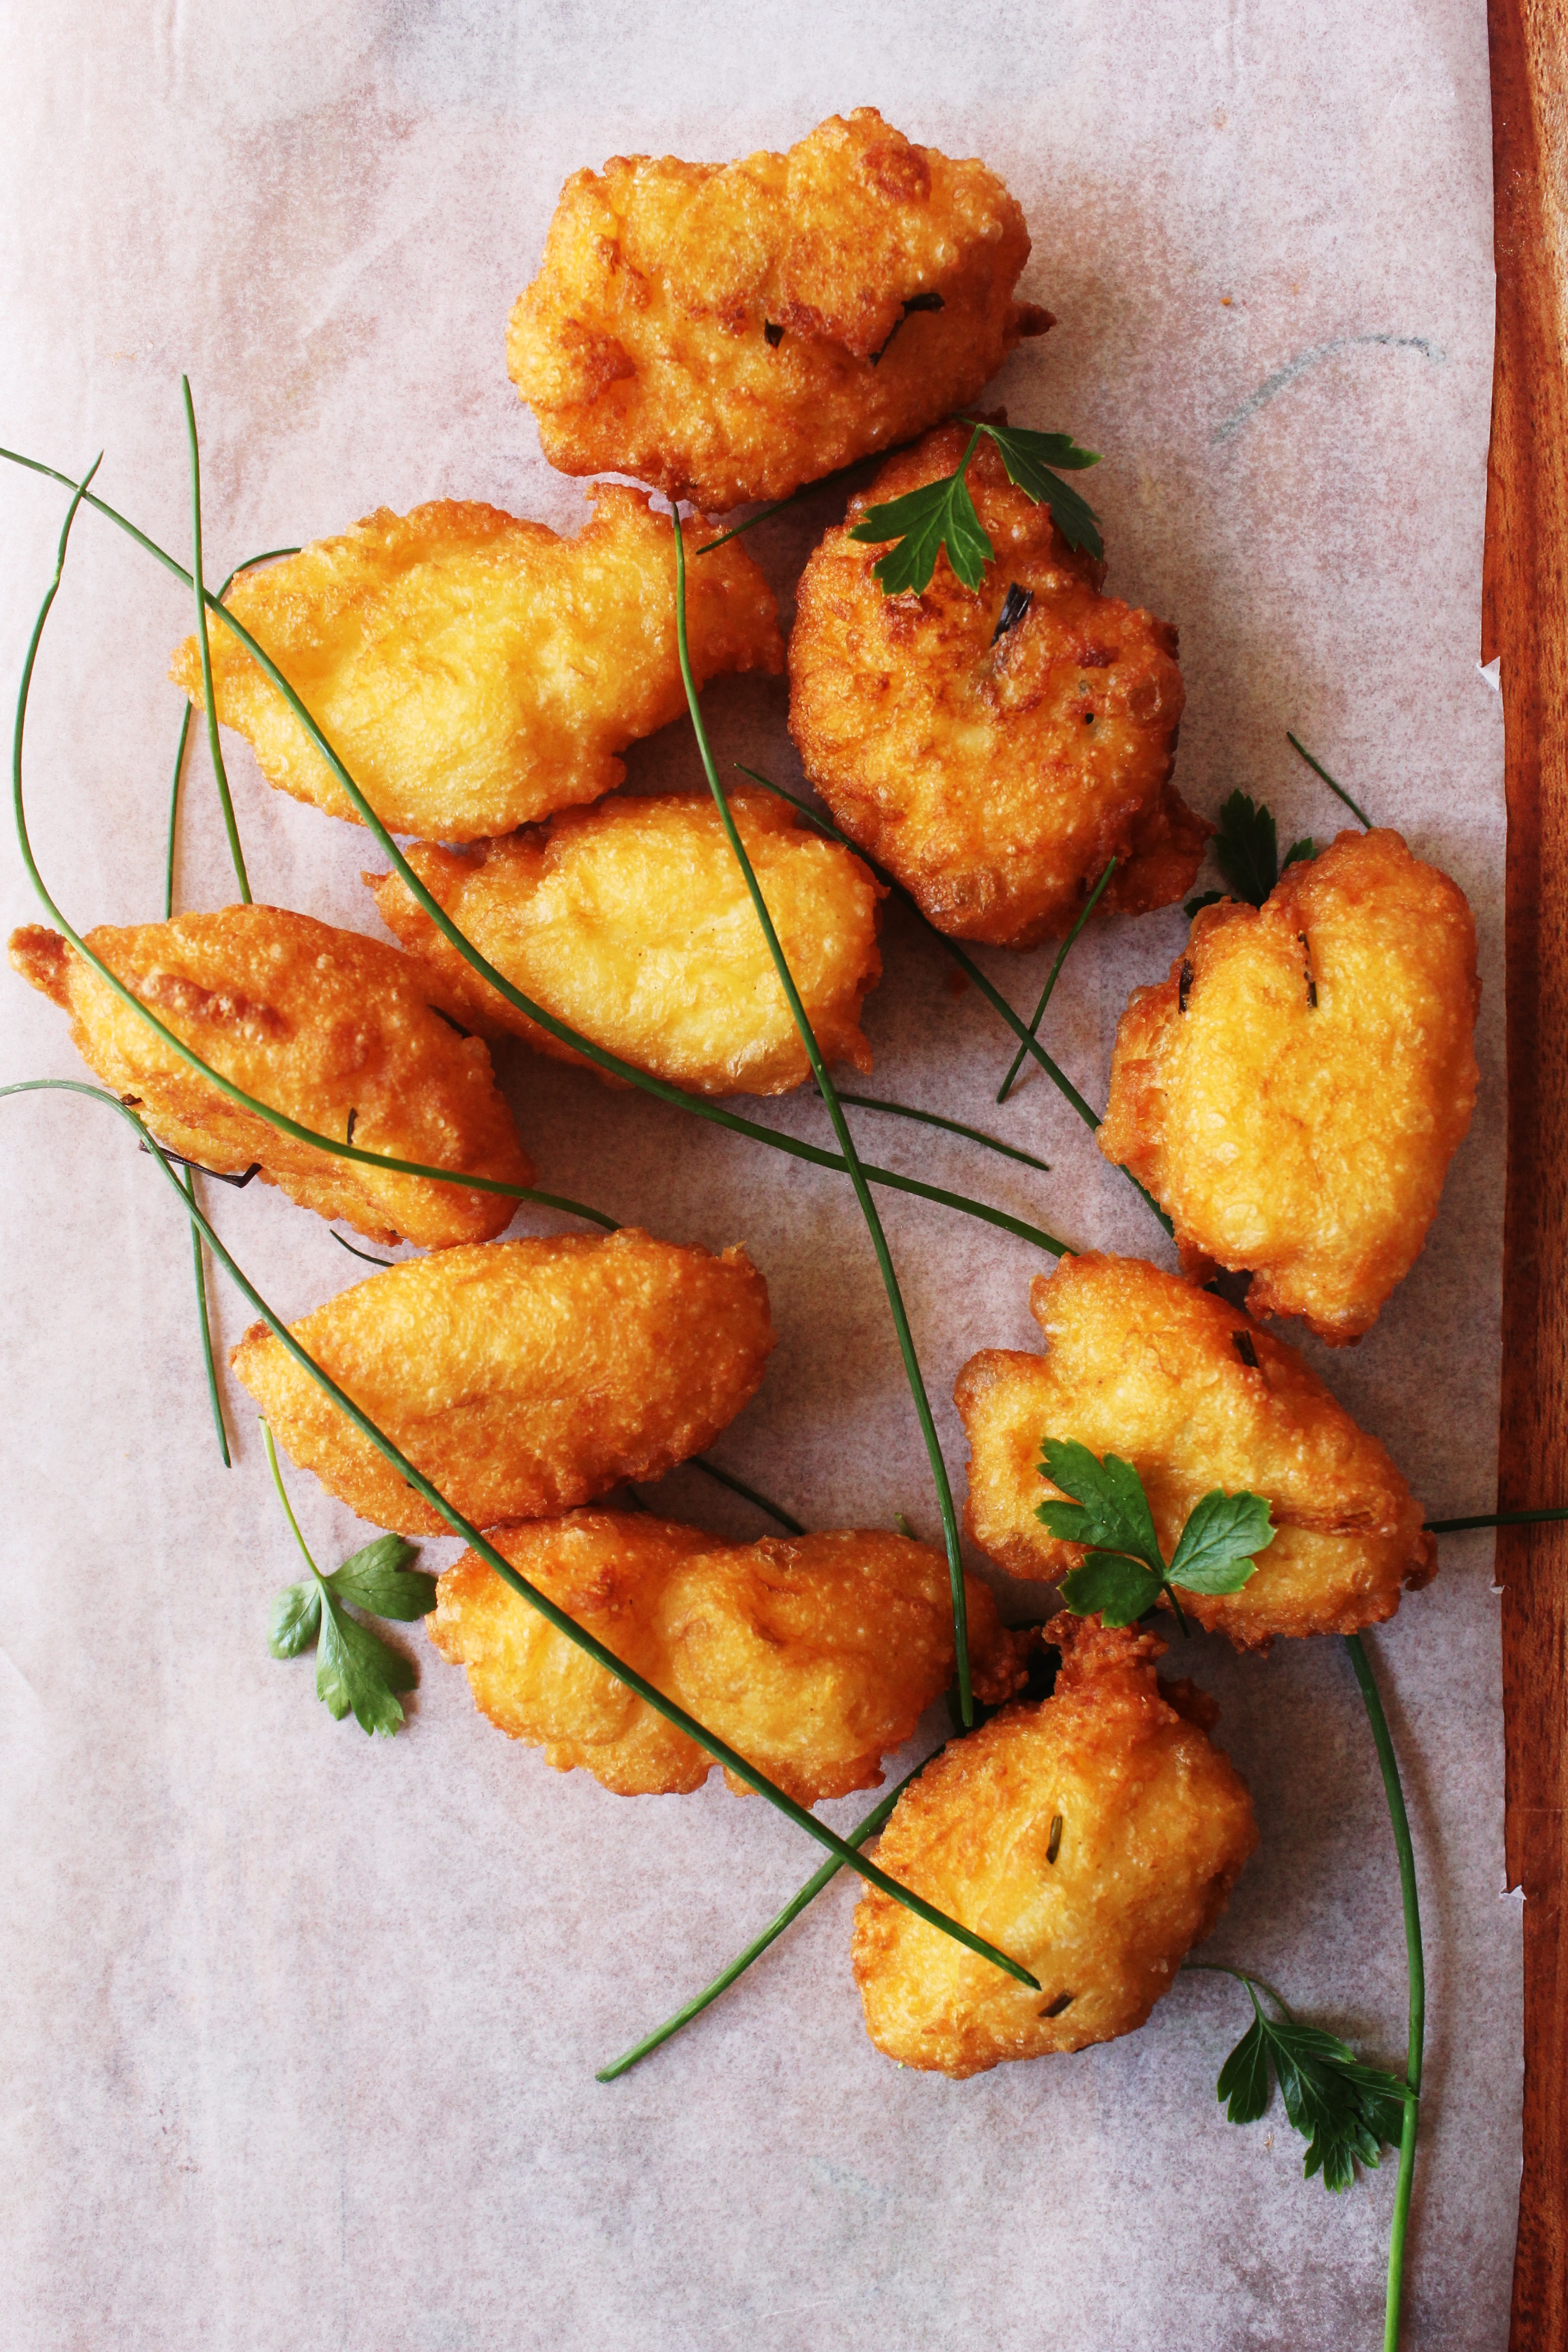
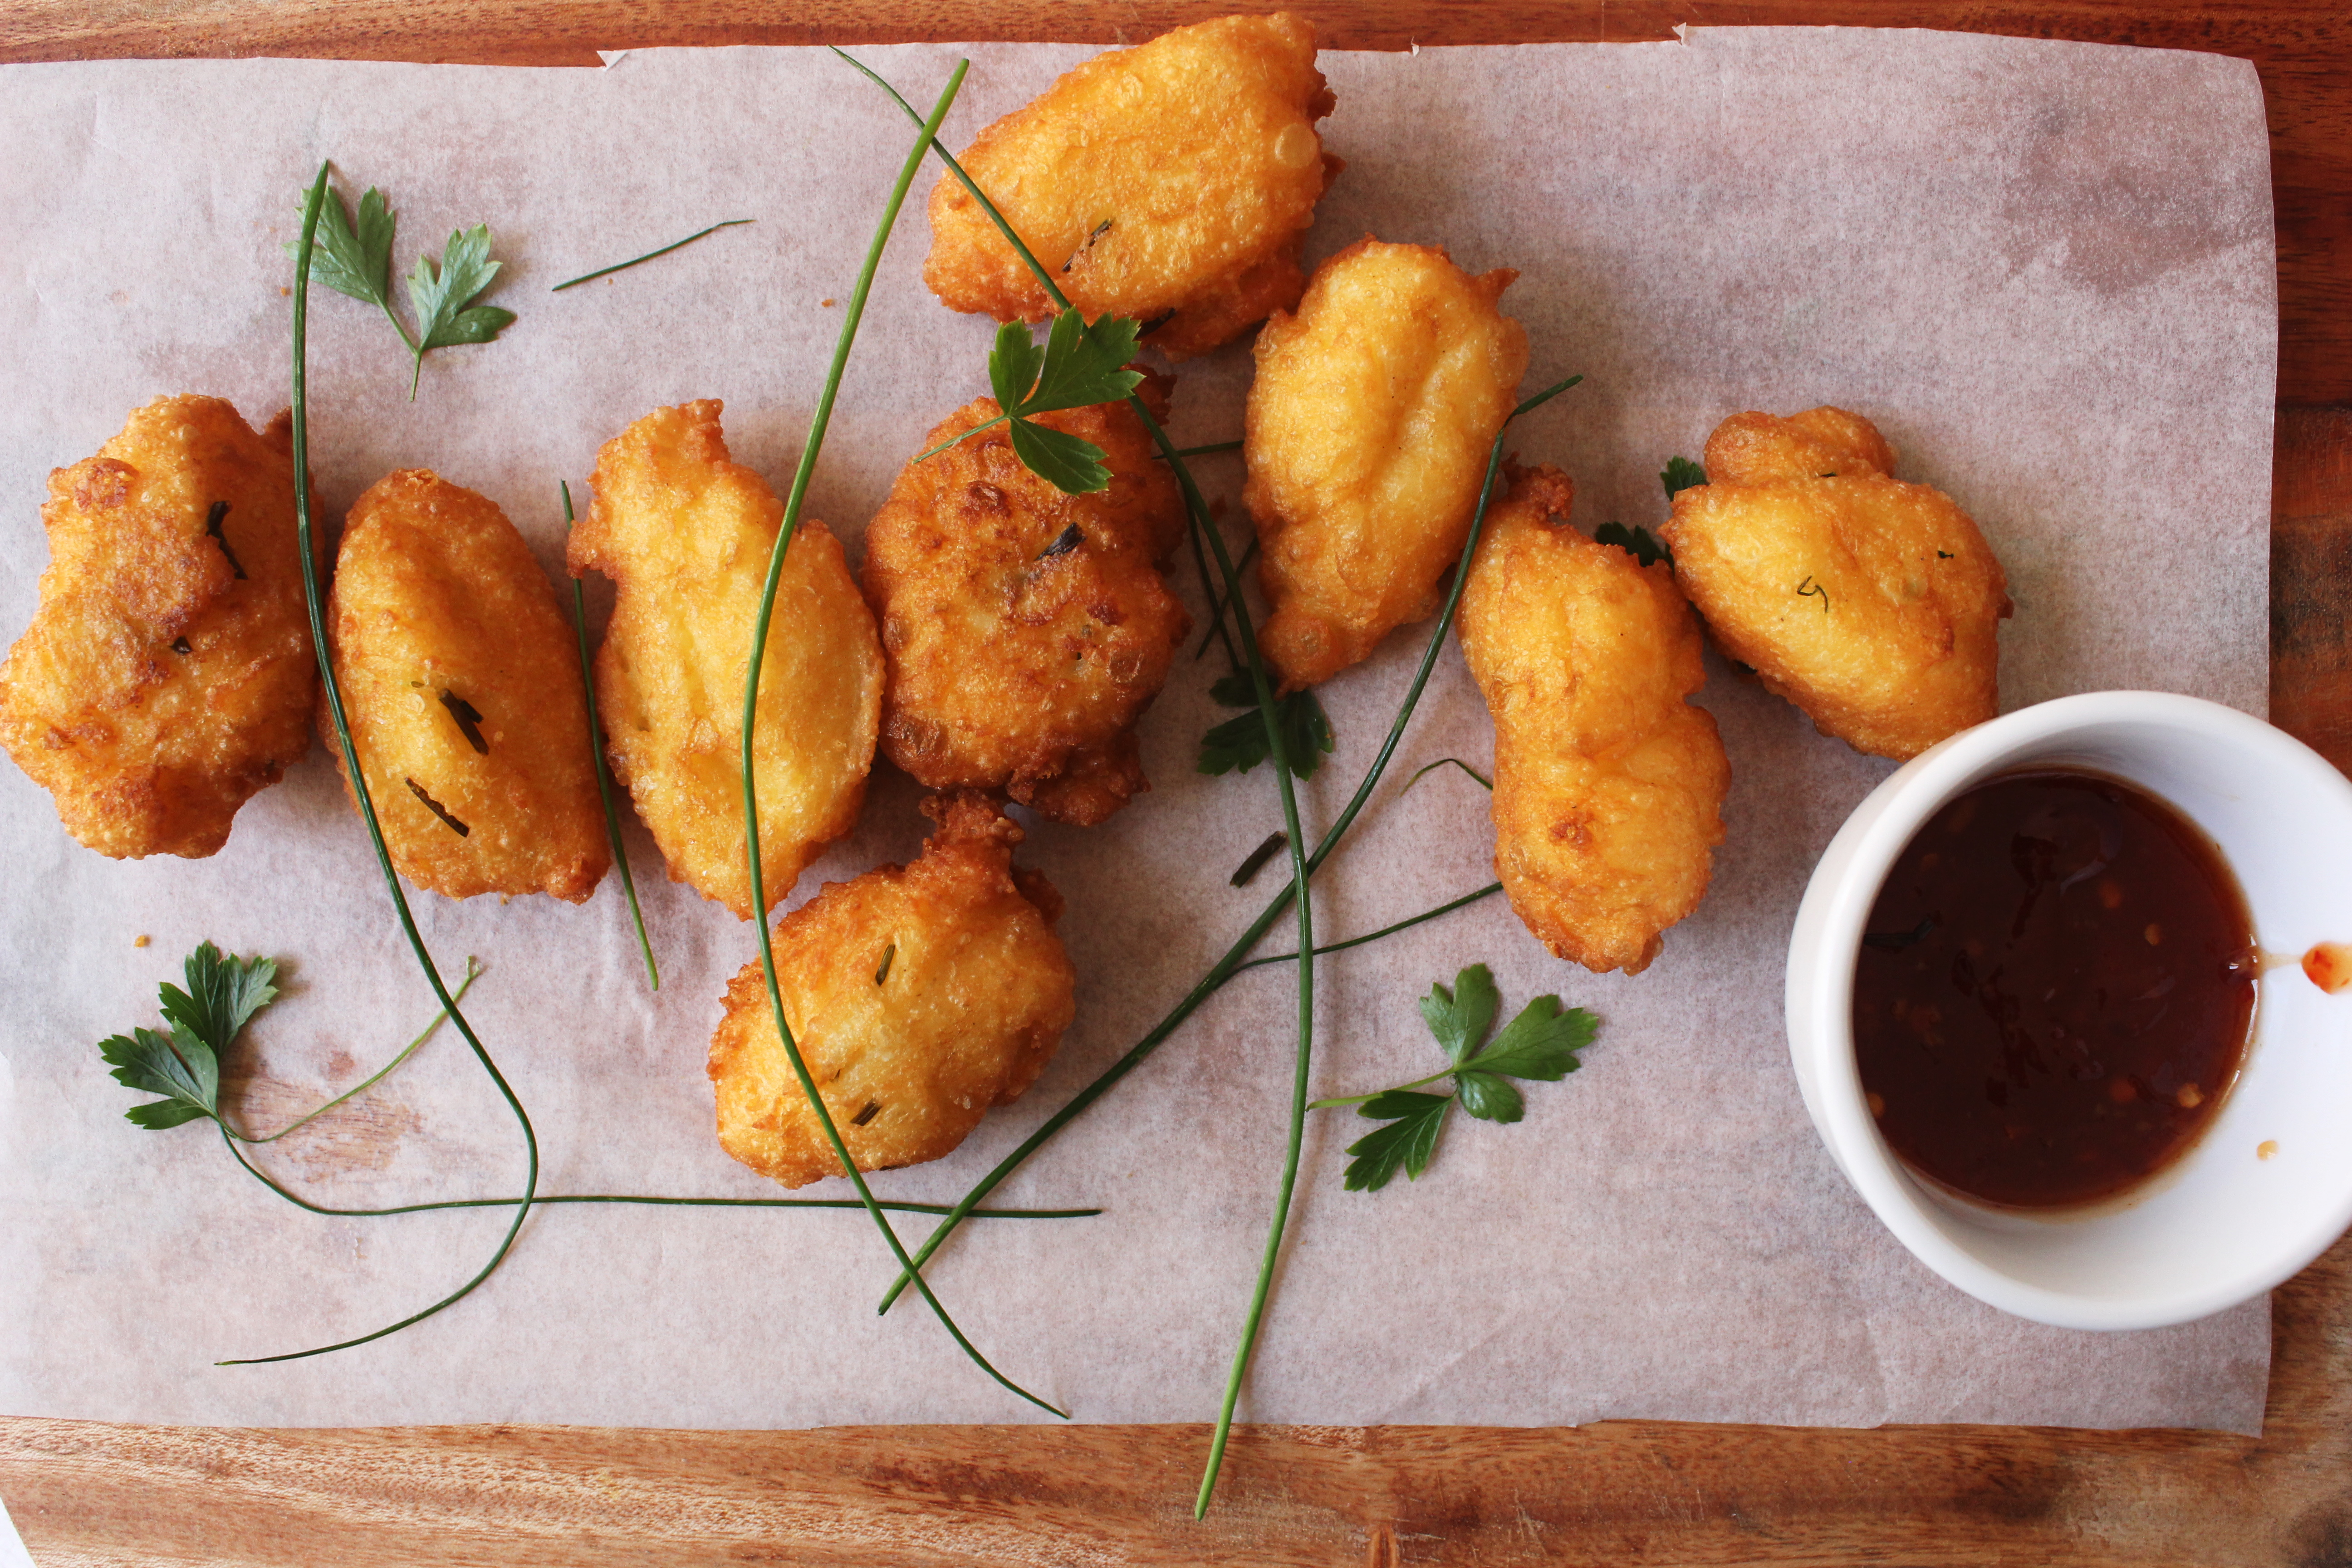
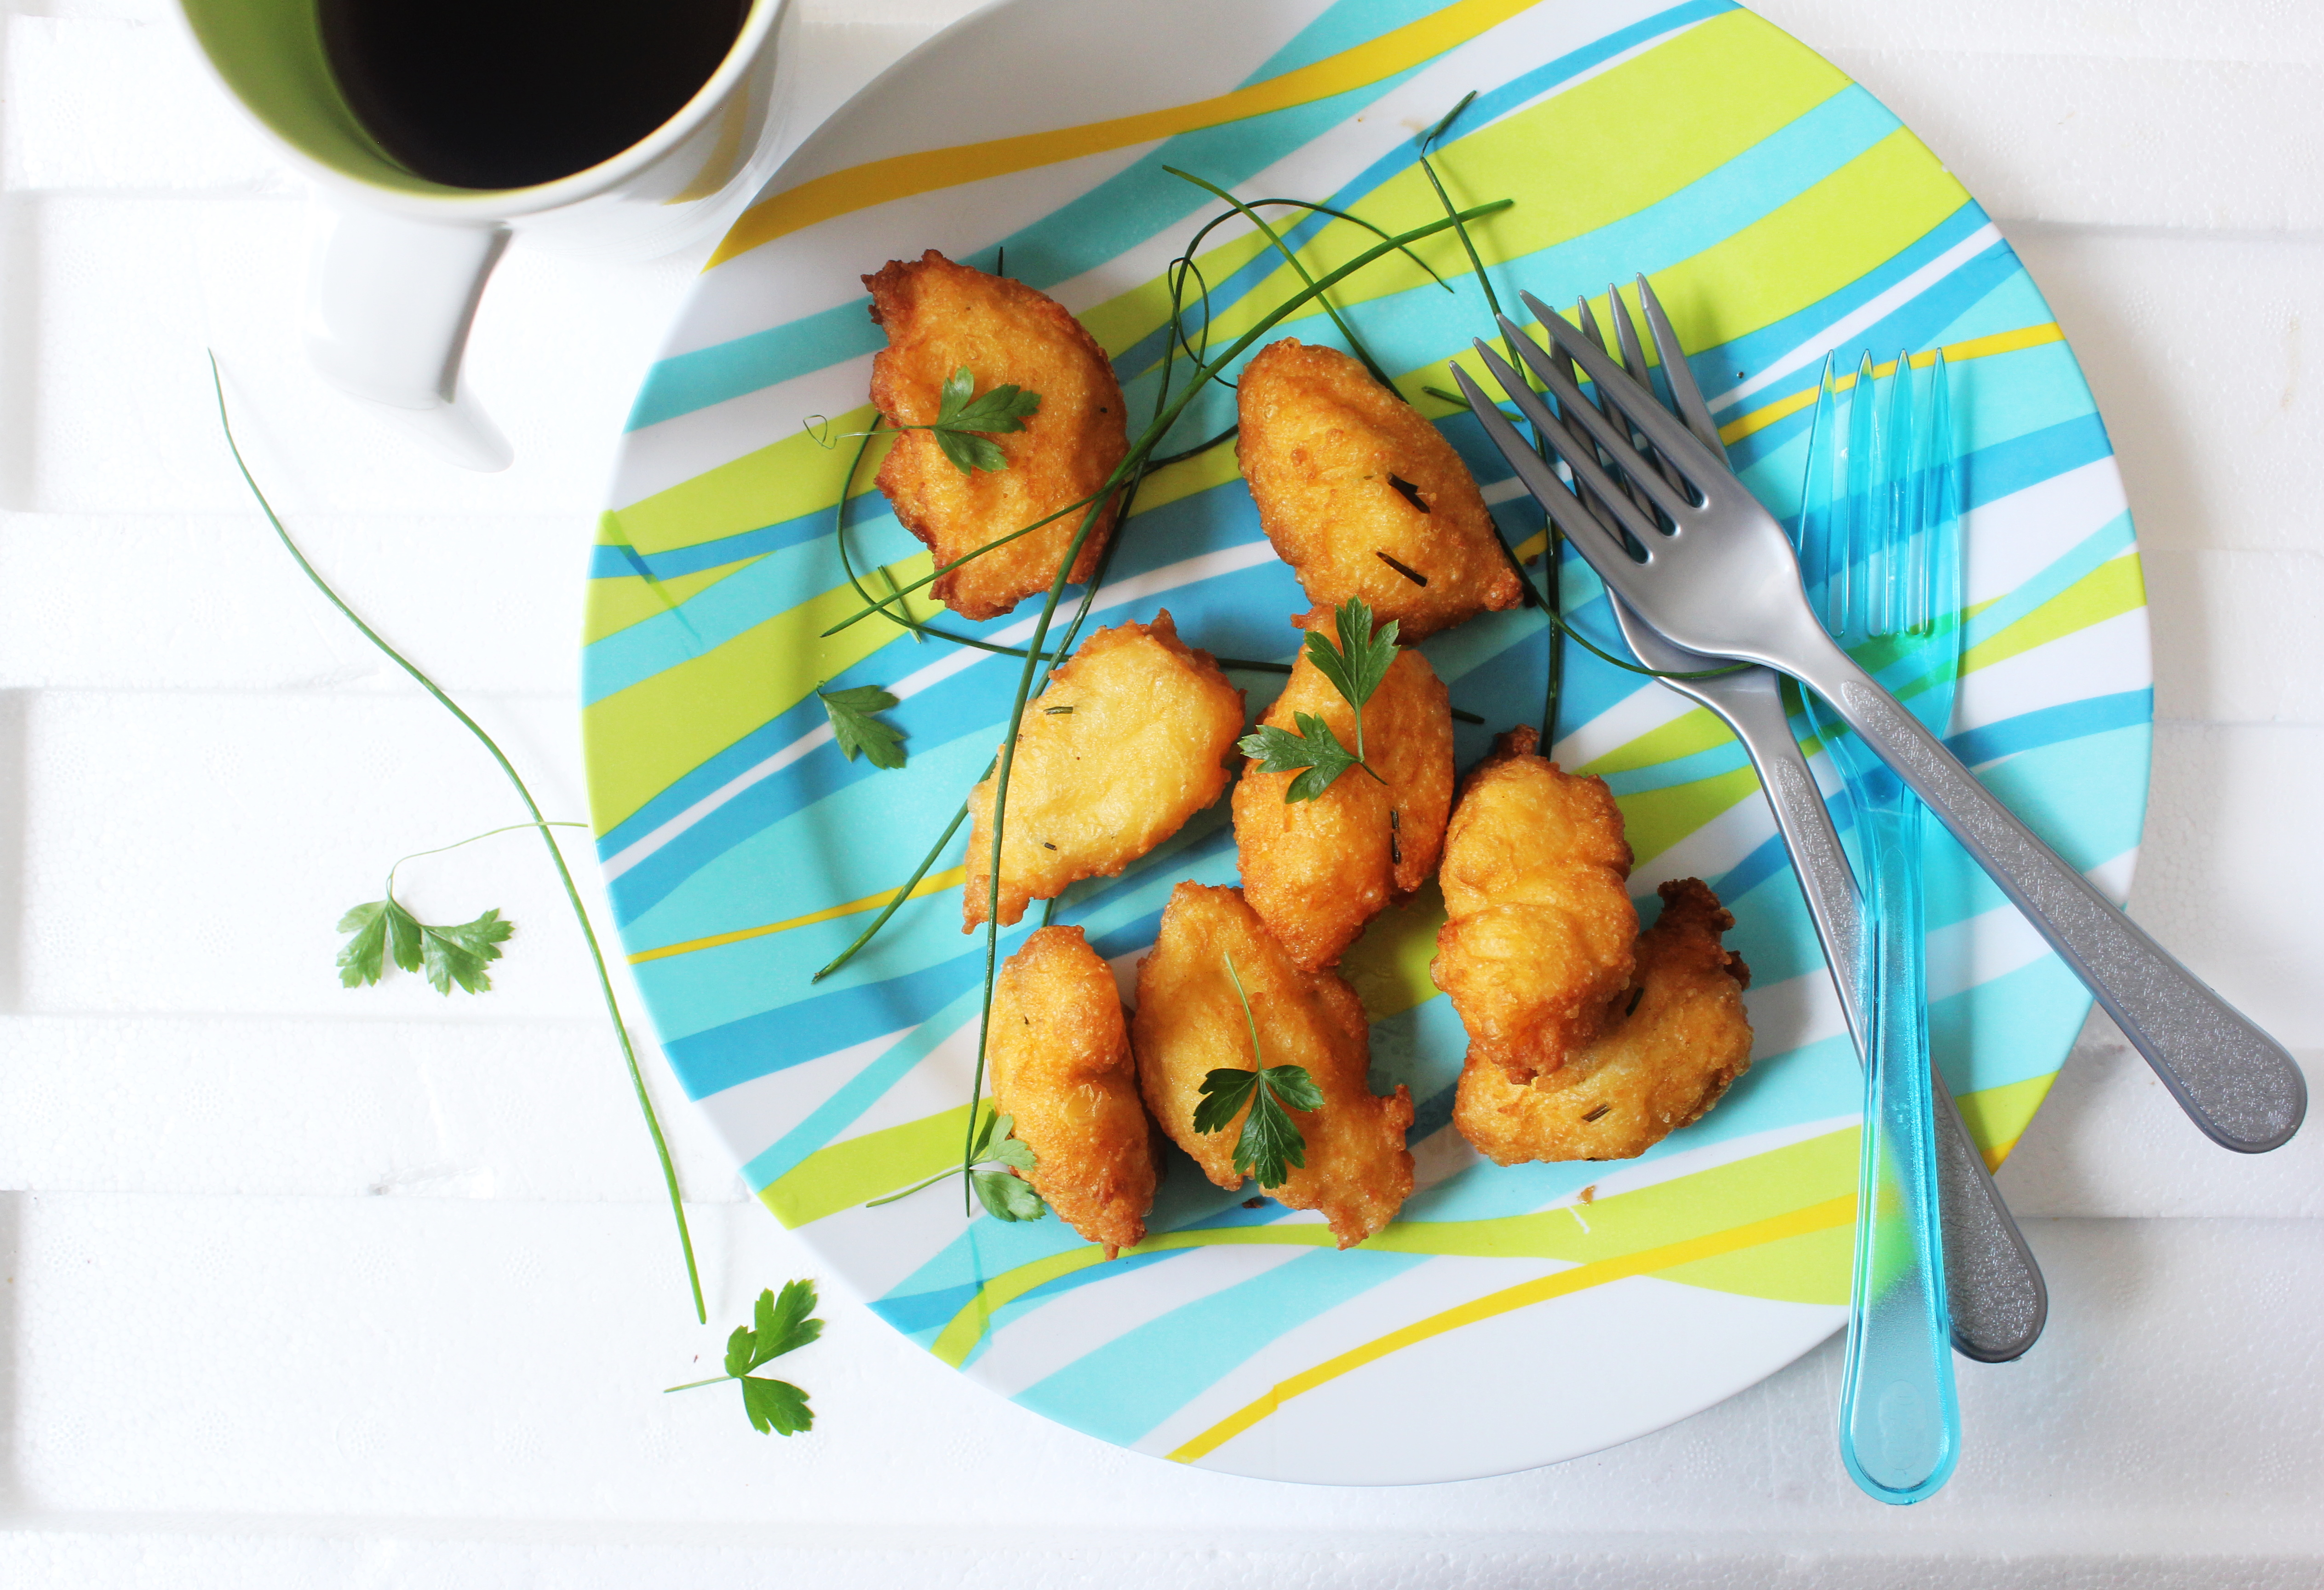
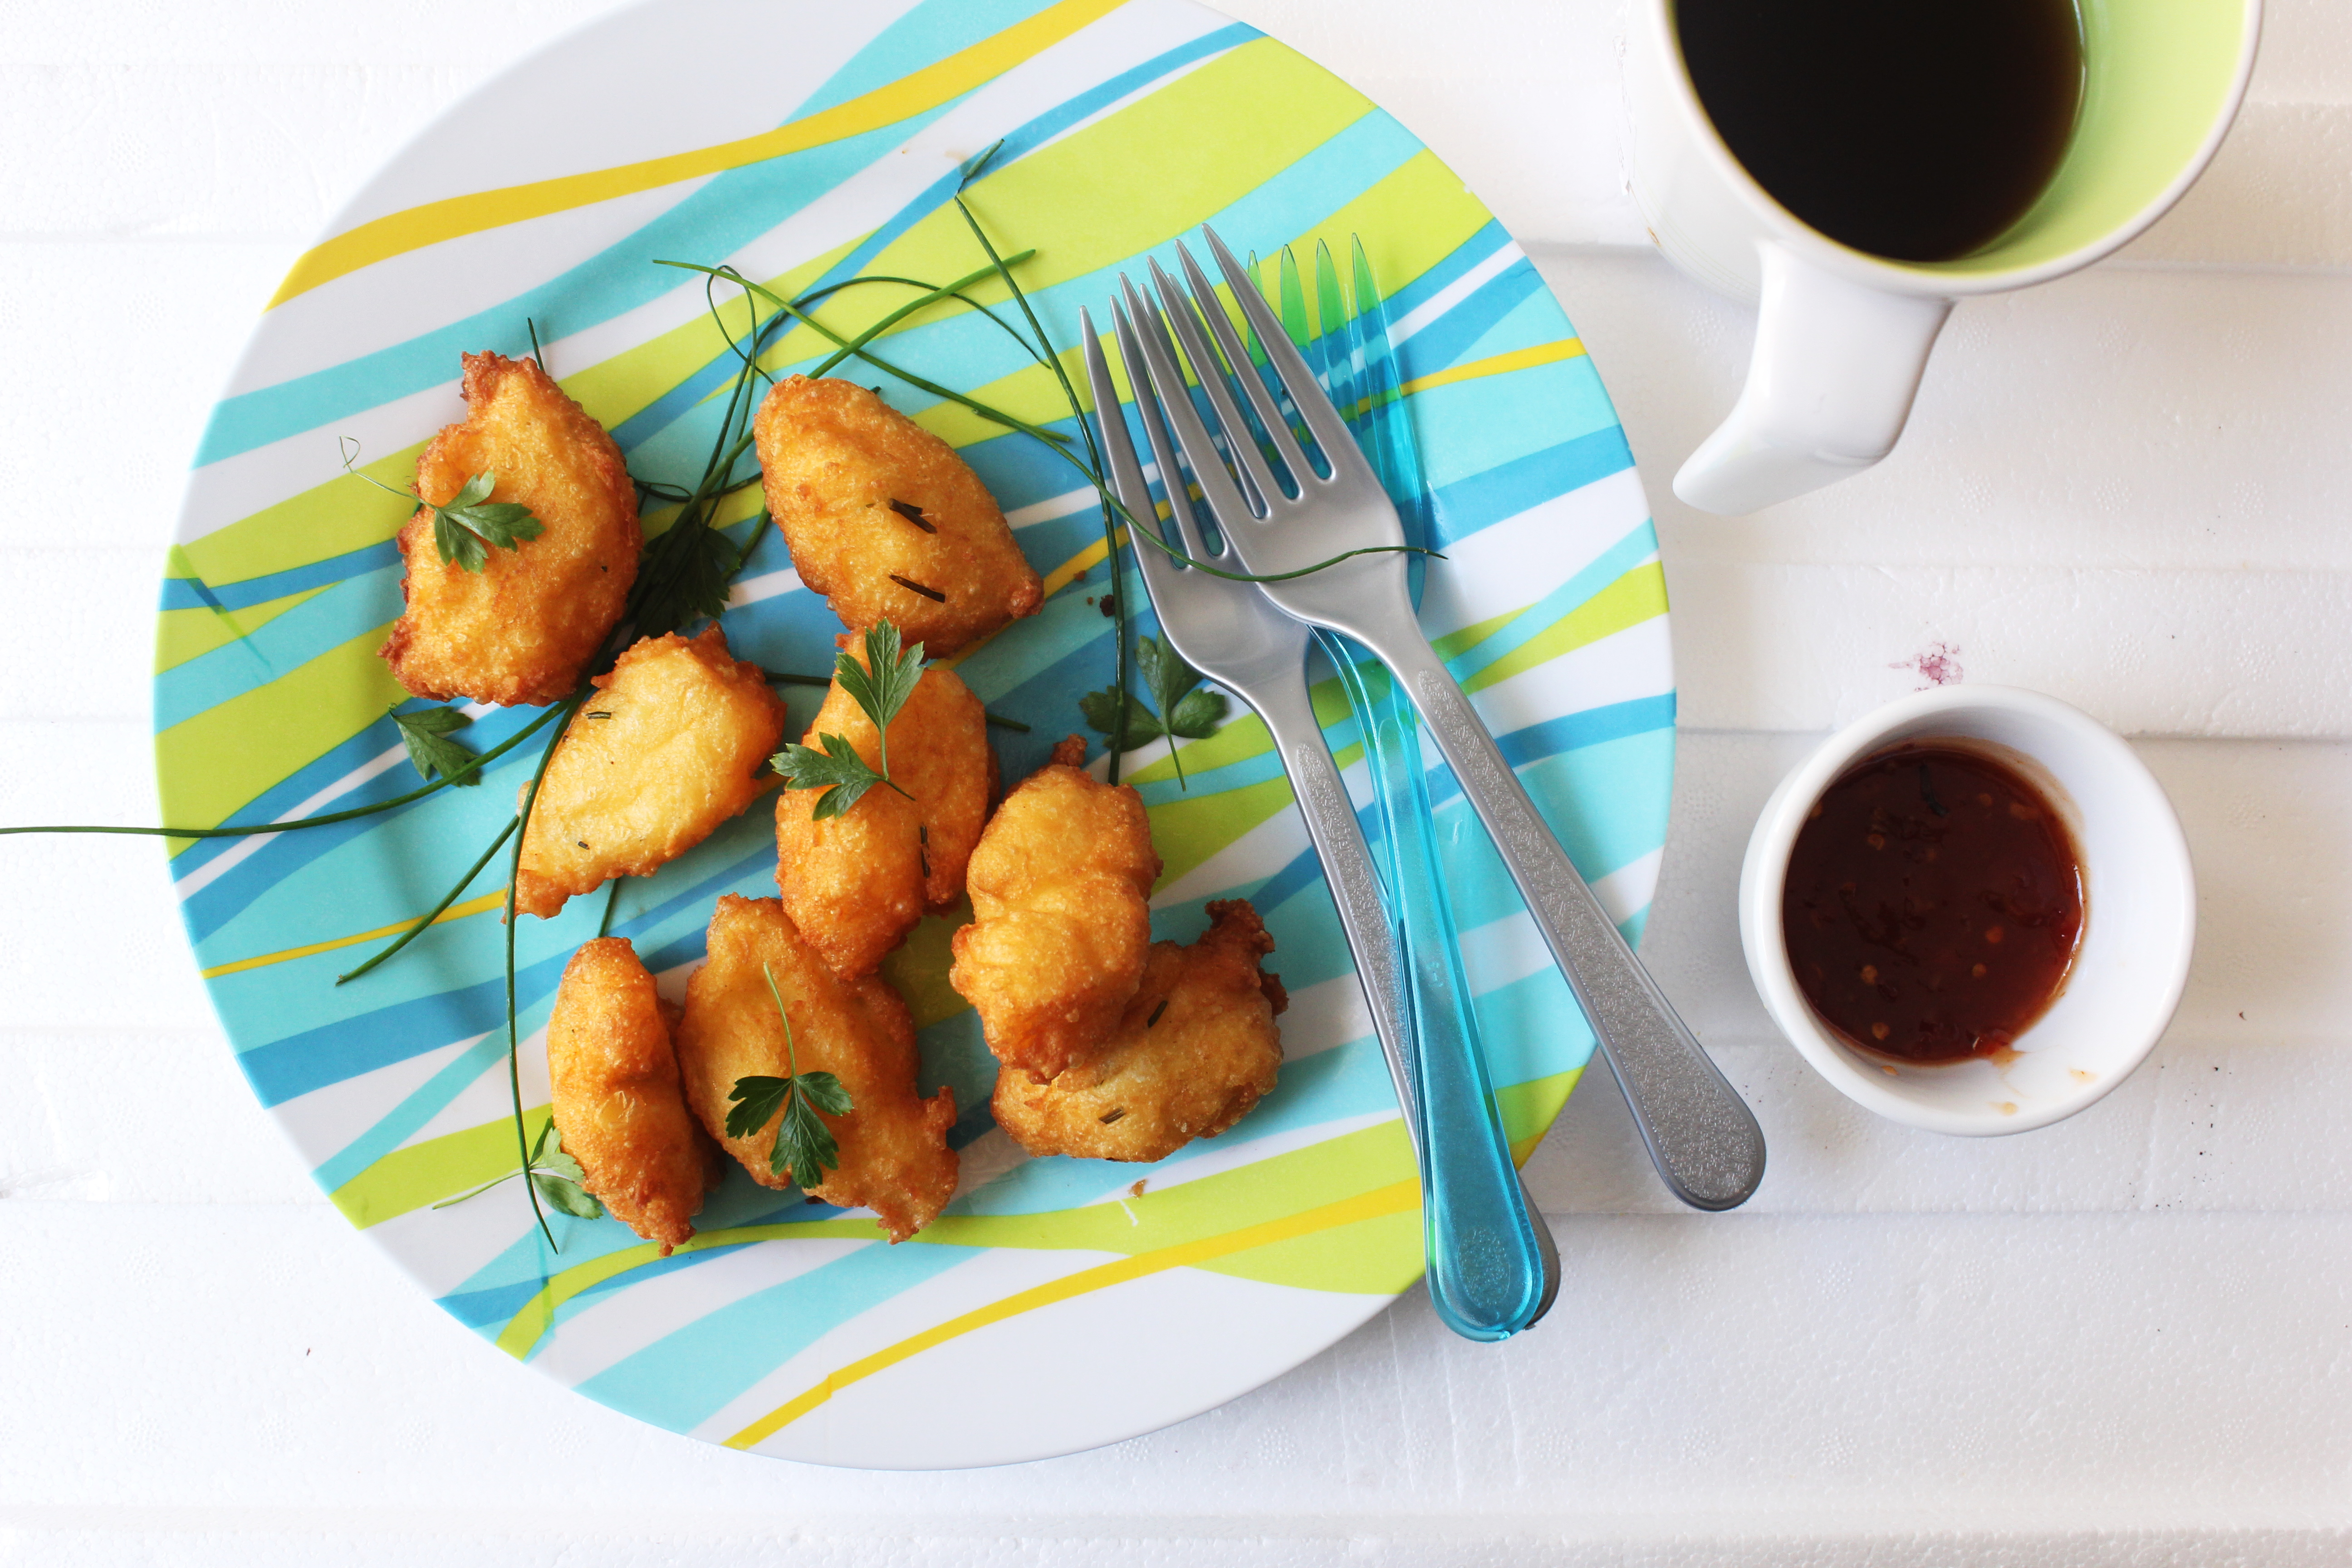
On Friday afternoon, I made these beignets to take a break from sweets. Sweets only. Not calories! They have cheese in them and taste so so good. These beignets are pretty easy to put together and the batter can be made a few hours in advance. Fry them when you want to eat them. I served them with a sweet chilli dipping sauce. I thought they tasted great with a slightly sweet-hot accompaniment. Another reason I’ve been wanting to make them was to use chives from my chives plant, a recent addition to my herb garden. You could substitute with finely chopped parsley or mint.

IMG_7317 (1)

The batter as you can see is choux pastry. I love using this batter in both sweet and savory dishes. It is really a versatile batter. And results in crispy, light, puffed up fritters. This makes for a delicious bite-sized canapé made up of regular pantry ingredients. No elaborate shopping required.

IMG_7331 (1)

Merry Christmas to all my lovely readers and their families! With part of my baking and cooking equipment packed away in boxes, I doubt if I will get to post anything again this week. But I hope to catch you before the New Year.

IMG_7322 (1)


Cheddar and Chive Beignets (adapted with variation from Great British Chefs)
Serves 6

50 g butter
150 ml water
1 tsp sugar
2/3 cup plain flour
50g of mature cheddar, finely grated
a handful of chives, finely chopped
2 eggs, beaten
sunflower oil, for deep-frying
salt and pepper to taste

Place the butter, water and sugar in a saucepan. Bring to the boil and add the flour, beating well until you have a smooth ball of paste that has left the sides of the saucepan. Remove from the heat and stir in the cheddar and finely chopped chives, followed by the eggs, one at a time, beating all the time until you have a smooth paste. Season with salt and pepper and set aside.
Fill another heavy-based pan one-third full with sunflower oil and place over a moderate heat.

Using two spoons, add spoonfuls of the pastry to the pan – take care not to overcrowd the pan. Fry for about 5 minutes or until they are nicely browned and have risen to the surface of the oil. Remove the beignets with a slotted spoon and drain on kitchen paper and keep warm while you fry the rest of the pastry. Grate more cheese over the beignets while they are still warm. Serve with sweet chilli sauce or tomato ketchup.

No-Bake 5 Minute Chocolate Marshmallow Crackles

20|12|2013

I’ve been so reluctant to pack away any of my baking tins and trays since I was pretty sure I would need them again this week. My family and every one else around here thought I wouldn’t and that I have made and fed enough sweet treats to them for the year. Along with baking tins, naturally there were other props that needed to stick around too. So as it turns out, I am a week away from moving and the boxes are sitting all around the house with nothing in them and the boys are using them as push carts to give each other a joy ride.

IMG_7348 (1)

IMG_7285 (1)

Finally out of guilt and panic, I agreed to a ‘no elaborate baking’ arrangement. And then these were born. Did not even need baking. Seriously, something as easy as this and tasting so insanely good. It takes 5 minutes from start to finish to make the crackles..at the most 10 if you are making it for the first time. Then they just chill and set in the refrigerator. The ganache takes another 3 minutes to make and is poured over the crackle mixture. And that’s it! Eat them, store them, gift them or share them…they are a joy to have. Even simpler than cookies. Honestly, aren’t you getting a bit tired of cookies…I know I am!

IMG_7292 (1)

You can use up dried fruits or nuts in them and be creative as you want to be. I used the home-made marshmallows that I made last week for the Marshmallow Sandwich cookies. These are chewy little bars…a bit of crunch here and there, sweet from the glace cherries and apricots. I have used milk chocolate in the crackles and bittersweet chocolate in the ganache to balance the sweetness. I also piped a little ganache on top and sprinkled lemon jelly crystals for a hint of tang. You could skip the ganache if you want to keep it simple and quick but then the ganache too is hardly any effort.

IMG_7347 (1)Hope you have a great weekend. We have so many activities lined up for the weekend but I am most excited to see the Christmas lighting in CBD (city centre) and of course taking the kids to meet their favourite Santa. They are so looking forward to it.

IMG_7342 (1)

No-Bake 5 Minute Chocolate Crackles
Makes 10-12 Crackles

For the Crackles
2 cups Rice Bubbles (I used Kellogg’s)
1/2 cup red glace cherries
1/2 cup dried apricots
1/4 cup glace ginger
200 g milk chocolate, roughly chopped
250 g marshmallows
2 tbsp. milk

For the Ganache
120 g dark chocolate, roughly chopped
1/4 cup thickened cream

Grease a 10cm x 25cm (base) rectangular pan. Line base and sides with baking paper, allowing 3 cm overhang on all sides.

Place rice bubbles, cherries, apricots and ginger in a heatproof bowl. Place chocolate in a saucepan which is placed on another saucepan filled with simmering water over medium heat minutes. Stir with a metal spoon till smooth and completely melted. Set aside to cool slightly.

Meanwhile, place marshmallows and milk in a saucepan over medium heat. Cook, stirring for 5 minutes or until melted and smooth. Working quickly, add chocolate to the marshmallow mixture. Mix and add to rice bubble mixture. Stir to combine. Spread into prepared pan. Press a little bit with the back of a spoon.

Make the Chocolate Ganache: Place the chocolate and cream in a microwave safe bowl and microwave in bursts of 20 seconds till mixture is smooth and well combined (about 2 minutes). Pour the ganache over the crackle. Cover. Refrigerate for 4 hours or until set.

Once cooled, slice into squares and serve.


Spiced Orange Almond Cake

18|12|2013

I’ve been wanting to make an Orange cake this month. Though Orange is not our seasonal best at the moment, it is still abundantly available. All throughout my growing up years in India I have associated Oranges with colder months and though the seasons have been reversed now that I am in the southern hemisphere, I continue to have a soft spot for Oranges around this time. As far as my experience goes with Citrus cakes, they always taste delicious and appeal to most people. And they smell amazing too. Remember my Gluten Free Whole Orange Almond Mini Cakes…I’ve made it a number of times and I wanted to experiment with spice this time.

IMG_6988 (2)So I played around with a few recipes and came up with this one. I can rarely find myself baking a cake and not adding a nut meal to it. I find the texture so beautiful and nutty. But never rich. I also did not want a completely fudgy cake that would not work with my bundt pans. I made adjustments accordingly and the cake turned out just the way I wanted it to be. You can taste the orange, spices and the almonds that go so well together. Overall, it is a simple recipe with great results.

IMG_6961 (1)

As you can see, I have used a thin glaze. I didn’t want to overload it with sweetness as it was great on its own. If you do not have the individual spices, you can replace with 1 teaspoon of all spice. This recipe makes a 8 inch bundt cake which is not too big (my cake did not reach the full height of the pan.). I wanted to test out the recipe on a smaller cake. You can double up the recipe for a 9 inch round cake.

IMG_6981 (1)

In other random news, we will be beginning the new year in our new house. Some of you will remember that I had moved houses a while back. Well, a few things worked well..others did not.  And then with children, priorities keep changing. So moving again! With bigger and more boxes. I don’t believe in 8 months I have acquired so much stuff (blame it on the blog). But I do look forward to moving right next to the harbour side. If you have visited Sydney, you would know that we have some very beautiful beaches and harbours. You know I’ve been meaning to share photographs with you but every time I intend to, I think twice. The blog has grown so much over the months and apart from my regular readers, there are a lot of people visiting the site in search of recipes who may not enjoy the additional content. I will probably figure out some other way.
I had a great time this weekend visiting a lavender farm nearby and spending the day with a wonderful elderly couple learning about different varieties of lavender and how they are grown. I hope to write about that once I develop a recipe around edible lavender.

And I had another feature on the Kitchn! So, you know why I am so critical of myself and my blog lately.

IMG_6985 (1)


Spiced Orange Almond Cake
Makes a 8 inch bundt cake

For the Cake
125 ml (1/2 cup) freshly squeezed Orange juice
1 tbsp. finely grated orange zest
2/3 cup castor sugar
11/3 cup self-raising flour (11/3 cup plain flour + 1 tsp baking powder), sifted
1/2 tsp powdered ginger
1/2 tsp powdered nutmeg
1/4 tsp powdered cinnamon
11/2 cup almond meal (ground almonds)
2 medium eggs
60 g unsalted butter, melted

For the Glaze
1 cup icing sugar, sifted
2 tbsp. freshly squeezed orange juice

Preheat oven to 180 degrees C. Lightly grease a 8 inch bundt cake pan. Place the sifted flour, ginger, nutmeg, cinnamon together in a bowl and stir to mix. Keep aside.

In an electric mixer or with a hand mixer, beat the eggs and sugar till light and creamy. Fold in the flour mixture, ground almonds, orange juice, orange zest and melted butter until just combined and the mixture is smooth. Spoon the mixture into the prepared cake pan.

Bake for 30-40 minutes or until a skewer inserted into the centre of the cake comes out clean and edges turn golden brown. Leave in the pan for 15 minutes and then turn the cake onto a wire rack to cool completely. Once cooled, pour over the glaze all over the cake.

To make the glaze, in a small mixing bowl whisk the sugar and orange juice together till smooth.


Marshmallow Sandwich Cookies with Home made Marshmallows

15|12|2013

Holding on to the last two weeks of a beautiful year. And I cannot find a better way of bidding farewell to it than filling it with some more sweet treats. You know all the joy and cheer of the holiday season makes it harder to say goodbye. You really don’t want the party to end…when you are enjoying so much. Almost makes me sad. But there will always be good memories to take forward…some learning..a lot of hope AND a thousand ideas to work on for my dear little blog.

IMG_7062 (1)

I’ve been meaning to make marshmallows at home since months. I made them a couple of years back and promised myself never to get store-bought ones again. But when something is so easily available you don’t give much thought to recipes however simple they may be.

IMG_7054 (1)

Home made marshmallows not only taste better than the store-bought ones, you can do so much with them. Colour them, flavour them, cut them into any shapes…coat them with your favourite candies. And just 2 basic ingredients. It can’t get easier than this. I have used a 5 cm round cutter to cut out rounds and sandwiched them between store-bought biscuits. If you want to make the biscuits from scratch, you can use any basic cookie recipe (that is not crumbly) or similar cookies with this recipe. The best part is that they are gluten-free and if you sandwich them between gluten-free cookies, they will make a lovely gluten-free gift too.IMG_7052 (2)

A few things to note about the recipe. Do make sure you beat the sugar mixture till it is really thick..it should somewhat hold its shape for a few seconds when you lift the beaters. You can coat them in dessicated coconut or equal parts of corns starch and icing sugar.  After 3-4 hours if you find the marshmallow too sticky to work with, put the tray in the refrigerator for an hour. Dust your cookie cutter or knife with the sugar- corn starch mixture each time you cut into the slab of marshmallow. Tying ribbons around the cookies not only makes them look festive and pretty but keeps them intact.

IMG_7146 (1)

Marshmallow Sandwich Cookies with Homemade Marshmallows (Marshmallow recipe adapted from here)
Makes 12-14 sandwich cookies

1 1/2 cups castor sugar
2 tablespoons gelatine
1 teaspoon vanilla extract
1 cup icing sugar and corn starch mixture (equal parts)
Cookies (home-made or store-bought) to sandwich the marshmallows
1/2 cup of either melted chocolate, nutella or jam of your choice

Grease a 3cm deep, 16.5cm x 26cm (base) slab pan. Line base and sides with baking paper, allowing a 2cm overhang at both long ends. Combine sugar and 2/3 cup hot water in a saucepan over medium heat. Cook, stirring, for 3 minutes or until sugar dissolves and syrup is clear.

Using a fork, combine gelatine and 2/3 cup cold water in a jug. Pour into hot syrup. Cook, stirring, for 2 to 3 minutes or until gelatine has dissolved and mixture is clear. Pour into bowl of an electric mixer. Set aside to cool to room temperature (about 30 minutes).

Using an electric mixer, beat sugar and gelatine mixture on high for 6 to 10 minutes or until very thick. Add vanilla and beat for 1 minute. Spread into prepared pan. Smooth top. Set aside, at room temperature, for 4 hours or until set. Lift onto a board. Using a round cutter that is dusted with a mixture of icing sugar and corn starch, cut out round marshmallows (depending on the size of the cookies).

Sieve 1/2 cup icing sugar and 1/2 cup corn starch in a large bowl. Place 1 marshmallow at a time in the bowl and gently toss in the mixture to coat. Remove to a wire rack. Set marshmallows aside until surfaces feel dry (about 1 hour). Meanwhile, apply a little melted chocolate or Nutella or jam on the under side of each cookie and keep aside. Once the marshmallows are dry to touch, sandwich between two cookies and press firmly. To retain shape, you can tie them up with kitchen strings or ribbons.


  • « Previous Page
  • 1
  • …
  • 92
  • 93
  • 94
  • 95
  • 96
  • …
  • 111
  • Next Page »
Hey Sugar
Cake
Link to my Facebook Page
Link to my Instagram Page
Link to my Pinterest Page
Link to my Mail Page
Subscribe to this site
Fresh Awards
2019 Aus mumpreneur
2019 aus mumpreneur
Mumbrella

Copyright © 2025 · Sugar Et Al · Designed by Smitten Blog Designs · Log in