• Home
  • Recipe Index
    • Recipe Index
    • Breakfast/Brunch
    • Cakes and Puddings
    • Chocolate
    • Cookies and cupcakes
    • Custard and Mousse
    • Gluten Free
    • Ice Cream
    • Mains
    • Other Sweet Treats
    • Snack/Appetizers
    • Soups and Salads
    • Tarts and Pies
    • Vegetarian
  • About
  • Cookbook
  • Portfolio
  • Store
  • Press
  • Work with Me

Sugar et al

Because Life is a blend of flavours...

Easy Microwave Banana And Chocolate Chunk Pudding

29|10|2015

I don’t know about you but I cannot imagine my kitchen without a microwave. While moving houses in the recent past (4 times in 3 years) I made sure that it is the first of the electronic items to get plugged in…even before my beloved mixer and food processor. But coming to think of it, have I done anything with it other than reheating and defrosting food? Nope! Okay, maybe precook potatoes. Yet, it is an indispensable item that saves you time and a lot of dishes. I had 3 ripe bananas and no intention of making muffins, pancakes or even banana bread. So I did a Google search and came across this fabulous recipe.

IMG_9829-2
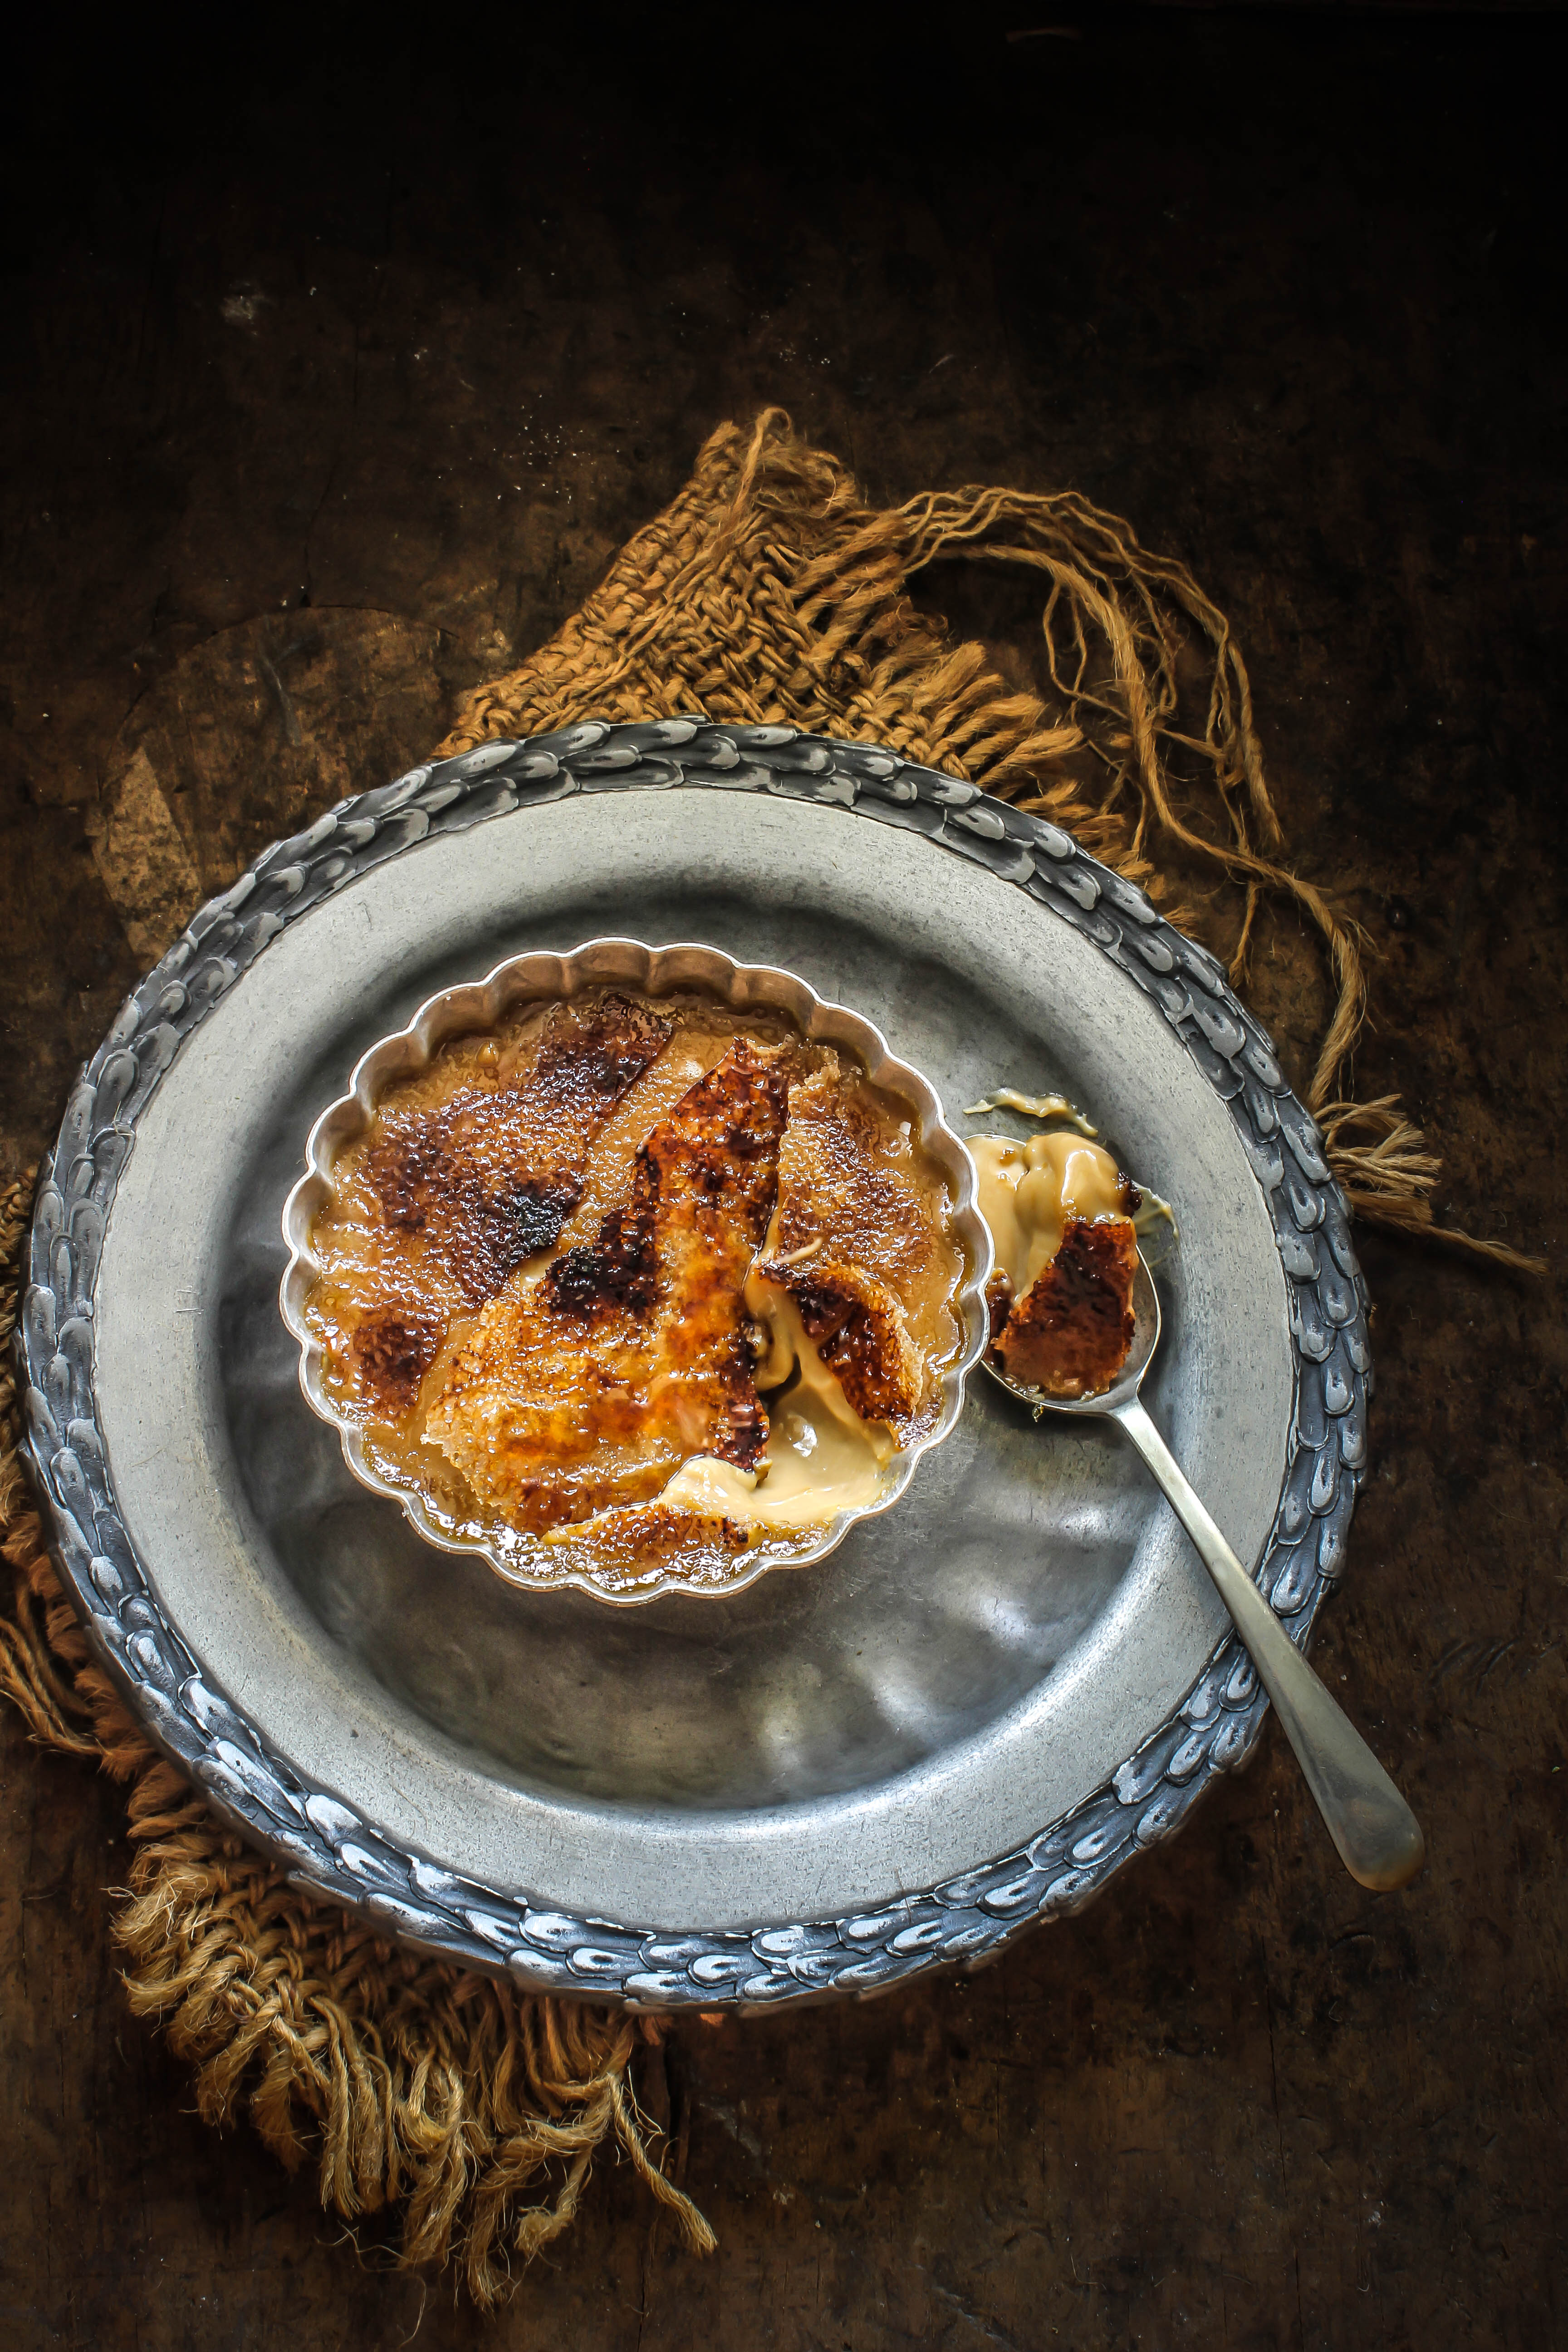
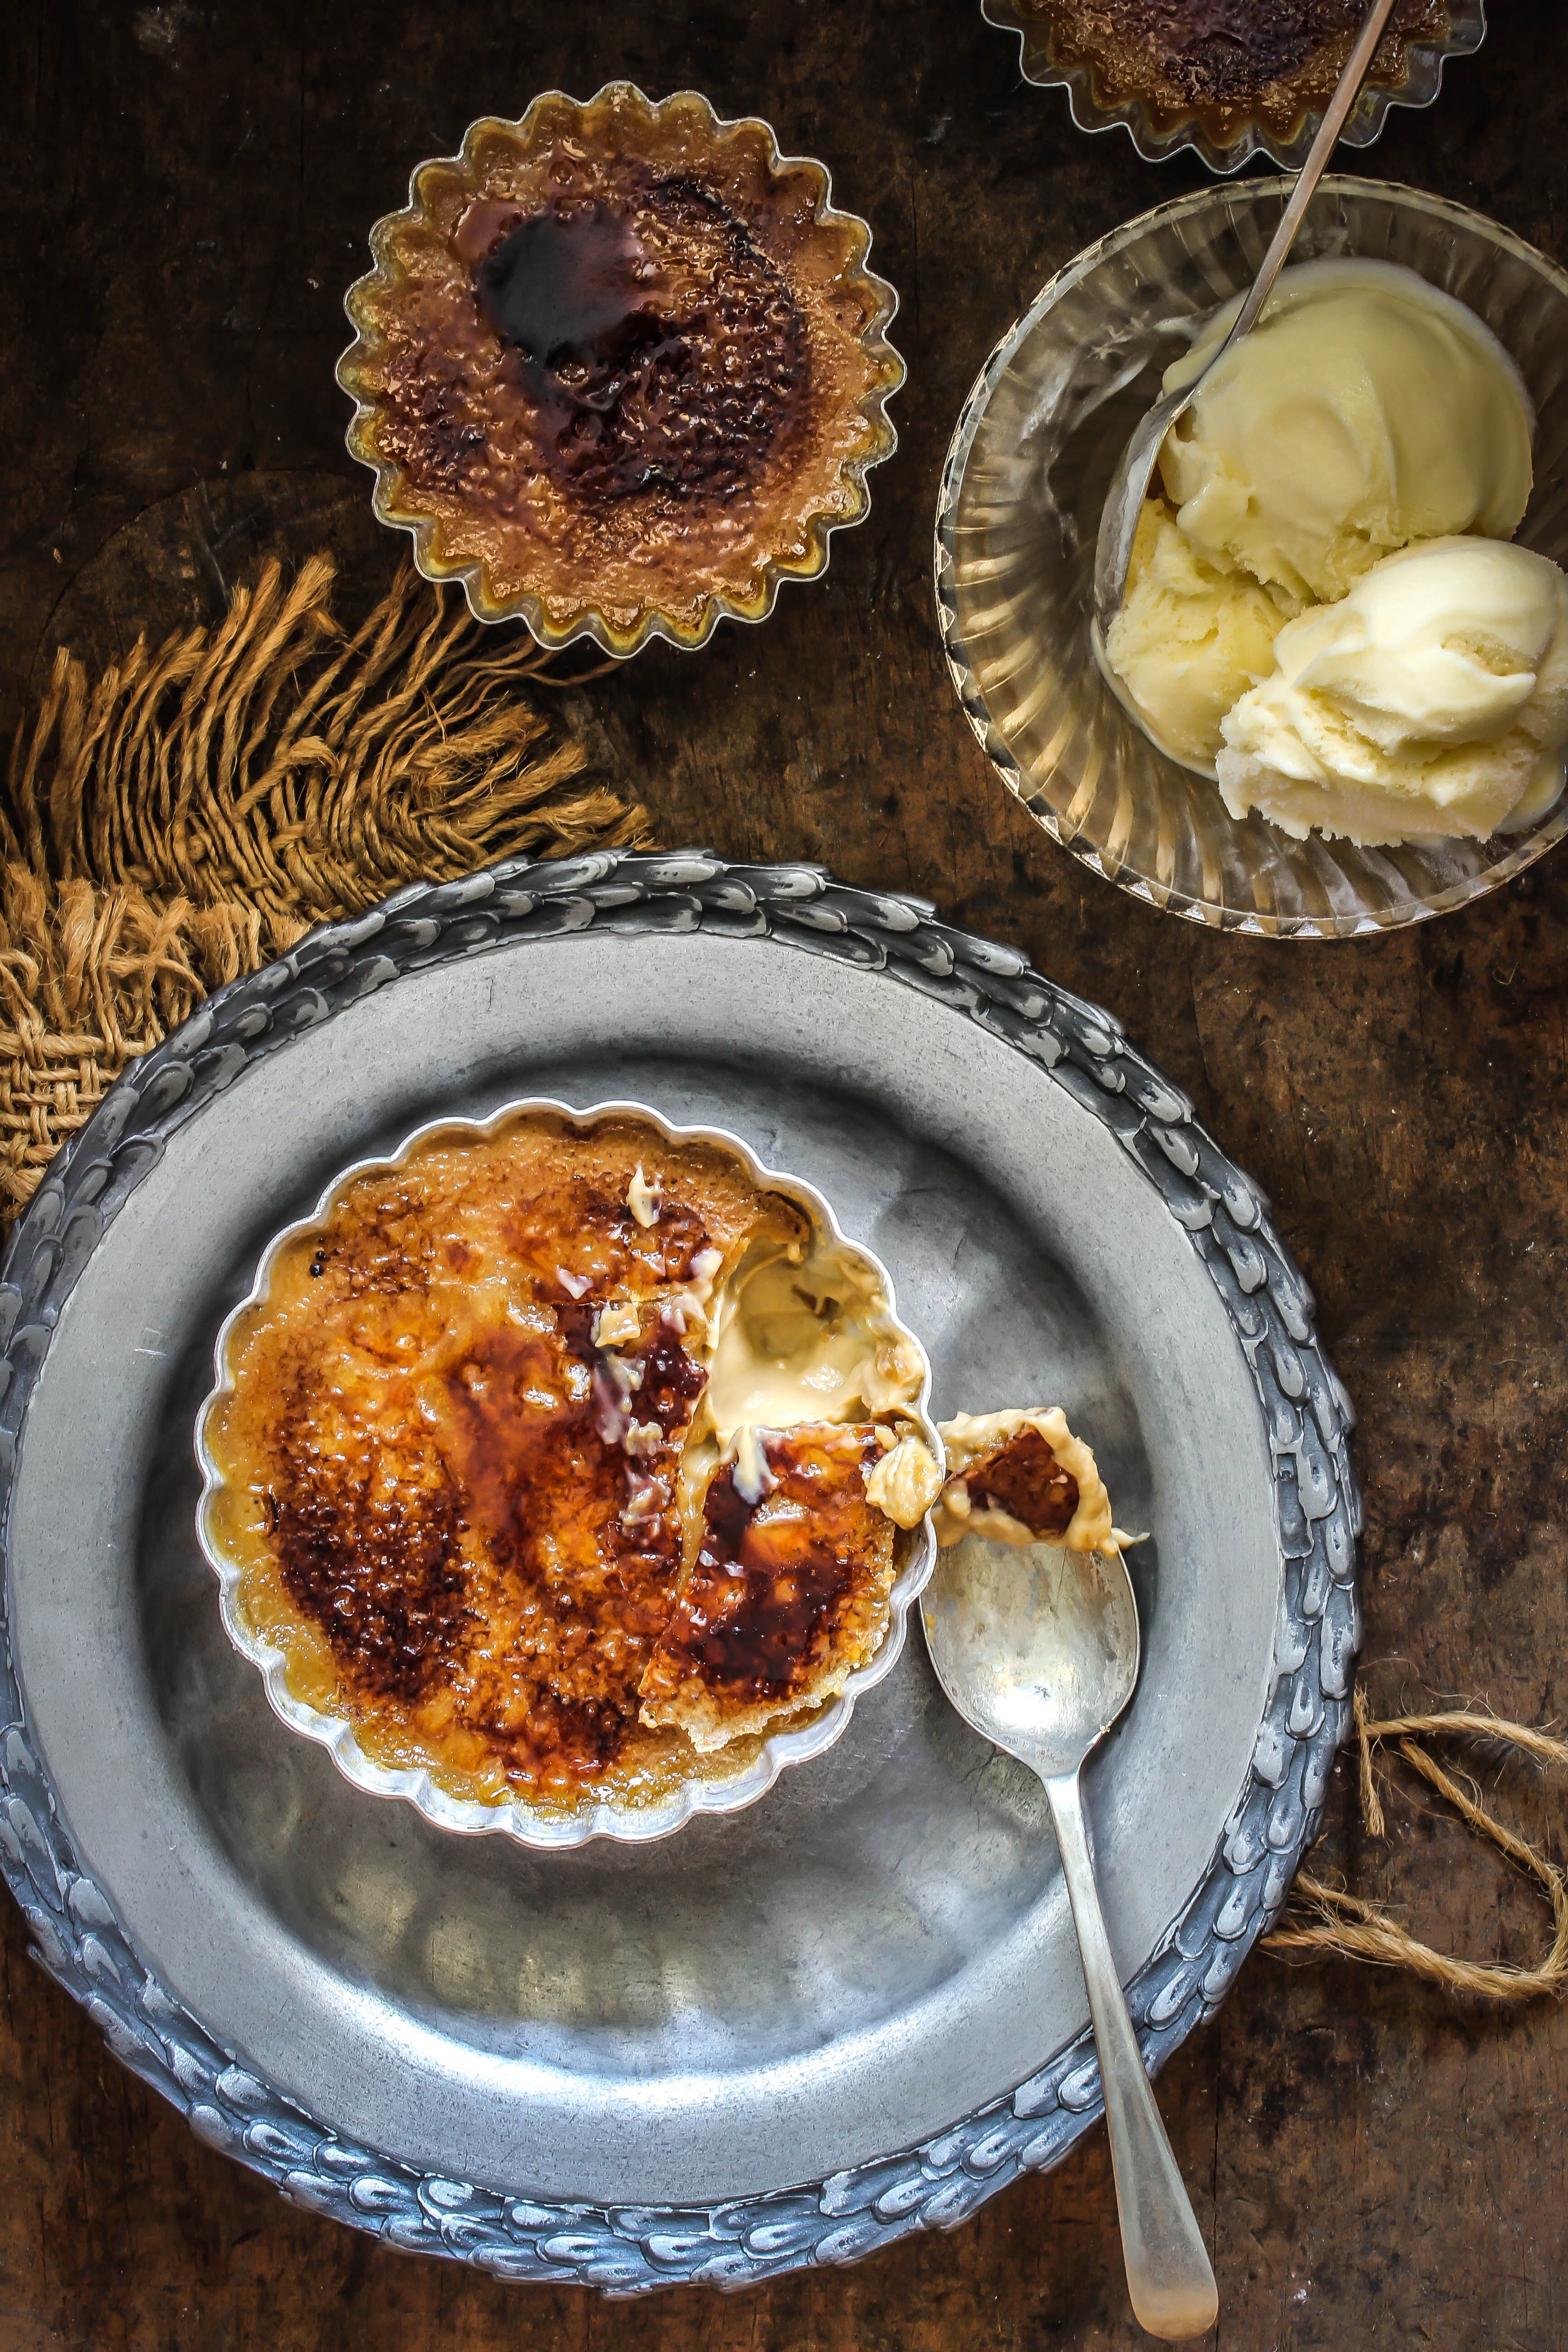
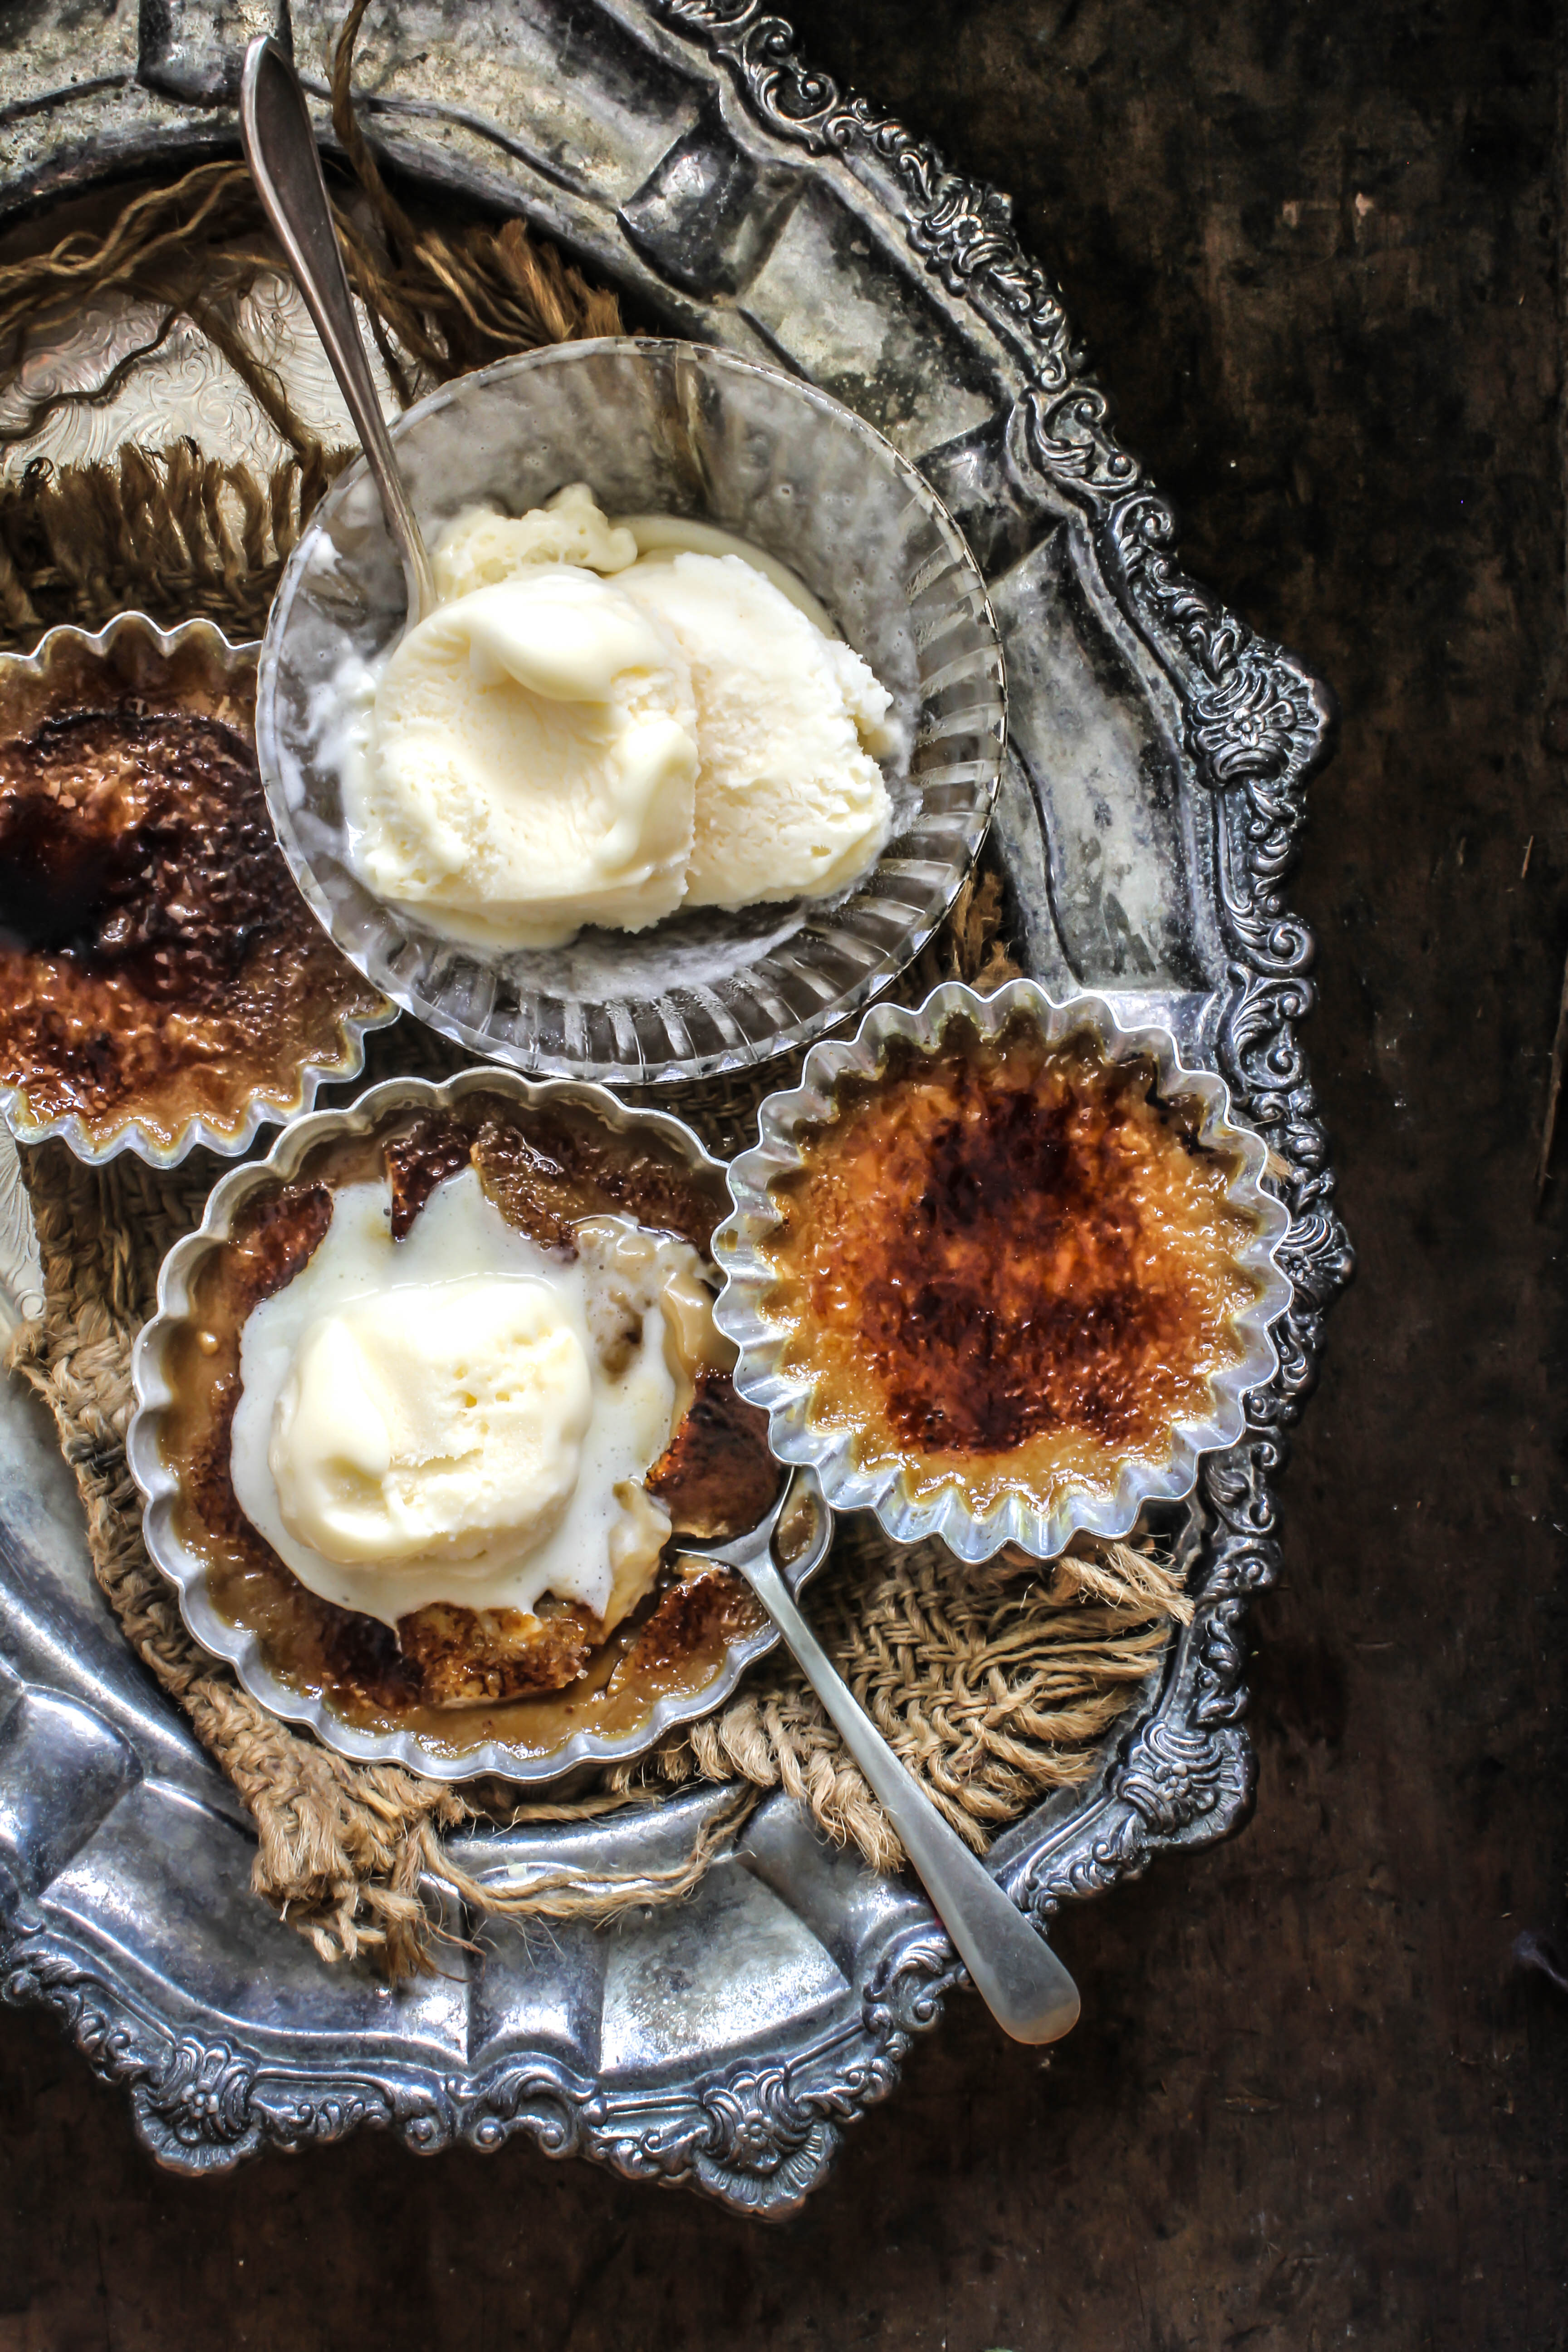
I made it twice this week. The first time I was unsure how it would turn out so I halved the recipe and just threw everything casually into a microwave safe bowl. Voila! It was done in 4 minutes. It was golden, sweet, soft, smelling of brown sugar and butter (you know, the one) spongy, gooey in some places and very slightly crusty on the sides. In other words, it was enlightenment! ‘Don’t underestimate the power of your microwave!’ The boys came back form school and finished it in one go with a scoop of vanilla ice cream.
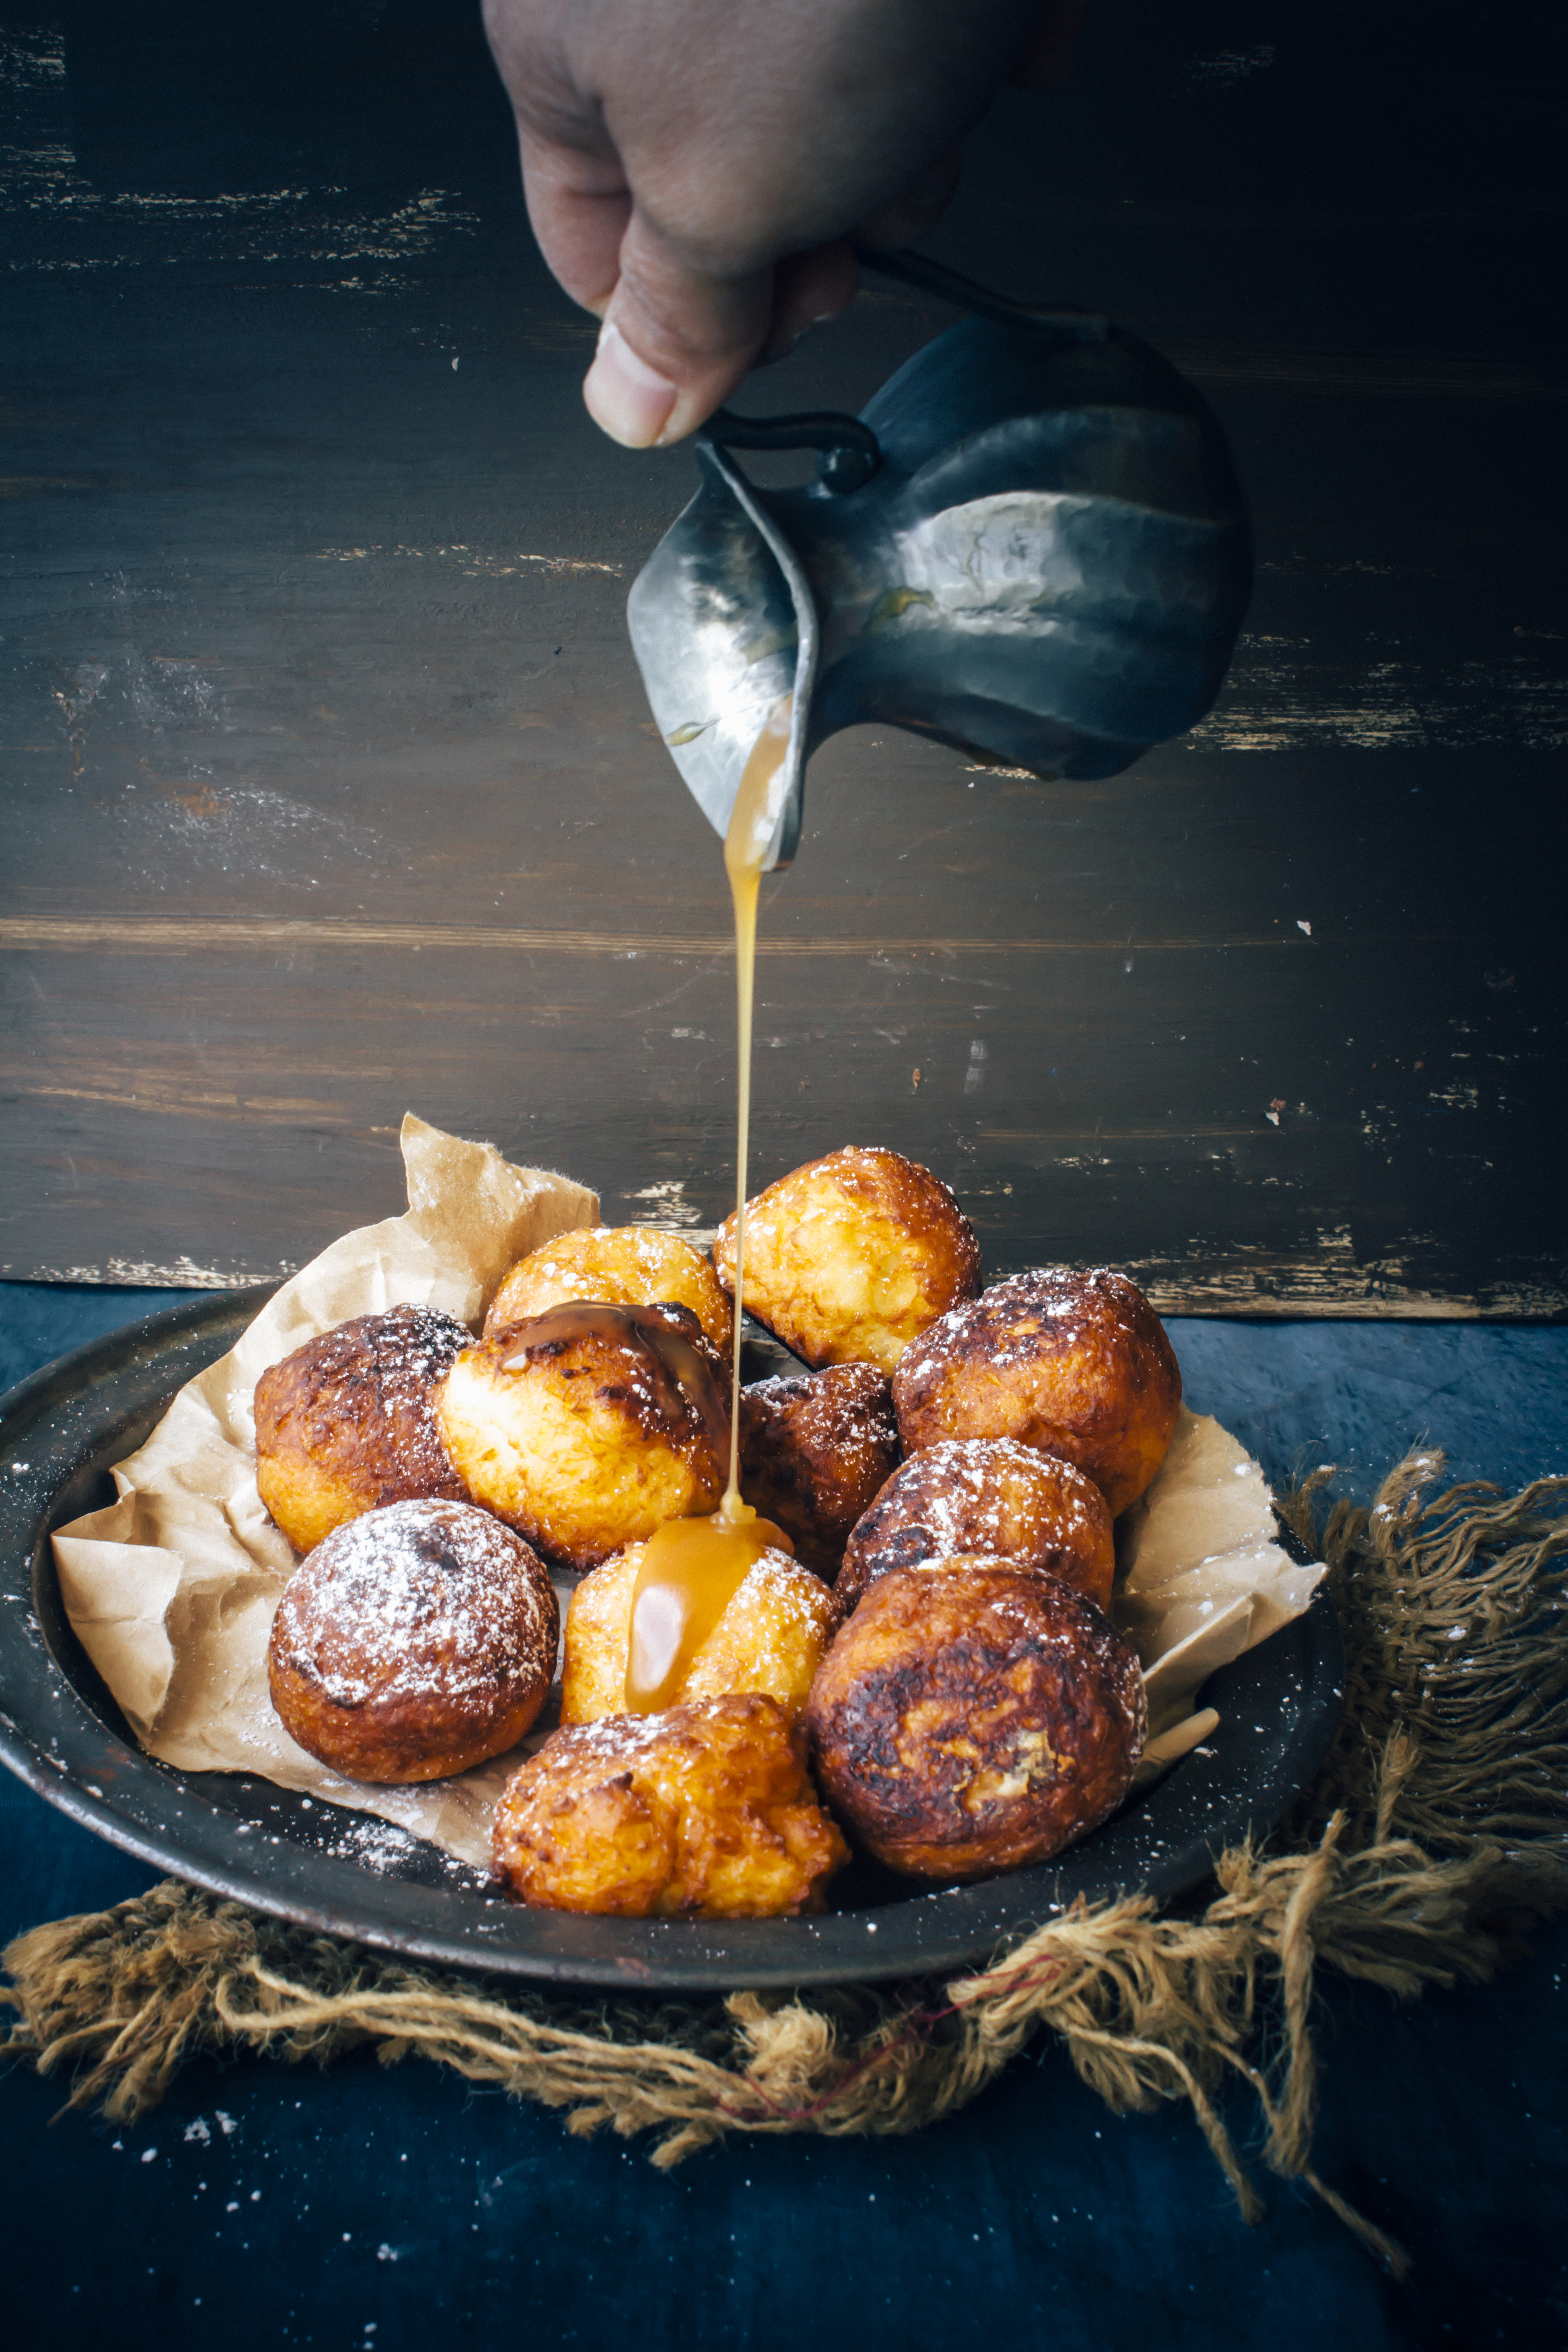
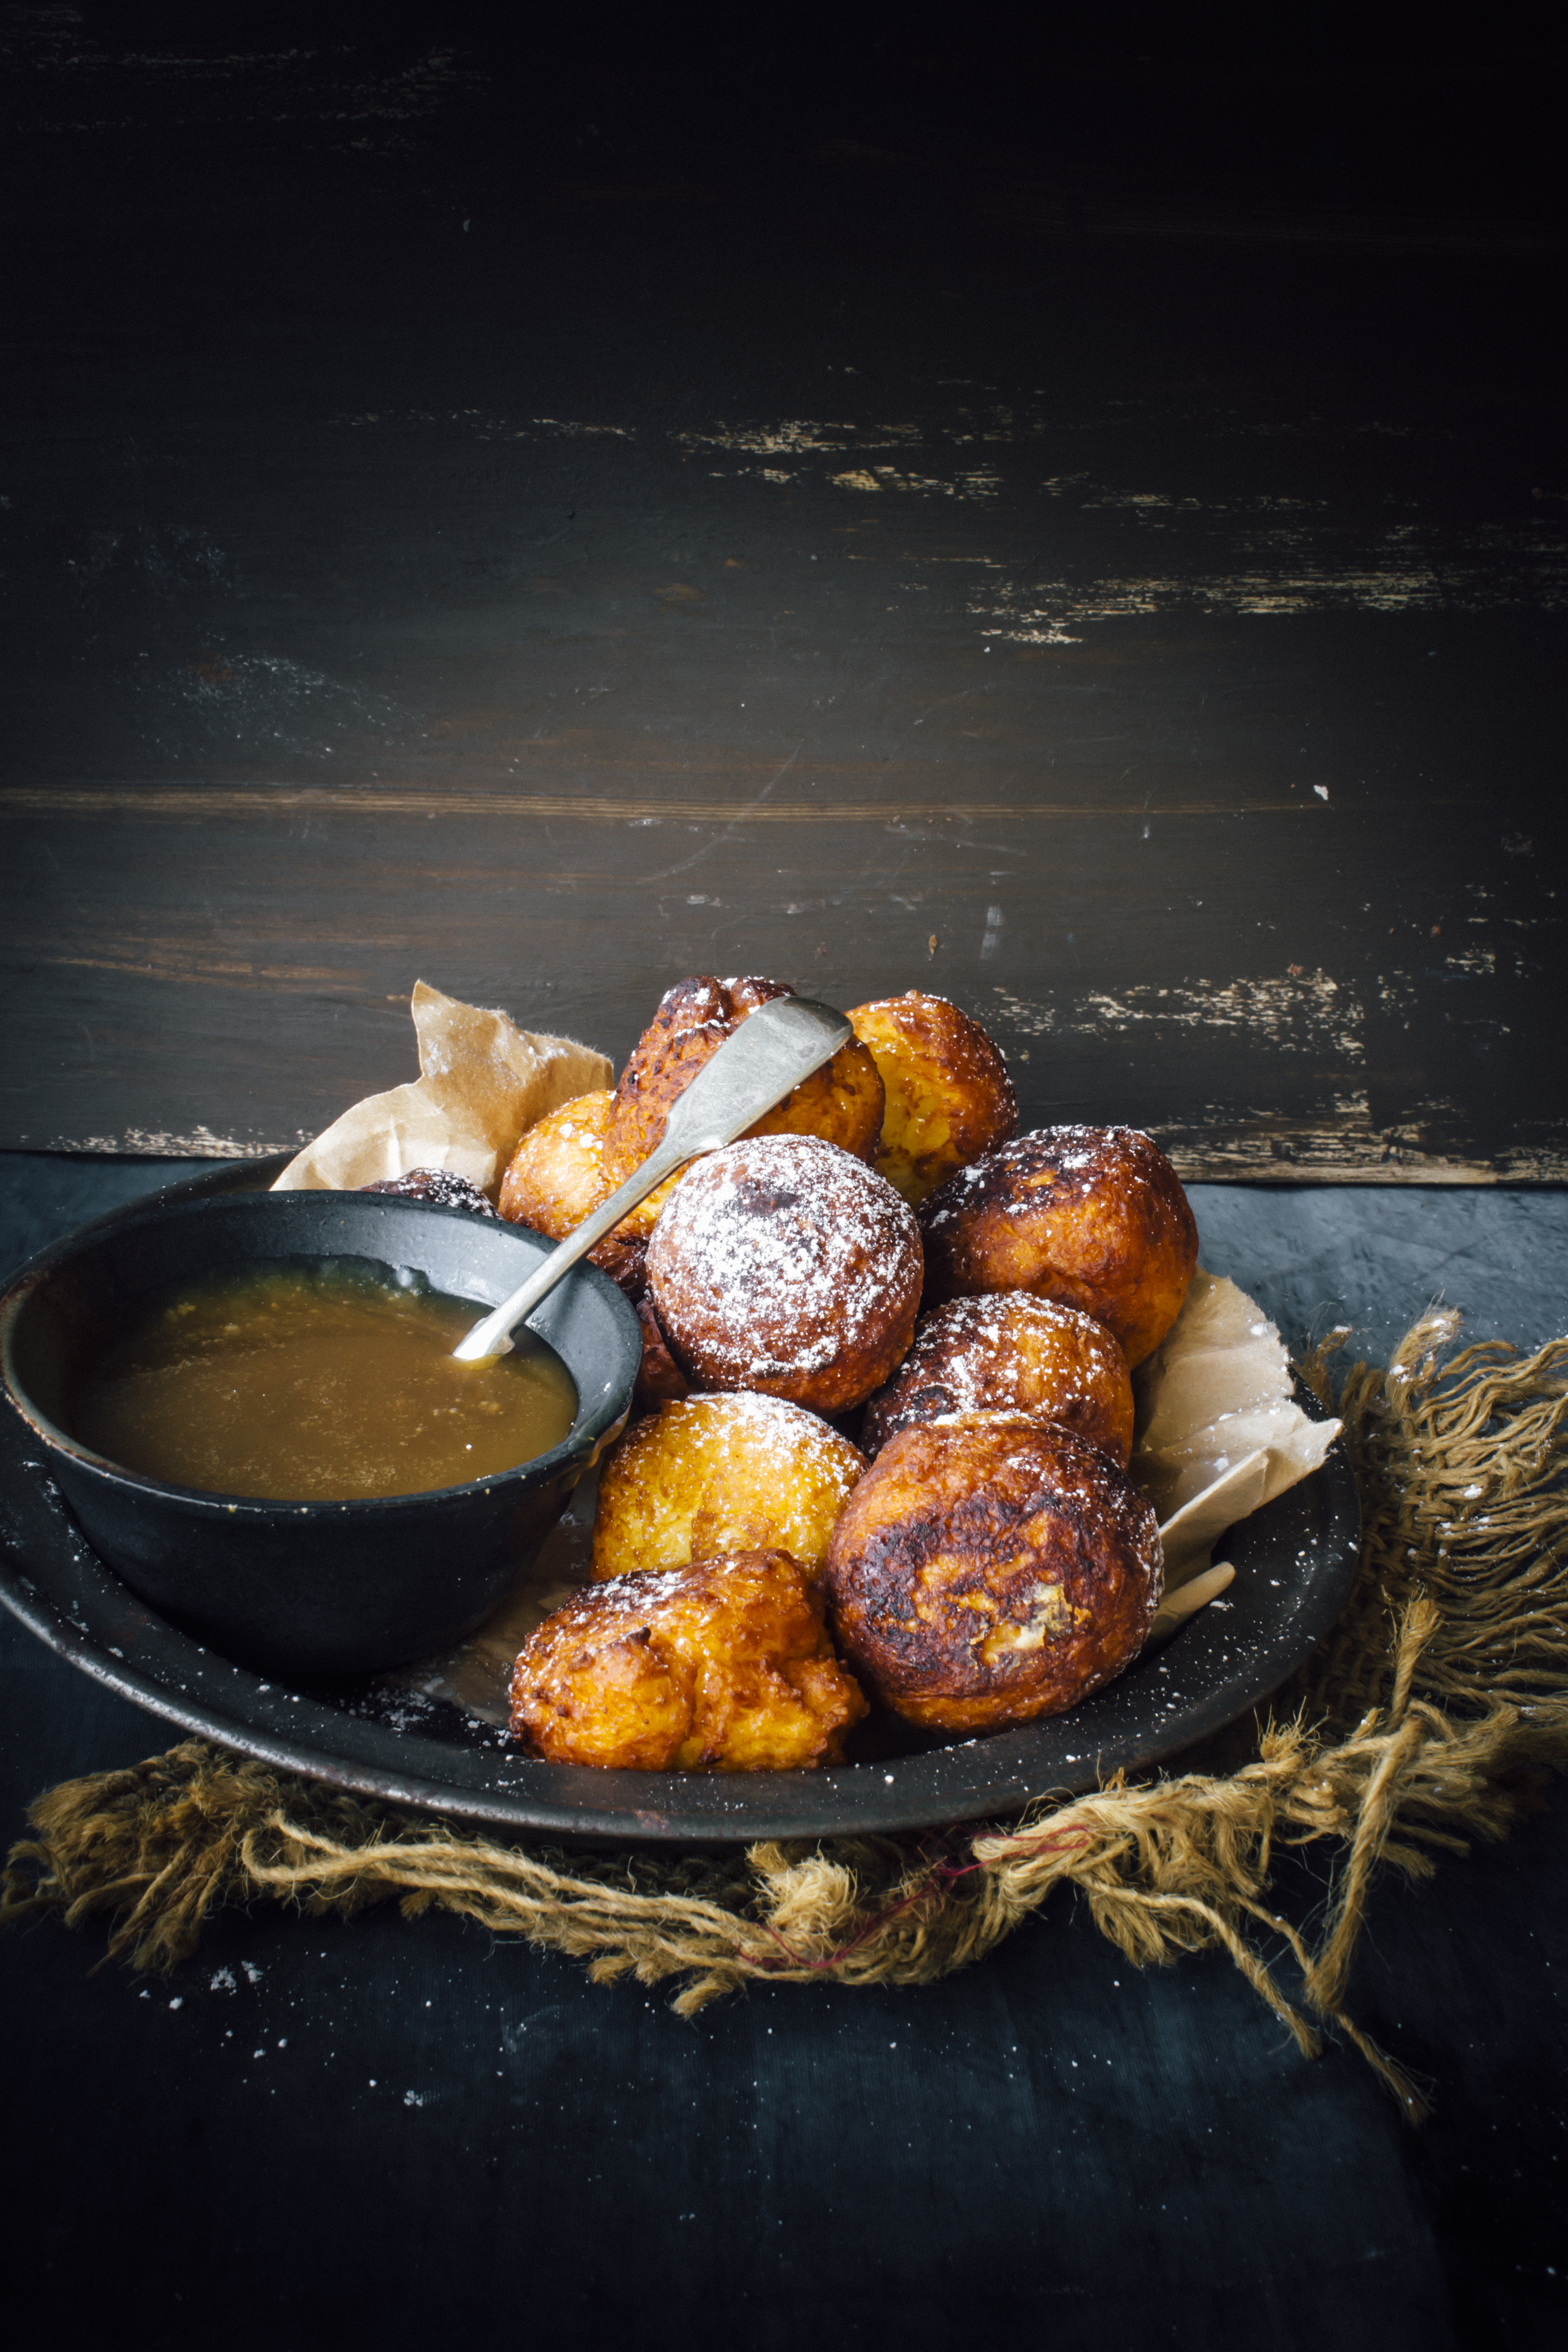
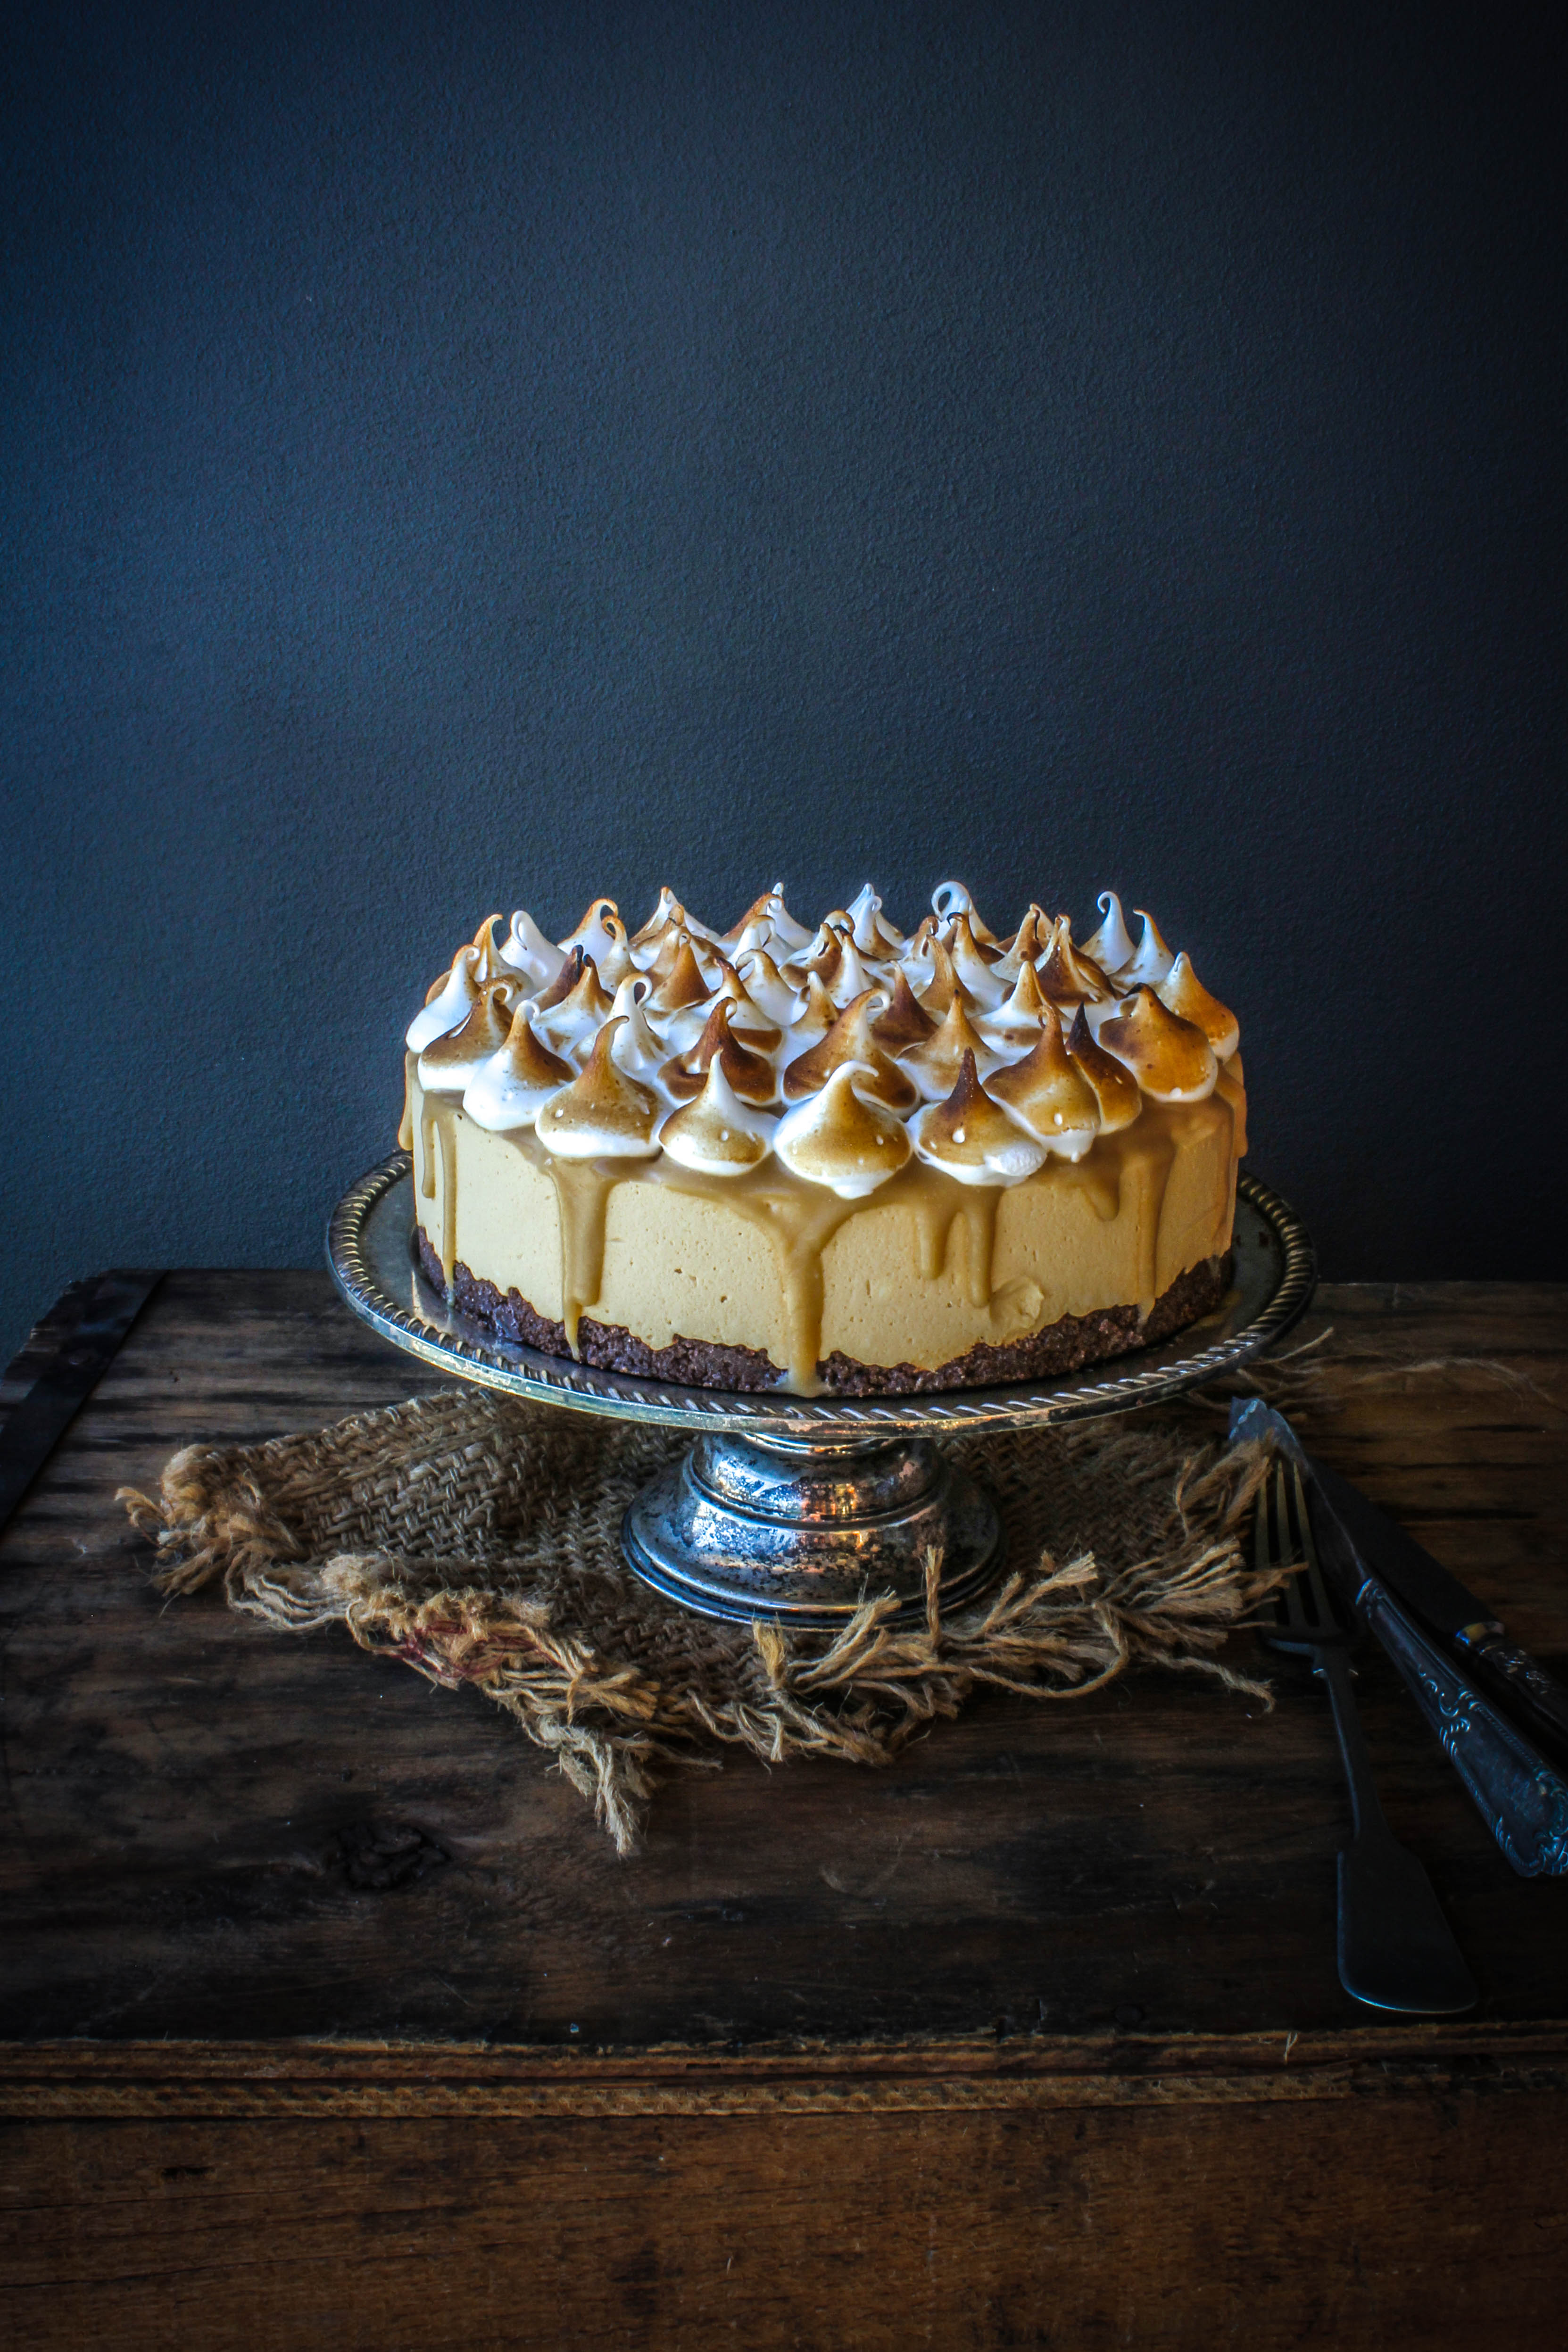
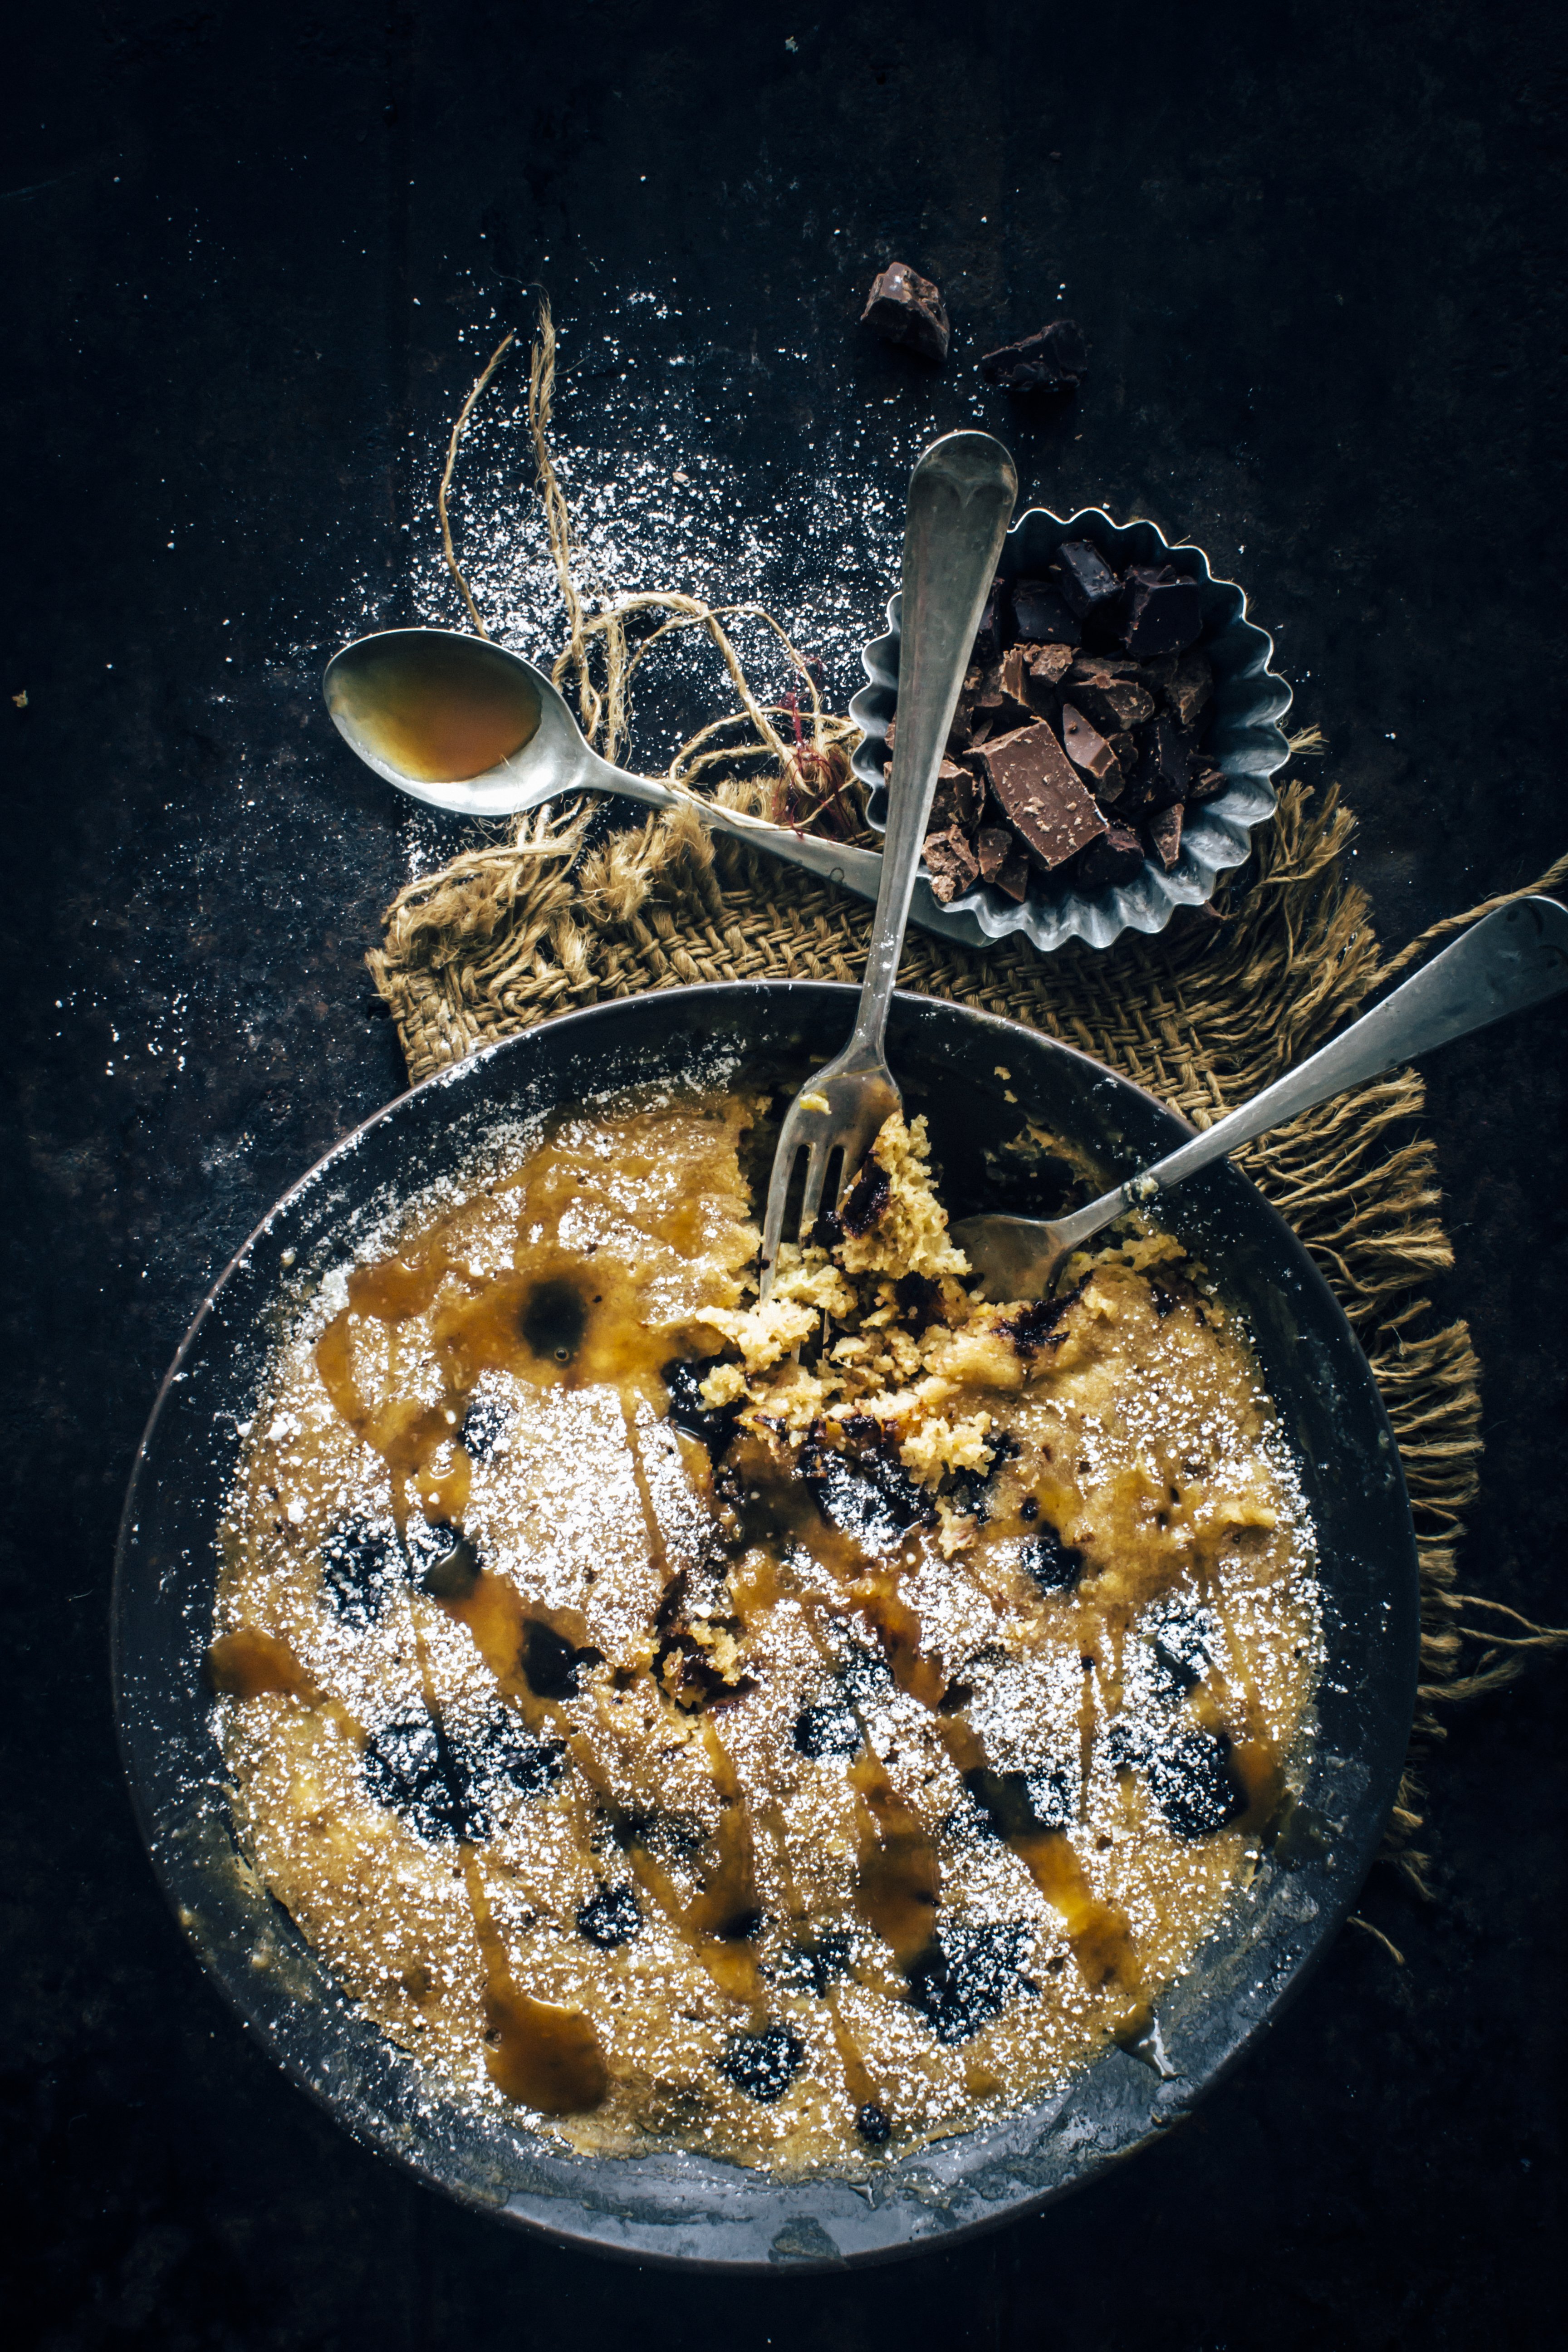
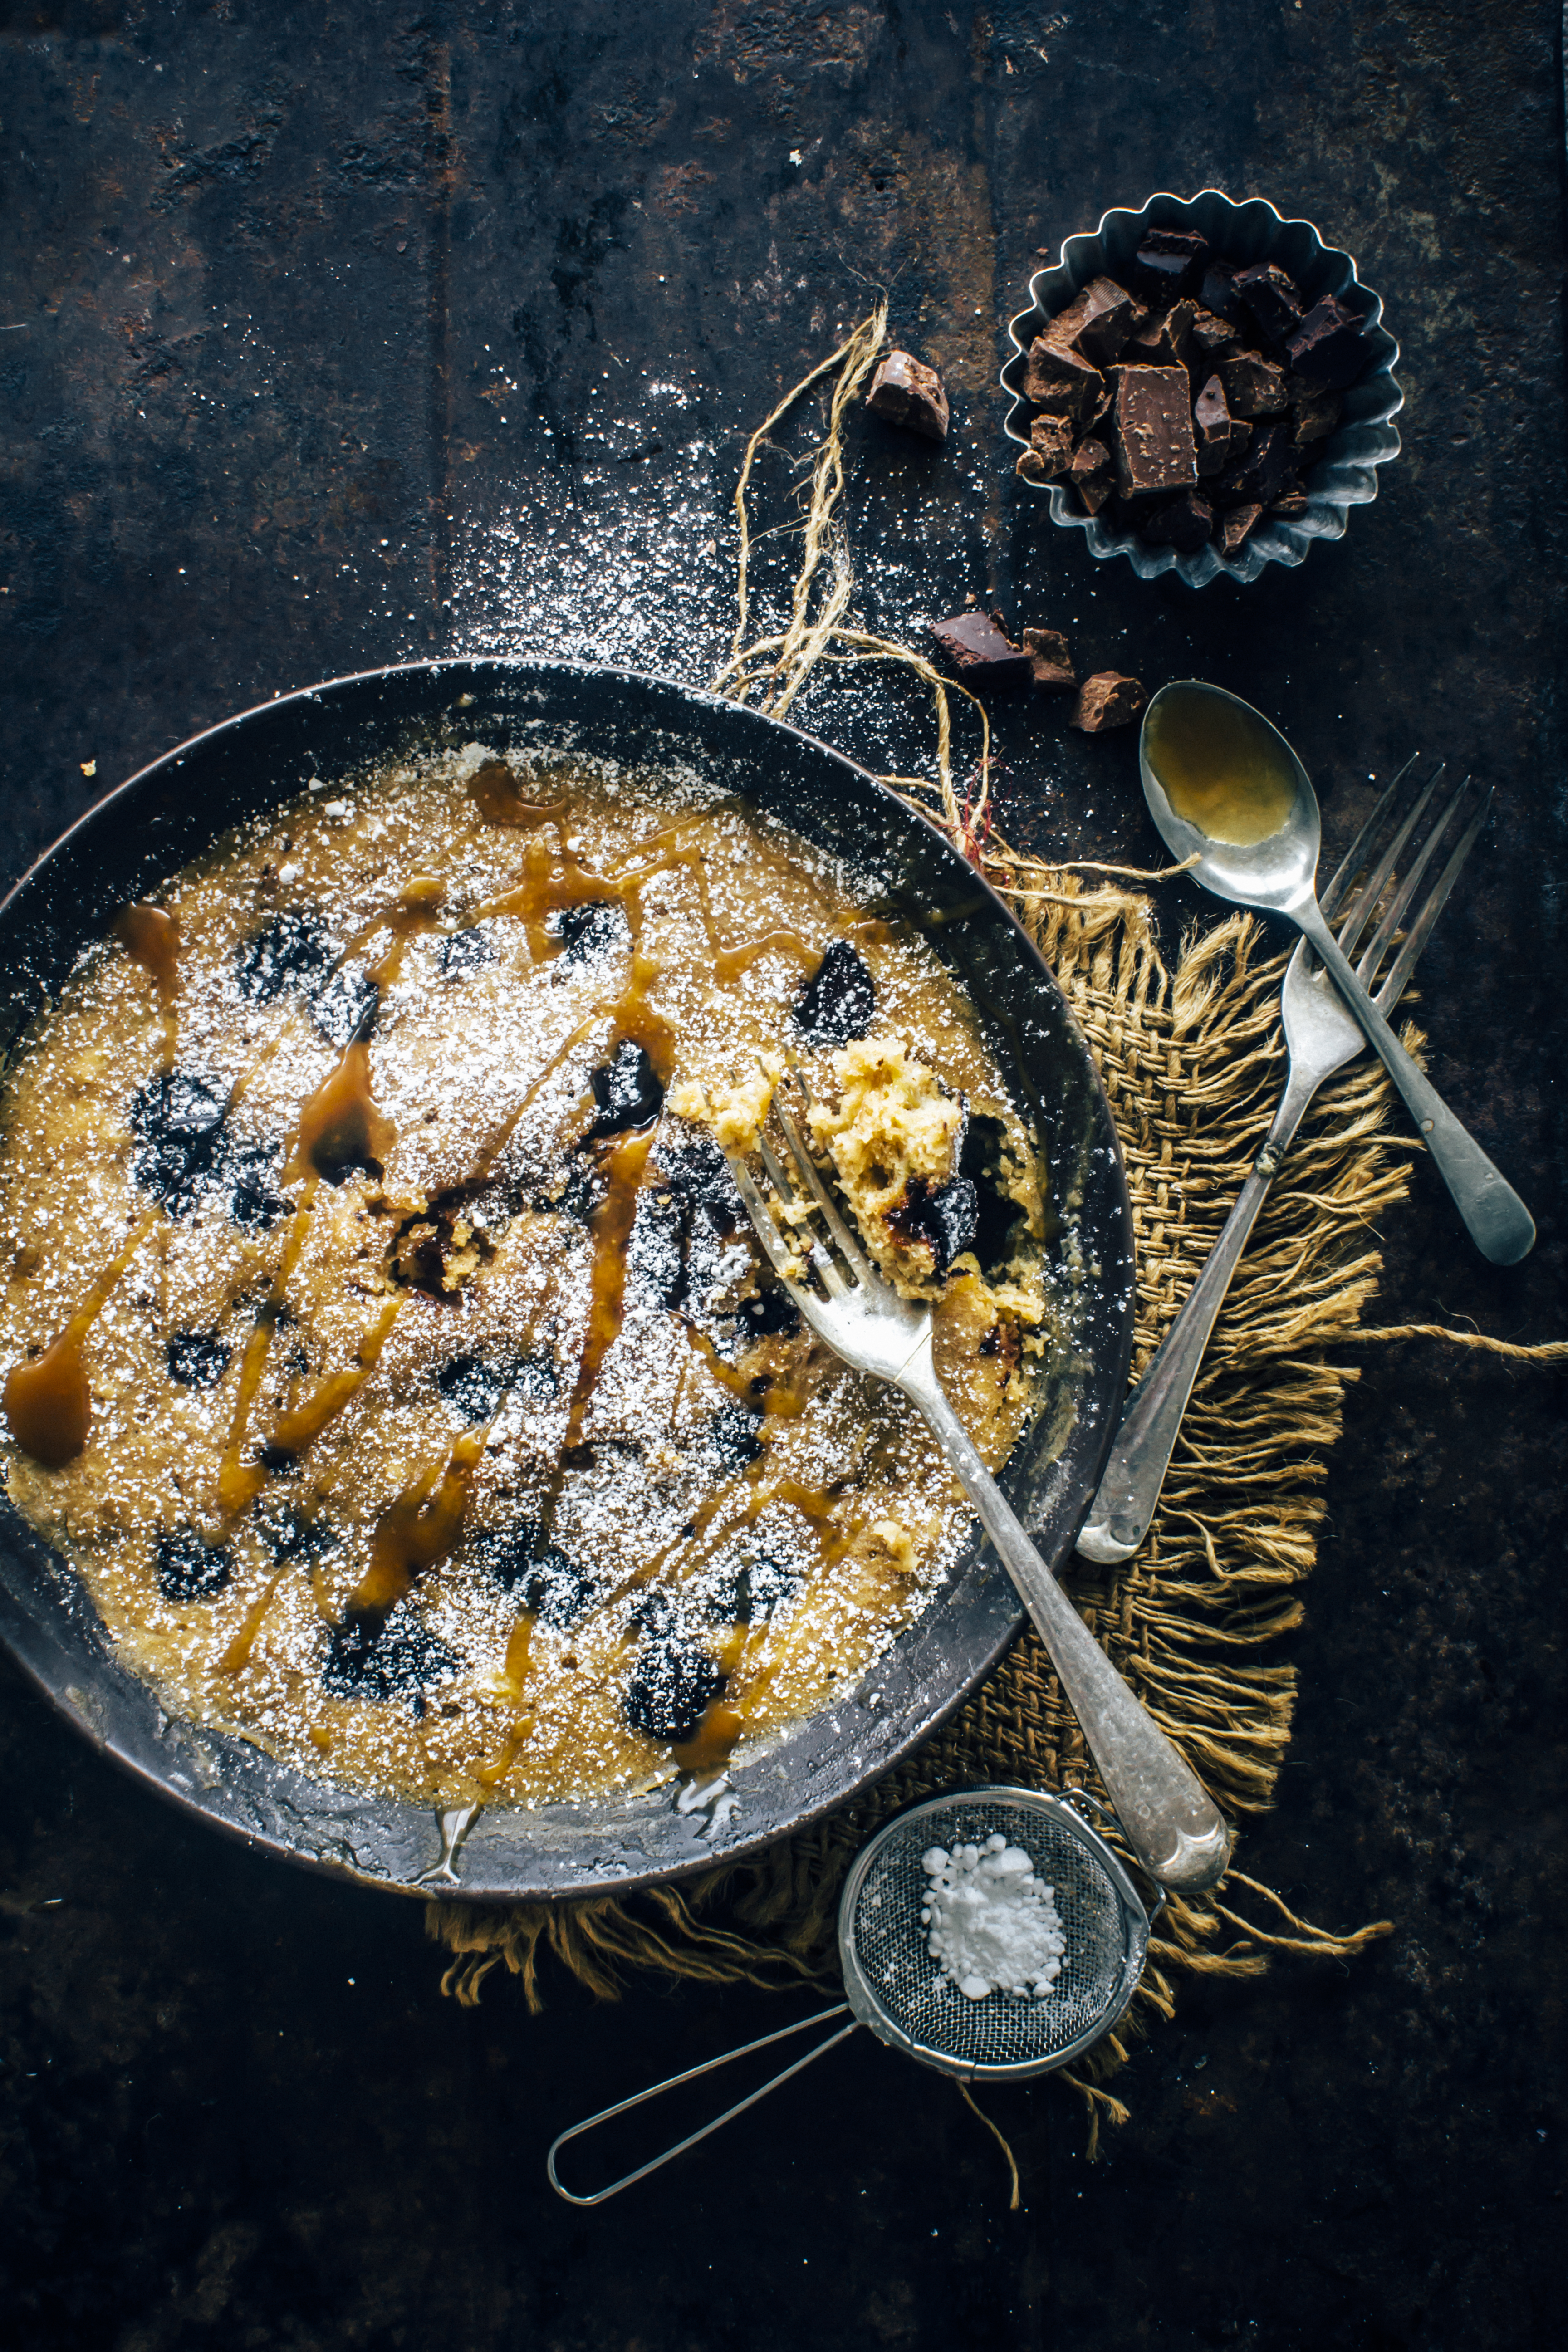
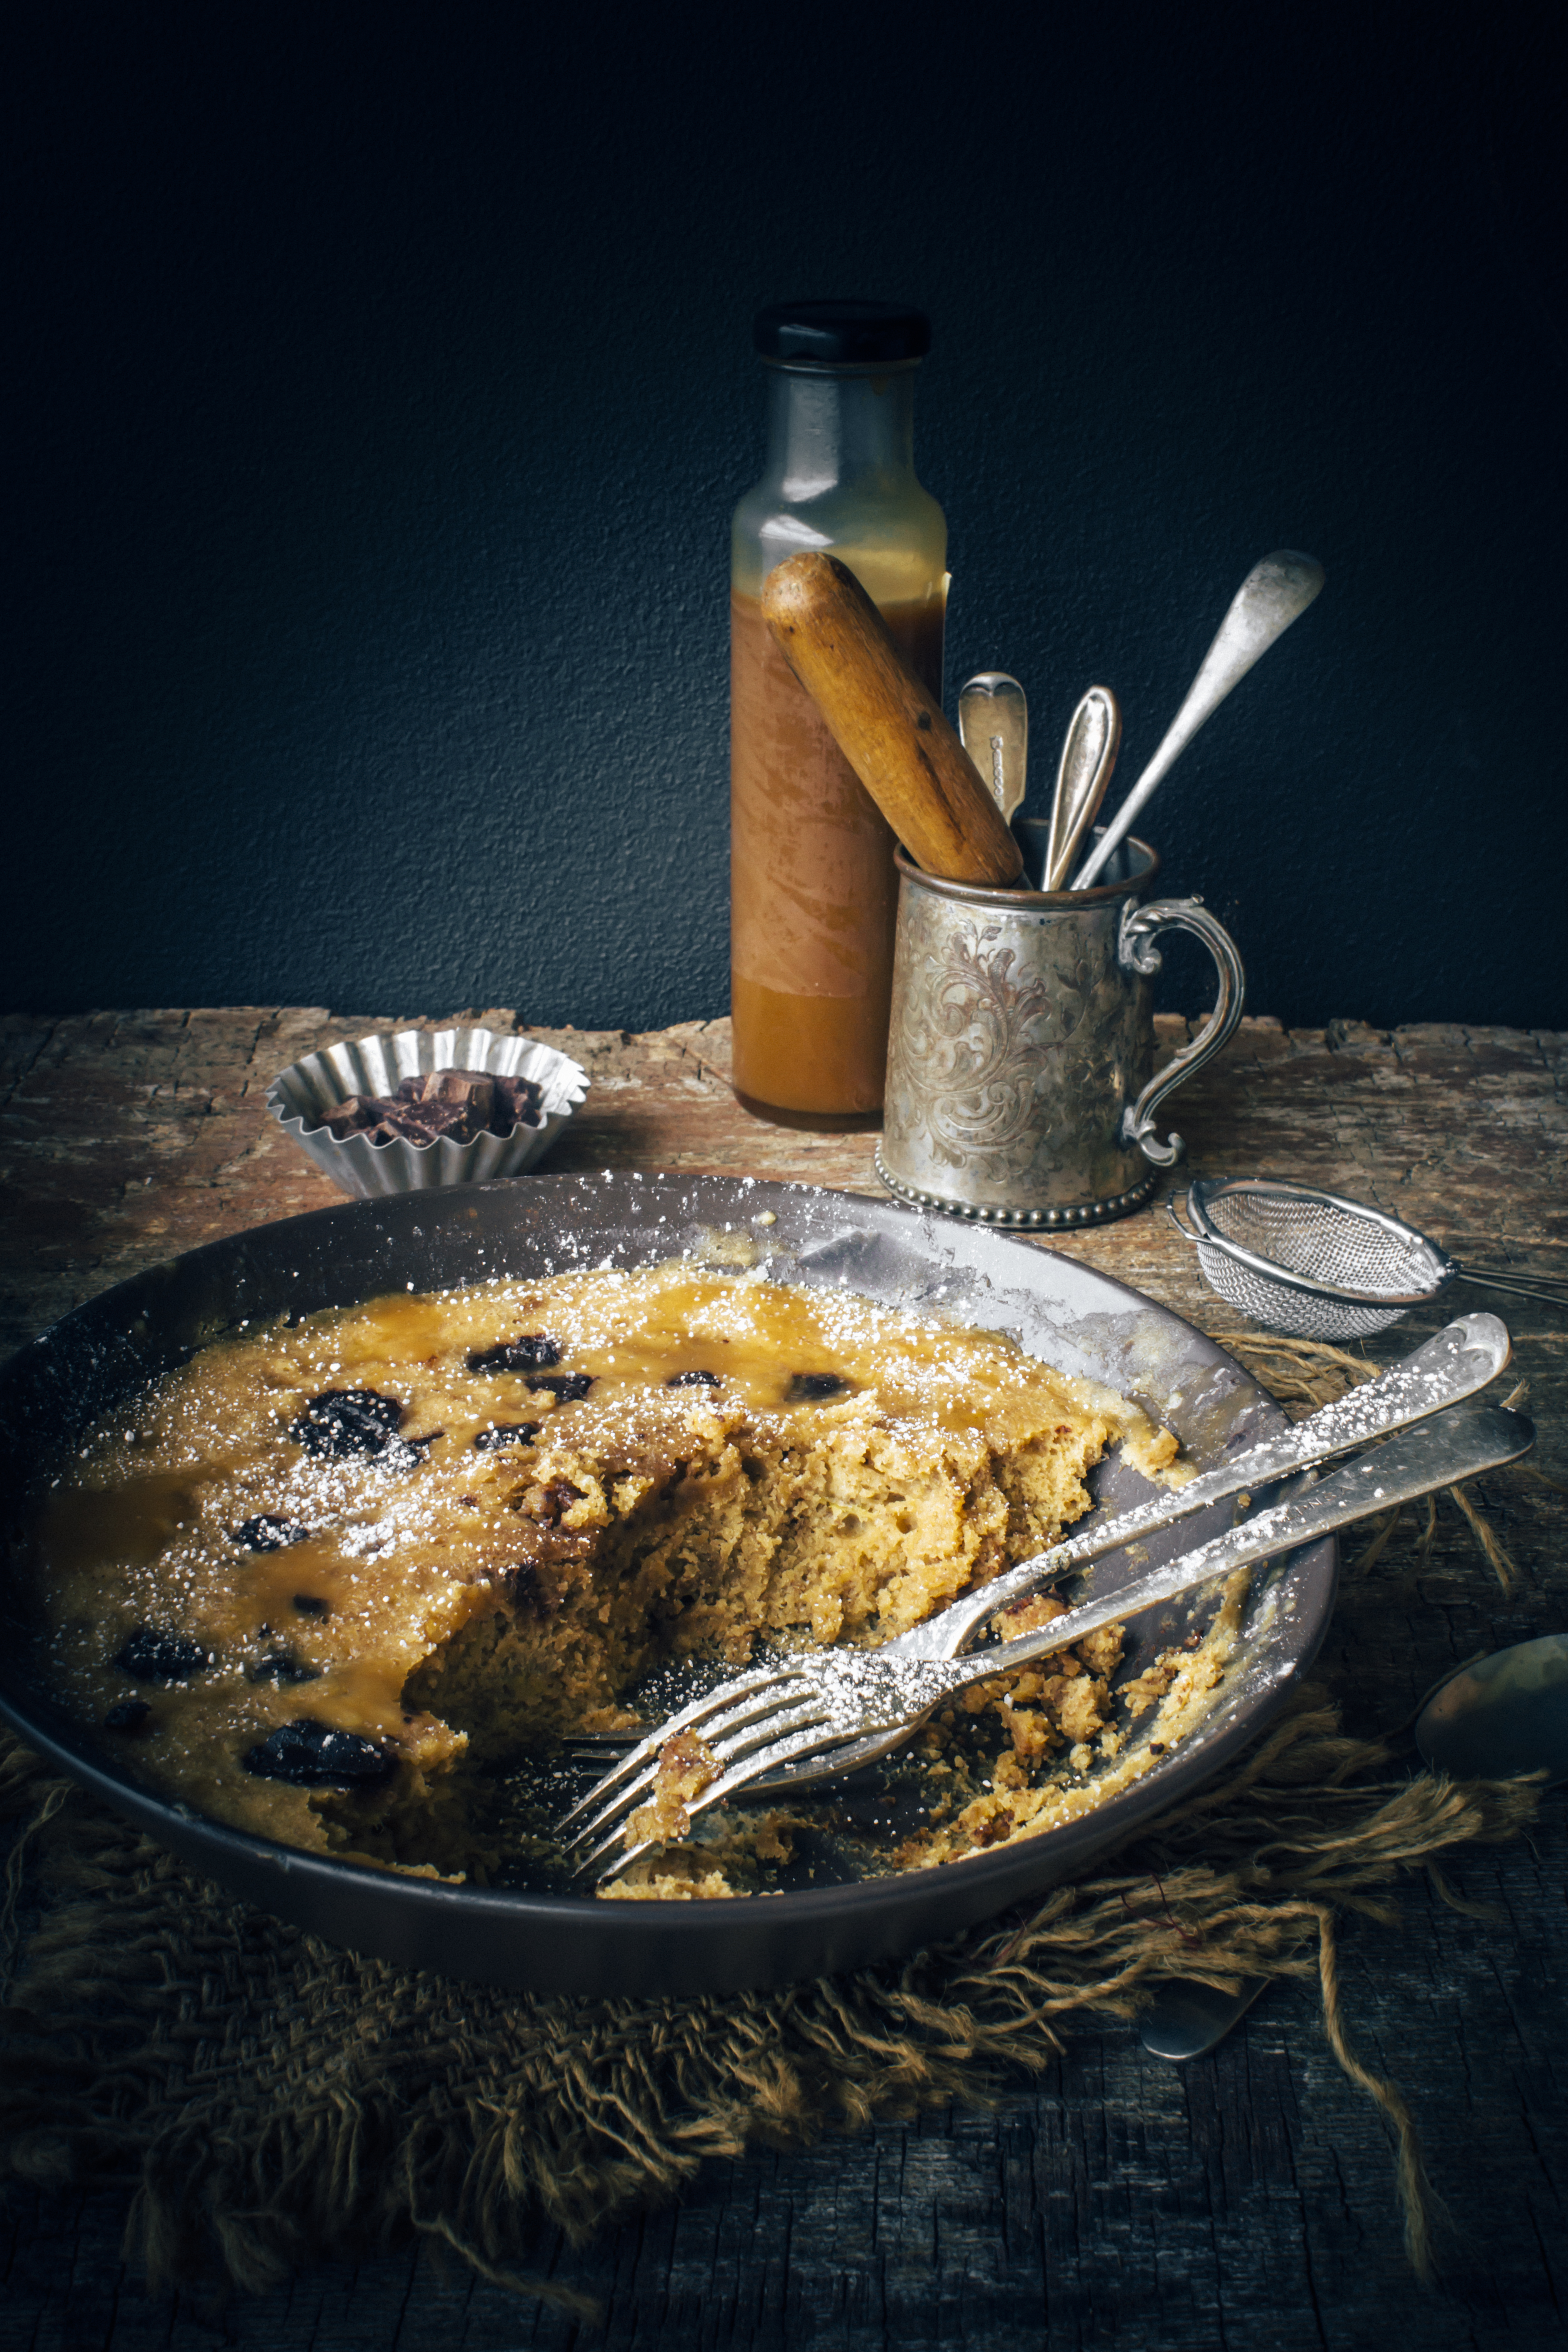
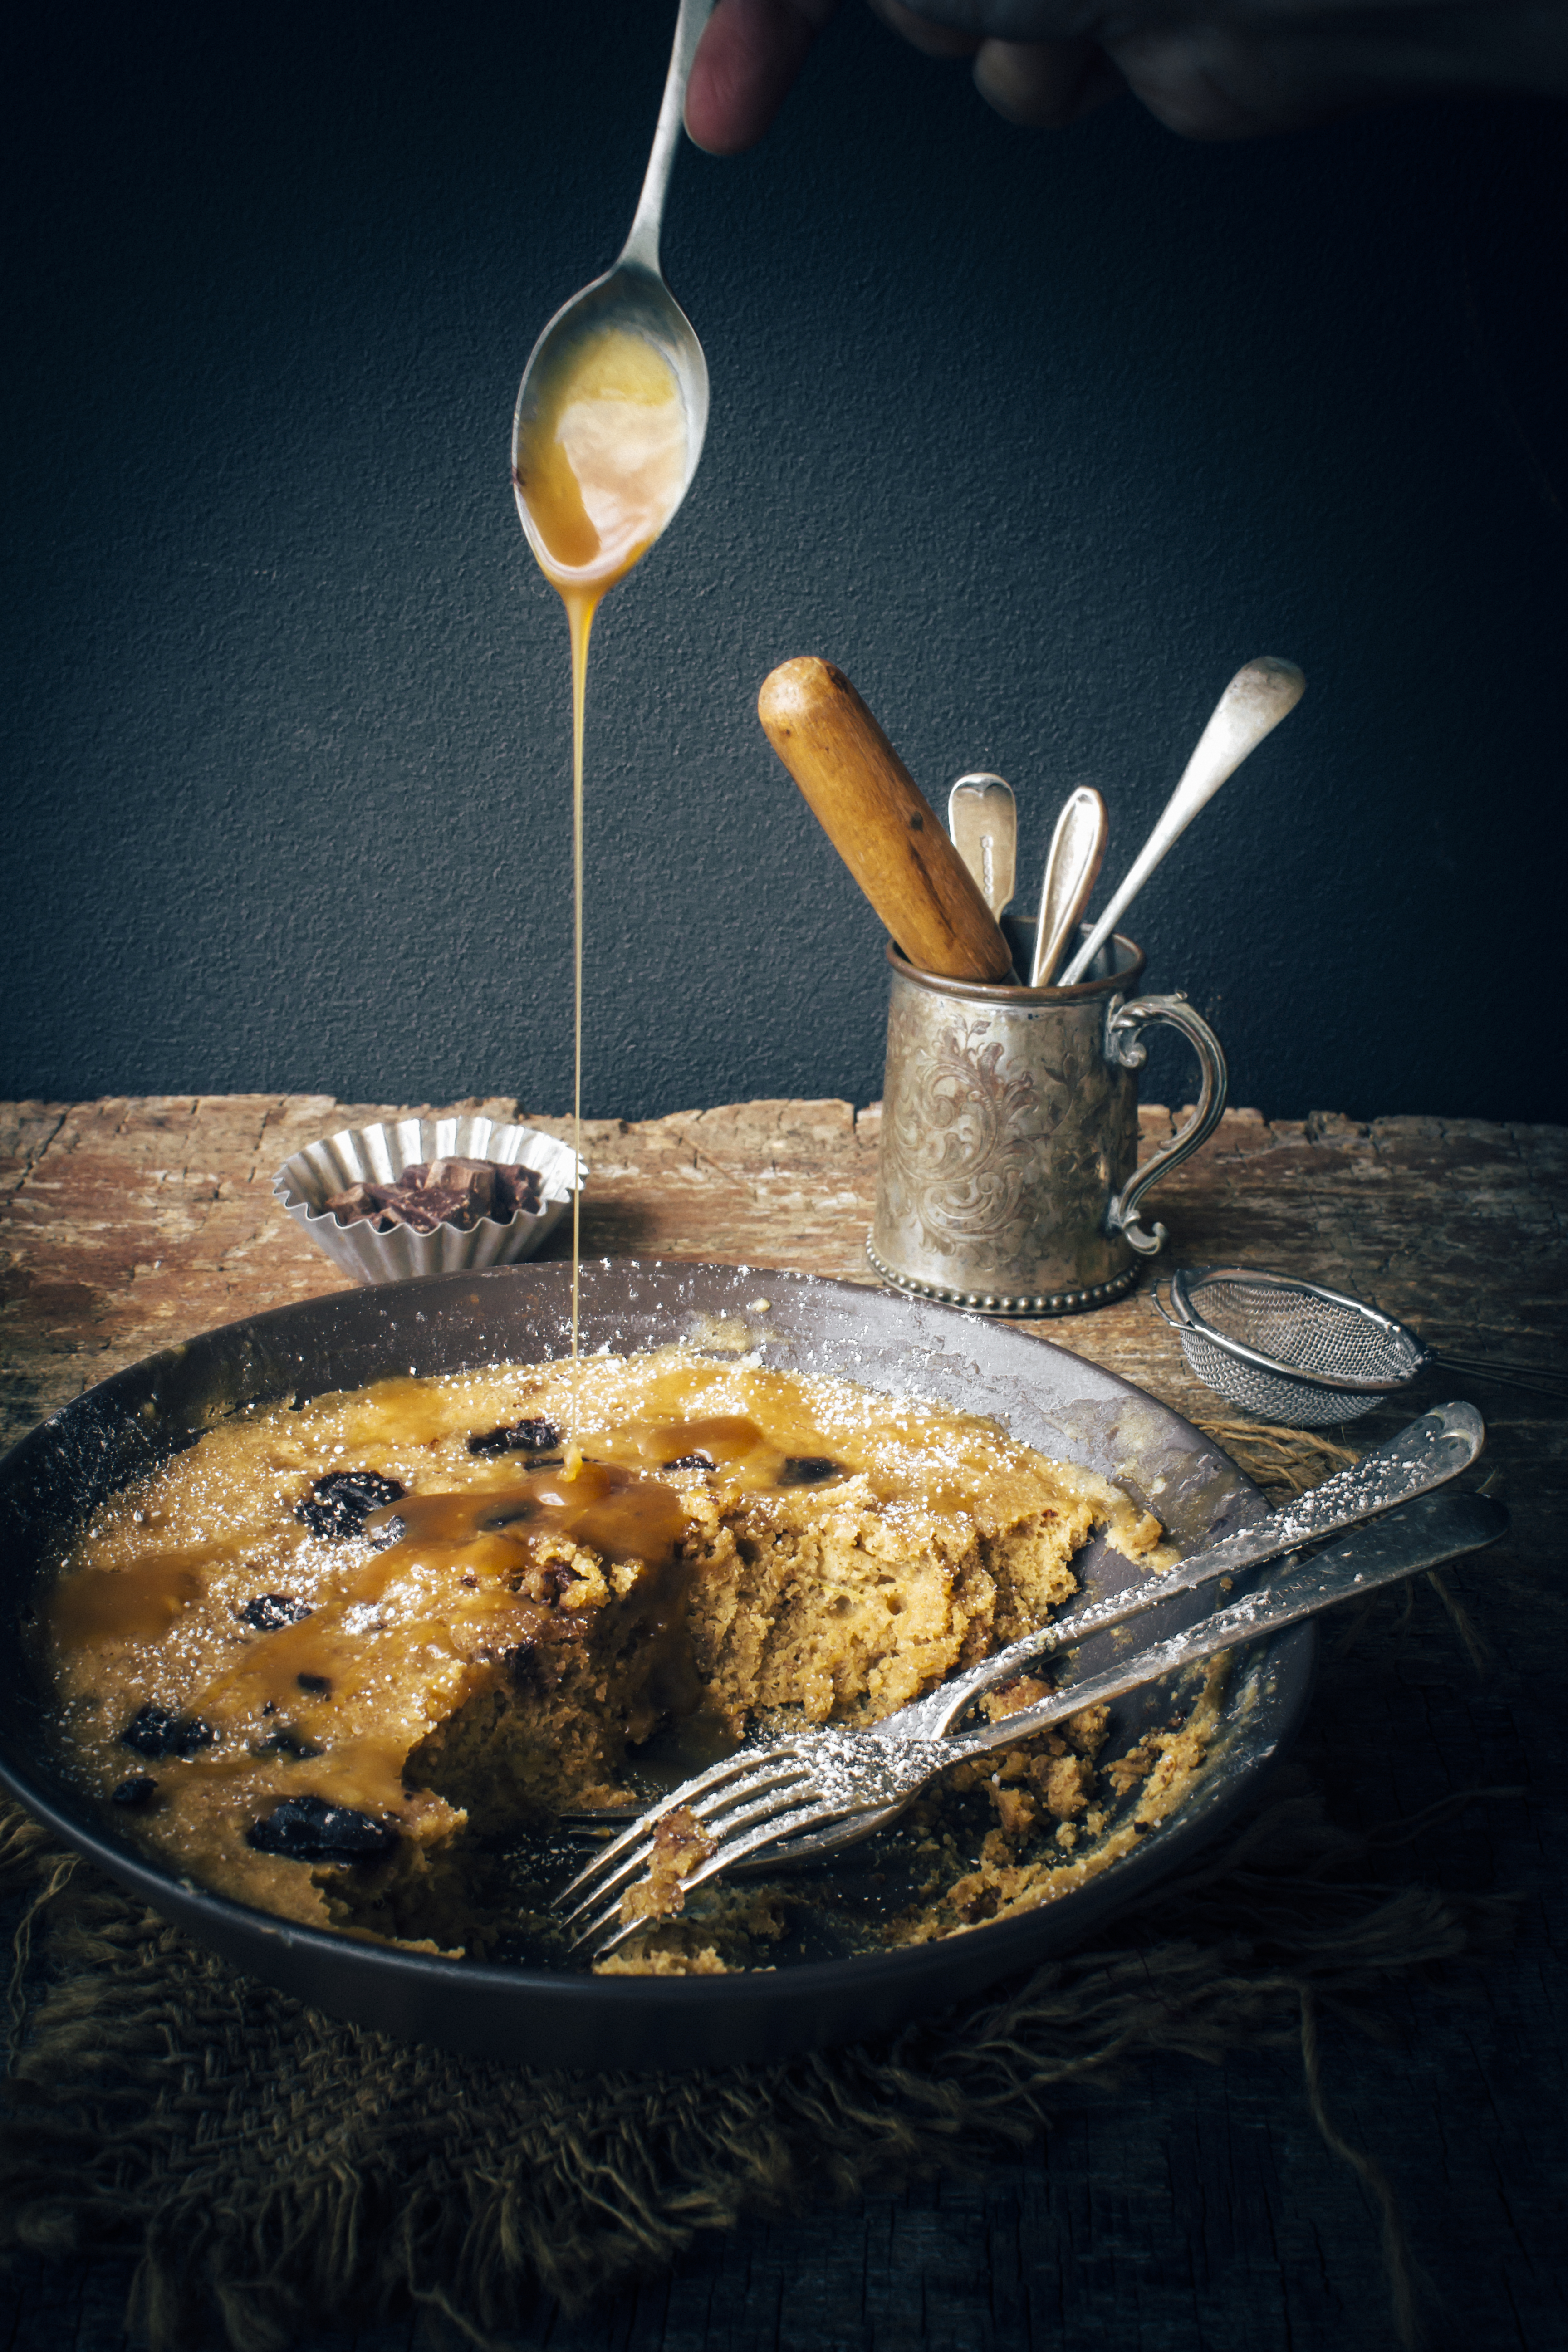
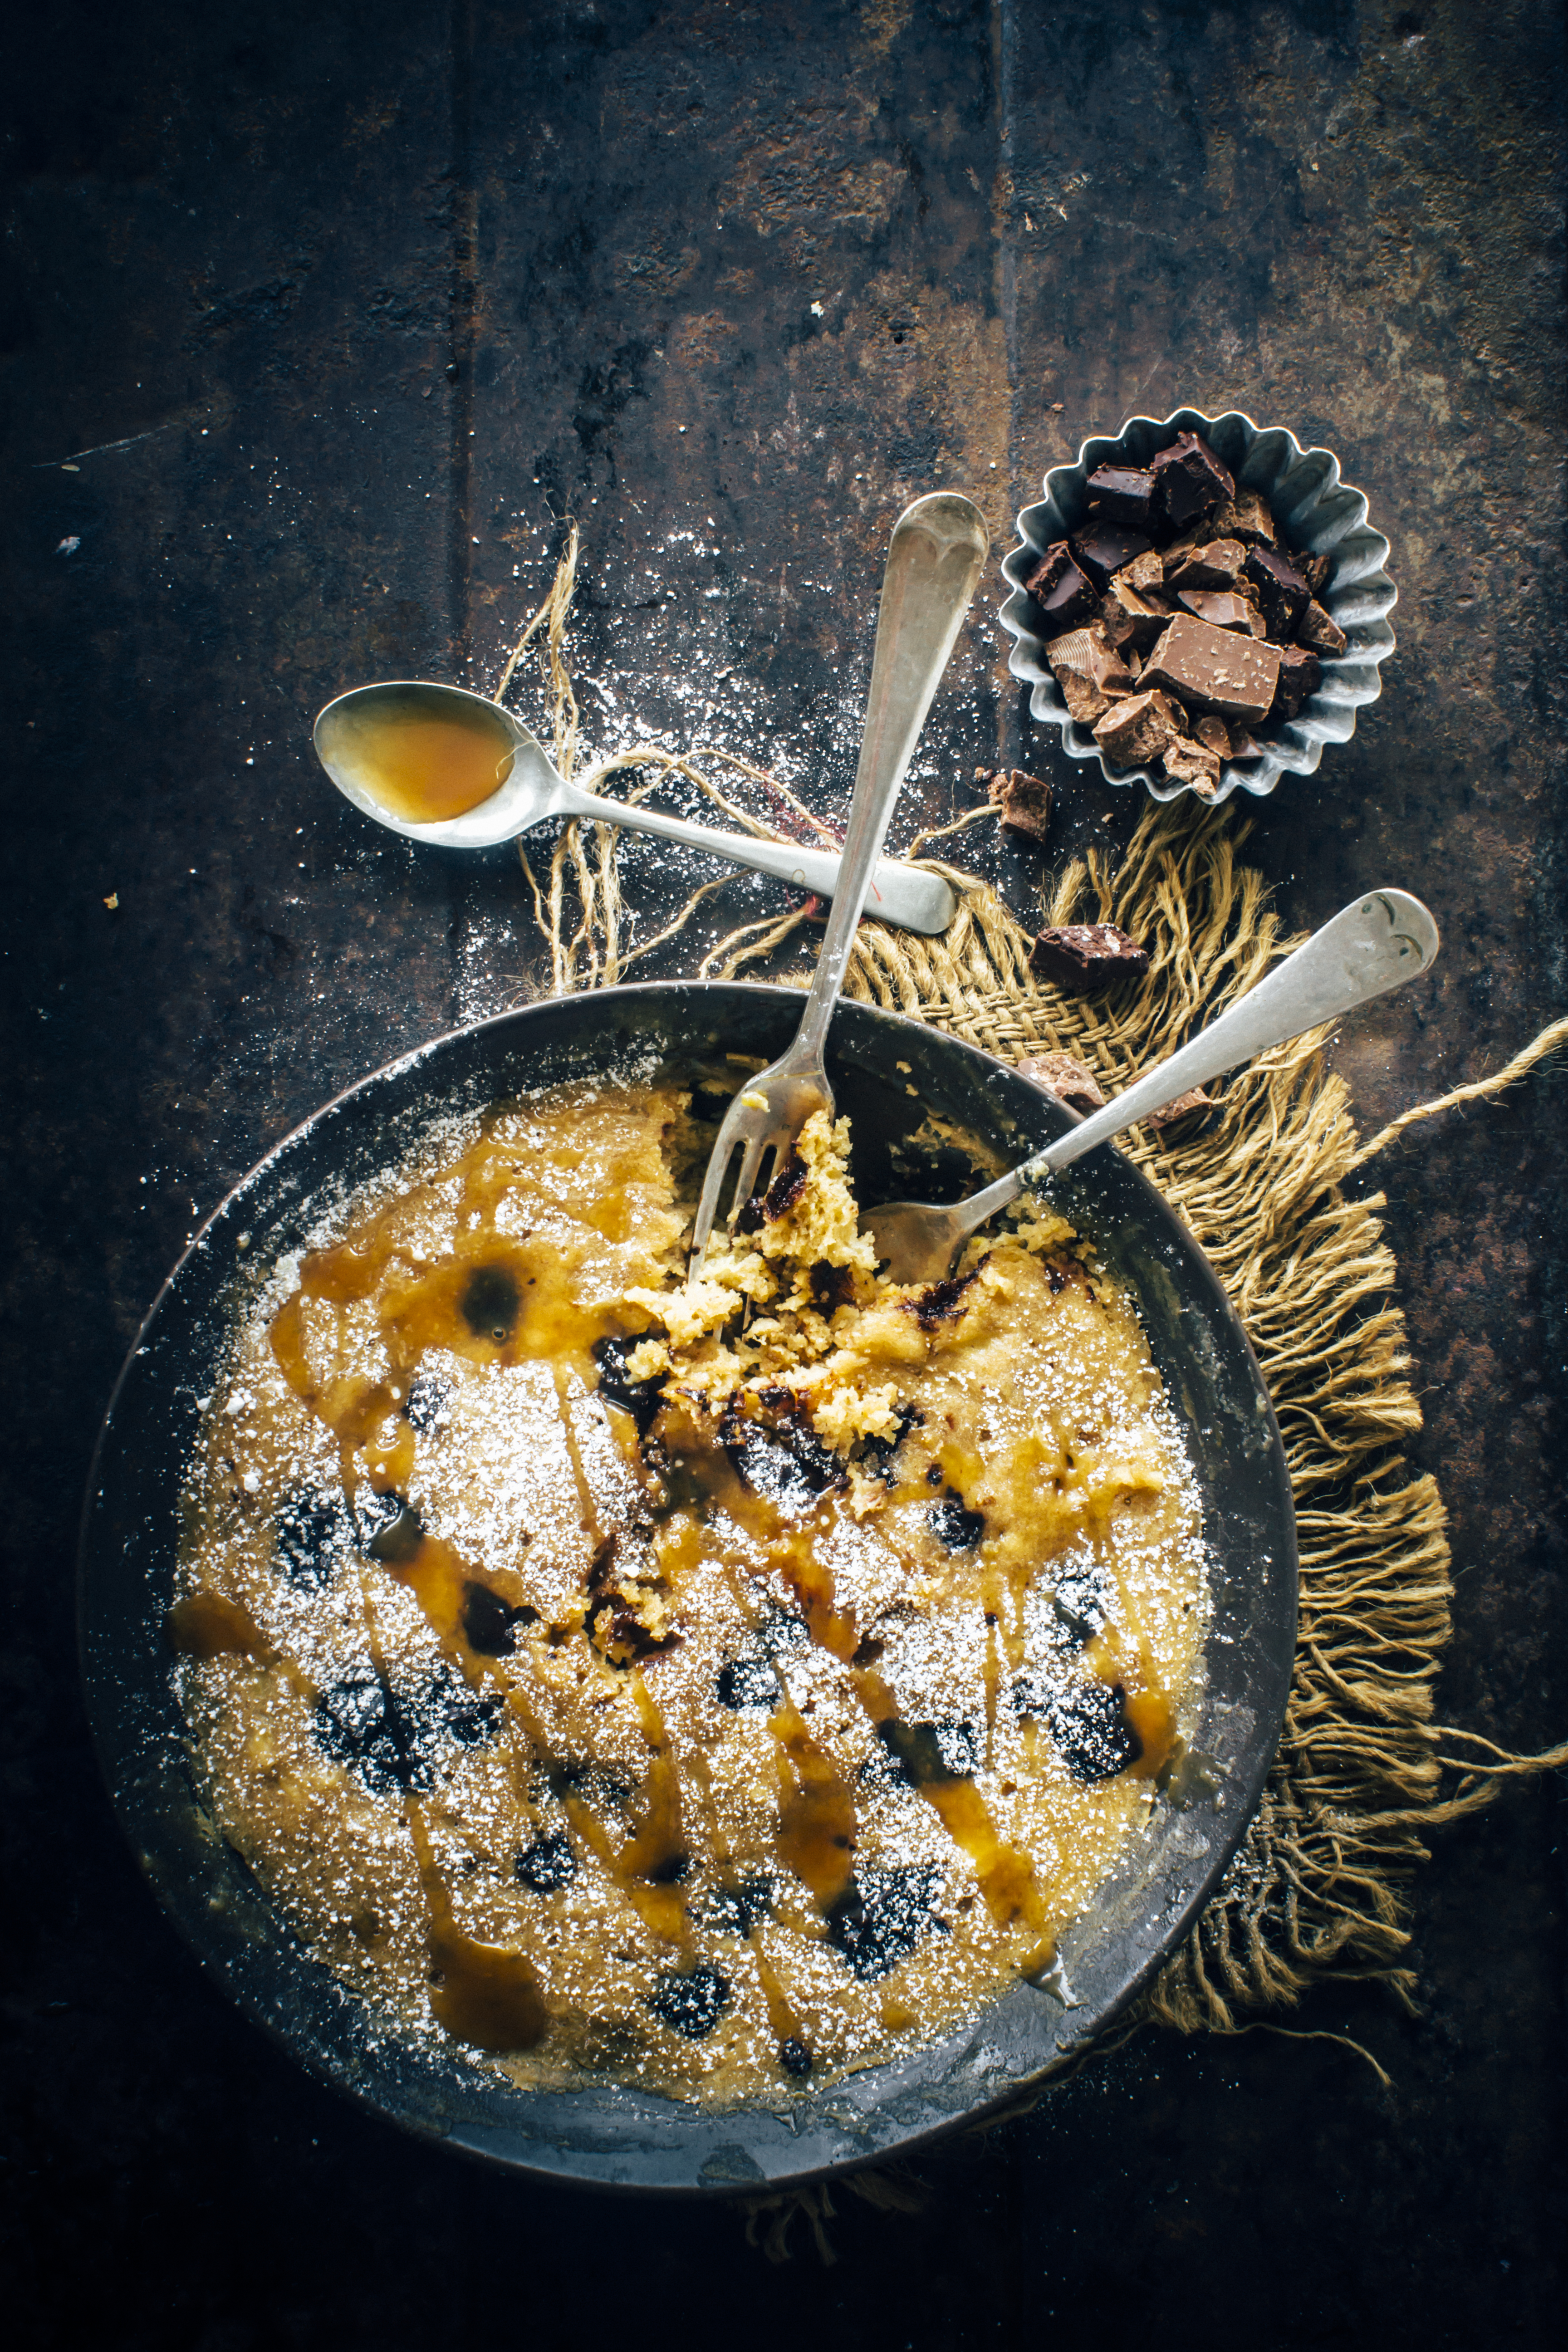
I just had to share this recipe so I made it again and added a cup of dark chocolate chunks. And salted caramel sauce to serve! The original recipe calls for sliced bananas on top but I chose to mash up the entire banana for the pudding. You could go either ways. If you do not have a one-liter microwave safe dish, use two smaller ones like I did. Please excuse the photos..I’ve shot them in a jiffy as I had something else going on.

IMG_9824

IMG_9837

All I’d say is please make it. It’s too easy, not to give it a try and too delicious for words. Make it to believe it!

IMG_9840

IMG_9831

Microwave Banana And Chocolate Chunk Pudding (adapted with variation from BBC Goodfood)
Serves 6

100 g butter, softened, plus extra for greasing
2 ripe bananas
100 g light muscovado sugar (brown sugar will work as well)
100 g self-raising flour
2 tsp ground cinnamon
2 eggs
2 tbsp milk
1 cup dark chocolate, roughly chopped into big and small chunks (or chocolate chips)
Salted Caramel sauce (store bought or home made)

Put the butter in a 1-litre baking dish and microwave on High for 30 secs-1 min until melted. Add bananas, mash into the melted butter, then add the sugar, flour, cinnamon, eggs and milk. Mix together well. Add the chocolate chunks and give it a stir to distribute evenly in the batter.

Cook on high for 6 mins until cooked through and risen. Check with a fork or a wooden skewer and microwave for a couple of minutes more if not ready. Serve warm, dusted with icing sugar, if you like, with a drizzle of salted caramel sauce and a scoop of ice cream.


3 Easy And Delicious Recipes to Use Up Leftover Ricotta Cheese

30|07|2015

3 easy and delicious recipes to use up leftover ricotta cheese, both sweet and savory. Ricotta fritters, baked ricotta and ricotta doughnuts.

Every time I do a fridge clean, I have the same problem. Leftover dairy. A tub of half finished Ricotta or Mascarpone or sour cream or a quarter filled carton of buttermilk will be lying in some corner of my fridge. Most often, it would have been bought for a recipe and the unfinished tub will go back into the fridge until I remember that it is nearing expiry date or at times when it is already too late. I hate wastage and throwing away something I really love to cook with makes me rethink my organisational skills.

ricotta cheese recipes

Ricotta is a soft cheese so it has shorter shelf life than many other cheeses. It’s mild creamy texture makes it ideal for using it as fillings with different kinds of pastry, to thicken up sauces, to create lighter versions of cheesecake and so on. Since we are dealing with left over ricotta here, we will not get into complicated recipes. The objective is to finish it up using recipes that are easy, can be scaled down and we can work with regular pantry ingredients. I have been facing a slightly bigger problem though. These recipes are my favourite. At home we love what ricotta can do on busy days so we are eating these all the time. I have actually photographed one of them months ago and wondered if anybody would have the same problem as me. Recently, I served baked ricotta to a friend on a gluten free diet and she kept asking me for the recipe. Recipe..? It is just mix and stir. So I decided to put them all here.

ricotta cheese recipes


Whether you are looking for an indulgent recipe, or a healthy one..I’ve got you covered! Most of Sugar et al. readers have a sweet tooth so we will start with sweet. I also have similar recipes with sour cream and buttermilk which I will share soon.

ricotta cheese recipes

Chai Spiced Ricotta Doughnuts With Salted Caramel Sauce: Easy peasy comfort food. Use whichever spice you have at home if Chai is not available at hand. I have tried all kinds of combinations and it really tastes good nevertheless. I use this salted caramel recipe a lot of times because it is super easy. No burning sugar and no need for thermometer.

ricotta cheese recipes


Chai Spiced Ricotta Doughnuts With Salted Caramel Sauce (makes about 16 medium sized ones)

1 cup smooth ricotta cheese
1/4 cup castor sugar
1 egg, lighlty beaten
1 cup self raising flour
3 tbsp milk,
1 tsp chai spice (if you don’t have chai spice, powdered cinnamon or ginger or cardamom will work fine as well)
1 tsp grated orange/lemon zest
vegetable oil for deep frying
icing sugar to dust

Salted Caramel Sauce
50 g butter
1 cup (220g) brown sugar
1 cup (250ml) cream
1 tsp vanilla extract
1/2 tsp salt

To make the doughnuts, Mix all the ingredients together in a bowl. If you find the consistency too thin, add a tbsp of flour.
Heat oil a heavy bottomed frying pan over medium heat With wet hands, rolls out balls of about 1 heaped tbsp of batter. Once the oil is hot, deep fry the balls until golden on all sides and cooked through. Keep turning them for an even browning. If you find the batter sticky, dropping them directly with a spoon into the oil will also do.
Drain on paper towels. Cool slightly. Dust with icing sugar. Serve warm with salted caramel sauce.

To make the salted caramel, combine butter, sugar, cream, vanilla extract and salt in a saucepan over low heat until butter melts and sugar dissolves. Bring sauce to a boil, reduce heat and cook for 5-6 minutes or until sauce thickens slightly.

Baked Ricotta With Seasonal Fruits: This is a perfect dessert when you want to have something light or on a gluten free diet. There are two ways to bake the ricotta, in a water bath (like a creme brulee) or directly in the oven. I prefer the first method though it involves an additional baking tray as the final dish is much firmer, set and creamier in texture. Serve it with fresh fruits or dessert sauces. I’ve used poached rhubarb, passion fruit, grapes, kiwi fruit and strawberries. I know, colour fanatic!  Give this recipe a try…you’ll be hooked forever.

ricotta cheese recipes

Baked Ricotta With Seasonal Fruits (Serves 2-3)

1 cup smooth ricotta
1/4 cup castor sugar
2 tbsp thickened cream
1 tsp grated orange zest
1 tsp vanilla extract

To make baked ricotta, preheat your oven to 170 degrees C (150 degrees C for fan forced). Grease two ramekins/baking molds with melted butter. Line the bases with a small piece of baking paper (need not be perfect).
Place the ricotta, sugar, cream, eggs, orange zest and vanilla extract in a large bowl and mix well until smooth. Pour into the prepared pans and smooth the surface with the back of a spoon.

Place pans in a deep baking dish. Pour boiling water into dish to come halfway up side of the pans. Bake for 30-40 minutes or until firm. Set aside to cool, then refrigerate for 1 hour.

Ricotta Fritters: These make a great breakfast or snack option. Serve them with a fresh salad, smoked salmon, bacon or even eggs. I have served them with an heirloom tomato salad here. The fritters tend to stick to the pan so make sure the batter is not runny, the pan is greased well.

ricotta cheese recipes

Ricotta Fritters (Serves 2)

250 g ricotta cheese
1 egg
1/4 cup sun-dried tomatoes, finely chopped
1 clove garlic, crushed
1/4 cup plain flour (more if batter is runny)
2 tbsp vegetable oil, for frying

Place ricotta, tomatoes, basil, garlic and eggs in a bowl. Mix until well combined. Stir in flour. Season with salt and pepper.
Heat 1 tbsp of the oil in a large, non-stick frying pan over medium heat. Using 1/4 cup of mixture per fritter, spoon mixture, 3 fritters at a time, into hot oil. Cook for 3 minutes each side or until golden and firm to touch in the centre, adding remaining oil as required. Transfer to a paper towel before serving. Serve warm with salad.


Caramel Ice Cream Cheesecake With Salted Butterscotch Sauce And Meringue

12|05|2015

There was a time when I would buy a can of condensed milk only to dip my flat breads into. On Sundays when breakfasts could be a bit elaborate and I could stand in front of the sizzling frying pan, patiently turning flat breads one at time whilst simultaneously rolling out the next one, I would always make a few extras. Flat breads as you know are best served immediately. But I couldn’t resist the idea of savoring them later with a few tablespoons of creamy condensed milk. Then I discovered Delce de Leche. After that, the only reason condensed milk came into my kitchen was to make Dulce de Leche. A simple process but time consuming and requiring  a fair amount of supervision. The taste was however so worth the effort that sometimes I would make the flat breads only to finish up the Dulce de Leche. After that, I discovered Caramel Top n Fill and that was the end of my Dulce de Leche making. The thick, rich caramel sauce is so similar in taste to Dulce de Leche minus the effort to  make it. My flat breads found a new partner. Nope! This is not a sponsored post. I am sharing this because I figured out another favorite way of eating it. In this cheesecake.

Caramel Ice Cream Cheesecake

During summer this year, I discovered the convenience, ease and delightful taste of an ice cream cheesecake that I shared with you here and here. I was thinking of make-ahead recipes for Mother’s Day that would involve ice-cream and I hit upon this idea. The fact that there is no use of gelatine or no need to whip up heavy cream gives me all the more reasons to make it. It’s as simple as opening a few containers, placing them together, mix, fold and place it in the freezer. I made this a couple of days before Mother’s Day because I knew I would be busy. After lunch, I served it to the boys who wanted to eat the entire cake.

Caramel Ice Cream Cheesecake

If you do not want to use Caramel Top n Fill or do not have access to it, any thick caramel sauce would work. A thinner consistency may thin down the cheesecake mix that will melt faster when you leave the ice cream cheesecake at room temperature. To top the cheesecake, I have used salted butterscotch sauce and torched meringue. You can skip this if you find it difficult to make, and just drizzle with chocolate sauce or decorate with shaved dark chocolate.

Caramel Ice Cream Cheesecake

IMG_7186

Caramel Ice Cream Cheesecake With Salted Butterscotch Sauce And Meringue
Serves 6-8

180 g chocolate cookies
75 g unsalted butter, melted
500 g cream cheese, room temperature
500 ml vanilla ice-cream, softened (I used store bought)
380 g can caramel top n fill

Line the base of a 19 cm round Spring-form pan with baking paper.
Place the cookies in a food processor. Process until fine crumbs. Add melted butter and mix to combine. Alternatively, you could crush the biscuits with a rolling pin inside a zip-lock bag. Using your fingertips, press biscuit mixture over base of prepared pan. Place in the freezer for 30 minutes or until required.

Meanwhile, beat the cream cheese in a large bowl (with a mixer or a whisk) until light and fluffy. Add the ice cream and mix well. Gently fold in the caramel top n fill. Pour over the prepared crust. Freeze for at least 6 hours (preferably overnight)or until firm. Remove from freezer 10 minutes before serving.
Before serving, drizzle with salted butterscotch sauce and pipe the meringue. Brown the meringue with a blow torch.

Salted Butterscotch Sauce

25 g salted butter
1/2 cup brown sugar
1/2 cup thickened/heavy cream
1/8 spoon sea salt

For the butterscotch sauce combine butter, sugar, cream and salt in a saucepan over low heat until butter melts and sugar dissolves. Bring sauce to a boil, reduce heat and cook for 5-6 minutes or until sauce thickens slightly.  Cool to room temperature. Pour over caramel ice cream cheesecake.

Meringue

2 egg whites, room temperature
1/2 cup castor sugar
cream of tartar, a pinch (optional)

To make the meringue, place the egg-whites, sugar and cream of tartar in a heatproof bowl that is placed over a saucepan of simmering water. Whisk continuously till the sugar dissolves (about 2-3 minutes). Remove from heat and whip up the mixture with a electric or hand mixer to stiff peaks.
Fill up a piping bag with a round nozzle and pipe meringue kisses on top of the cake. Using a blow torch, brown the meringue.


Coffee Caramel Creme Brulee

17|04|2015

The Google searches initiated from my laptop, which are normally recipe oriented, since Easter are looking a bit like this ‘how to keep kids busy during school holidays?’ ‘ Apps for young children’ ‘ways to entertain kids’ and so on. Yes, I almost feel guilty having to kook them up  but these vacations are a whole new thing for me. Google came up with 15,800,000 results. Yay! So, I am not alone! There are Pinterest boards on that topic too. I am finding comfort in solidarity!

IMG_6673-2


Despite cooking many new dishes, I hardly got around to photographing anything. I just didn’t have the heart to make the boys wait for food while it was being dressed up and photos taken. I have done that before but now it just didn’t seem fair. It’s been awesome having them around and cooking warm lunches for them but keeping them busy whilst managing my own to-do list is an art that I am yet to master.

IMG_6662

These Creme Brulees are perfect little treats for a busy scenario because they are so easy to make. Keep them in the refrigerator and grab one when you have a sweet craving or need a small feel-good after the kids have gone to bed. I love coffee in desserts and this one is addictive.
If you do not own a blow torch, just place the custard under a preheated grill for 2-3 minutes. However, don’t let it sit there for too long as it might overcook the custard.

IMG_6694

Coffee Caramel Creme Brulee

2 1/2 cups single/pouring/thin cream
21/2 tsp instant coffee granules
7 egg yolks,

Preheat oven to 150 degrees C.  Place six ramekins in a large baking tray or roasting pan.
Place the cream in a small saucepan and heat, over medium heat for 4-5 minutes or until warmed through (don’t let the cream boil). Remove from heat. Add the coffee and stir till blended.

Meanwhile: place the egg yolks and brown sugar in a medium heatproof bowl. Whisk until well combined.
Gradually add in the warm coffee-cream mixture while stirring constantly with a fork. Pour the mixture through a fine strainer into a large jug, then pour the mixture evenly into the ramekins.

Pour enough hot water into the roasting pan to reach half of the way up the sides of the ramekins. Bake in preheated oven for 30-35 minutes or until mixture is just set. Carefully remove the ramekins from the baking tray. Cool to room temperature, then cover with plastic wrap and place in the fridge for 3-4 hours or until chilled.

When ready to serve, divide caster sugar evenly over the top of the custard in the ramekins. Using a blowtorch, caramelize the sugar till golden brown.

  • « Previous Page
  • 1
  • 2
  • 3
  • 4
  • Next Page »
Hey Sugar
Cake
Link to my Facebook Page
Link to my Instagram Page
Link to my Pinterest Page
Link to my Mail Page
Subscribe to this site
Fresh Awards
2019 Aus mumpreneur
2019 aus mumpreneur
Mumbrella

Copyright © 2025 · Sugar Et Al · Designed by Smitten Blog Designs · Log in