• Home
  • Recipe Index
    • Recipe Index
    • Breakfast/Brunch
    • Cakes and Puddings
    • Chocolate
    • Cookies and cupcakes
    • Custard and Mousse
    • Gluten Free
    • Ice Cream
    • Mains
    • Other Sweet Treats
    • Snack/Appetizers
    • Soups and Salads
    • Tarts and Pies
    • Vegetarian
  • About
  • Cookbook
  • Portfolio
  • Store
  • Press
  • Work with Me

Sugar et al

Because Life is a blend of flavours...

Festive Nougat Lassi

12|12|2014

You might have heard of ‘summer in a glass. For me that glass is Lassi. If you are new to this term, Lassi is a cold yogurt based drink, popular in India. In the scorching hot sun, when my sister and me would come back home from school, our tired backpack laden shoulders and exhausted feet would fall in a slump on the couch. Our eyes would be searching the table where two glasses of freshly made Lassi would have been placed with loving hands. Who would know children better than Mum! Our thirsty lips would make an attempt to drink at a frantic pace. Lassi is of a thicker consistency than a juice or a smoothie. It is difficult to gulp it all down all at once though creamy silky taste is very tempting. Every weekday afternoon Mum would strain the home made yogurt to make Lassi and then place another bowl in a warm corner of the house for the active cultures to work in the process of making yogurt. This was common in a lot of Indian households. The home-made yogurt or Dahi was not as thick or rich as the commercially sold ones but it was an inexpensive and effective way of making something within the comfort of your kitchen.
IMG_4020-5

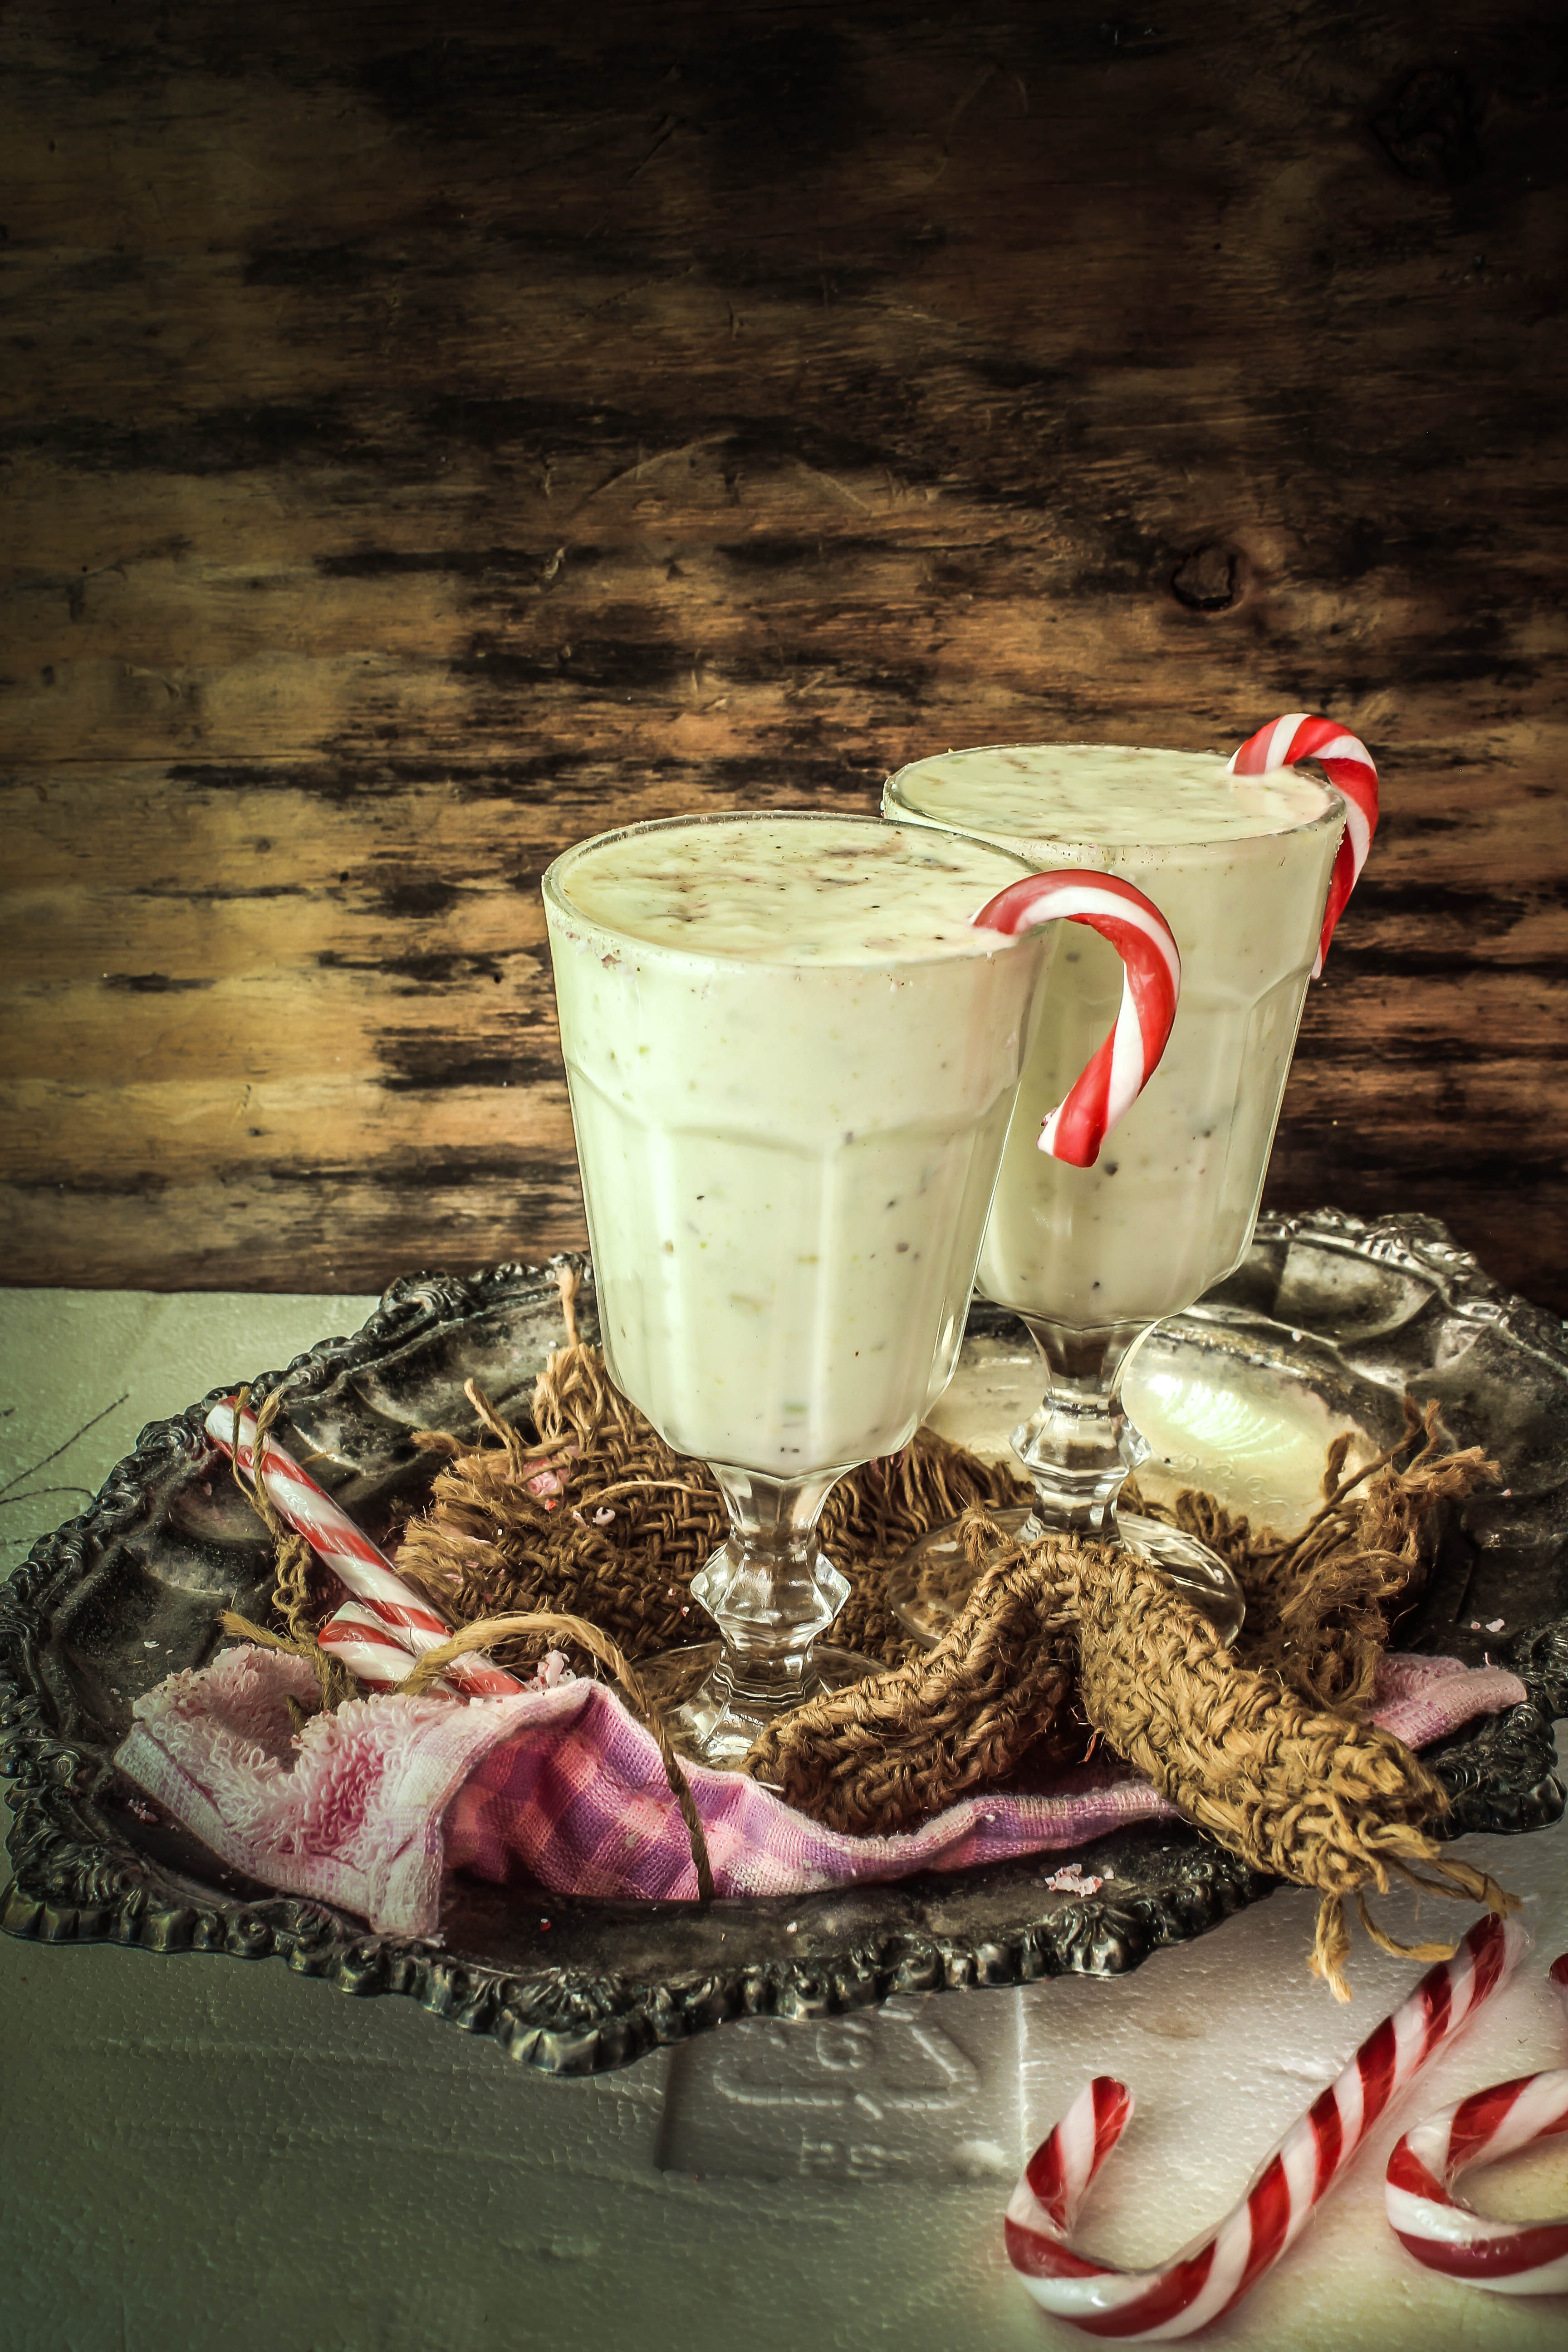
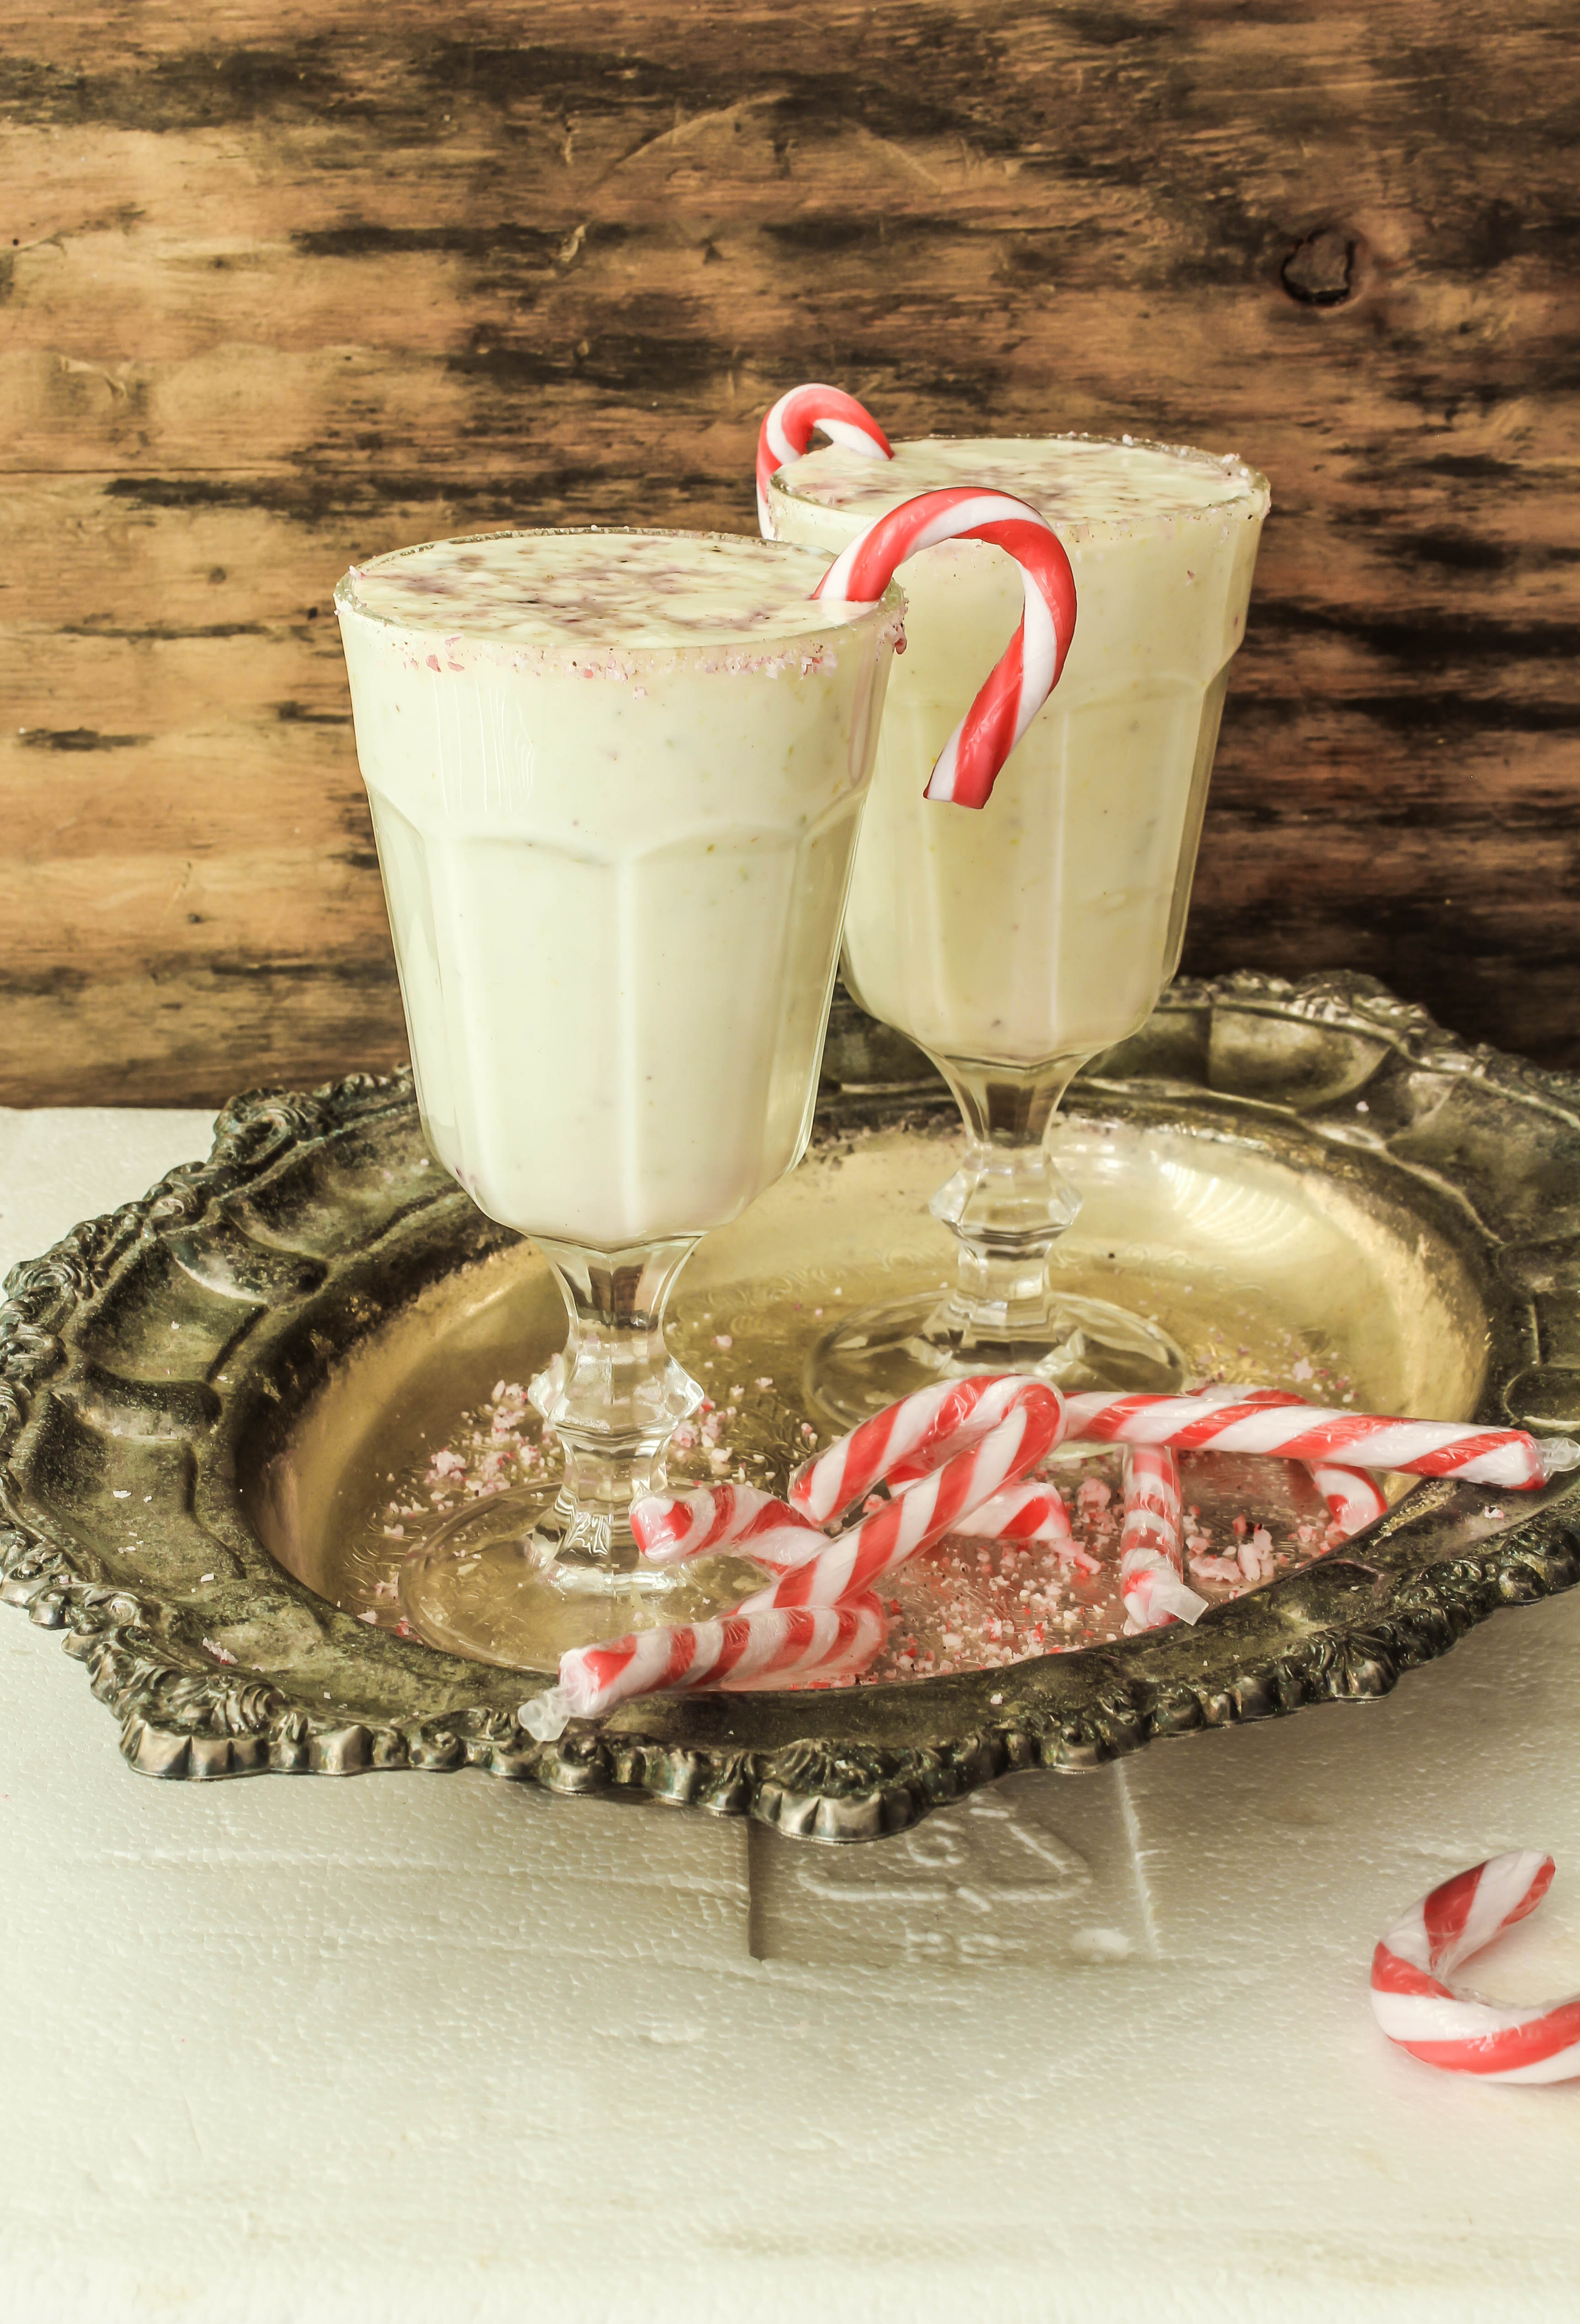
In our Australian markets we have so many varieties of yogurt. Though I miss the lassi of my childhood, I love what Greek yogurt can do to a Lassi. It makes the whole process a breeze to make. Since, this is the time to bring some nougat into our lives, I thought I would add the flavours of nougat to my Lassi along with a dash of peppermint to turn it into a festive drink perfect for our summer holidays. This drink is certainly healthier than milkshake and would appeal to adults and kids alike.

For a spiced chocolate version of Lassi, you may want to check out this post.
IMG_4008

Festive Nougat Lassi
Serves 2-3
1/4 cup pistachios, skinned
1/4 cups whole almonds
zest of one orange
2 candy canes
11/2 cups cold milk
11/2 cups greek yogurt (preferably vanilla flavoured but regular will work just as fine)
2-3 tbsp maple syrup/honey (depending on sweetness preferred)
Place the pistachios, almonds, orange zest and candy canes in the bowl of your food processor and process till finely chopped. Add the milk, yogurt and honey and blend till smooth.

Serve with or without ice-cubes and place a candy cane in the serving glass just before serving.


Raspberry Rhubarb and Chocolate Baked Alaska

10|12|2014

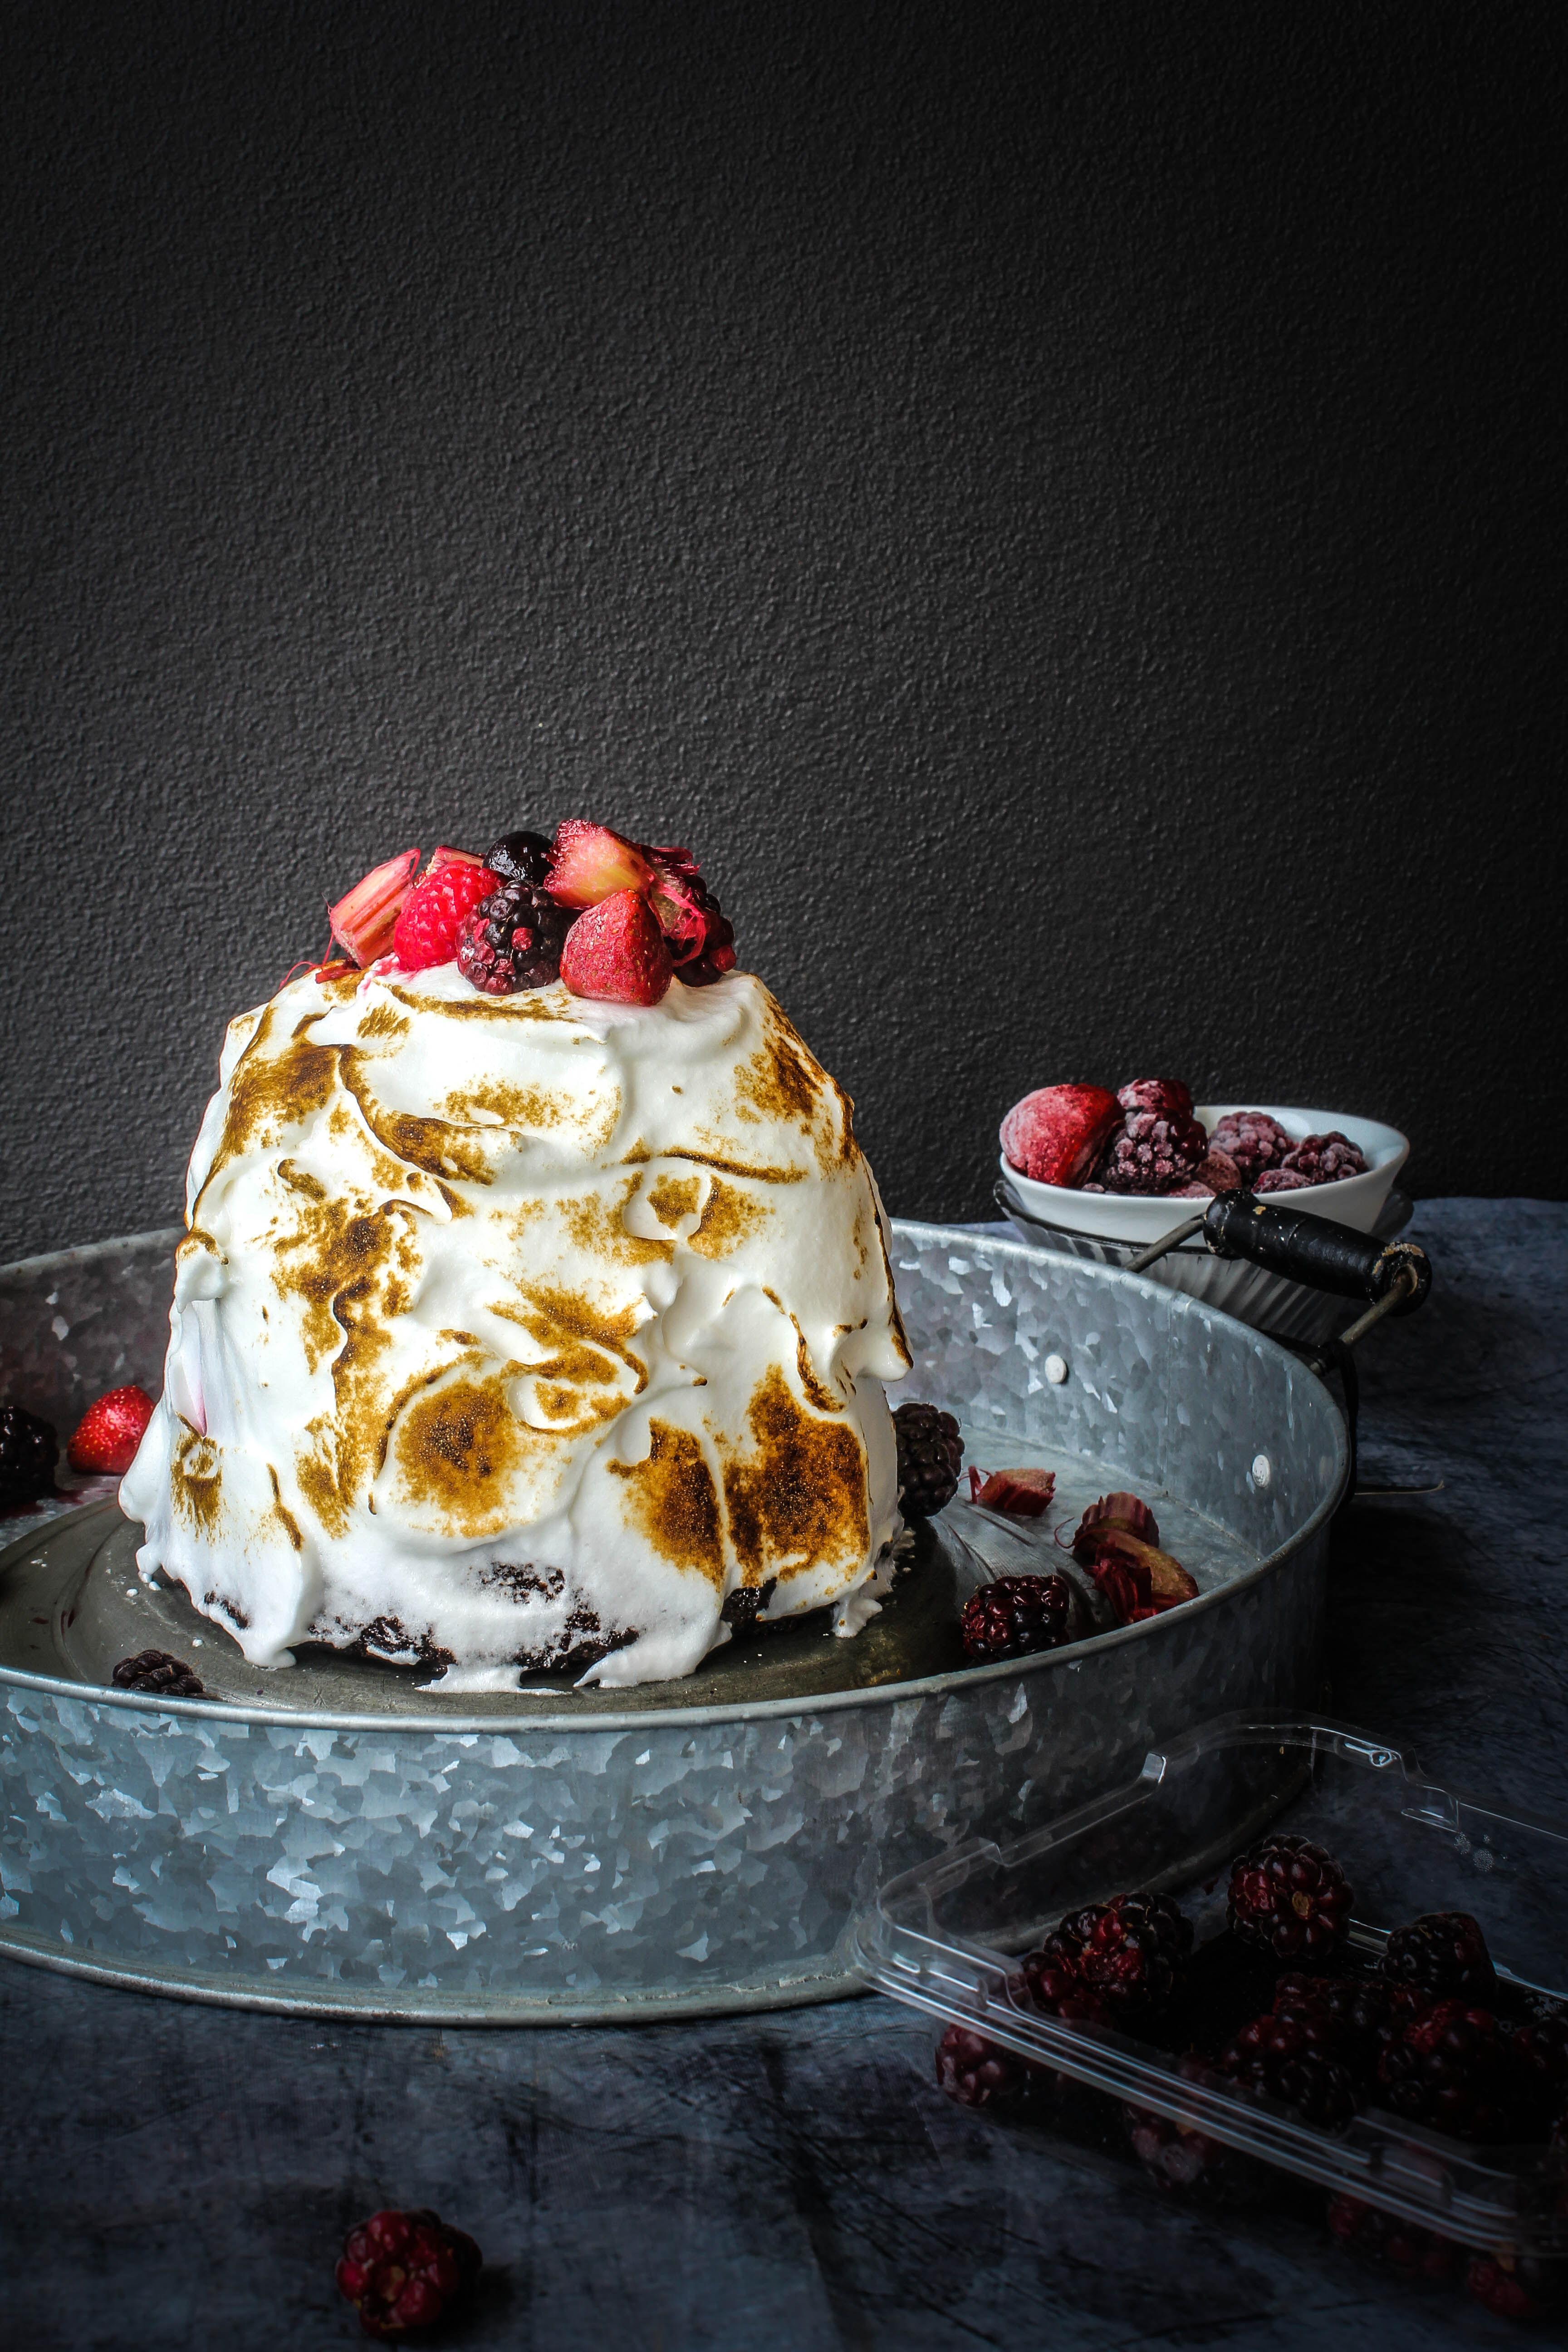
As a little girl,I had my favourite ice cream flavours and choices like most other children. Generally, restaurants we went to had a frozen dessert called Cassata on the menu which is the one I would always ask for. I later on figured out that it was inspired by the Cassata Siciliana, a true Italian beauty. The bright colours of the ice-cream layers and candied fruit would of course appeal to any child. When I grew up, the pastry chef in me was totally drawn to the layered structure and anatomy of the Italian classic. Perhaps you might have guessed by now that I find the whole layer thing of a cake or dessert very exciting. Then I came across the Baked Alaska. Though this one was a layered ice-cream cake too, the components were different. More specifically, it had a meringue coating. So this one naturally ranked high among my list of favourites. To make and to eat. And most of all, the reveal…as you slice through it’s very core.

baked alaska with chocolate, rhubarb and strawberry

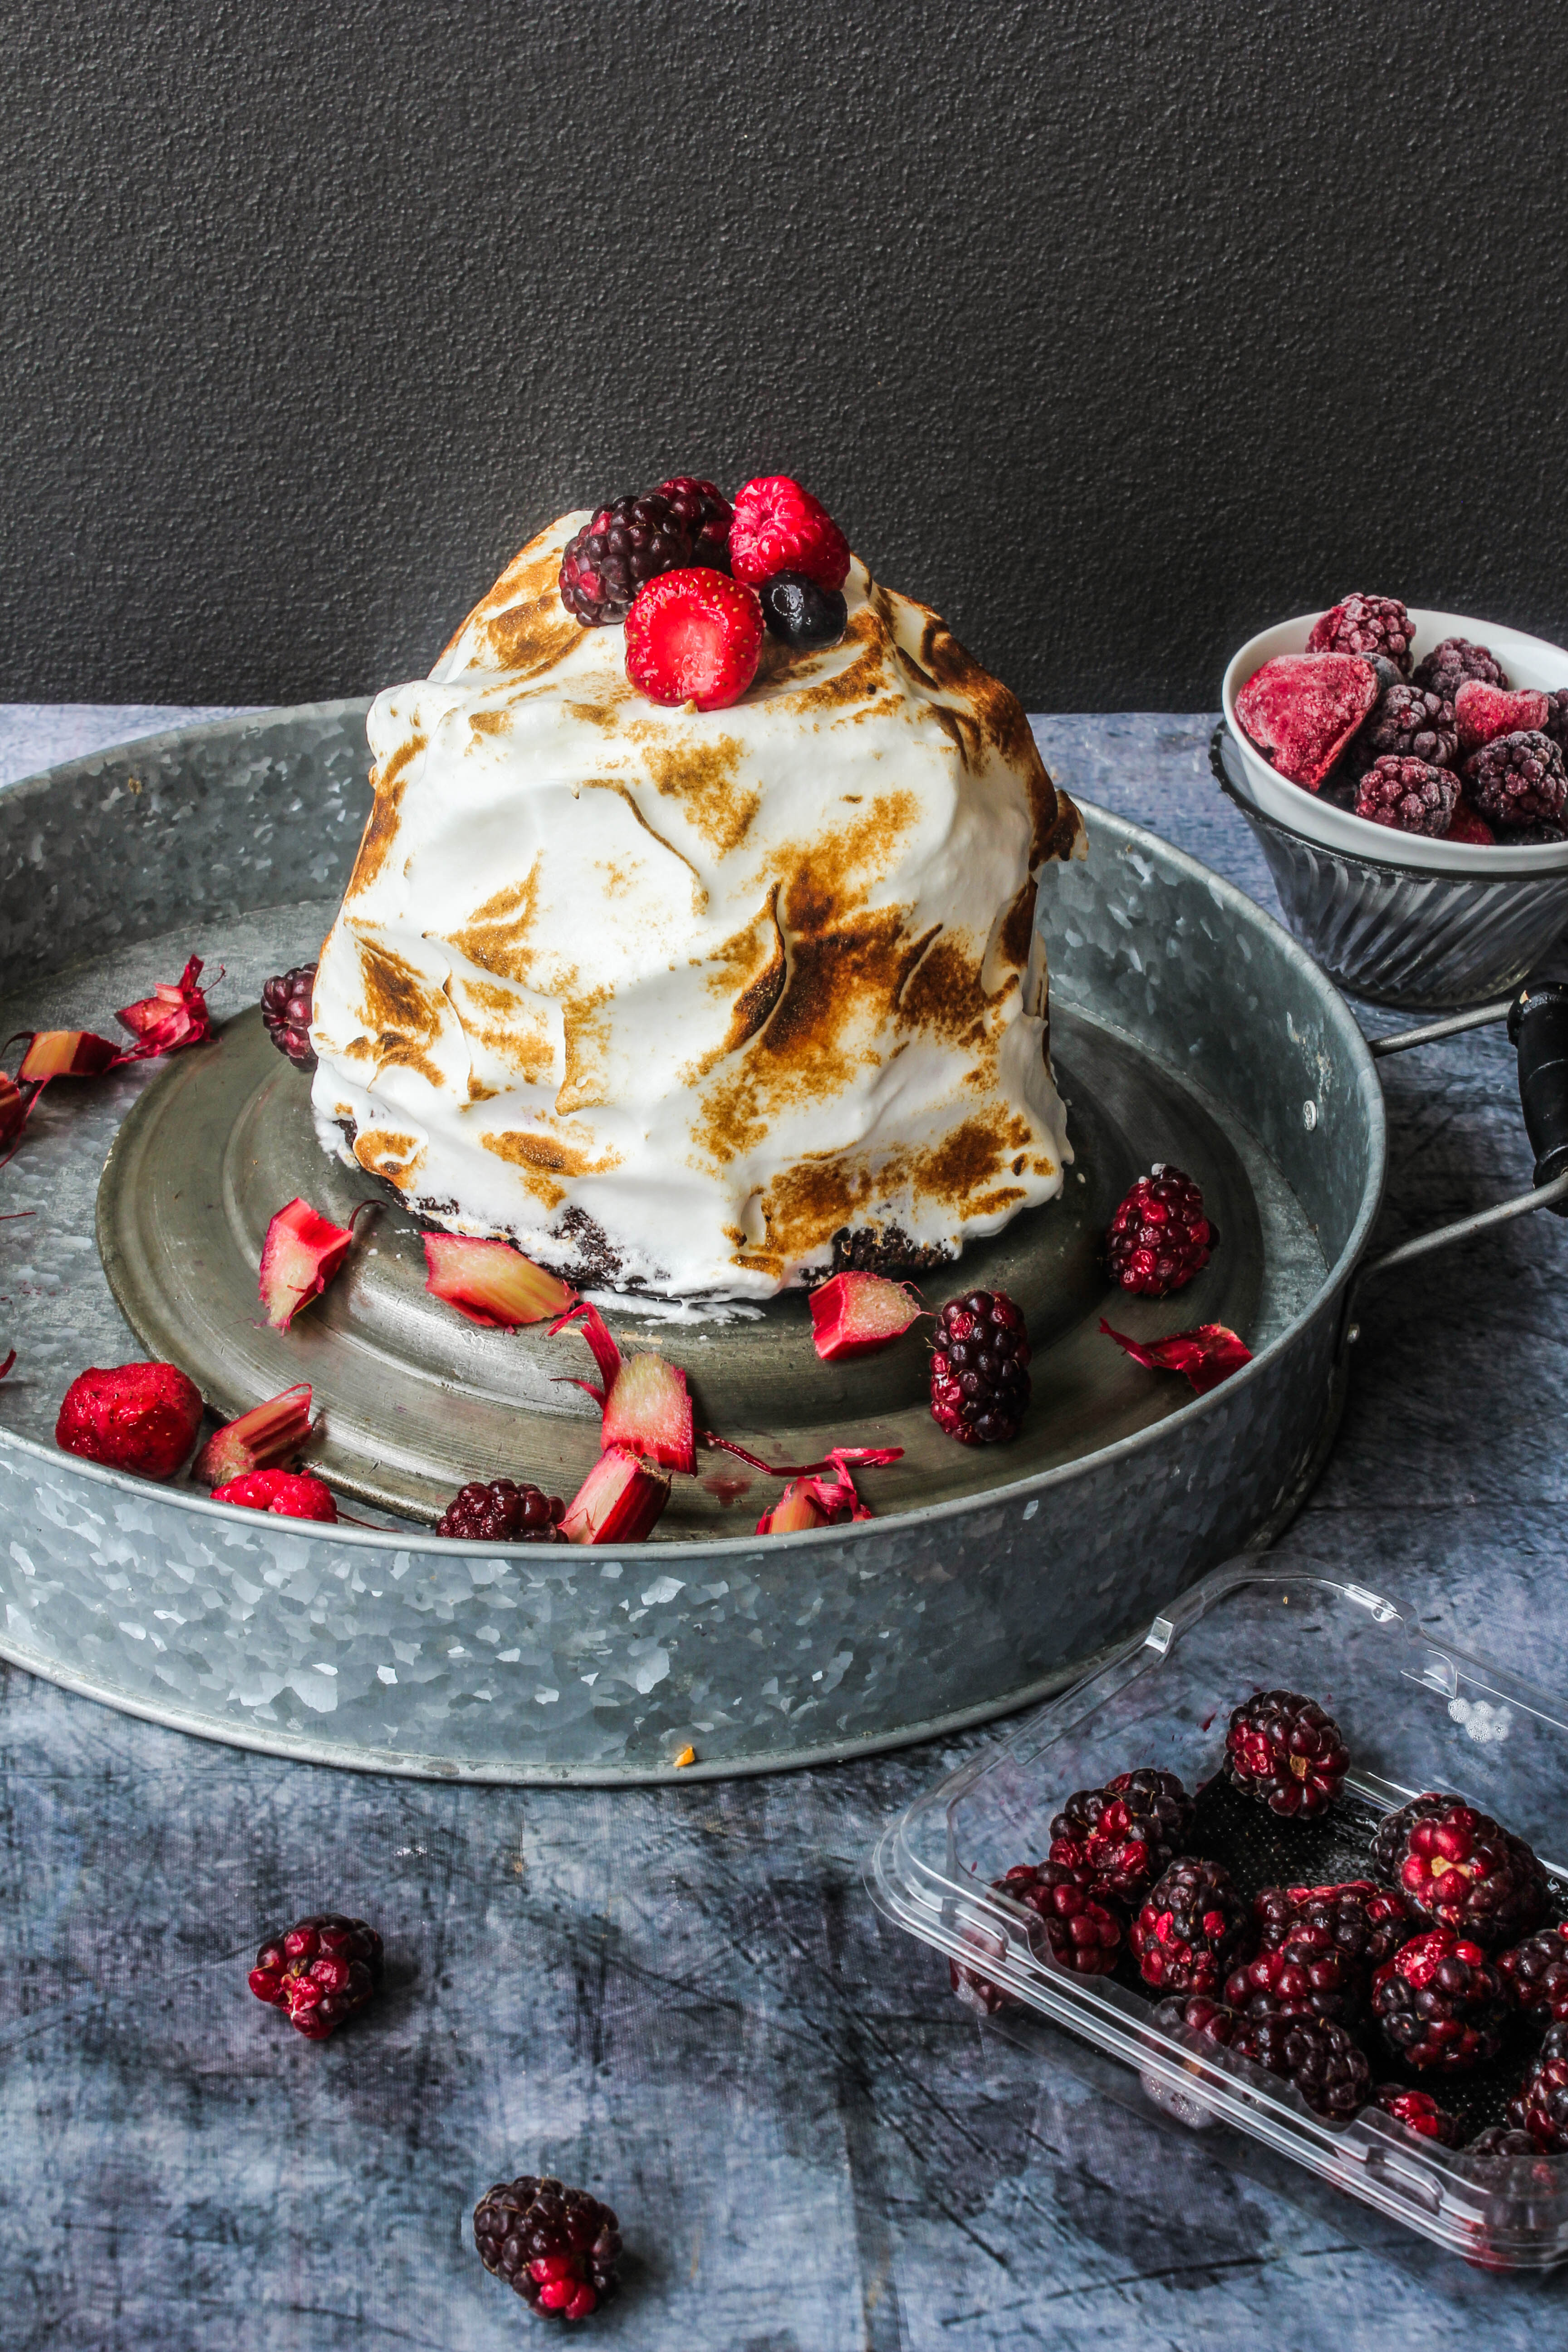
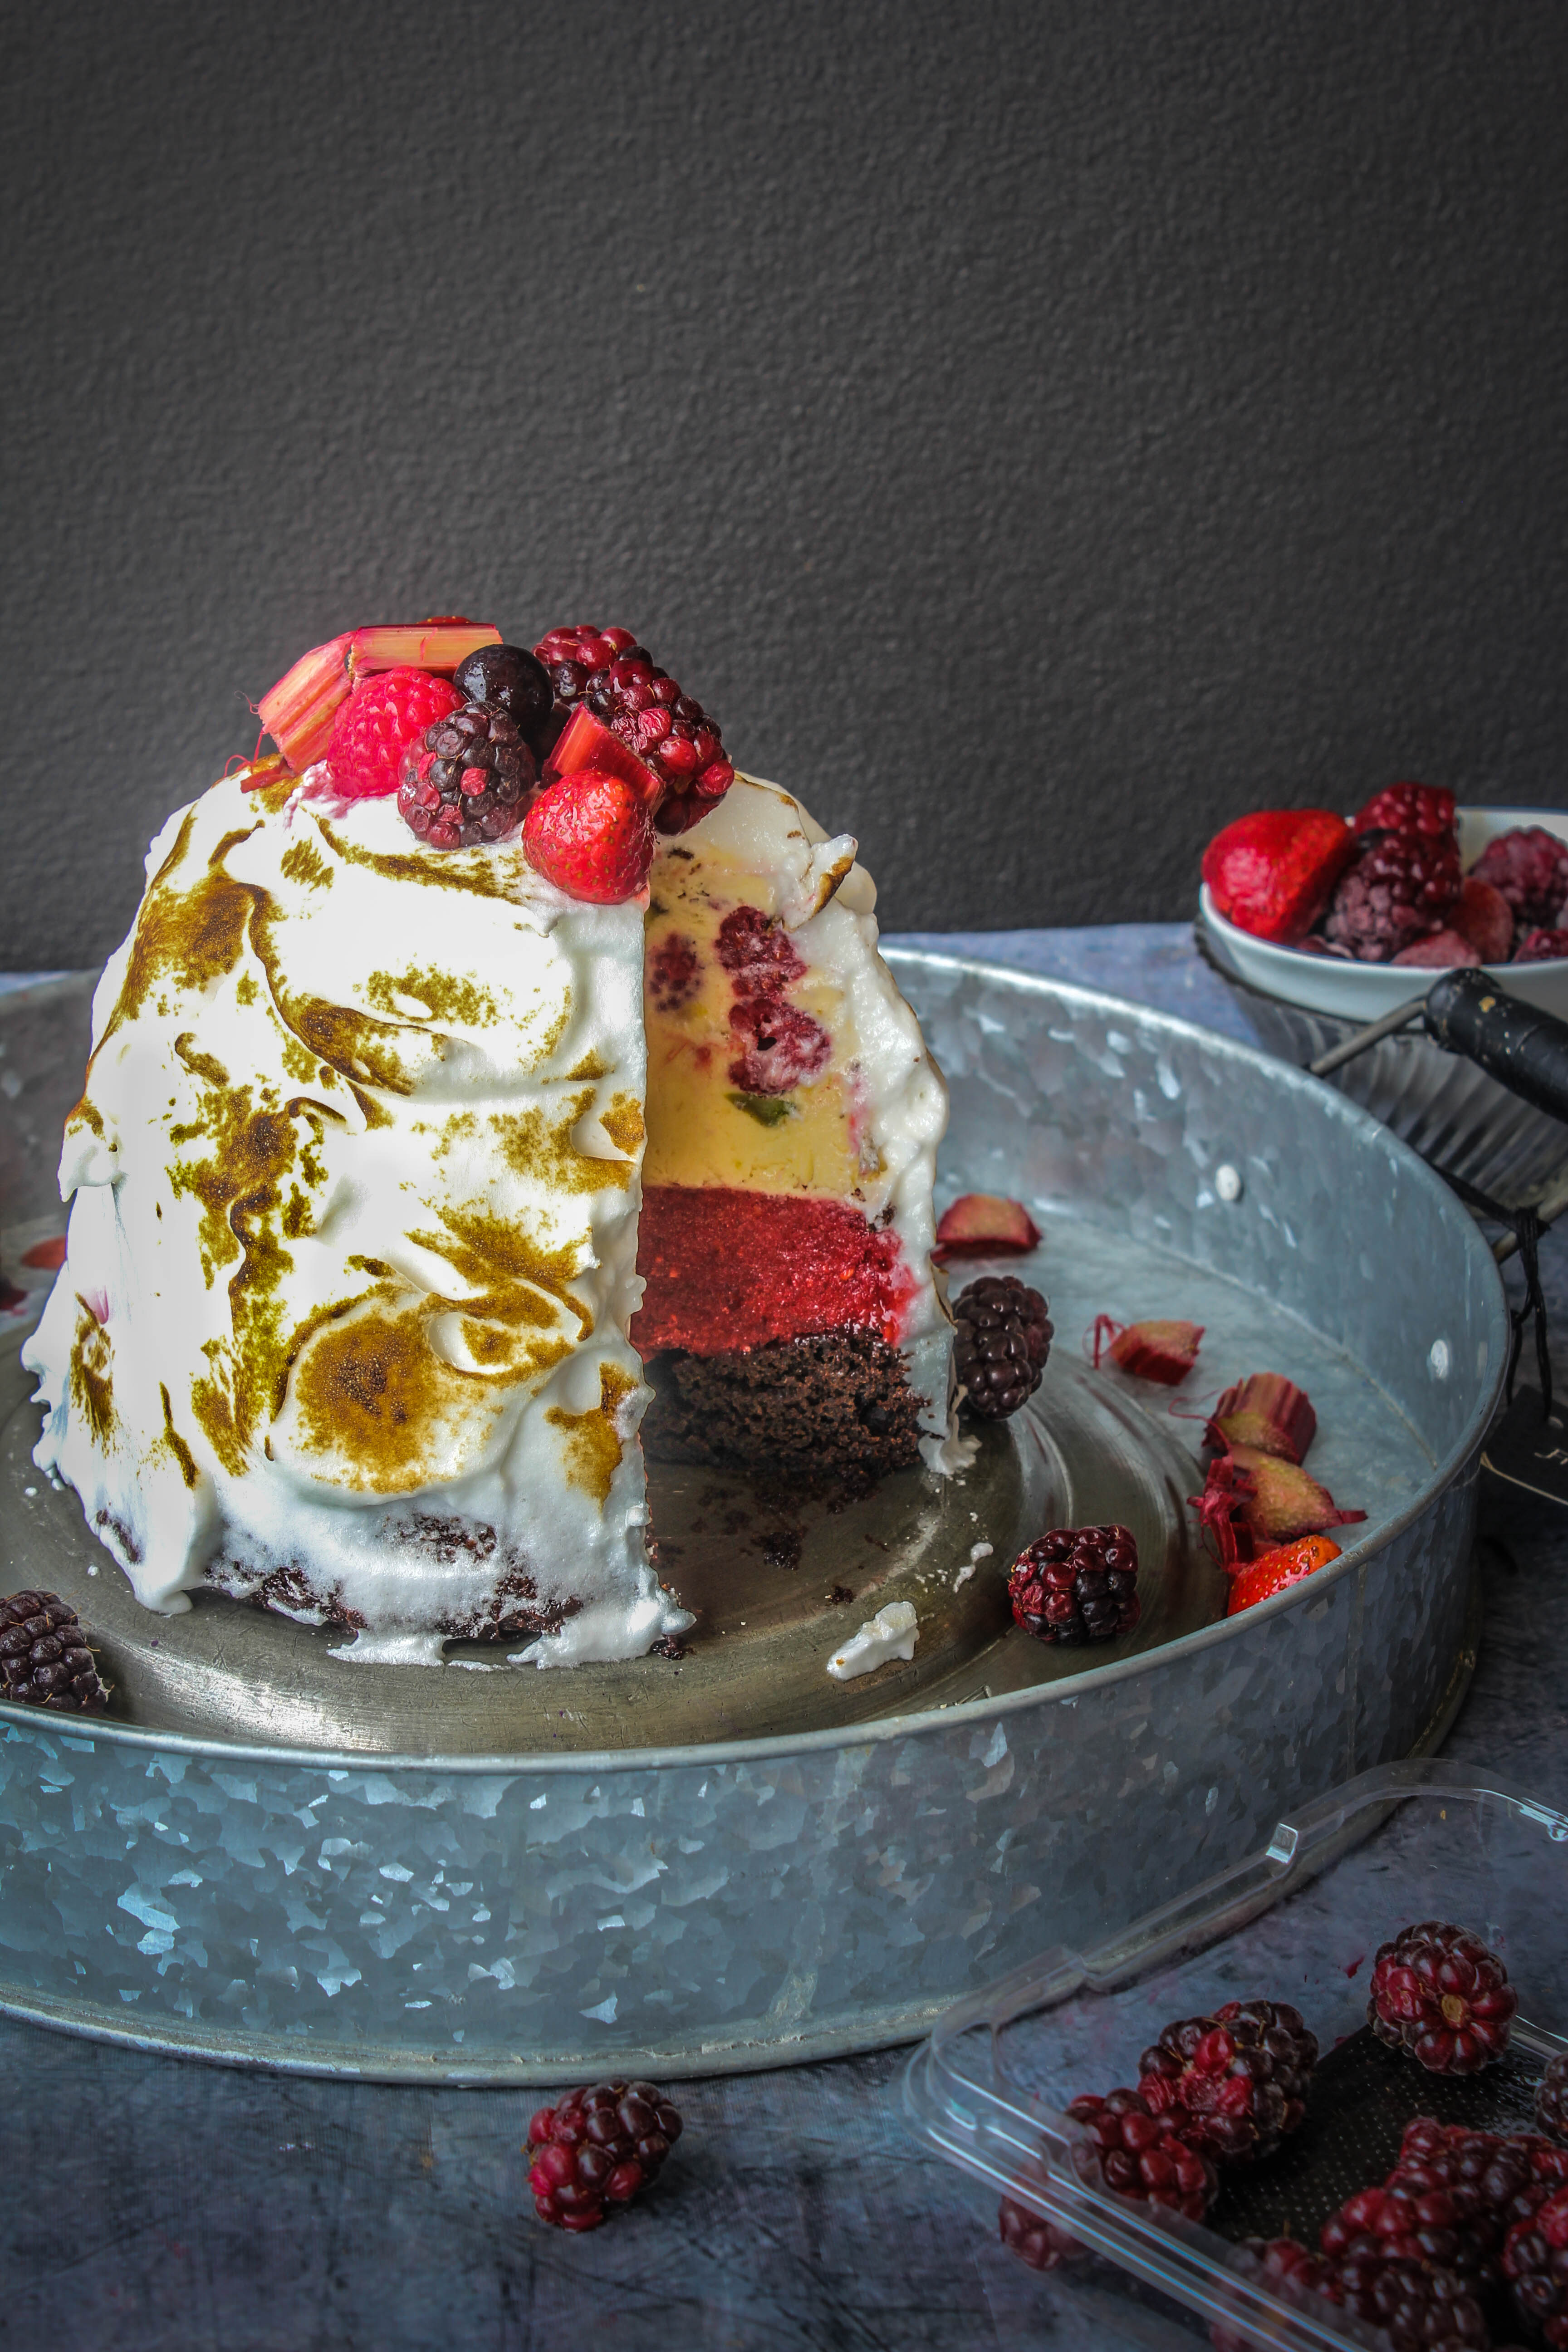
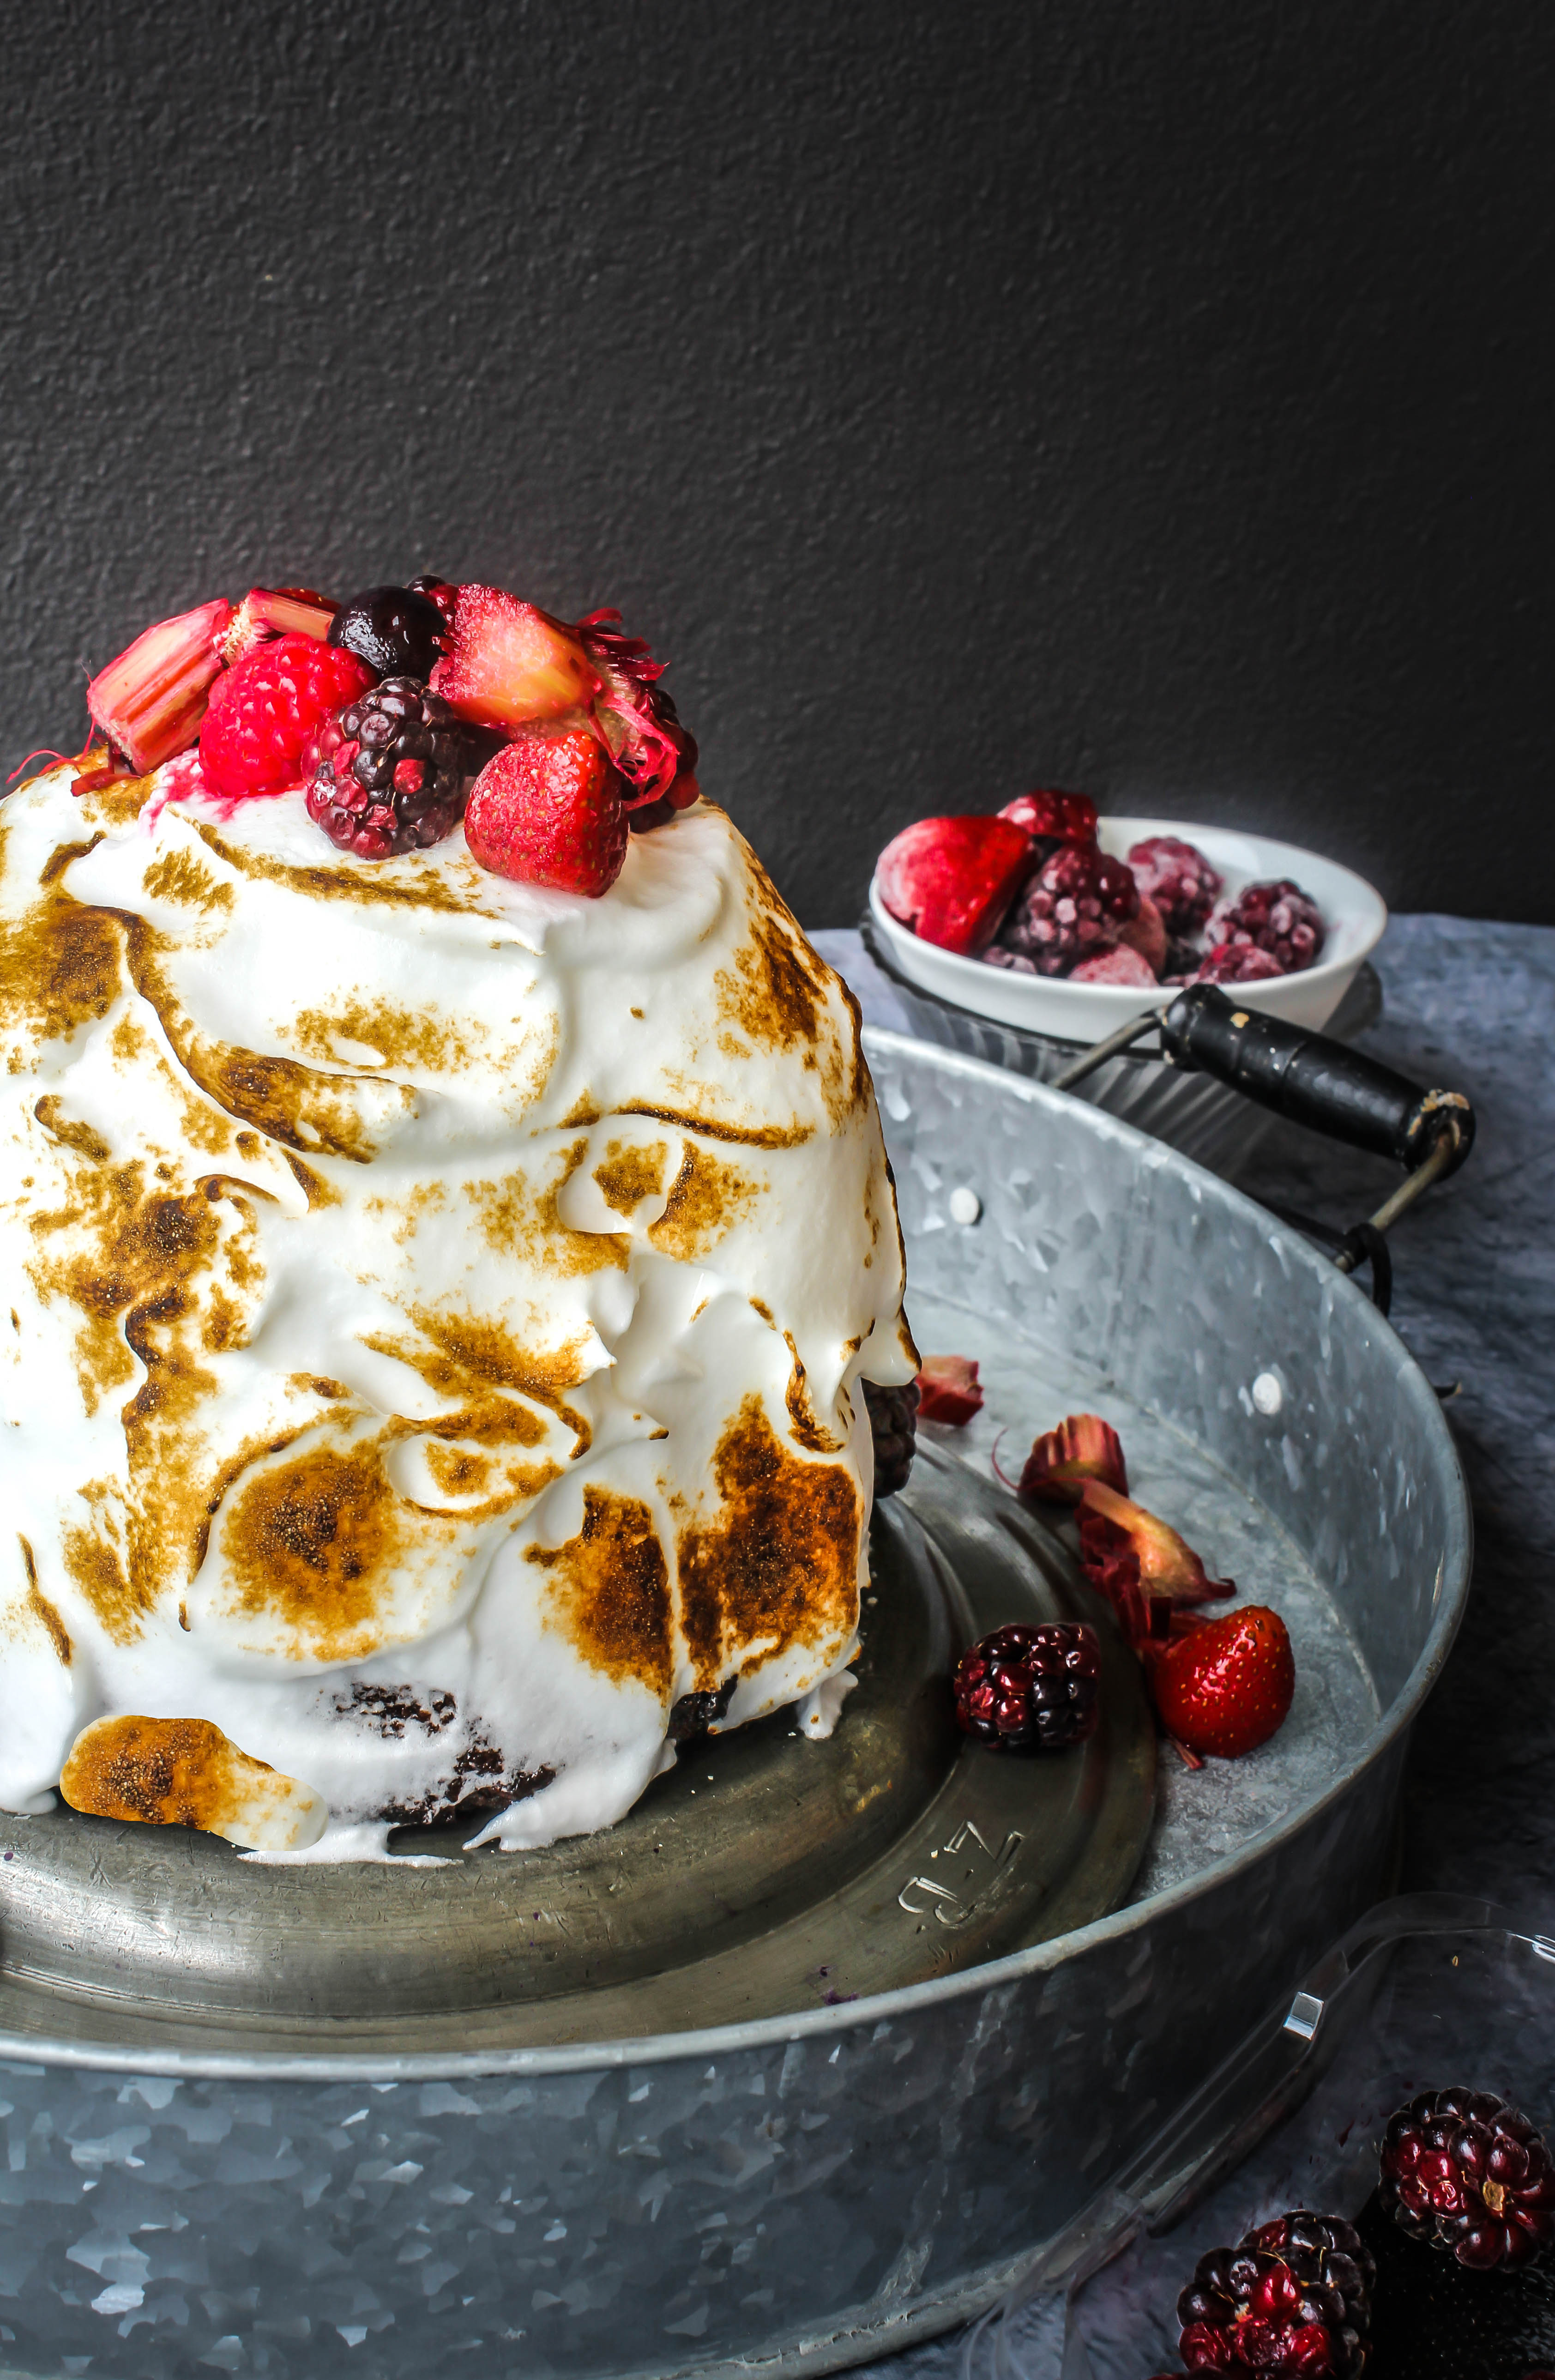
The traditional Baked Alaska has a layer of sponge housing one or two layers of ice-cream and covered all around with uncooked meringue. The cake is frozen till it is hard so it can withstand a few minutes in the oven while the meringue is being toasted. The fascinating thing is that the ice-cream does not melt as the sponge and meringue prevents the heat from reaching the centre.  So scientific and interesting, isn’t it?  My version is a slightly simpler. The layers are one on top of the other, then covered in meringue which is then browned with a blow torch.

baked alaska with chocolate, rhubarb and strawberry

baked alaska with chocolate, rhubarb and strawberry

The bottom layer is my go-to chocolate cake recipe. I have used half the batter for this cake. You could bake the other half and freeze it for later use. The recipe is quite a flexible one so you can make your favourite chocolate cake recipe or a ready mix or a store bought cake as well. The next layer is a rhubarb-raspberry sorbet that has been on my mind since last summer. The topmost layer is a raspberry and pistachio semifreddo. So you can see that you do not need to take out your ice-cream machine to make this. The individual layers can be made way ahead and assembled the night before you plan to serve it. I have used used a swiss meringue to cover the dessert for stability but you could go with any meringue recipe you are comfortable with. I have got the dome shape from an old plastic pudding container in which I made this. A round cake pan would just work as well.

Needless to say, all the individual elements of this dessert can be made independently as a stand alone dessert. They are as delicious together as much as they are by themselves.


baked alaska with chocolate, rhubarb and strawberry


Raspberry Rhubarb and Chocolate Baked Alaska
Serves 8-10

For the chocolate cake (we will be using half the batter for this recipe)

1 cup self-raising flour, sifted
2 tablespoons plain flour, sifted
1 1/3  cups, firmly packed) brown sugar
3/4 cup milk
125 g butter, cubed
1/2 cup cocoa powder, sifted
1/4 teaspoon bicarbonate of soda, sifted
3 eggs, lightly whisked

Preheat oven to 160 degree C. Grease the base and sides two 15 cm round cake pan and line the base with non stick baking paper.

Place the two flours together in a bowl. Place the sugar, milk and butter in a large saucepan. Add the cocoa and bicarbonate of soda into the pan. Place the pan over medium-low heat and use a whisk to stir until the mixture is smooth (don’t boil the mixture). Remove the pan from the heat and set aside for 5 minutes to cool slightly.

Add the flour mixture in slow additions gradually whisking to mix. Add the eggs and continue to mix till well combined. Pour into the prepared oan. Smooth surface with the back of a spoon. Bake in the oven for 30-35 minutes or until a skewer inserted in the centre of a cake comes out clean. Set aside for 10 minutes before turning the cakes onto a wire rack.

For the Raspberry-Pistachio Semifreddo
1 egg
2 egg yolks
1/2 cup caster sugar
1 cup thickened/heavy  cream, whipped
1/4 cup pistachios, toasted and roughly chopped
1 cup frozen raspberries

To make the semifreddo :  Grease a 6cm-deep, 15 cm round cake pan or pudding basin/mold. Line with baking paper, allowing a 5cm overhang on both long ends.
Place eggs, egg yolks and sugar in a heatproof bowl. Place bowl over a saucepan of simmering water over low heat. Whisk for 4 to 5 minutes or until thick and creamy. Remove from heat. Whisk for 4 to 5 minutes or until cool.

Transfer mixture to a large bowl. Gently fold in cream, pistachio and raspberries. Pour mixture into prepared pan. Cover and freeze for 4 hours or until firm.

For the Raspberry-Rhubarb Sorbet
250 g rhubarb, washed, trimmed and roughly chopped into chunks
250 g raspberries (fresh or frozen, I used frozen)
1 cup castor sugar
1 tbsp lime juice
1 cup water

Place rhubarb, raspberries, sugar, lemon juice and water in a pan and gently cook until soft, around 15-20 minutes.
Allow to cool then blend mixture to smooth in a food processor.
Freeze in an air tight container stirring every hour to prevent ice crystals forming until set, around 4 hours.
Thaw for 30 minutes and spoon on top of the Semifreddo.

For the Meringue
3 egg whites
3/4 cup castot sugar
cream of tartar, a pinch

To make the meringue, place the egg-whites, sugar and cream of tartar in a heatproof bowl that is placed over a saucepan of simmering water. Whisk continuously till the sugar dissolves (about 2-3 minutes). Remove from heat and whip up the mixture with a electric or hand mixer to stiff peaks.

To Assemble, turn the frozen semifreddo-sorbet once it is solid, onto the cake and firmly press together. Place this back into the freezer for a couple of hours. Just before serving, remove from freezer and coat with meringue. Using a blow torch, brown the meringue all over. Top with berries. Serve. The Baked Alaska will be rock solid so it is best to wait a for 10 minutes before slicing it.


Easy Nutmeg Bars

7|12|2014

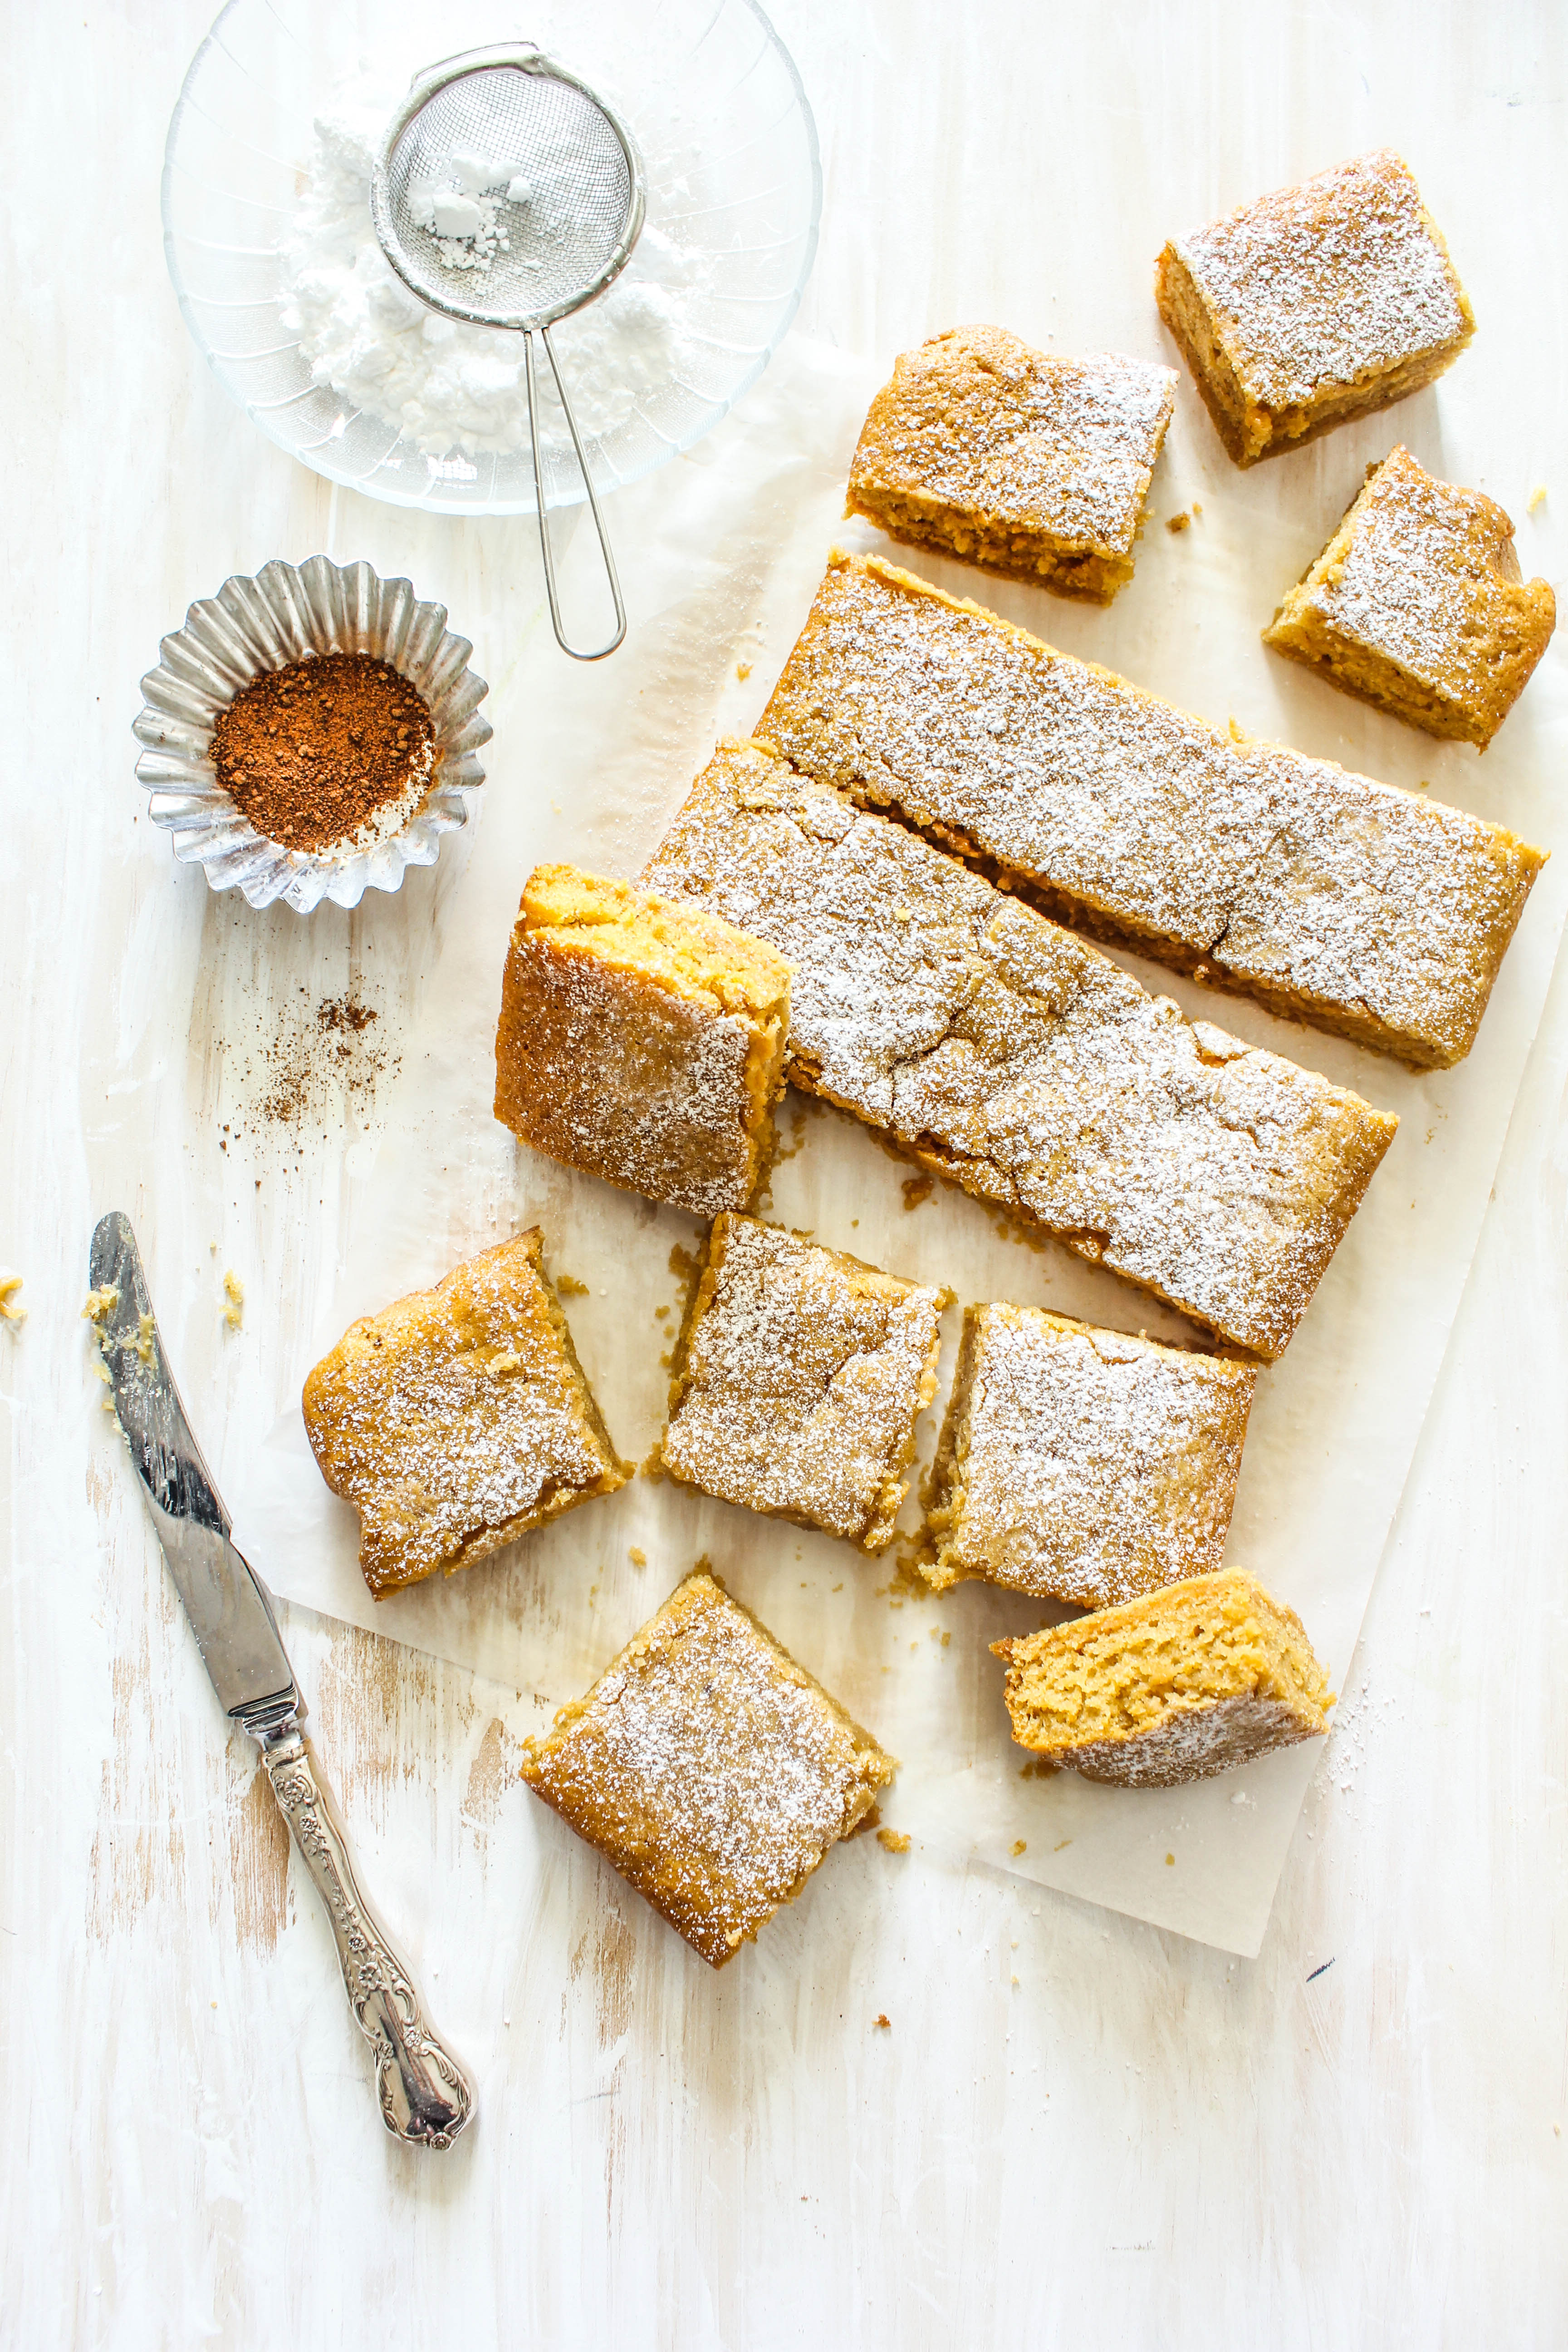
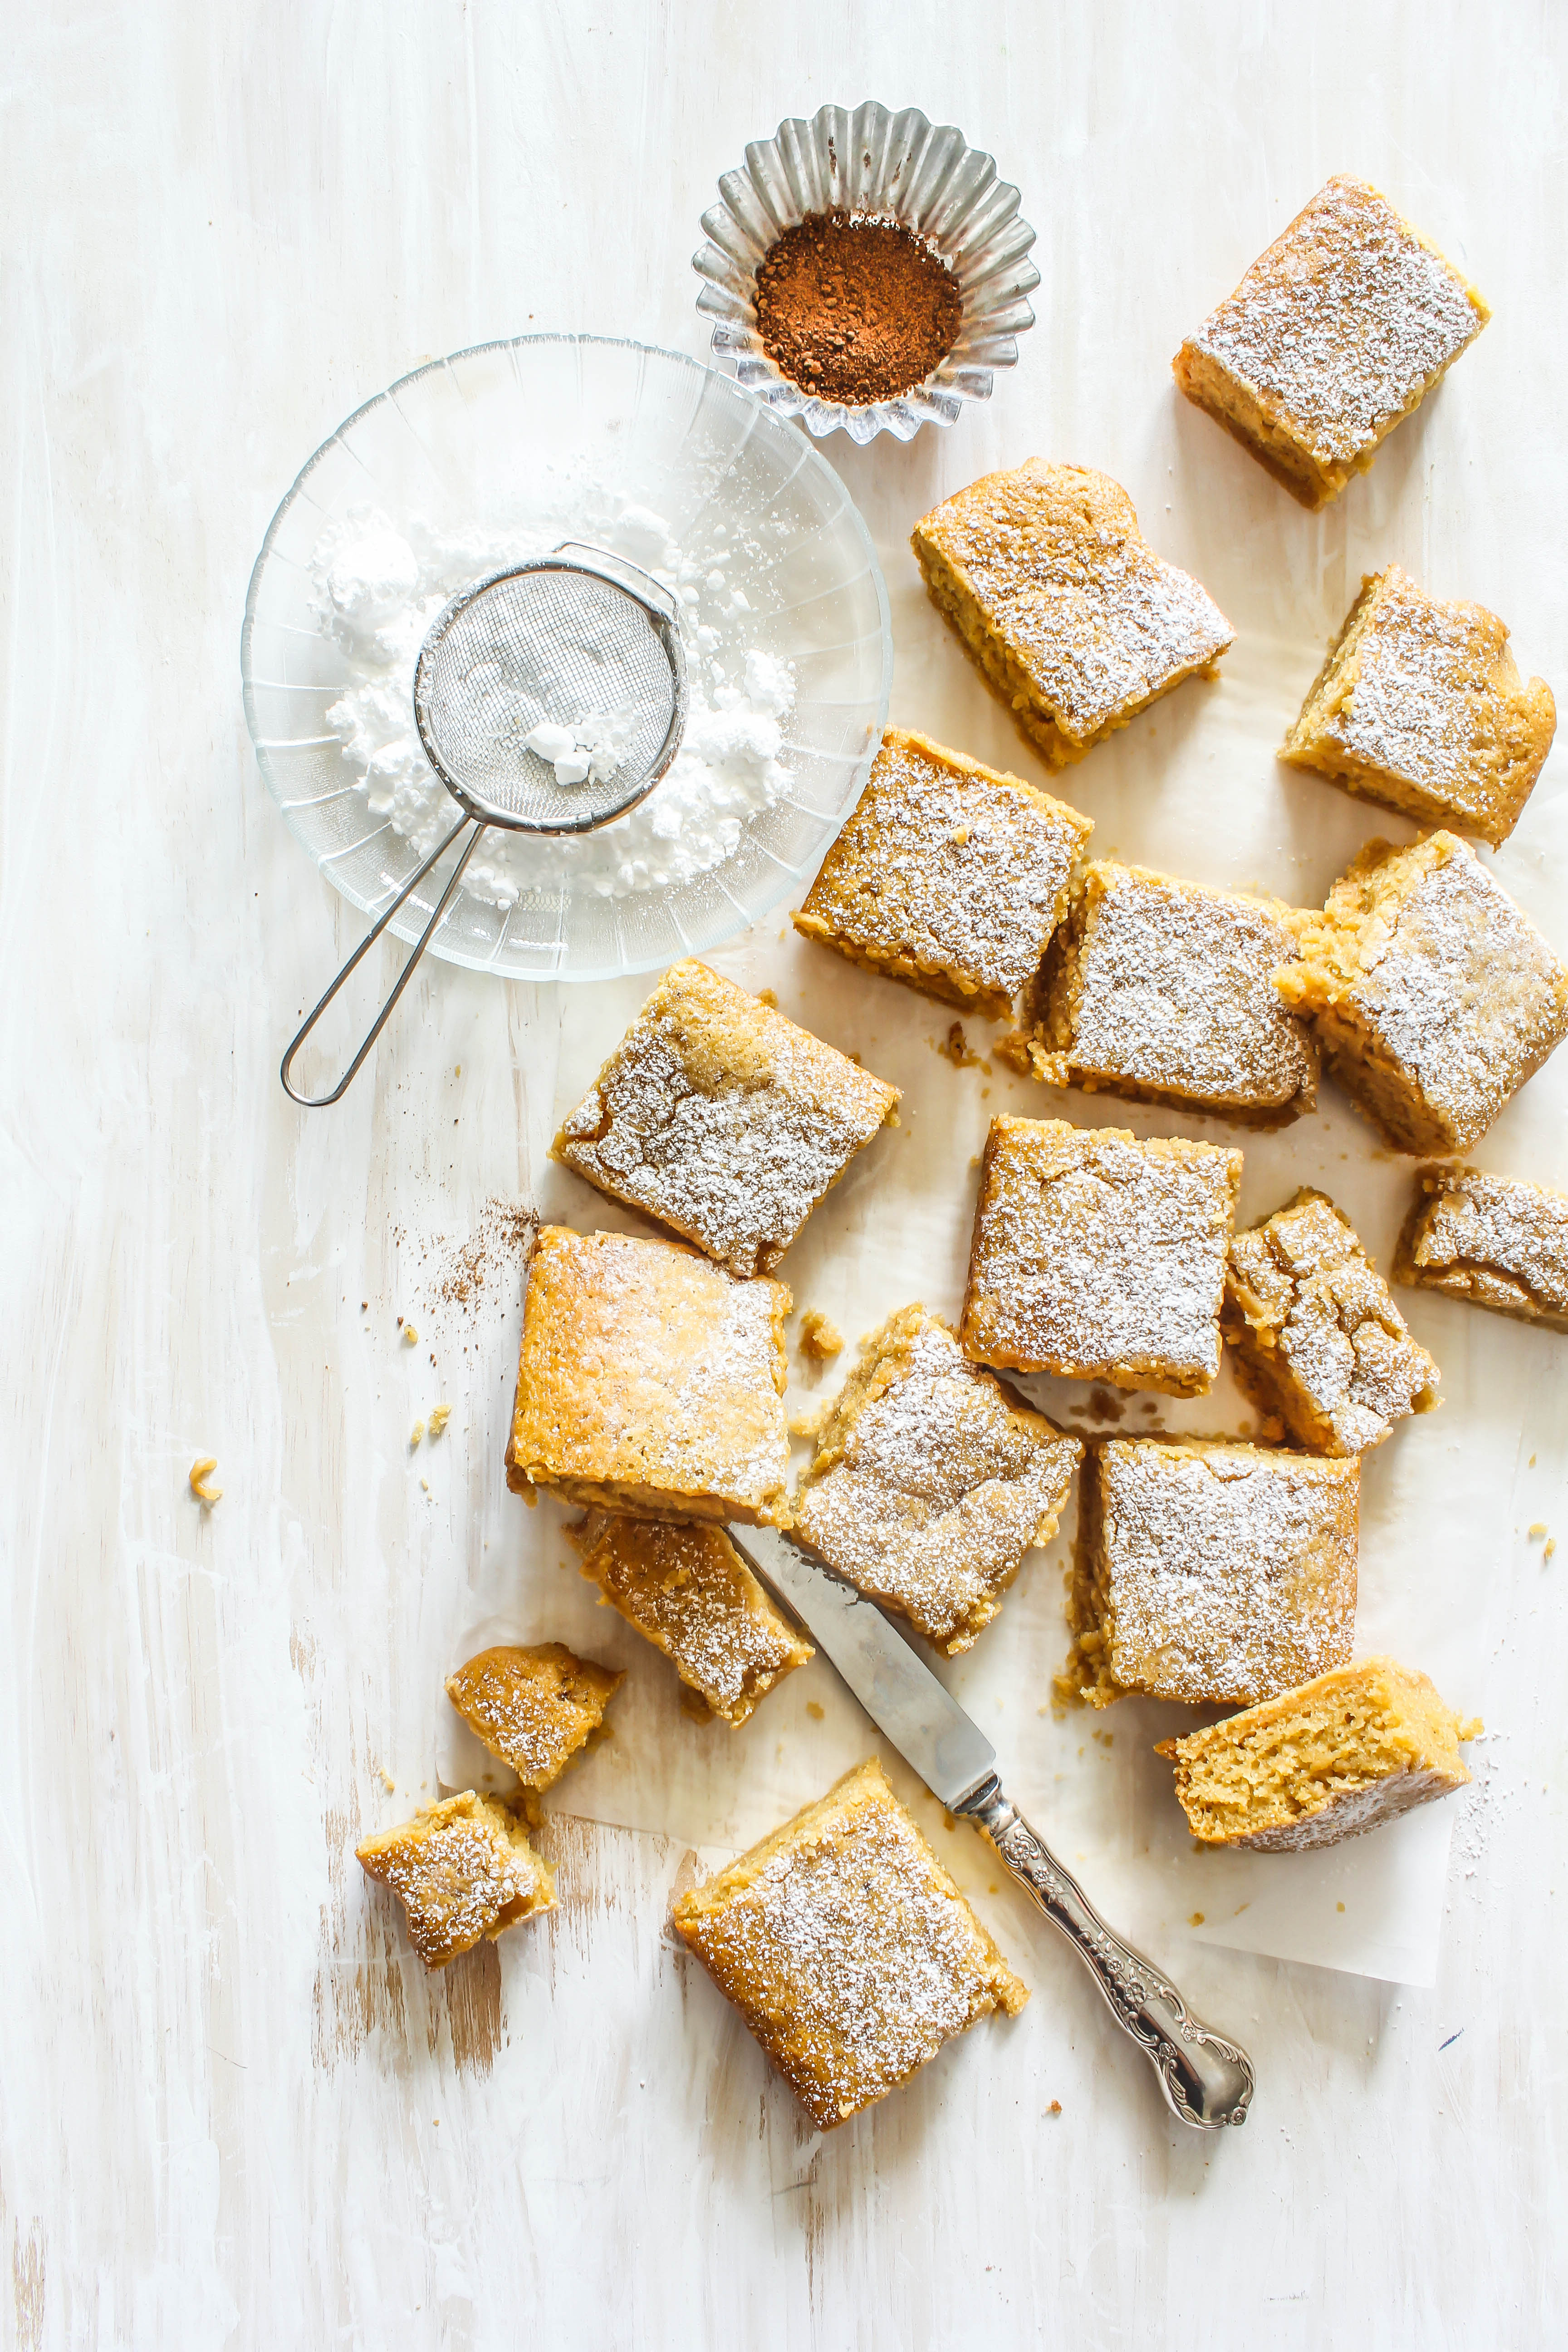
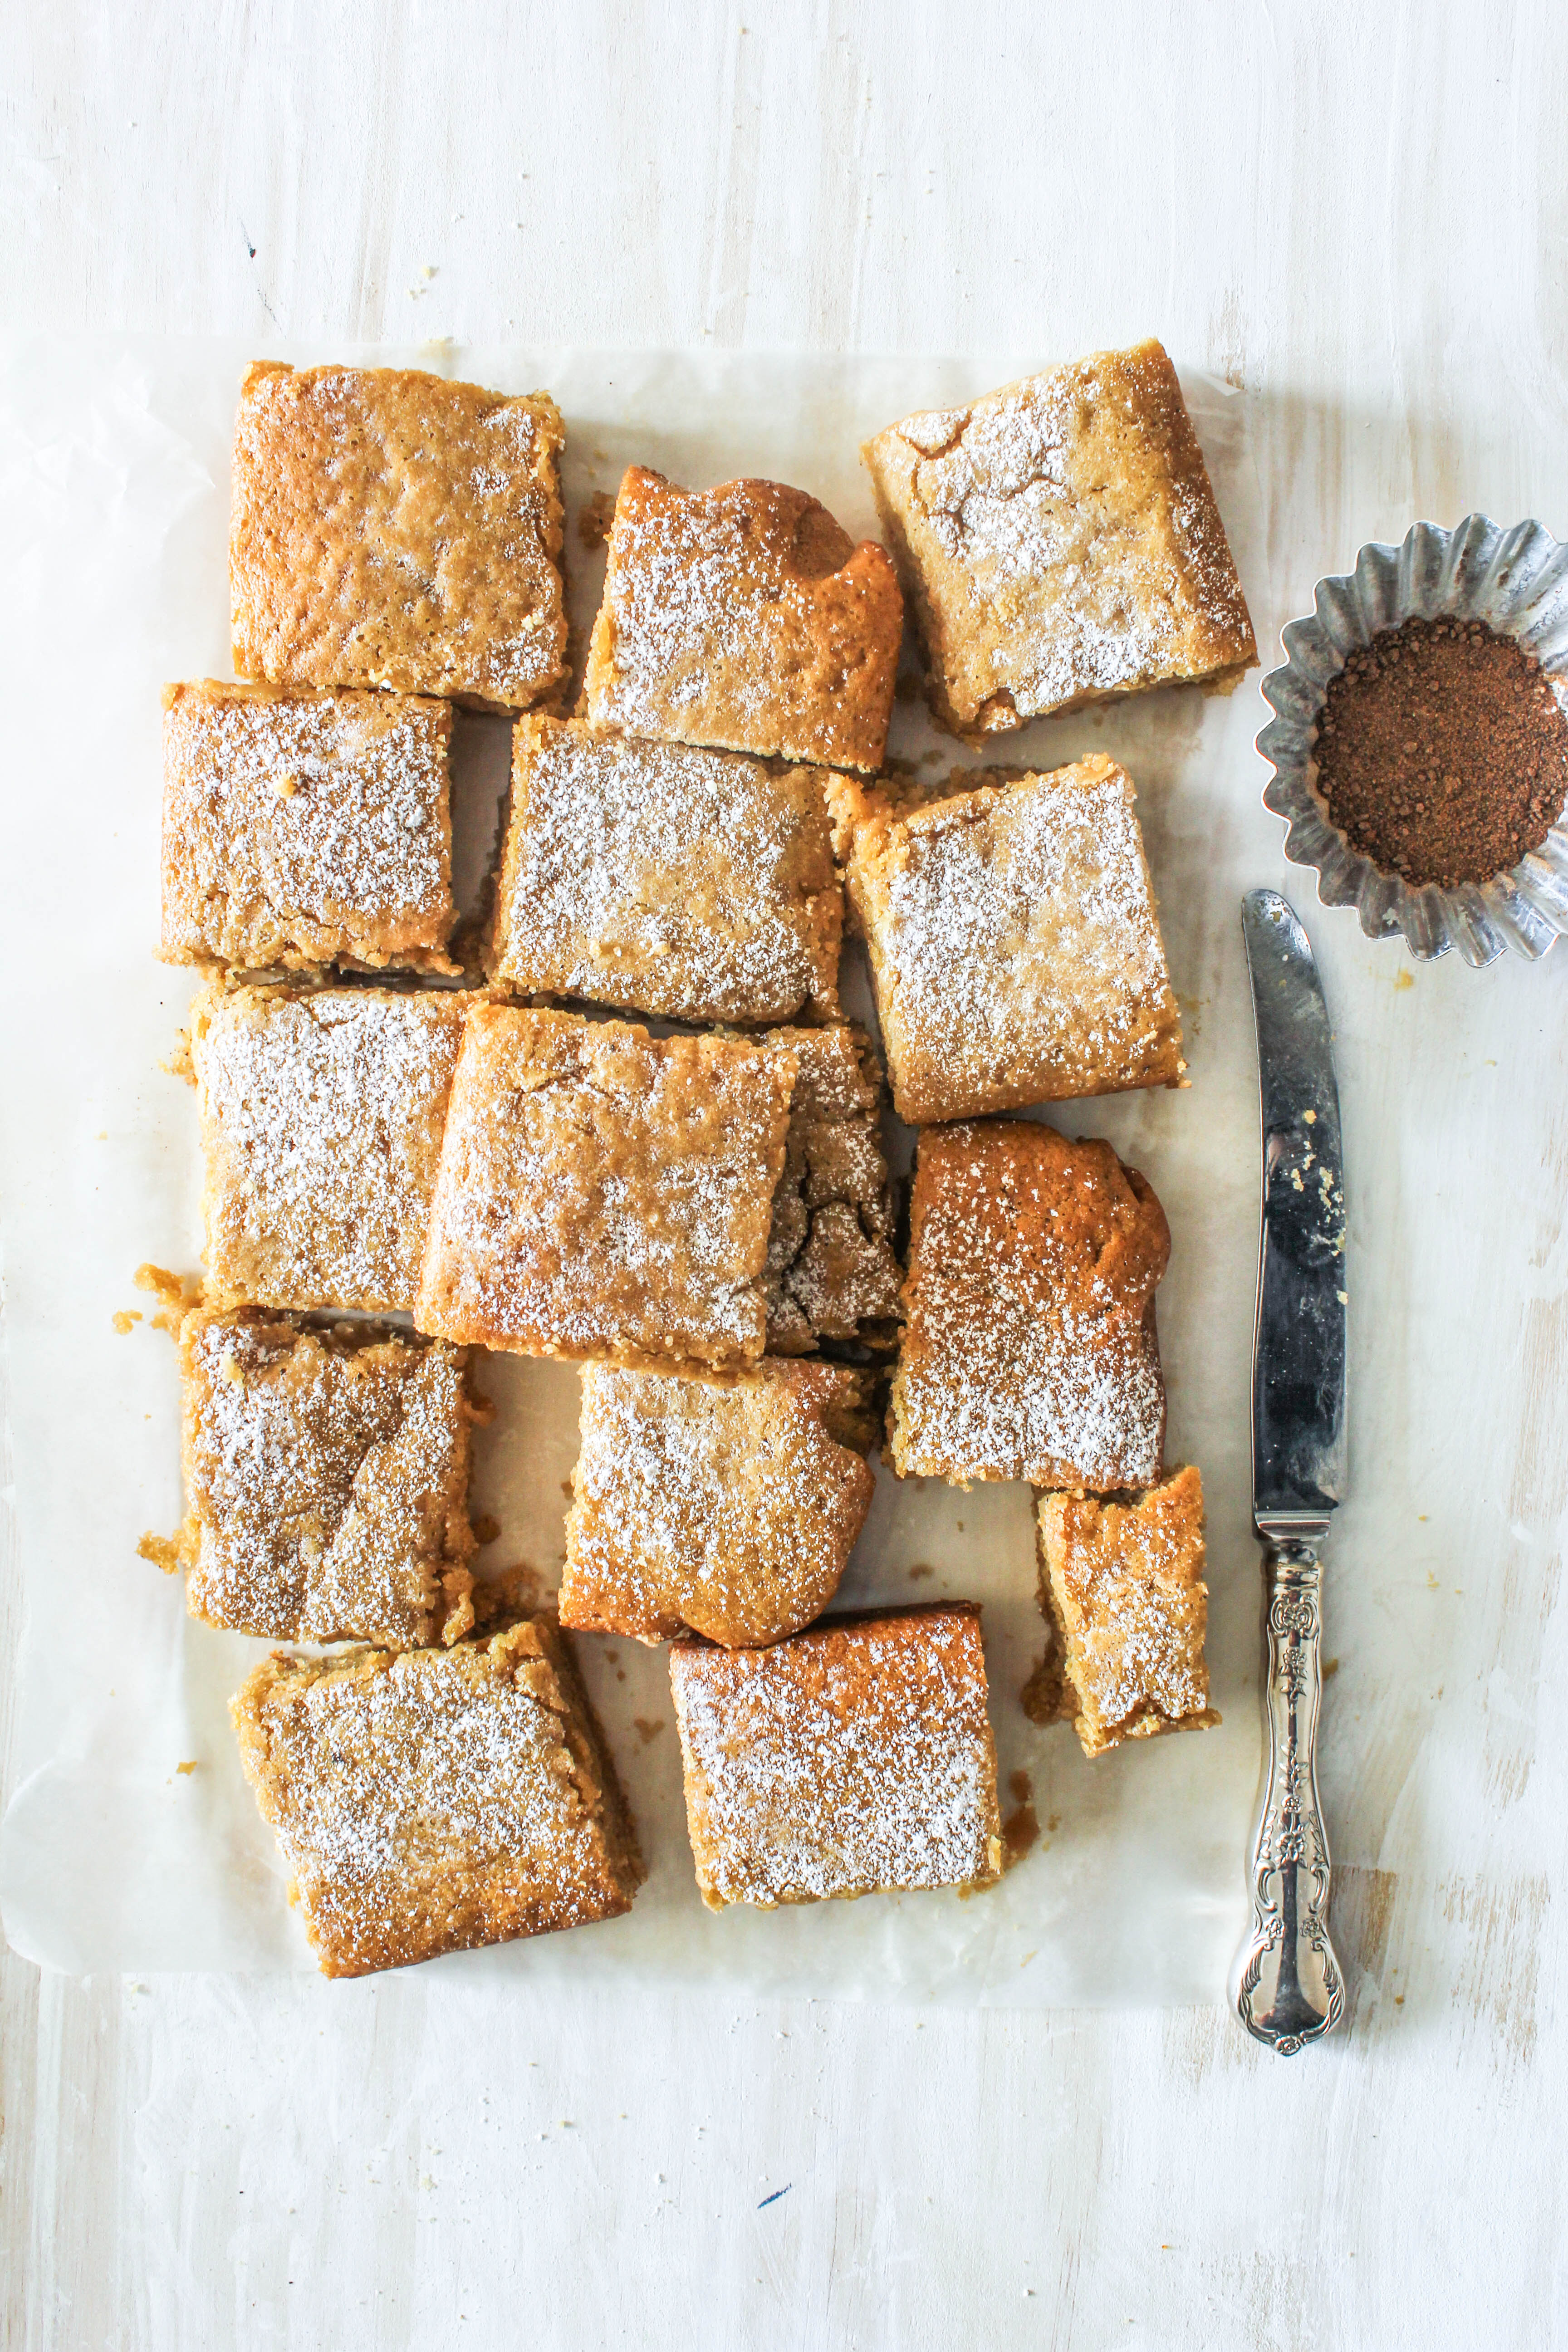
Nutmeg bars are so perfect for this time of the year when a substantial amount of baking is on the agenda and everyone is getting into the spirit of Christmas including our ovens and our kitchens. I have lived on my spices all my life but there is something magical about using them in sweet recipes around Christmas. Till about a few years ago, Nutmeg was a secret ingredient for me to enhance the flavours of Indian meat dishes and my favourite Biriyani. It was only when I tried it in a a cake that I found it equally amazing in desserts.

IMG_4038-2

If you are looking for a recipe that is quick to make without hard-to-find ingredients and makes a great edible gift for friends and family, this is it. They are ready in no time. What impressed me the most about these, are the dual textures within the bars. We  mix together some flour, butter and sugar like a shortbread mix, layer half the mix on a baking tray. To the other half, we add the rest of the ingredients and put together a cake like batter. We then pour it over the shortbread layer. The resulting bars have a slightly crunchy base with a cake like top. And they smell amazing as much as they taste great. The nutmeg is subtle but adds a special something to the caramel flavour that is so typical of brown sugar.

IMG_4049-2

I came across this recipe on Taste. They looked so worth making that I made them in a jiffy and I had to share them. Next time I make them I am going to add dried cranberries for a more festive look.
Give these a try. You won’t be disappointed.

IMG_4060-2

Easy Nutmeg Bars (adapted with variation from Taste.com)
Yields 12 bars

2 cups brown sugar
2 cups self-raising flour
100g unsalted butter, softened
1/2 cup walnuts, chopped
1 teaspoon bicarbonate of soda
1 cup full-cream milk
1 egg
1 teaspoon ground nutmeg
Icing sugar, to dust

Preheat oven to 180 degrees C. Grease and line a rectangluar pan (28 cm by 18 cm) with baking paper.

Place the sugar, flour and butter in a food processor and process until the mixture resembles breadcrumbs. Spread half the mixture in the base of the pan and sprinkle with the pecans.
Place the bicarbonate of soda and milk in a bowl, and stir to dissolve the soda. Add the egg and the nutmeg and stir to combine.

Stir in the remaining crumb mixture and pour over the base. Bake in the oven for 30 minutes. Set aside to cool, then cut into squares. Serve dusted with icing sugar.

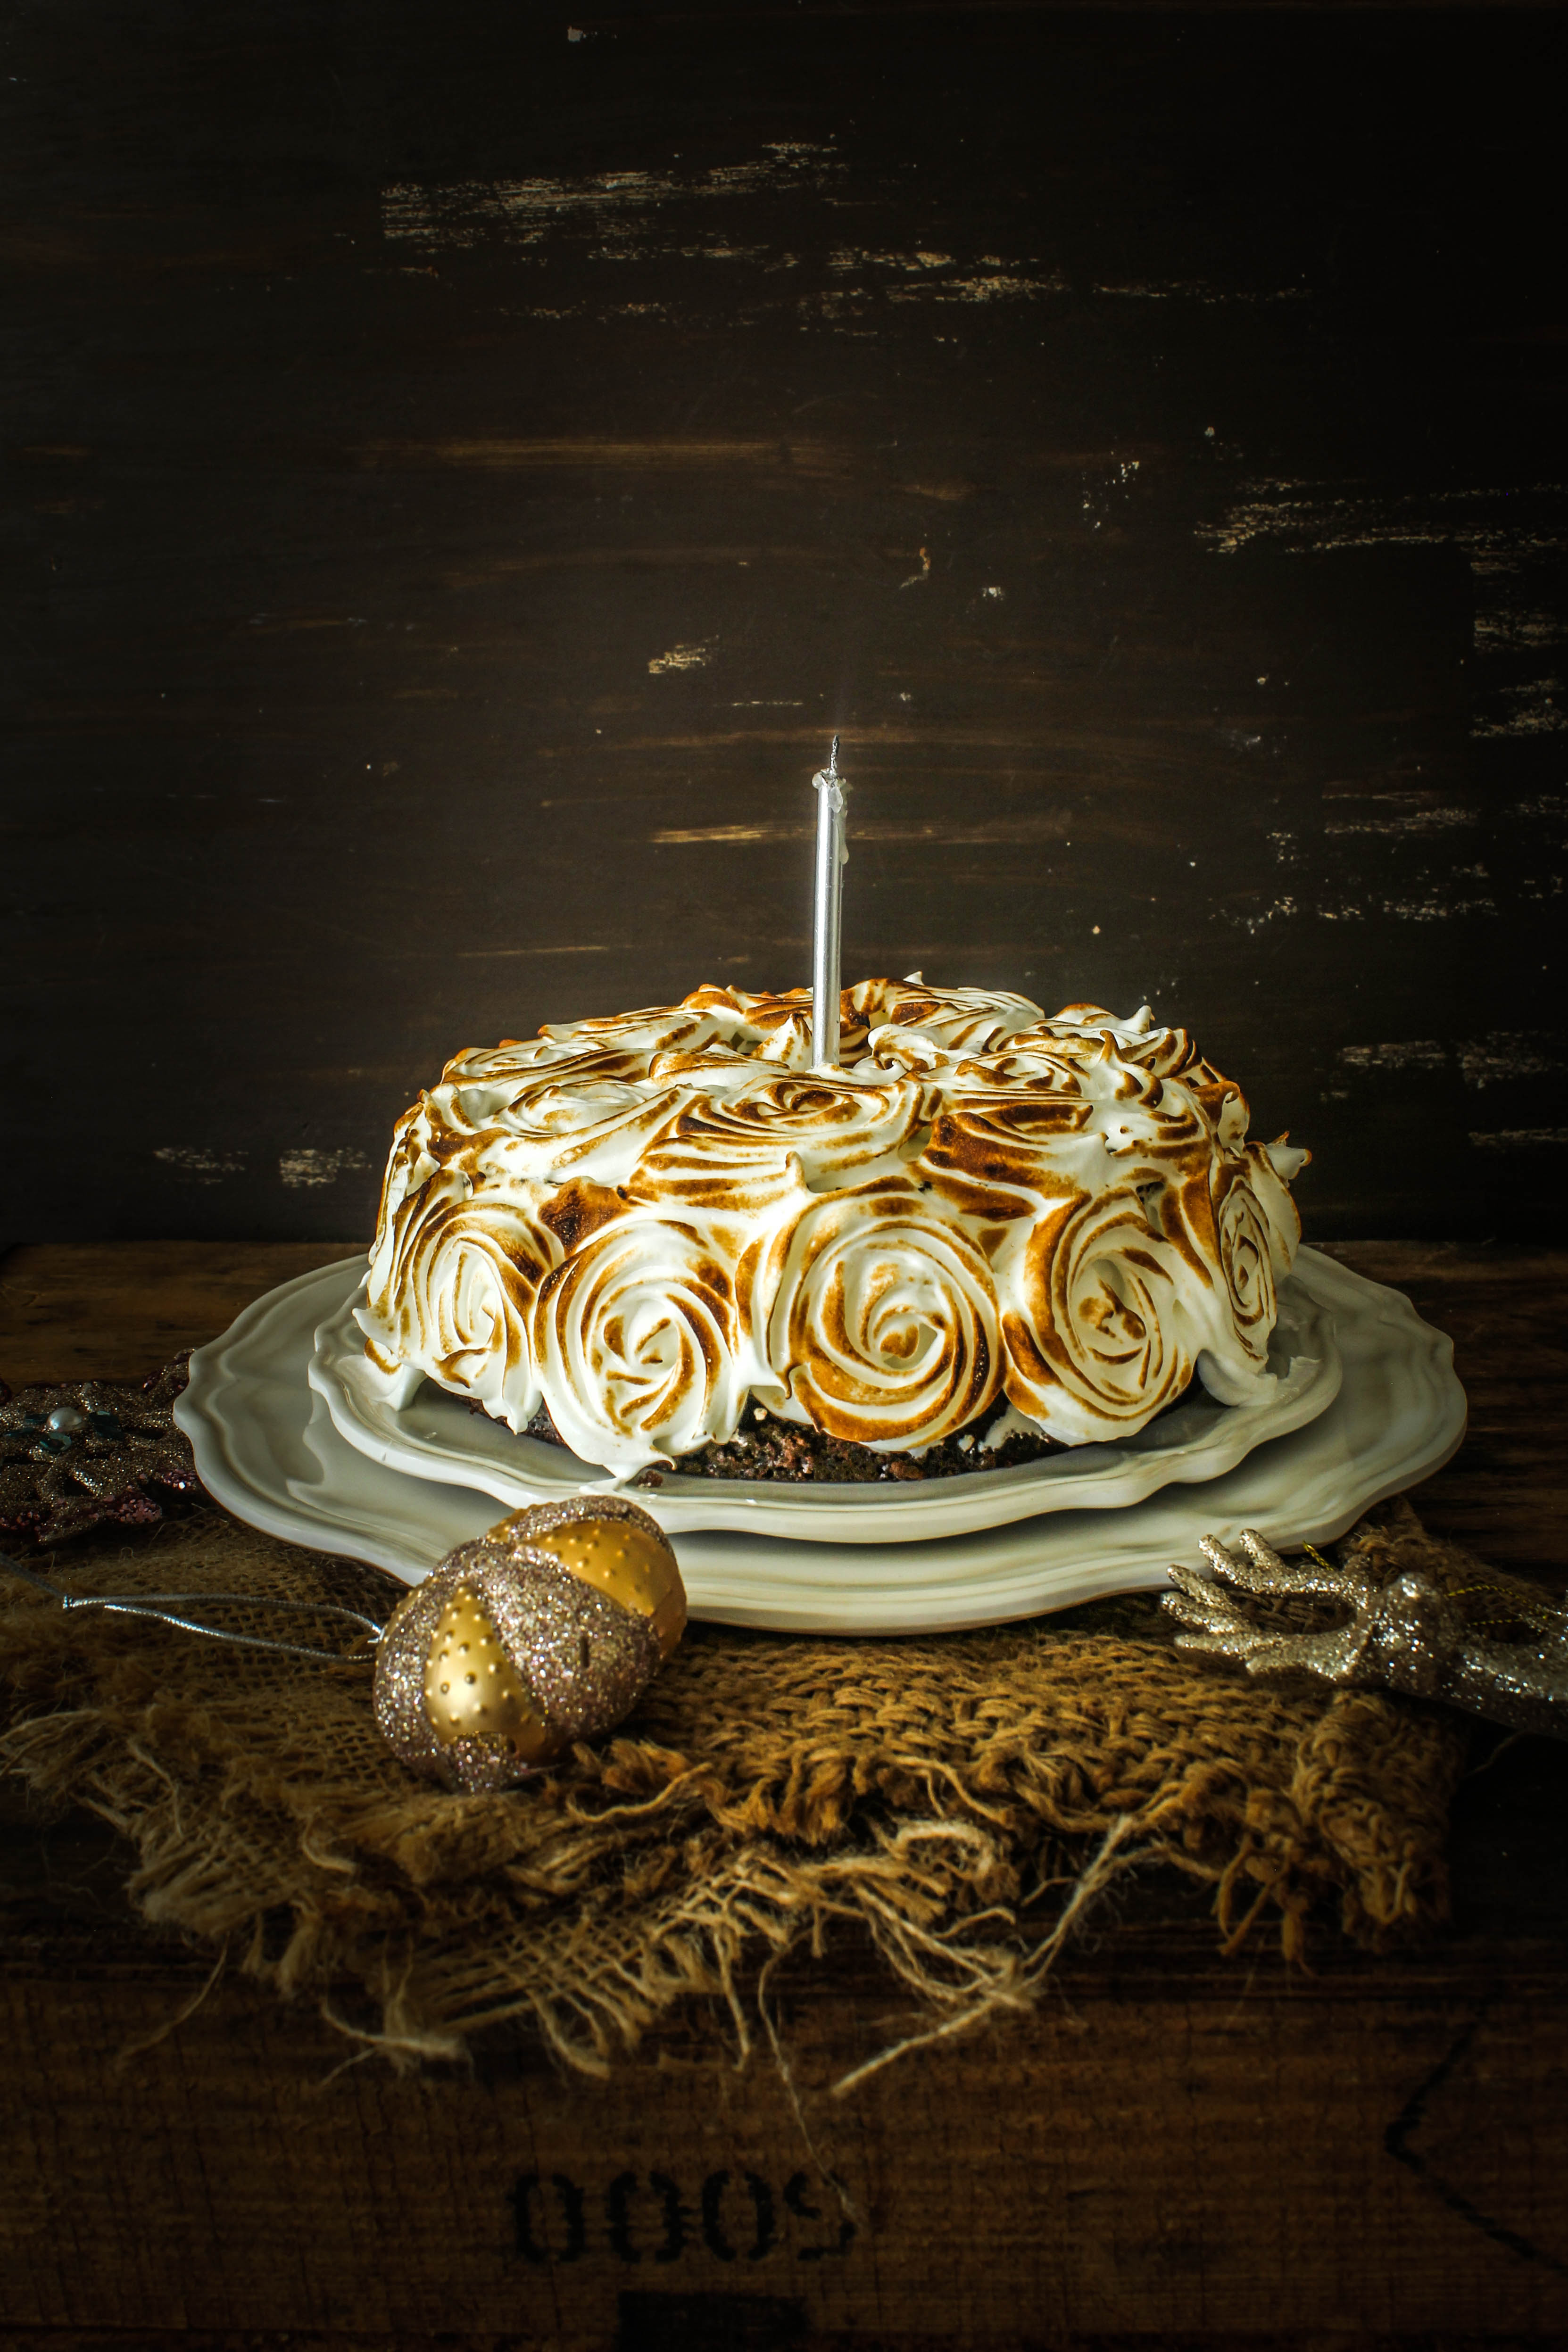
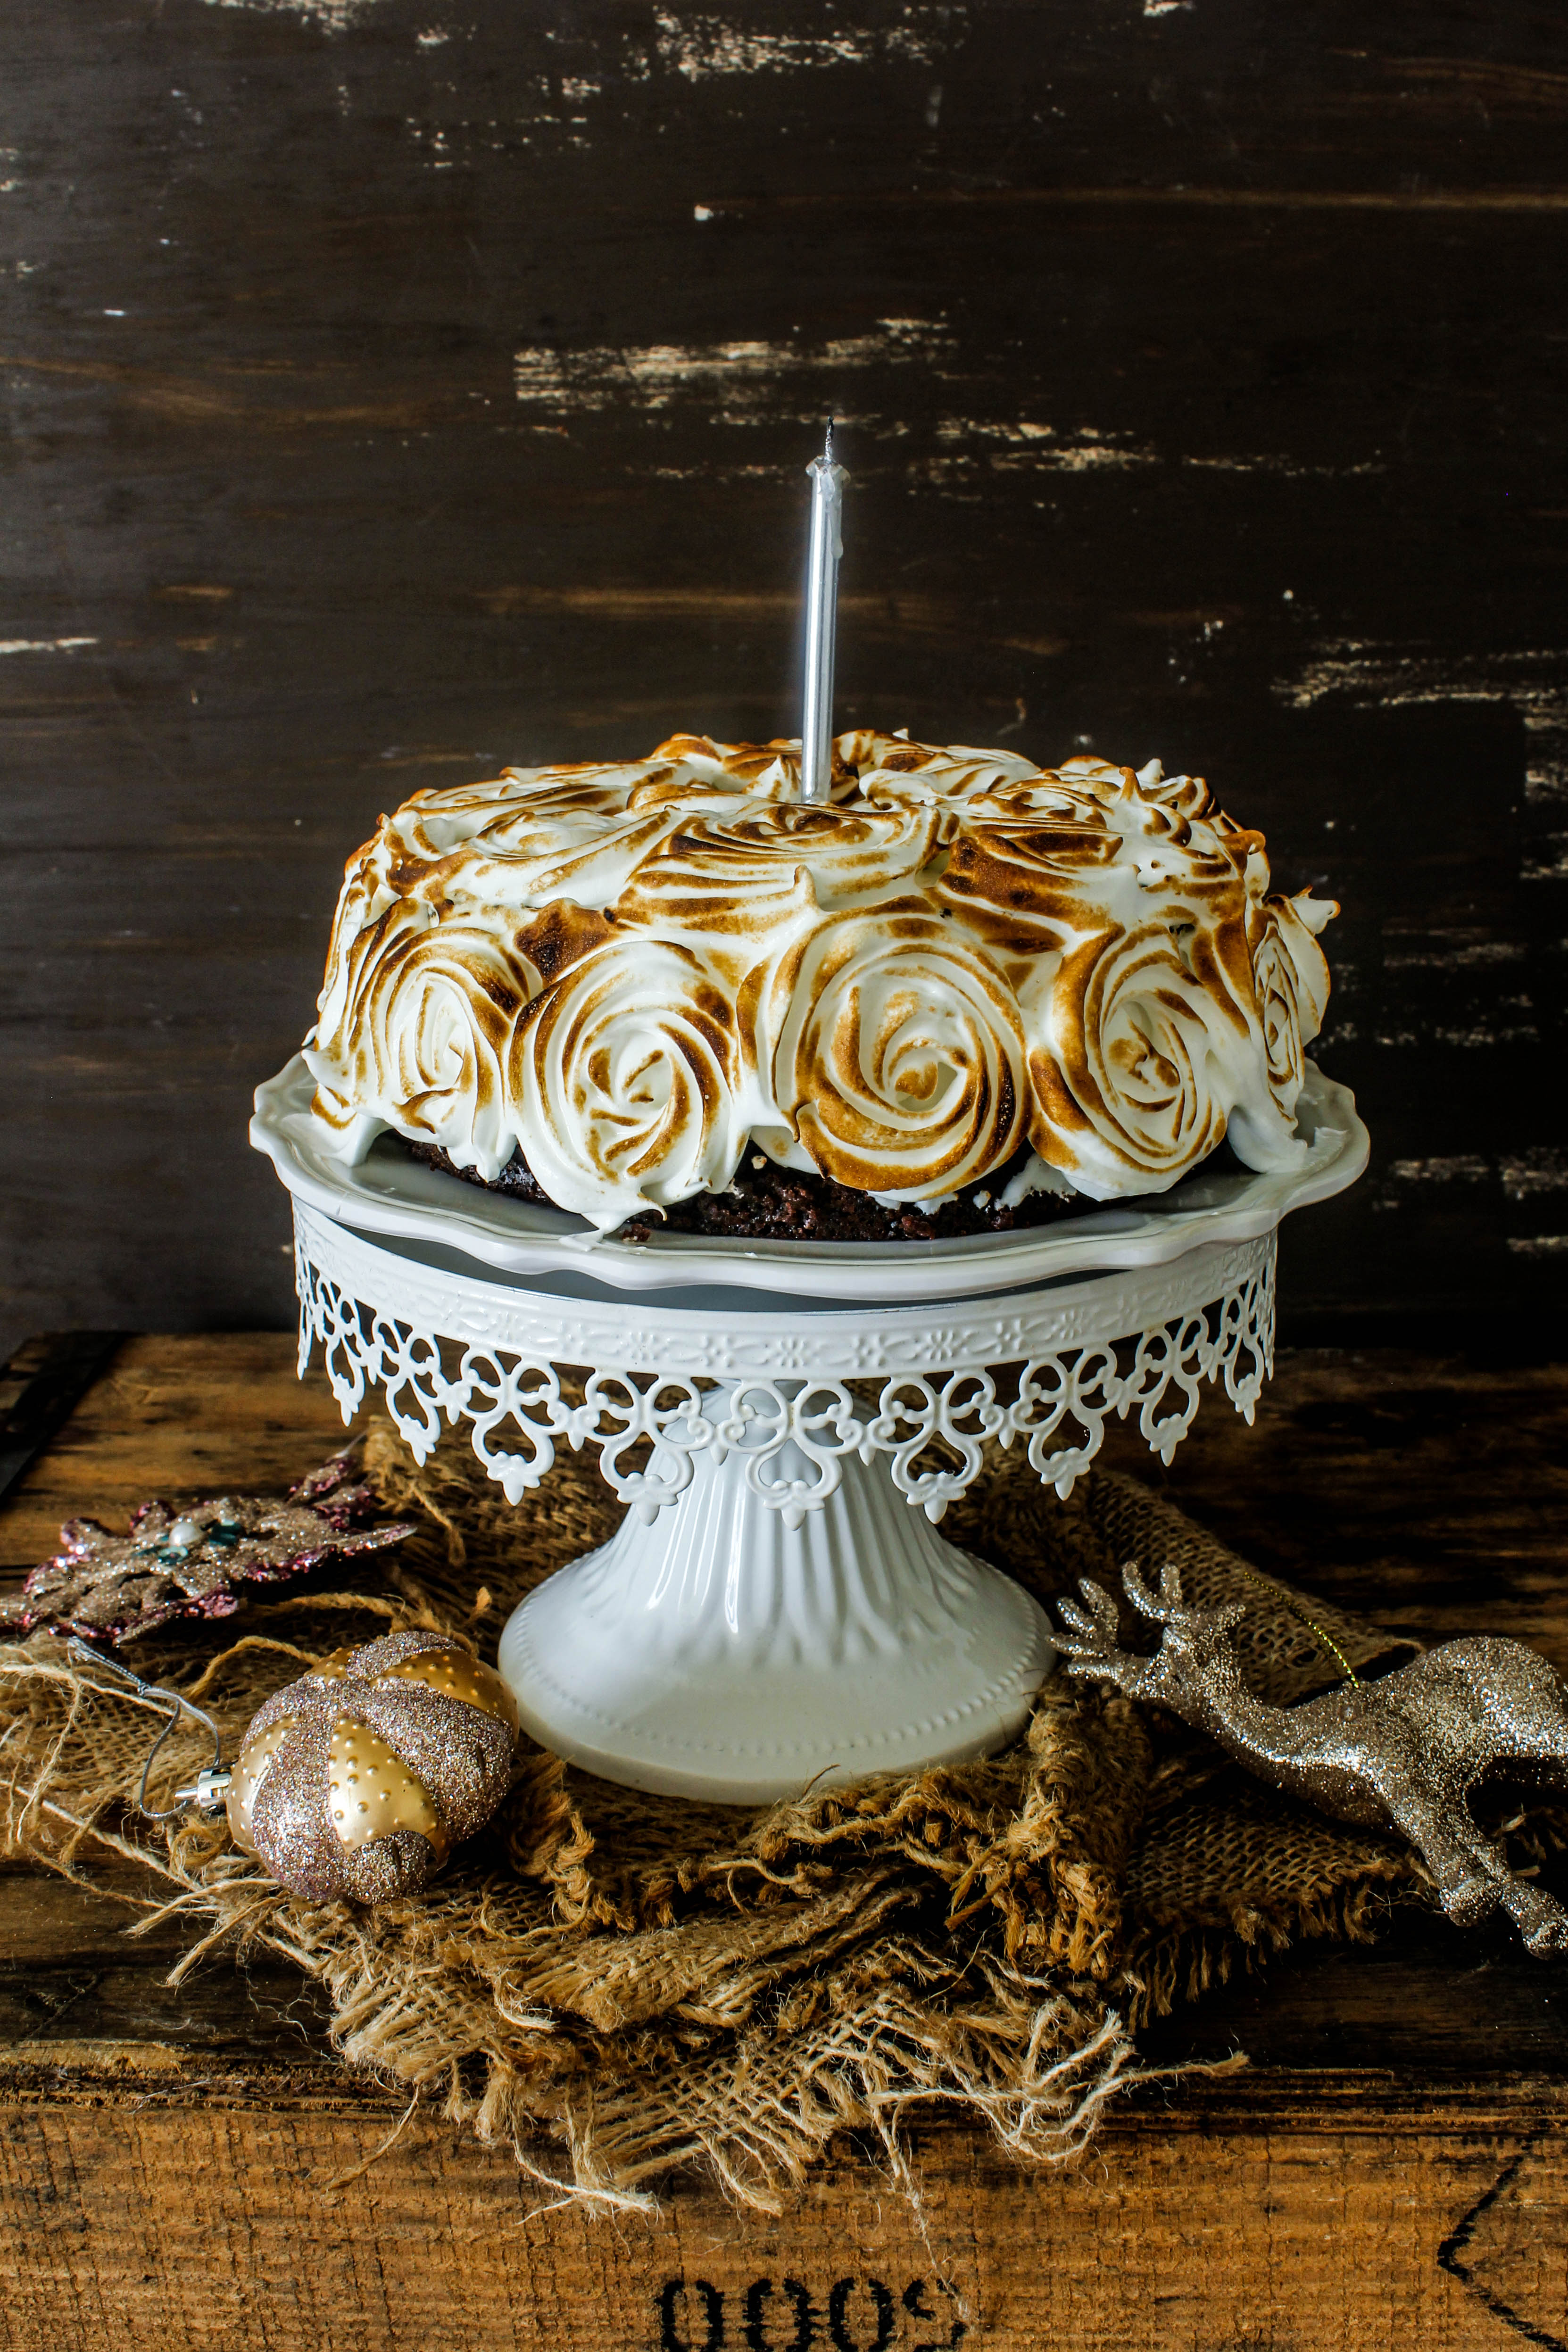
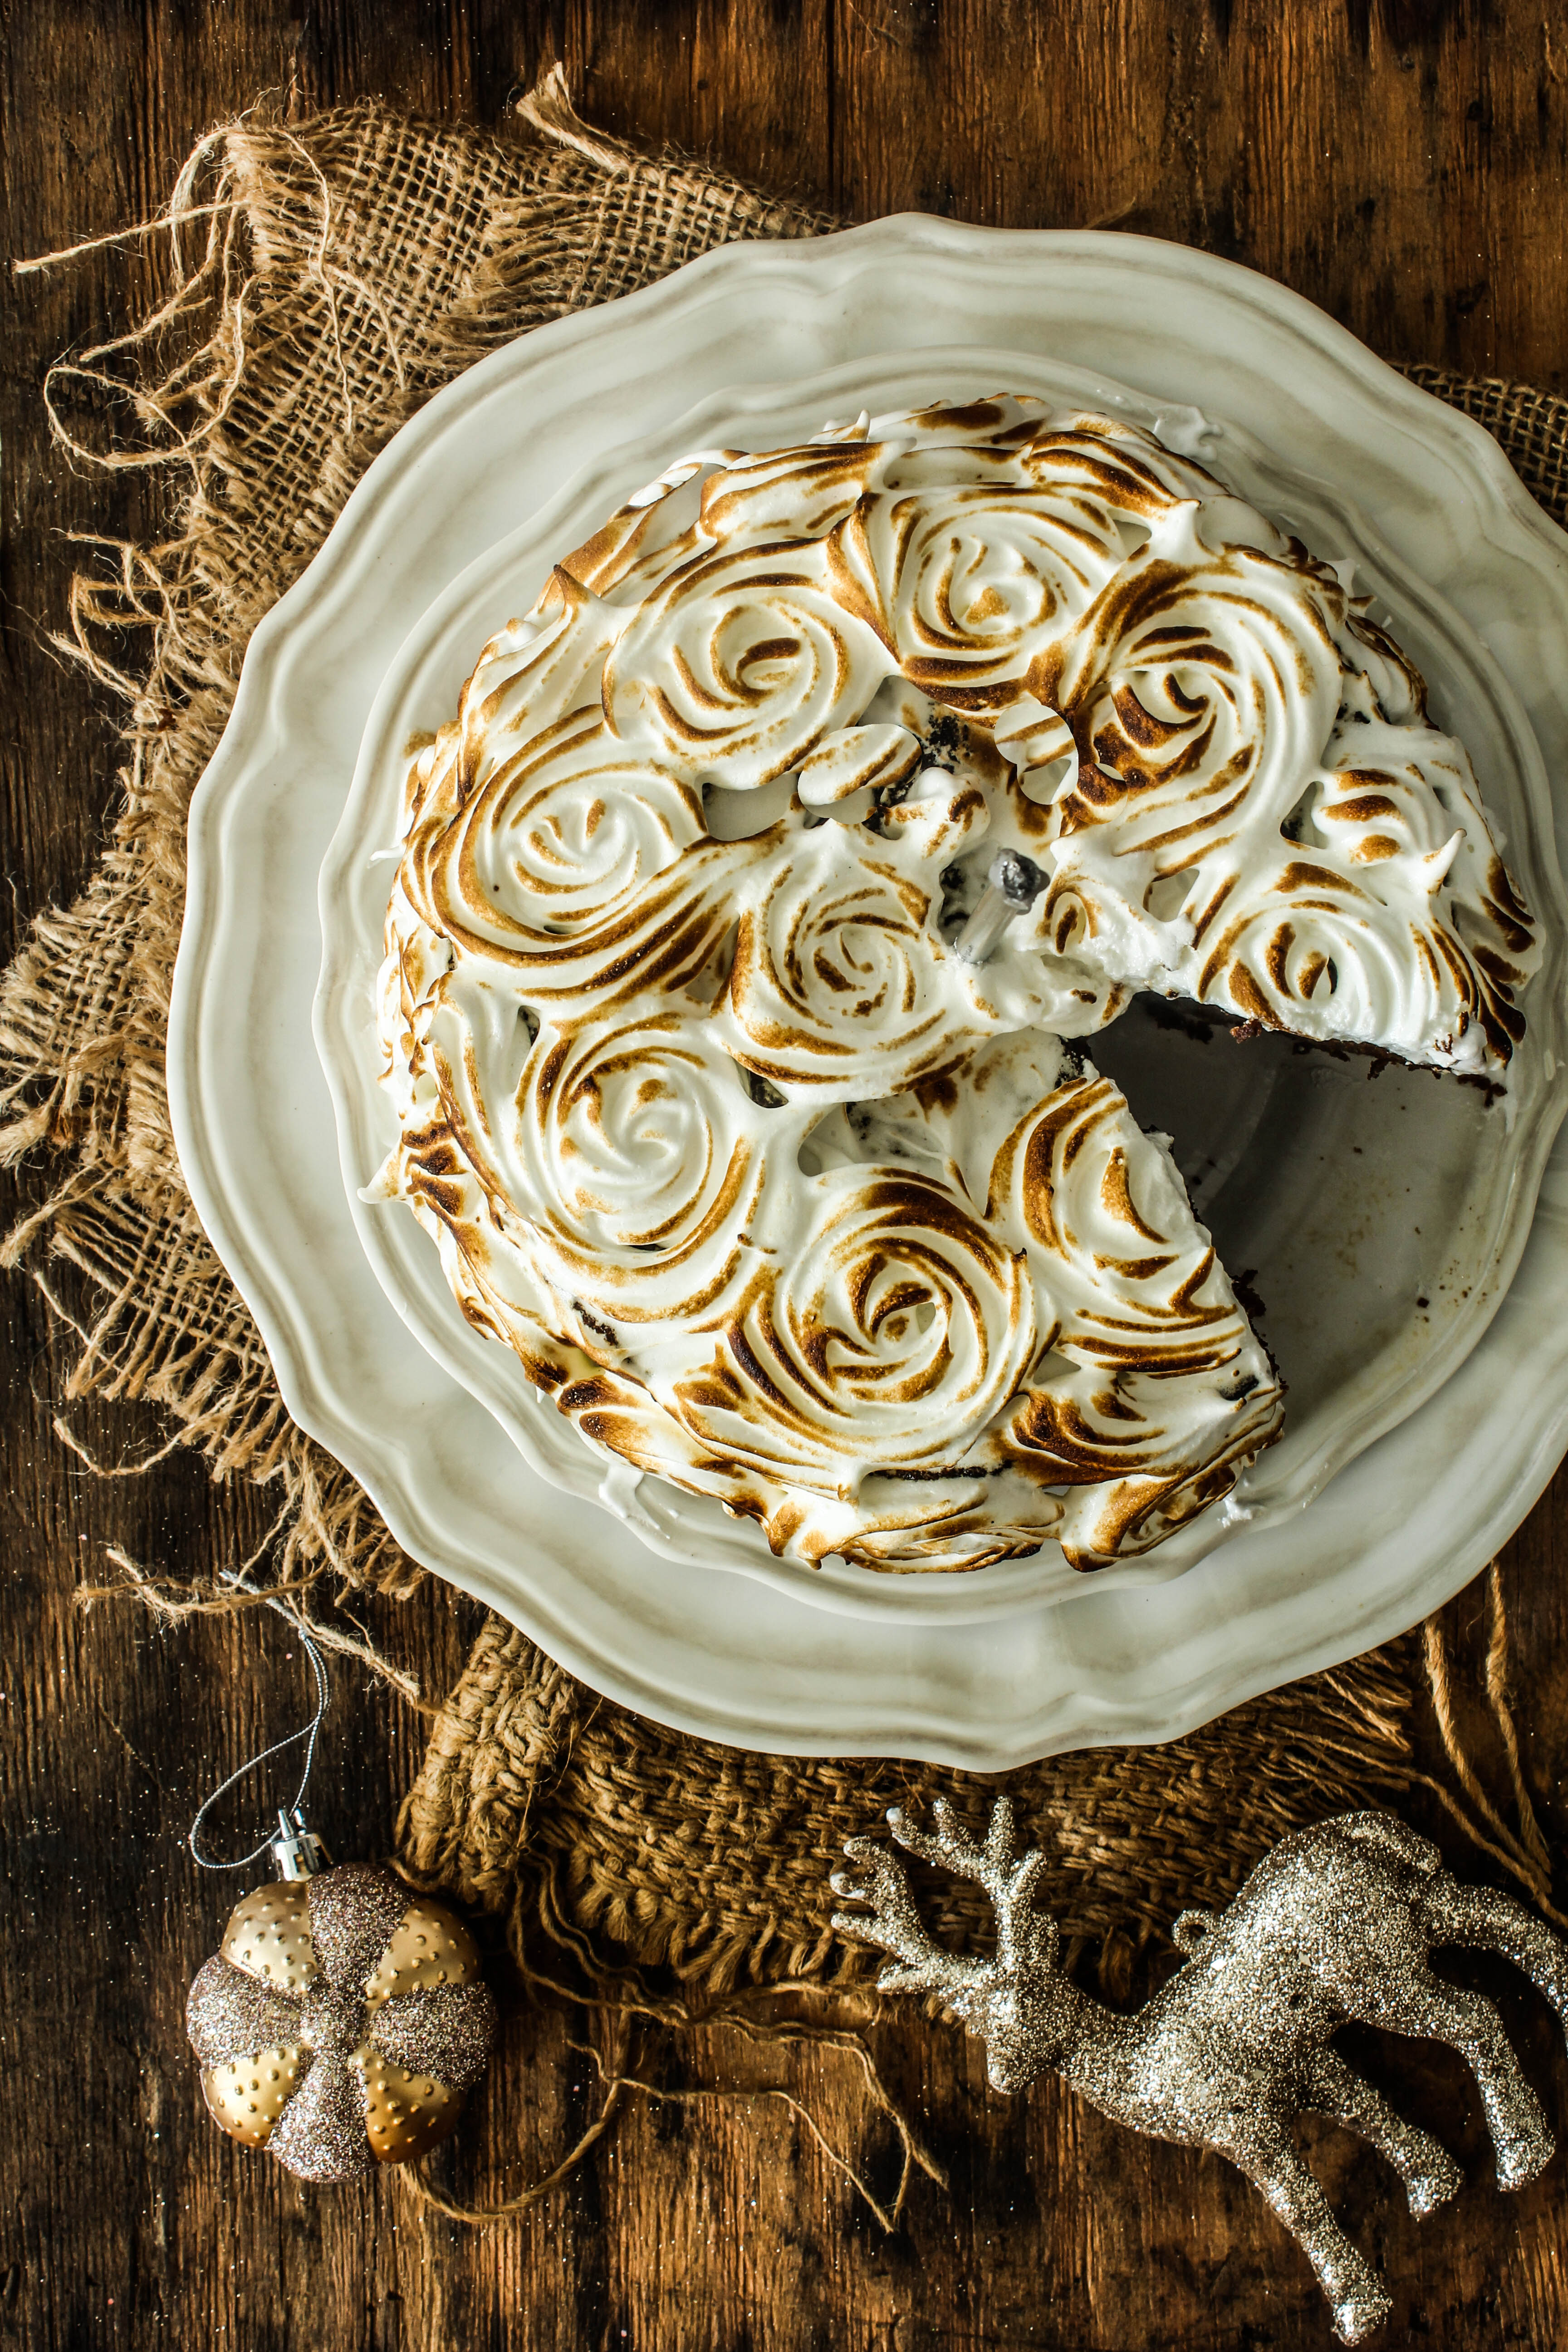
Ginger Cake with Meringue

3|12|2014

Has your kitchen started to smell like Christmas? Mine has been smelling so much of spices and vanilla and brown sugar….all of the warm and nice things that go hand in hand with this time of the year. In the southern hemisphere, we don’t have a white Christmas. We are well into summer by then.Our Australian markets are flooded with the best of summer produce that allows us to be as diverse as possible with our Christmas baking and cooking. Our Pavlovas are loaded with juicy  peaches and plums and raspberries and all the fresh fruits we can get our hands on. I have a few coming up for you but that does not stop me from dreaming up recipes with meringue, marzipan or nougat. My favourite bits of Christmas baking has to be the coming together of sugar and spice. Spices are a part of my heritage so popping open a container of powdered ginger or nutmeg delights me to the core. It fills up my senses with nostalgia.

IMG_4090

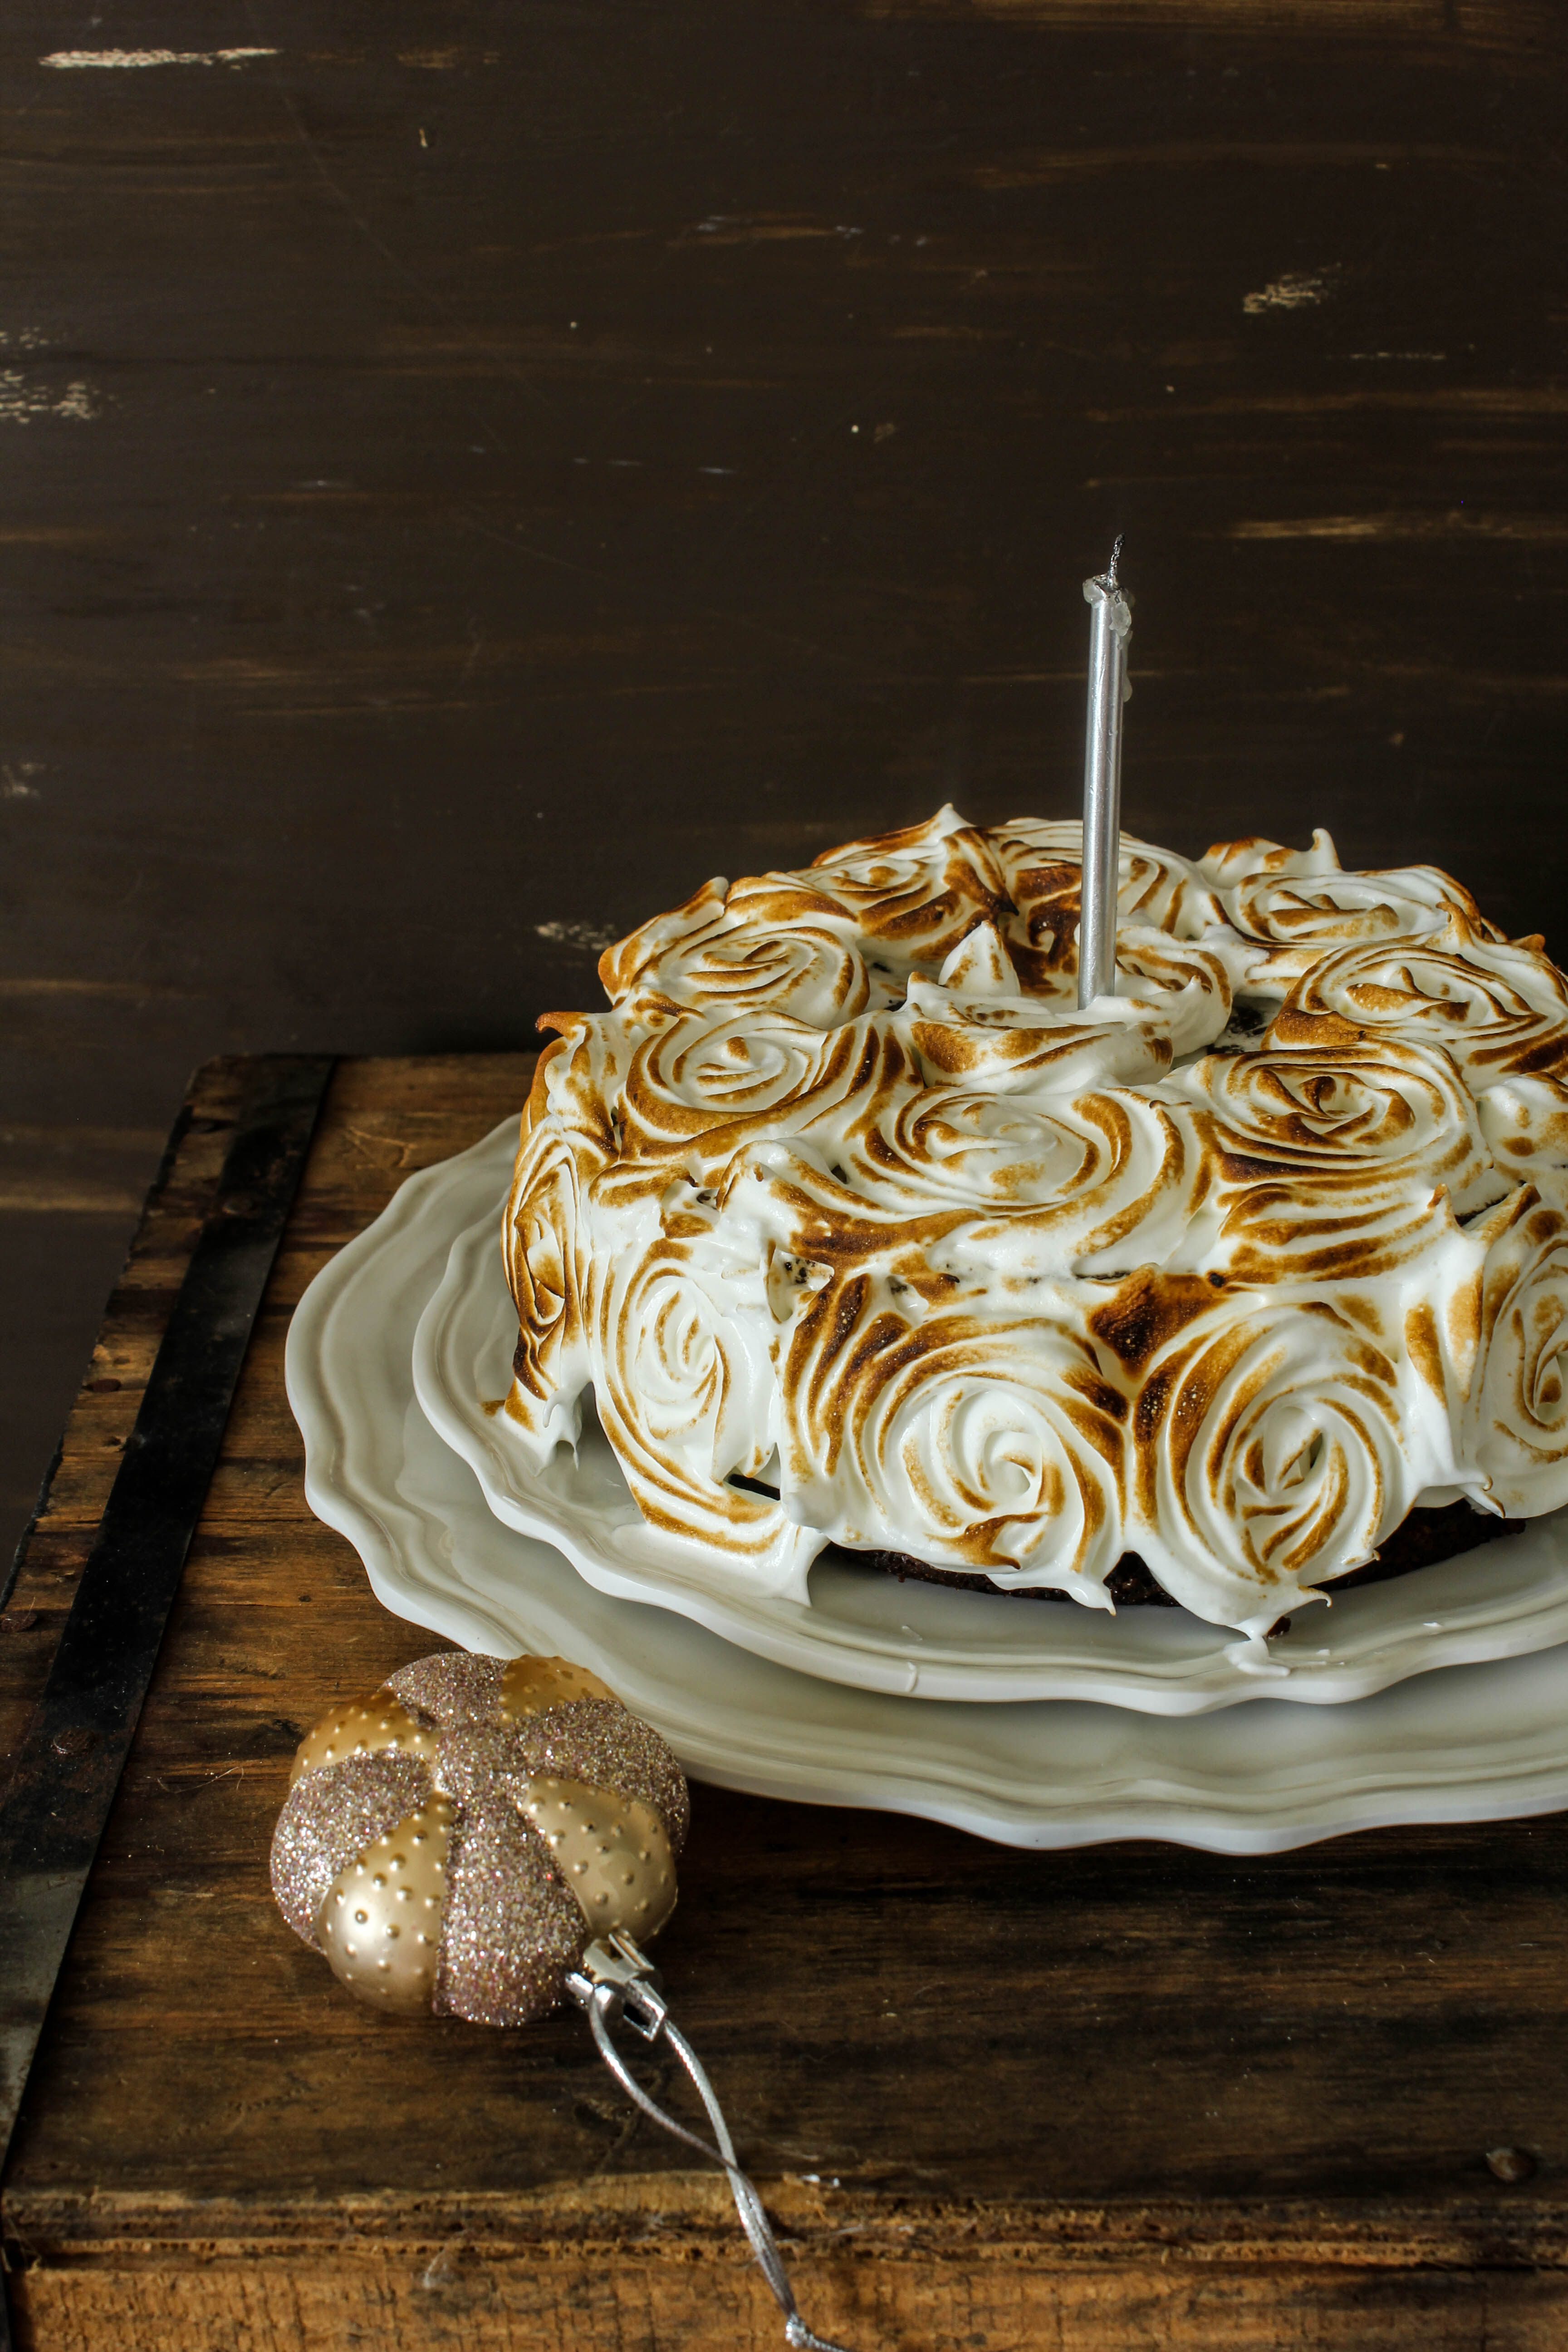
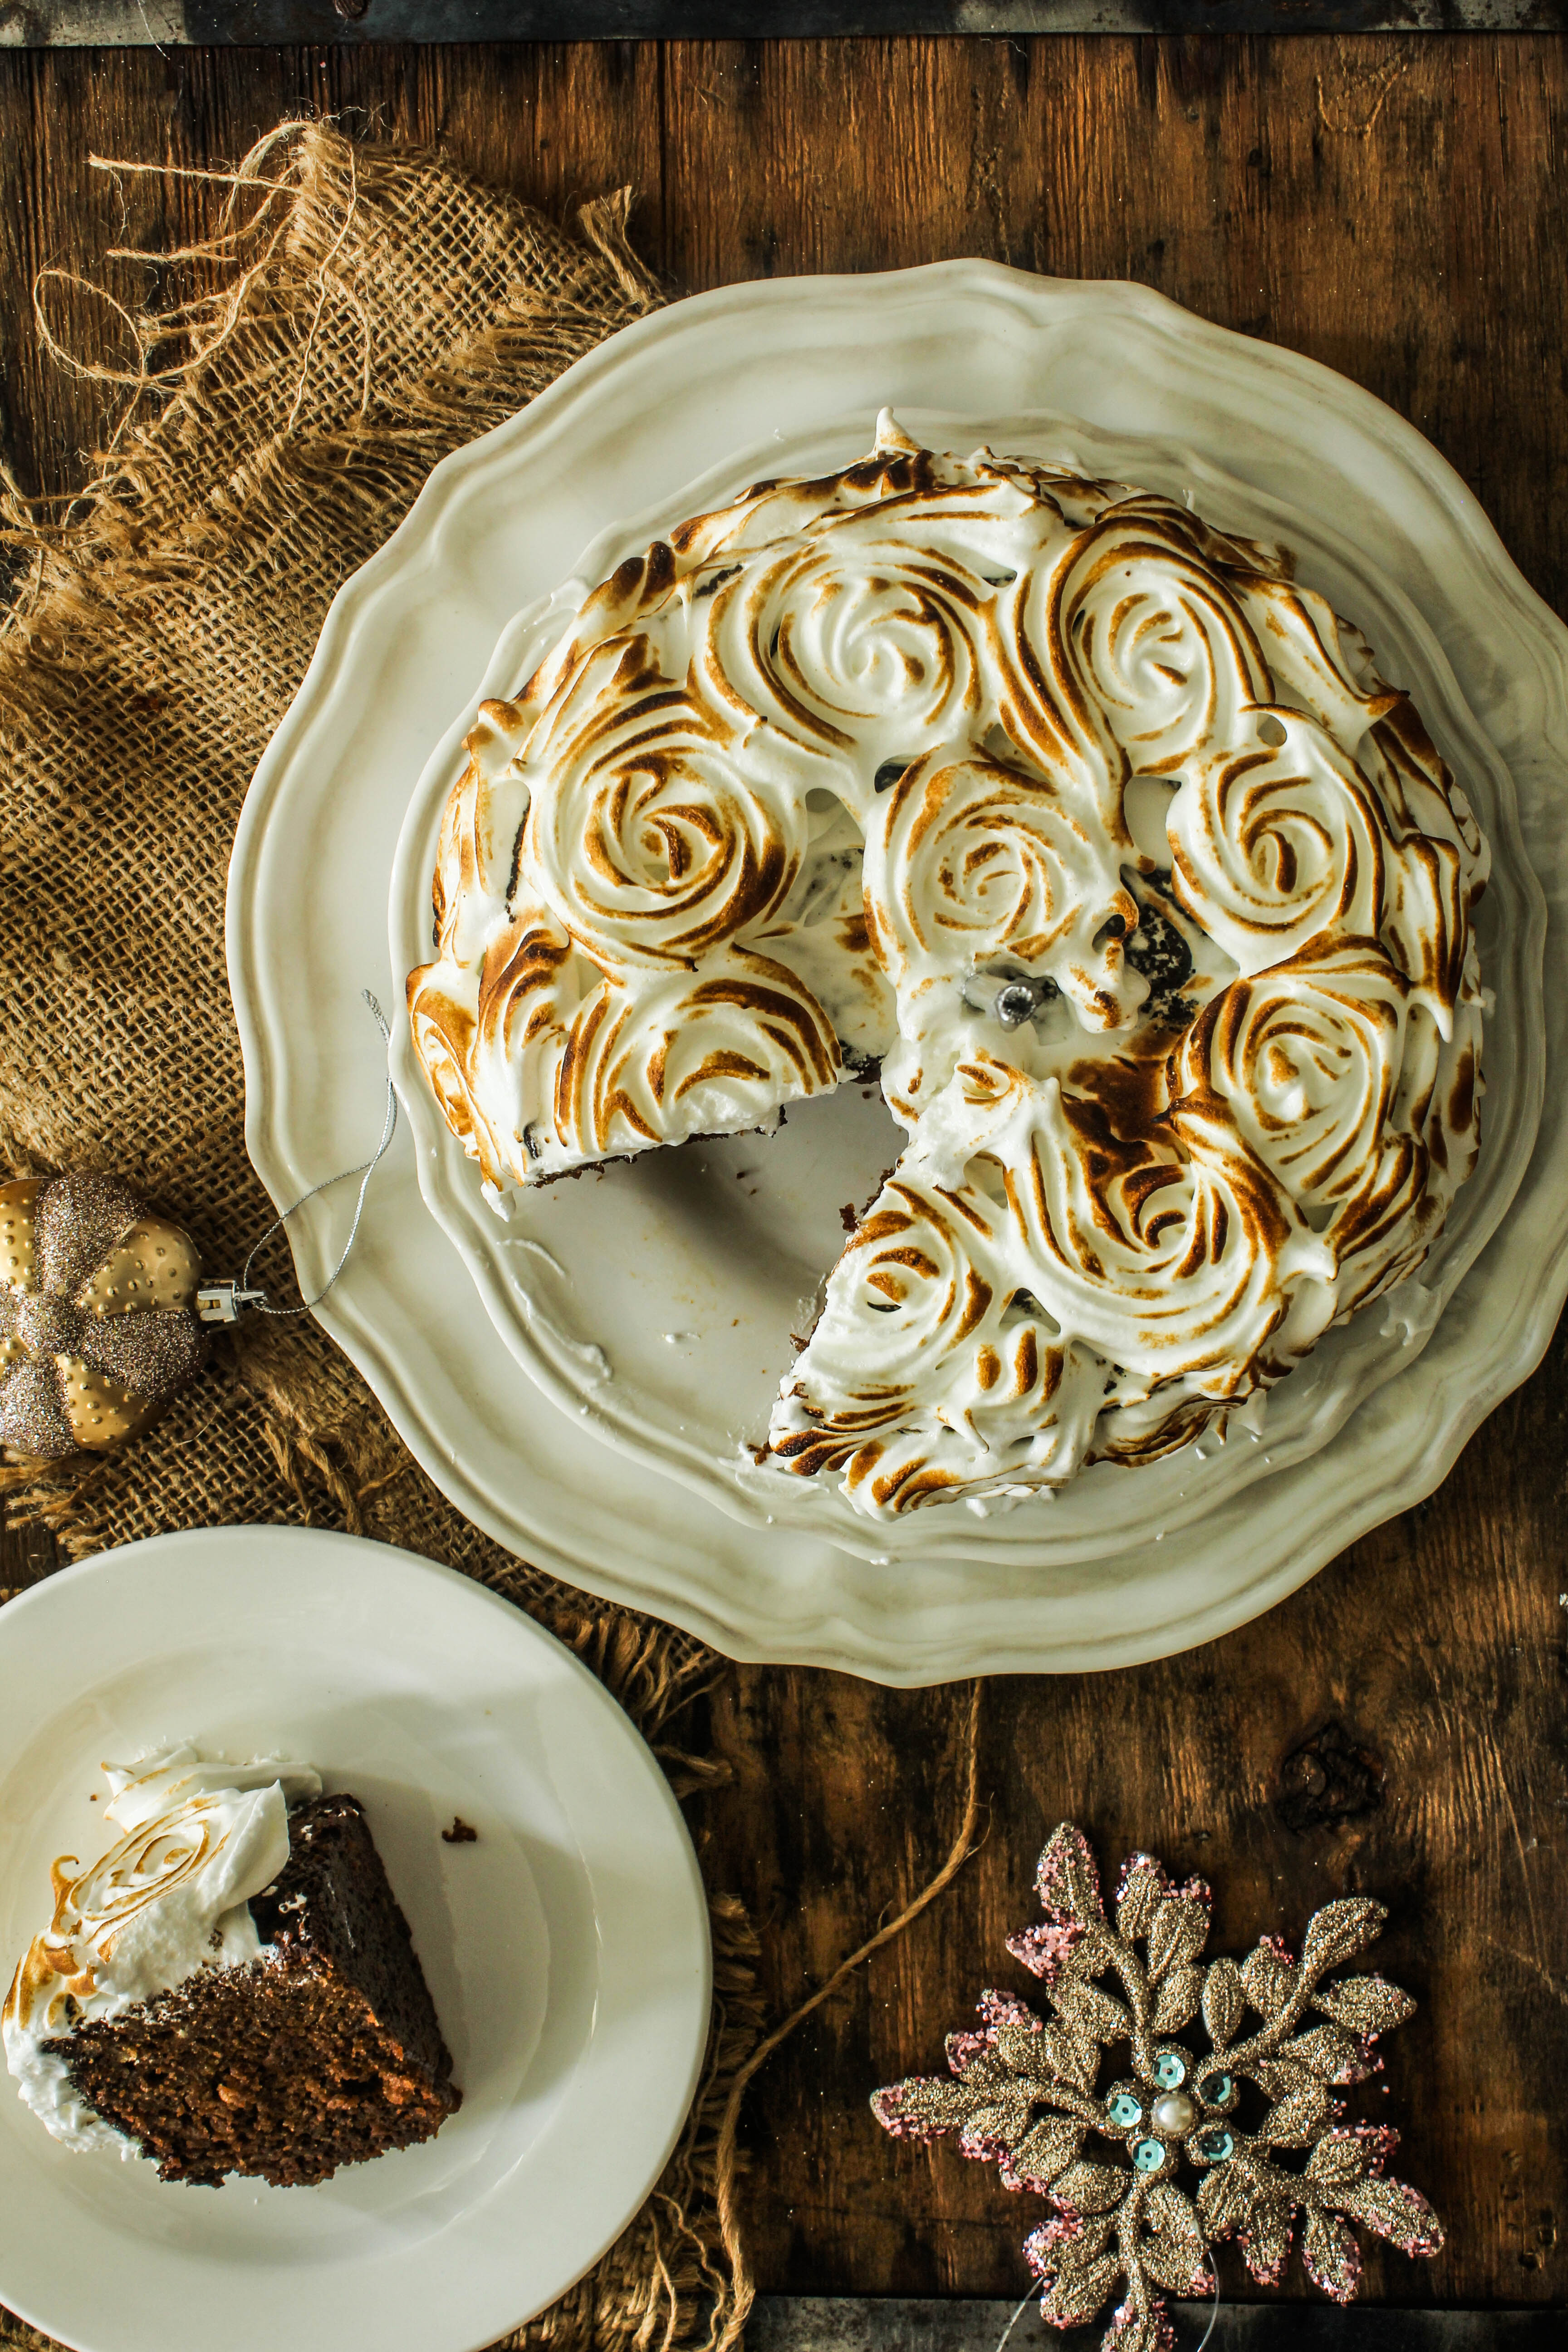
I can see gingerbread recipes all over the Internet. I love so many of them especially the ones dripping with caramel sauce, white chocolate or lemon icing. I did not notice any with meringue though meringue is so perfect for Christmas. I have an individual soft spot for ginger cakes and meringue so I wanted to pair them. I was happy with the outcome. A soft, gooey spiced ginger cake with crispy sweet torched meringue. I have added a touch of ginger to the meringue as well. The cake has powdered ginger and glace ginger which gives it a bold punch of flavour.

IMG_4119

IMG_4111-2

A few weeks back I had made a rose cake for my twins birthday. It was a cake meant for a special occasion so I did not feel like cutting it open and styling it before the birthday and hence I did not post it. The rose-like appearance appealed to many so I had made a mental note to make another one along the same lines for the blog. I was excited at the idea of piping meringue roses and torching them to get the striped white-brown look. Even if you are not comfortable with piping it, spreading it on the cake like a frosting and torching will also give you a beautiful effect. I say this with conviction because at the very same time I piped this, I was covering another beauty with meringue for a Baked Alaska. You will get to see that too.

IMG_4107

The cake itself is easy. One of the easiest I have ever made. No creaming butter or need to use a mixer. You can actually make it in a single bowl. In this case, a large saucepan maybe. The ingredient that gives the cake it’s rich brown colour and warm flavour is Treacle. If you like a good ginger cake or make a few during the year, Treacle is a great thing to have in your pantry. The intense caramel-like flavour is hard to replicate. I generally don’t replicate recipes…I try come up with my own. But this ginger cake from Good Food is a really good recipe. The only change I have made is add in a few spices. I have also provided the tentative measurements in cups for some of the ingredients that could help if you not always in the mood to weigh every little ingredient. This recipe will make a tall cake, enough to share with a a large group of people.

IMG_4124-2

Ginger Cake with Meringue (cake recipe adapted with variation from Good Food)
Serves 8-10

200g butter
200g dark muscovado sugar (about 11/3 cup)
200g black treacle (about 1 1/3 cup)
2 large eggs, beaten
300ml milk
350g plain flour (about 3 cups)
2 tsp ground ginger
1 tsp cinnamon
1/2 tsp nutmeg
2 tsp bicarbonate of soda
few chunks crystallised ginger/glace ginger, chopped

Meringue frosting
4 egg whites
1 cup castot sugar
cream of tartar, a pinch
powdered ginger, 1 tsp

Heat oven to 160 degreec C (140 for fan-forced). Grease and line a 19 cm round cake tin. Put the butter, sugar, treacle and syrup in a large pan and gently heat, stirring until the butter has melted and the mixture is smooth. Remove from the heat and cool for 10 mins.

Stir in the eggs and milk, then sift in the flour, ginger, cinnamon, nutmeg, crystallised ginger and bicarbonate of soda. Mix well, then pour into the prepared tin. Bake for 60-70 minutes or until the cake is firm to the touch and springs back when pressed in the centre. Cool in the tin for 15 mins, then turn out, peel off the paper and cool on a wire rack.

Once completely cooled, frost the cake with meringue frosting. Fill up a piping bag with a star nozzle and pipe roses all around the sides and top of the cake. Alternatively, spread the frosting all over the cake. Using a blowtorch, toast the meringue.

To make the meringue, place the eggwhites, sugar and cream of tartar in a heatproof bowl that is placed over a saucepan of simmering water. Whisk continuously till the sugar dissolves (about 2-3 minutes). Remove from heat and whip up the mixture with a electric or hand mixer to stiff peaks. Fold in the powdered ginger.


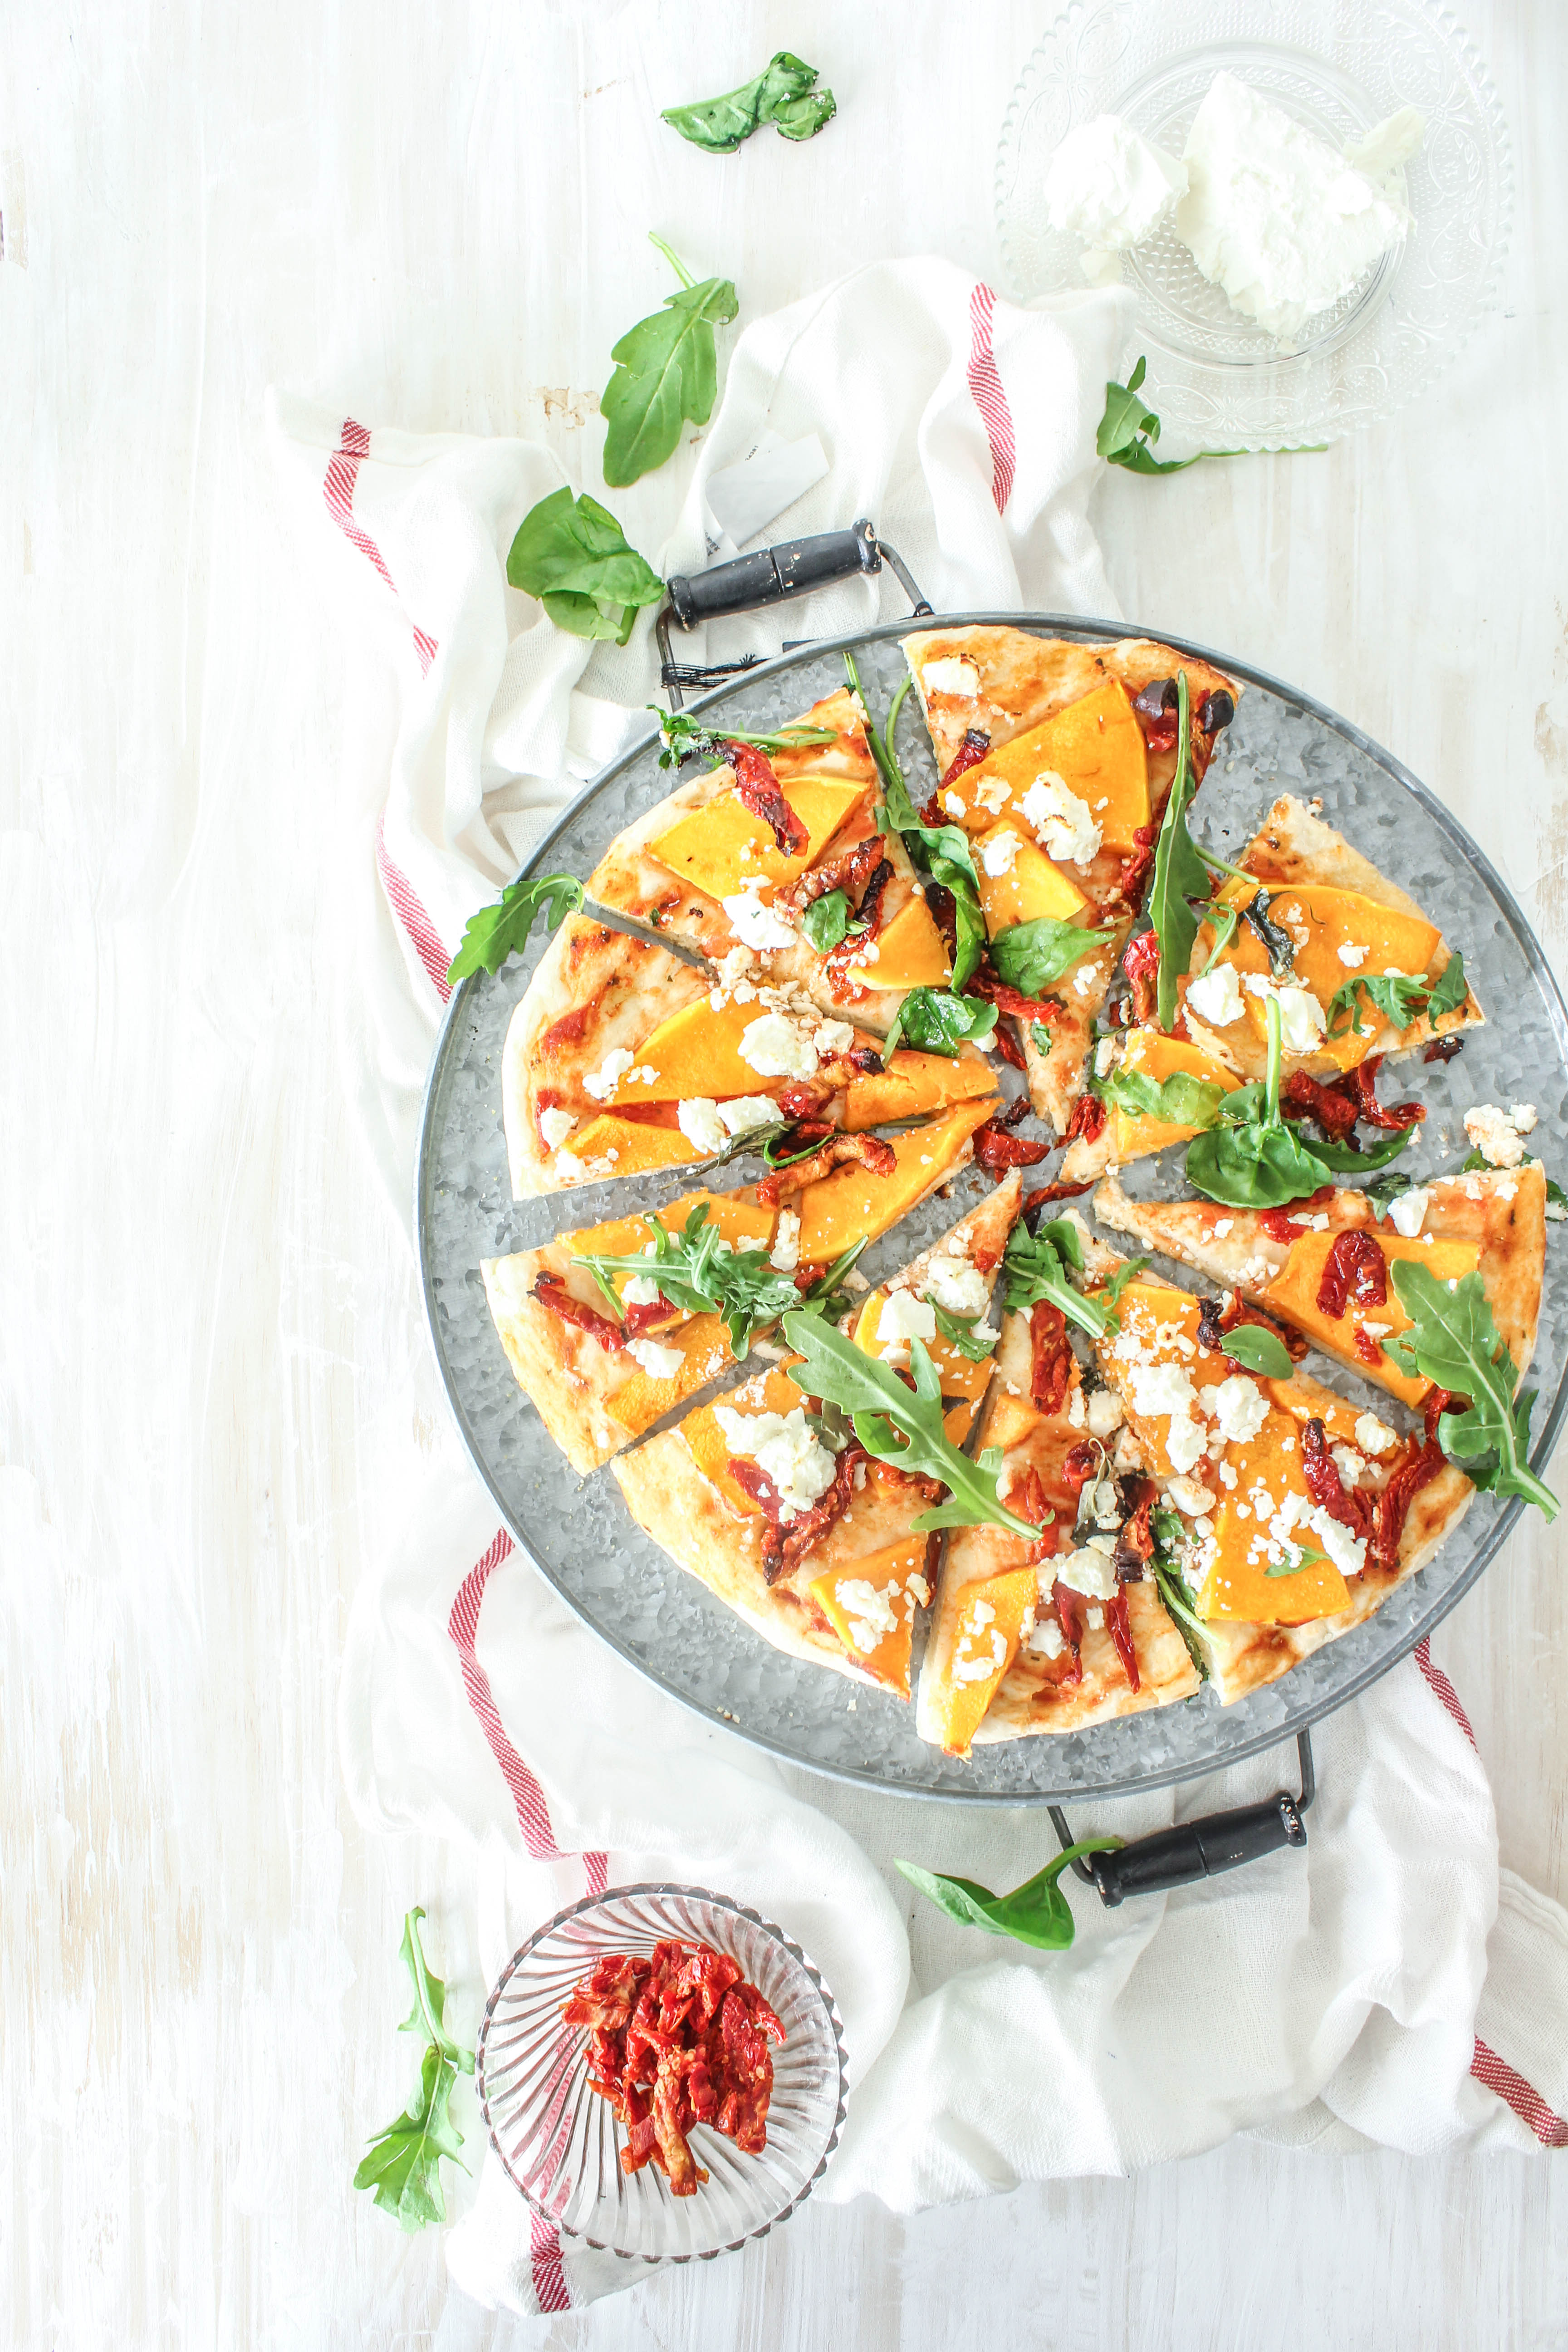
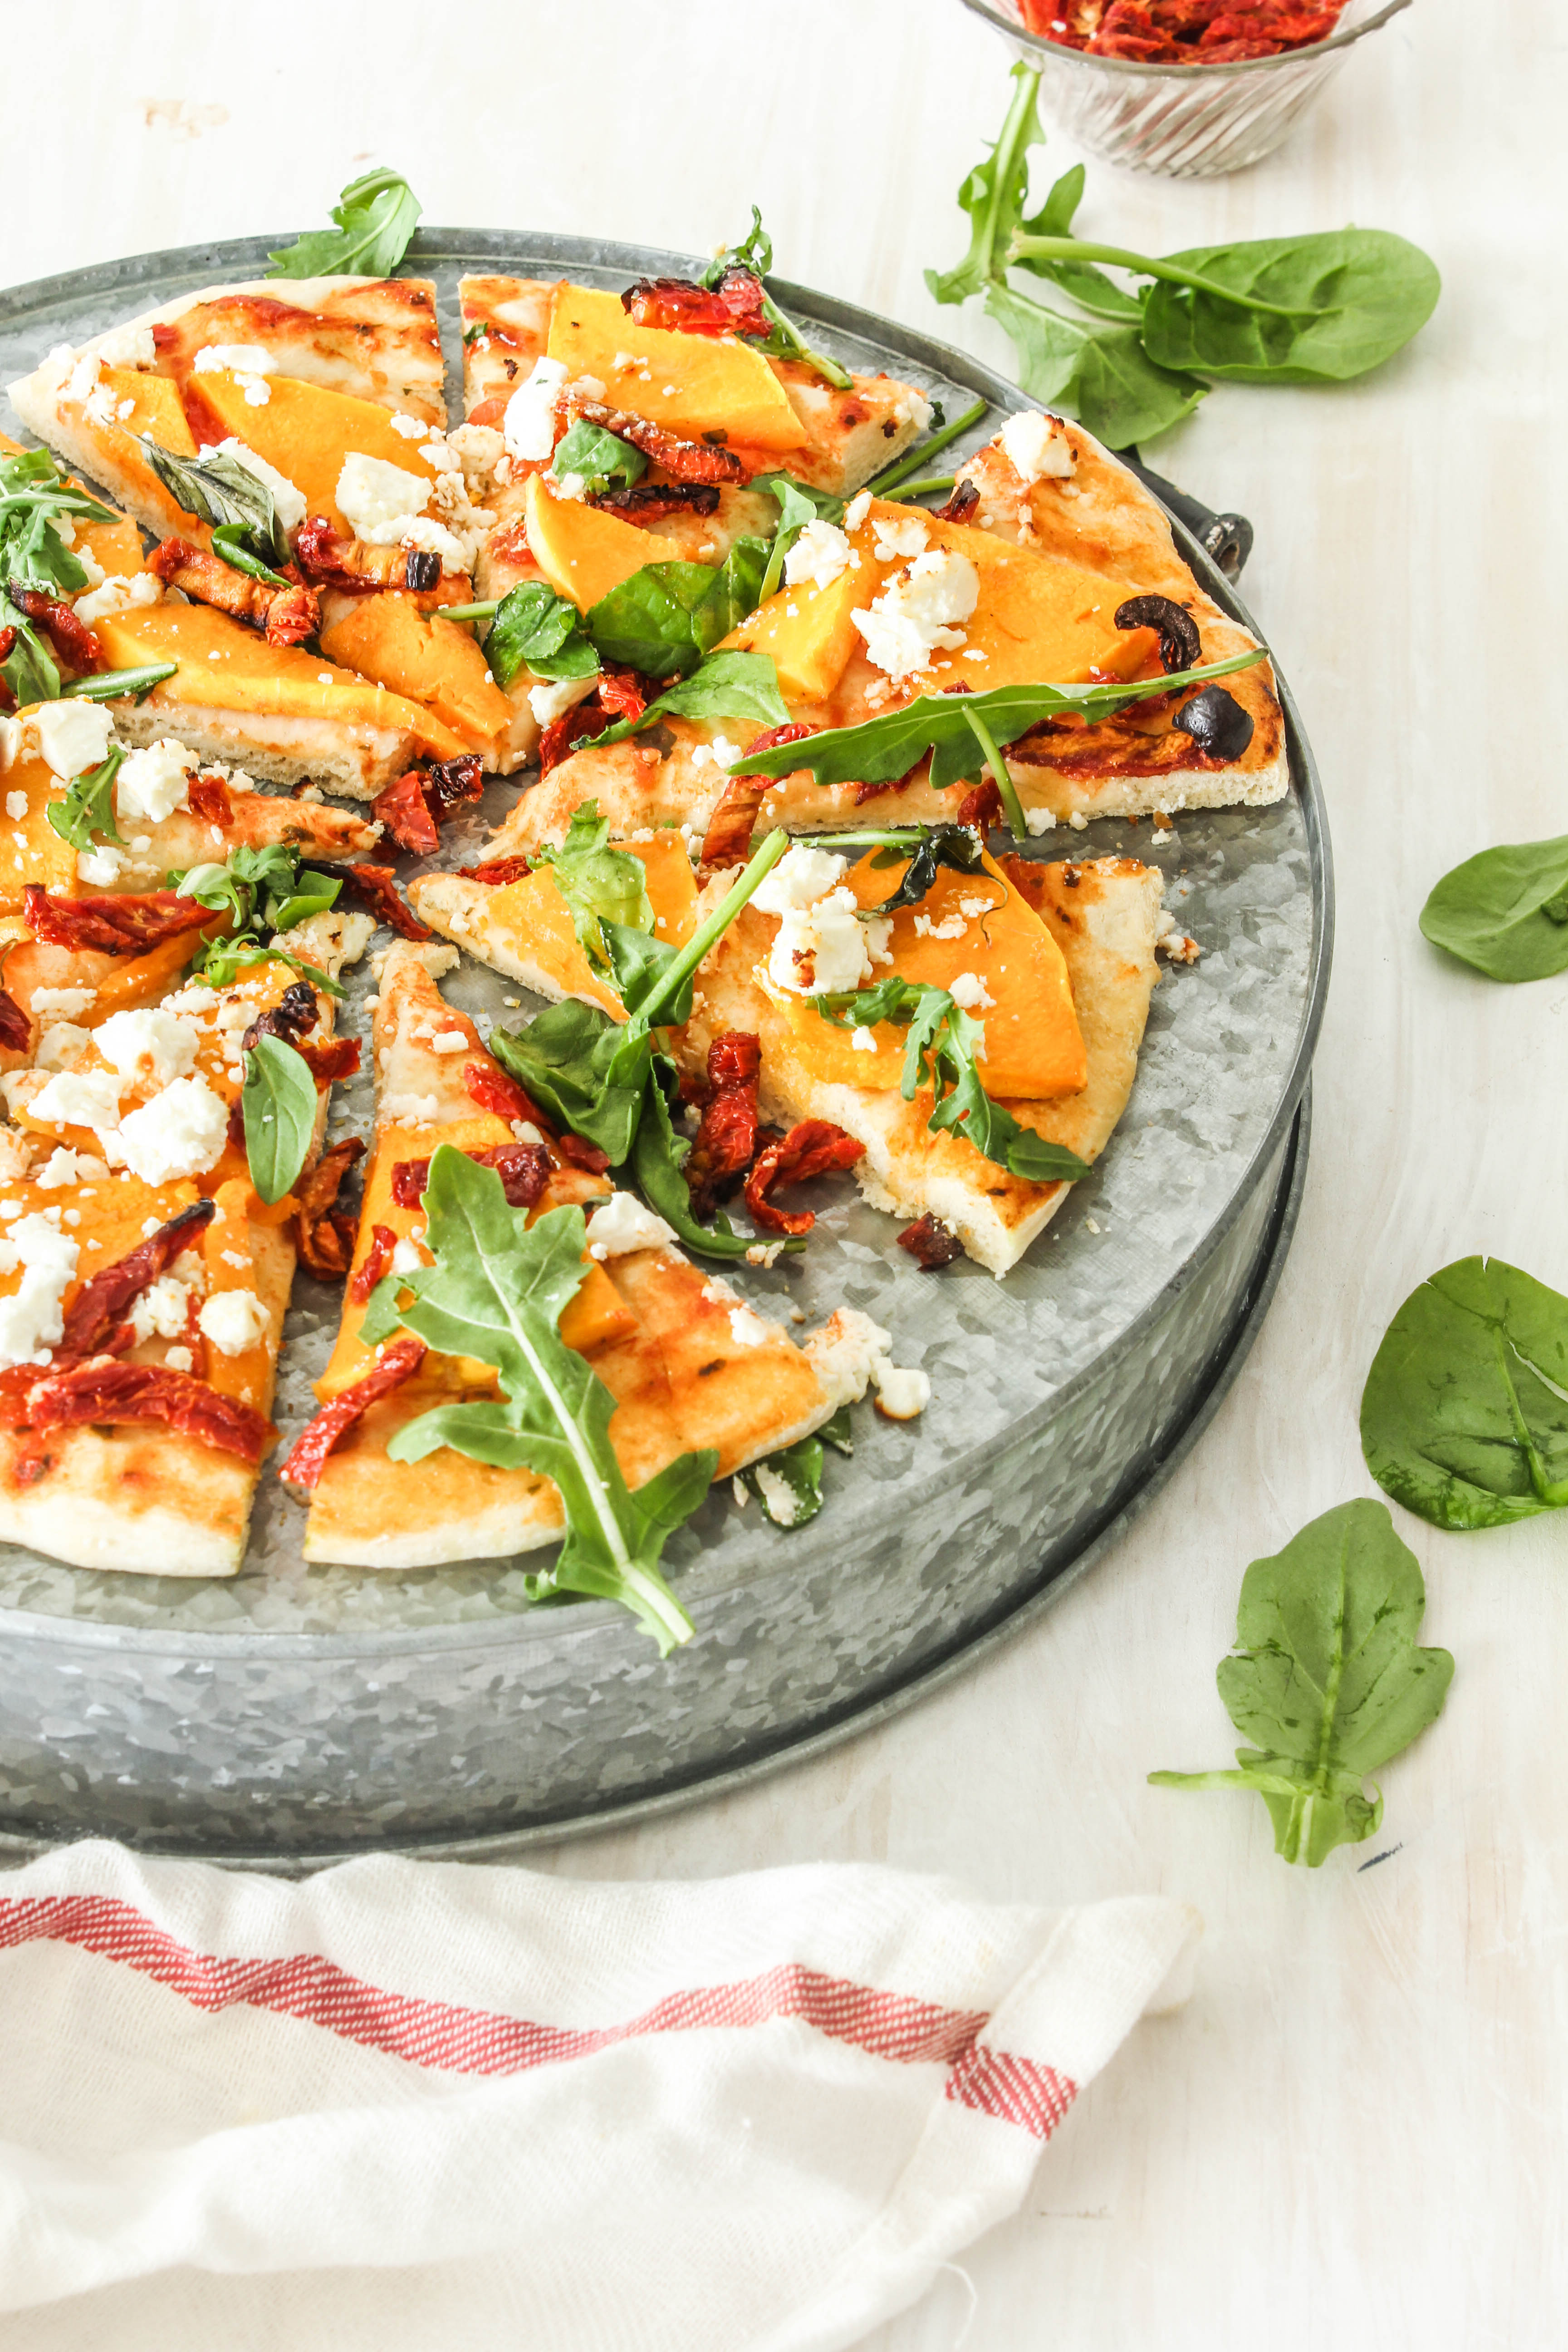
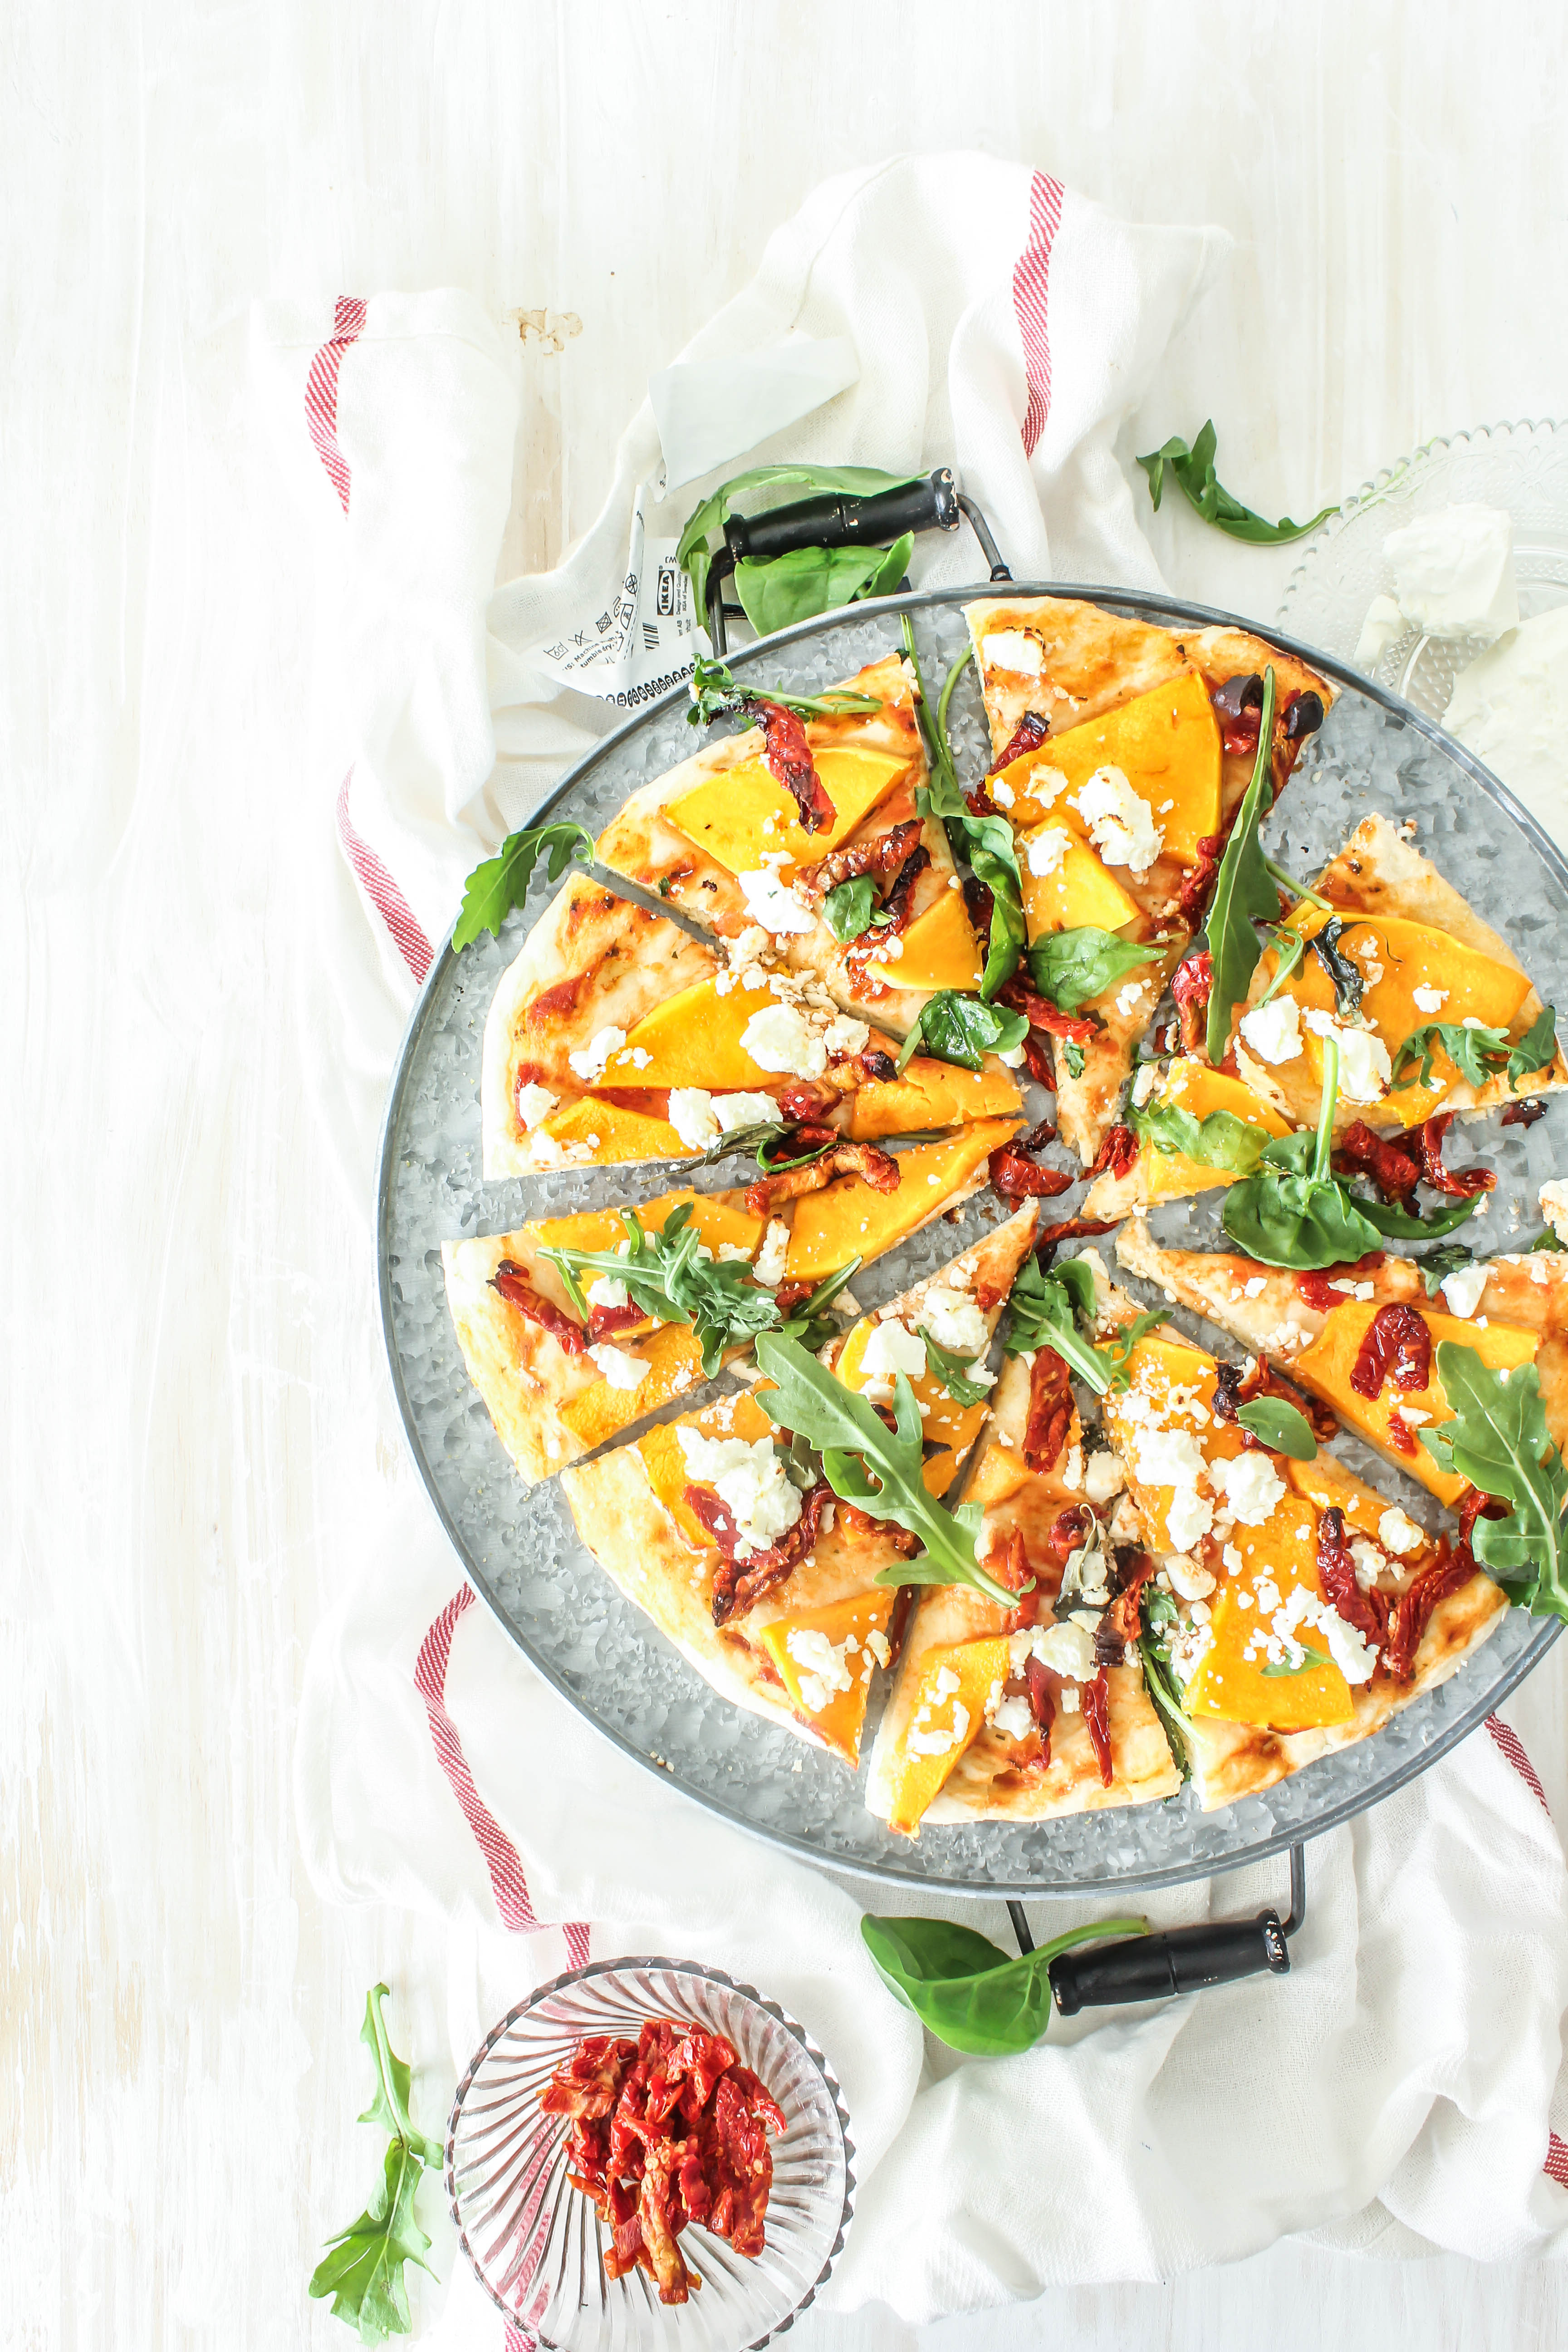
Pumpkin and Sun-Dried Tomato Pizza with Basil and Feta

1|12|2014

Love  happens in the most unlikeliest of places. It happened to me in Melbourne. On a bus. We had stopped by at a quaint little town for tea on our way to Philip Island and I was so engrossed in taking pictures that I did not realize that our 30 minute tea break was getting over and it was time to get back up on the bus. I looked around and noticed there weren’t that many options for take-away. One of the cafes nearby, had a few sweet things on offer but no-one was game except me. I urged my husband to get hold of some sandwiches while I got the kids seated on the bus. Hubby came back at the nick of time holding two small and two big brown paper bags. I did not have breakfast that morning so I was ready to eat anything. He handed over mini pies to the kids and I thought a large one was coming for me.


IMG_4005-2
‘Pumpkin Foccacia’ he said handing over one of them. I was so sure that I had heard him wrong. Our tour guide had taken over the speakers on the bus and was describing the next destination. If you are with me for a while, you know I am not a fan of pumpkin. I may have started to eat it and enjoy it it small quantities but not in my sandwiches and wraps. I looked inside the bag and there it was. ‘No way’ I exclaimed.
‘They said it is the most popular item on their menu’ he replied. I wasn’t happy but I was hungry so I bit into it. I could taste basil pesto and feta, two of my favourite things. I started to enjoy it. The pumpkin was mild and a perfect contrast to the crunchy foccacia, salty feta and aromatic pesto. I loved the flavour combination. It was like a burst of freshness in the mouth. Something so unexpected for me. It also looked amazing with the bright orange, green and white.

IMG_3998

When I got home, I wanted to give the flavours another try. Instead of a foccacia I used the dough to make a pizza. Instead of pesto, I added fresh basil leaves and sun-dried tomatoes. I thought I managed to create a similar flavour effect, yet I would recommend using Pesto for a bolder taste and the ideal balance. If you are making this recipe, go with a strong herb pesto like basil or mint. You may use home-made or store bought. Dollop spoonfuls over the pizza base before you layer the pumpkin. The pumpkin is more like the filler component here and a great base to pair the rest of the ingredients. This would make a nice meat-free alternative for vegetarians as well.

IMG_4003-2

Pumpkin and Sun-Dried Tomato Pizza with Basil and Feta
Serves 4

Pizza Dough (makes two 12 inch pizzas)
3 cups Plain Flour
2 tsp/7g/1 sachet dried yeast
1/2 tsp castor sugar
1/2 tsp salt
1 1/4 cups warm water
1 tbsp olive oil
Olive oil, for brushing
Semolina or Polenta, to dust

Pizza Topping
1/2 cup pizza/pasta sauce
150 g butternut pumpkin, peeled, de-seeded and thinly sliced
1/2 cup sun-dried tomatoes
1/2 cup feta, crumbled
salt and pepper, for seasoning
Extra virgin olive oil, for drizzling
a handful of fresh basil leaves
a handful of rocket & baby spinach leaves, for garnish

Make the dough: Combine the dry ingredients in a large bowl and make a well in the centre. Add the warm water and olive oil. Mix together and use your hands to bring it to a soft dough. Knead it on a floured surface to make it smooth and pliable. Return it to the mixing bowl that has been brushed with oil. Add the dough and turn to coat.
Cover with a damp tea towel. Set aside in a warm place for 30 minutes or until dough doubles in size. Punch down dough with your fist. Remove the dough from the bowl and knead it gently for a minute. Halve the dough (for one 12 inch pizza) and roll it out to the desired portion and thickness.

Make the pizza :Preheat the oven to 220 degrees C. Dust pizza tray with semolina or polenta. Place the rolled out dough onto the prepared tray. Spread a thick layer of pizza/pasta sauce around the base of the pizza. Top with thinly sliced pumpkin, sun-dried tomatoes and feta. Season with salt and pepper and drizzle with olive oil. Bake for 10 minutes or until base is crisp. Remove the pizza from the oven, top with leafy green (basil, rocket and spinach). Serve with an extra drizzle of extra virgin olive oil and cracked pepper.


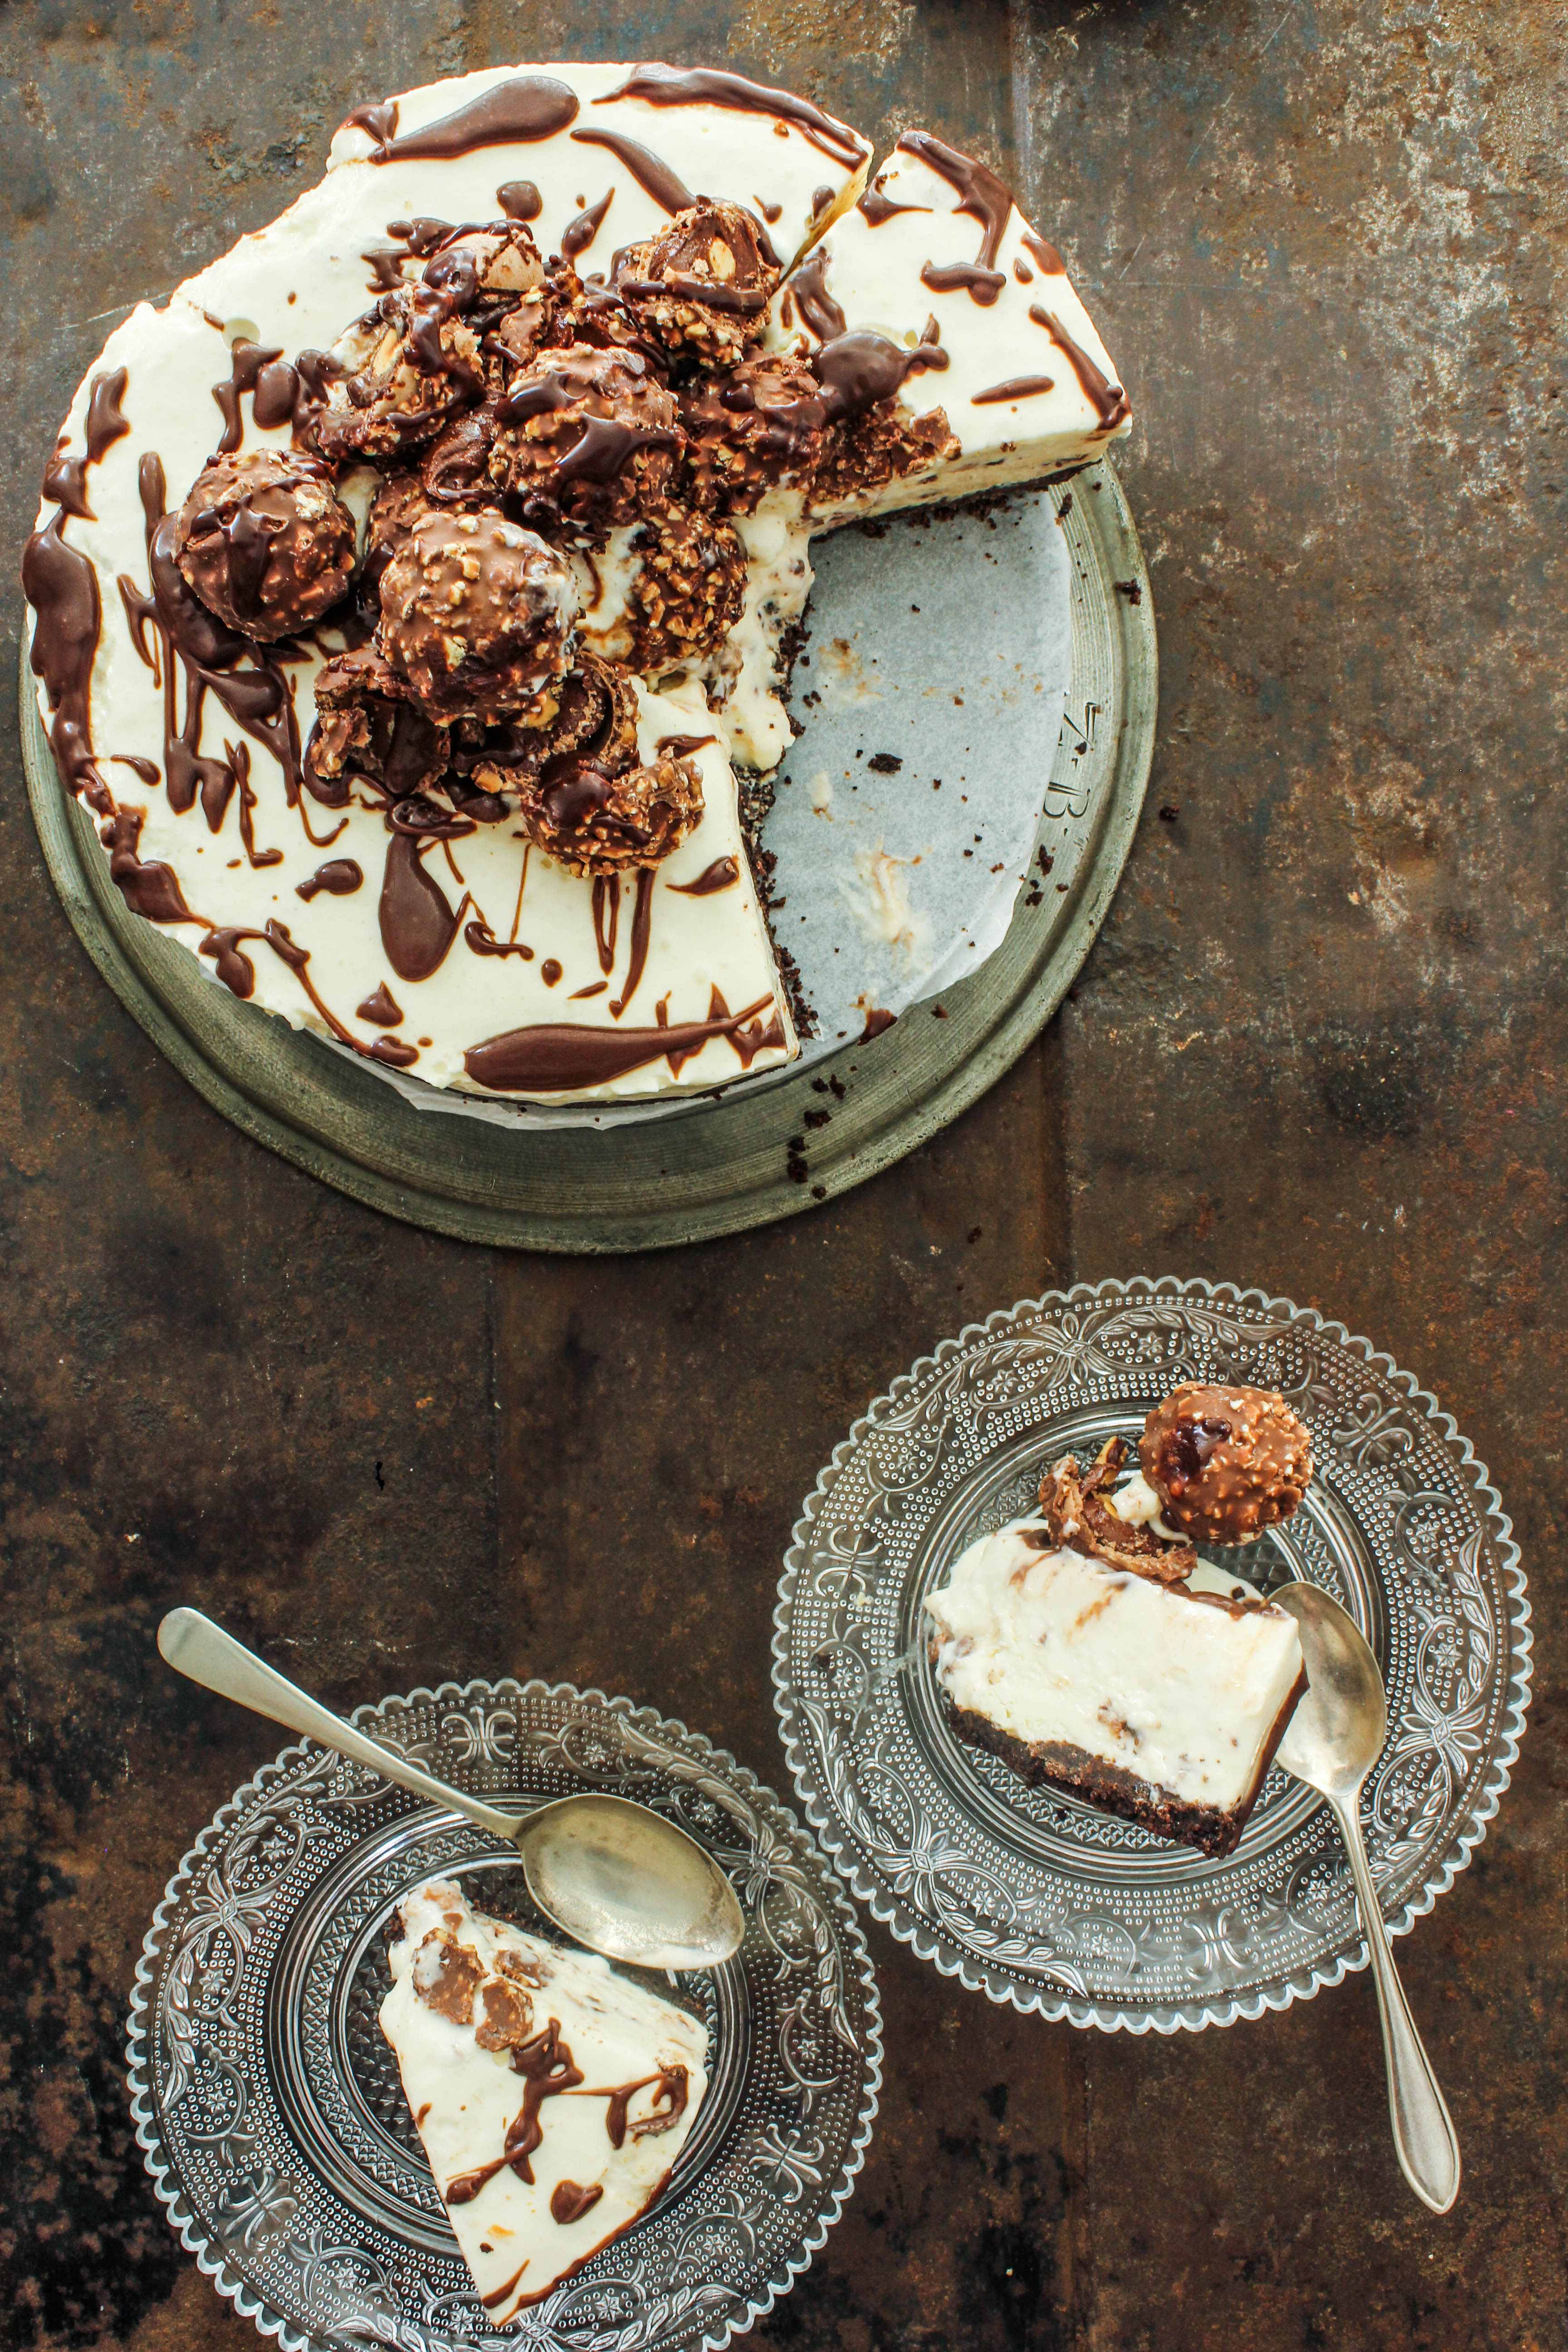
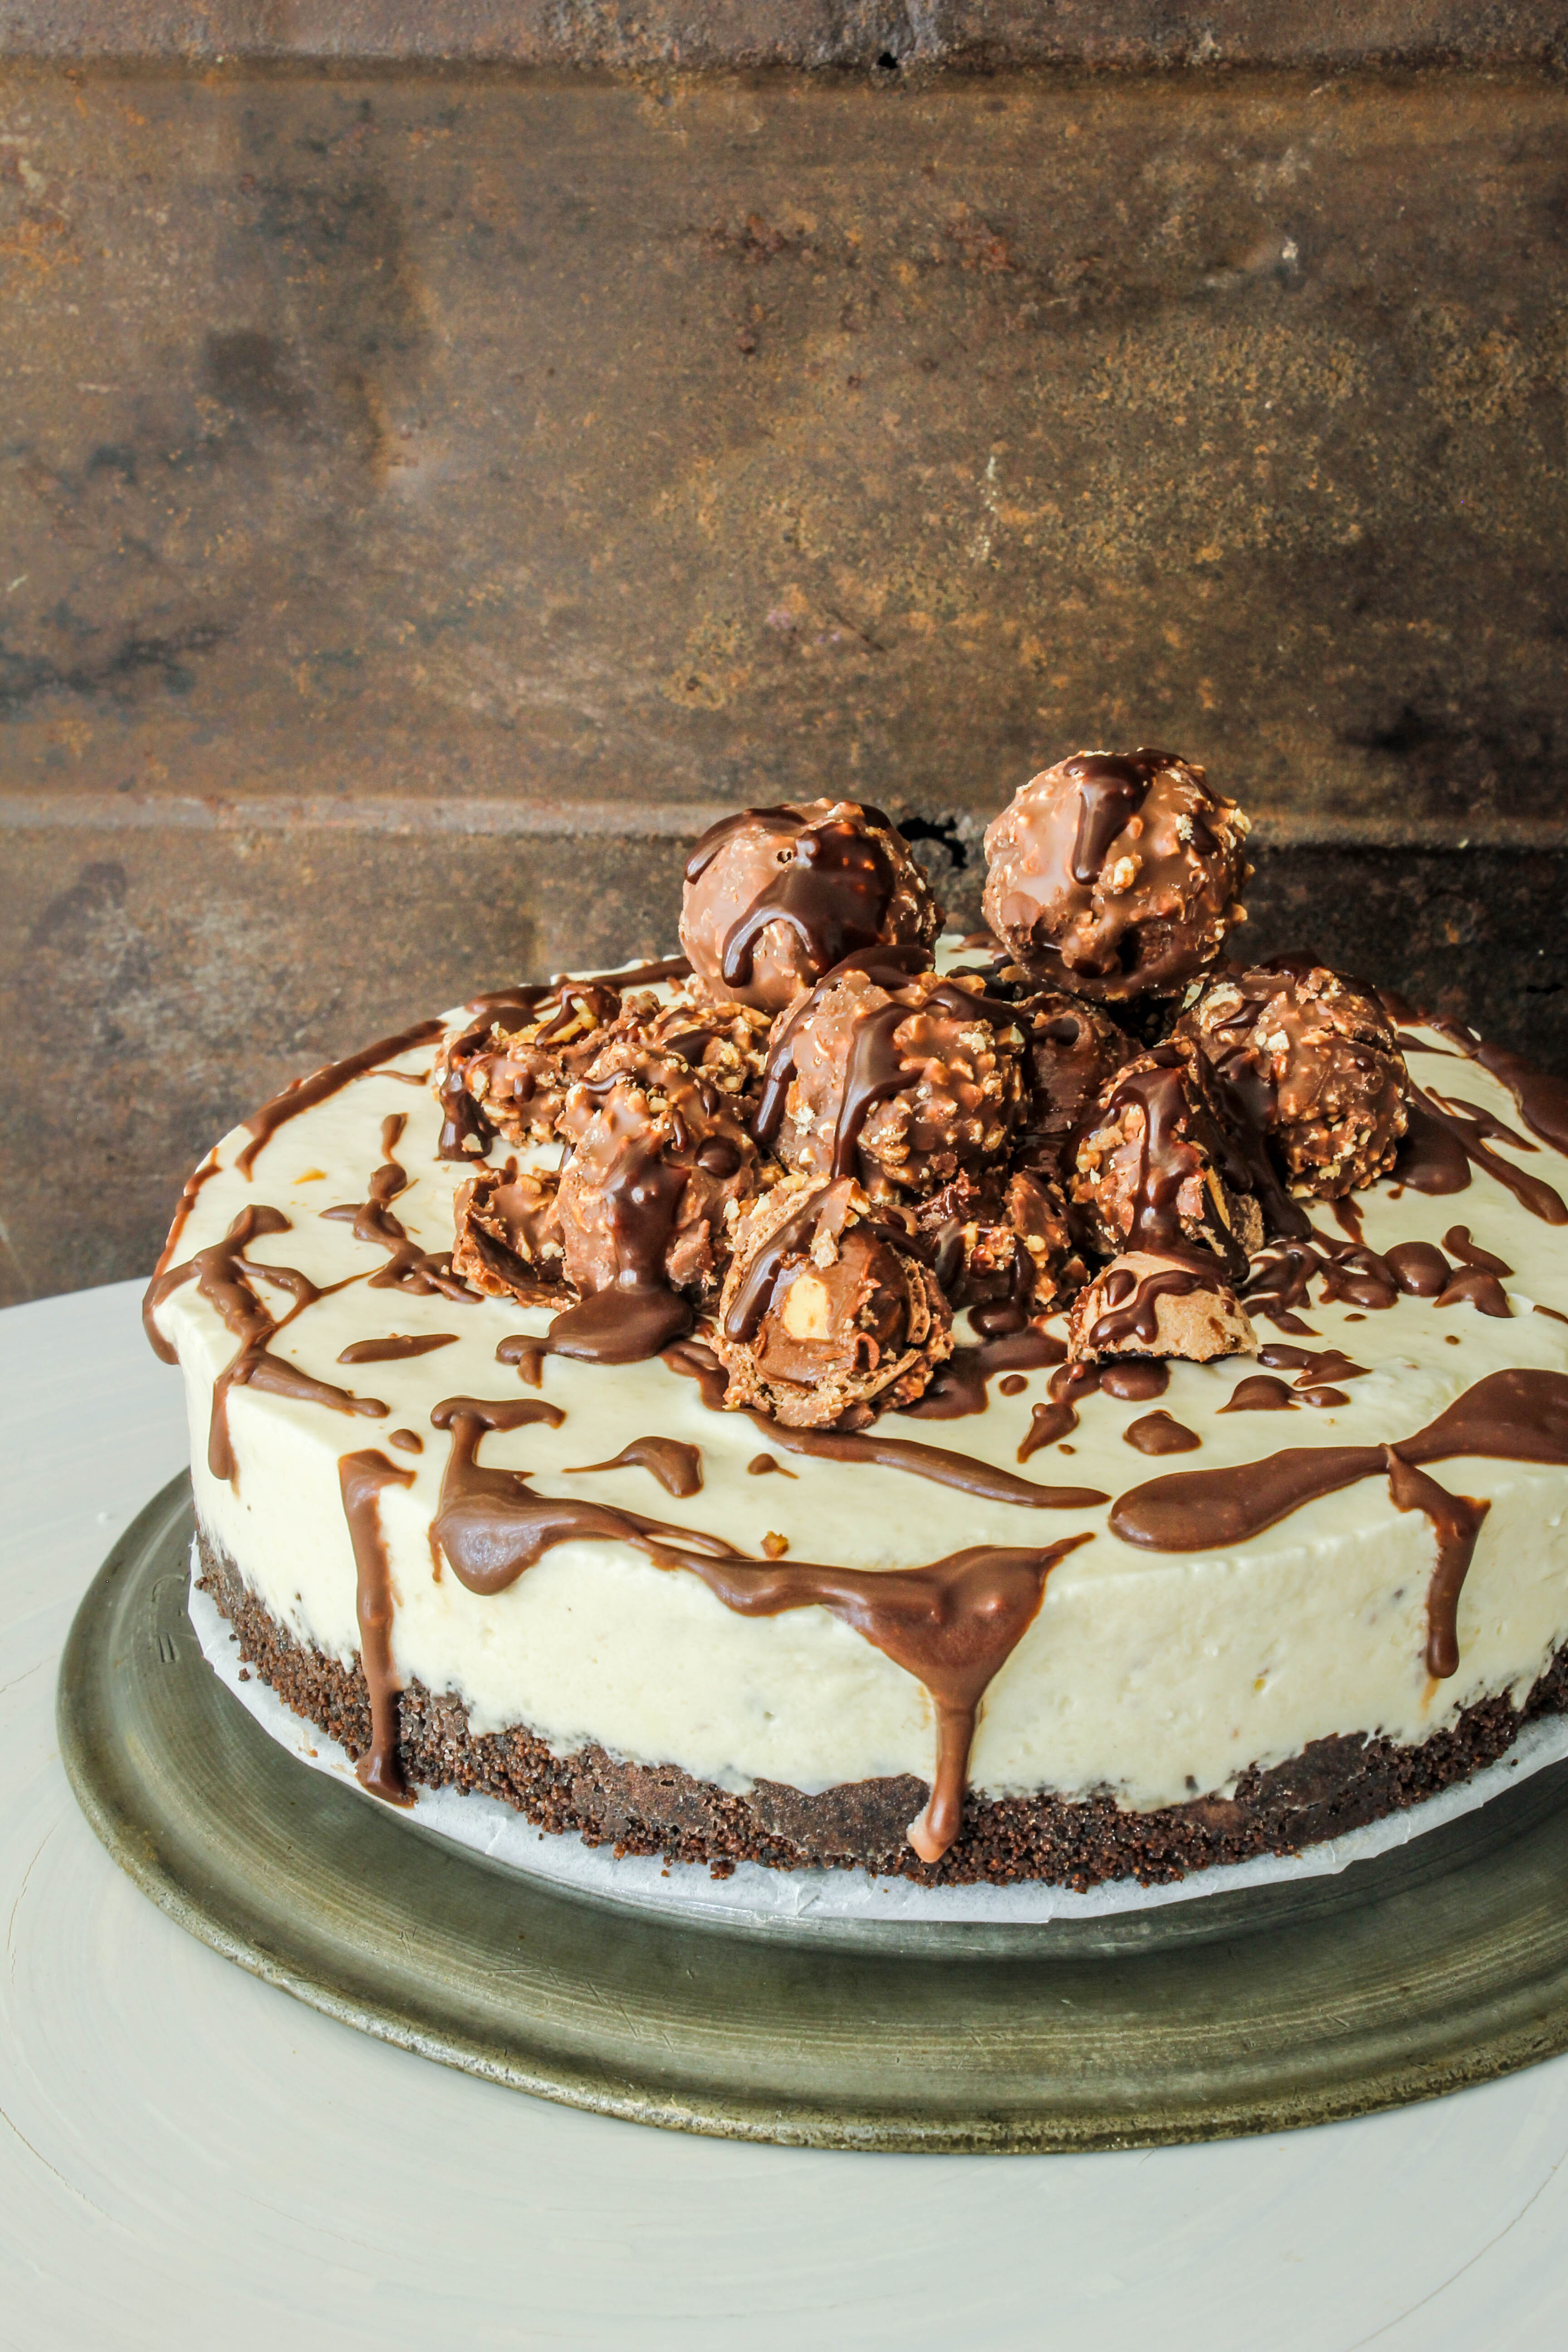
Ferrero Rocher Ice Cream Cheesecake

27|11|2014

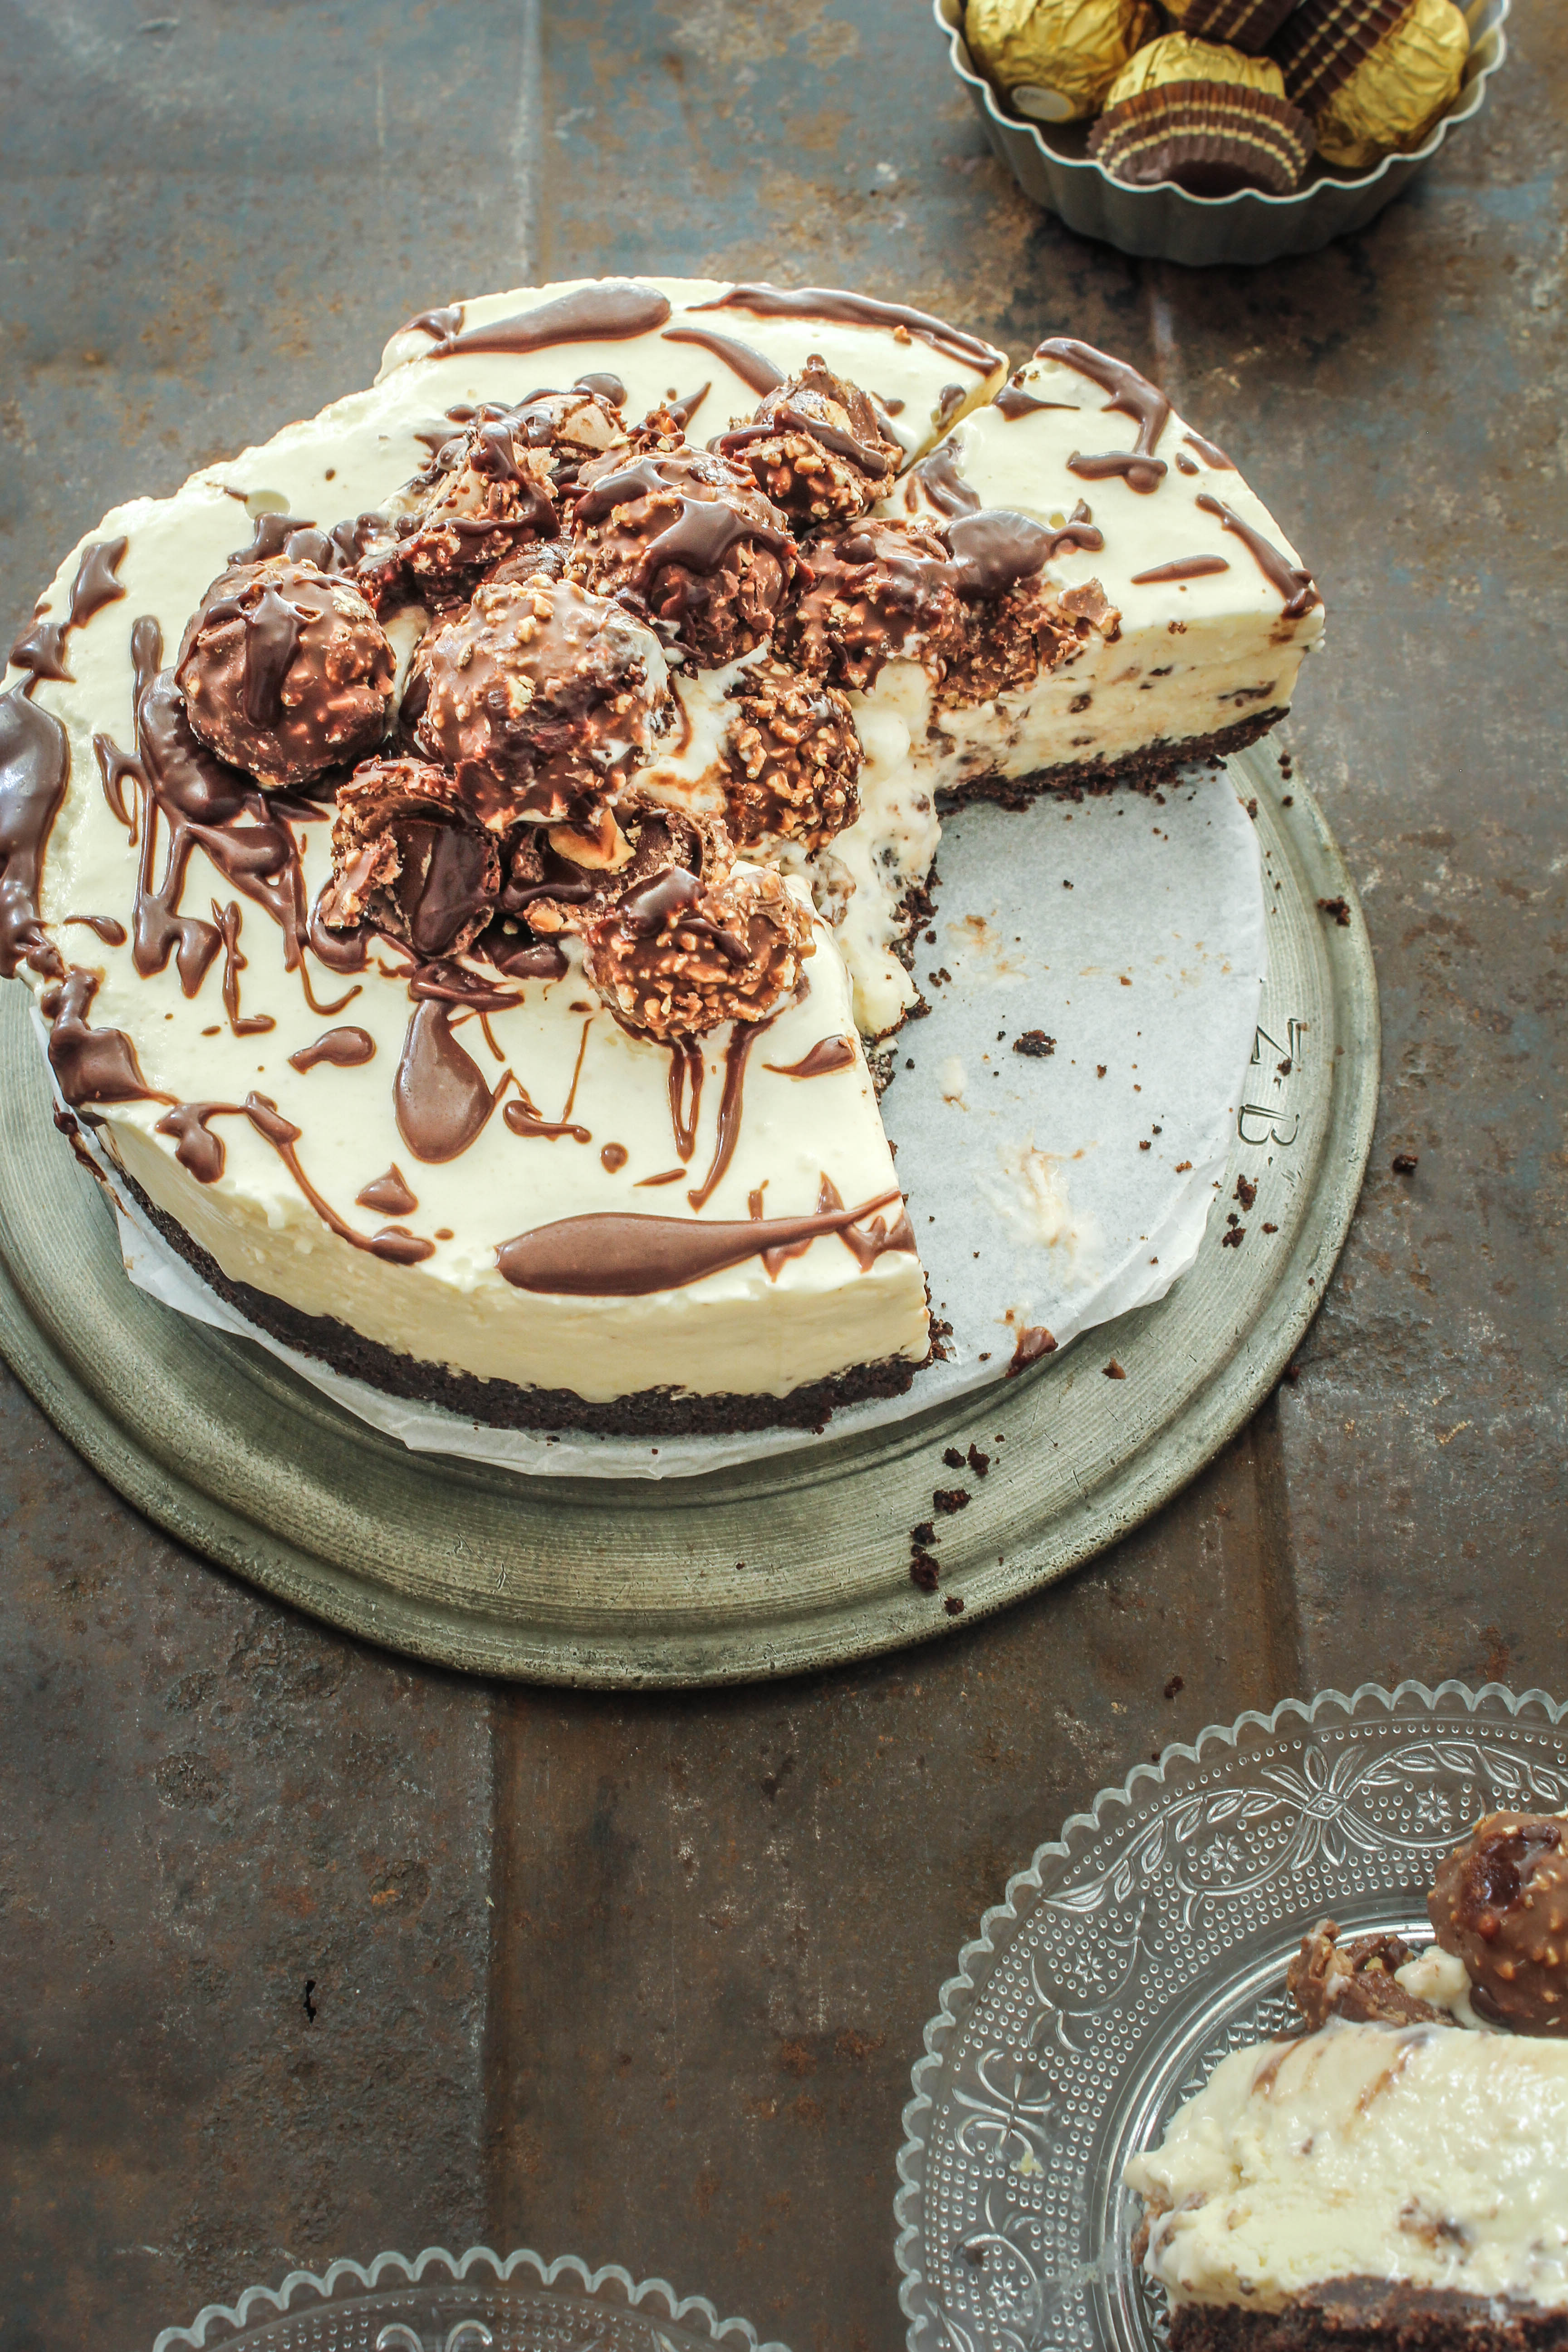
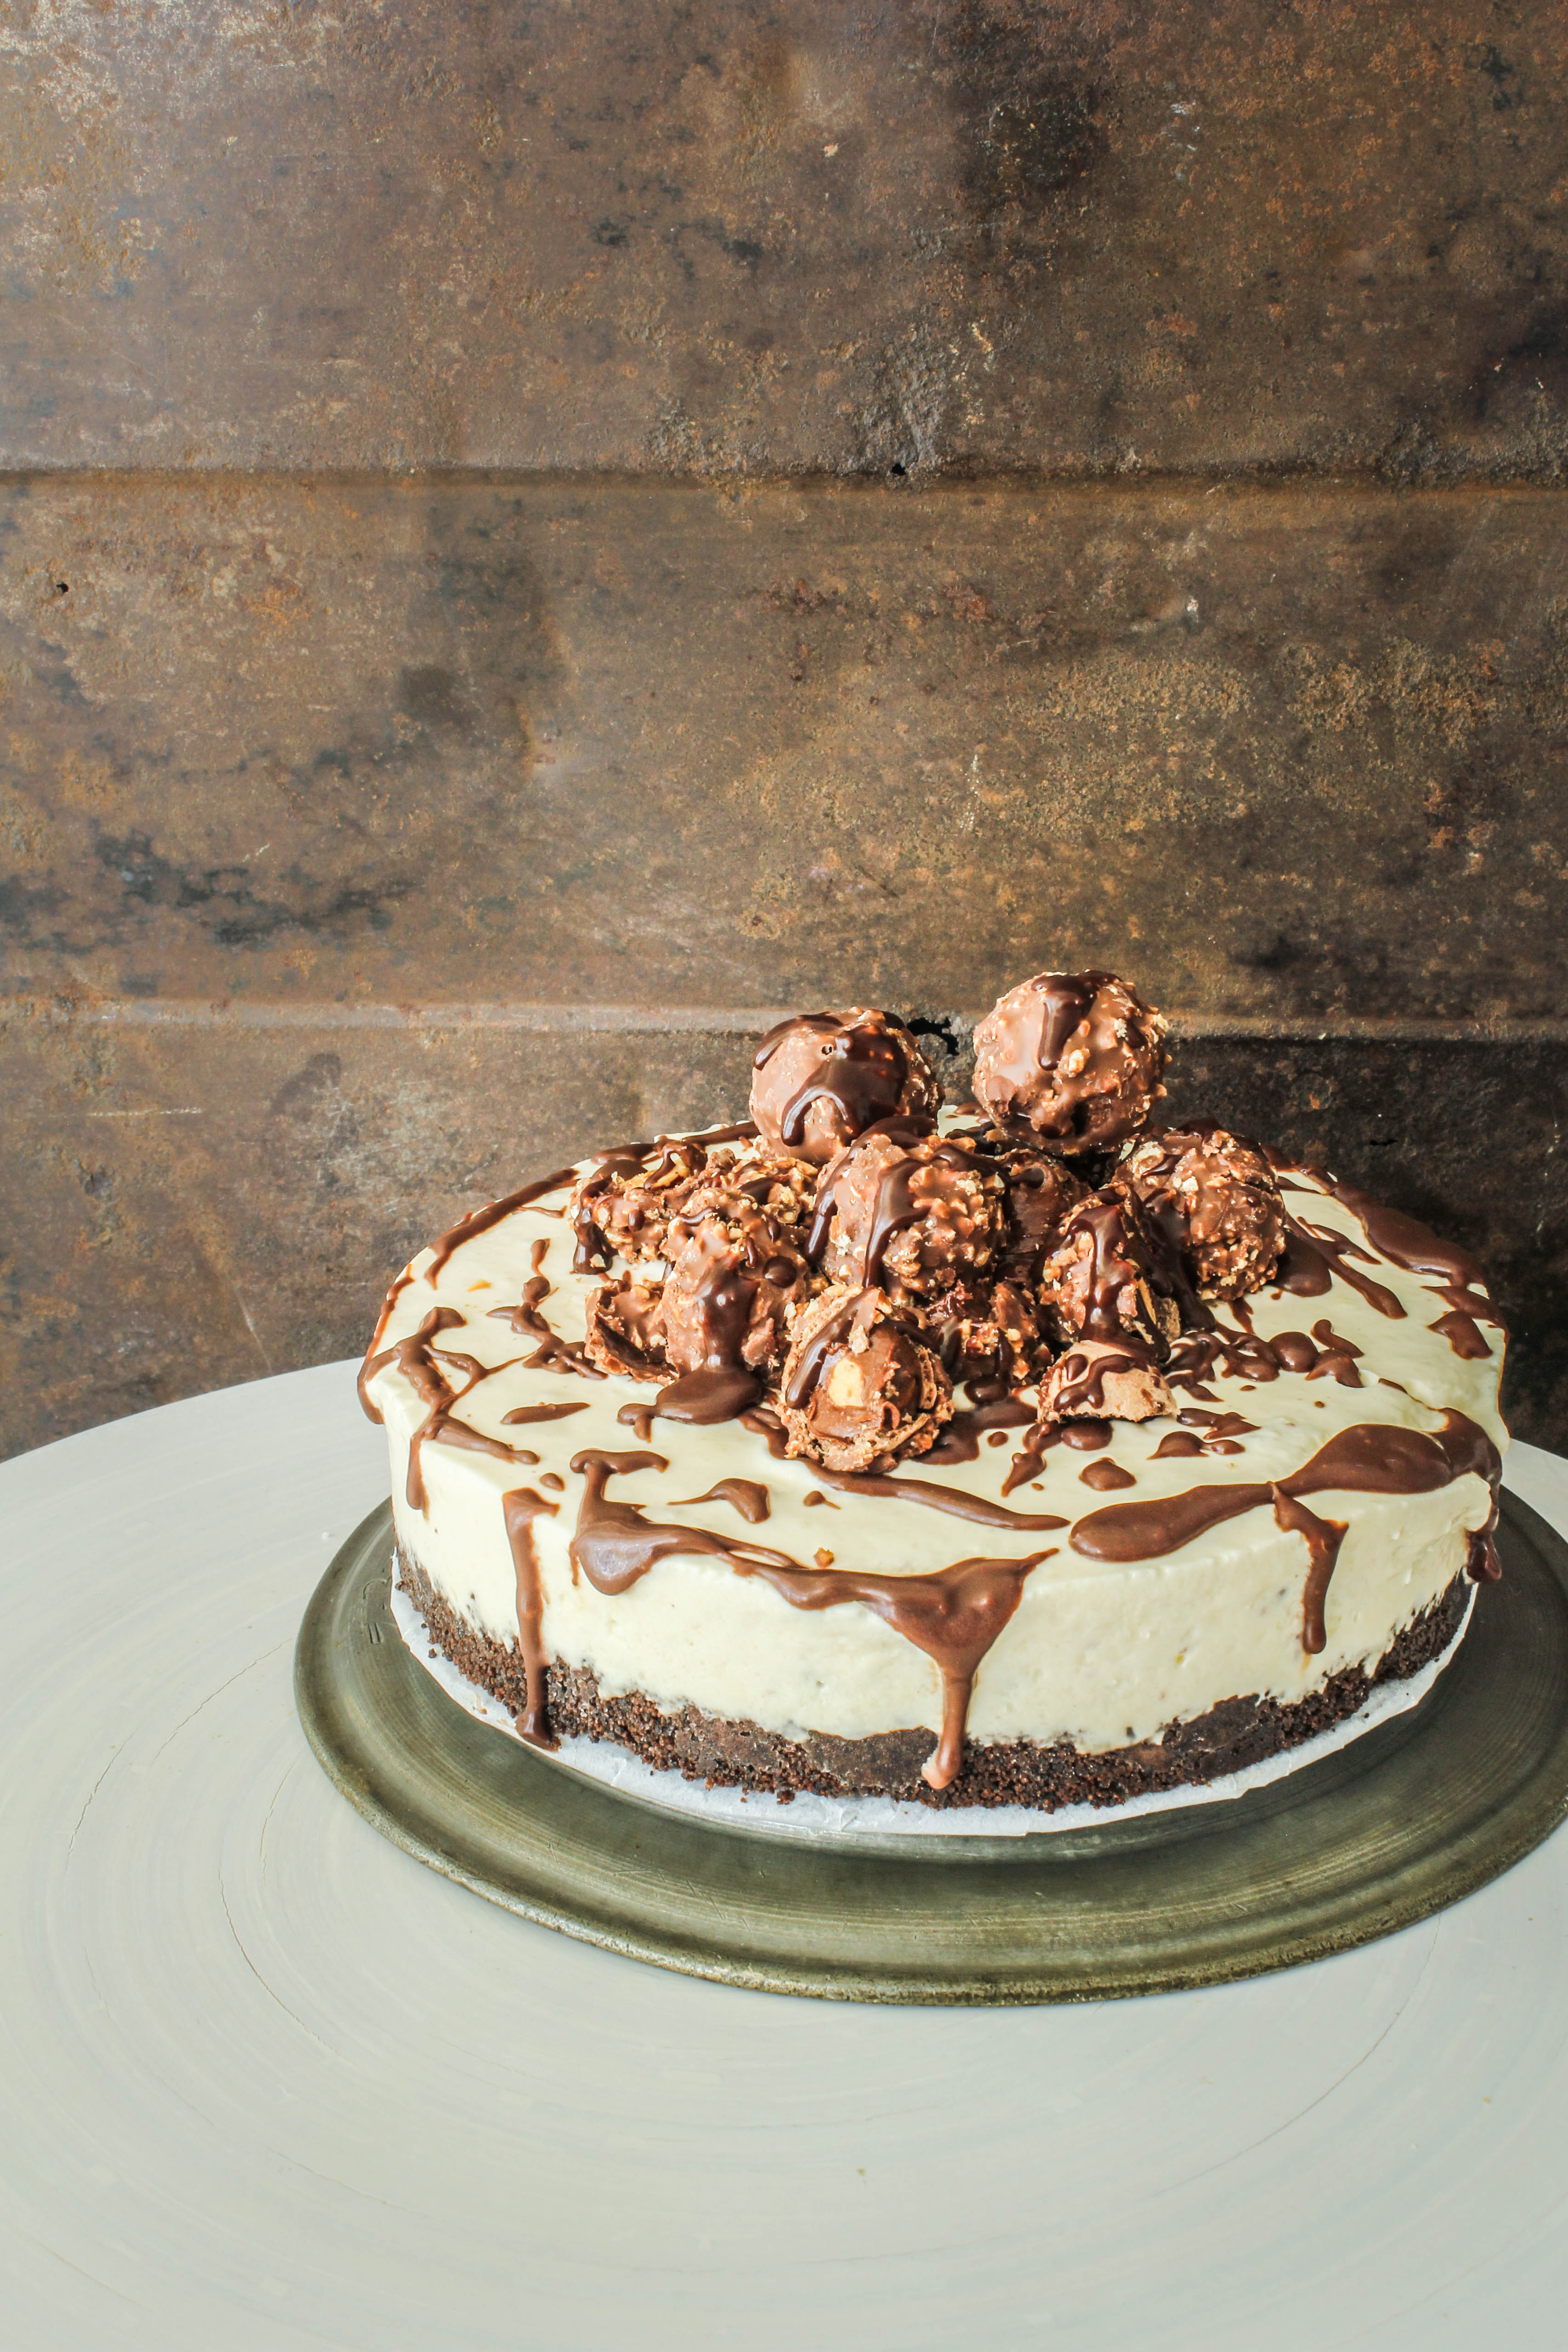
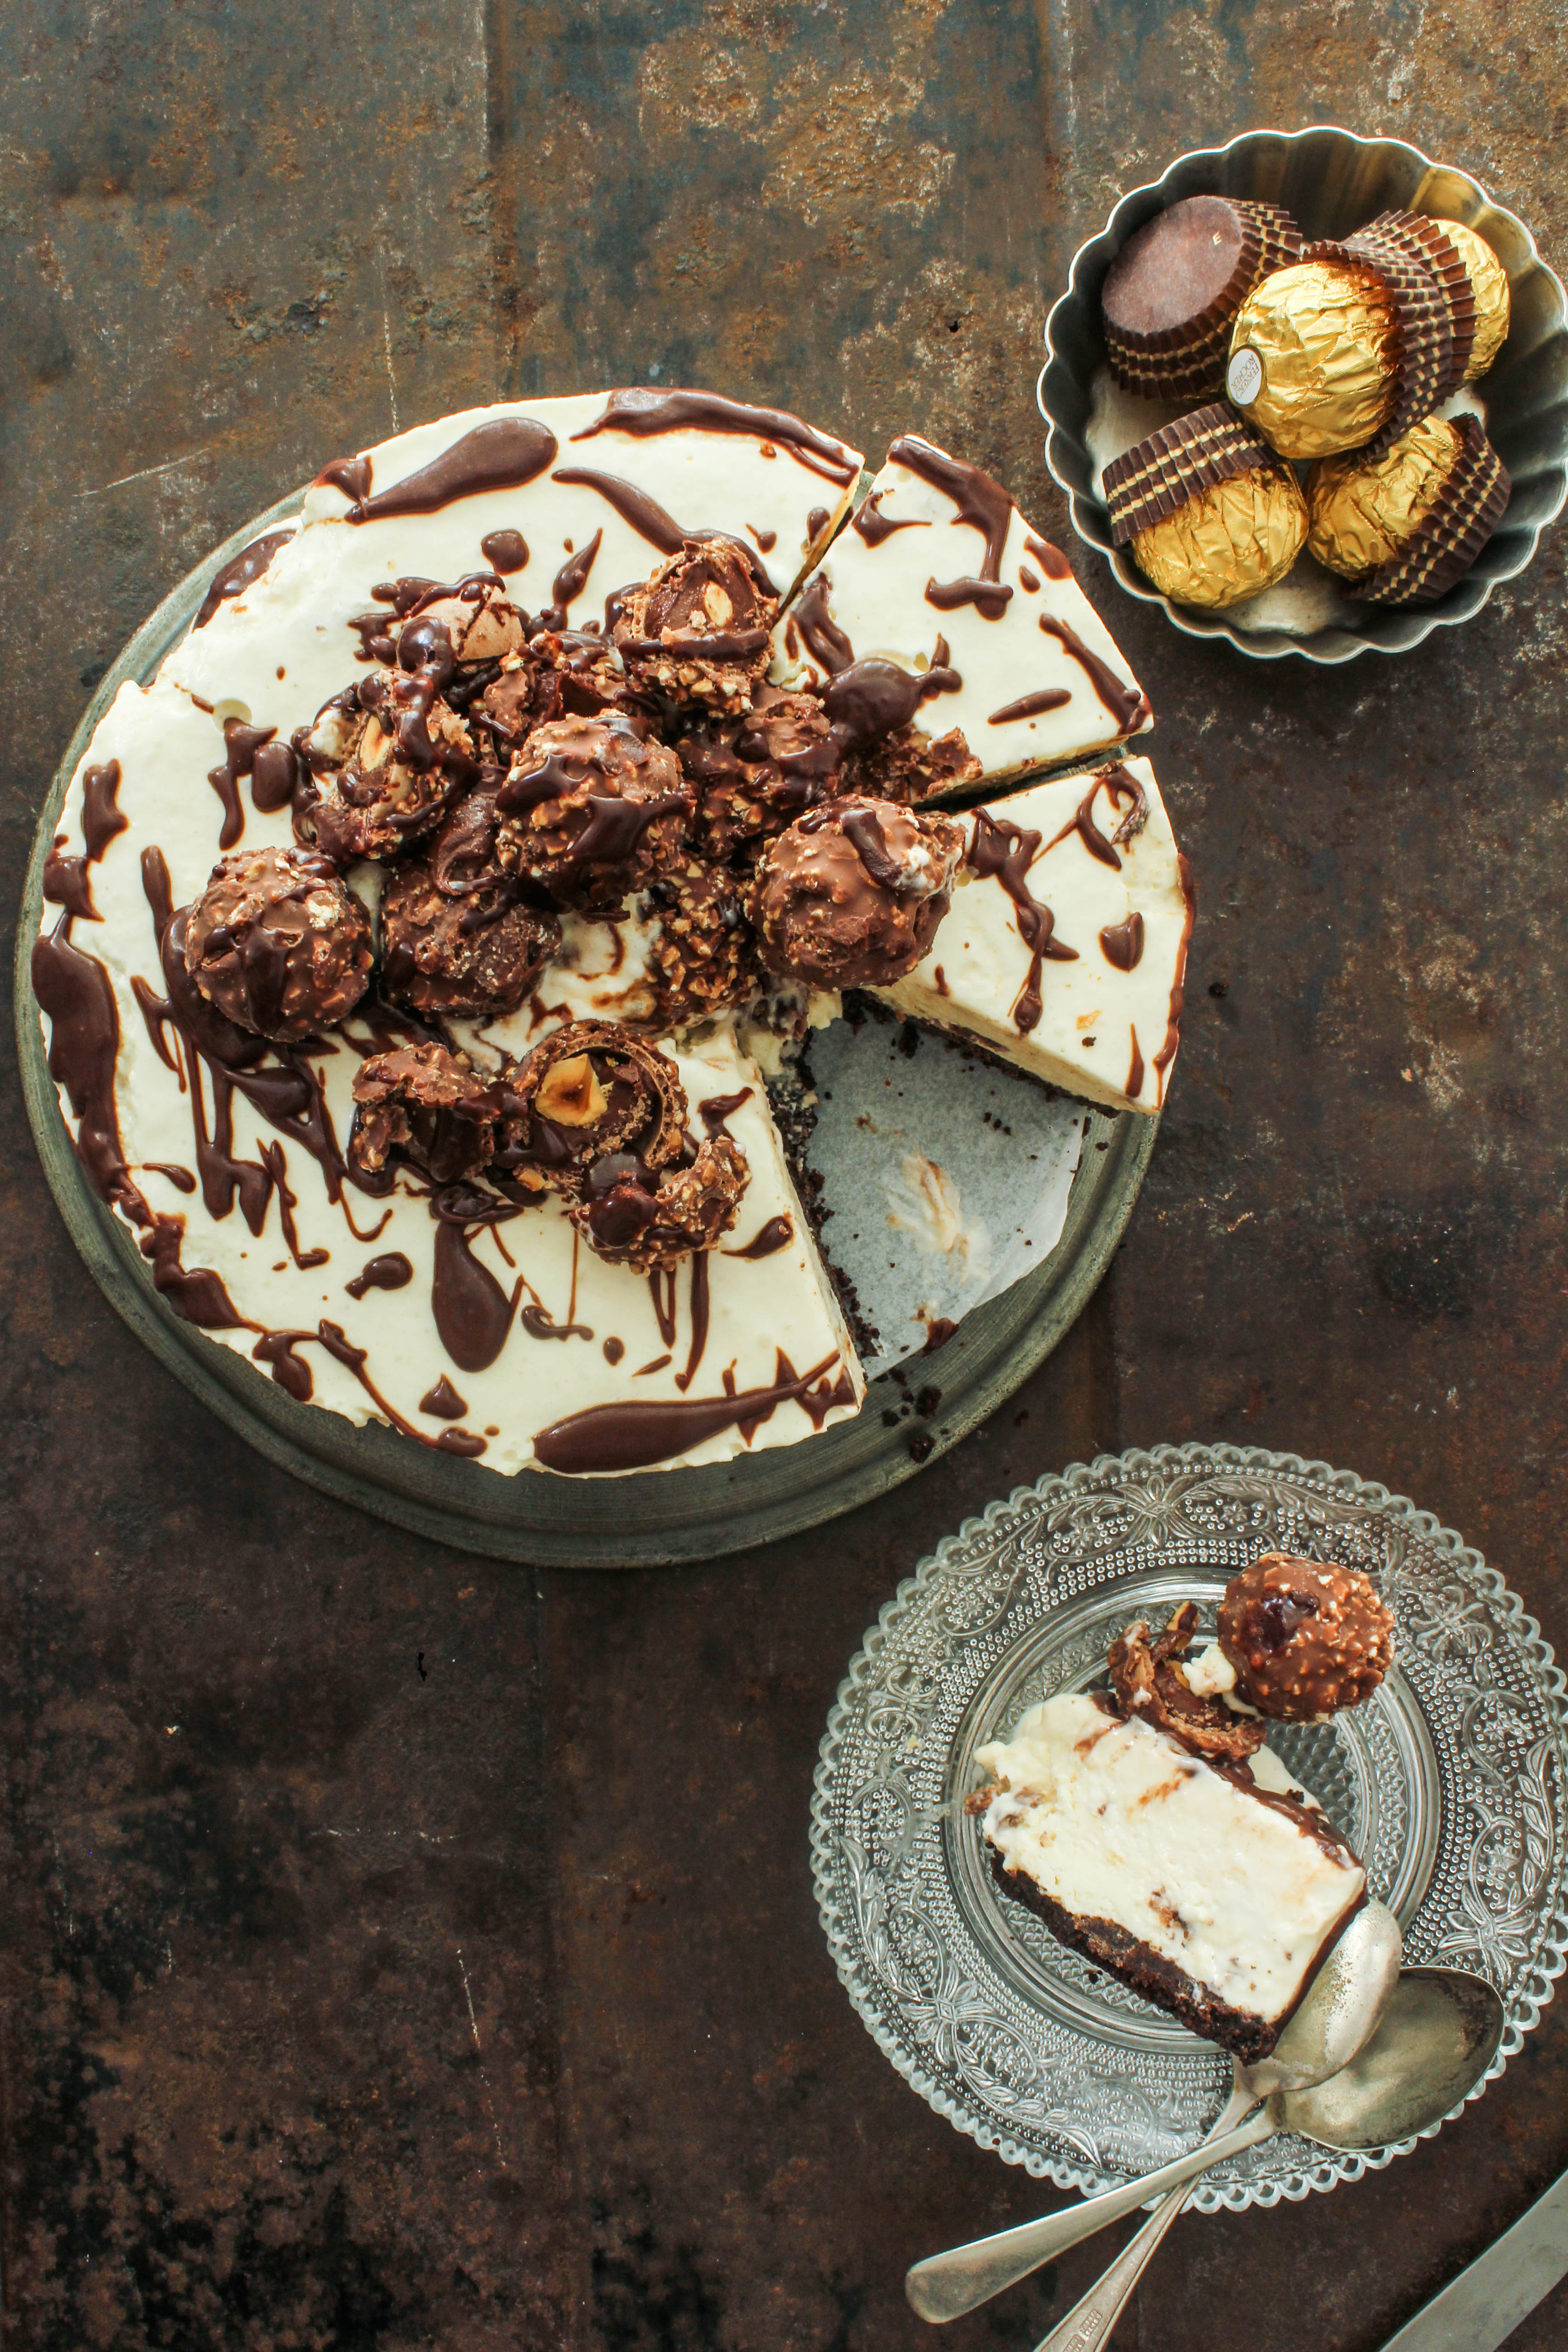
The best of both worlds! A Ferrero Rocher Cheesecake and ice cream combined together to make a delicious frozen treat.

At work, we often had training sessions on personality development, leadership, team building and such things. I remember one of the mentors talking about the importance of ‘being at the right place at the right time. People who are able to do that are deemed smarter and successful. It always made me wonder what the right time was..who knows!  I would say it has a bit to do with luck and a lot of persistence.
Ferrero Rocher chocolates (which happen to be the most favourite chocolate of mine) were the first things to go on sale at my local supermarket this year. I wouldn’t like to think of myself a person who keeps tabs on sales…in fact quite the oppsosite, but Ferrero Rochers at half price is a pretty big deal. I noticed it in the mailers and made a mental note to be there. By the time I went there, they were gone. Every single one of them. I checked with the store manager and he smiled. ‘They were gone in a couple of hours’. He told me they would be put up on the shelves again at the  end of the week. This time I made sure I was there at the start of business. I waited for a few minutes since they told me that the new stocks hadn’t arrived. Finally I came back ,without the Ferrero Rochers of course. So I guess I was not at the right place at the right time. Or maybe at the wrong time at the right place. But here’s the twist to the story.

ferrero rocher cheesecake ice cream

The same evening we attended a birthday party. There were two celebrations going on at the same time, one of them for a little girl. My boys came back with return gifts in pretty paper bags. When I opened them, what do I see! Yes, two boxes of Ferrero Rochers. Some things are just destined. Like this cake. Our weather totally demands it and the festivities call for it.

ferrero rocher cheesecake ice cream


As much as I love cheesecakes and you see them often on the blog, I don’t enjoy the waiting time to photograph them. Which is mostly the next day to make sure they are are nicely set and hold up shape outside while I shoot them. This one being a ice cream blended cheesecake, took about 4 hours to set and the edges/sides were neat when I removed it from the spring-form pan. So you could make this even at the spur of the moment and you could have a gorgeous cake to serve after dinner. The cake has a chocolate cookie crust, a layer of ice-cream cheesecake filled with chopped Ferrero Rochers, a drizzle of chocolate sauce and more Ferrero Rocher Chocolates on top. It is really simple to make with no fancy equipment or technique. The taste is like a vanilla cheesecake with crunchy bits of chocolate and hazelnut in each bite. So good!

ferrero rocher cheesecake ice cream


ferrero rocher cheesecake ice cream

Though I did cut into the cheesecake the same day, I though it was better if you keep it longer in the freezer. Make sure to take it out 10 minutes before you serve it. The best thing is that the cake will keep for months in the freezer so it makes for a fantastic make-ahead dessert. When I had posted my Ferrero Rocher Mousse Cake a few months ago, I had smashed the chocolates in a zip-lock bag. This time I figured out, it was better to chop them up with a sharp knife. It makes it easier to handle the chocolates. You may use use store bought chocolate sauce to drizzle on top. I always have home made sauce in my fridge so I used that.


ferrero rocher cheesecake ice cream

IMG_3958-2

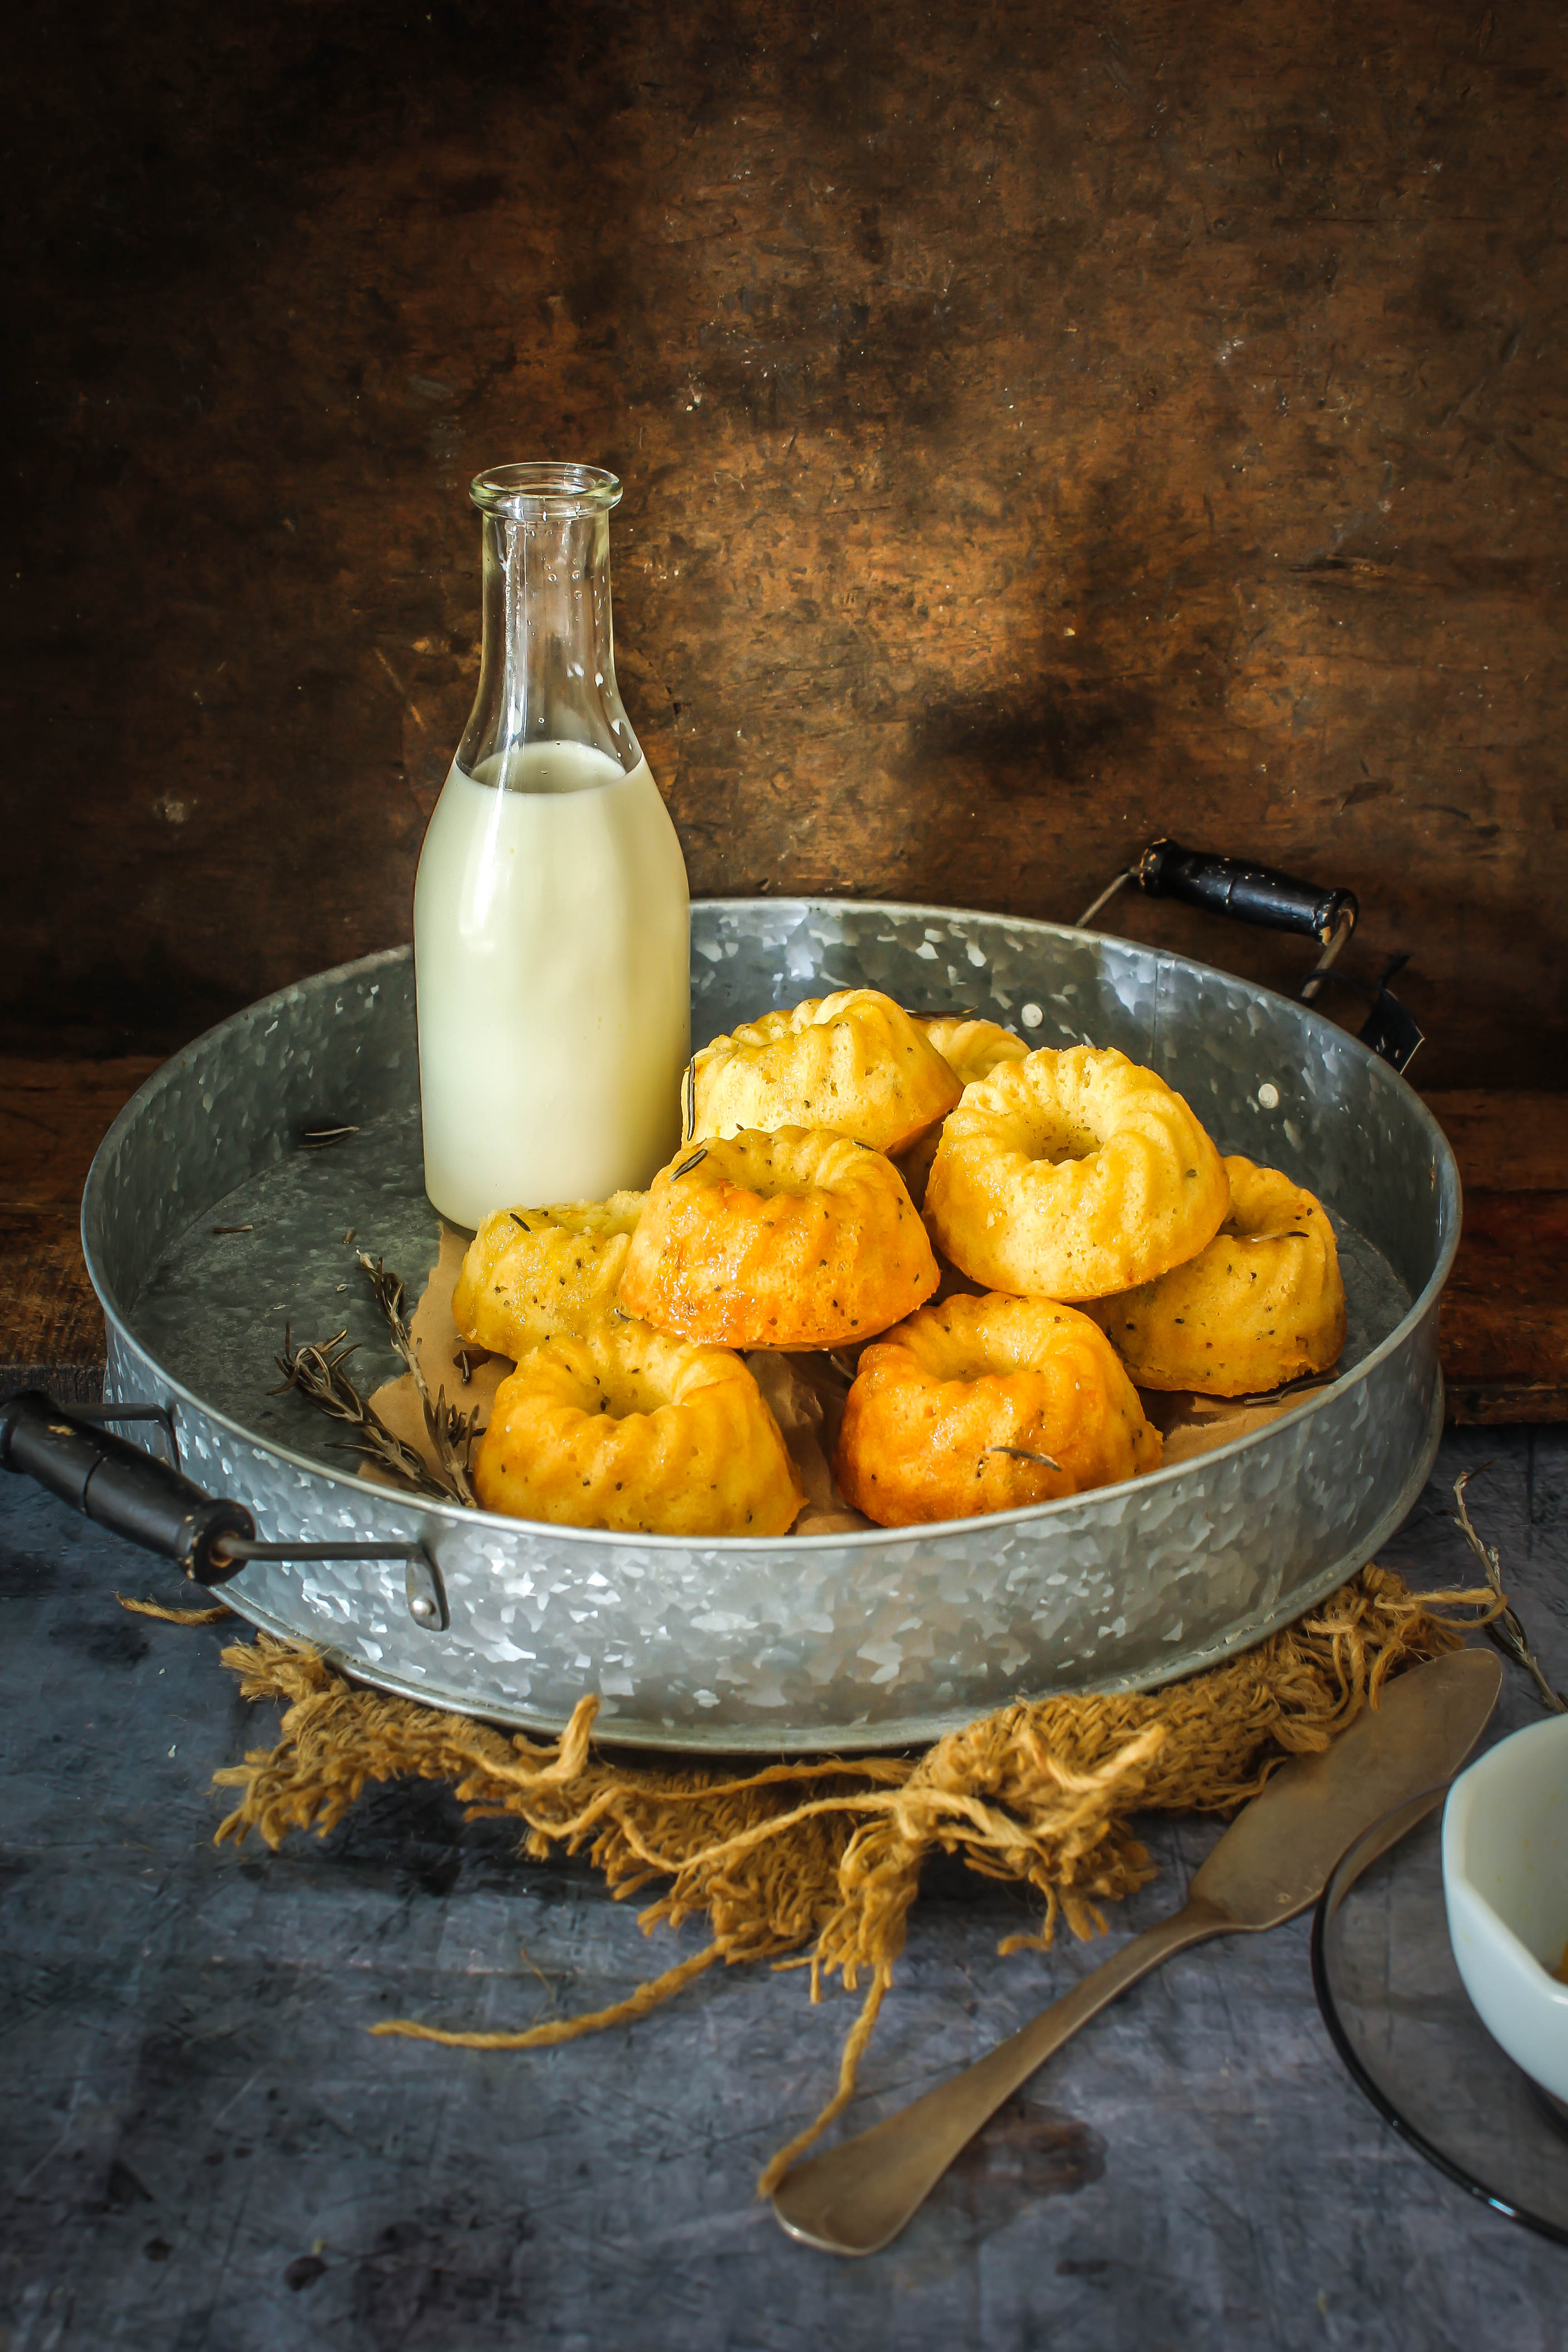
Ferrero Rocher Ice Cream Cheesecake
Makes a 19 cm round cake

200 g chocolate cookies
70 g unsalted butter
8-10 Ferrero Rocher chocolates, roughly chopped
400 g cream cheese, room temperature
1/2 cup castor sugar
1 tsp vanilla essence
500 ml vanilla ice-cream, slightly softened (I used store bought)
1/2 cup dark chocolate sauce (recipe below), to drizzle
8-10 Ferrero Rocher Chocolates, to decorate

For the dark chocolate sauce
100g dark chocolate, chopped
1/2 cup pouring/single cream
2 tablespoons brown sugar

Line the base of a 19 cm round Spring-form pan with baking paper.
Place the cookies in a food processor. Process until fine crumbs. Add melted butter and mix to combine. Alternatively, you could crush the biscuits with a rolling pin inside a zip-lock bag. Using your fingertips, press biscuit mixture over base of prepared pan. Place in the freezer for 30 minutes or until firm.

Beat the cream cheese, sugar and vanilla in a large bowl (with a mixer or a whisk) until well blended. Add the ice cream and mix well. Gently fold in the chopped chocolates. Pour over the prepared crust. Freeze for 4 hours or until firm. Remove from freezer 10 minutes before serving. When ready to serve, drizzle with chocolate sauce, top with remaining Ferrero Rocher chocolates and drizzle with more sauce.
To make Dark Chocolate Sauce: Combine chocolate, cream and sugar in a saucepan over a low heat. Cook, stirring, for 5 minutes or until mixture is smooth. Set aside to cool. To store, pour into a cup/jar, cover and store in the refrigerator till needed. Warm up before using.
 

Orange, Honey, Rosemary and Chia Seed Friands/Financiers

24|11|2014

After a lovely little vacation in Melbourne, I am back to the precious confines of my home. Though to be honest, I did not miss cooking and baking, I was very excited at the sight of my kitchen when I came back. Melbourne is a colourful city. That was one of the first things that caught my eyes. The buildings can exist in any colour you dream of. Amongst the grey, brown walls or the striking blue waterbodies all over the city, there would be a yellow wall somewhere, red staircase, an orange coloured bridge…some blue boats floating around. It makes a lovely sight. My camera has been working overtime in the last few days..the birthday pictures of my twins, then Melbourne and the beautiful Victorian countryside. So much to share but I guess I will stick to food photos here. You can see my travel photos on Instagram.

IMG_3200-2

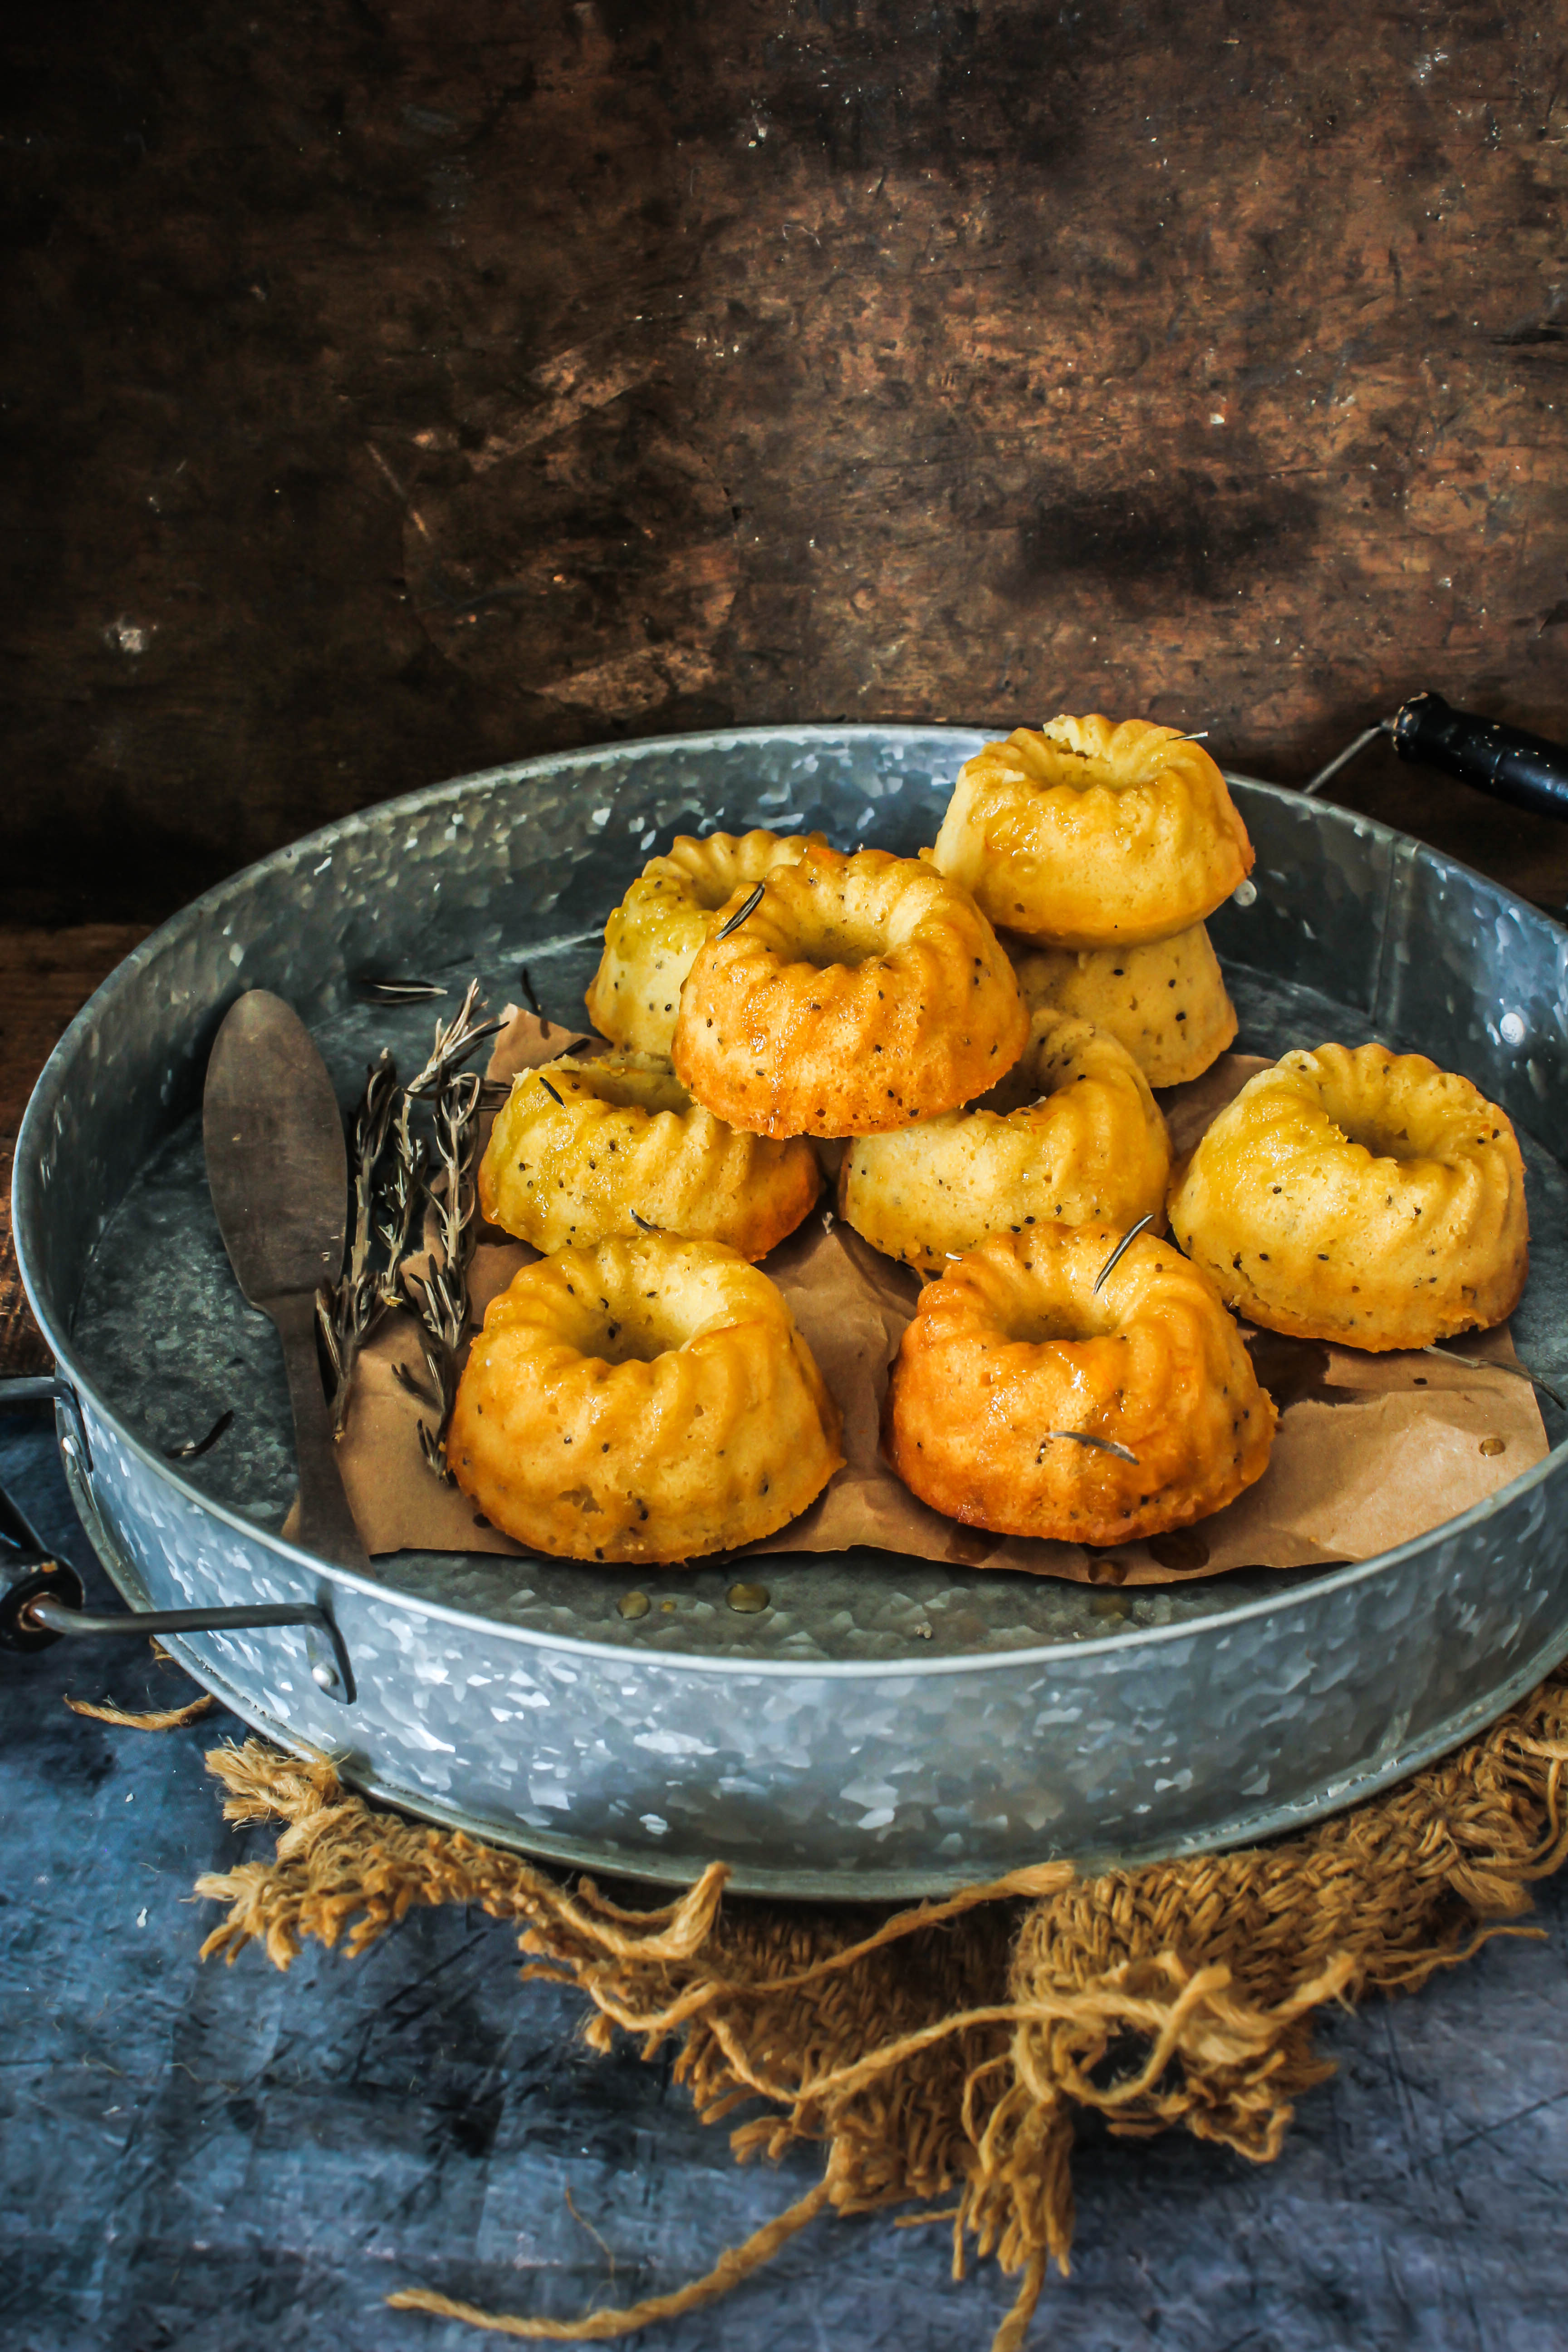
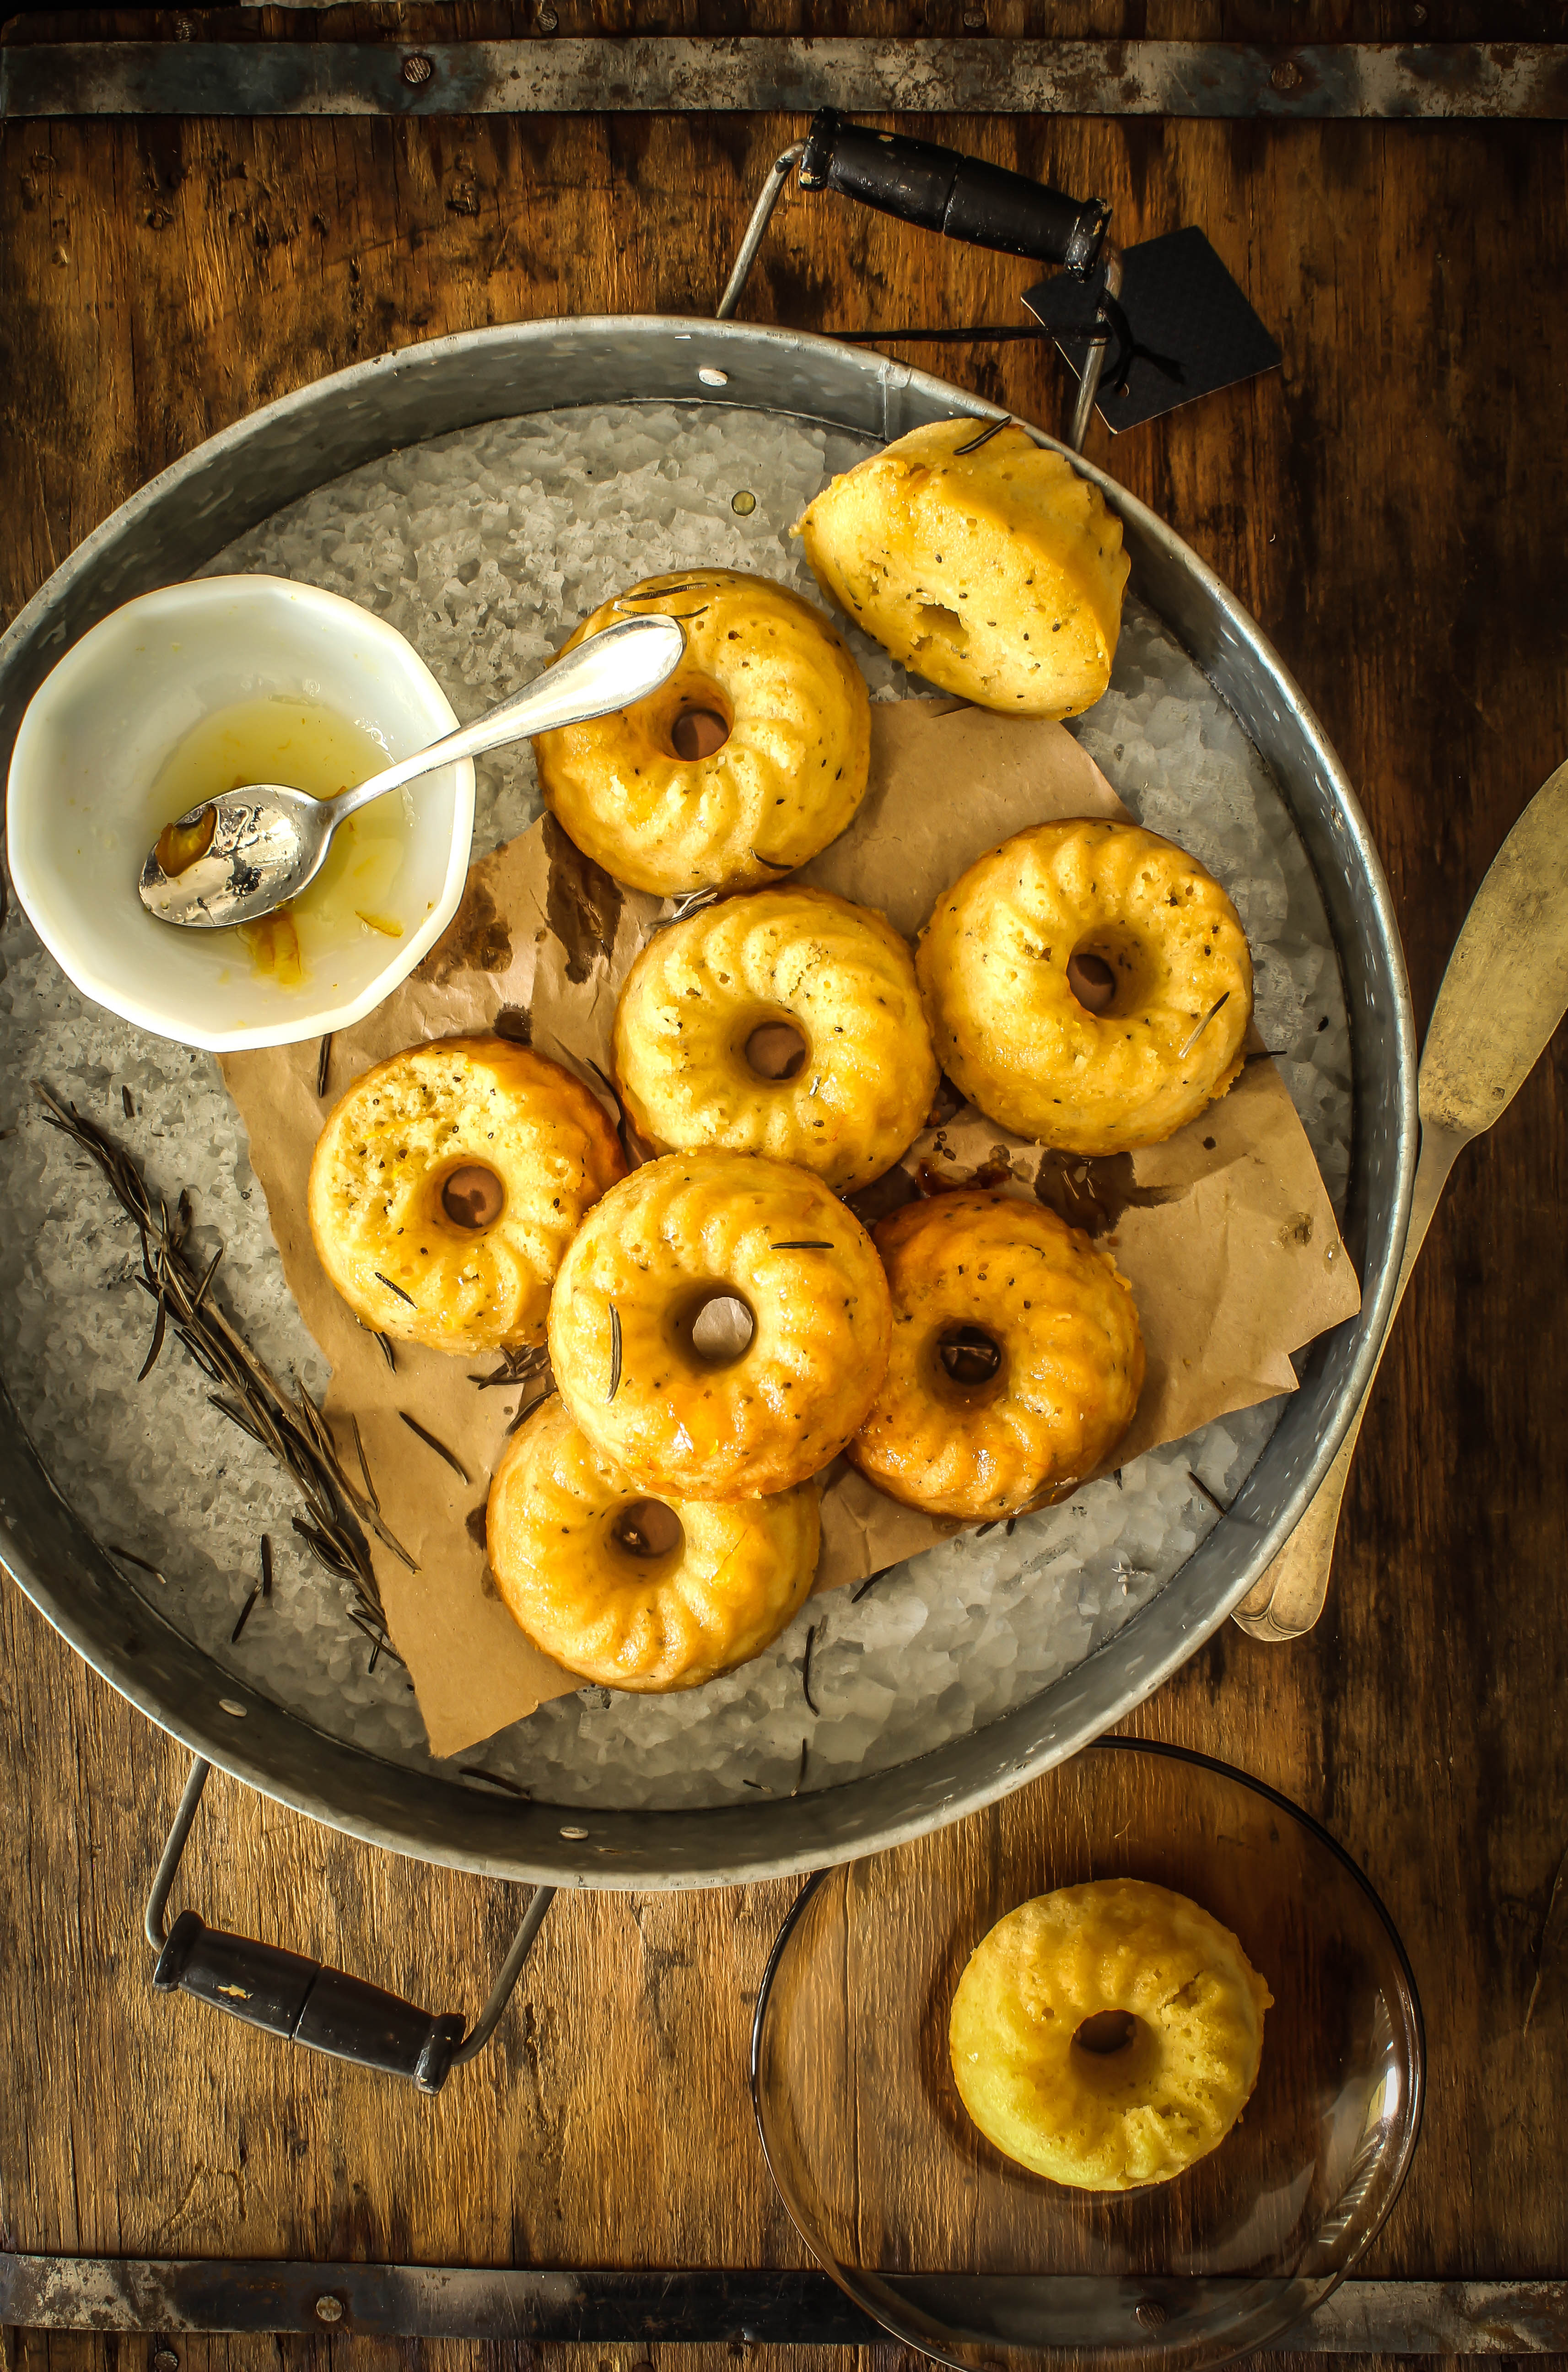
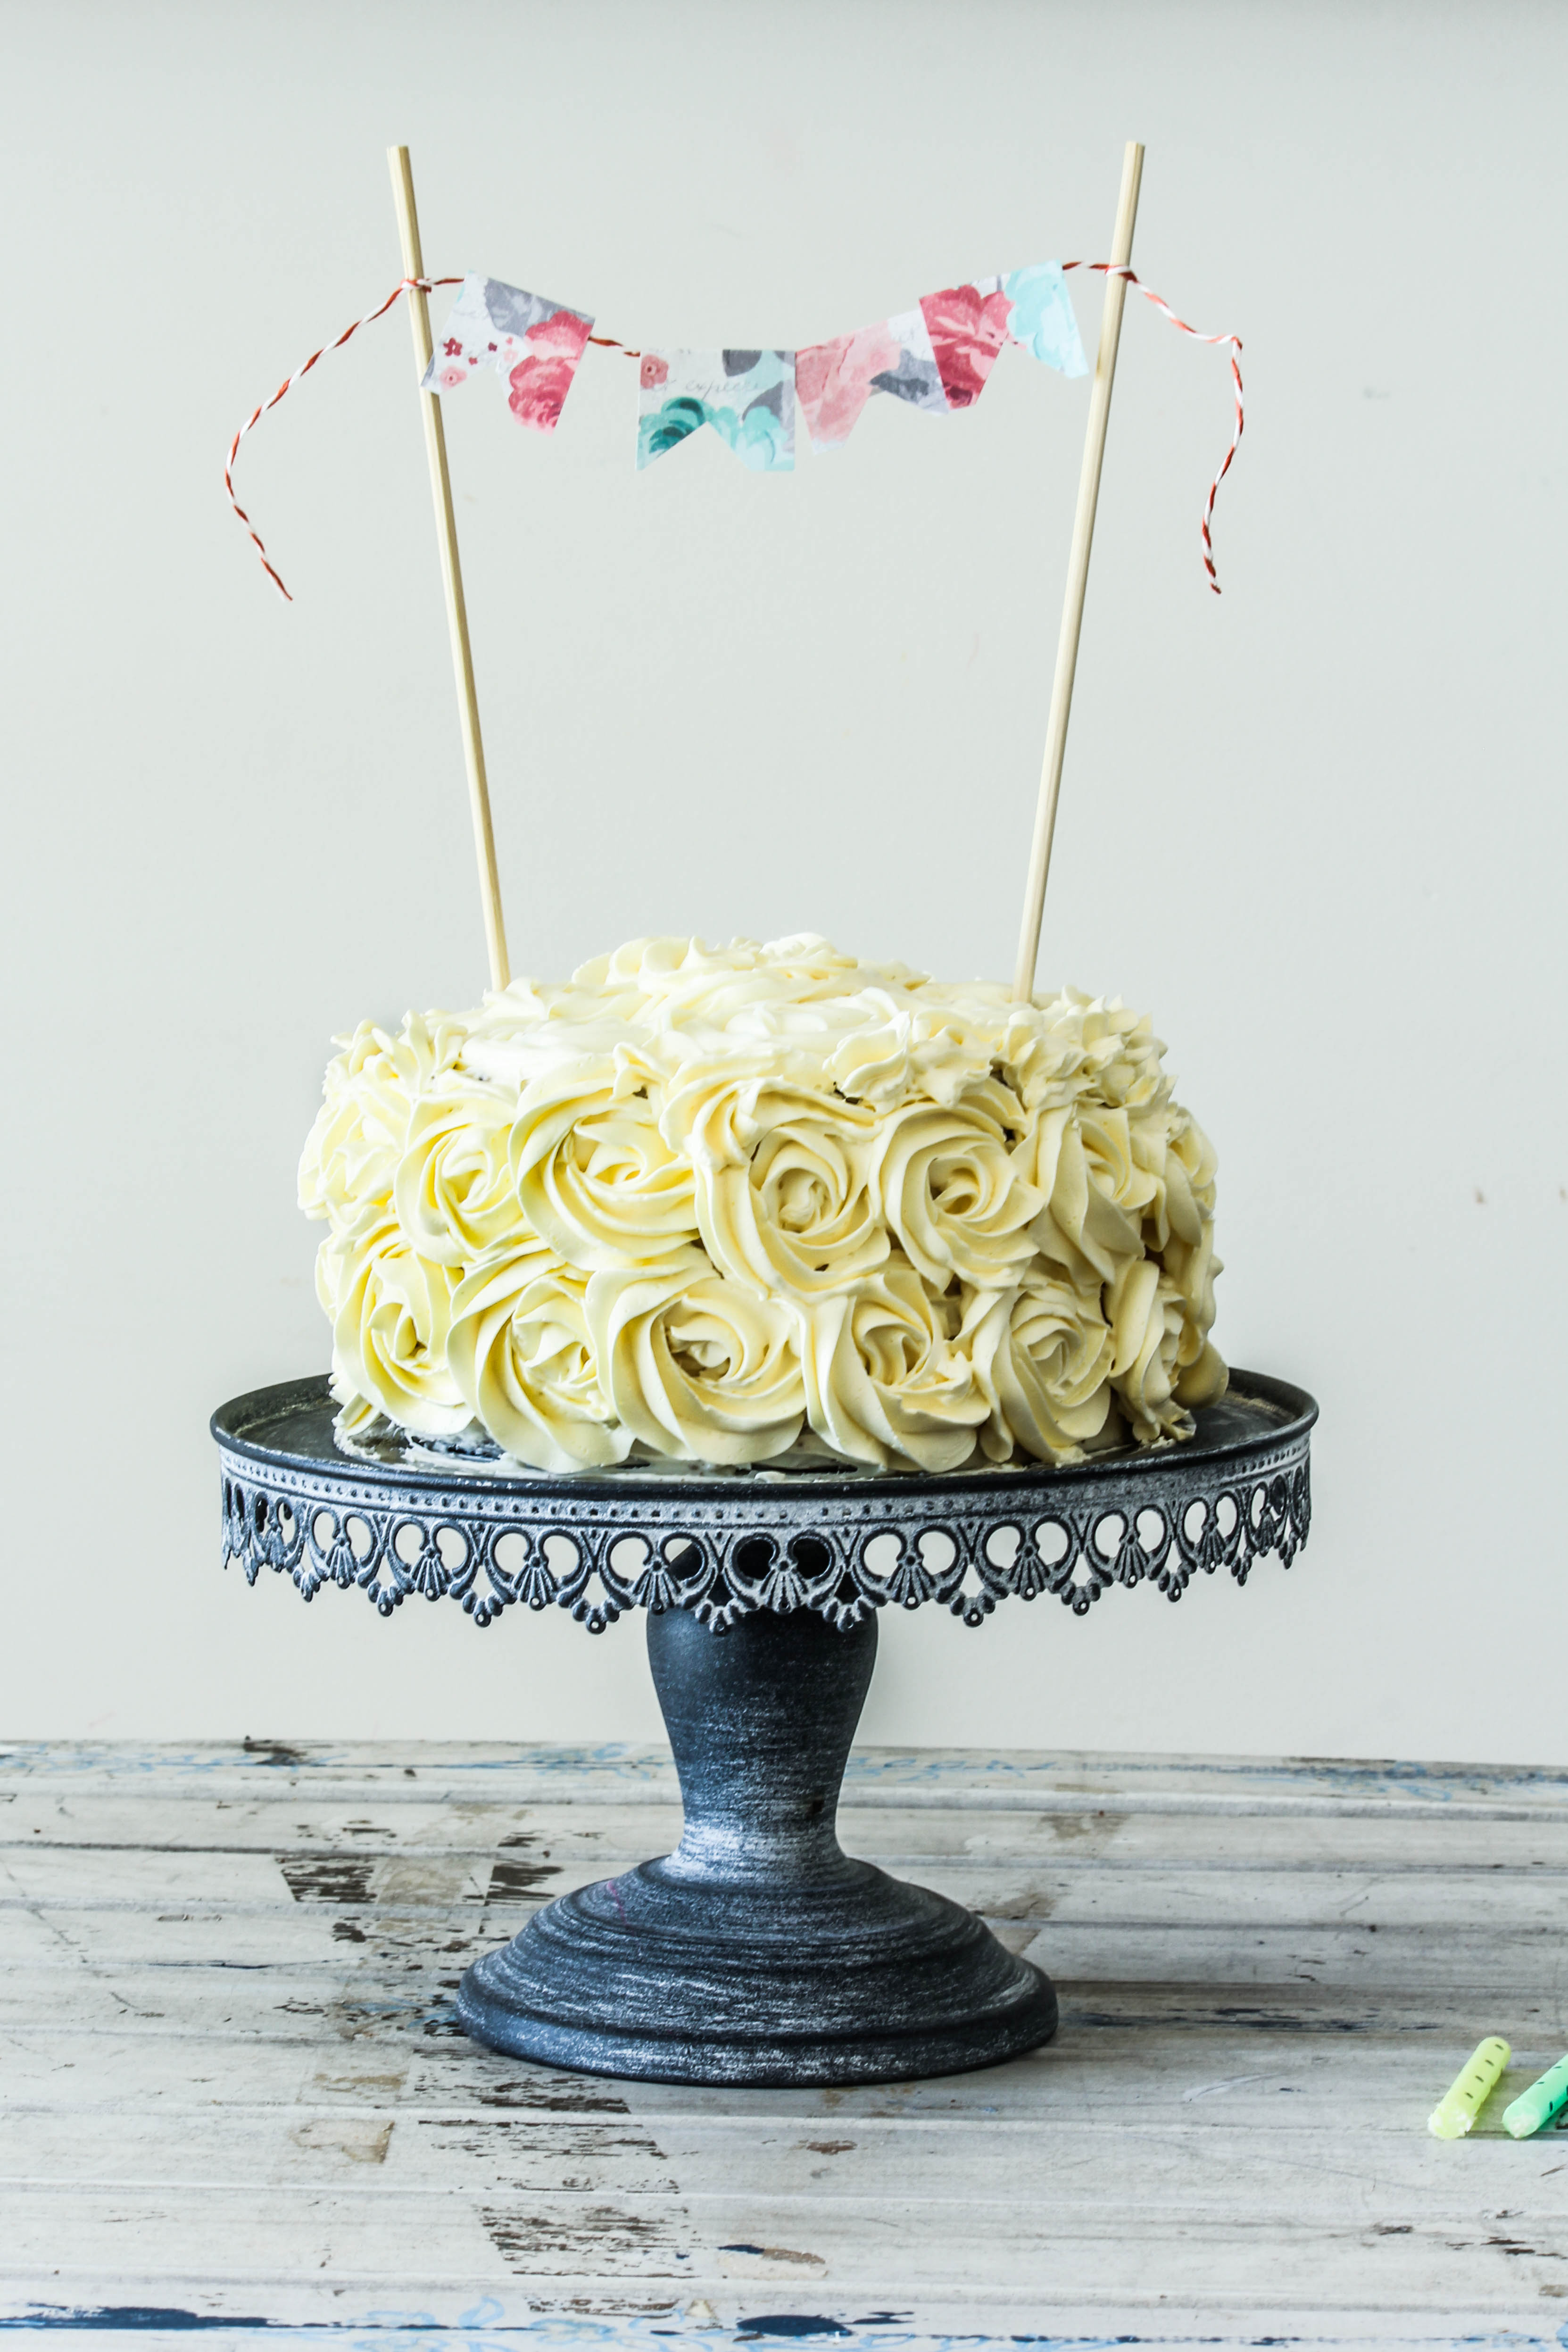
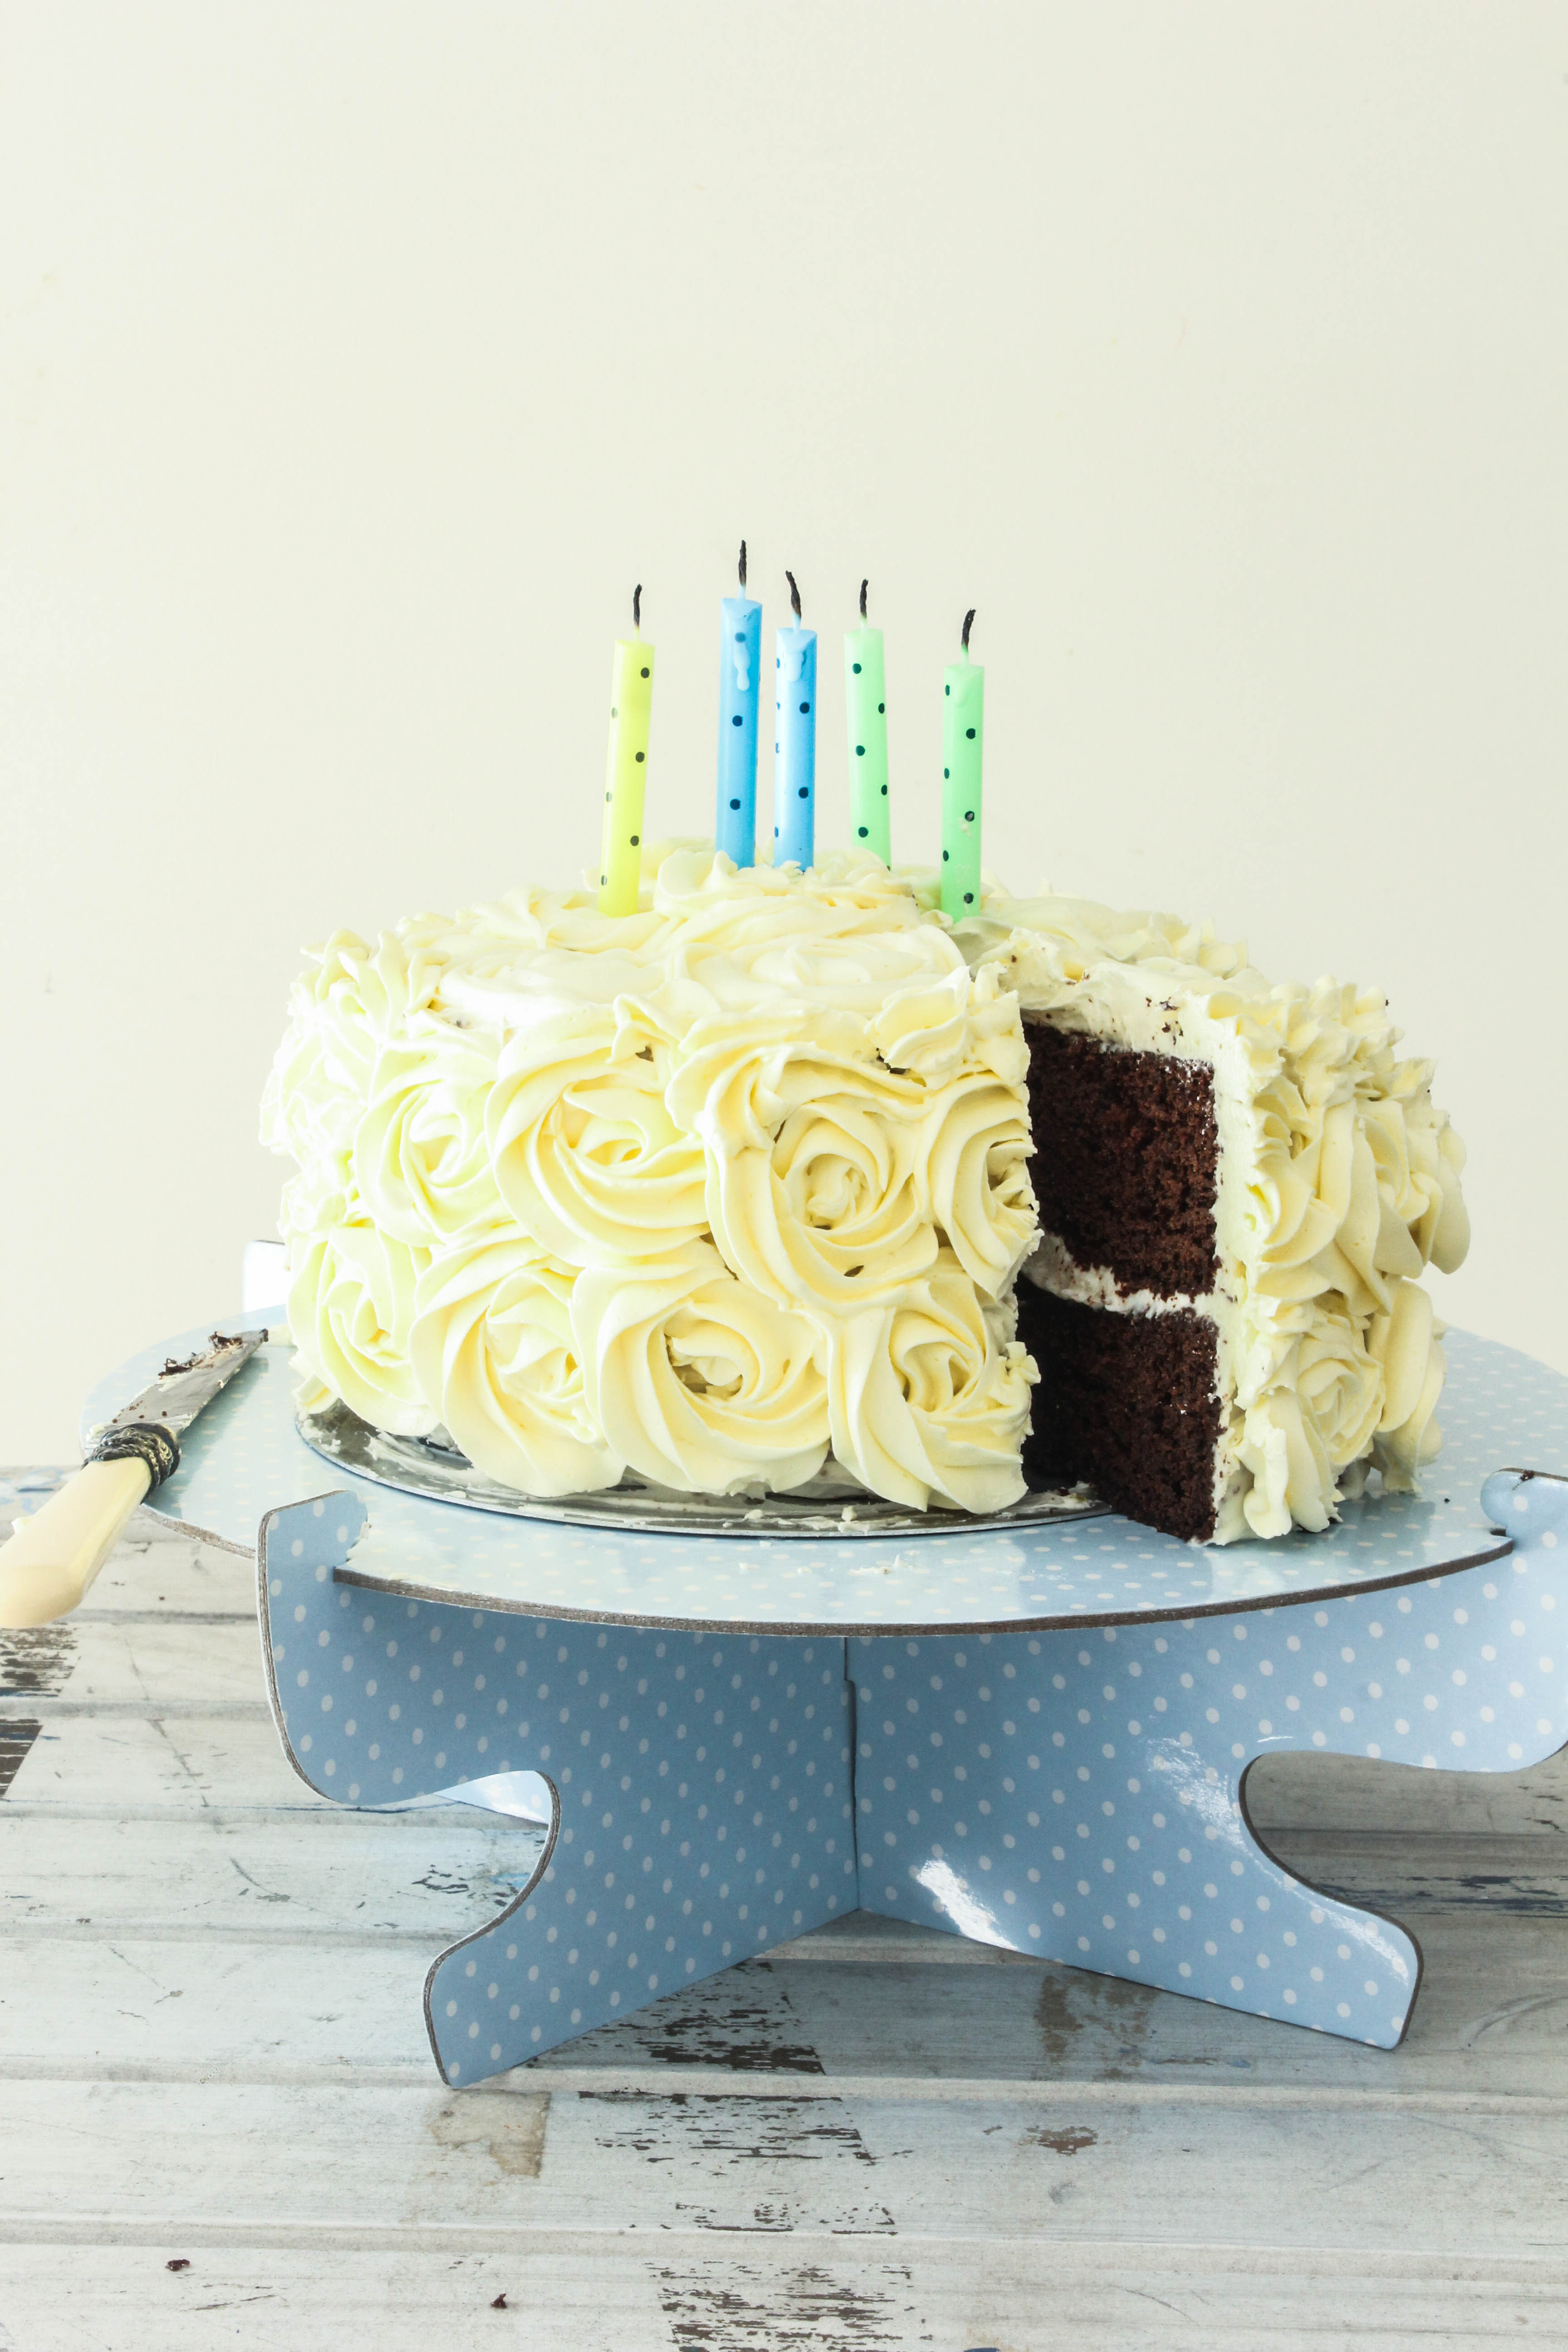
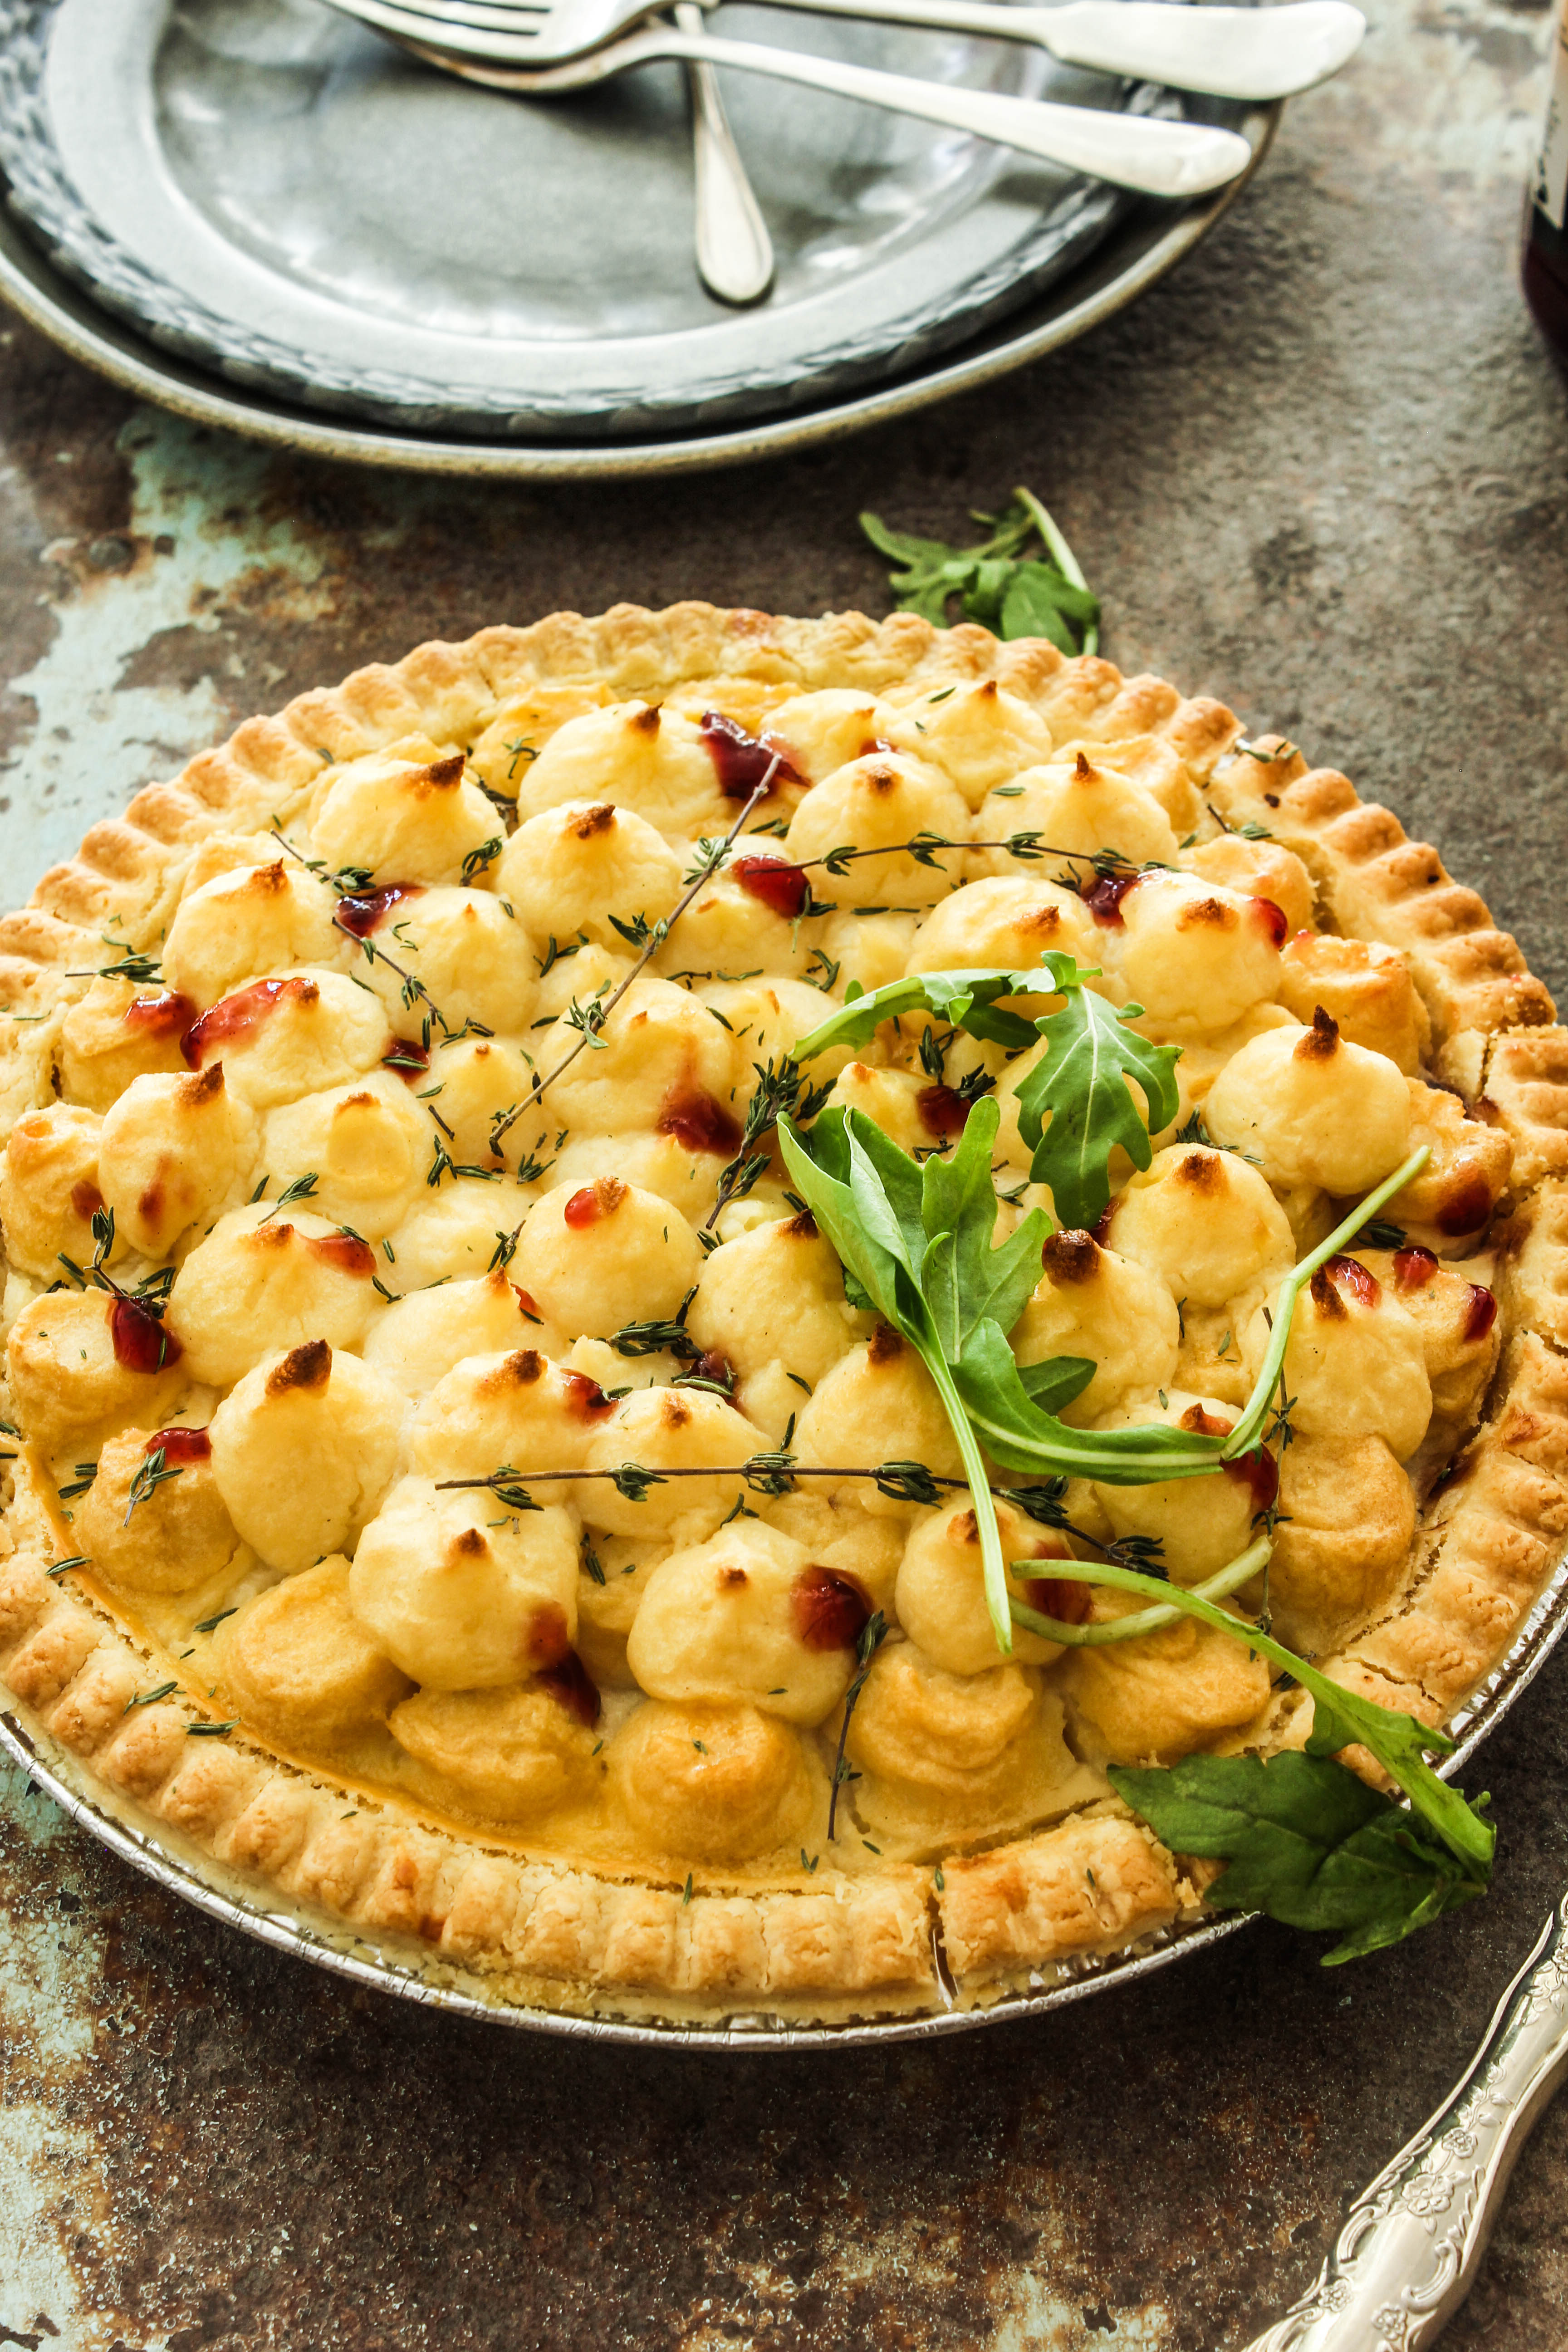
So before I left for Melbourne, I made a birthday cake for my twins and we had an advance celebration at home. It was a big cake and we were happy to come back to it after a vacation of plentiful eating outside. It made a delicious dinner for me last night when I barely had the zeal to put a meal together. I also had these friands in my freezer that made a happy breakfast for all of us. My regular readers would know my love for friands…the lovechild of egg whites and almond meal, both of which I am totally obsessed with. I added some more love to it in the form of orange, honey, rosemary and chia seeds. It sounds like a lot of things happening in these friands but really, you can taste each one of those flavours. They are a treat.

IMG_3213-3

The rosemary leaves add a subtle depth and paired with orange and honey, they elevates the sweet citrus notes to a different level. The chia seeds were a last minute addition because I was introduced to them recently and have been looking for ways to add them to recipes. They provide a crunch to these gorgeous little  afternoon tea treats. The great thing about the recipe is that it is totally flexible. Use any nut meal, substitute orange with lemon or lime, use golden syrup or maple syrup instead of honey, poppy seeds in place of chia seed. There is so much you can do to it to make it your own. As you can see, I baked the friands in my mini bundt cake pan which was almost forgotten for a year. Friands can be baked in any shape and size so you can use muffin pans, friand molds or ramekins.

IMG_3207-3

Here are a few photos of the birthday cake. It was a double chocolate cake with a swiss meringue buttercream.

IMG_3375

IMG_3446


Orange, Honey, Rosemary and Chia Seed Friands/Financiers
Makes 10

1 cup almond meal (ground almonds)
1 1/3 cups icing sugar, sifted
3/4 cup plain flour, sifted
1/2 teaspoon baking powder, sifted
5 eggwhites
125g butter, melted
1/4 cup honey
Finely grated Zest of 1 large orange
1 tbsp rosemary leaves (fresh or dried), finely chopped
1 tbsp chia seeds

Orange Syrup
Juice of 1 orange
1 tbsp honey

Preheat oven to 180 degrees C.  Lightly grease a 12- capacity muffin pan or mini bundt cake pan. Place the almond meal, icing sugar, flour, baking powder, eggwhites, butter, honey , orange zest, rosemary and chia seeds in a bowl and whisk until combined. Spoon the mixture into the prepared pan and bake for 20–25 minutes or until the friands are golden and cooked through. Remove from oven and release friands immediately. Drizzle with orange syrup .Cool on a wire racK.

To make the syrup : Place the orange juice and honey together in a small saucepan over low heat. Remove as soon as it comes to a boil and blends together.


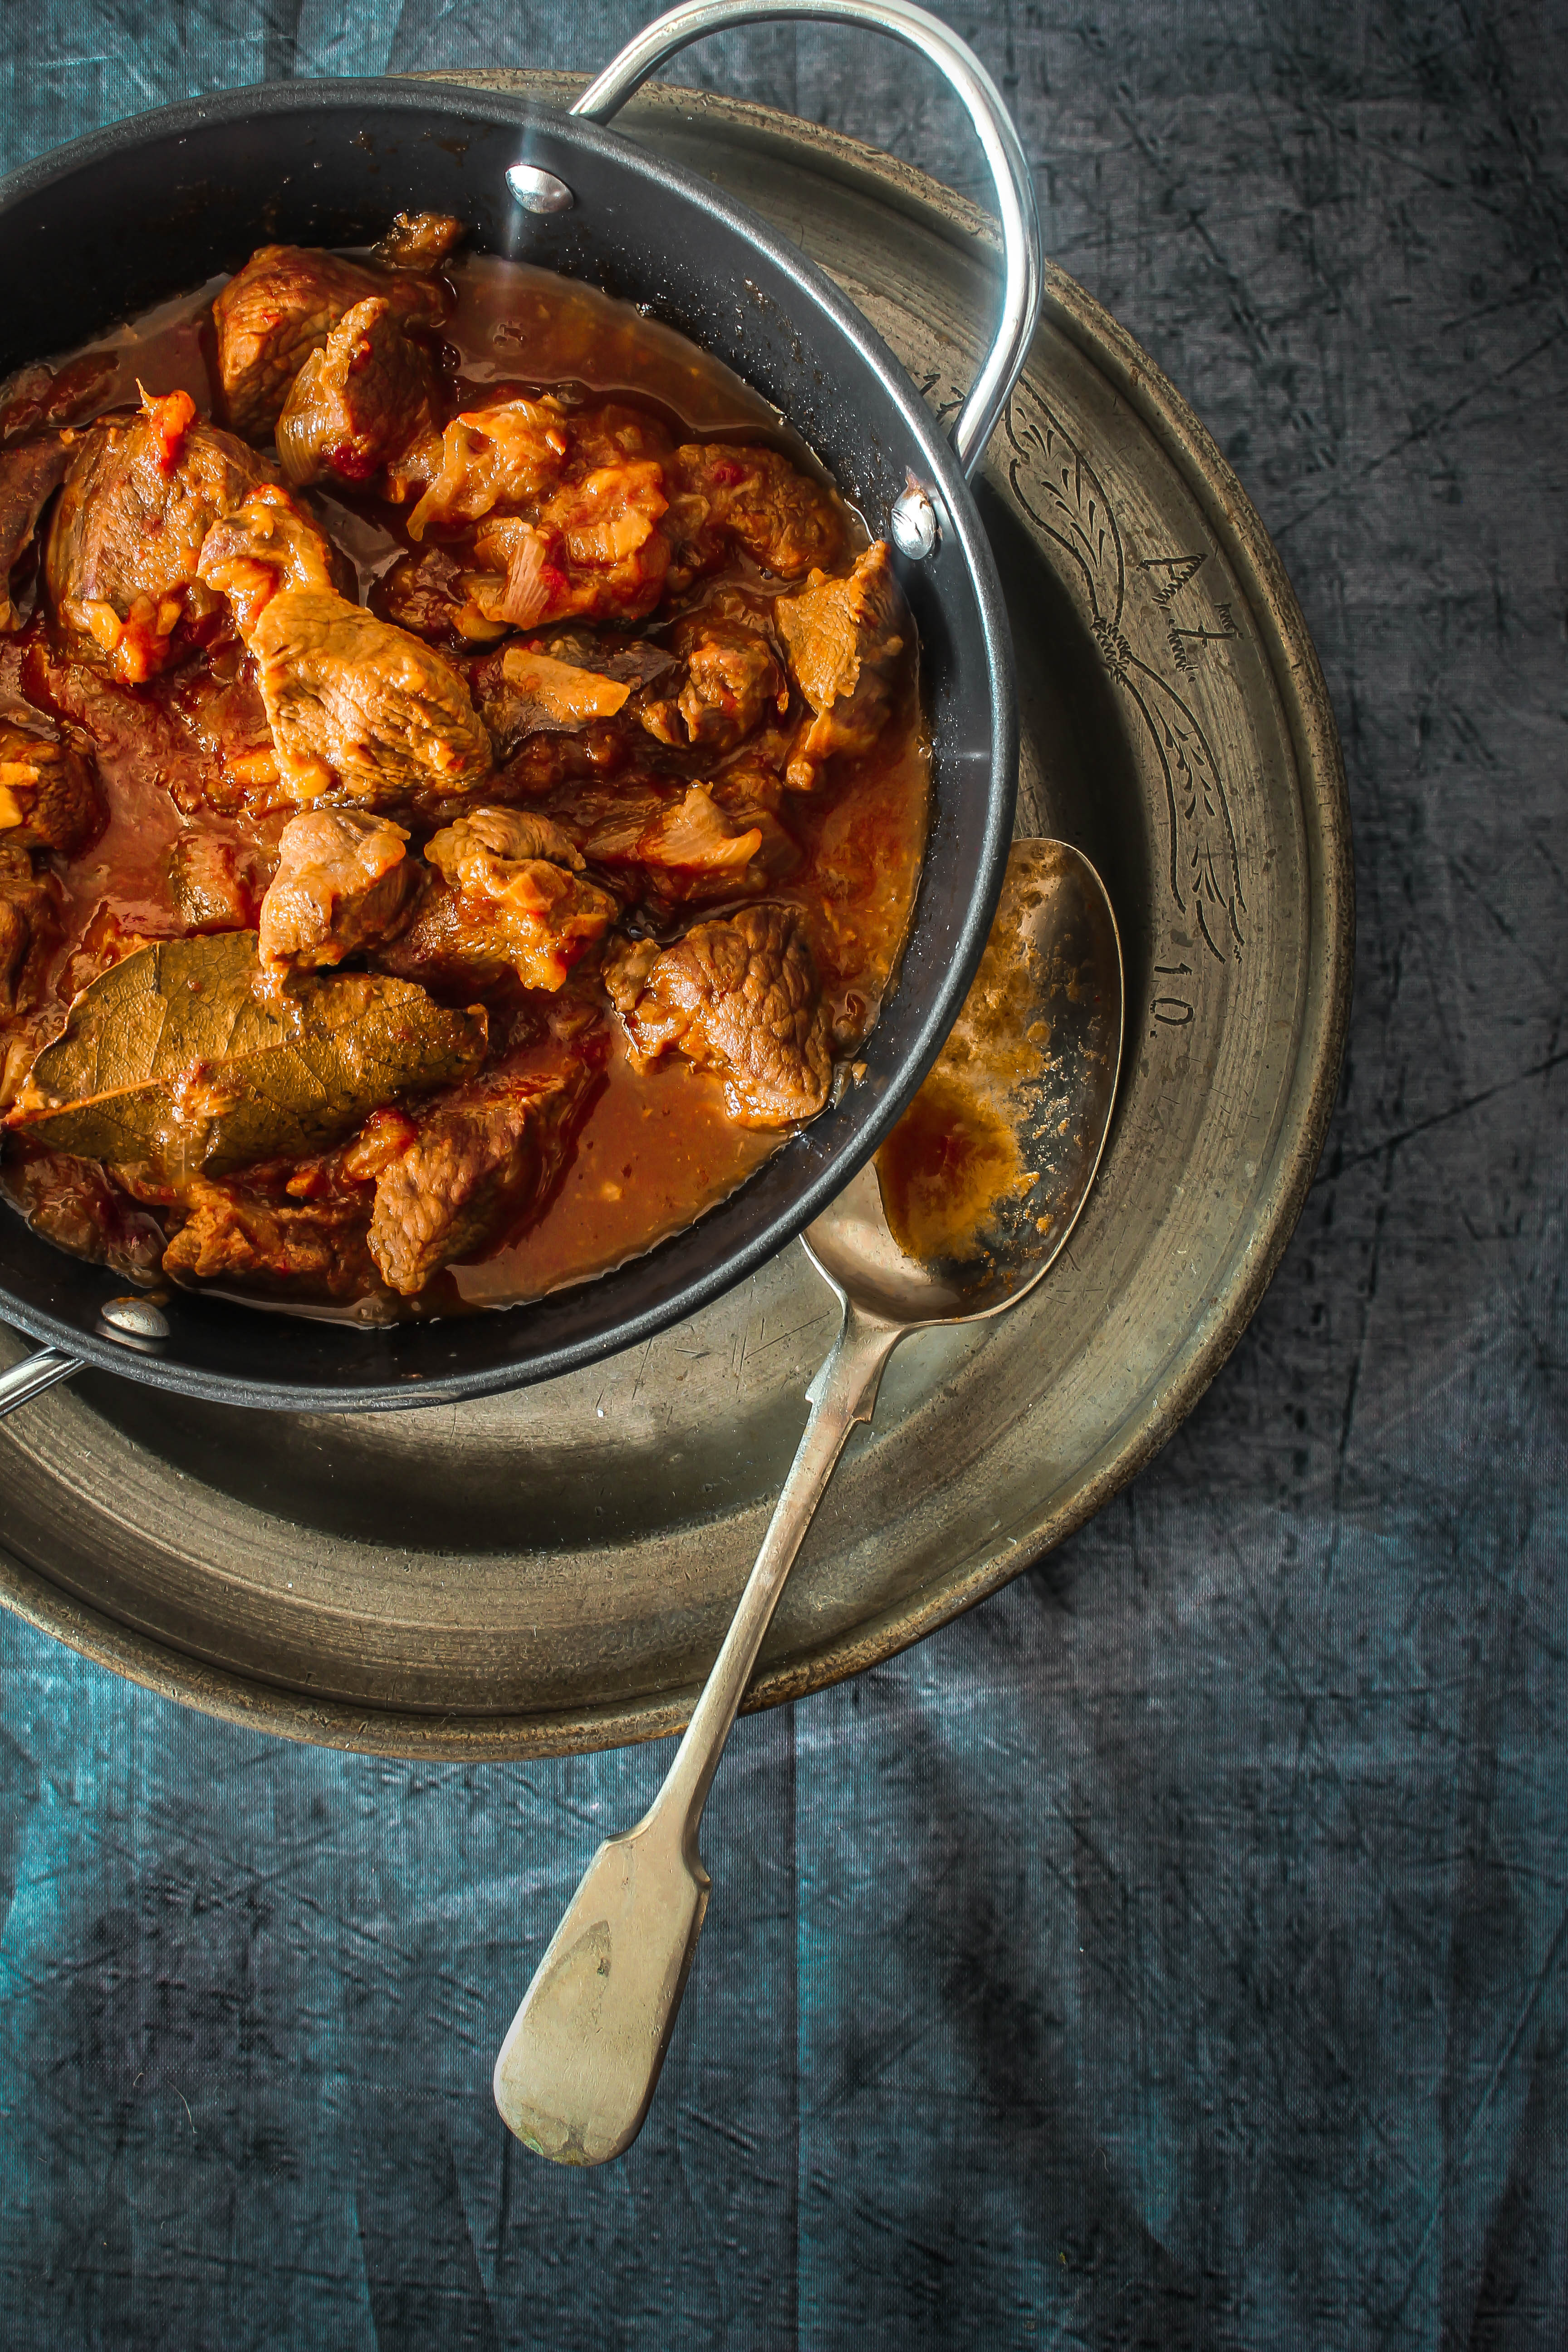
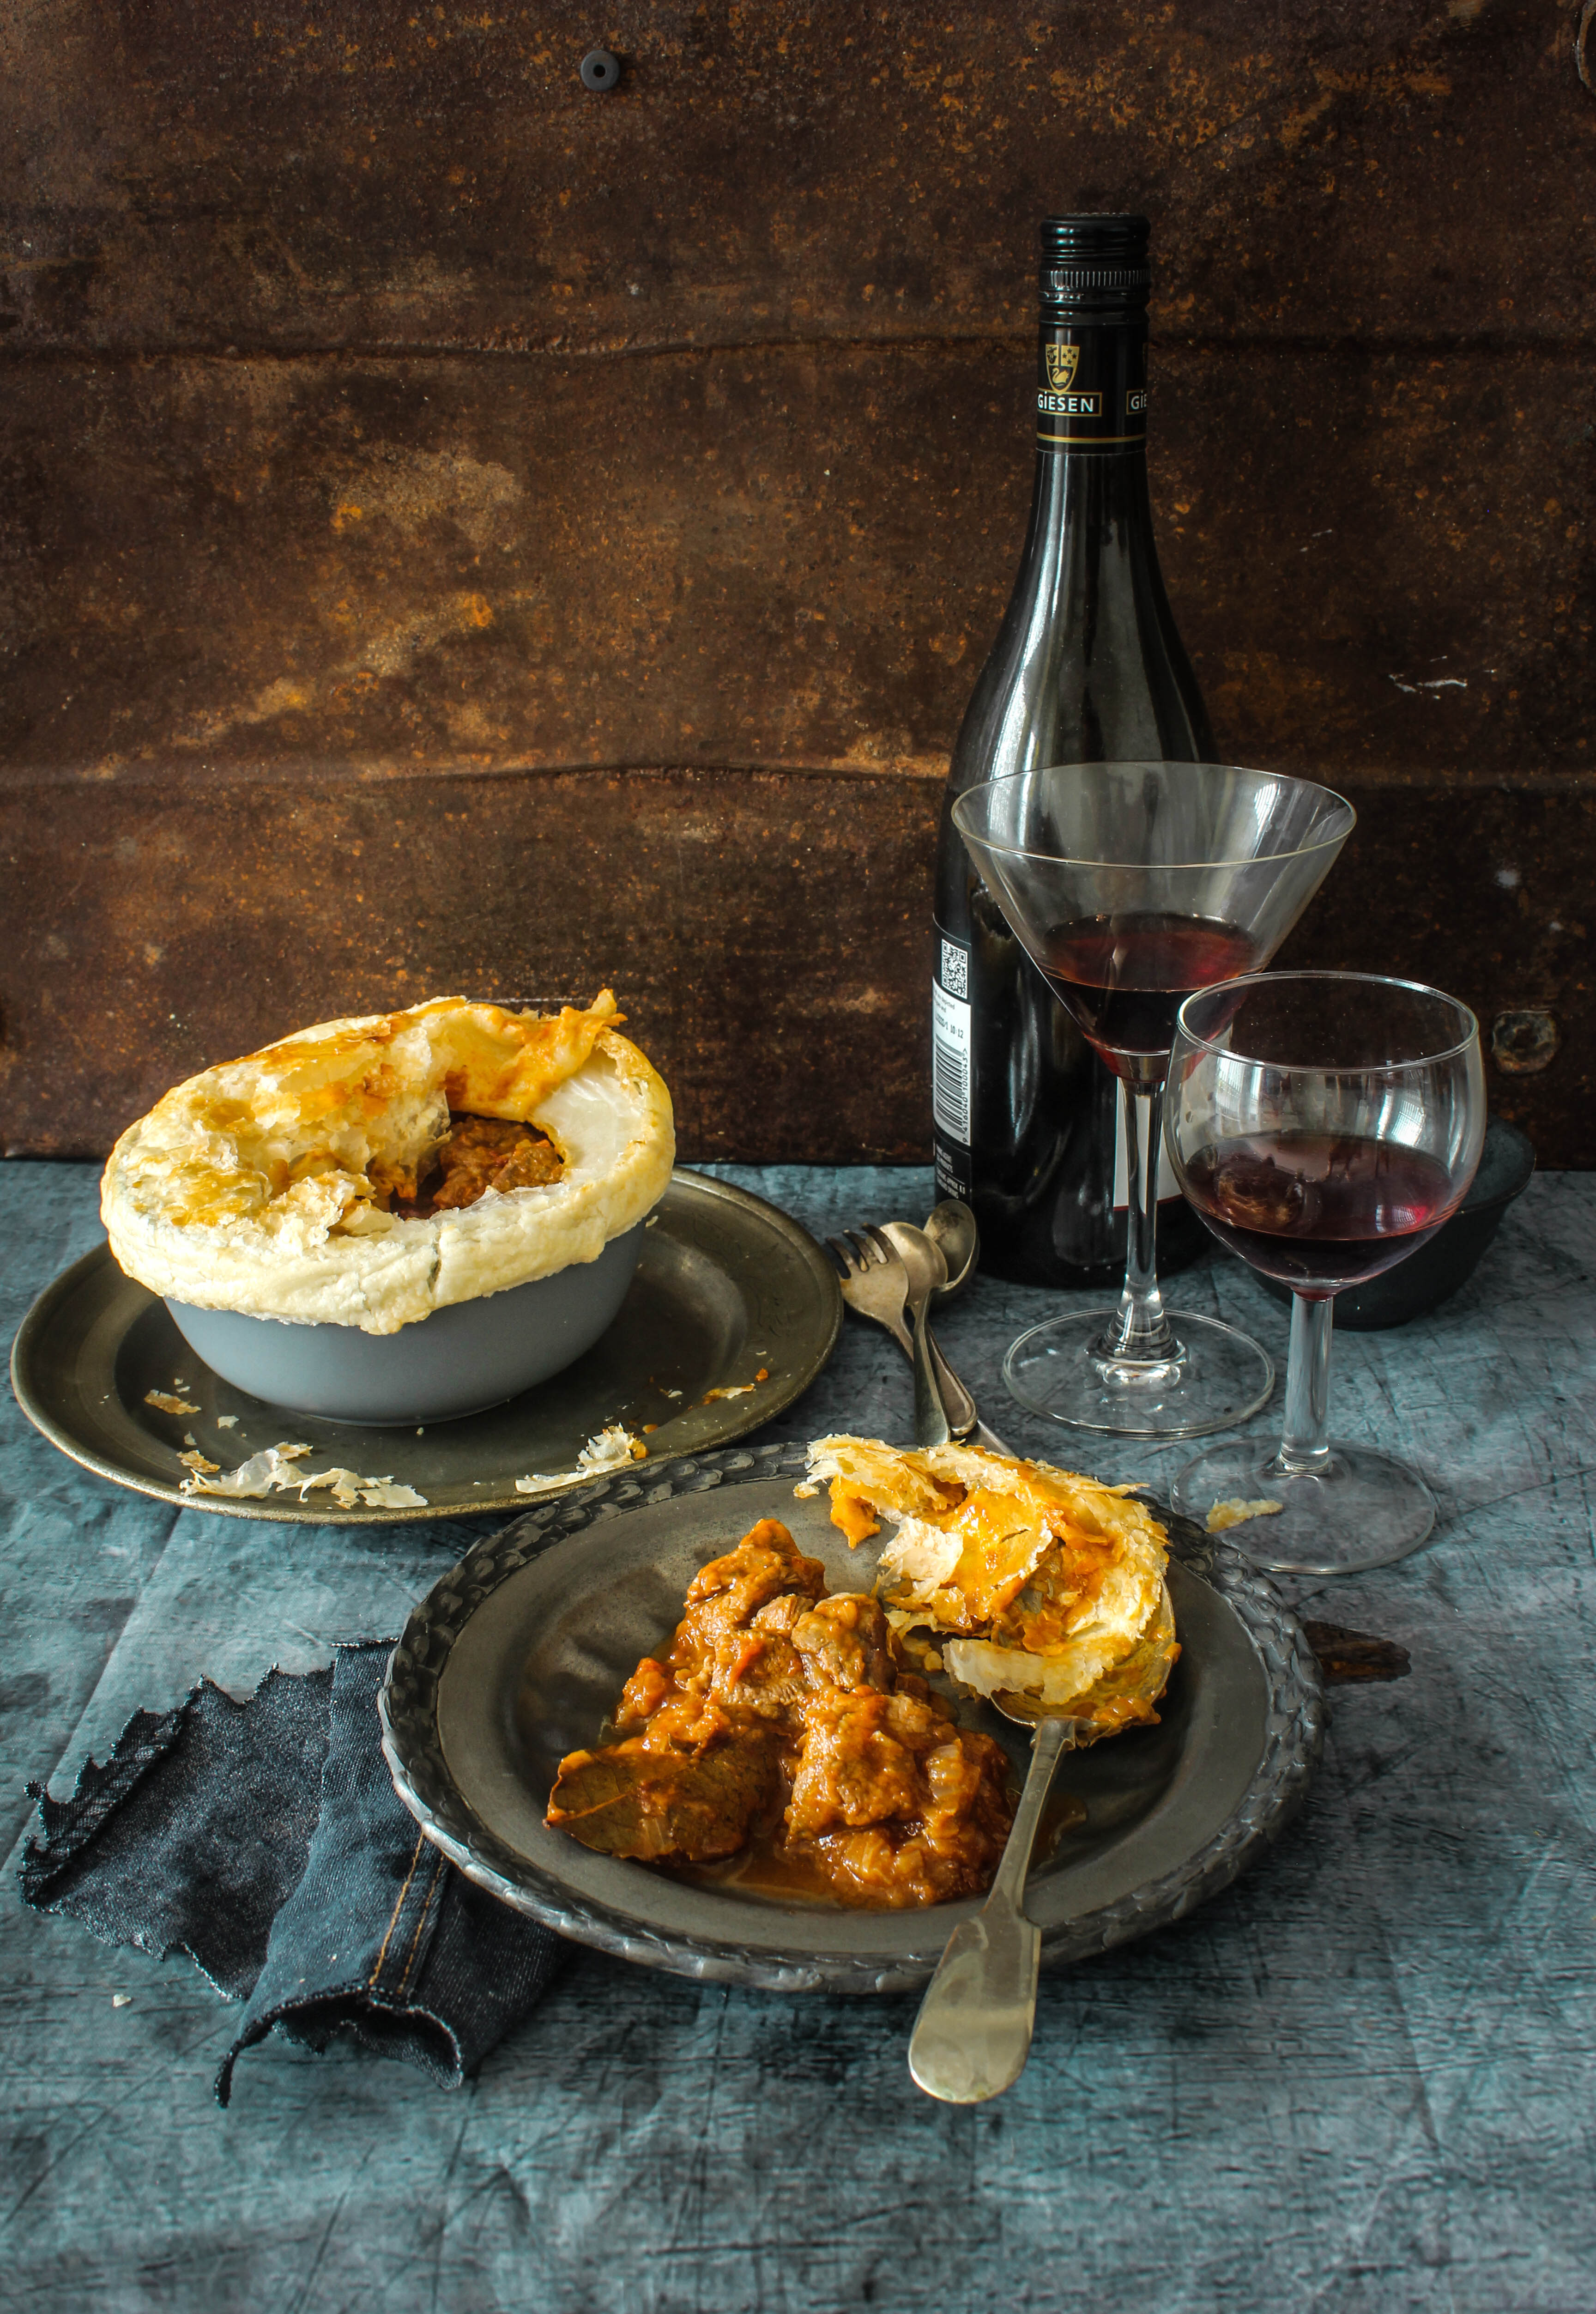
Lamb Rogan Josh Pot Pie

17|11|2014

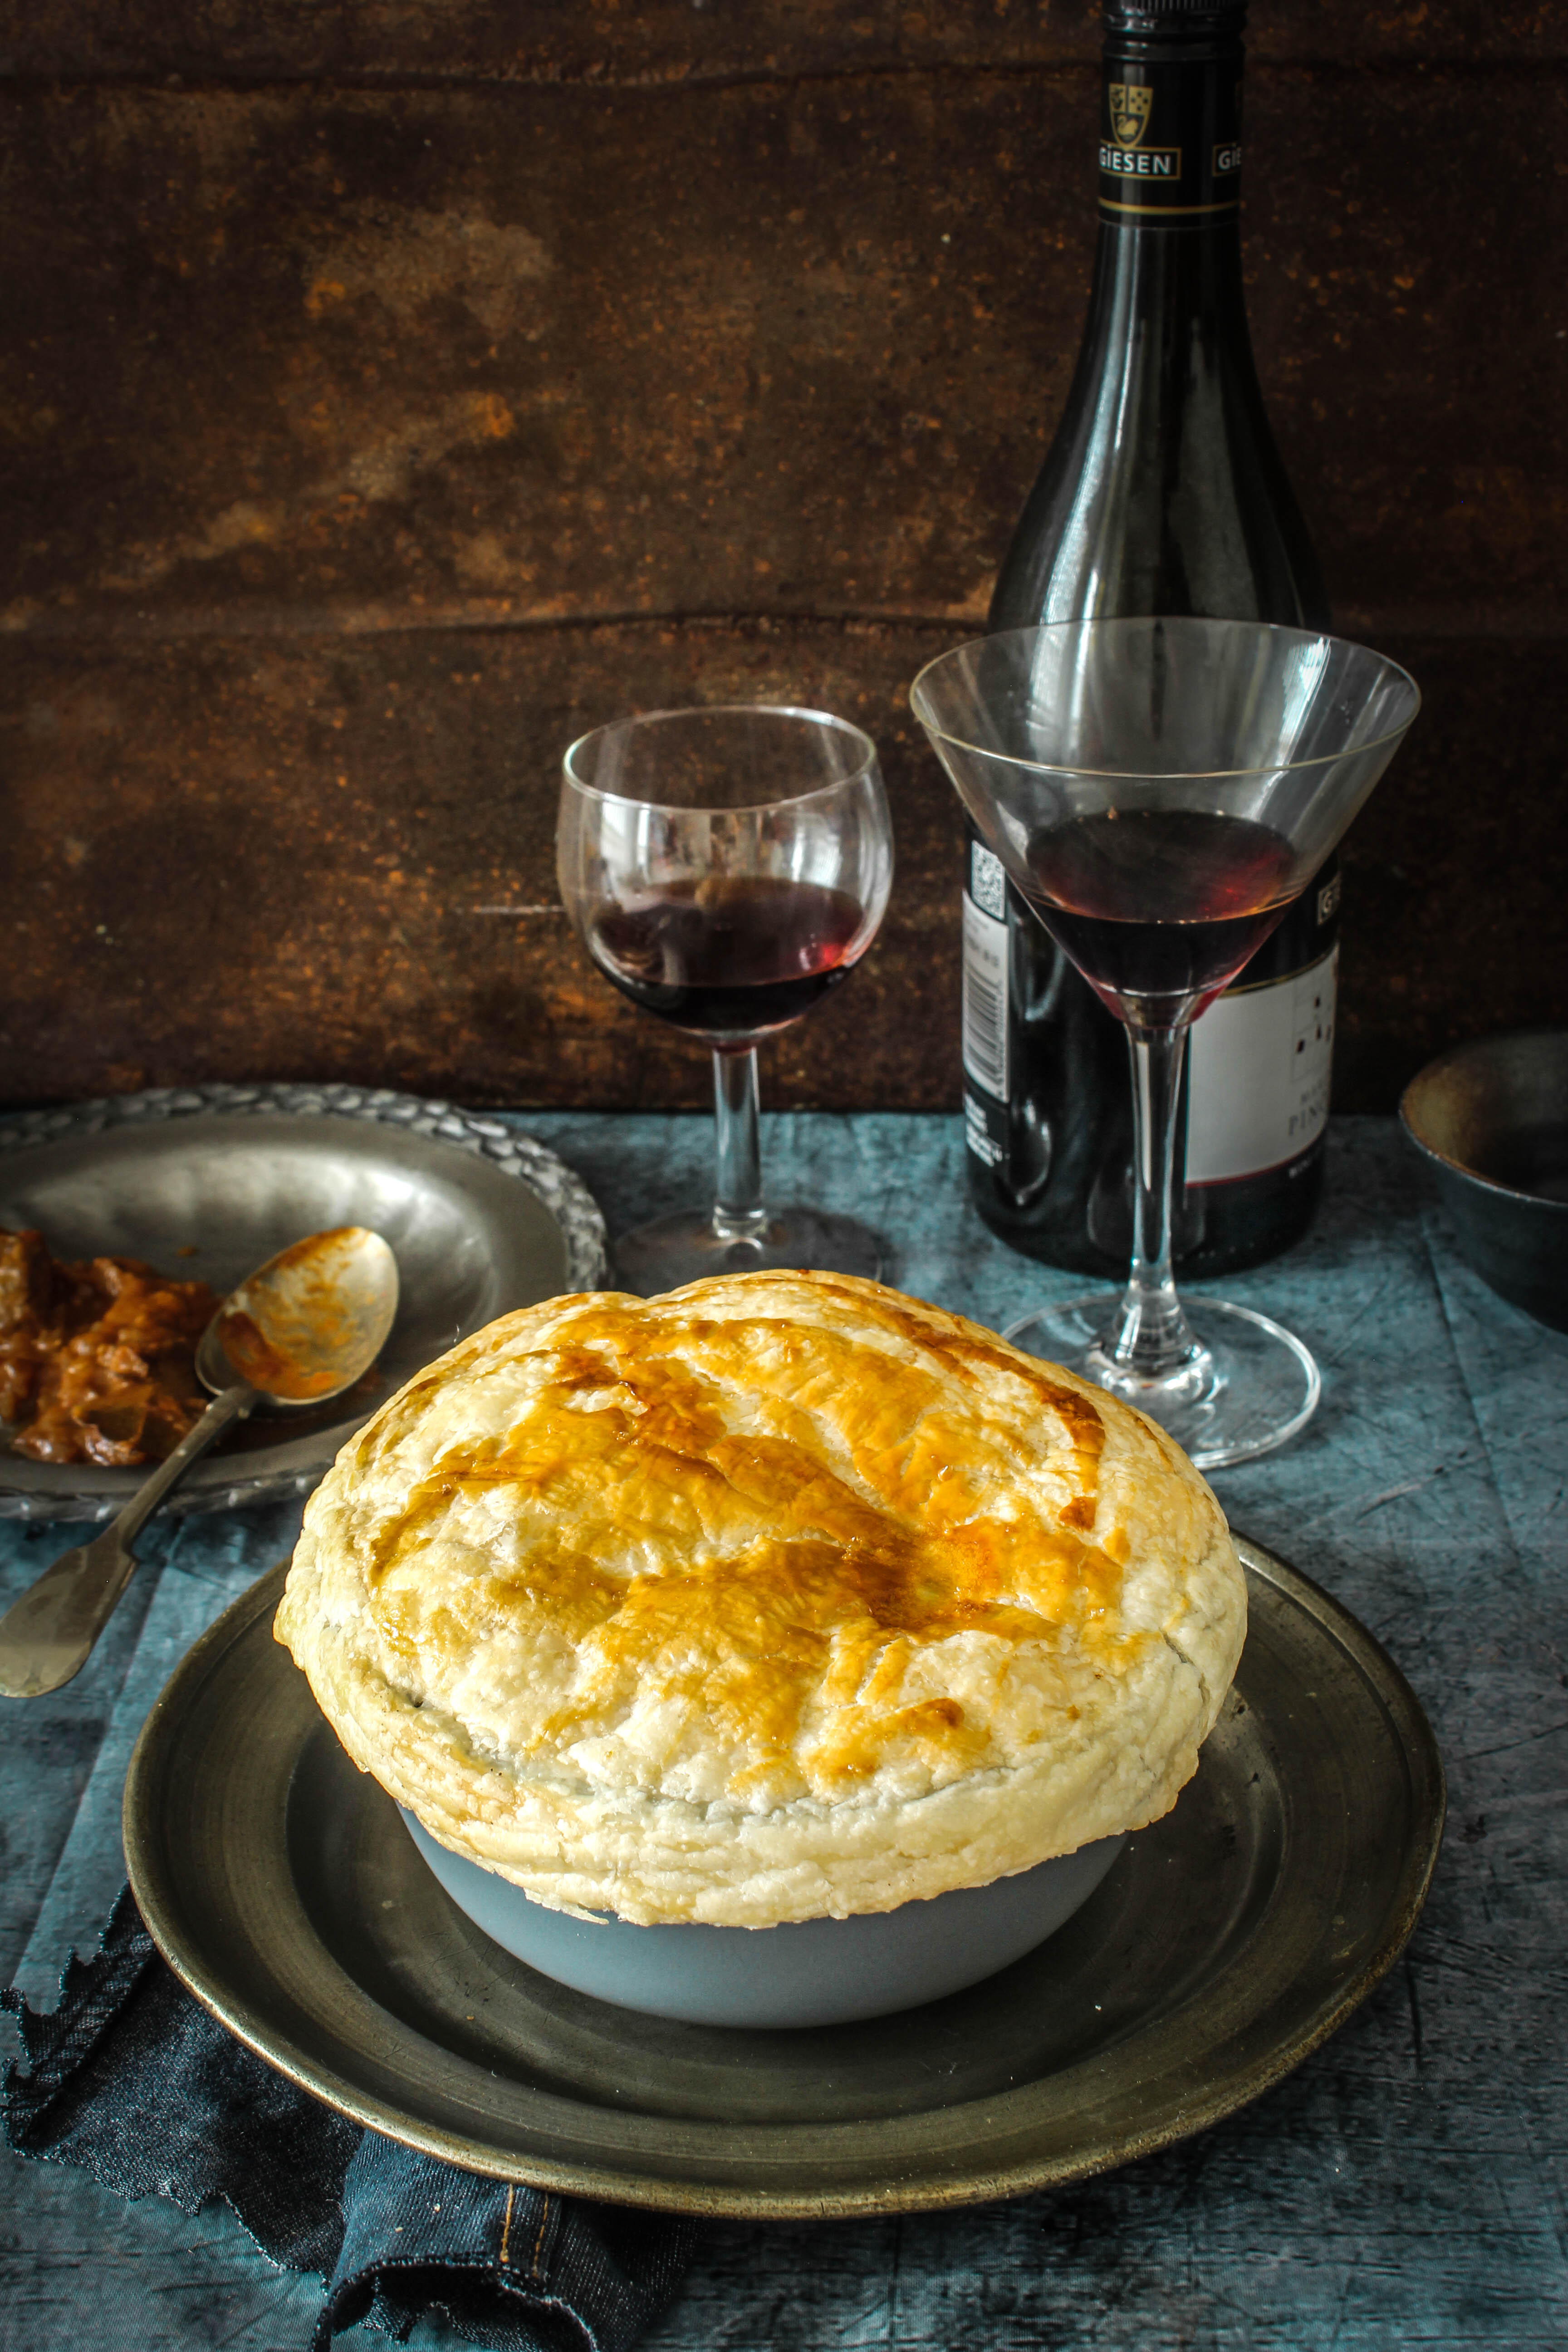
When I was growing up, the definition of good, delicious food at home was as simple as finger-licking food. Food that is so irresistible that you wipe your plates clean with the last piece of flatbread and lick the last of the dish off your fingertips. This theory cannot be truer for a bowl of good Indian curry. The right consistency, the perfect blend of spices, the rich flavours and also very essentially the aroma that fills the home were the standards that were to be met to be for the humble curry to appeal to palates that were used to eating curries all the time. I made my first Lamb Rogan Josh in my early teens after falling in love with it while watching a cooking show. Alas! No fingers were licked. The gravy had dried out and all that were left were the lamb pieces. They were delicious so I wasn’t discouraged.

IMG_3183

Rogan Josh is an aromatic lamb dish that is slow cooked with chillies and spices till the flavours blend into a magnificent curry and the lamb is tender and succulent. The dish is a signature from the Kashmir region of India and what makes it unique, flavours aside is the gorgeous red colour that comes from the usage of chillies that are grown locally in that region. Since the chillies are not accessible to a lot of people, (even those living in other parts of India) people like to use the Kashmiri Chilli powder that is quite easily available in India and in Indian stores abroad. Otherwise, it is best to make a fine paste of dried red chillies which you could find in most supermarkets. This is my chosen way of cooking the dish.
Like any classic recipe, the Lamb Rogan Josh has many different variations today. I have simplified my version over the years for the sake of convenience but also taking care not to compromise much on the flavours.
Talking of comfort food, as much as I love my curries I also have a thing for pies. Living in Australia, you cannot overlook the pies. They are everywhere and they are smashing! The idea of a pot pie however is what delights me the most. A simple puff pastry cover and you have wonderful textures in your food. I love the fact that you can get creative with your fillings and there is so much room for variety. Then why not an Indian inspired hearty, spicy lamb filling that makes your taste-buds go crazy with deliciousness.

IMG_3177-2

This recipe as I mentioned is a simplified one. The original dish is quite rich and spicy. I cook mine in a pressure cooker so it is quite fast but you could cook it in a saucepan as well. If I am serving this for guests I tend to go easy with the oil and spices but if it is for a weekend dinner at home I am careful about the quantities. Once the Rogan Josh is ready, all we do is pour it into a deep dish, cover with puff pastry and bake till brown and crispy. The filling can be made ahead in time and stored in the refrigerator or freezer.

IMG_3193

Lamb Rogan Josh Pot Pie
Serves 4

2 tbsp vegetable oil
2 bay leaves
3 green cardamom pods
4-5 cloves
1 stick cinnamon
1 tsp fennel seeds
2 red onions, finely chopped
3 cloves garlic
1 inch ginger, grated
1/2 cup diced canned tomatoes
3 dried red chillies (processed to a paste with 2 tbsp of water
400 g boneless cubed lamb (preferable from the shoulder)
salt, to season
11/2 cups water
1 sheet puff pastry (store bought)
1 egg, lightly beaten

Heat oil in a large thick bottomed saucepan over medium heat. Add the bay leaves, cardamom, cloves, cinnamon, fennel seeds and cook till they splutter (about 1 minute). Add the onion, garlic and ginger and cook till onion is soft and translucent.

Add the diced tomatoes and red chilli paste and cook till blended. Turn the heat onto high and add the lamb cubes Sear the lamb cubes evenly on all sides, stirring constantly. Season with salt. Pour in the water and mix. Reduce heat to low, cover and cook for 40-45 minutes or until meat is tender. Keep adding water if the gravy appears to dry out.

Once meat is cooked through and gravy has thickened up, remove from heat. Cool slightly and pour into a deep dish.

Preheat oven to 220 degrees C (200 degrees for fan-forced). Cup pastry into a large round, an inch larger than the circumference of the pie dish. Place on top of lamb mixture, scrunching edges of pastry around the dish. Brush with a little egg. Bake for 10-15 mins, until puffed and golden. Serve immediately.


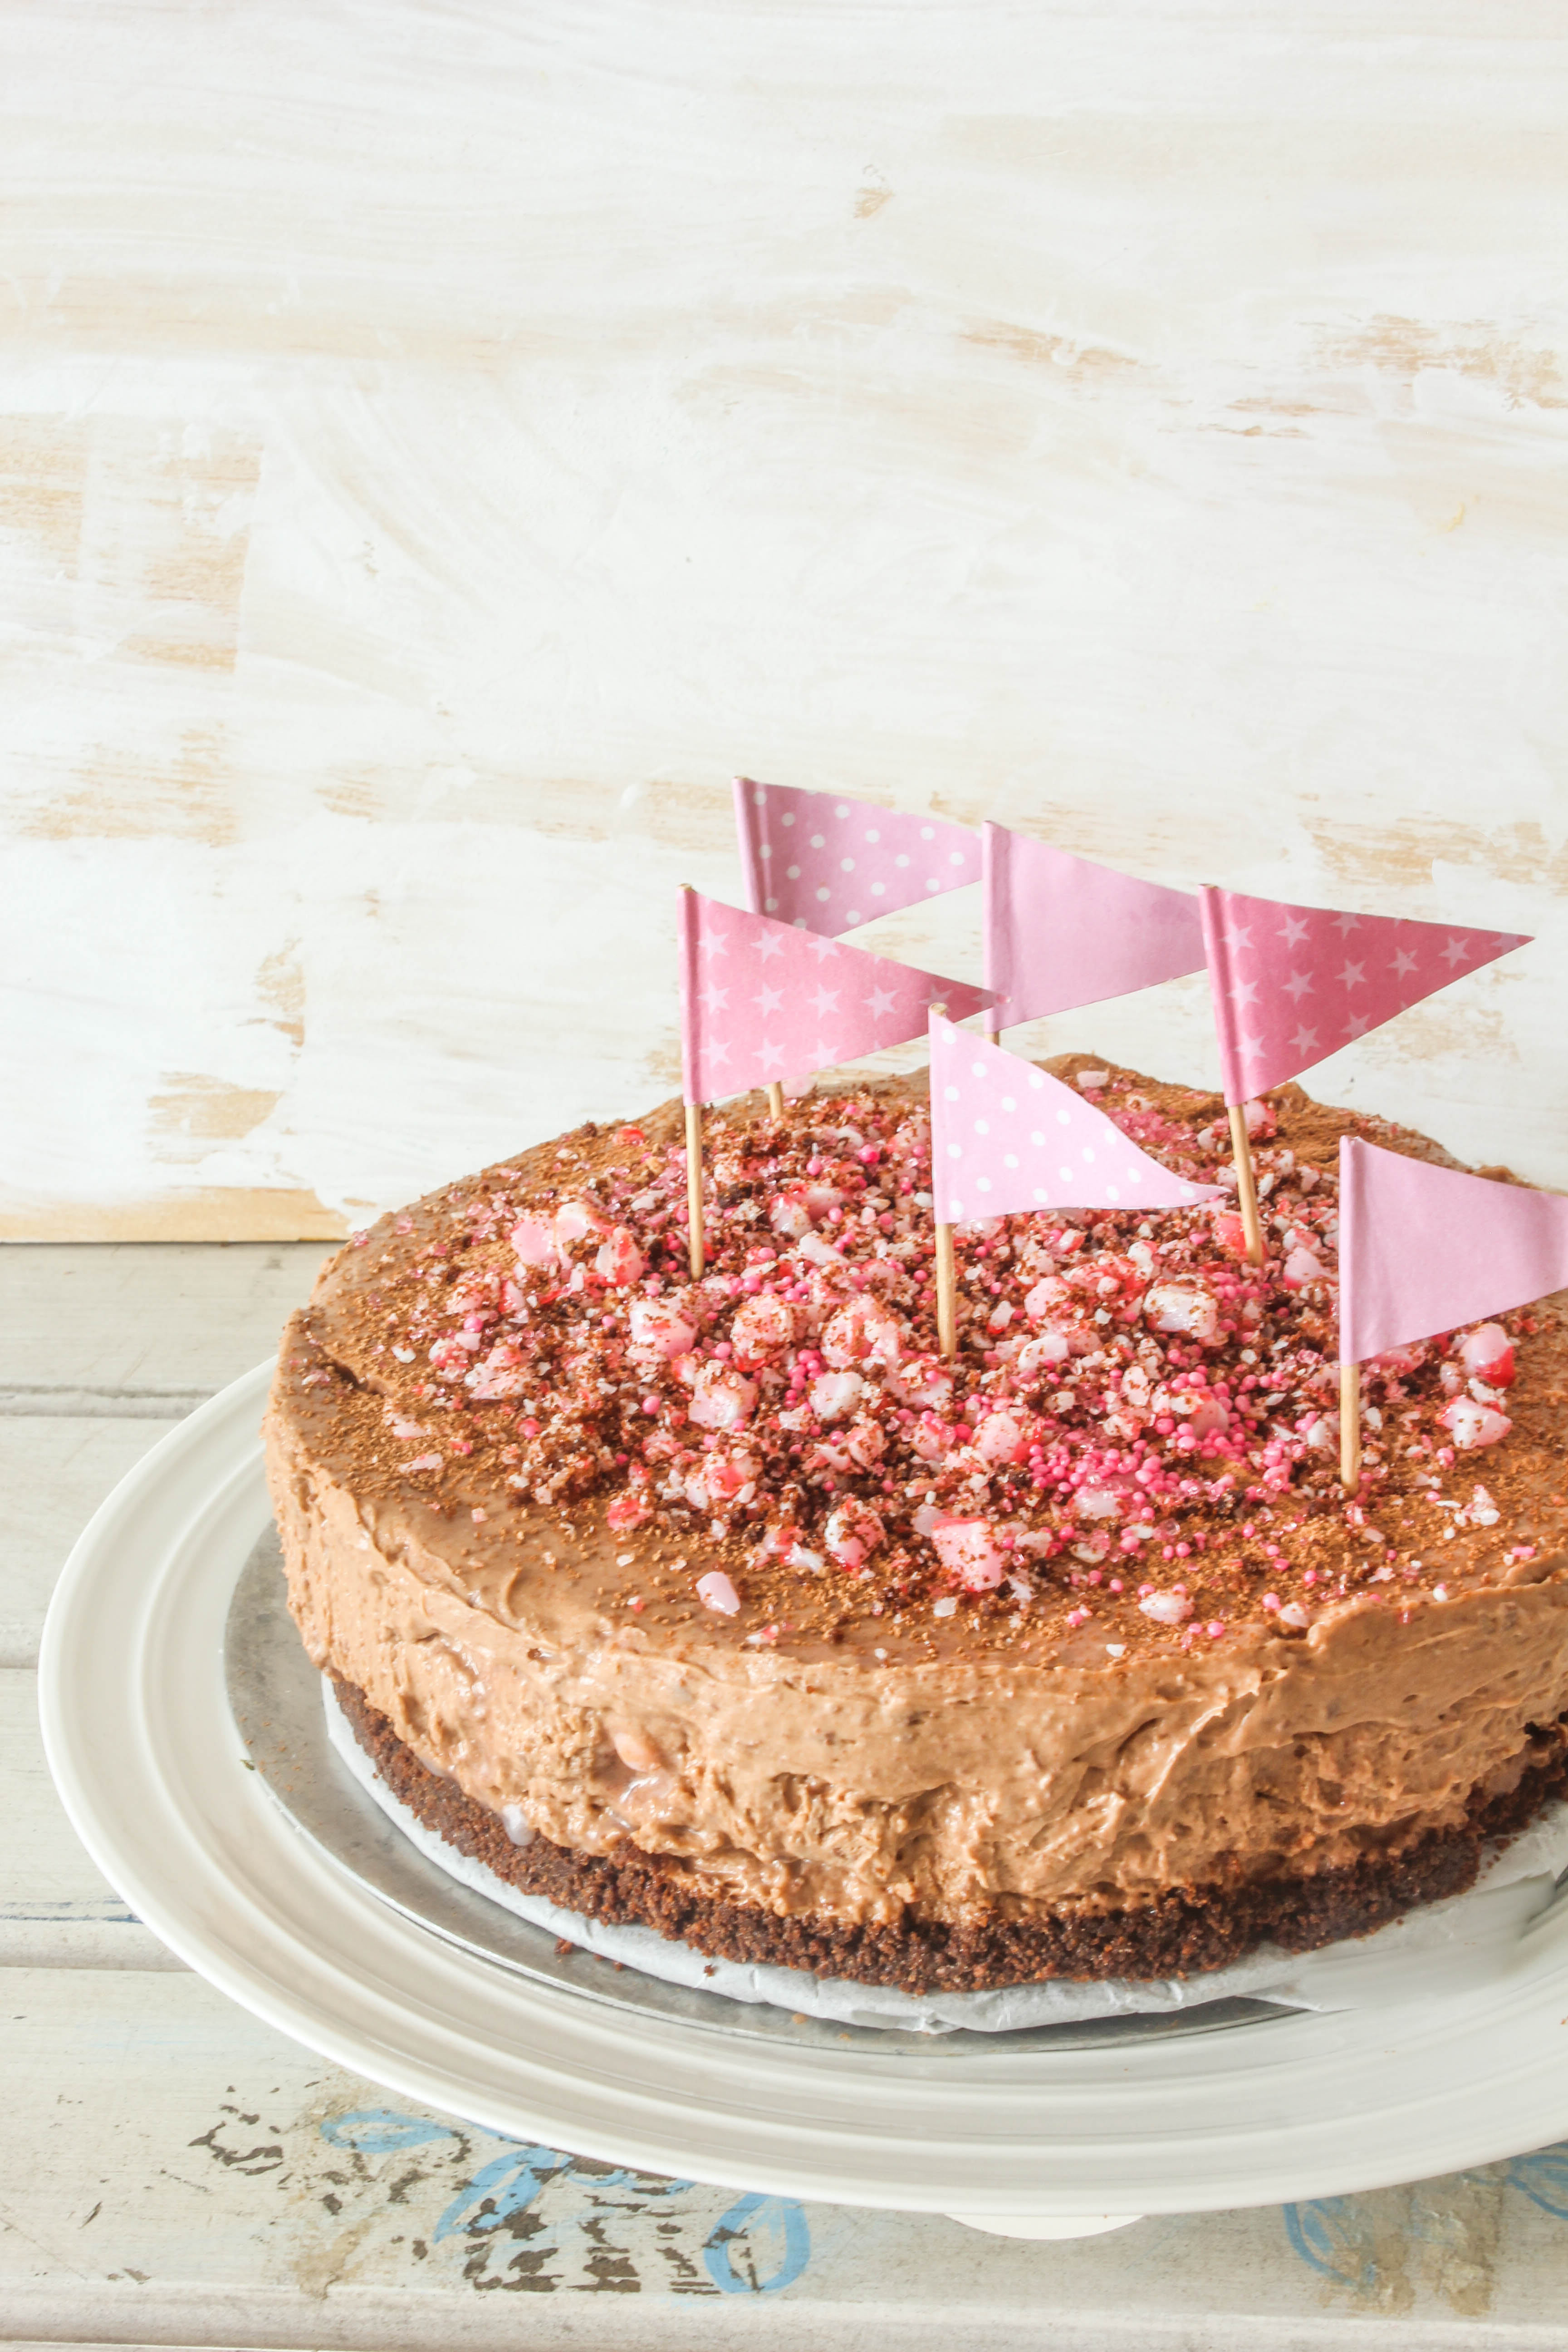
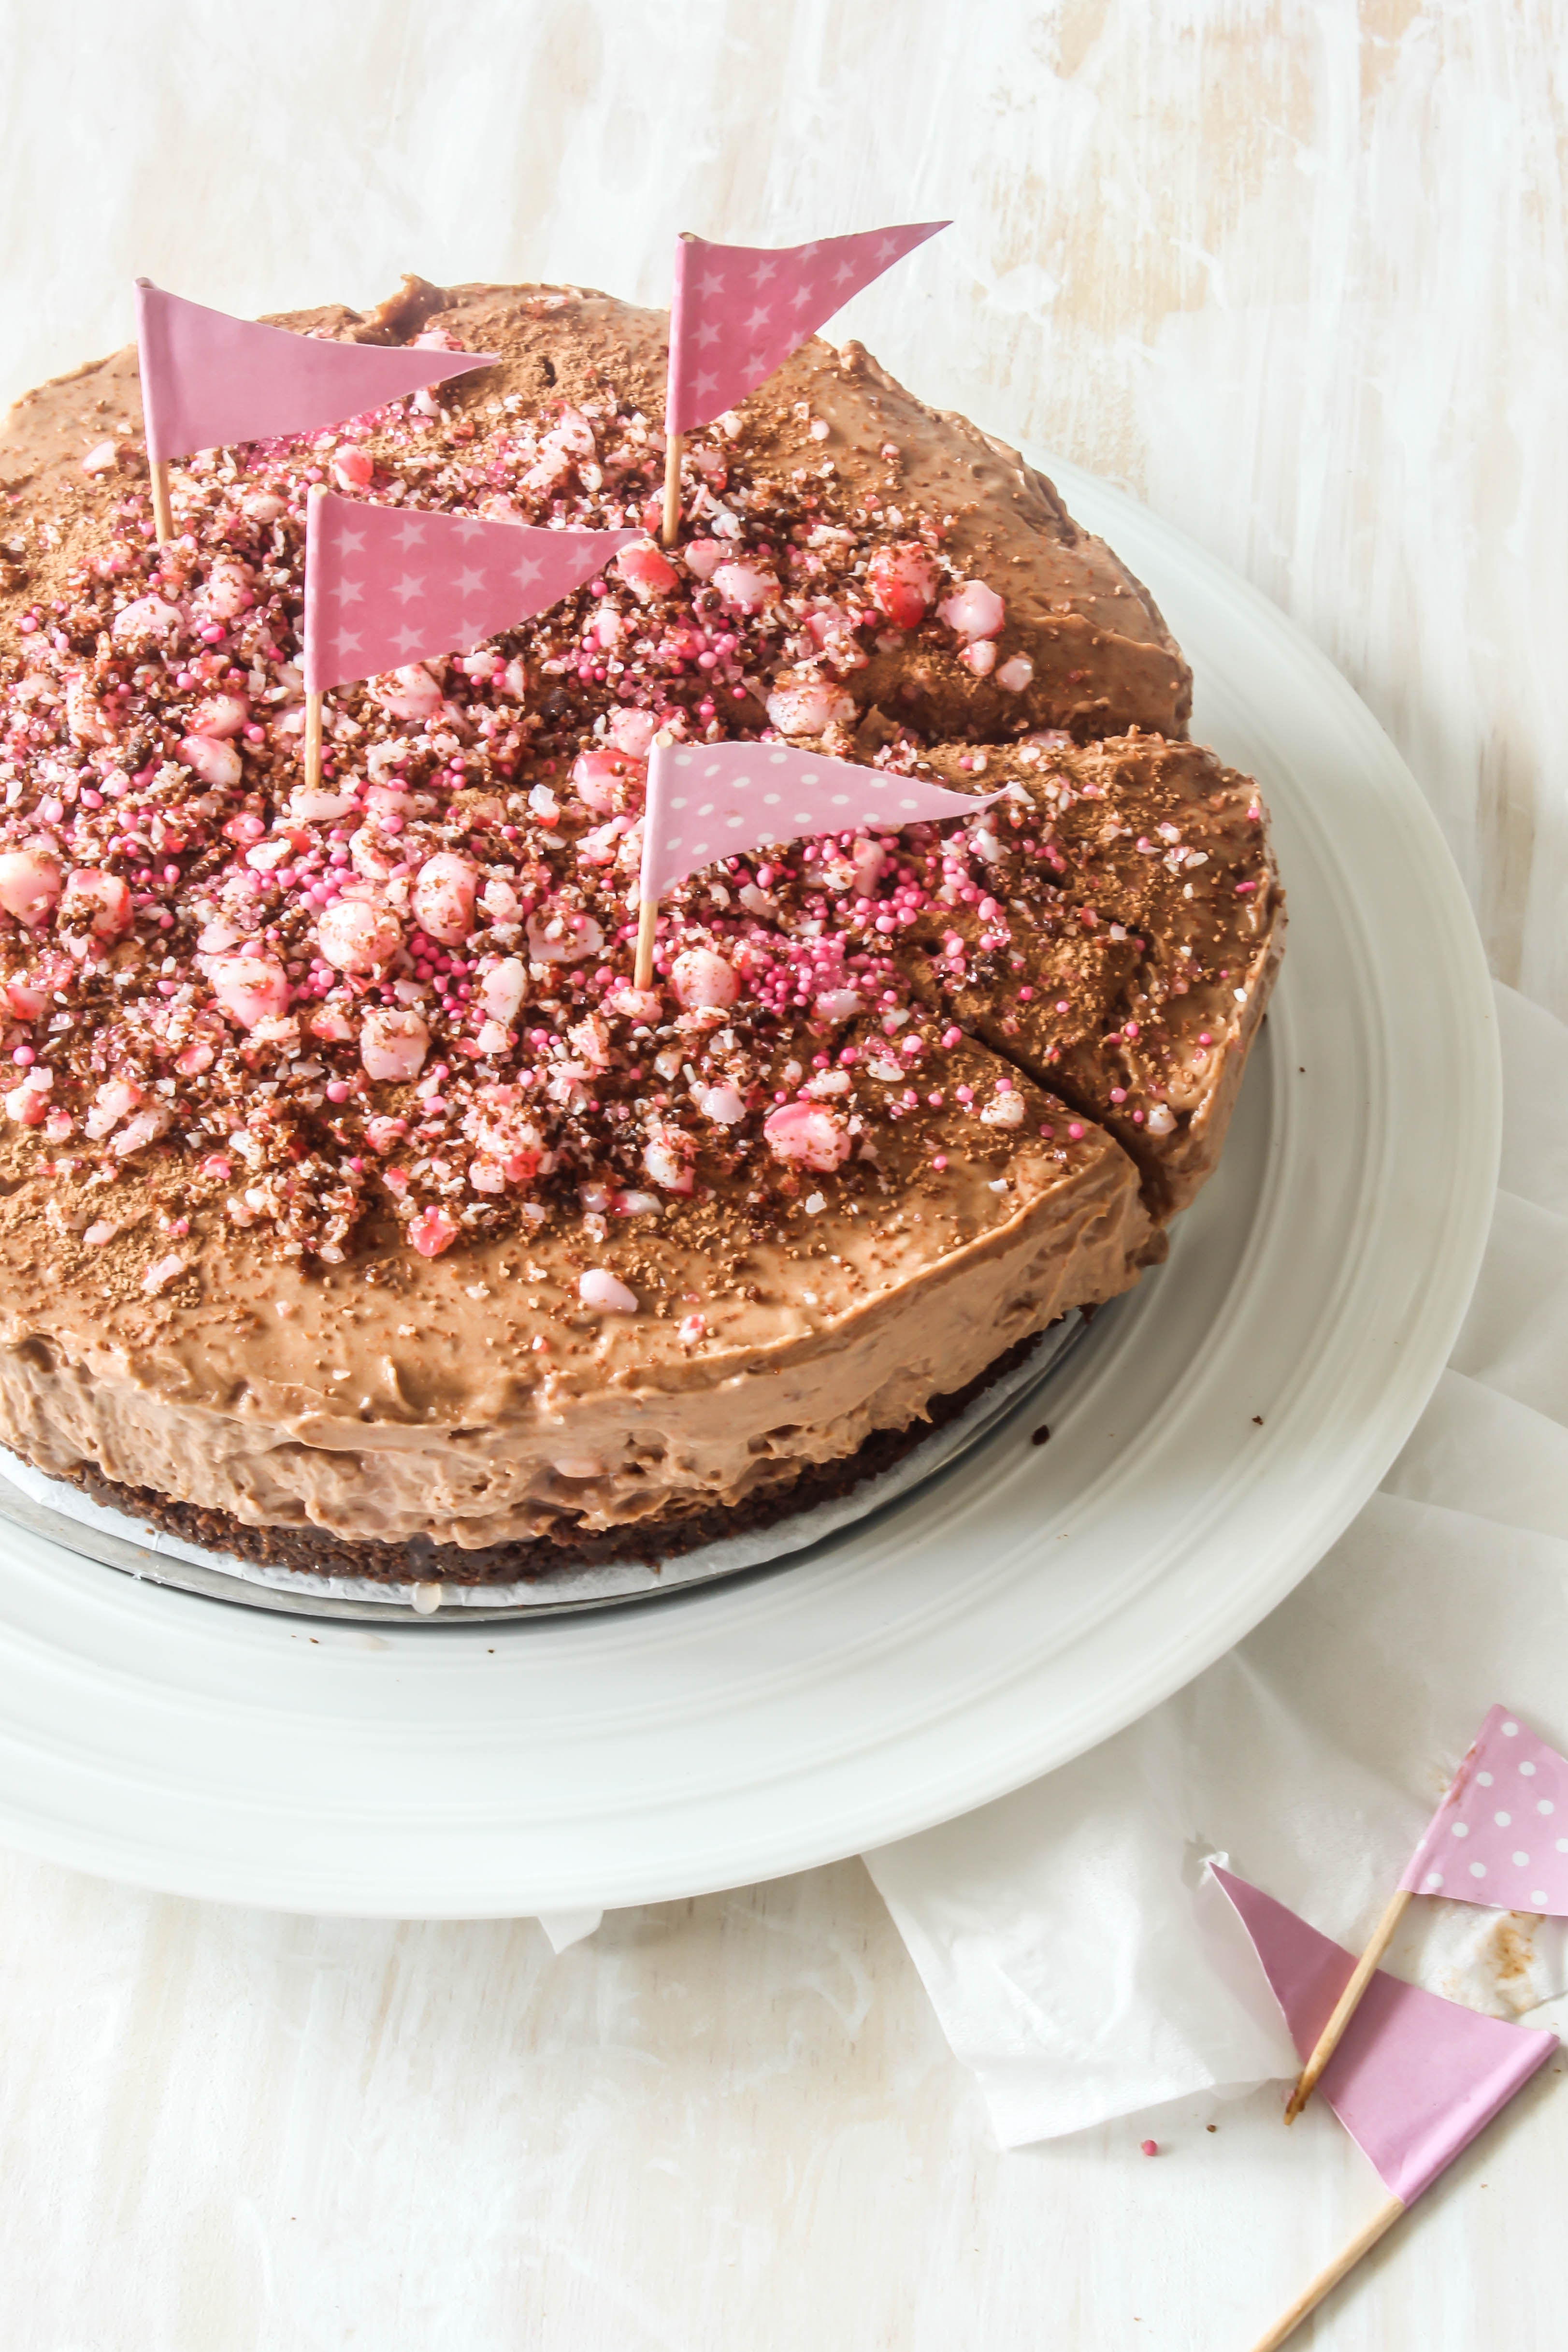
No-Bake Mocha Peppermint Cheesecake

12|11|2014

I know I have to step up my fitness regime. I can foresee two whole months of eating too much cake, cookies and indulgent treats. I have to make them and if there isn’t enough room in the fridge, someone has to make room for them. Someone who thinks she could hug them if they were real. Or showcase them in a museum.

IMG_3343-2


It’s really hard for me to decide if I like a no-bake cheesecake than the baked version. But I do find it a bit easier to put together and without eggs,it is lighter in texture than it’s baked counterpart.  In this recipe I’ve used my favourite chocolate cheesecake ingredients, added coffee to it for a mocha flavour and folded in crushed candy cane for a touch of Peppermint. Then I have topped the cheesecake with more crushed candy cane and pink sprinkles.And that’s all. Easy peasy. But the flavours are good together. Peppermint isn’t really my favourite but Mocha is. You have complete control over how subtle or strong you want the peppermint to be in the cheesecake.The candy cane tends to become sticky after crushing so my advice would be to not do this too much ahead in time.

IMG_3359

There are quite a few food-porn-ish cakes in the making now. One more resting in the fridge begging to be photographed. And then the one I am most excited about…for the twin’s fifth birthday. We decided to take a small vacation during that time so the cake will be made and cut in advance at home. We plan to have a store bought one on the actual birthday so whichever way it is, there’s going to be a lot of cake. Along with happy faces.

IMG_3364


No-Bake Mocha Peppermint Cheesecake
Serves 8-10

200 g chocolate cookies
70 g unsalted butter, melted
2 tbsp hot milk
2 tsp powdered gelatine
11/2 tsp instant coffee
10-12 candy canes (crushed with a rolling pin inside a ziplock bag)
200 g dark chocolate, melted and cooled
500 g cream cheese, room temperature
1 cup brown sugar
1/4 cup castor sugar
1/2 cup thickened cream
cocoa powder, to sprinkle

Grease a 19 cm round Springform pan. Line the base and sides with baking paper.
Place the cookies in a food processor. Process until fine crumbs. Add melted butter and mix to combine. Using your fingertips, press biscuit mixture over base of prepared pan. Refrigerate for 30 minutes or until firm.

Pour milk into a small bowl. Sprinkle over gelatine. add the instant coffee. Using a fork, whisk until gelatine and coffee are dissolved. Set aside to cool slightly.

Using an electric mixer, beat cream cheese and sugars in a large bowl until smooth. In a separate bowl, whip heavy cream to soft peaks. Add the melted and cooled chocolate and gelatine mixture to the whipped cream. Fold in to blend till smooth.

Add the chocolate-cream mixture to the cream cheese mixture. Fold in gradually till mixed. Next, add 1/2 the crushed candy cane (reserving the rest for the topping) and fold in. Spoon over the base of the cookie mixture. Smooth out the surface with a palette knife or the back of a spoon. Cover. Refrigerate for 4 hours or until set. Sprinkle generously with cocoa. Top with crushed candy cane.


Herbed Ricotta, Cranberry Chutney and Duchess Potato Tart

8|11|2014

I don’t have a Thanksgiving but that has never stopped me from being a part of the celebrations. The events leading up to Christmas have brought me joy since I was in school. Even as a little girl my eyes would light up when I saw the trees on display, the tinsel, glittery ornaments, the fairy lights and the Christmas sales. At school we learnt about the different traditions and I embraced them with wide open arms. When I came to live in Australia I thought I might like to live inside the shops during Christmas. Having a food blog makes it a bonus for me. It allows for the planning and preparations to begin well in advance. And I am so up for it.

IMG_3247-3

Would you believe me if I told you that it took me less than 15 minutes to put this together? I have cheated a bit on this tart…okay more than a bit to simply things. Unlike my usual recipes, I have used a few store bought ingredients, put them together and the result is something that can be a centre-piece on the table without spending hours in the kitchen.

IMG_3249-2

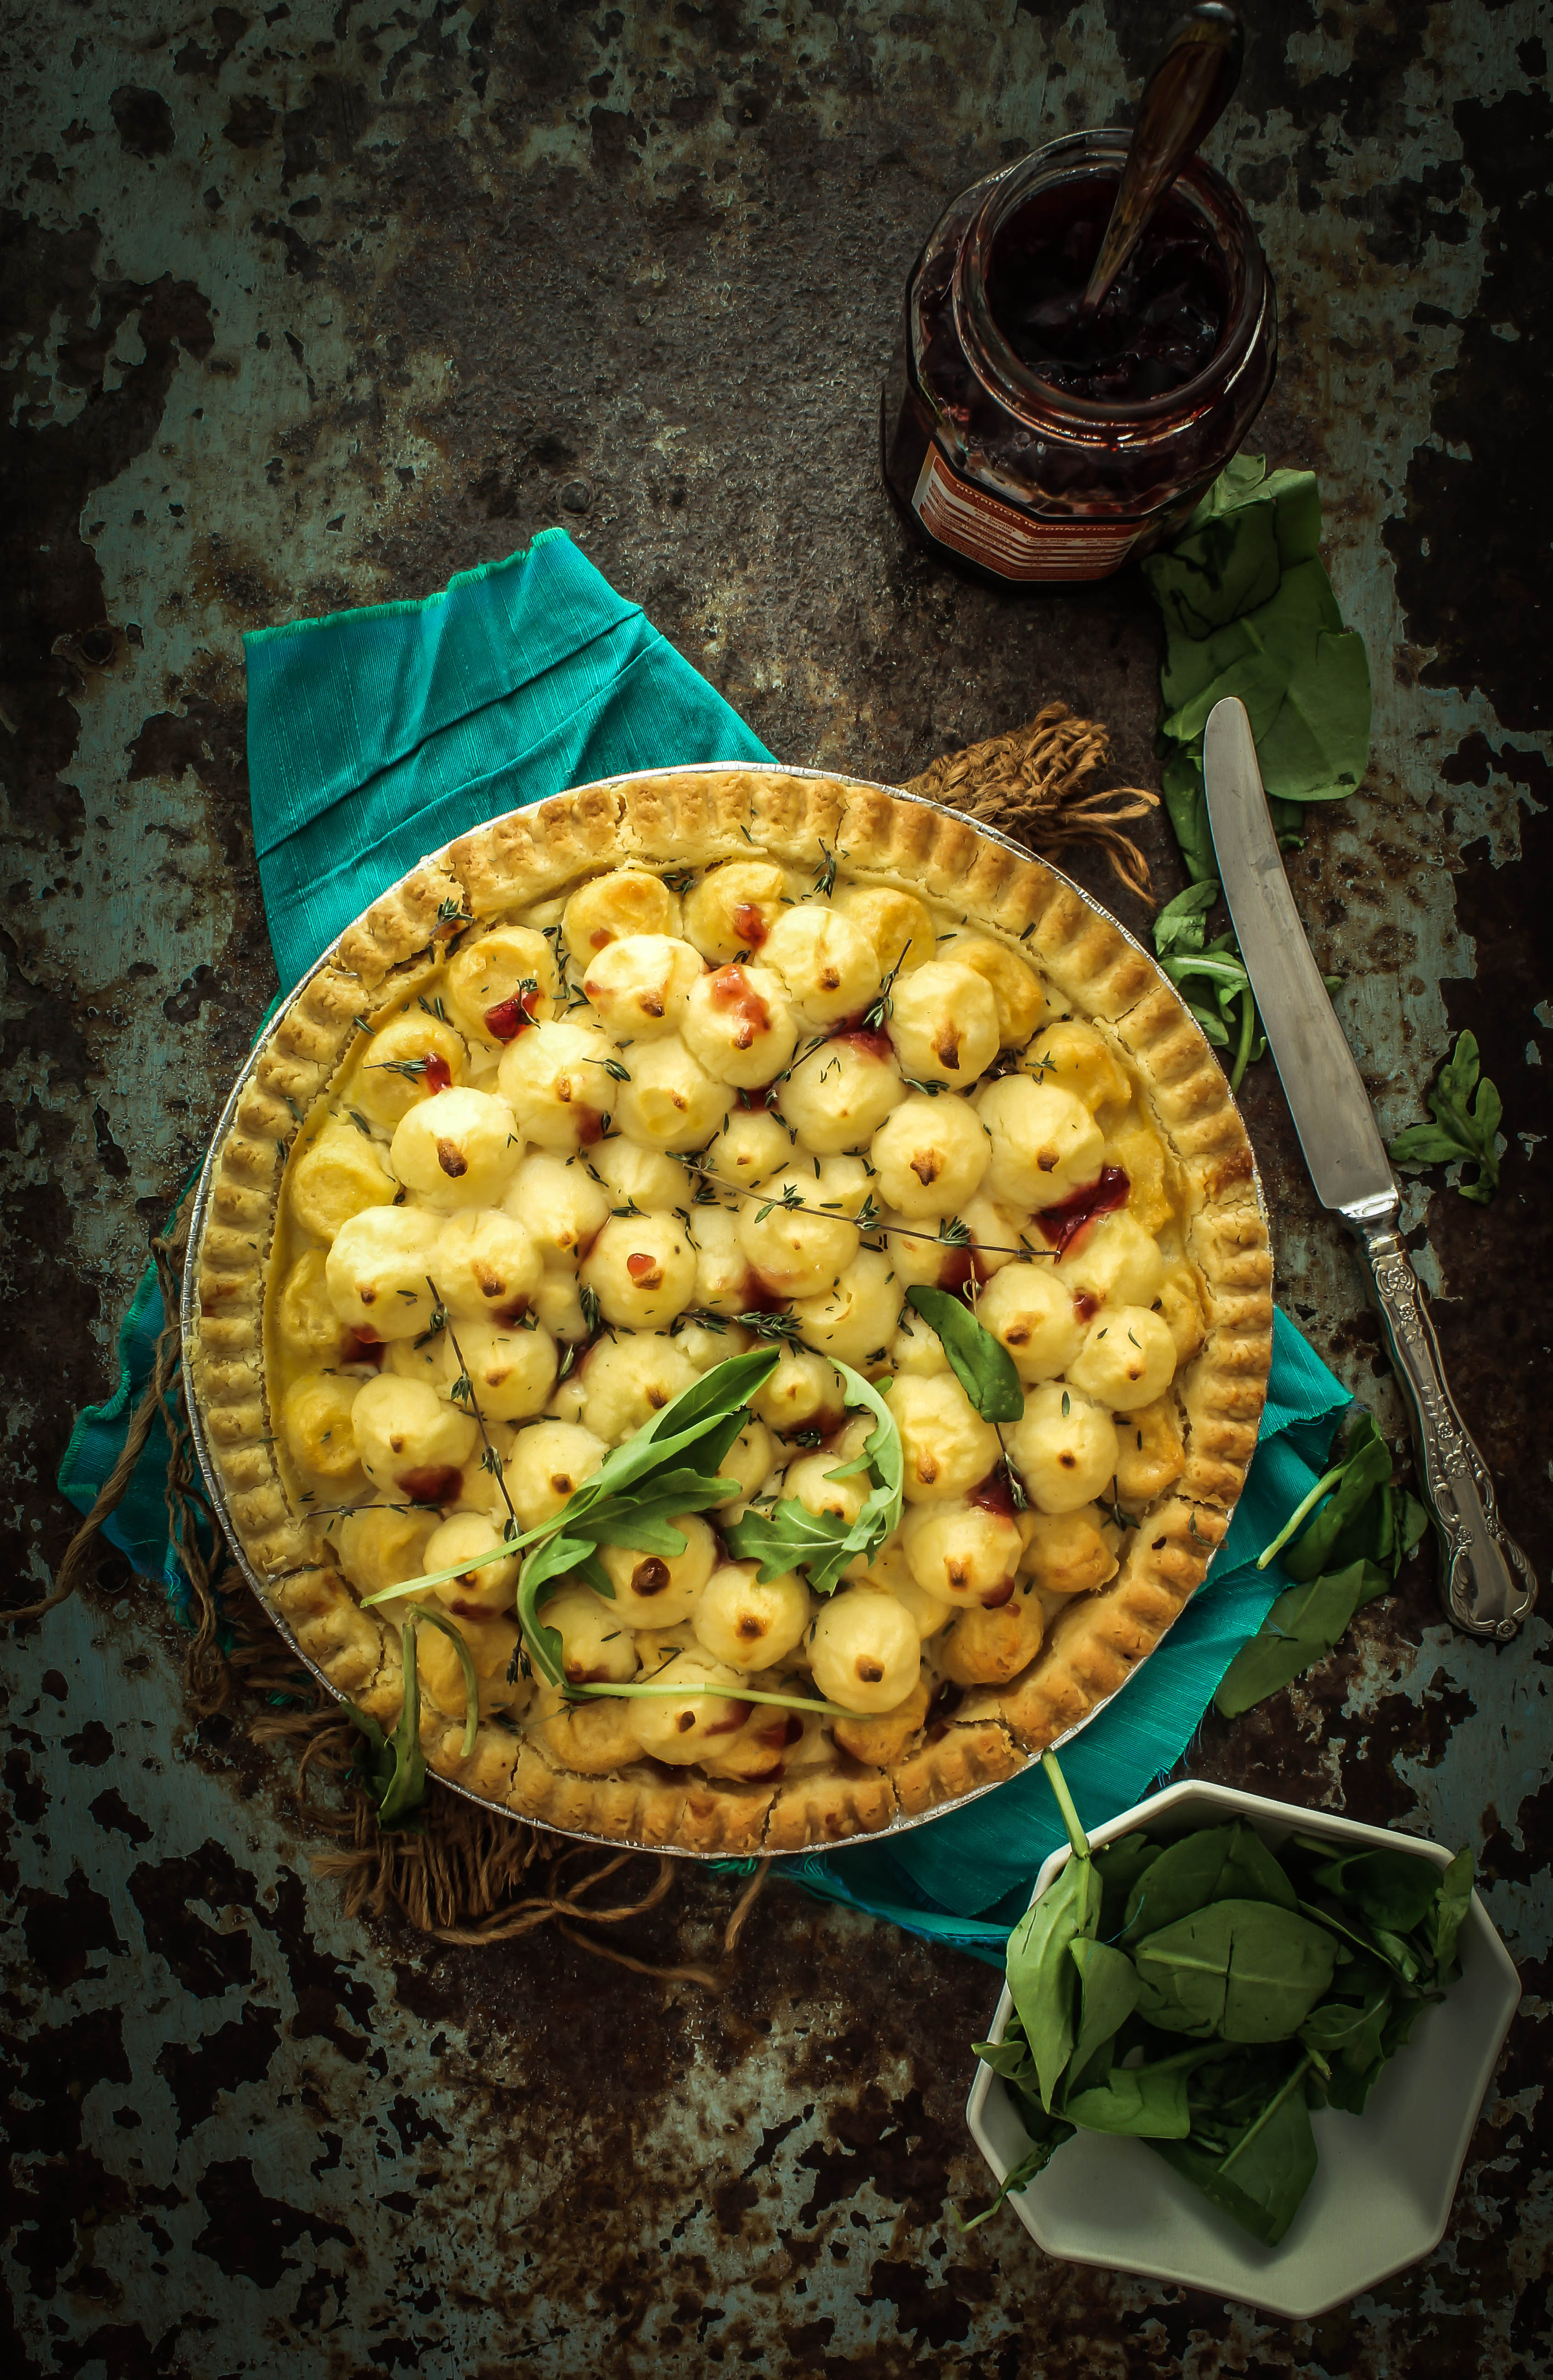
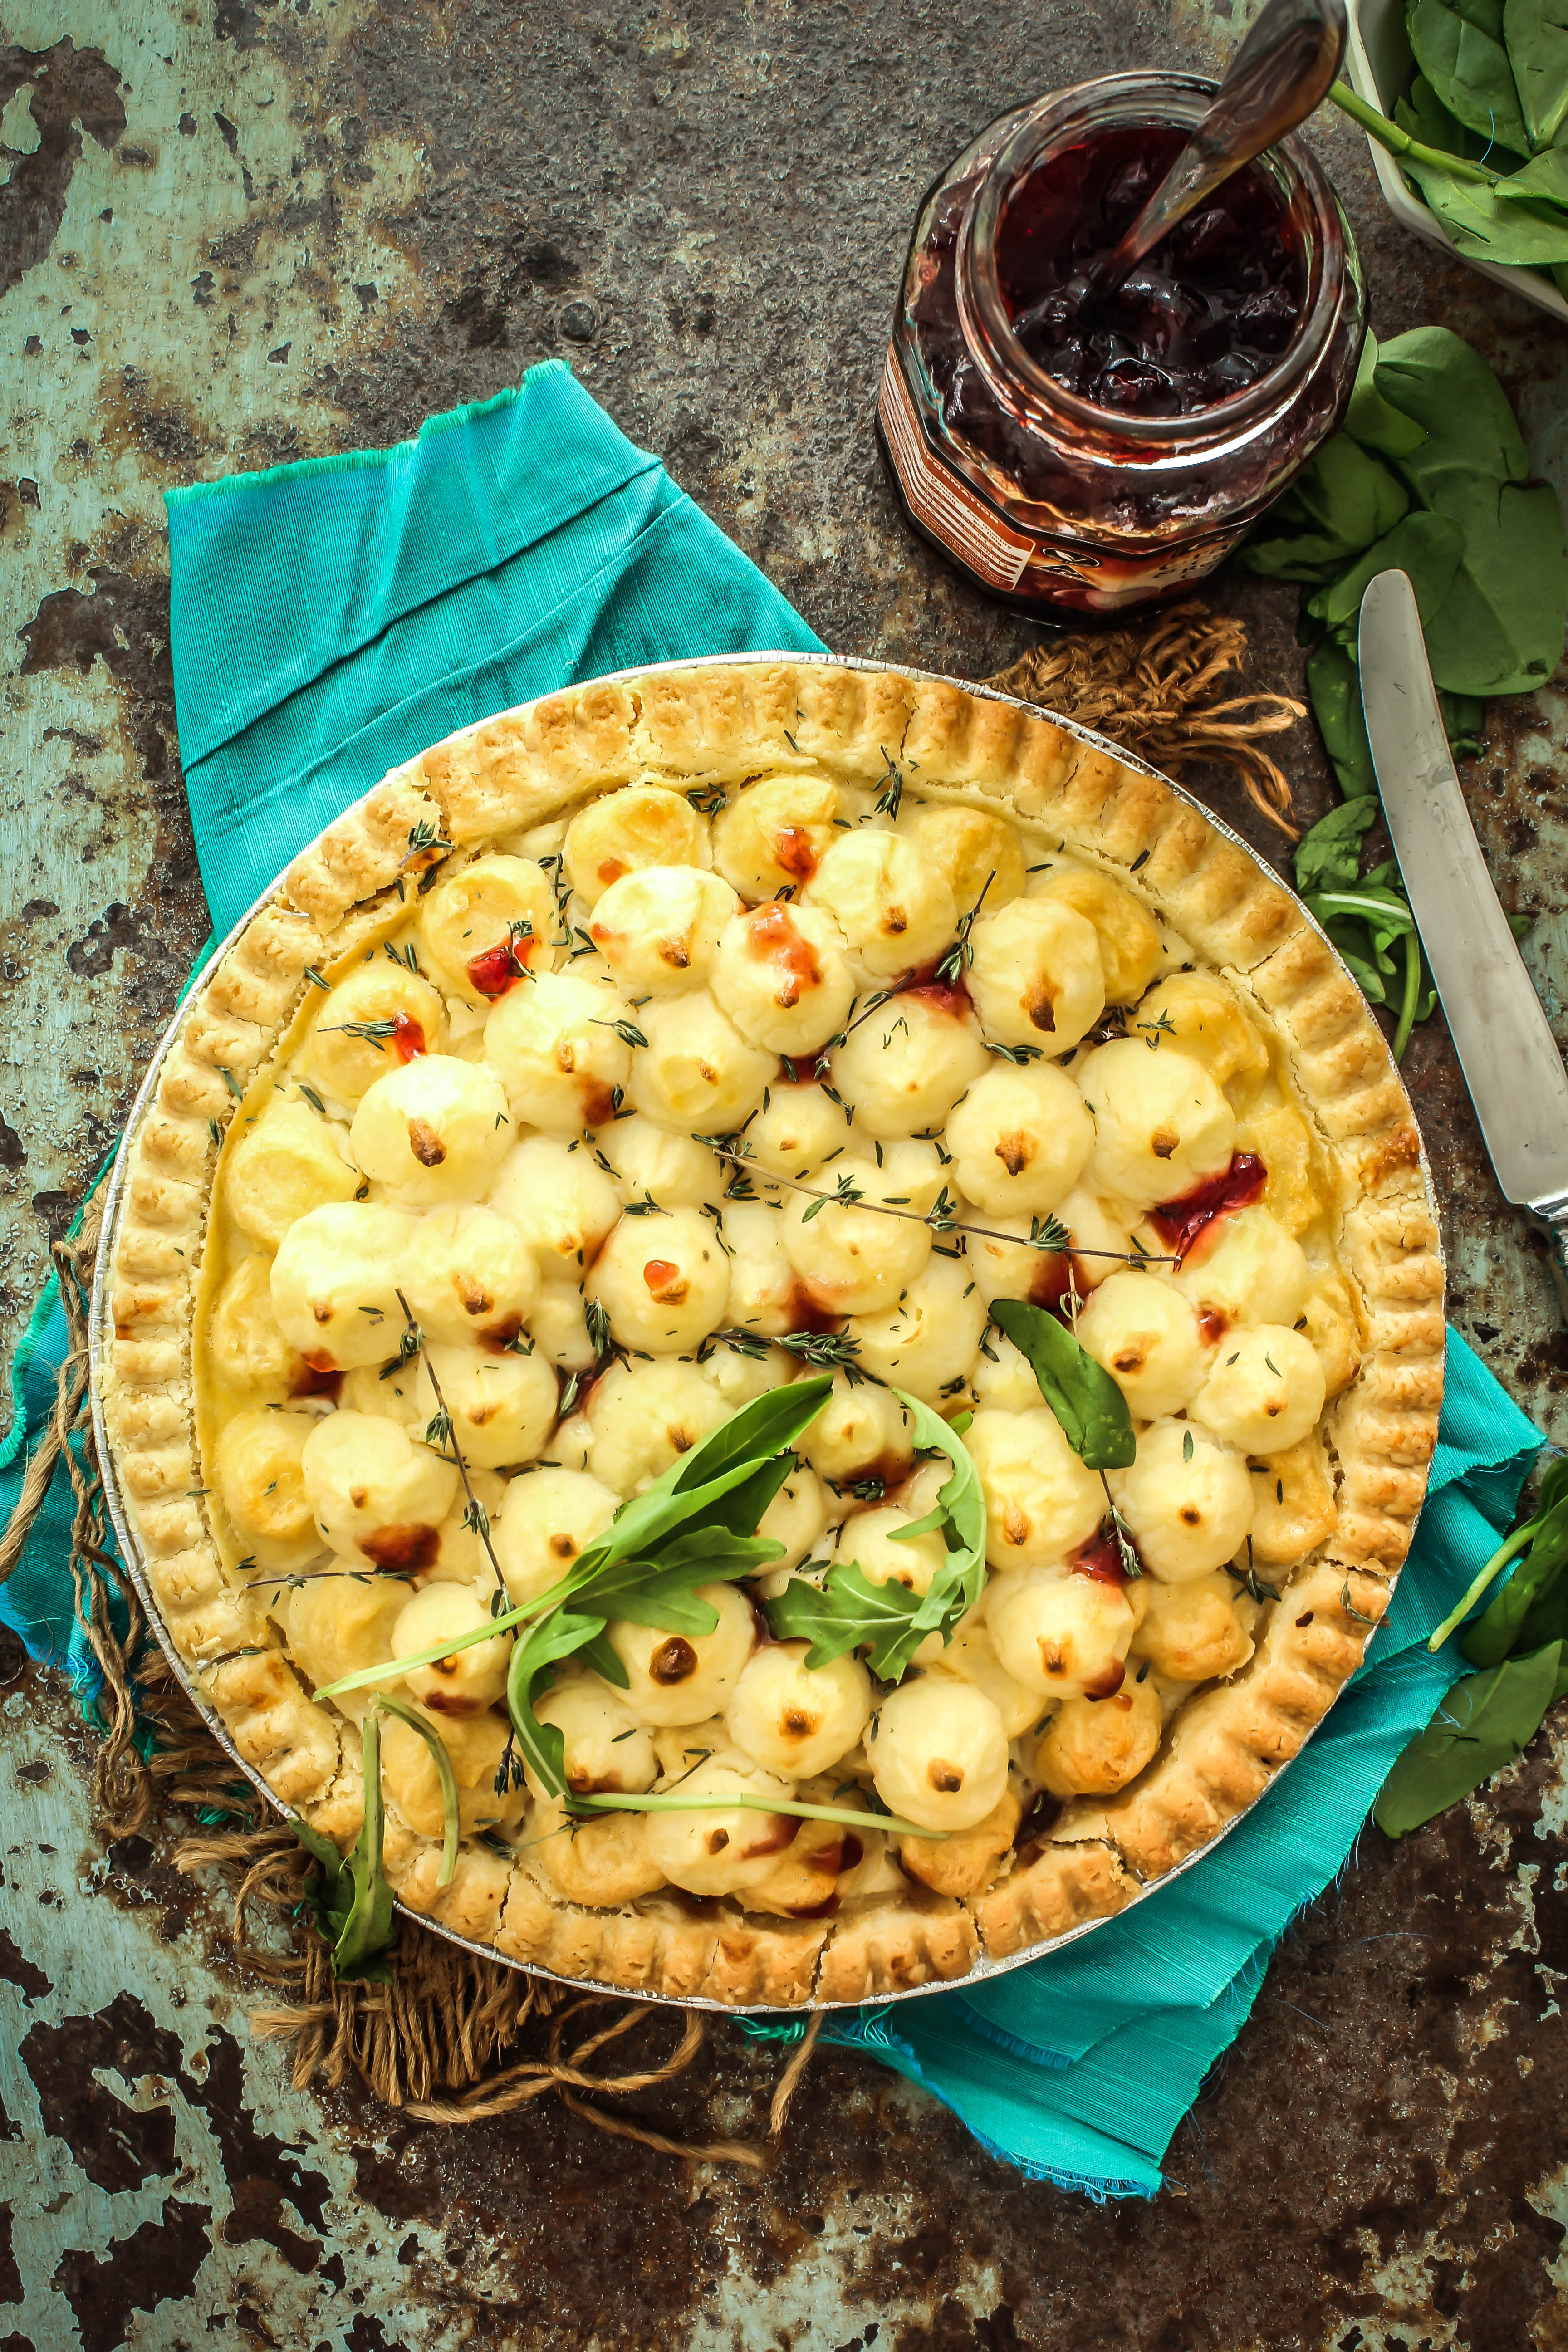
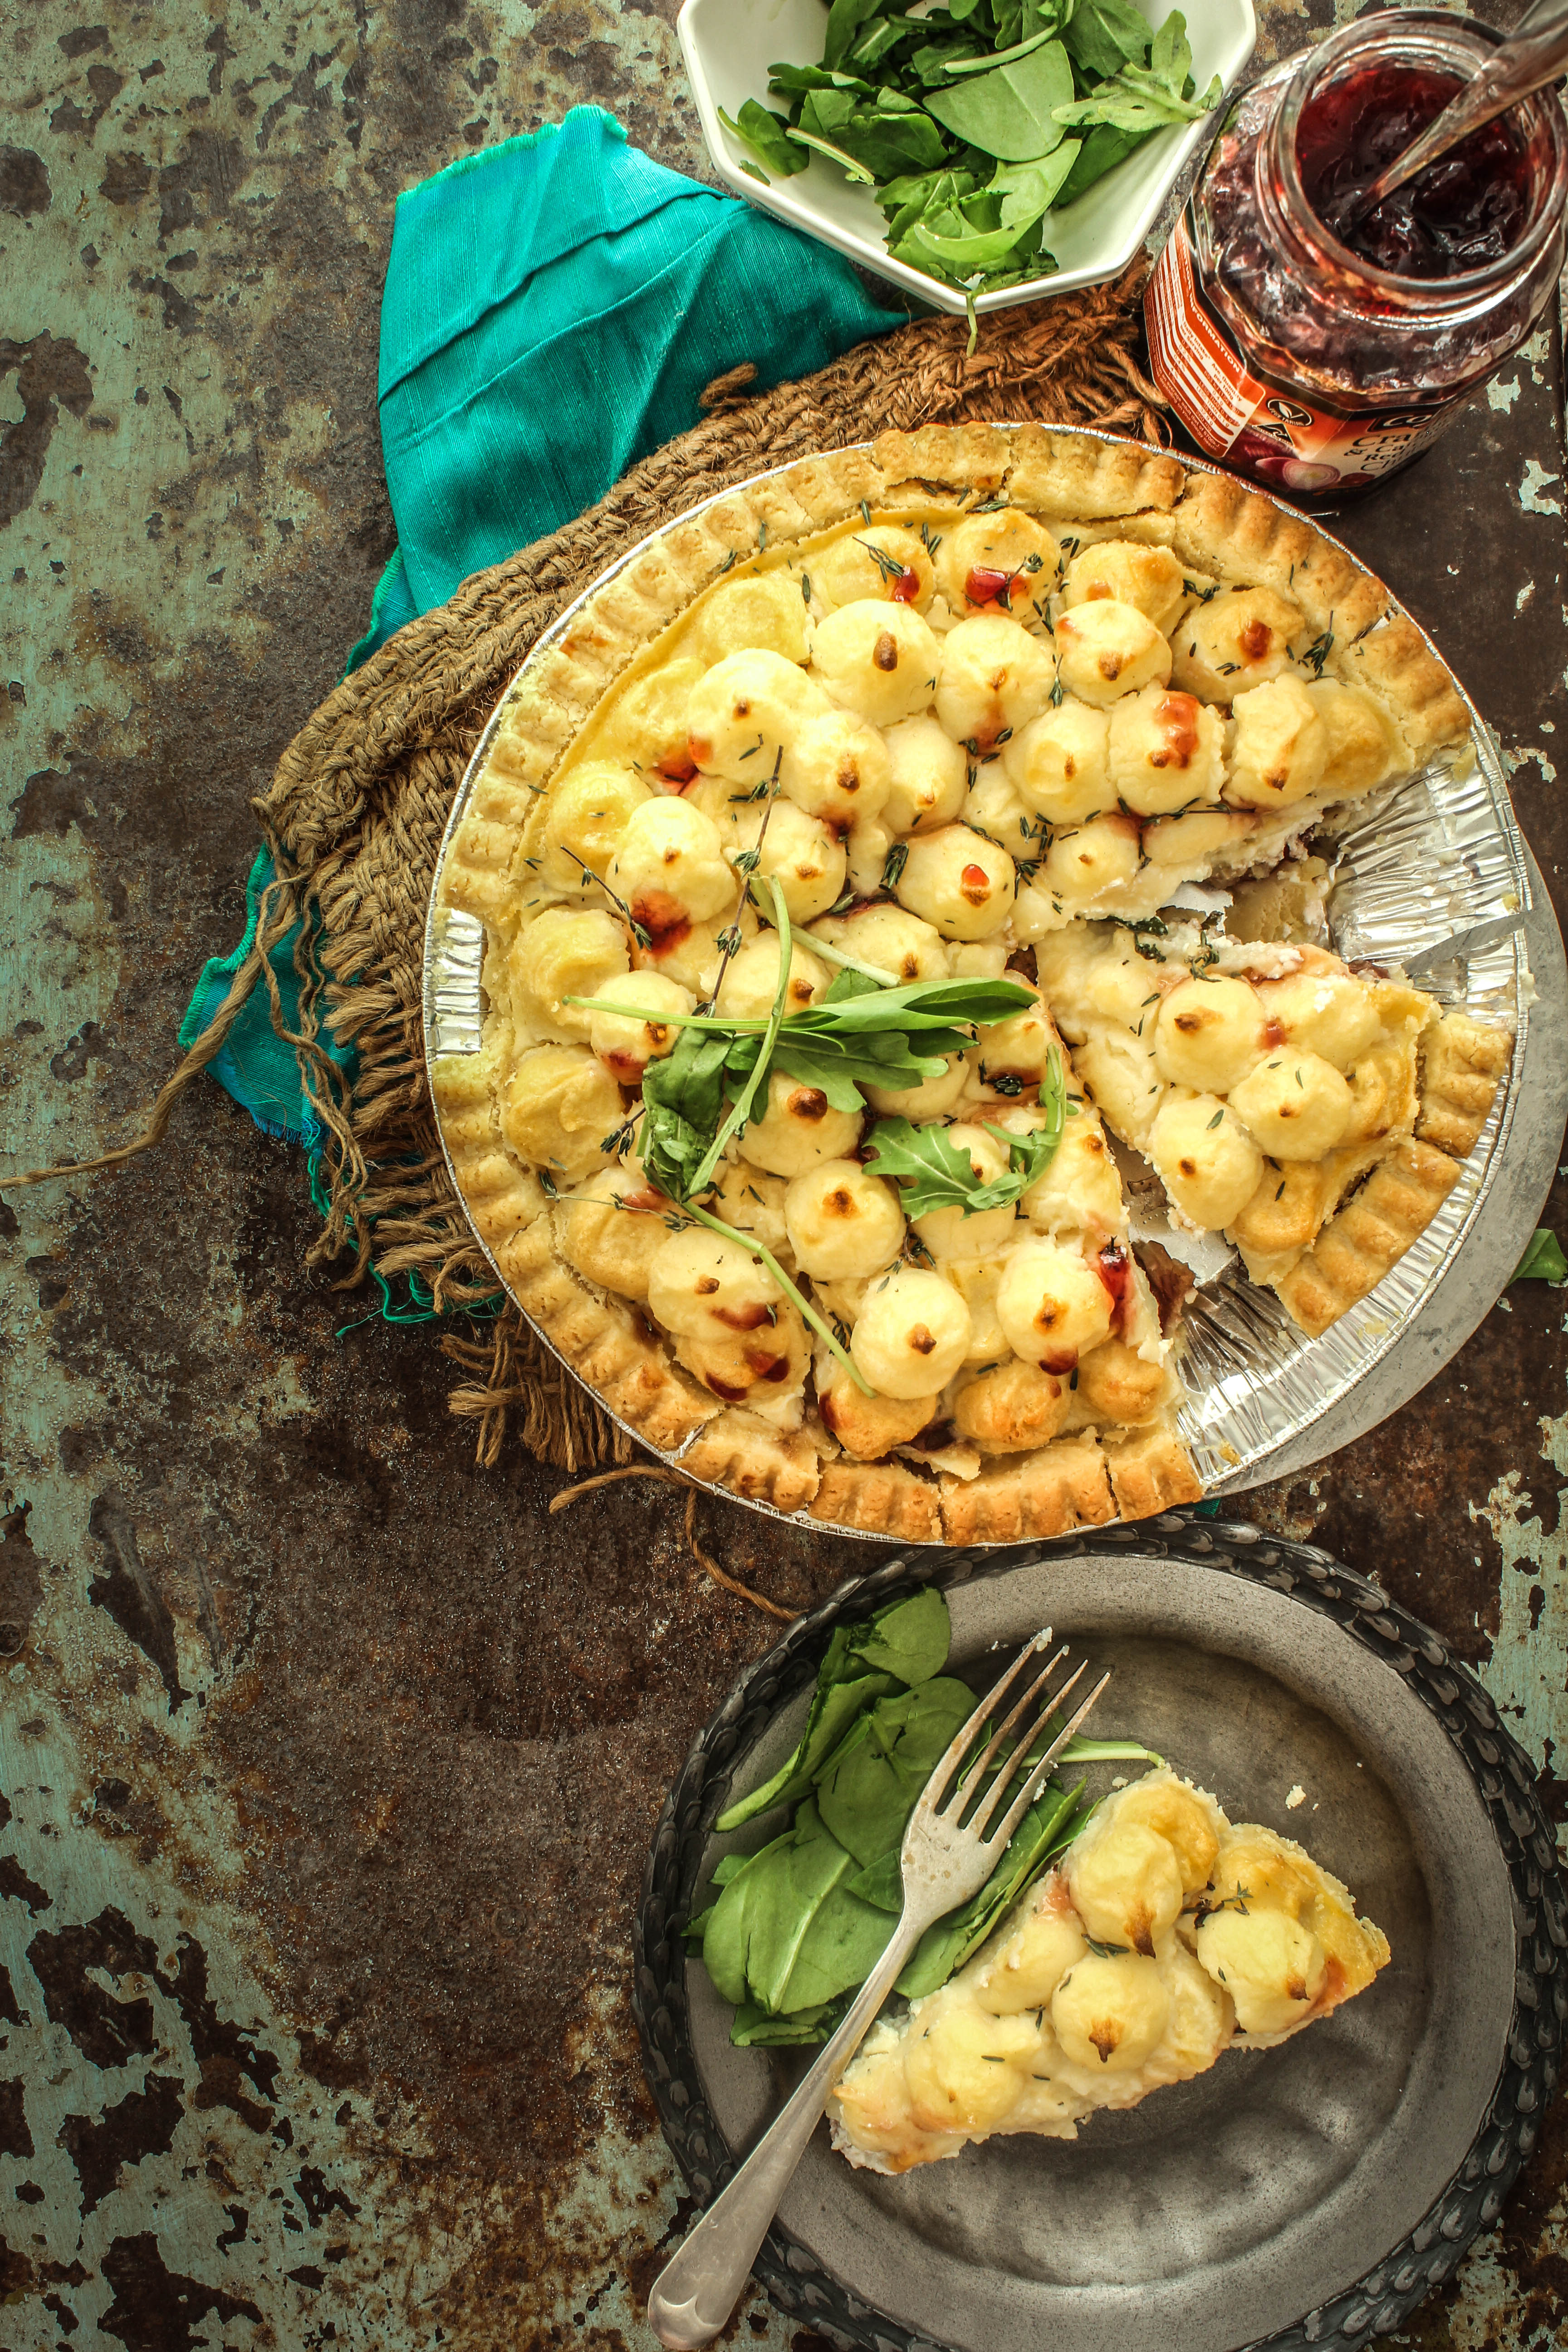
There are 3 layers in this tart. A layer of caramelised onion and cranberry chutney, a herbed ricotta layer and the duchess potato on top. To speed up the process, I used a store bought tart case. To get a smooth pipeable potato mash without the effort, I used Instant mash which is basically nothing but dried potato flakes. To make great mashed potatoes at home, I may not use or recommend it but in this tart, it does not matter. To be honest, it makes life easier. You can of course, make your own from scratch if you want to. The caramelised onion and cranberry chutney packs a lot of flavour into the tart. Any home made or store bought chutney would do but I picked up cranberry to make it festive. Caramelised onion chutney or relish is available in most if not all supermarkets in Australia.
After this, we just mix, layer and bake.

IMG_3252-2

Notes: The brand of Instant Mash I used, was already seasoned so I didn’t have to season separately. Most often they don’t need  it but please do check on your package. I used a frozen tart shell that was already pre-baked. In case you are making your own pastry, you will need to pre -bake it before following the recipe. If you want more browning on top, put the tart for a few minutes under the broiler of your oven.

IMG_3240


Herbed Ricotta, Cranberry Chutney and Duchess Potato Tart
Serves 6-8

1 store bought tart shell (I used frozen)
1 cup  Caramelised Onion and Cranberry Chutney
400 g fresh ricotta
2 eggs, lightly whisked
a handful fresh herbs (parsley, mint, thyme, oregano), finely chopped
salt and pepper, to season
2 cups Instant Mash powder, cooked according to package directions
2 tbsp butter (room temparature)
2 egg yolks (reserve a tablespoon for brushing on top later)
Extra chutney, to drizzle on top
Fresh thyme to garnish

Preheat the oven to 170 degreec C.
Spread the Caramelised Onion and Cranberry Chutney on the base of the tart shell. In a medium bowl, mix together the Ricotta, eggs and mixed herbs.Season. Spoon over the chutney and spread evenly.

Add the butter and egg yolks to the Instant mashed potatoes and mix to blend. Fit a piping bag with a large round tip and fill in the mashed potatoes. Do this in two batches for ease of piping. Pipe rounds on top of the ricotta layer to uniformly cover the entire tart. Brush with egg yolks. Sprinkle with fresh thyme.

Bake for 25-30 minutes or until potatoes are crisp and browned and ricotta is set in the centre. Remove from oven. Drizzle with chutney. Serve with salad on the side.


  • « Previous Page
  • 1
  • …
  • 27
  • 28
  • 29
  • 30
  • 31
  • …
  • 45
  • Next Page »
Hey Sugar
Cake
Link to my Facebook Page
Link to my Instagram Page
Link to my Pinterest Page
Link to my Mail Page
Subscribe to this site
Fresh Awards
2019 Aus mumpreneur
2019 aus mumpreneur
Mumbrella

Copyright © 2026 · Sugar Et Al · Designed by Smitten Blog Designs · Log in