• Home
  • Recipe Index
    • Recipe Index
    • Breakfast/Brunch
    • Cakes and Puddings
    • Chocolate
    • Cookies and cupcakes
    • Custard and Mousse
    • Gluten Free
    • Ice Cream
    • Mains
    • Other Sweet Treats
    • Snack/Appetizers
    • Soups and Salads
    • Tarts and Pies
    • Vegetarian
  • About
  • Cookbook
  • Portfolio
  • Store
  • Press
  • Work with Me

Sugar et al

Because Life is a blend of flavours...

Chocolate Covered Lemon Meringue Truffles

6|10|2014

The best weekends for me are those that I wake up with more than one recipe in mind and run around my kitchen with chocolate on my clothes and fingers. Is there ever a thing called chocolate stain? Chocolate doesn’t stain. It’s too special. It glorifies, it dignifies..the Midas touch, perhaps?
IMG_2767


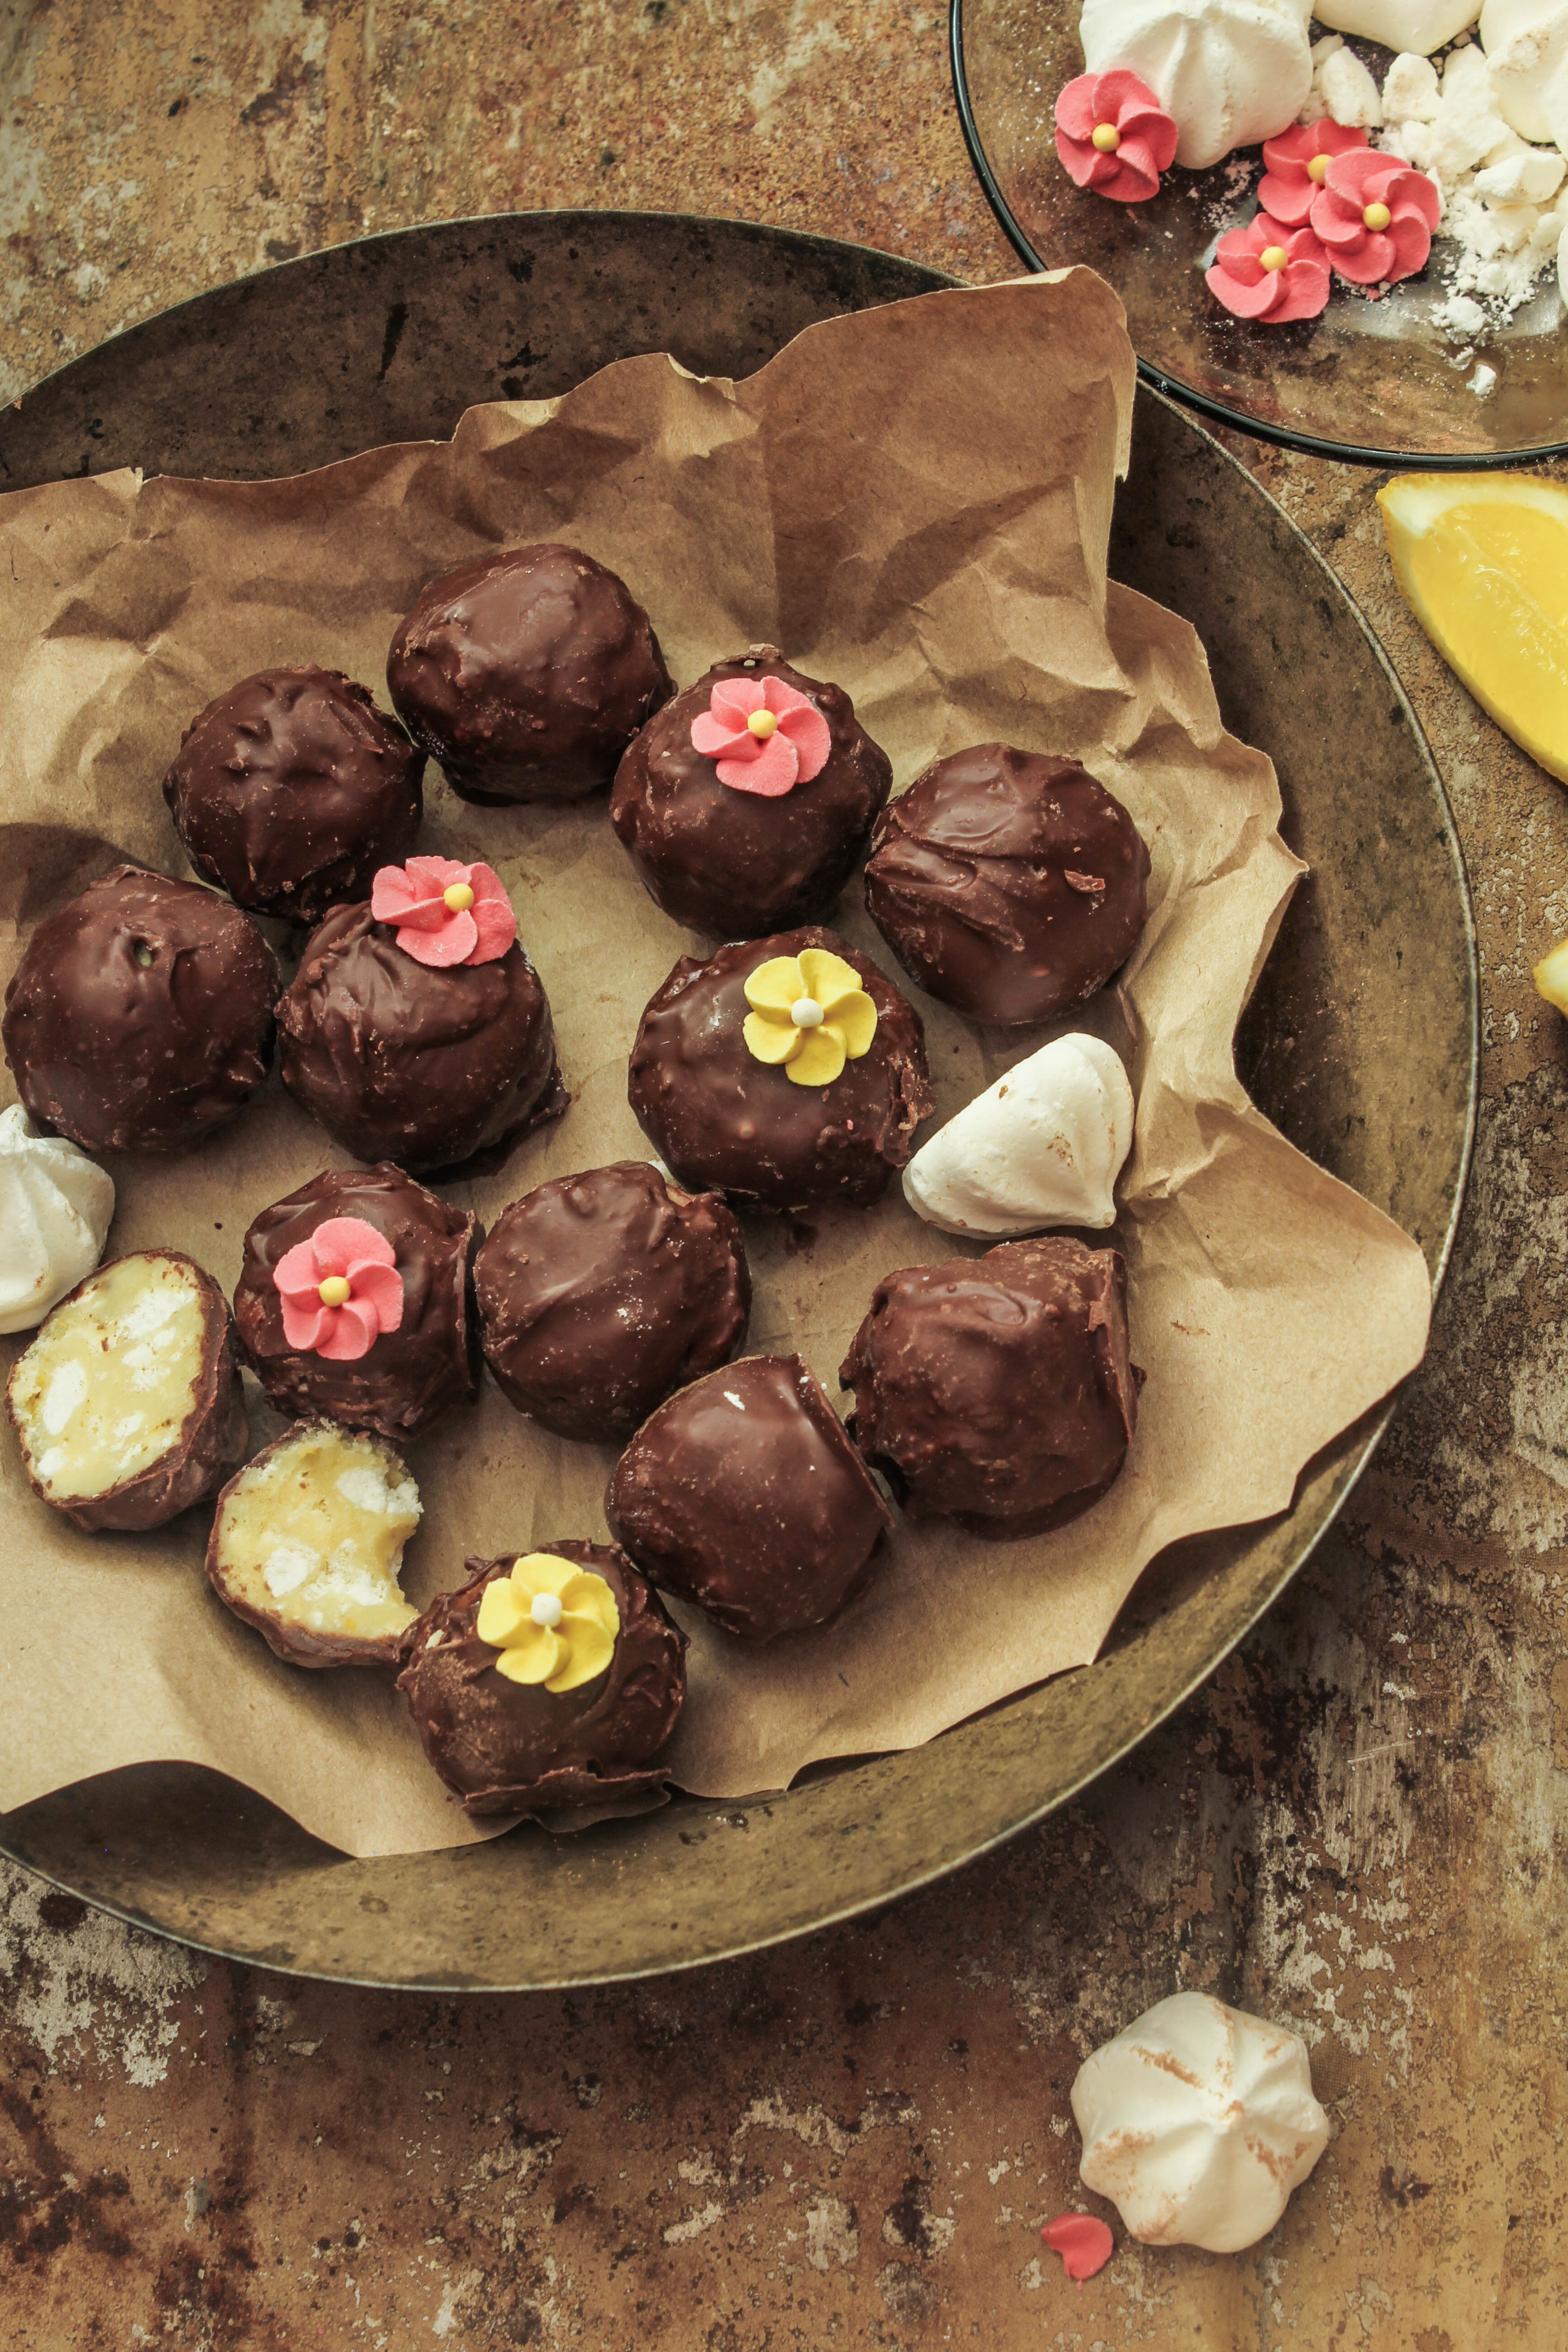
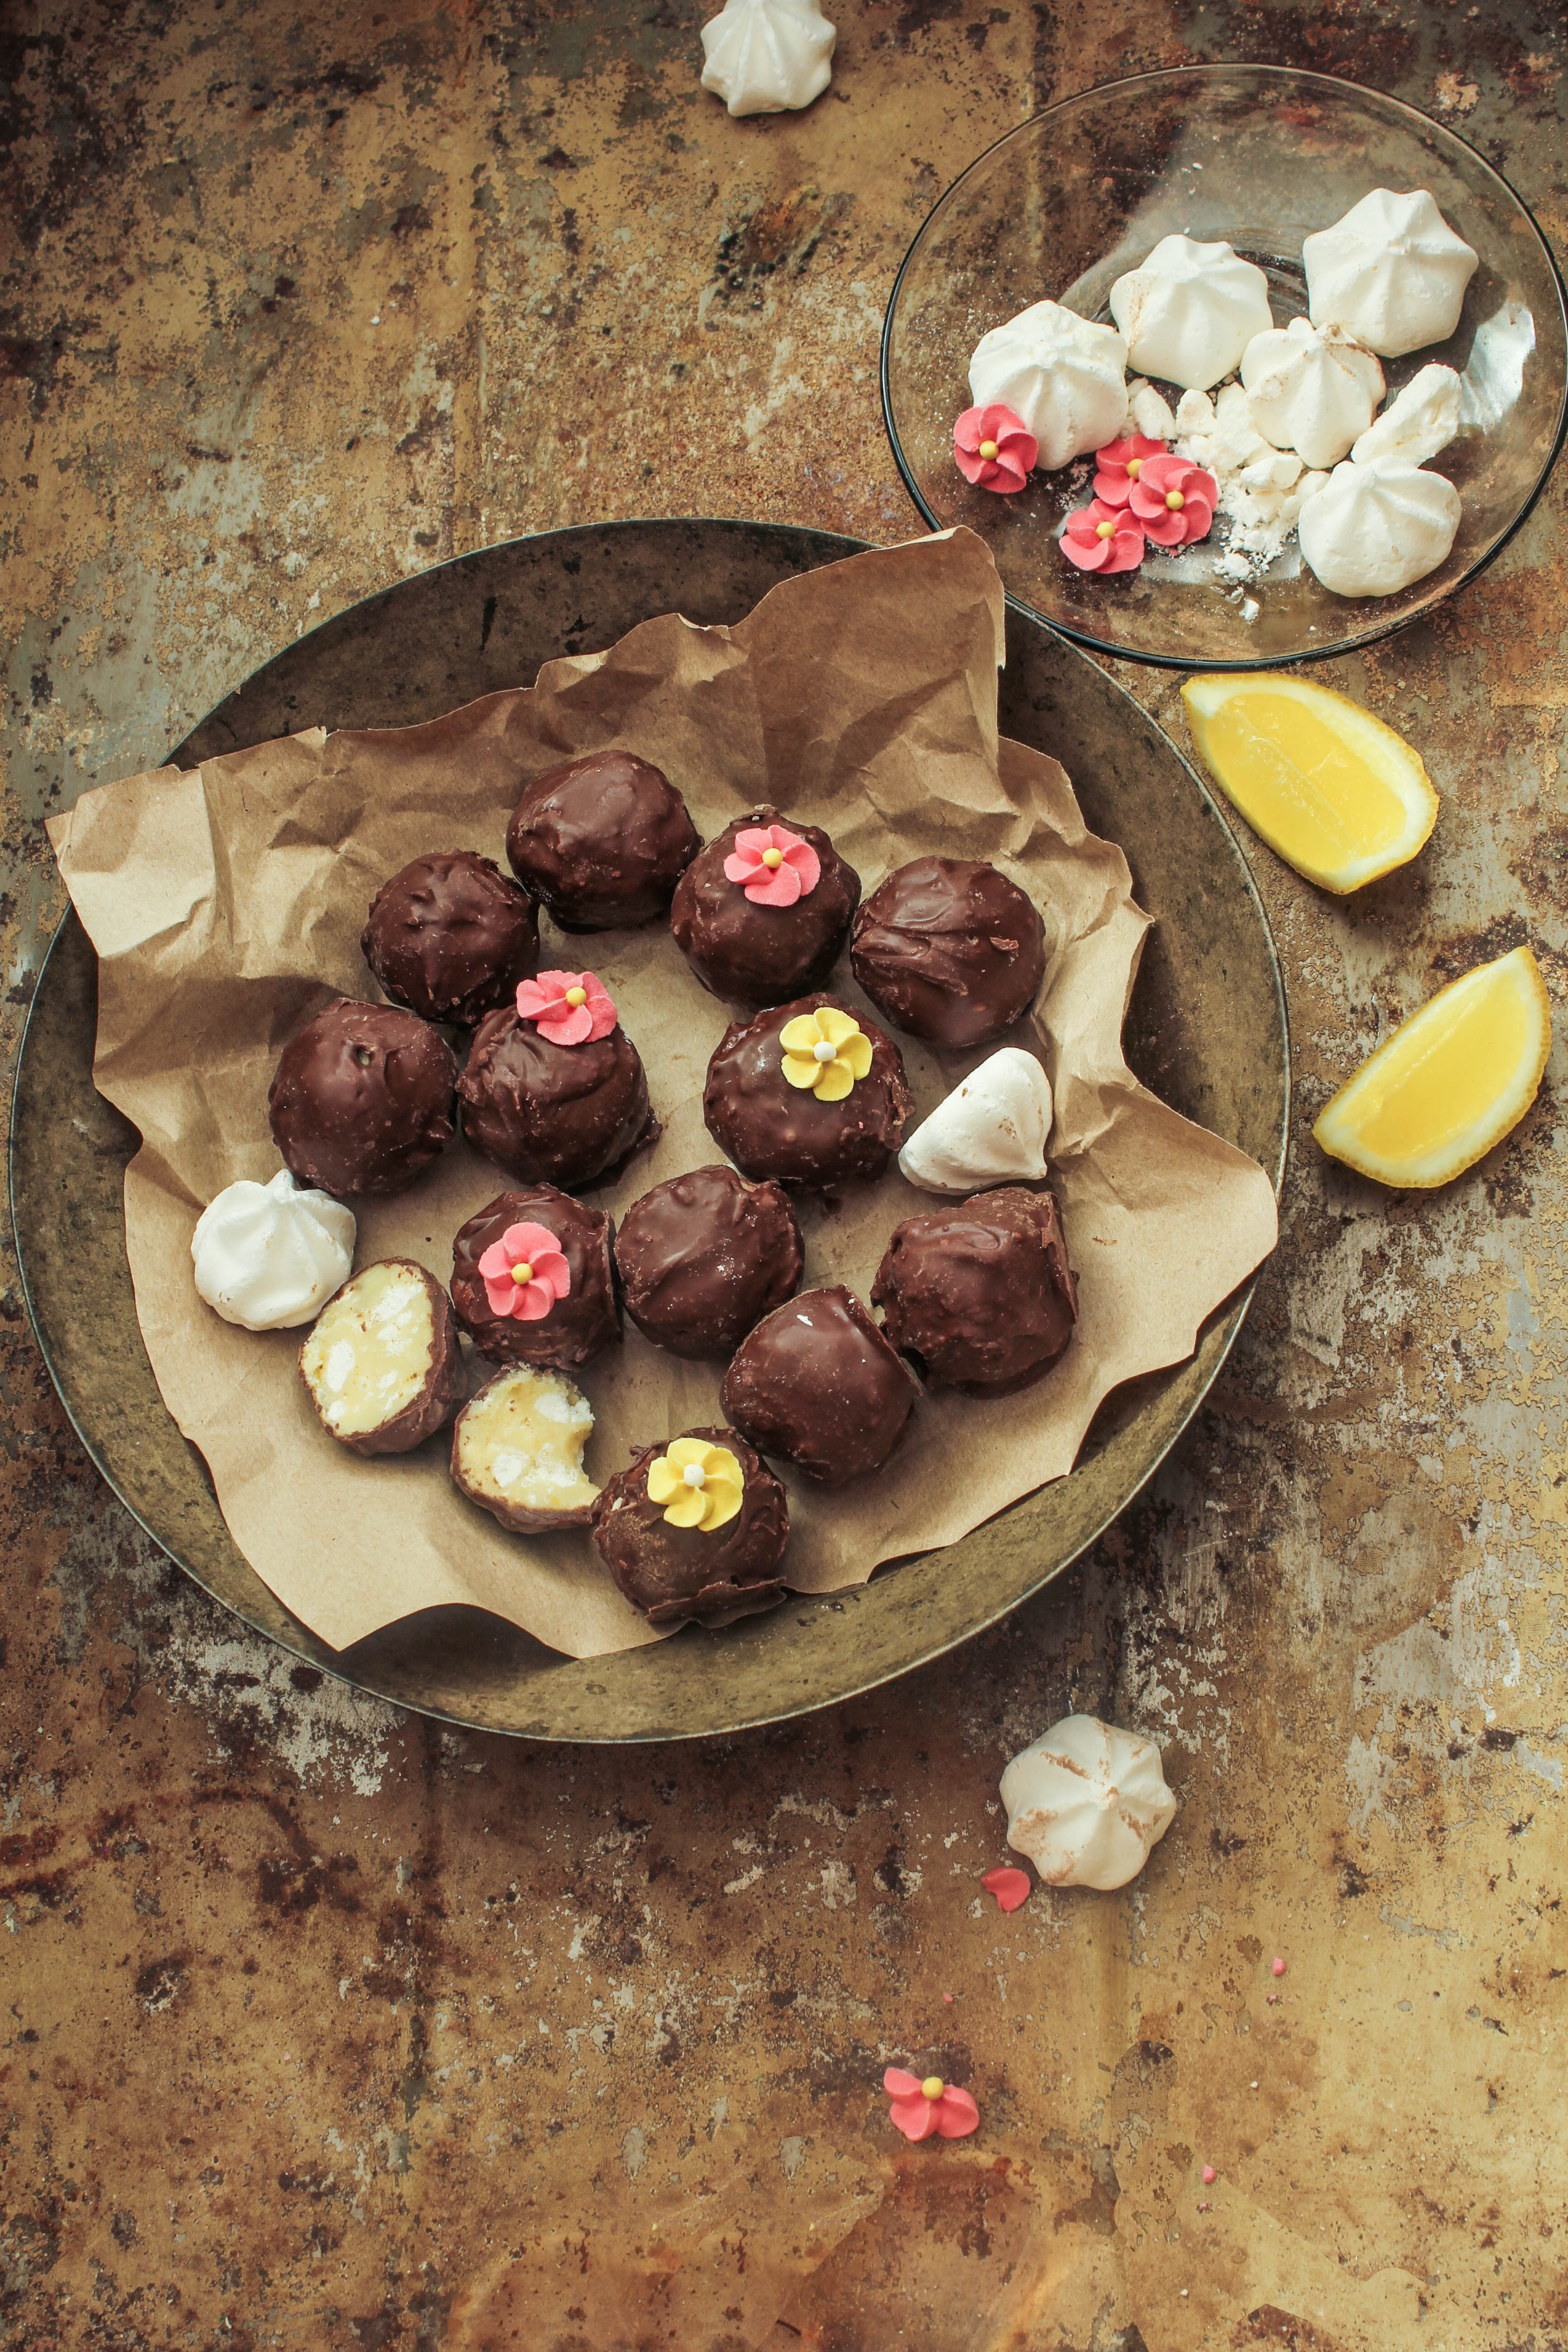
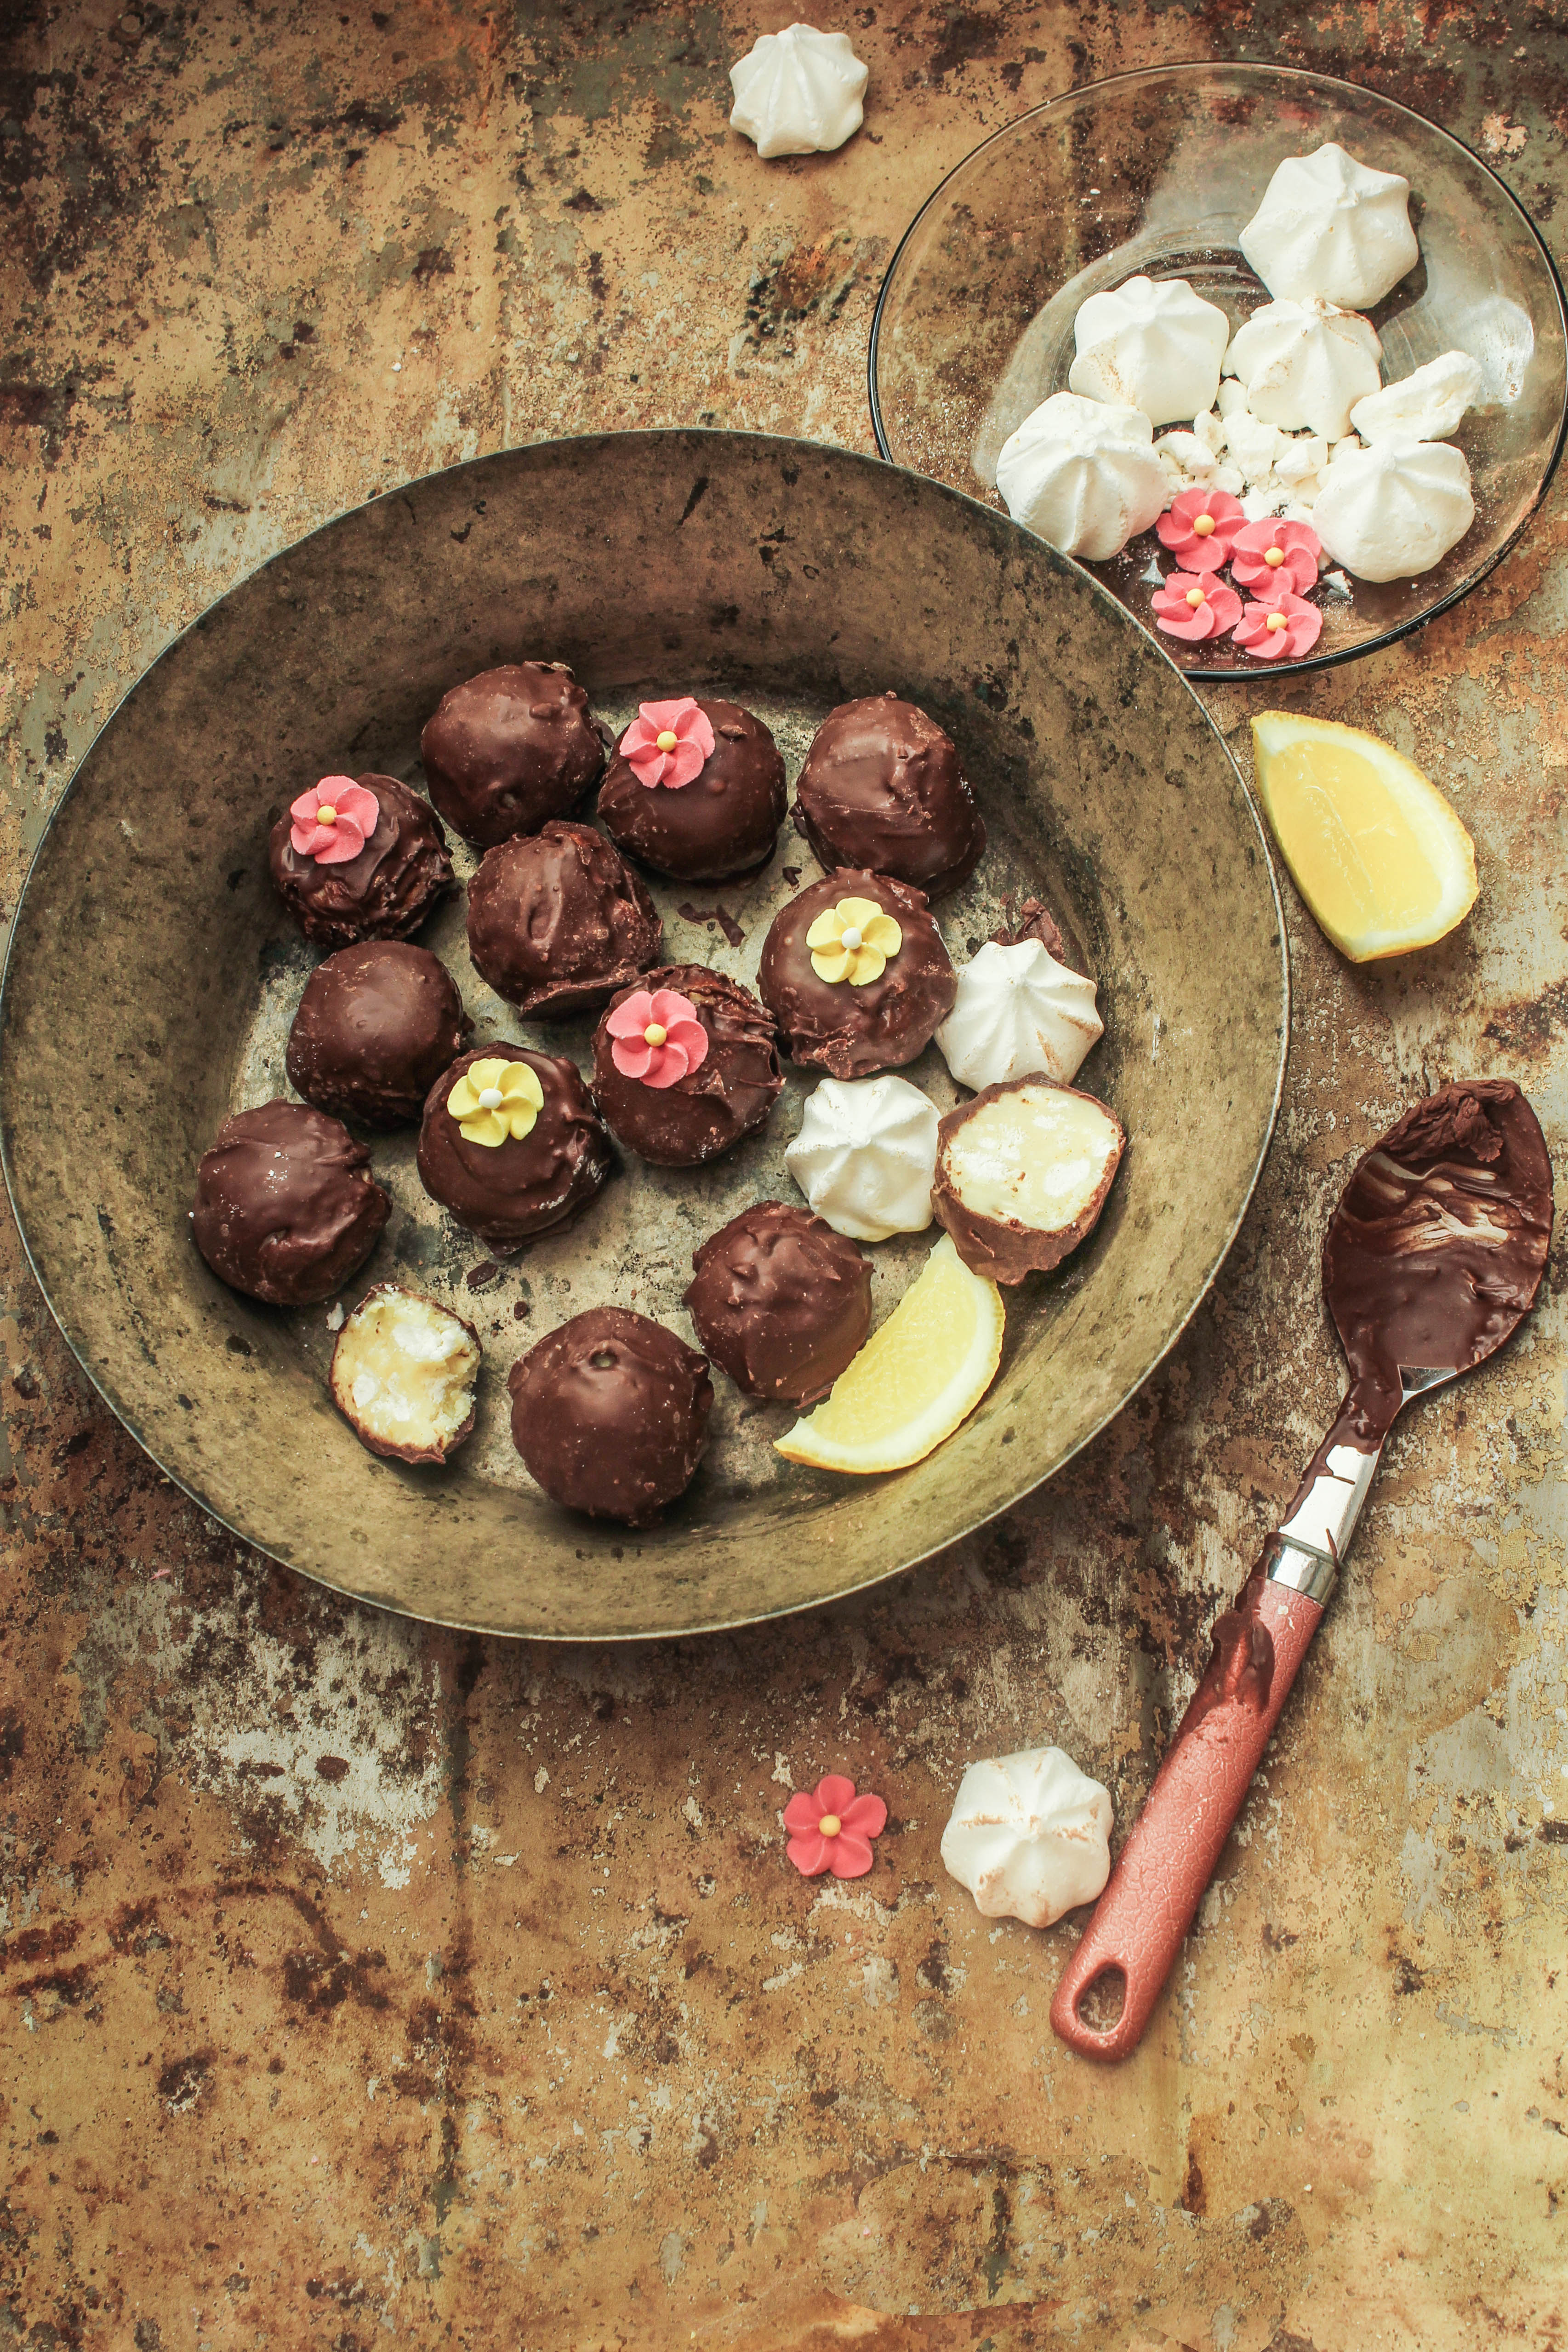
I have had plenty of fun with chocolate recently and have come up with a few creations that make me love it all the more. This one has a double dose of chocolate. I have used white chocolate and crushed meringues (you know how much I love meringue) in the filling along with some lemon zest. To complement the sweetness and slight tangy citrus flavour, there is bittersweet dark chocolate. These truffle balls are big on flavour and texture. A complete blow-away treat that doesn’t need a lot of time or effort and they look so festive. You can use home-made meringues or store-bought. It would not really matter as you are crushing them anyway. However do make sure to crush them gently so you are left with big and small pieces. I was bit worried if they would turn out too sweet but the bittersweet dark chocolate took care of the required balance. Needless to say, using a good quality dark chocolate is important here.
 

IMG_2765

IMG_2760-3

I am already thinking of the holidays and cookie and truffle season. I guess, since chocolate overrides the seasons, why wait till the end of the year!
Our long weekend is still not over and I have another favourite ingredient to work with. Beetroot and chocolate!
Please excuse this short and impromptu appearance. Short and sweet! I was a bit too excited to share this treat with you.

IMG_2782-3

Chocolate Covered lemon Meringue Truffles
Yields 12 medium-sized truffles

250 g white chocolate (roughly chopped)
1/3 cup thickened/heavy cream
1 tbsp finely grated lemon zest
1/2 cup meringue (home-made or store-bought), crushed
200 g good quality dark chocolate (Lindt 85% cocoa), roughly chopped
sugar flowers/sprinkles to decorate.

Place the white chocolate and cream in a medium heatproof bowl that is placed over a saucepan of simmering water (make sure the bowl doesn’t touch the water over medium heat). Use a metal spoon to stir the mixture gently till the white chocolate has melted and the mixture is smooth..

Carefully remove the bowl from the pan and stir in the lemon rind. Let the mixture cool down to luke warm before adding in the crushed meringue. (If the mixture starts to set before adding the meringue, put it back on the saucepan to warm up and loosen slightly). Stir to mix. Cover with plastic wrap and place in the fridge for 30 minutes to chill.

Line a tray with baking paper. Remove the lemon-meringue mixture from fridge and scoop out balls with the help of a teaspoon and then quickly and gently roll out between the palms of your hands. (You will need to do it swiftly as the warmth from your hands could melt the chocolate). Place the truffle balls on the baking paper. Refrigerate again for 30 minutes.

Melt the dark chocolate in a heatproof bowl over a saucepan of simmering water. Remove from heat and leave aside to cool slightly. Dip the lemon-meringue truffle balls in dark chocolate (allowing the excess to drip off) and place them quickly back on the tray lined with baking paper. Place the sugar flowers or coat them again in sprinkles. Refrigerate till chocolate is set.
 

Prawn and Eggplant Hoisin Stir-Fry

3|10|2014

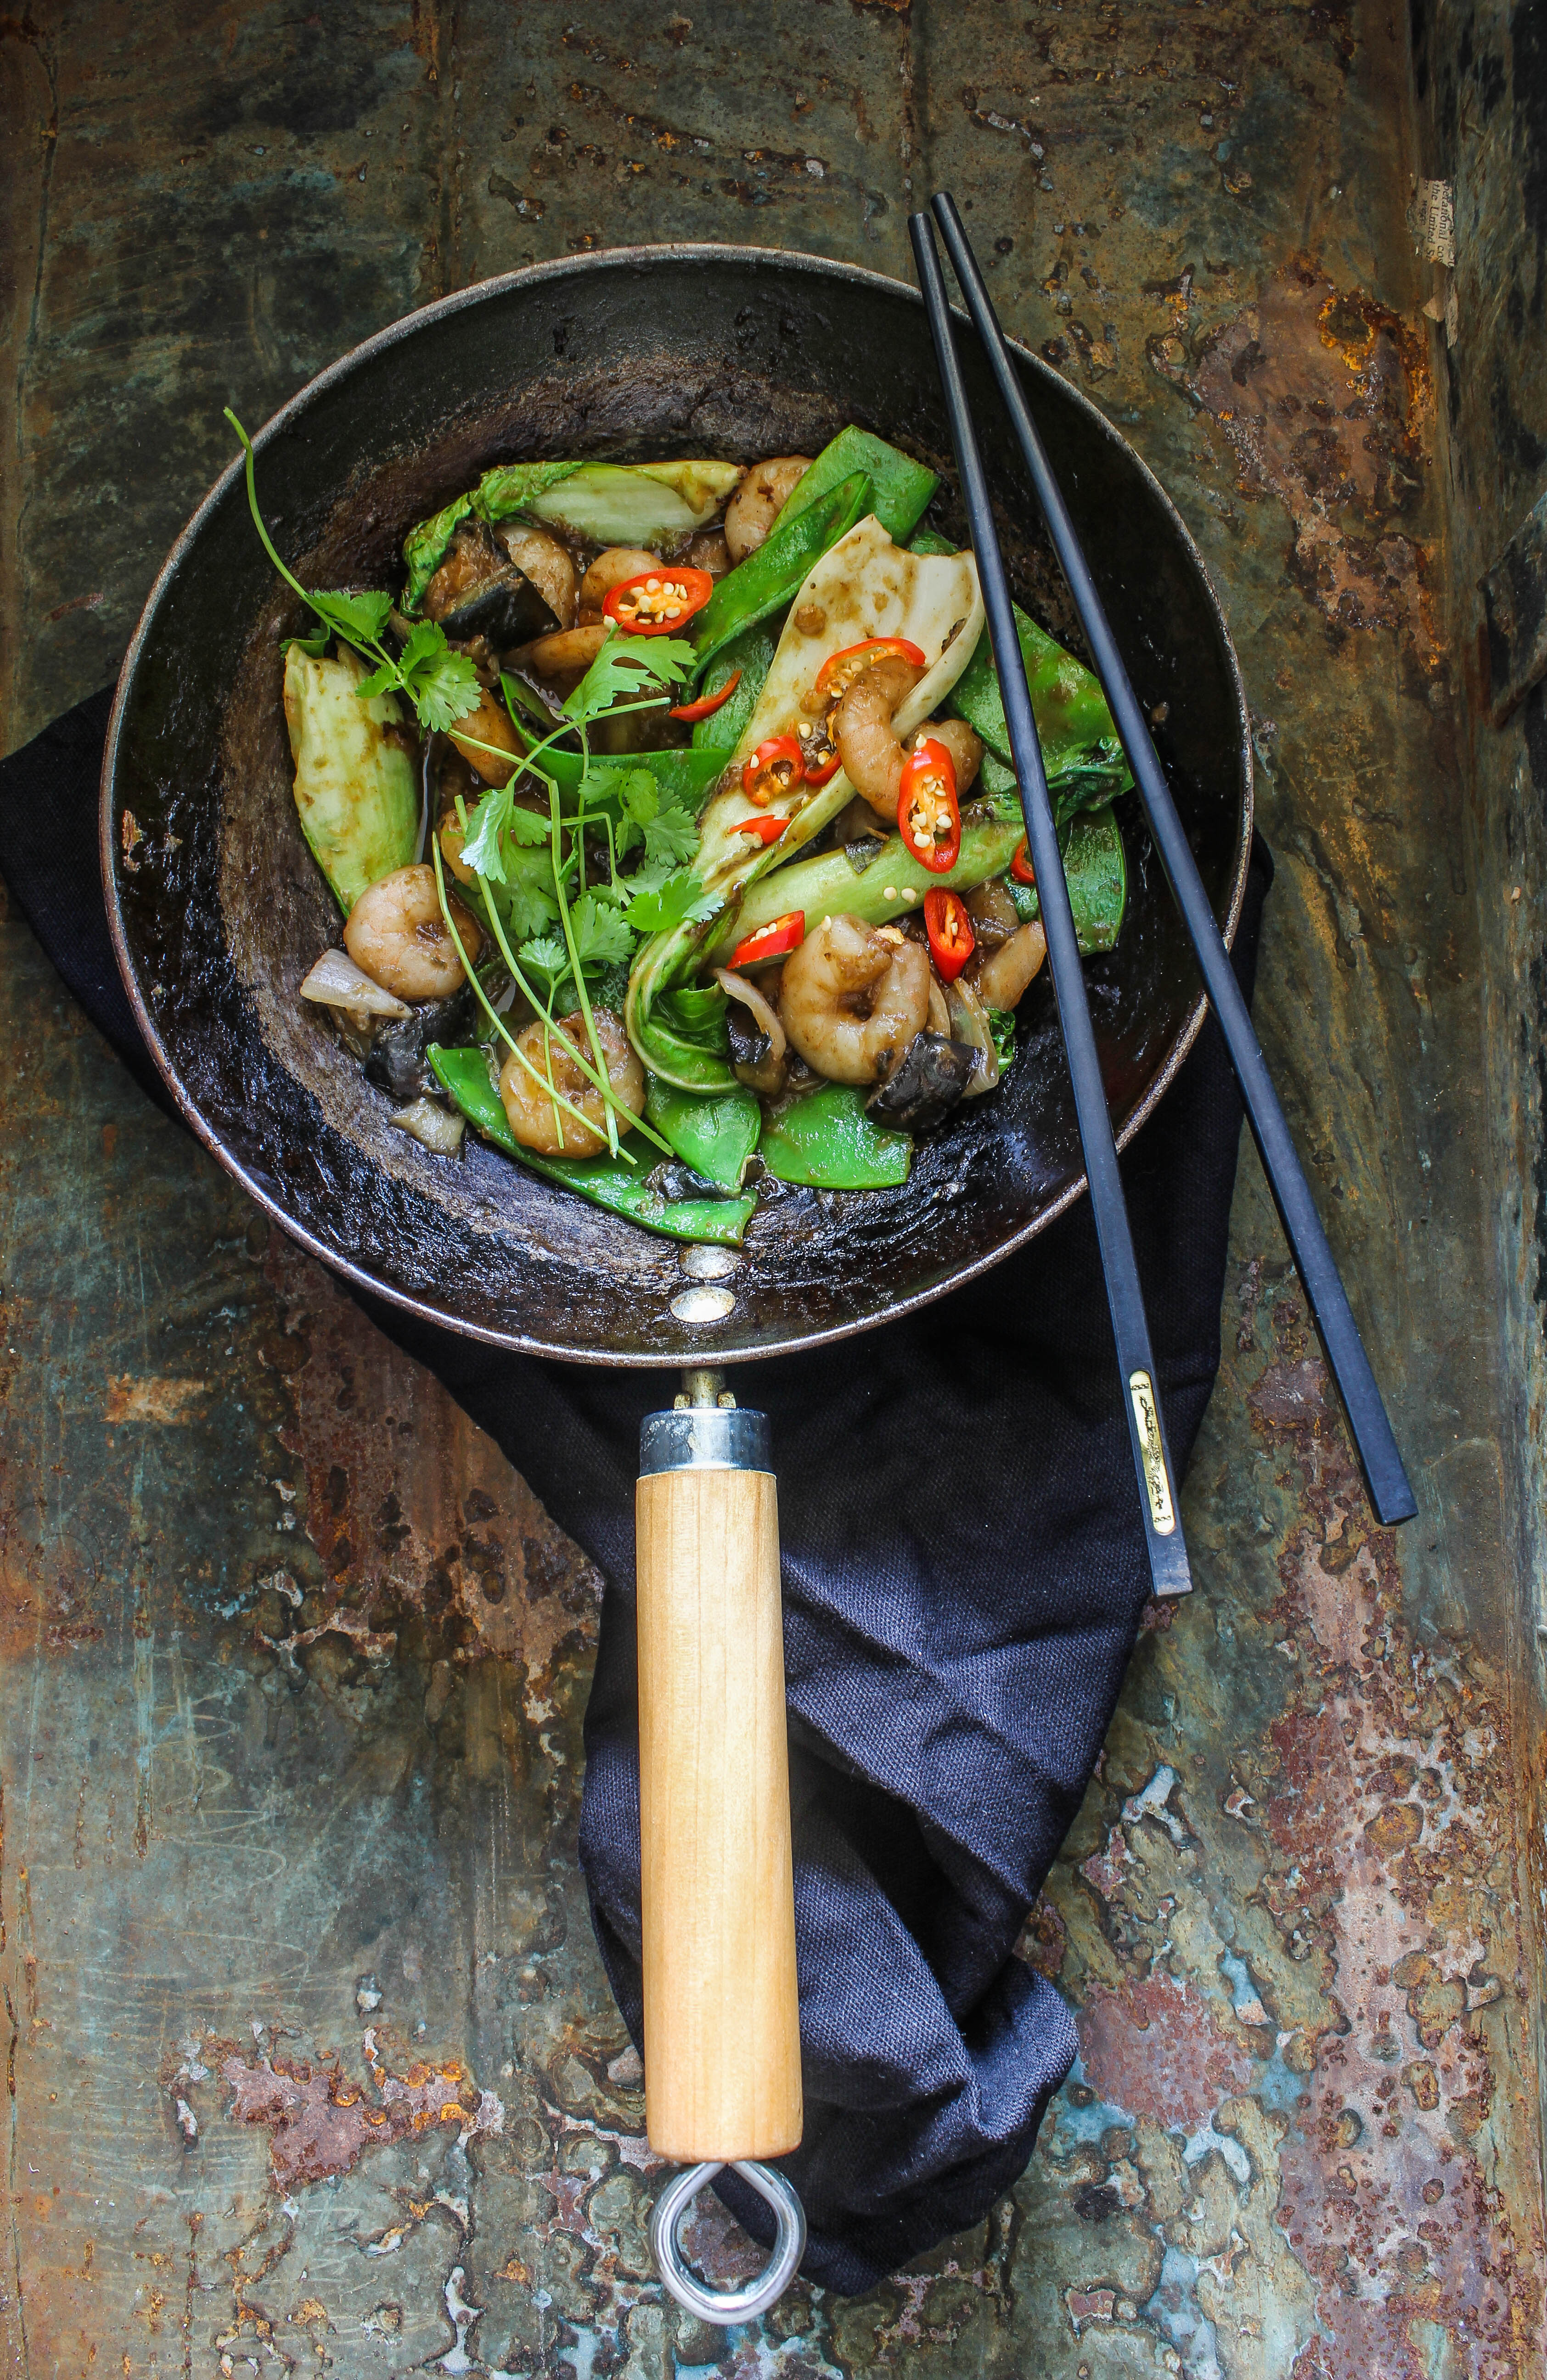
A quick stir-fry of prawns and eggplant with a delicious chinese hoisin sauce. Delicious with rice or noodles and perfect for busy weeknights.

My sister and me are soul mates. It would still remain an understatement if I said it over and over again, which i think I have, quite a few times in this blog. But we are polar opposites in terms of personality, habits, and preferences. We see things differently but we mostly agree on anything so as not to hurt the feelings of the other. I think that happens when you get to see your loved ones after long periods.  When it comes to food, I am the more passionate cook, my sister is the smarter one. In the treasured times that we are together, I think of the most delicious things to cook and feed her. She on the other hand,would return with packets of instant noodles, soups, canned veggies, purees and such if she went grocery shopping. She would scan the entire store and nothing would escape her sharp eyesight if it defines ‘quick’ and ‘smart’ cooking.
‘Cooking is secondary, let’s chat’ she would insist.

prawn and eggplant hoisin stir-fry

In such scenarios when time is limited, great food matters and conversations with your loved ones are dearer, a fabulous stir-fry is the answer. It tastes a lot better and is fresher than the takeaway and is ready in moments. I have realized over the years that Asian sauces make this happen quite easily. They are easier to store as they don’t always need place in the refrigerator.

prawn and eggplant hoisin stir-fry

Hoisin is brilliant as it is quite thick. It coats itself nicely on meat and vegetables. You can throw in whatever vegetables you have at hand. Prawns can be easily replaced with chicken, fish or beef. I always have a pack of frozen, cleaned prawns in my freezer as it cooks the fastest and the prep time is zero. The flavours are authentic and vegetables are crunchy which is the true essence of Asian cooking. You can eat this stir-fry as a starter or serve with steamed Jasmine rice to make a meal.

prawn and eggplant hoisin stir-fry


Prawn and Eggplant Hoisin Stir-Fry (inspired by this recipe from Taste.com)
Serves 3-4

1 tbsp vegetable oil
2 Lebanese eggplants (ant kind of eggplant will do)
1 cup frozen prawns (peeled, deveined and cleaned)
2 garlic cloves. finely sliced
3 cm ginger, finely sliced (or grated if you don’t like pieces of ginger in your mouth)
1 bunch baby bok choy, leaves separated
10-12 snow peas, trimmed
1/2 cup Hoisin sauce
1 tbsp soya sauce
1/2 tsp palm sugar/brown sugar
salt for seasoning
red chillies, finely chopped, to serve
a handful chopped chives, to serve
a handful fresh coriander leaves, to serve

Heat 1 tablespoon oil in a wok or large frypan over medium-high heat. Add eggplant and cook, stirring occasionally, for 3-4 minutes until softened and lightly browned. Add  prawns, garlic and ginger to wok. Cook, stirring, for 2 minutes or until prawns have changed colour. Reduce heat to medium, then add bok choy, snow peas and cook, stirring, for a minute.
Add Hoisin, soya sauce, sugar, and salt and stir fry for 2 minutes or until the bok choy is just wilted and the mixture is coated with sauce. Garnish with red chillies, chopped chives and fresh coriander. Serve with steamed rice.


Parmesan and Blueberry Pound Cake with Lemon Icing

1|10|2014

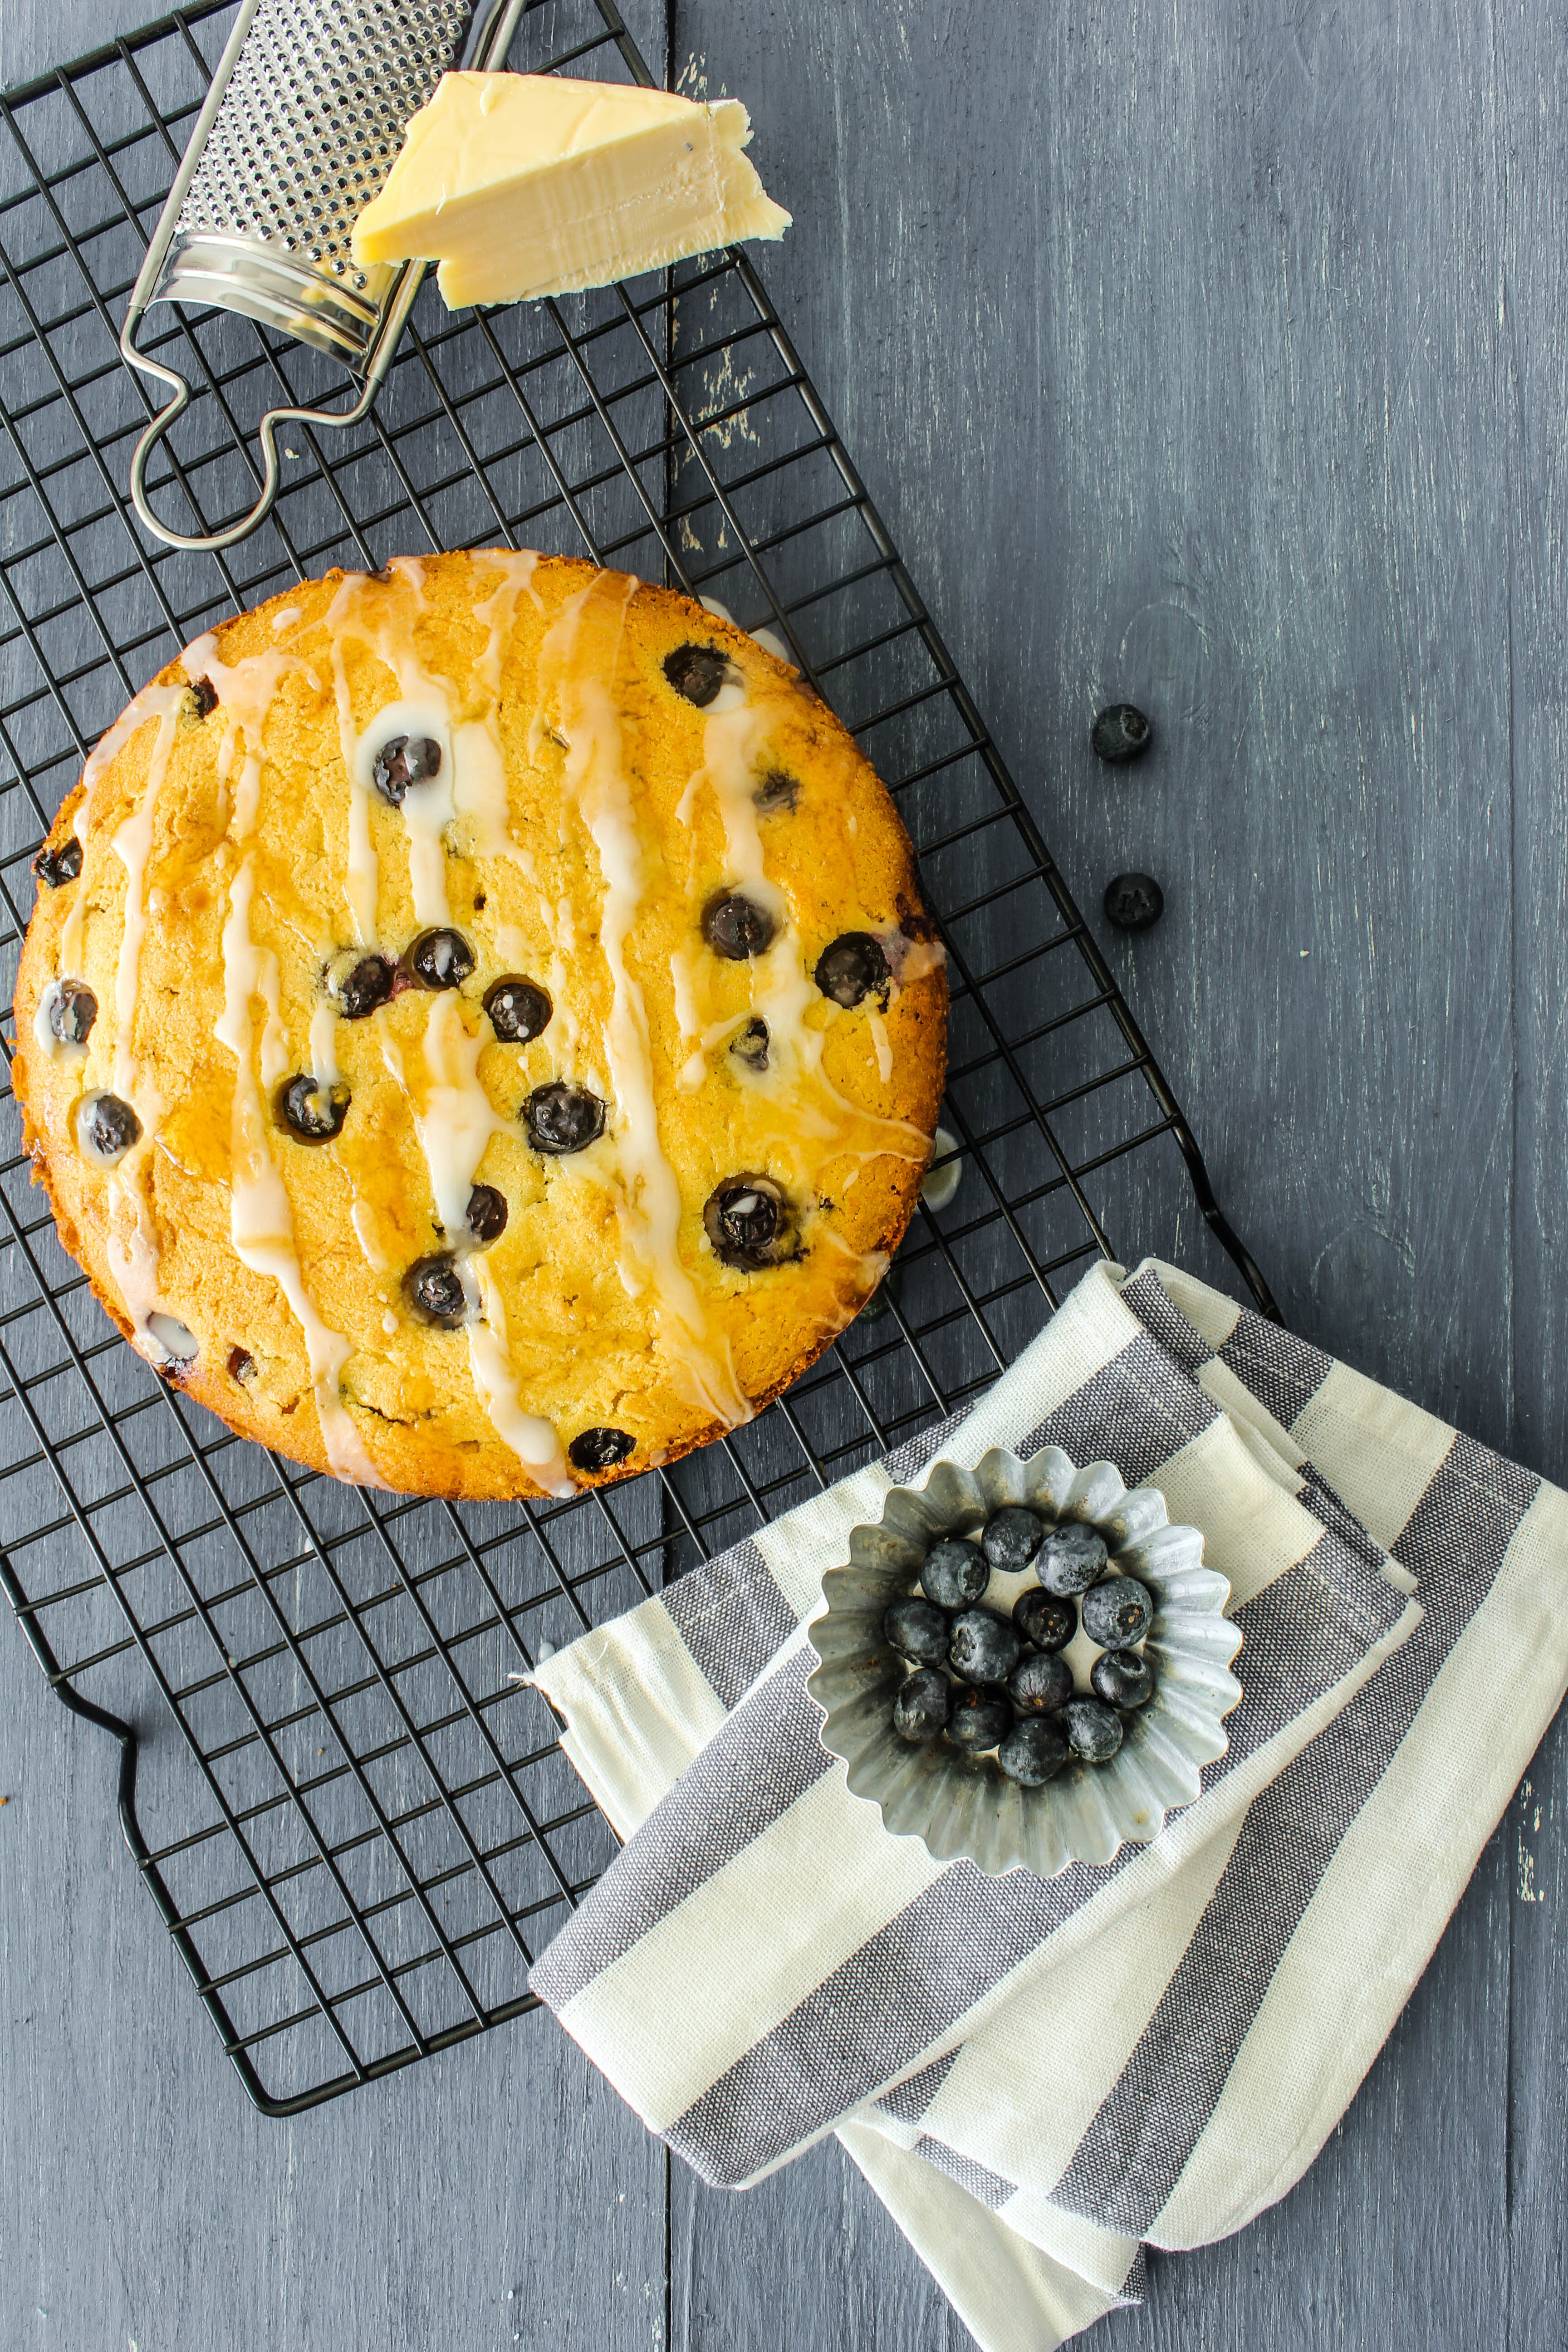
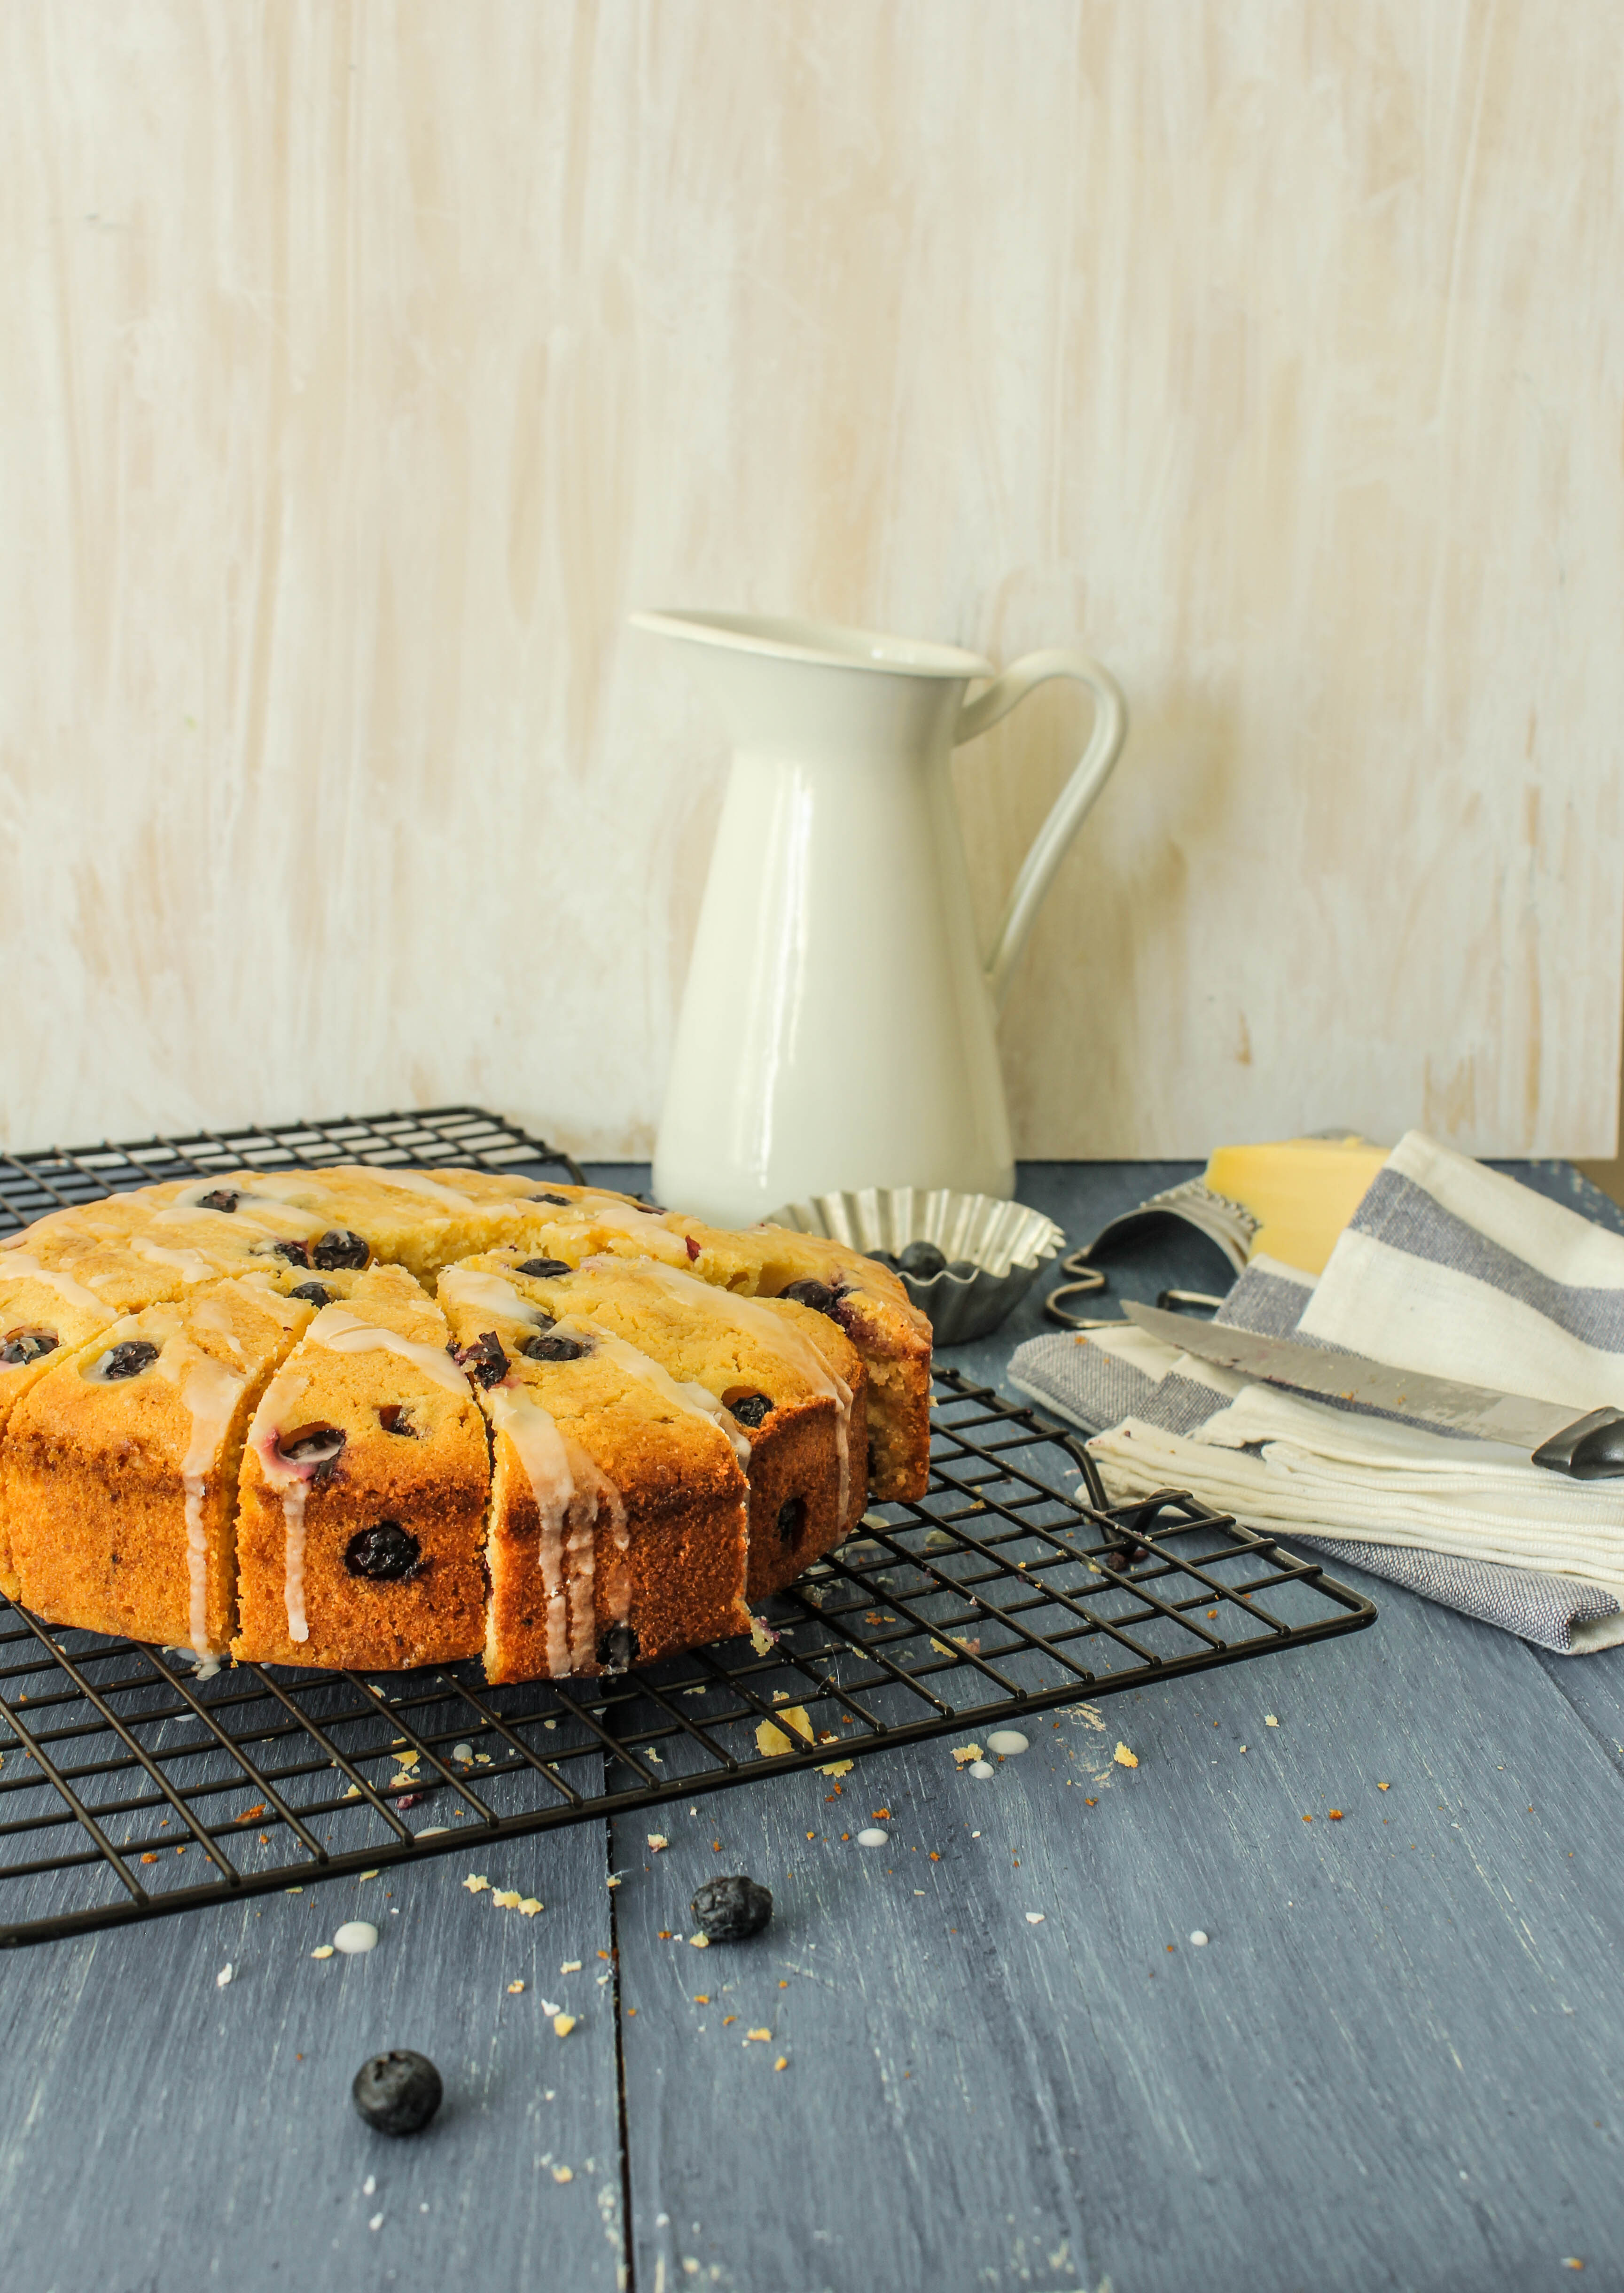
For many years, on the last day of September I partied hard. I put on my brand new outfit, painted my lips, let my hair down and danced. Well actually, I did no such thing. Yes, I partied. With all my favourite people. I woke up to deep love, the sort of selfless affection that can come only from family. I got to hear familiar voices on the telephone that I wouldn’t normally hear all year round. I came back from work with flowers and presents that would fill up the entire backseat and boot of my car. I ate my favourite breakfasts, splurged on lunches and dinners were a thing to commemorate in the precious folders of my memory forever. I expected…and I received. Basically, I was spoilt. IMG_2712

In the last few years, since I became a mother, so much has changed. Yet a lot hasn’t. My birthday is still a day I start with the brightest of faces, the warmest of hugs, fewer phone calls but more heartfelt wishes. I eat what we all love as a family. My brand new outfit, matching shoes and lip colour have been replaced with comfortable wear that allow me to chase two little boys around the house. Instead of flowers, the backseat of my car is occupied by car seats where the two of my most precious beings sit, loudly singing ‘Happy Birthday’ for me in the cutest of voices. Thanks to technology, messages flow in from various different apps. I make sure I have checked all of them and replied. Some of them need an upgrade which I realise only at that instance. I still feel very celebrated, pretty overwhelmed and reflective in the last few hours of the day. But there is a difference. I don’t expect. I understand..appreciate and acknowledge. I feel gratitude more than ever, with each passing year. Quite a few times I tell my husband ‘I don’t believe it’s the same ‘me”. He nods understandingly.

IMG_2737

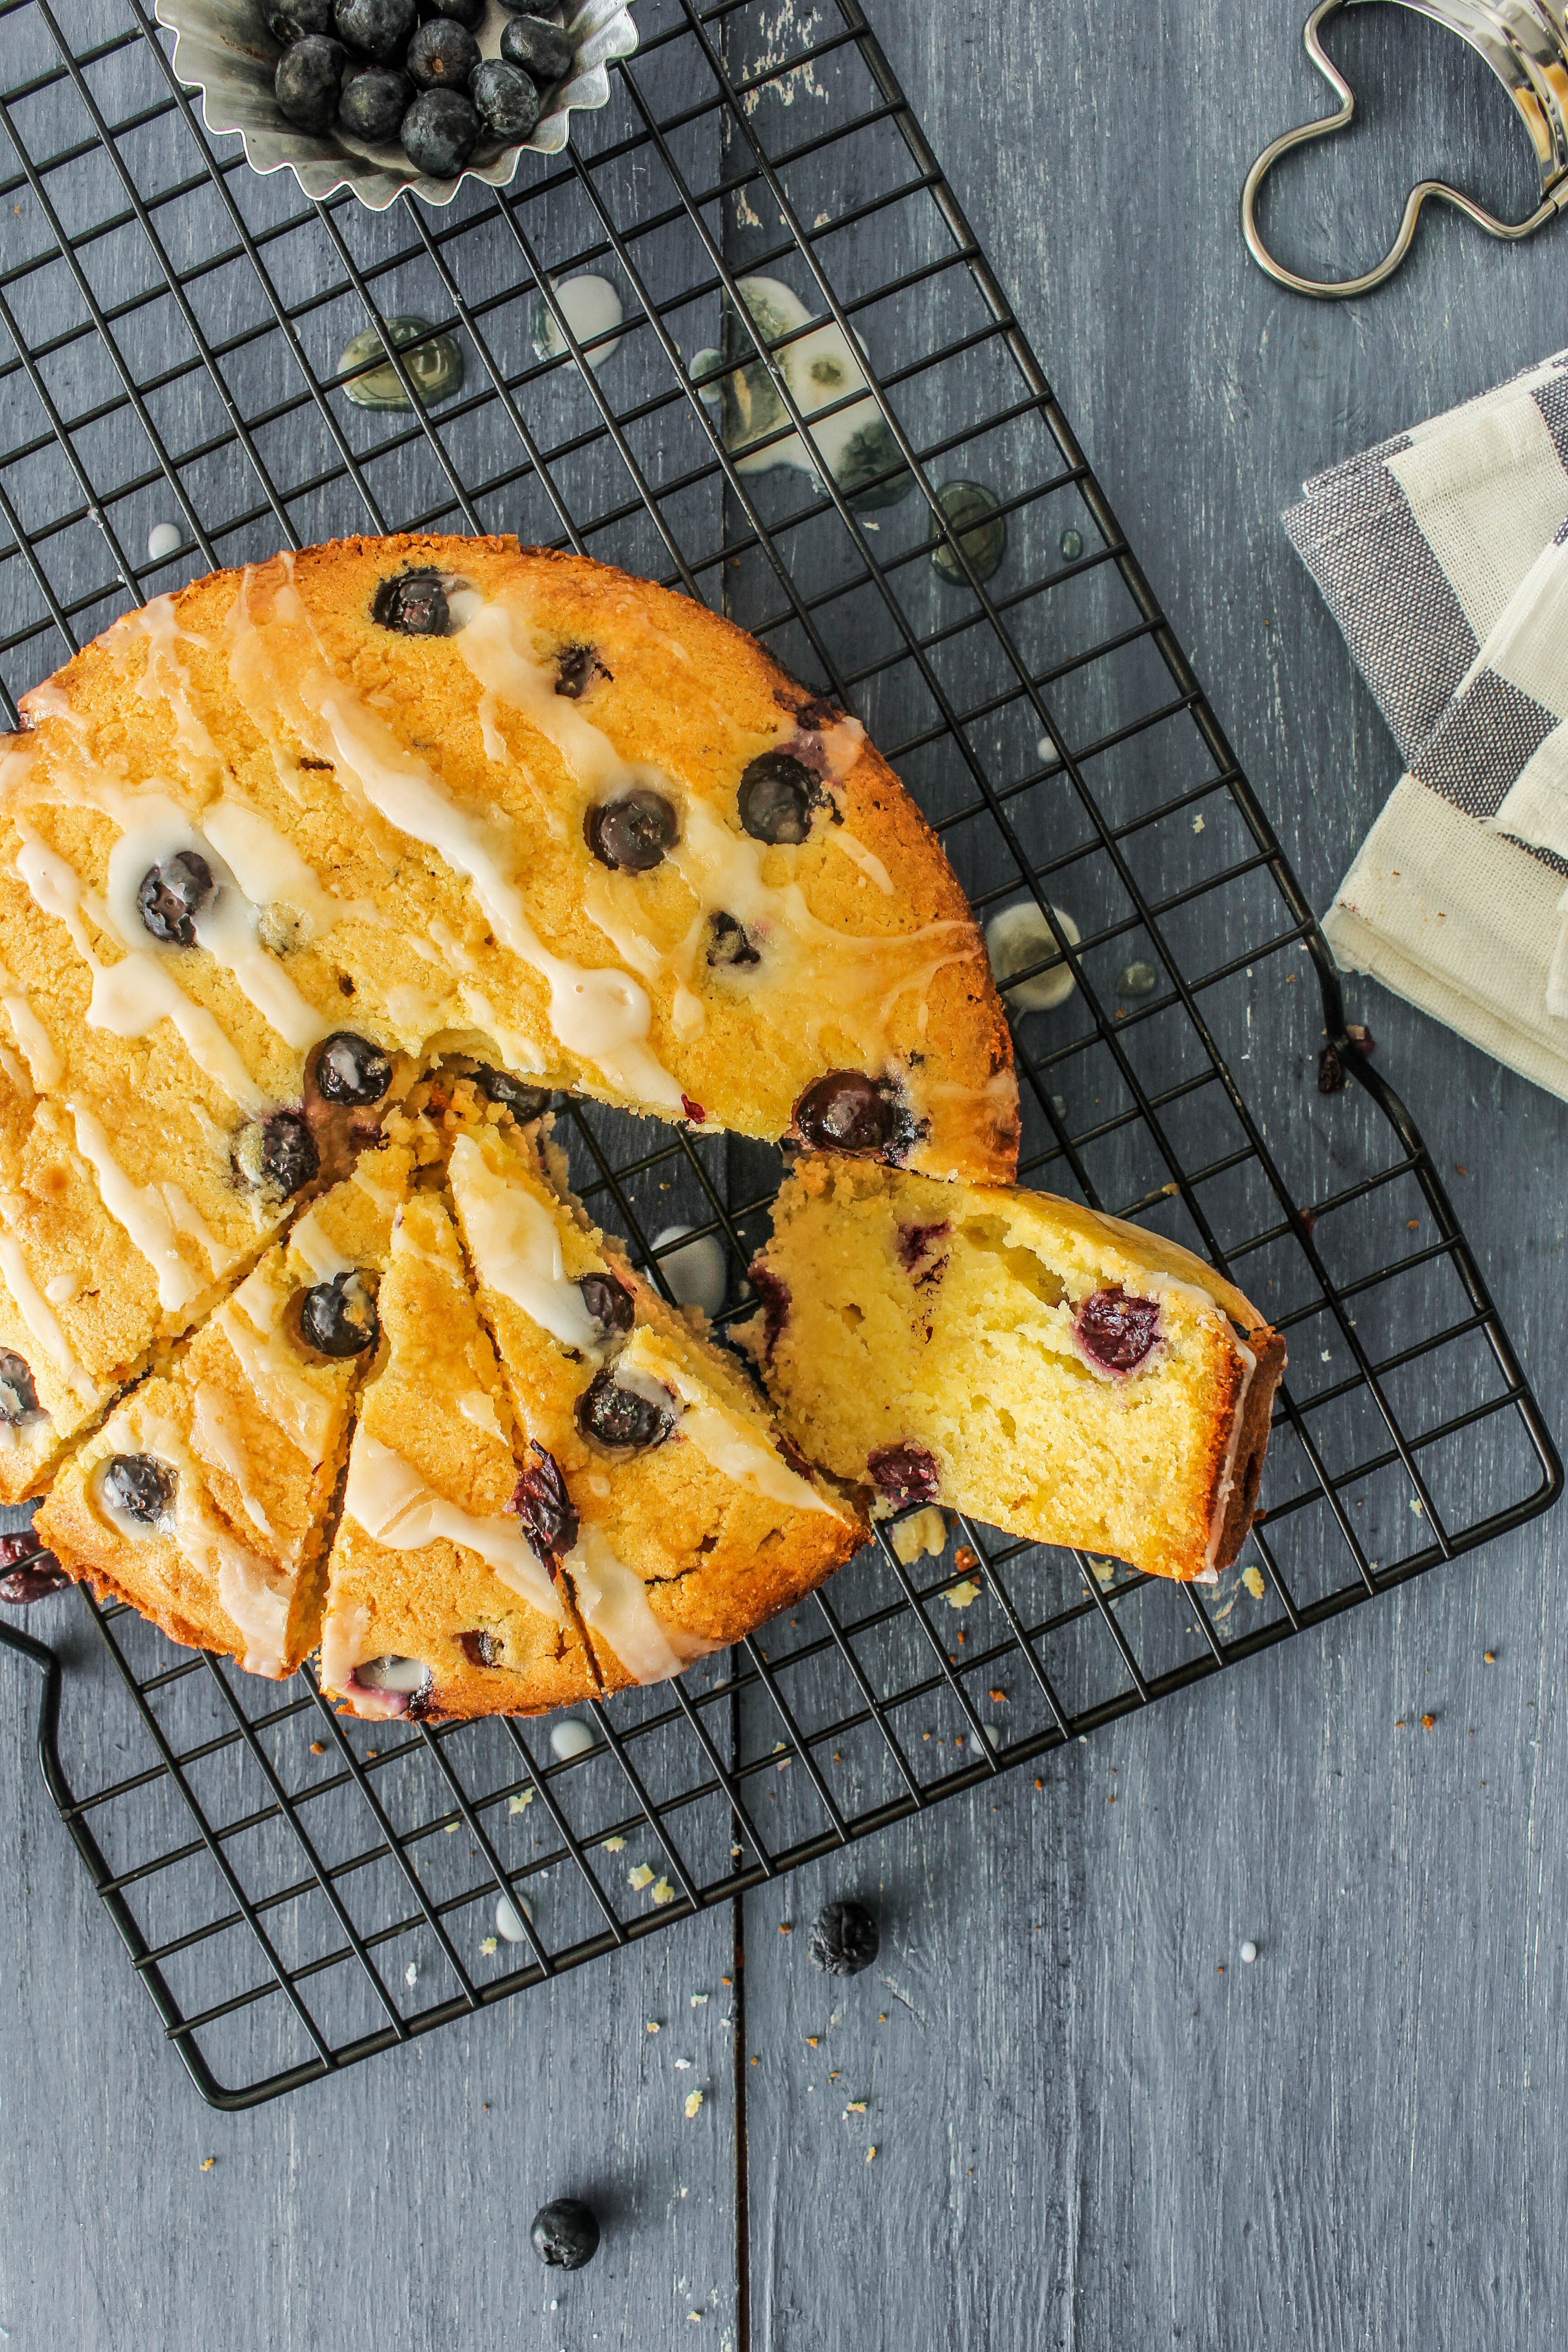
There is no birthday without a cake. Though this really wasn’t the cake I ate (I mean, my birthday cake), I made it because I’ve been meaning to for a long time. This was my second attempt at making a parmesan cake. The first time, the flavour wasn’t strong enough and I baked it in a bundt cake pan. So I increased the parmesan, added blueberries, a lemon icing and honey drizzle this time. This is a fun cake. Quite easy to make but the flavours are a play on your senses…sweet…savoury…sweet…savoury..tart! Parmesan adds an extra something which is hard to describe. A hint of cheesy goodness and a slight acidity to the cake. If you are a fan of the sweet-savoury combination in food, this is a must-try. The lemon icing and honey drizzle balances out the acidity. You may want to cover the entire cake in icing if you don’t enjoy the saltiness in the cake. Overall, it is a delicious cake and best enjoyed warm or at room temperature with vanilla ice-cream on the side. IMG_2733

Parmesan and Blueberry Pound Cake with Lemon Icing
Serves 6-8

11/2 cups plain flour, sifted
1 tsp baking powder
75 g parmesan cheese, finely grated
180 g unsalted butter, room temperature, roughly chopped
3/4 cup castor sugar
3 large eggs, room temperature
1 tsp vanilla essence
1 cup fresh or frozen blueberries (I used a mix of both) Lemon Icing, to drizzle
Honey, to drizzle

Lemon Icing 1 tbsp. lemon juice
1/2 cup icing sugar, sifted (another 1/4 cup if you want a thick icing)

Preheat oven to 180 degrees C. Butter and line the base the of a 19 cm round cake pan with baking paper. In a medium bowl, place the flour, baking powder and parmesan cheese and mix gently together. In the bowl of your electric mixer or with a hand mixer, beat the butter till soft and fluffy. Add the sugar, little at a time till fully incorporated. Add the vanilla essence and eggs one at a time, beating well after each addition. Slowly add in the dry ingredients and beat on medium speed till mixture is smooth and well blended. Gradually fold in the frozen blueberries with a wooden spoon. Pour the batter into the prepared pan. Smooth the top with the back of the wooden spoon. Bake in the oven for 50-60 minutes or until the top is golden brown and a skewer inserted in the centre of the cake comes out clean. Remove carefully from the oven. Stand in the pan for 10 minutes, then transfer onto a wire rack to cool completely. Once the cake has cooled down, drizzle or ice with lemon icing (recipe below). The icing thickens on cooling.

To make the Lemon Icing, place the ingredients together in a bowl and stir until combined.

Double Chocolate Sticky Date Pudding

27|09|2014

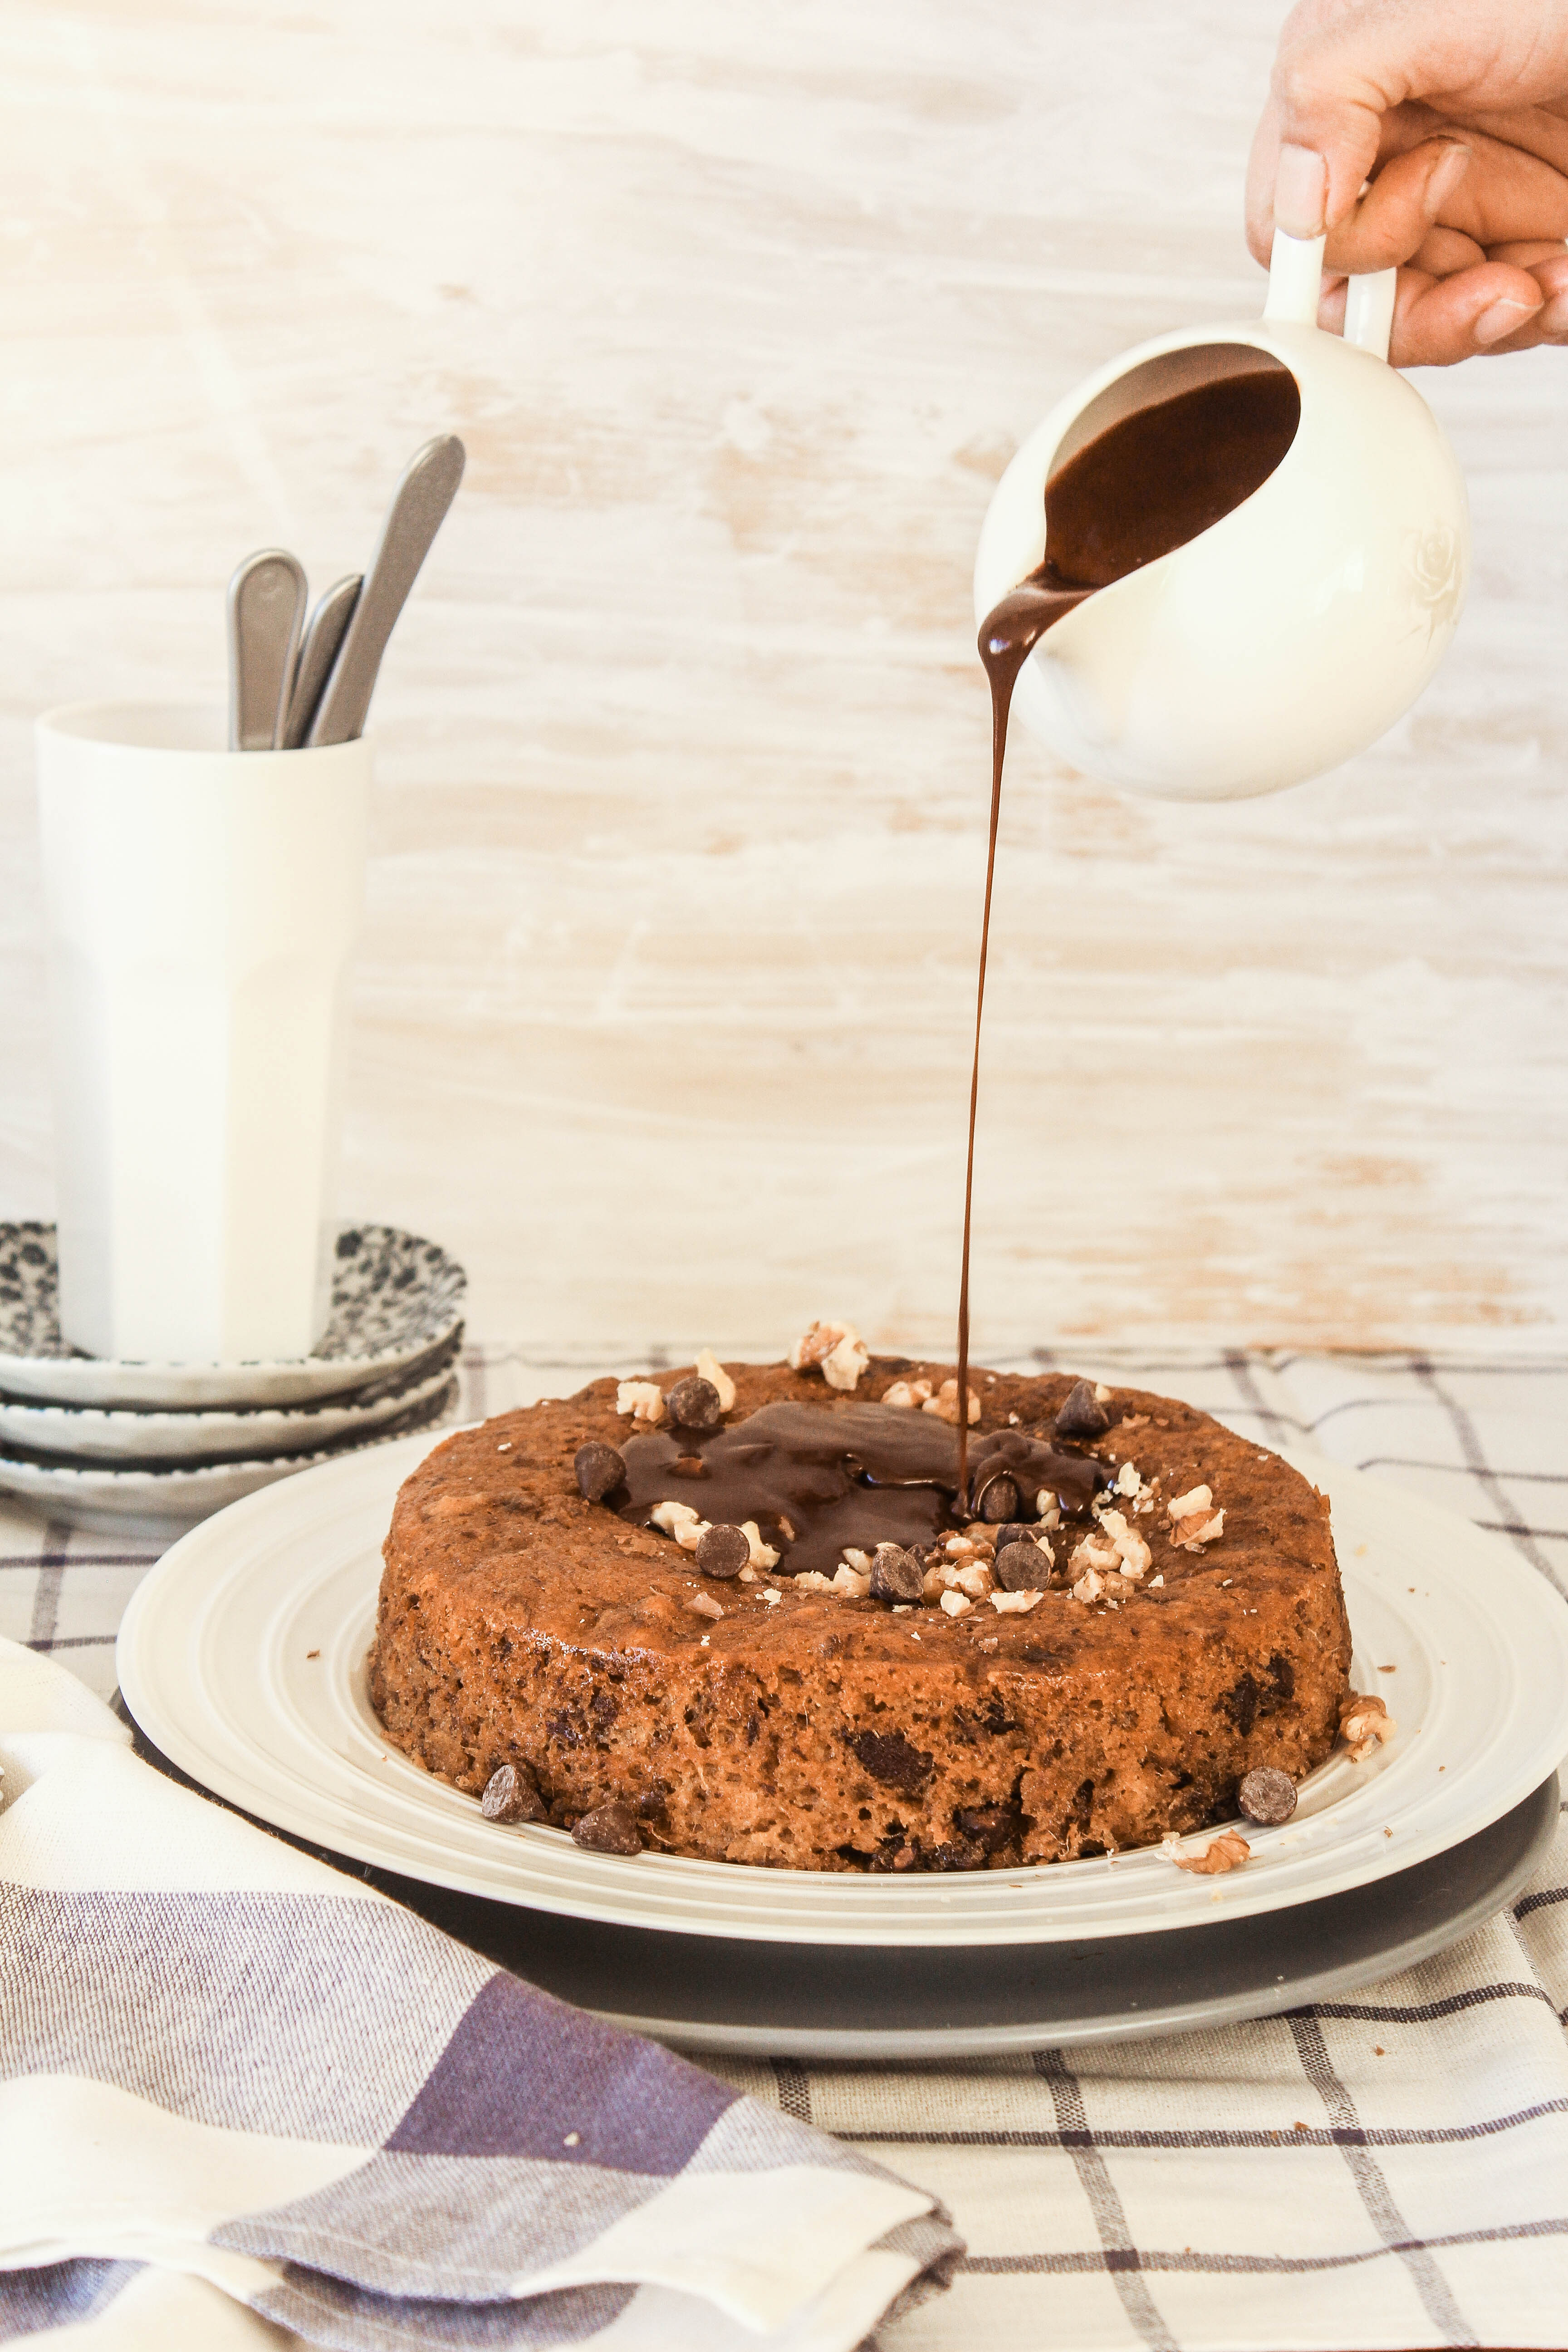
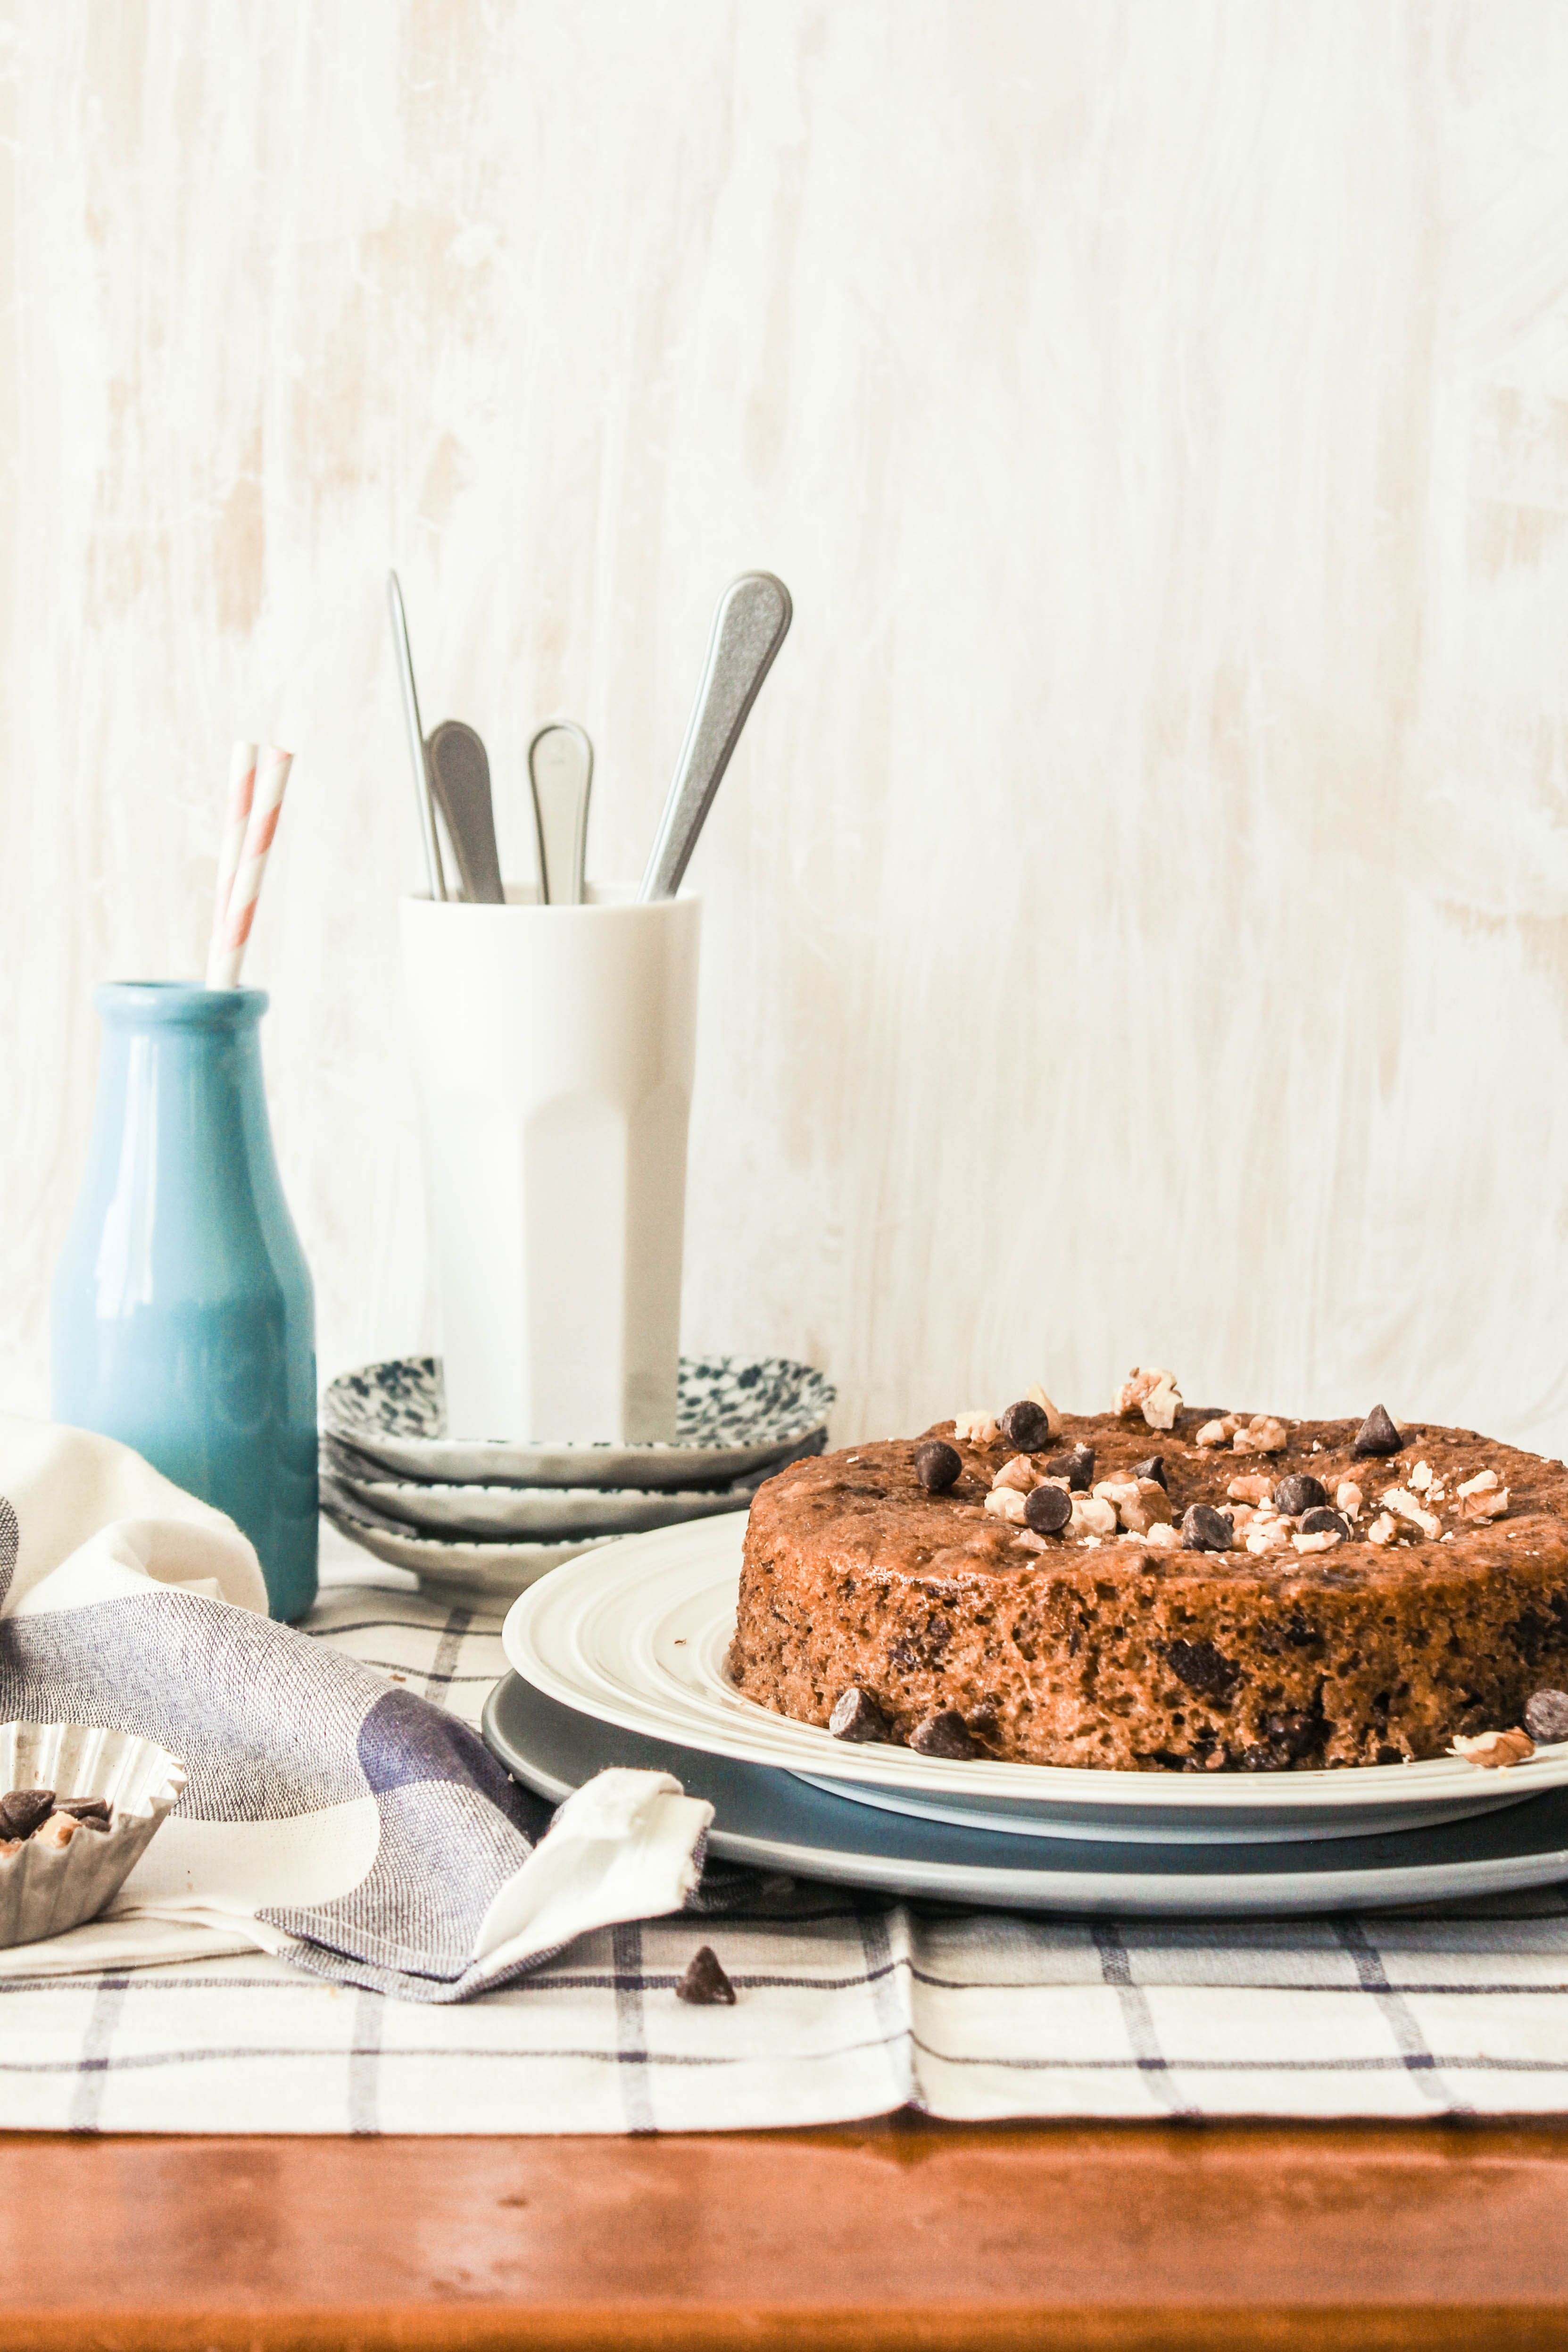
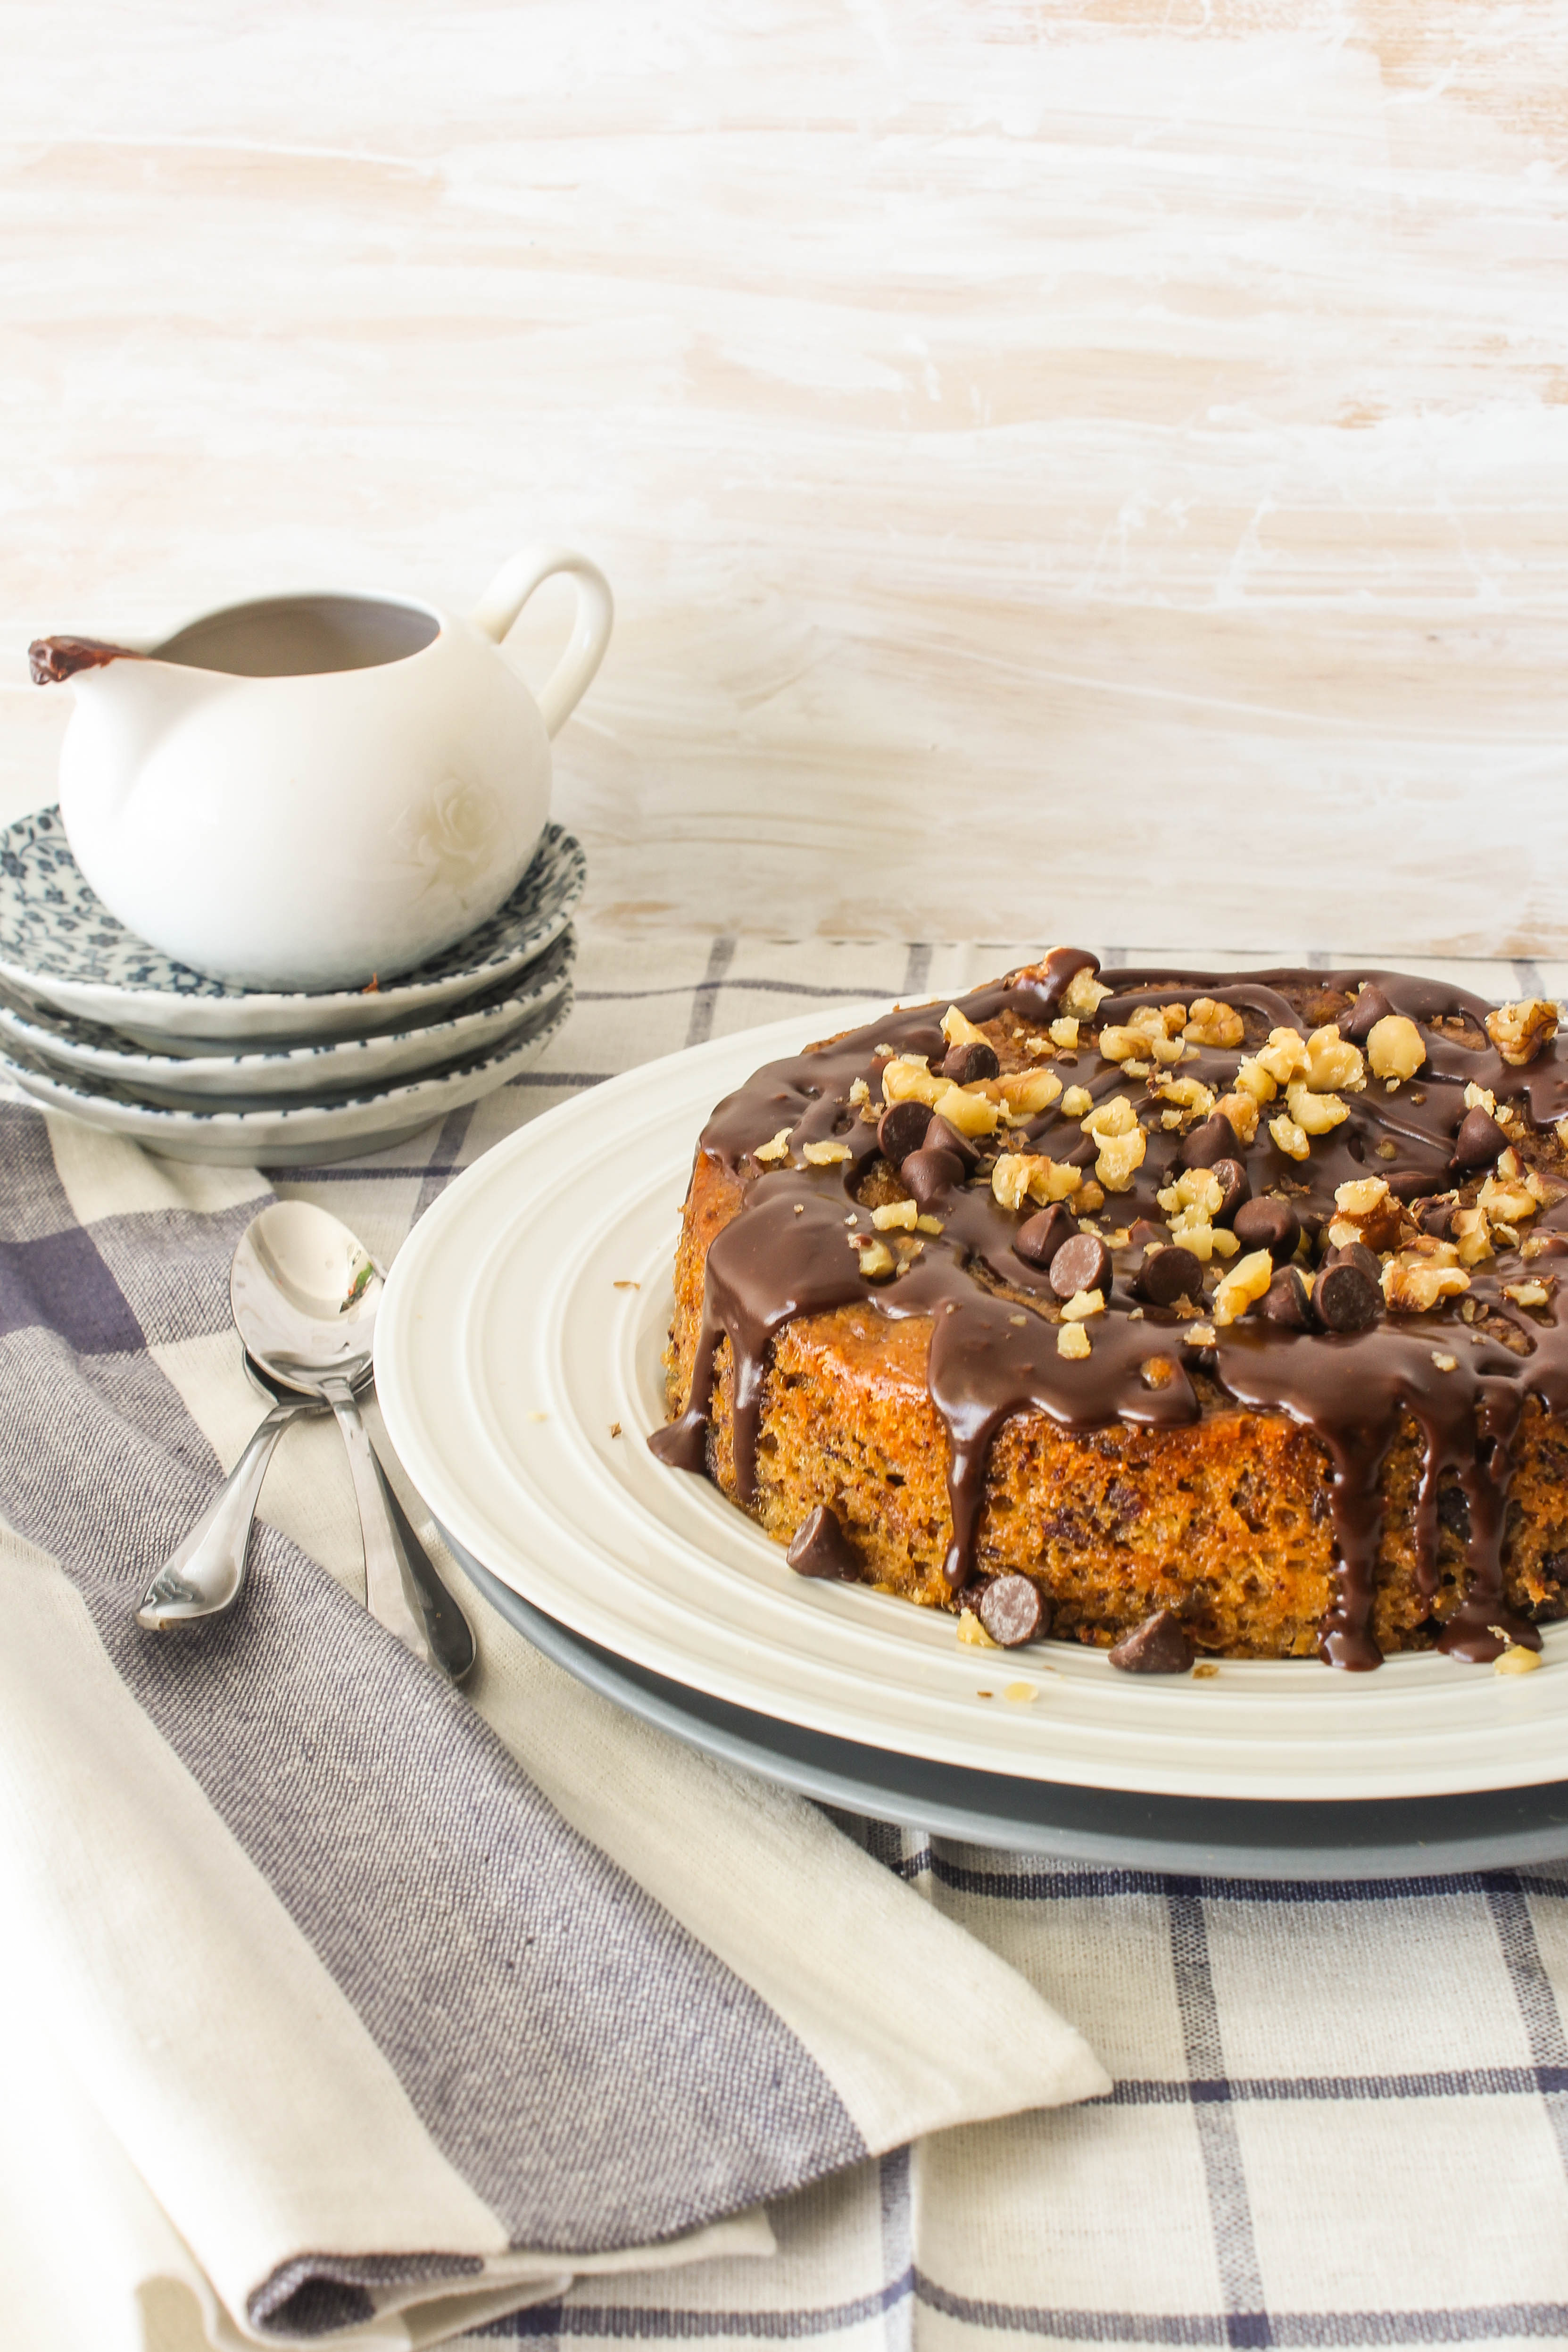
The only thing better than a sticky date pudding is a sticky date pudding with a double dose of chocolate. Spring is starting to set in and it’s filling my life with many new excitements. Spring for me, is the time to take a good look at life and remark ‘Yes, it’s time to detox..its time for change!’. Normally what people would do at the start of New Year. Somehow leaving winter behind gives me a burst of energy. I wake up with a list of things to do pretty much every morning. One of the resolutions I had made for this Spring was to improve my photography and pick up some new skills. I have been working hard in doing so. If you follow me on Instagram, you would know that I was very excited when I shared my first ever ‘pour shot’ recently. As a lover of all things sweet, nothing spells ‘food porn’ to me than a sauce dripping dessert.  I chose the sticky date pudding with chocolate chips to be the subject of my pour. Again, raising the bar to my creativity is one more journey I have embarked on. I have to admit, I have always been a bit fearless in the kitchen. It is a very spontaneous thing for me. Rarely have I entered the kitchen with a fixed outcome in mind or followed a recipe to the T. This time around I have decided to fuel this passion and try my hand at as many things as possible. You may get to see a lot of pouring, drizzling, sprinkling and such on the blog in future.

IMG_2488-4


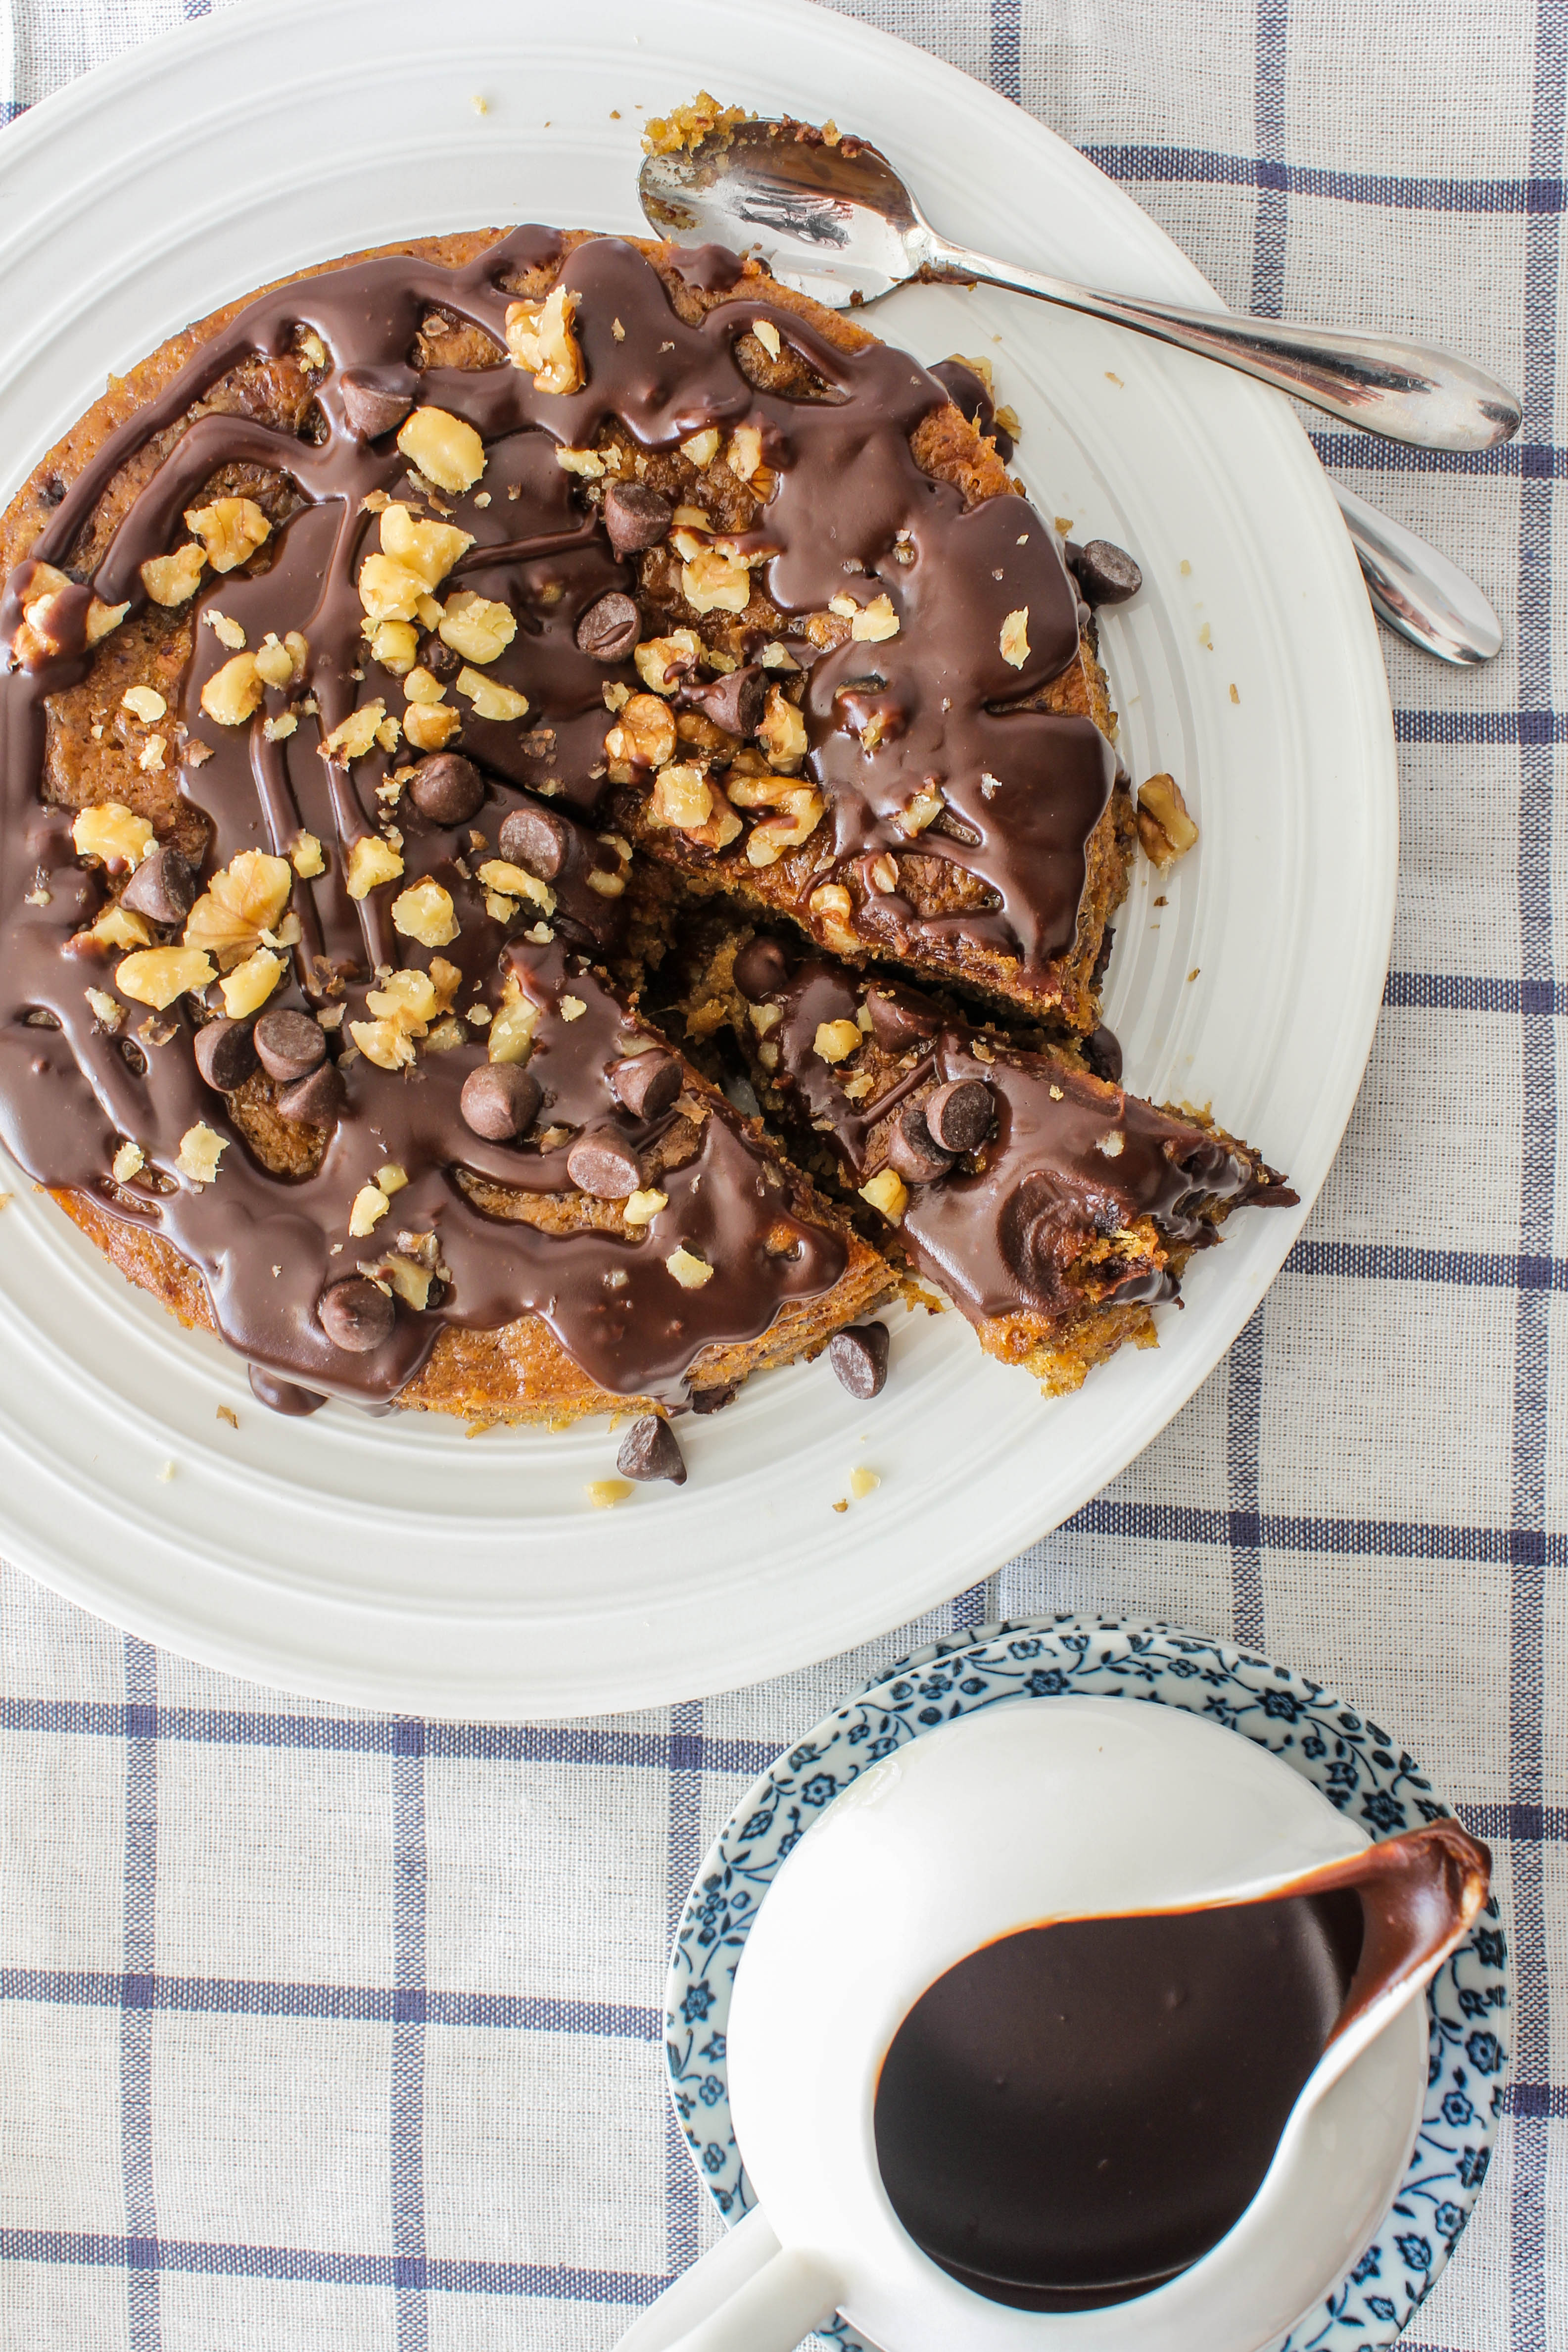
The sticky date pudding is such a gorgeous thing to share with friends and family. Especially on a special get-together when comfort and pleasure over-rides any form of calorie induced guilt. I wanted to make the pudding a centrepiece. There is already a recipe for individual sticky date puddings in my blog archives which is quite luscious with a butterscotch sauce. But chocolate is different, it just  works with everything. It gives an extra oomph to anything and everything. This version of the pudding has chocolate chips and toasted walnuts inside the batter, on top and dressed up in a rich, bittersweet chocolate sauce. Frankly, there is no major innovation in this, just that you want to convince yourself if you really want to play around with a dessert that is already so beautiful to taste and look at. Yes, you want to! Trust me, you will love to eat it and share it.

IMG_2484-3

If this is the first time you are going to make a sticky date pudding, there is very little date-like taste in your mouth. I know quite a few people who don’t enjoy dates in desserts. This is far from being chewy or munchy and all the textures you associate with dates. The dates are broken down right at the start and what you get is actually a rich caramel like sauce that flavours the pudding. You can make this recipe in 8 individual cups instead of one large. As you can see, the pudding holds shape beautifully, almost like a cake. It is very gooey inside however and the centre might sink a tad bit. Which actually formed the base to catch my chocolate sauce during the shoot. I could not take pictures of the insides like I normally do as I was jumping with excitement when I blew up the image on my screen. I wish I could show you the number of images I had with sauce hanging in mid-air and of course the blurry ones. Kind of spooky!
We just had to celebrate and all we wanted was a mouthful of the Sticky date pudding.

IMG_2539-3


IMG_2548-2

Double Chocolate Sticky Date Pudding
Serves 8

180g dates, pitted and roughly chopped
1 1/4 cups (310ml) water
1/2 tsp bicarbonate of soda
3/4 cup (165g) firmly packed brown sugar
60g butter, softened chopped
2 eggs
1 cup (150g) self-raising flour
1/2 cup dark chocolate chips
1/4 cup toasted walnuts

For the dark chocolate sauce
100g dark chocolate, chopped
1/2 cup pouring/single cream
2 tablespoons brown sugar

Preheat oven to 180 degrees C (160 degrees C fan-forced). Lightly grease an 18 cm round cake pan and line base with baking paper.. Place dates and water in a saucepan and bring to the boil over a high heat. Remove from the heat. Add bicarbonate of soda, stir until dates start to break down, set aside to cool, stirring occasionally.               
Place the chocolate chips, walnuts and flour together in a bowl. Beat butter and sugar in a bowl using a hand beater, gradually add eggs one at a time, beat until light and fluffy. Add date mixture, stir to combine. Carefully fold through the flour and chocolate chip mixture, pour into prepared cake pan. 

Place cake in a baking tray, carefully pour water in tray until it comes up 1/3 of the sides of the pan. Bake in the oven for 40 minutes or until golden and skewer comes out clean. Leave in pan for 10 minutes. then carefully turn out pudding onto a serving plate or tray. Serve warm with Chocolate Sauce, extra chocolate chips and toasted walnuts.

Make the Dark Chocolate Sauce :  Combine chocolate, cream and sugar in a saucepan over a low heat. Cook, stirring, for 5 minutes or until mixture is smooth. Set aside to cool. To store, pour into a cup/jar, cover and store in the refrigerator till needed. Warm up before using.

Red Kidney Bean and Pumpkin Stew

24|09|2014

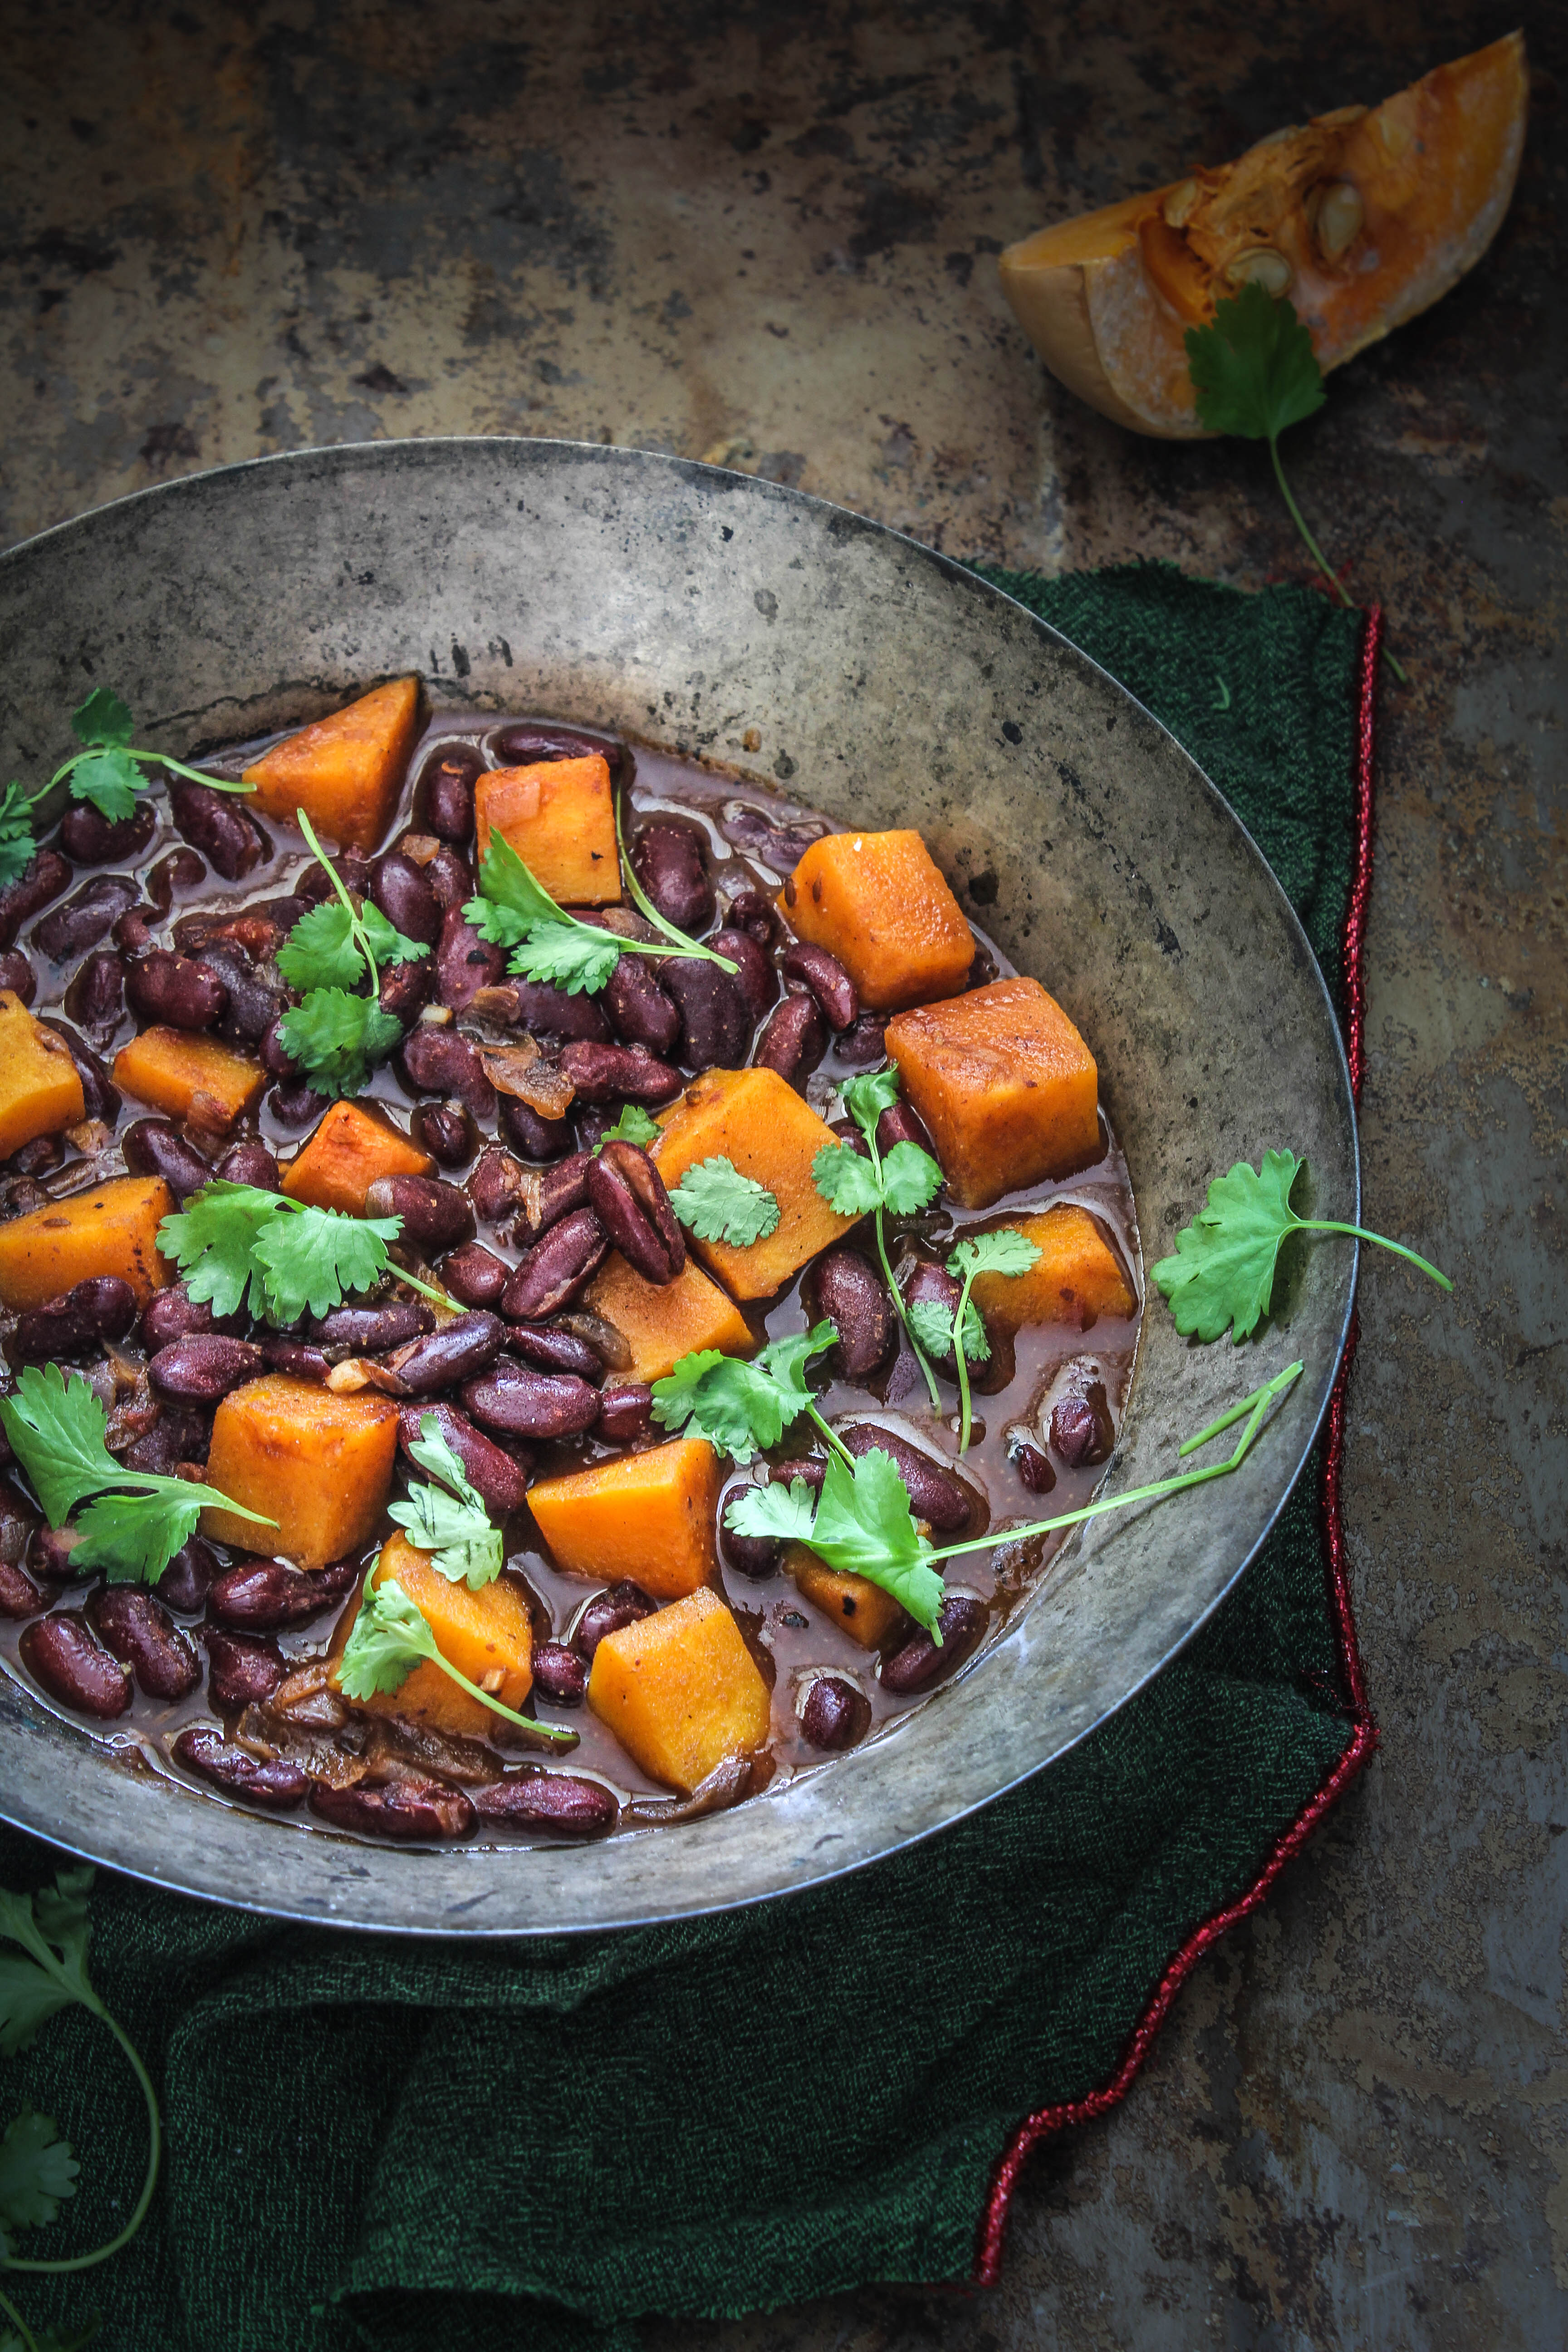
I think we all have heard the story. Cinderella, her step-sisters, her fairy Godmother and the pumpkin carriage. To be able to transform into the most glamorous carriage, I couldn’t love the pumpkin more!  But I literally couldn’t love it more than that. My parents love pumpkin and so do my children (how?). I couldn’t get past the mushy texture. As a colour-driven individual I love the way it looks and so last year, I made a few genuine attempts to start cooking with it. I did not fall in love. Nope. I know my readers love it too, gauging by the responses to my posts in the past. And since I love my readers, I decided to lock my eyes with pumpkin again. This time around I thought I would add it to recipes that are big on flavours and pumpkin is an addition. Non-pumpkin loving souls (if you exist?) could benefit from removing them, enjoying the rest of the dish if they wanted to. As it turned out, I actually liked the dish, along with the pumpkin. I did not have to remove any.

IMG_2527

The stew is inspired by an Indian dish from my childhood.,’Rajma Masala’. The red kidney bean is the star here. We moms have a natural tendency to add ‘things’ to the meals we feed our children, so the addition of pumpkin is a no-brainer. What is great however, is the way the ingredients work together! The contrast in textures and flavours, makes the stew really delicious. And filling. A quick and hearty weeknight meal. Whilst being equally healthy.

Feel free to increase the heat in the stew by adding either a teaspoon of cayenne pepper, powdered chilli or chopped green chillies.

IMG_2517

Red Kidney Bean and Pumpkin Stew
Serves 4

1 tbsp. olive oil
1 tsp cumin seeds
1 red onion, finely chopped
2 cloves garlic
1/2 inch ginger, finely chopped
11/2 tsp ground cumin
1 tsp ground coriander
3/4 cup canned, diced tomatoes
3/4 cup vegetable stock/chicken stock
1 can red kidney beans (400 g)
400 g butternut pumpkin, chopped into 3 cm cubes
salt, to season
fresh sprigs coriander, leaves picked, for garnish

Heat the oil in a large saucepan over medium heat. Add the cumin seeds and wait for 30 seconds. Cook the onion, stirring, for 2-3 mins or until softened. Add the garlic, ginger and spices. Cook, stirring, for 1 min or until fragrant.

Add the tomato and stock. Bring to the boil. Reduce heat and simmer, uncovered, for 10 mins. Add red kidney beans and simmer a further 10 mins or until pumpkin is just tender. Season with salt. Garnish with coriander. Serve warm

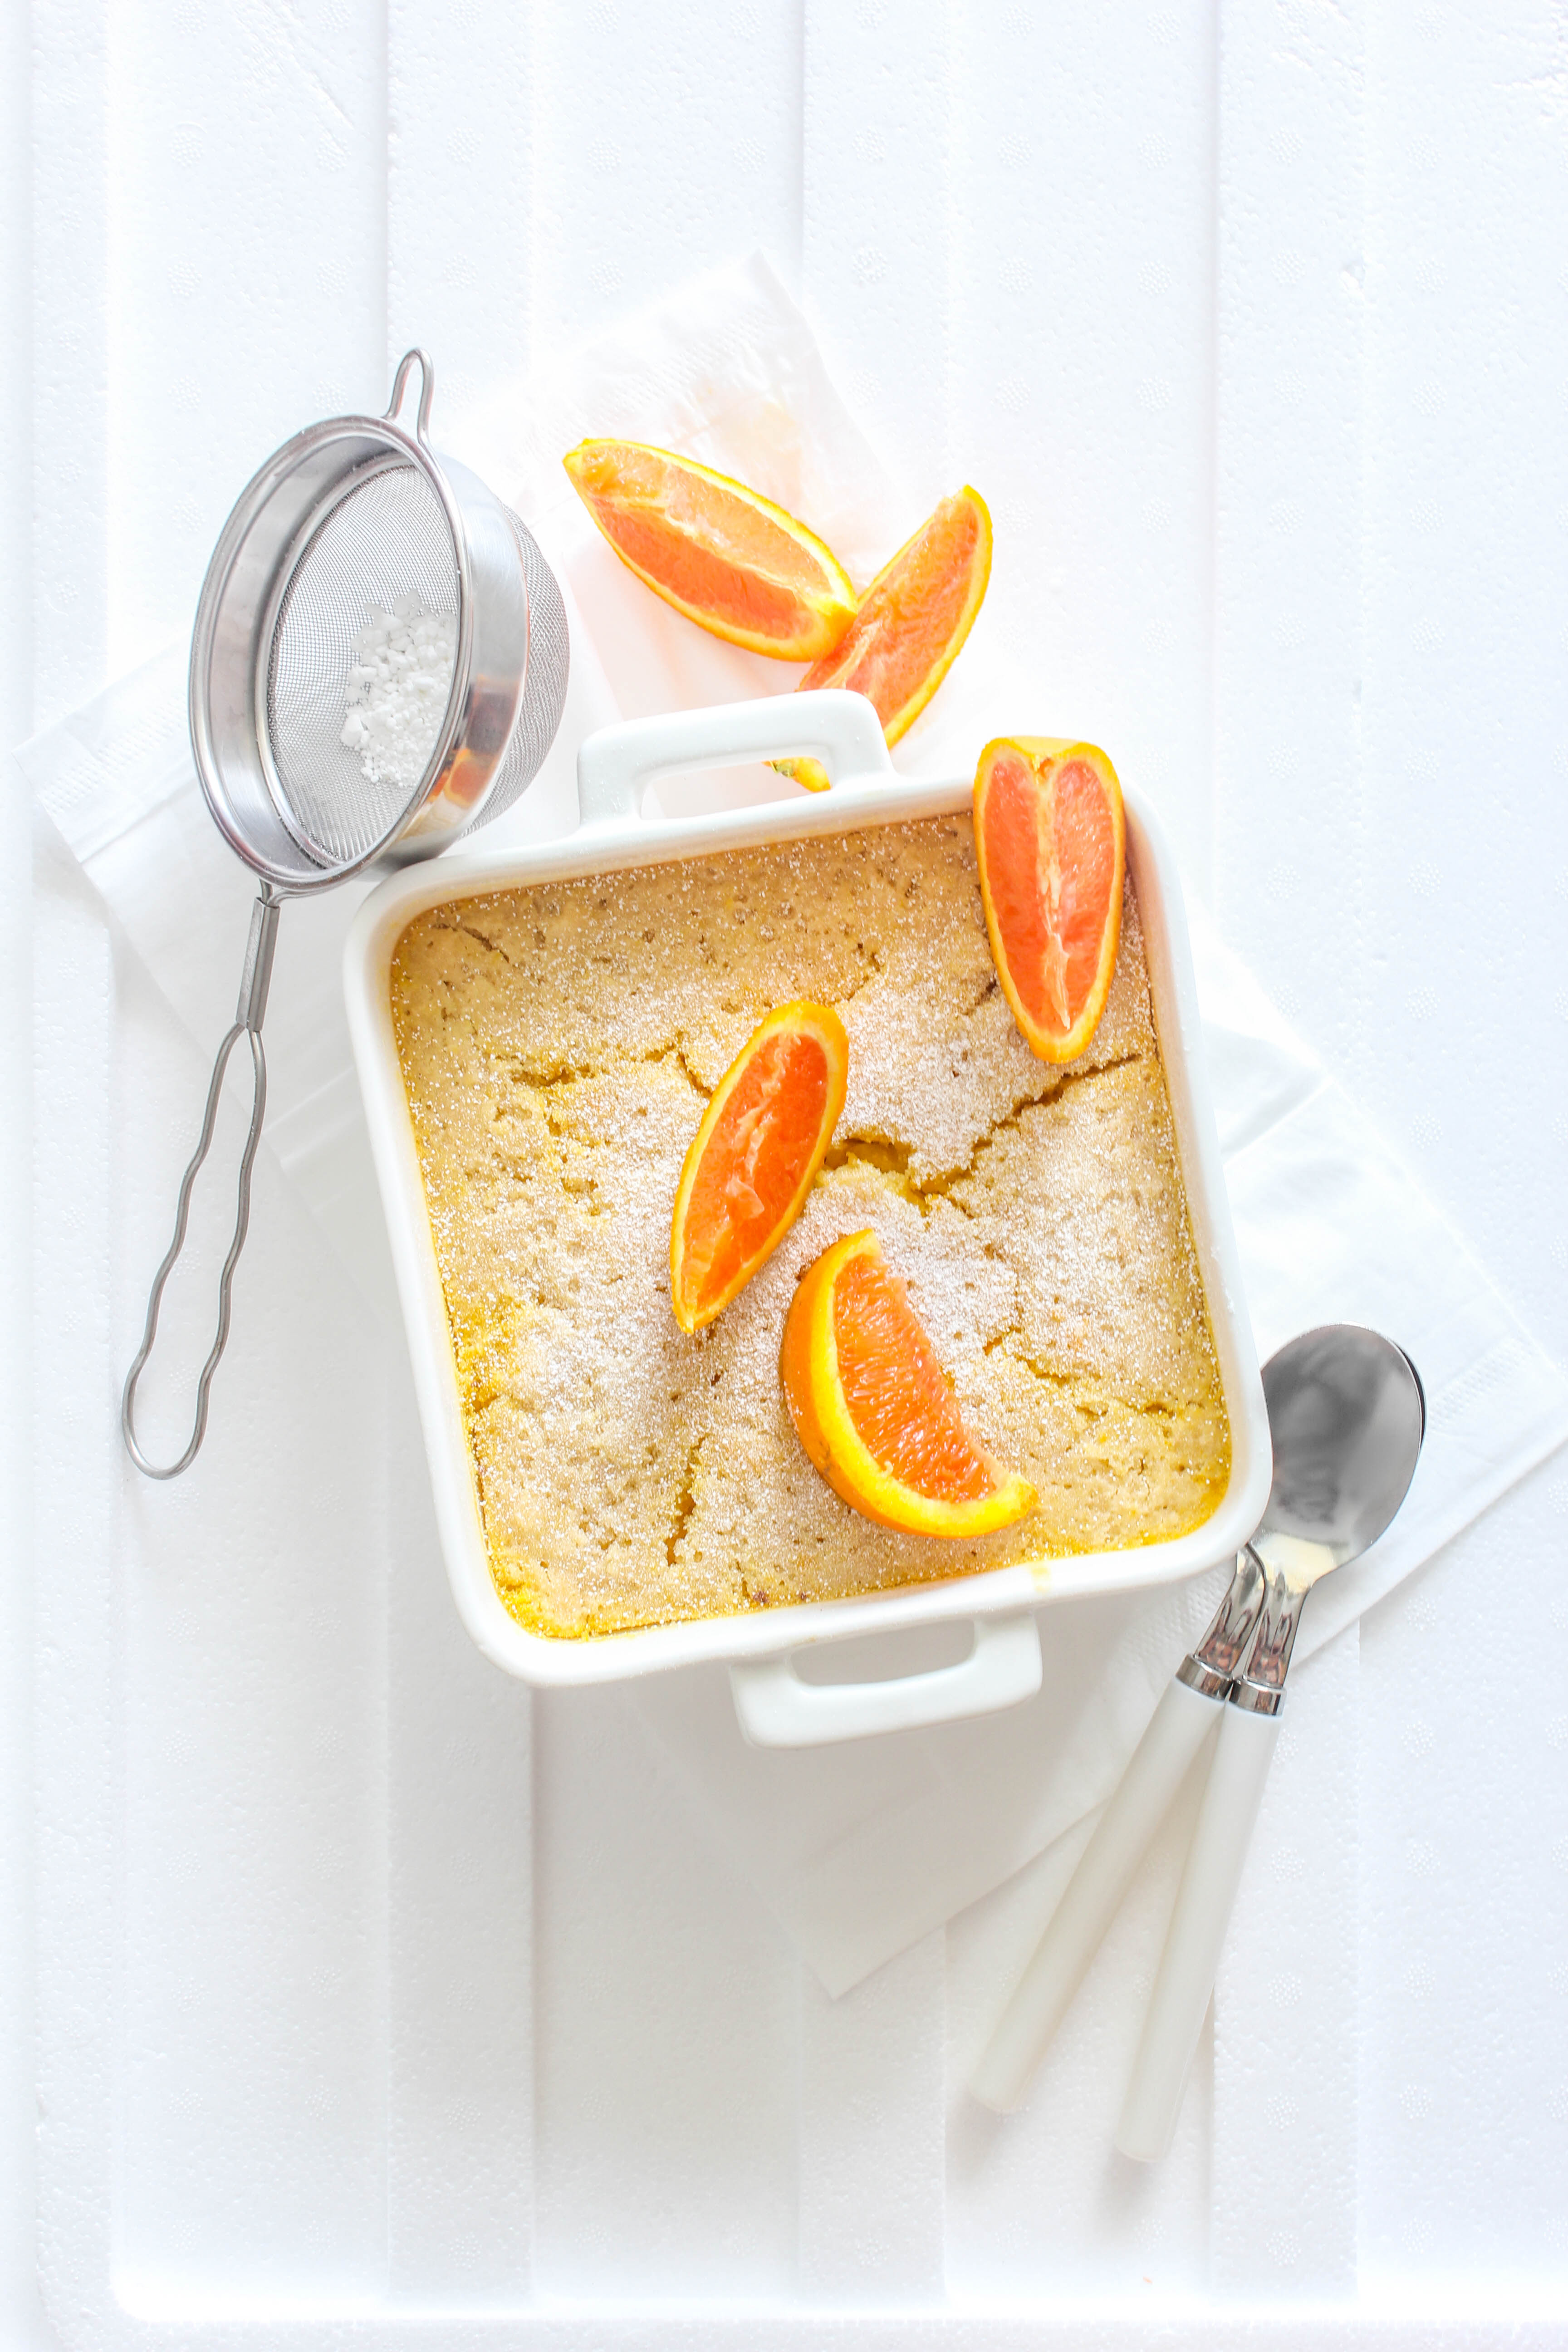
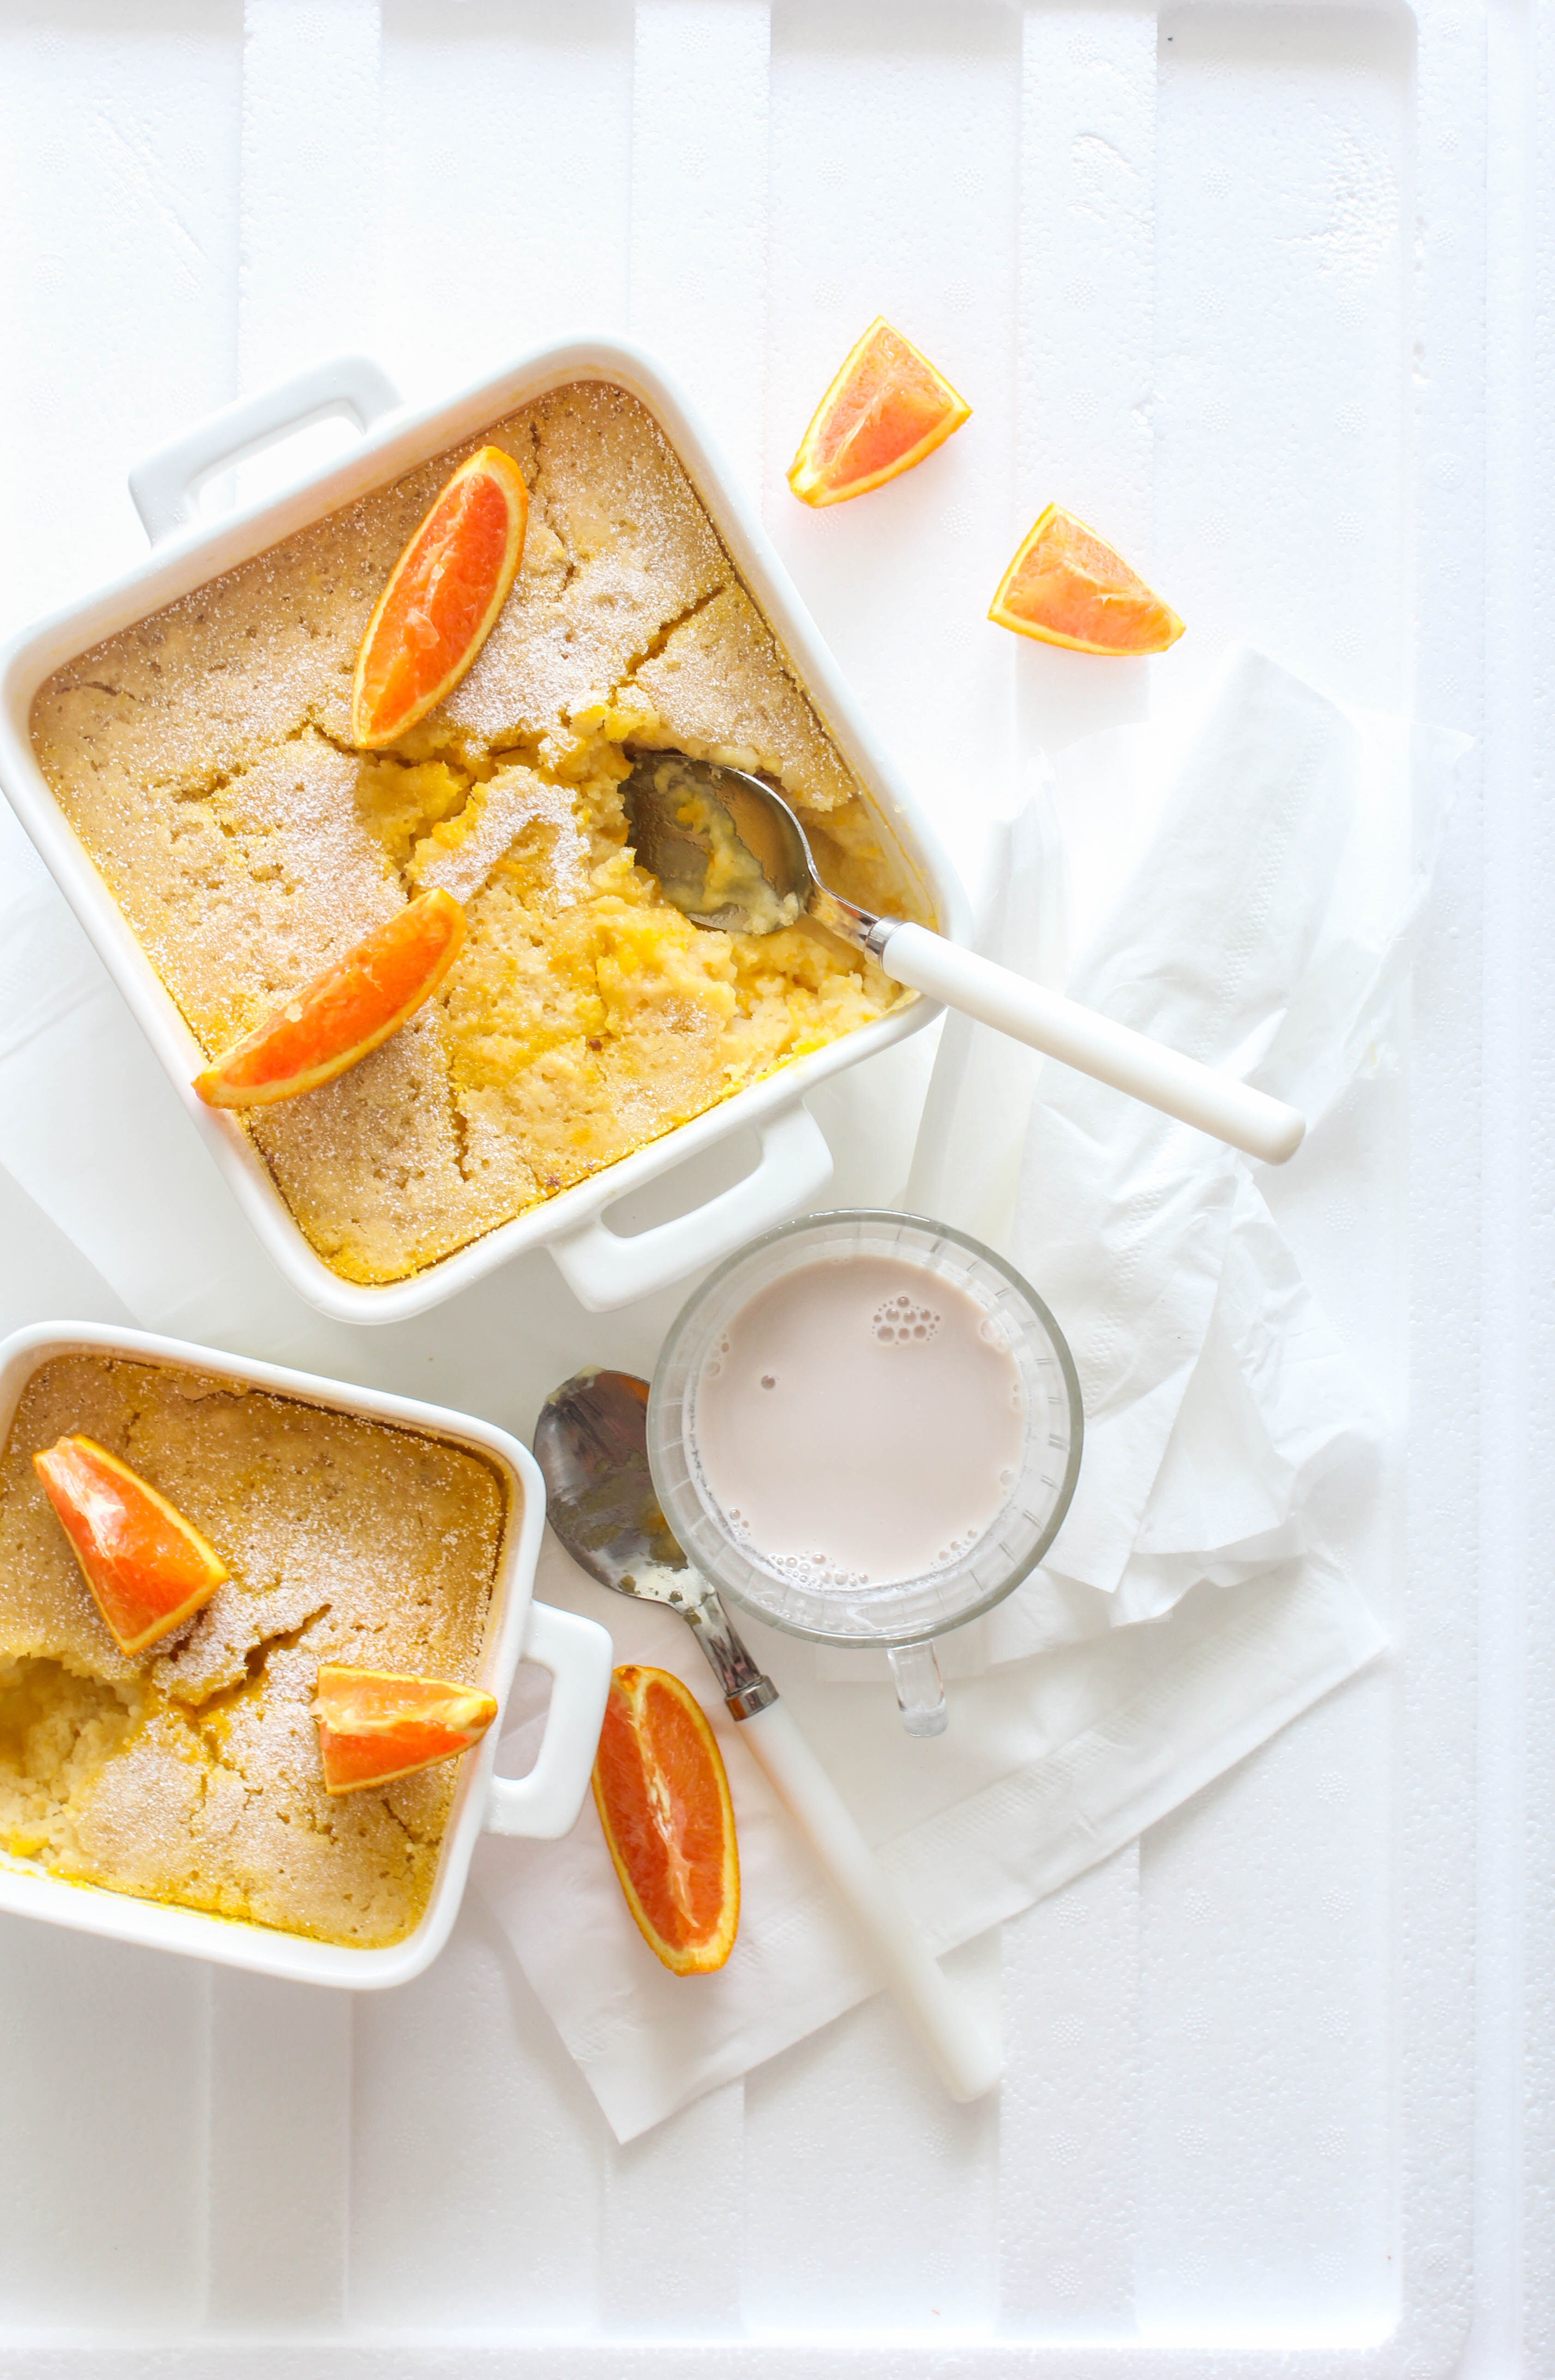
Orange Almond Self Saucing Pudding

22|09|2014

The whole of last week, I thought I was craving pie. A good Aussie meat pie with chunks of meat in a rich gravy encased in buttery flaky pastry. I saw it somewhere and then somewhere else and then I craved it. Several times during the week at dinner and even breakfast I told my husband ‘I wish I was having pie, instead’. Yet when I stood in the bakery facing the most fabulous choices of pies, my eyes travelled to the cakes, muffins and tarts on the shelves next to them. ‘Carrot cake’ I told the lady at the counter , much to my husband’s surprise. In my mind, I told myself  ‘Carrot cake with cream cheese icing and toasted walnuts…YUM! Sometimes for me, the line between what I think I want to eat and what I really want to it can get a little blurry. Possibly the little side-effects that come with dealing with food all the time. Possibly I am eating too much with my eyes lately.

IMG_1772

But there are some things that I know will never fail to satisfy my innermost cravings and those that I can eat with my eyes, mouth and heart wide open. Like the curries of my childhood (heady with the smell of ginger, garlic and Garam masala), heavily buttered toast, cupcakes over muffins (any day) loaded with sprinkles, chocolate chips (instead of pepitas or cranberries) on my oatmeal, at least half a cup of parmesan cheese on my pasta and gooey warm puddings that hide sauces underneath. Agreed that I have to shed of some of (okay, a lot of) the winter weight I have gained but it’s Spring, it’s still cold and puddings are very much on.
IMG_1798

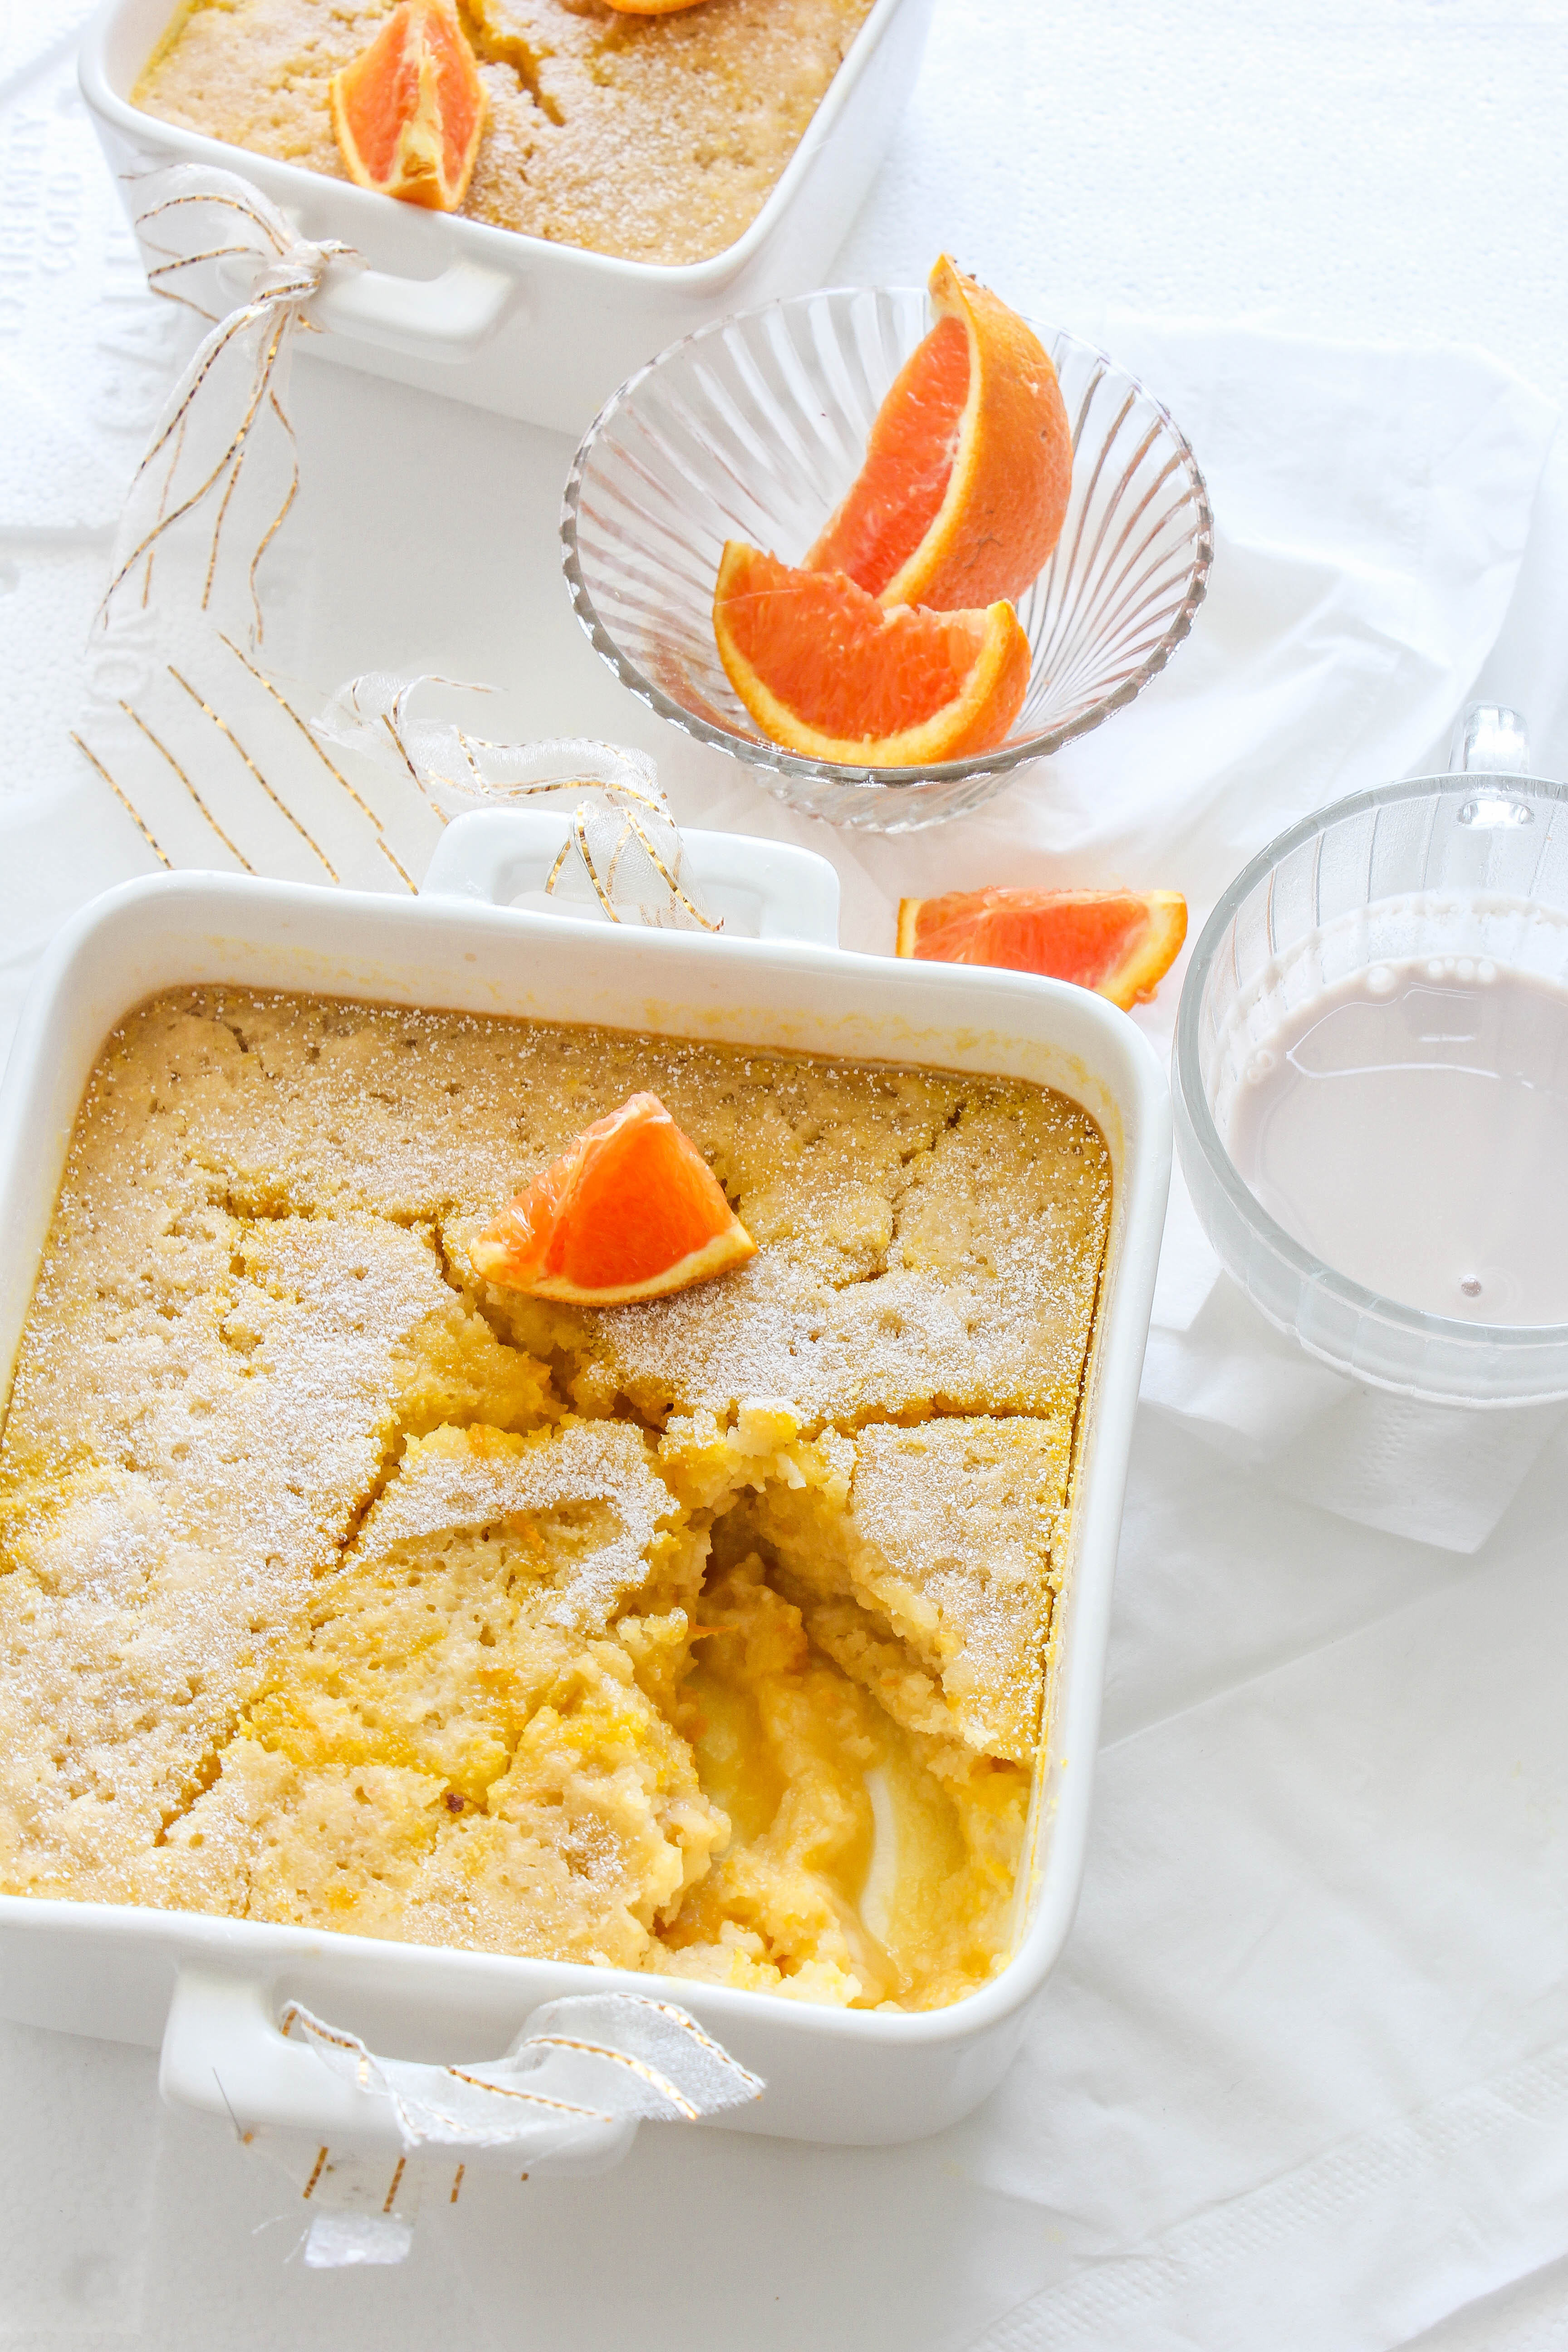
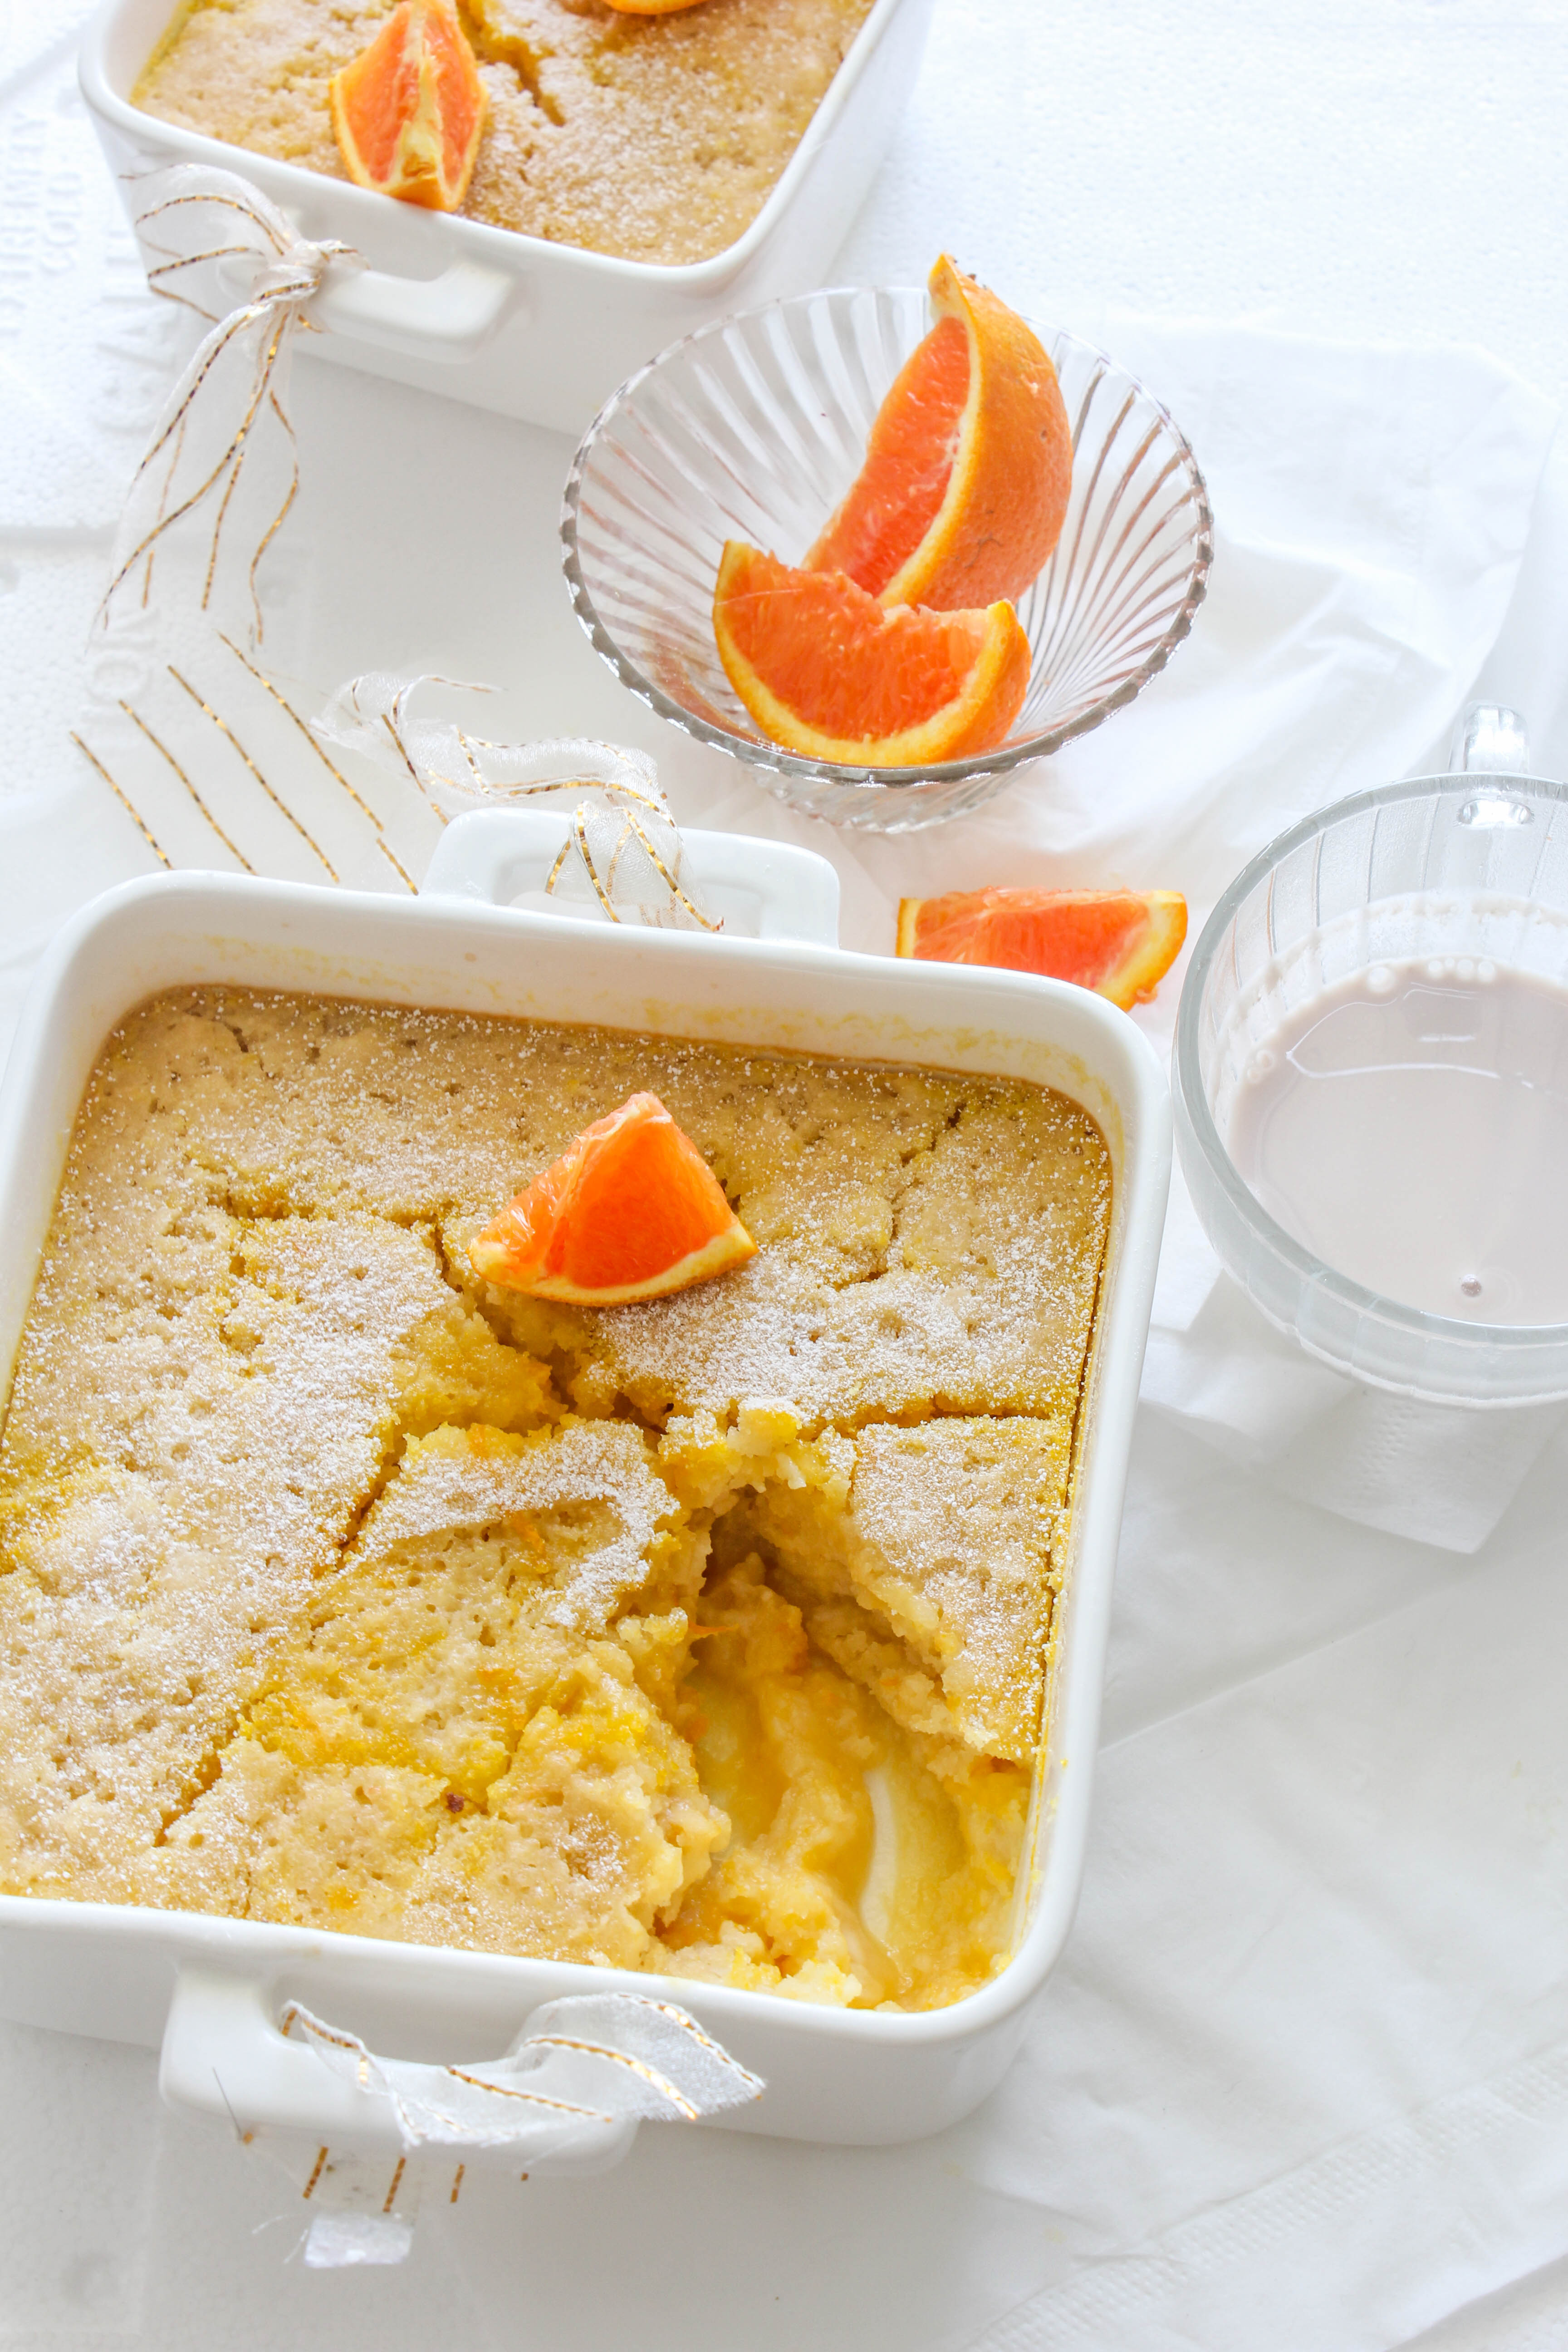
This pudding excites me over any other pudding I have ever made because it has almond milk in it. Regular milk will work just as fine but if you have almond milk at home or planning to get some, try this pudding. It is every bit citrus-y as much as it is nutty and livened with a gorgeous sauce beneath. I was already a big fan of the orange-almond combo and could have loved the cake alone. The thick sauce is an added bonus. Comfort food at it’s best!
It is quite an easy pudding to make. The only thing you need to take care of is to not to over-cook the pudding or you will not have enough sauce left. A tad bit undercooked is better than making a cake out of the pudding. The basic pudding recipe was adapted from here. When I made it the first time, I thought it could do with more sauce which is the true essence of a self-saucing pudding. So I made some adjustments to the recipe, experimented with almond milk and it turned out the way I wanted it to be. I baked the pudding in two baking dishes as I did not have a large one. In that case, you may need to reduce the baking time by 10 minutes.

IMG_1820-3


Orange Almond Self-Saucing Pudding
Serves 6

Melted butter, to grease
1 cup self-raising flour
1/2 cup castor sugar
1/2 cup almond meal
1 tablespoon finely grated orange rind
3/4 cup almond milk
1 egg
50g butter, melted, cooled
1 tablespoon  cornflour
1/2 cup castor sugar, extra
2 cups fresh orange juice
1 tbsp. Cointreau (or any other orange liqueur, optional)
Icing sugar, to dust

Preheat oven to 180 degree C (fan-forced 160 degrees C)  Brush a 1.5L (6-cup) capacity oven-proof dish with melted butter. Place on a baking tray lined with non-stick baking paper. Sift flour into a large bowl. Stir in the sugar, almond meal and orange rind.

Whisk the almond milk, egg and butter in a jug until combined. Add to the flour mixture and use a wooden spoon to stir until smooth and combined. Pour into the prepared dish. Use the back of a spoon to smooth the surface.

Combine cornflour and extra sugar in a bowl. Sprinkle over the pudding mixture. Place orange juice in a small saucepan over medium heat. Bring just to the boil. Remove from heat and add the Cointreau (if using). Gradually pour over the back of a spoon onto the mixture.
Bake for 45-50 minutes or until a cake-like top forms and a skewer inserted halfway into the centre of the pudding comes out clean.

Set aside for 5 minutes to stand. Dust with icing sugar and serve hot with custard or vanilla ice cream.


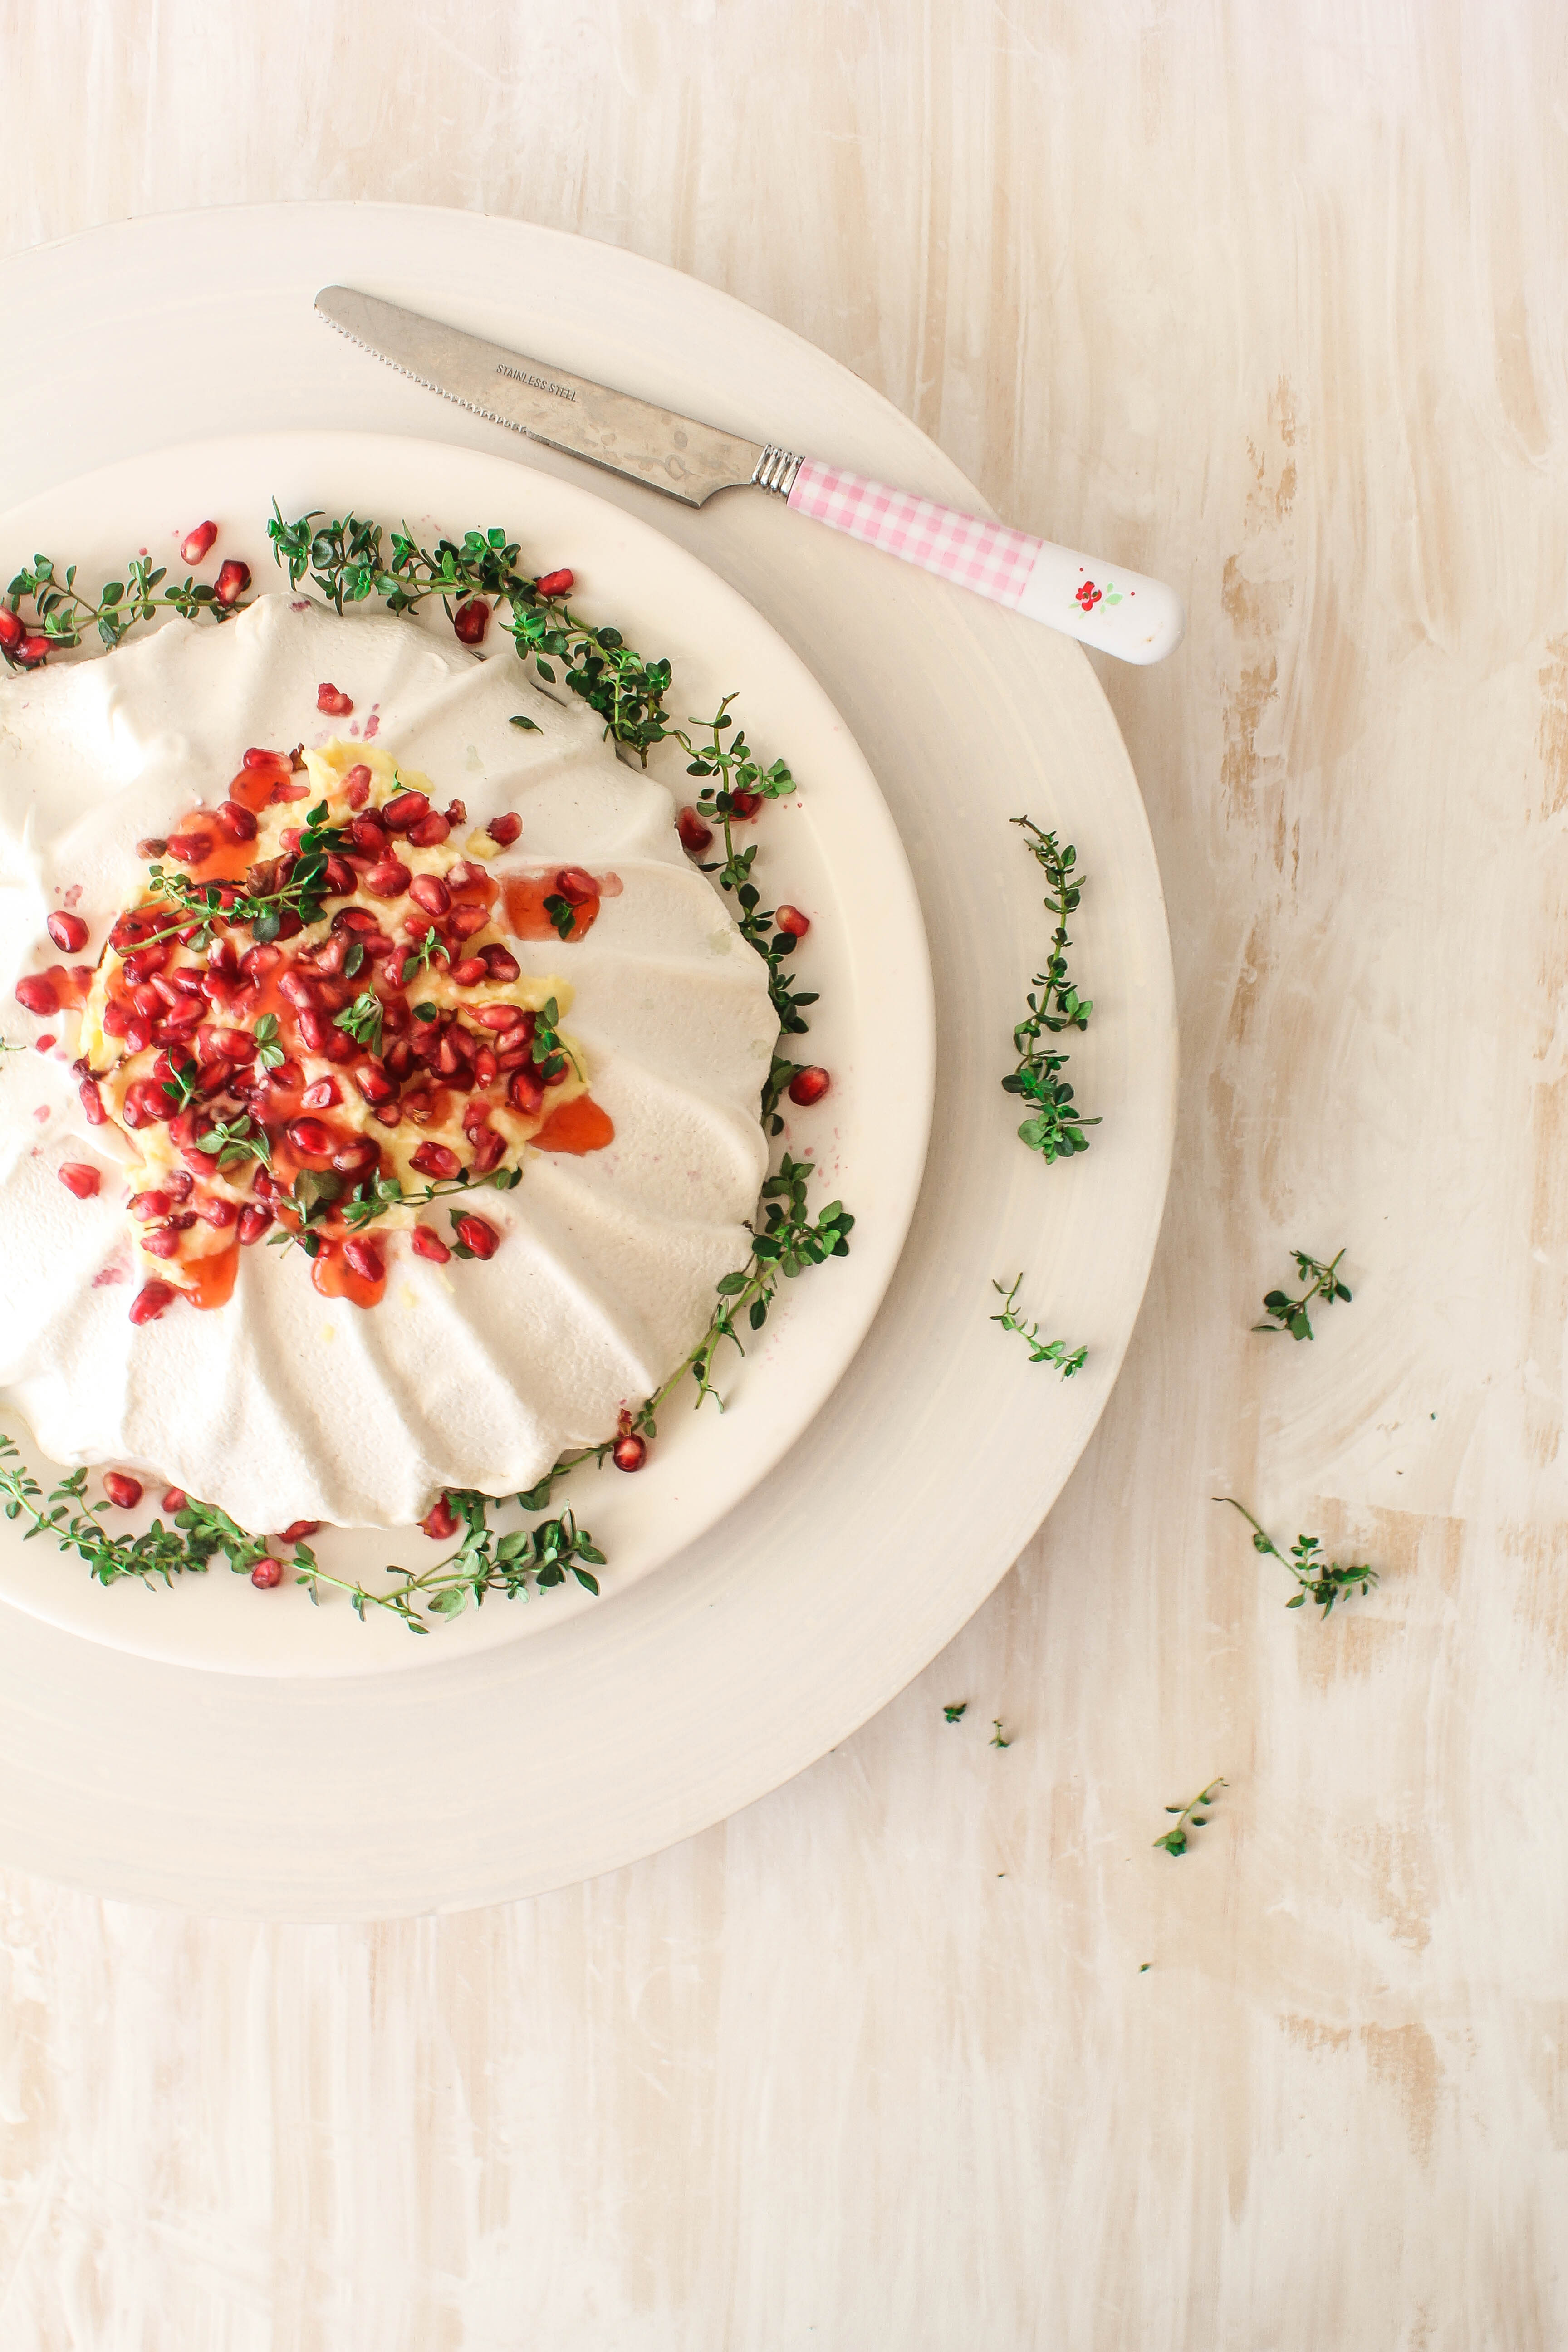
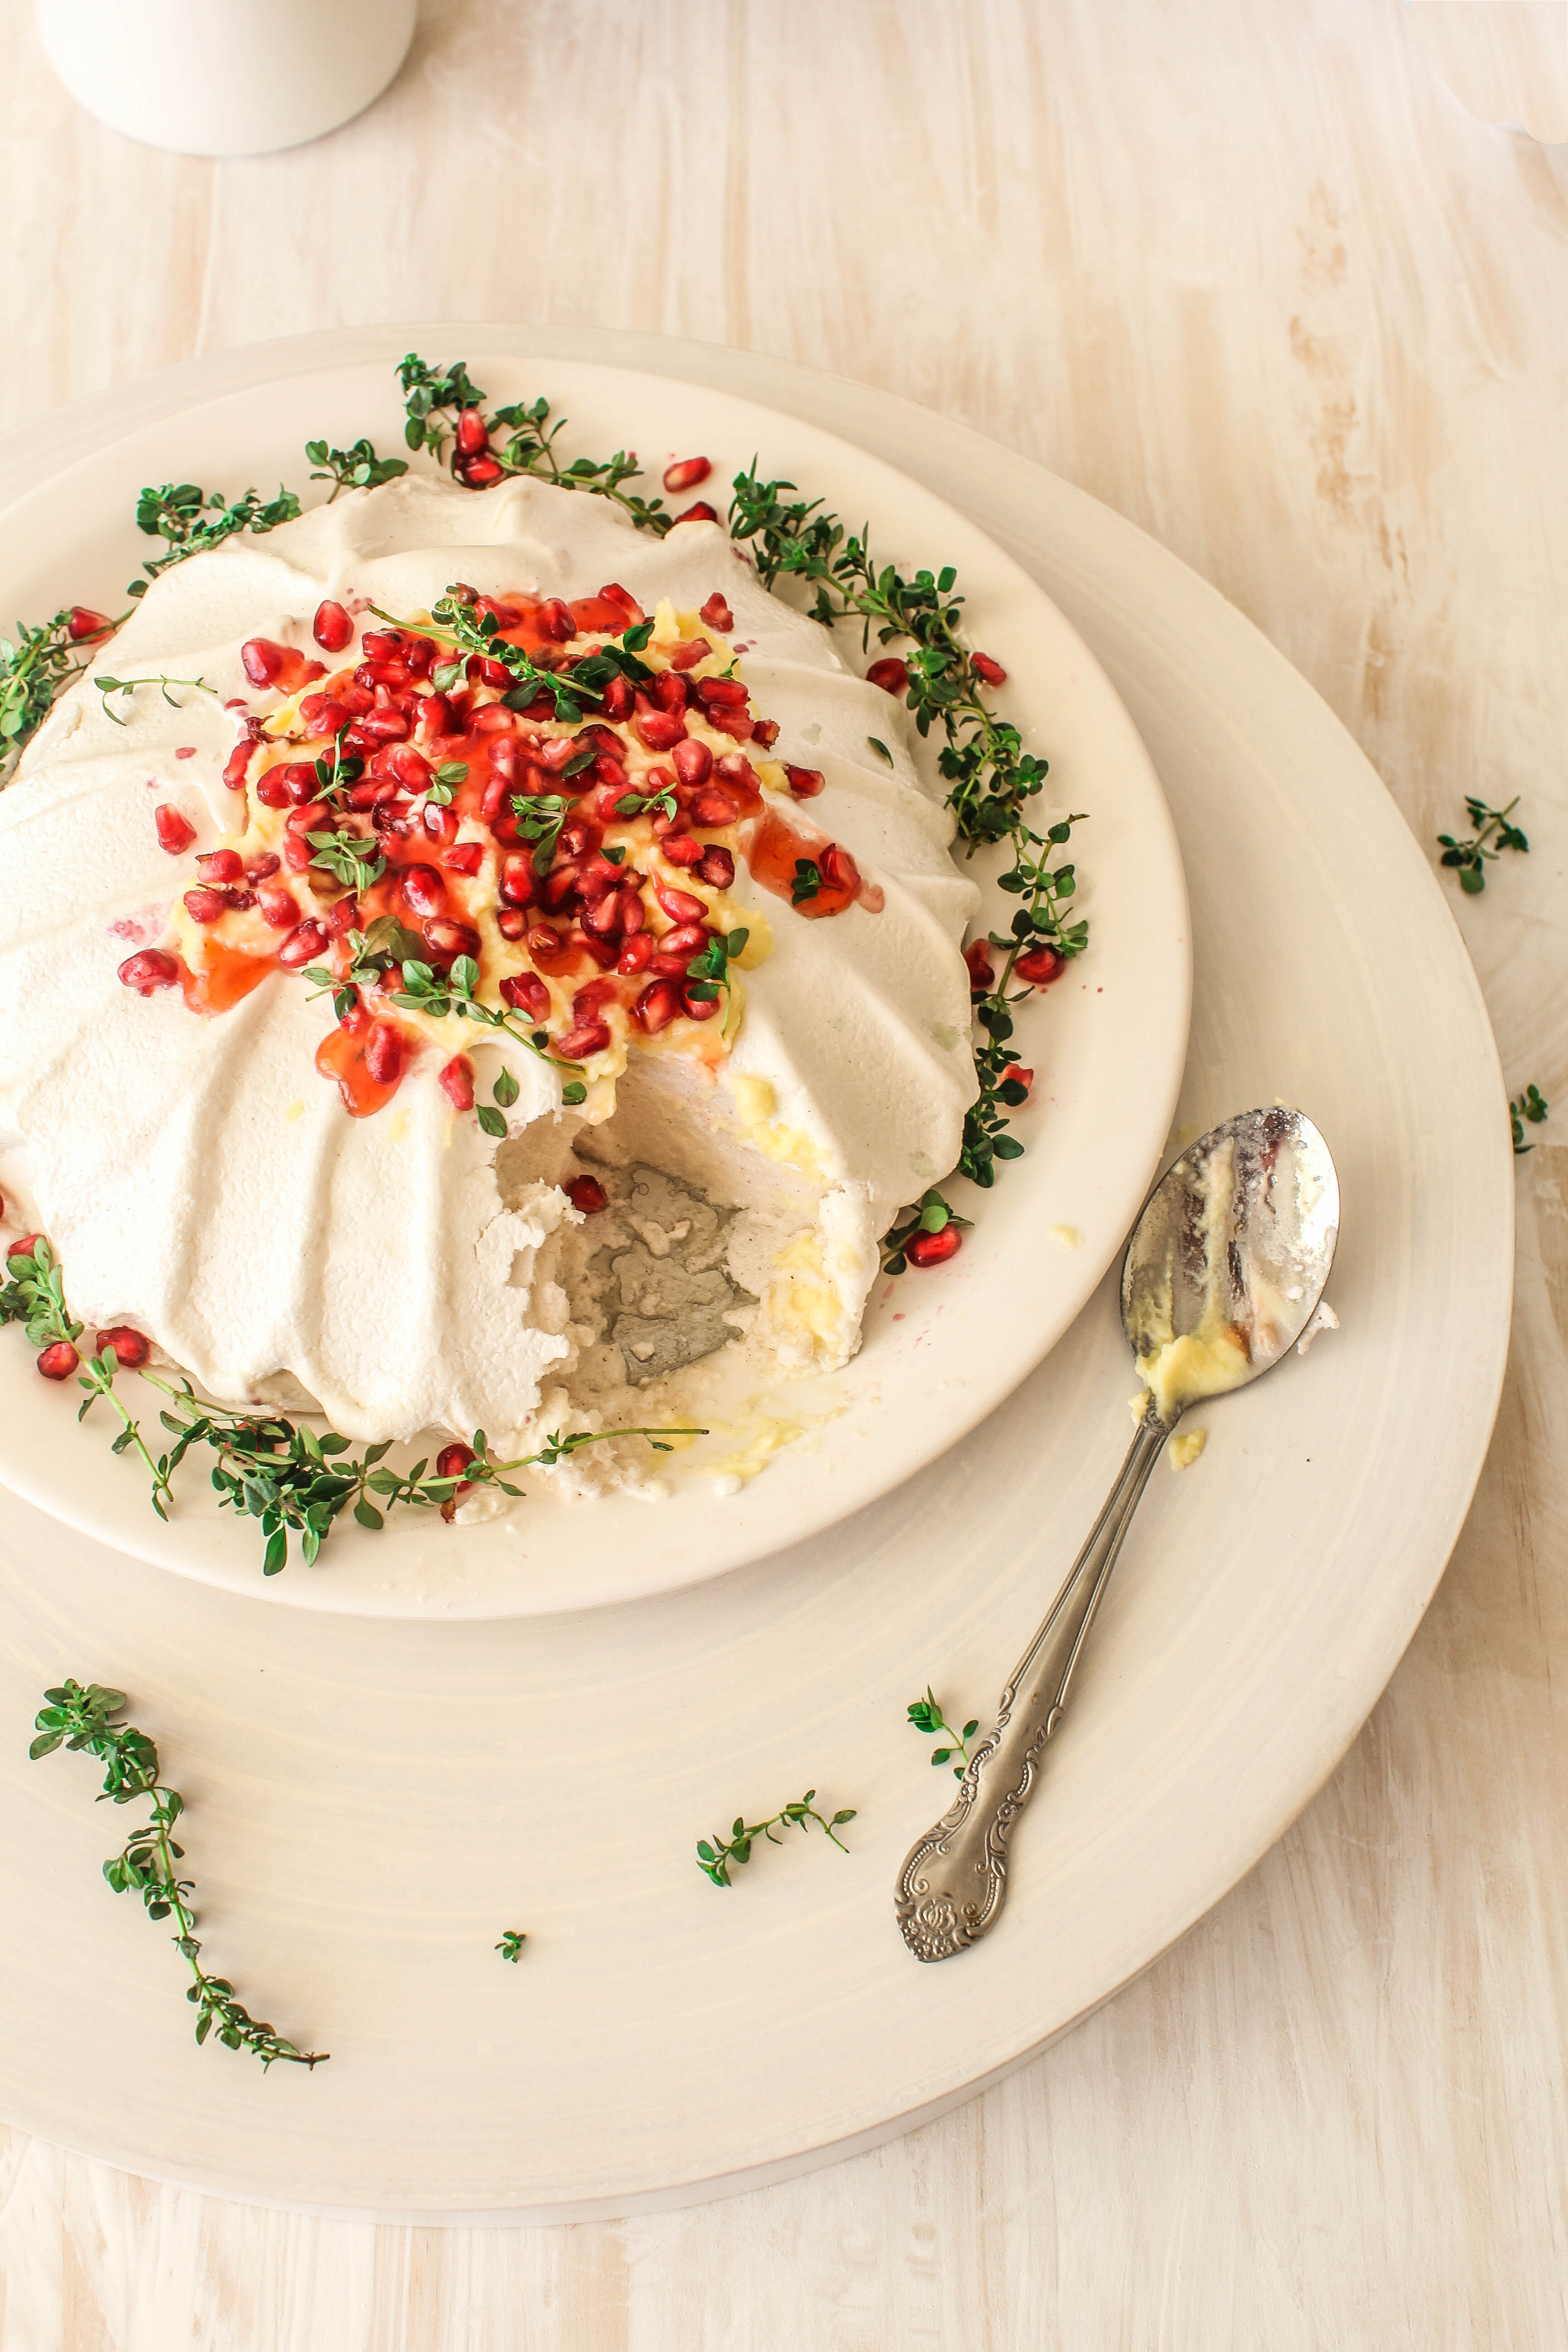
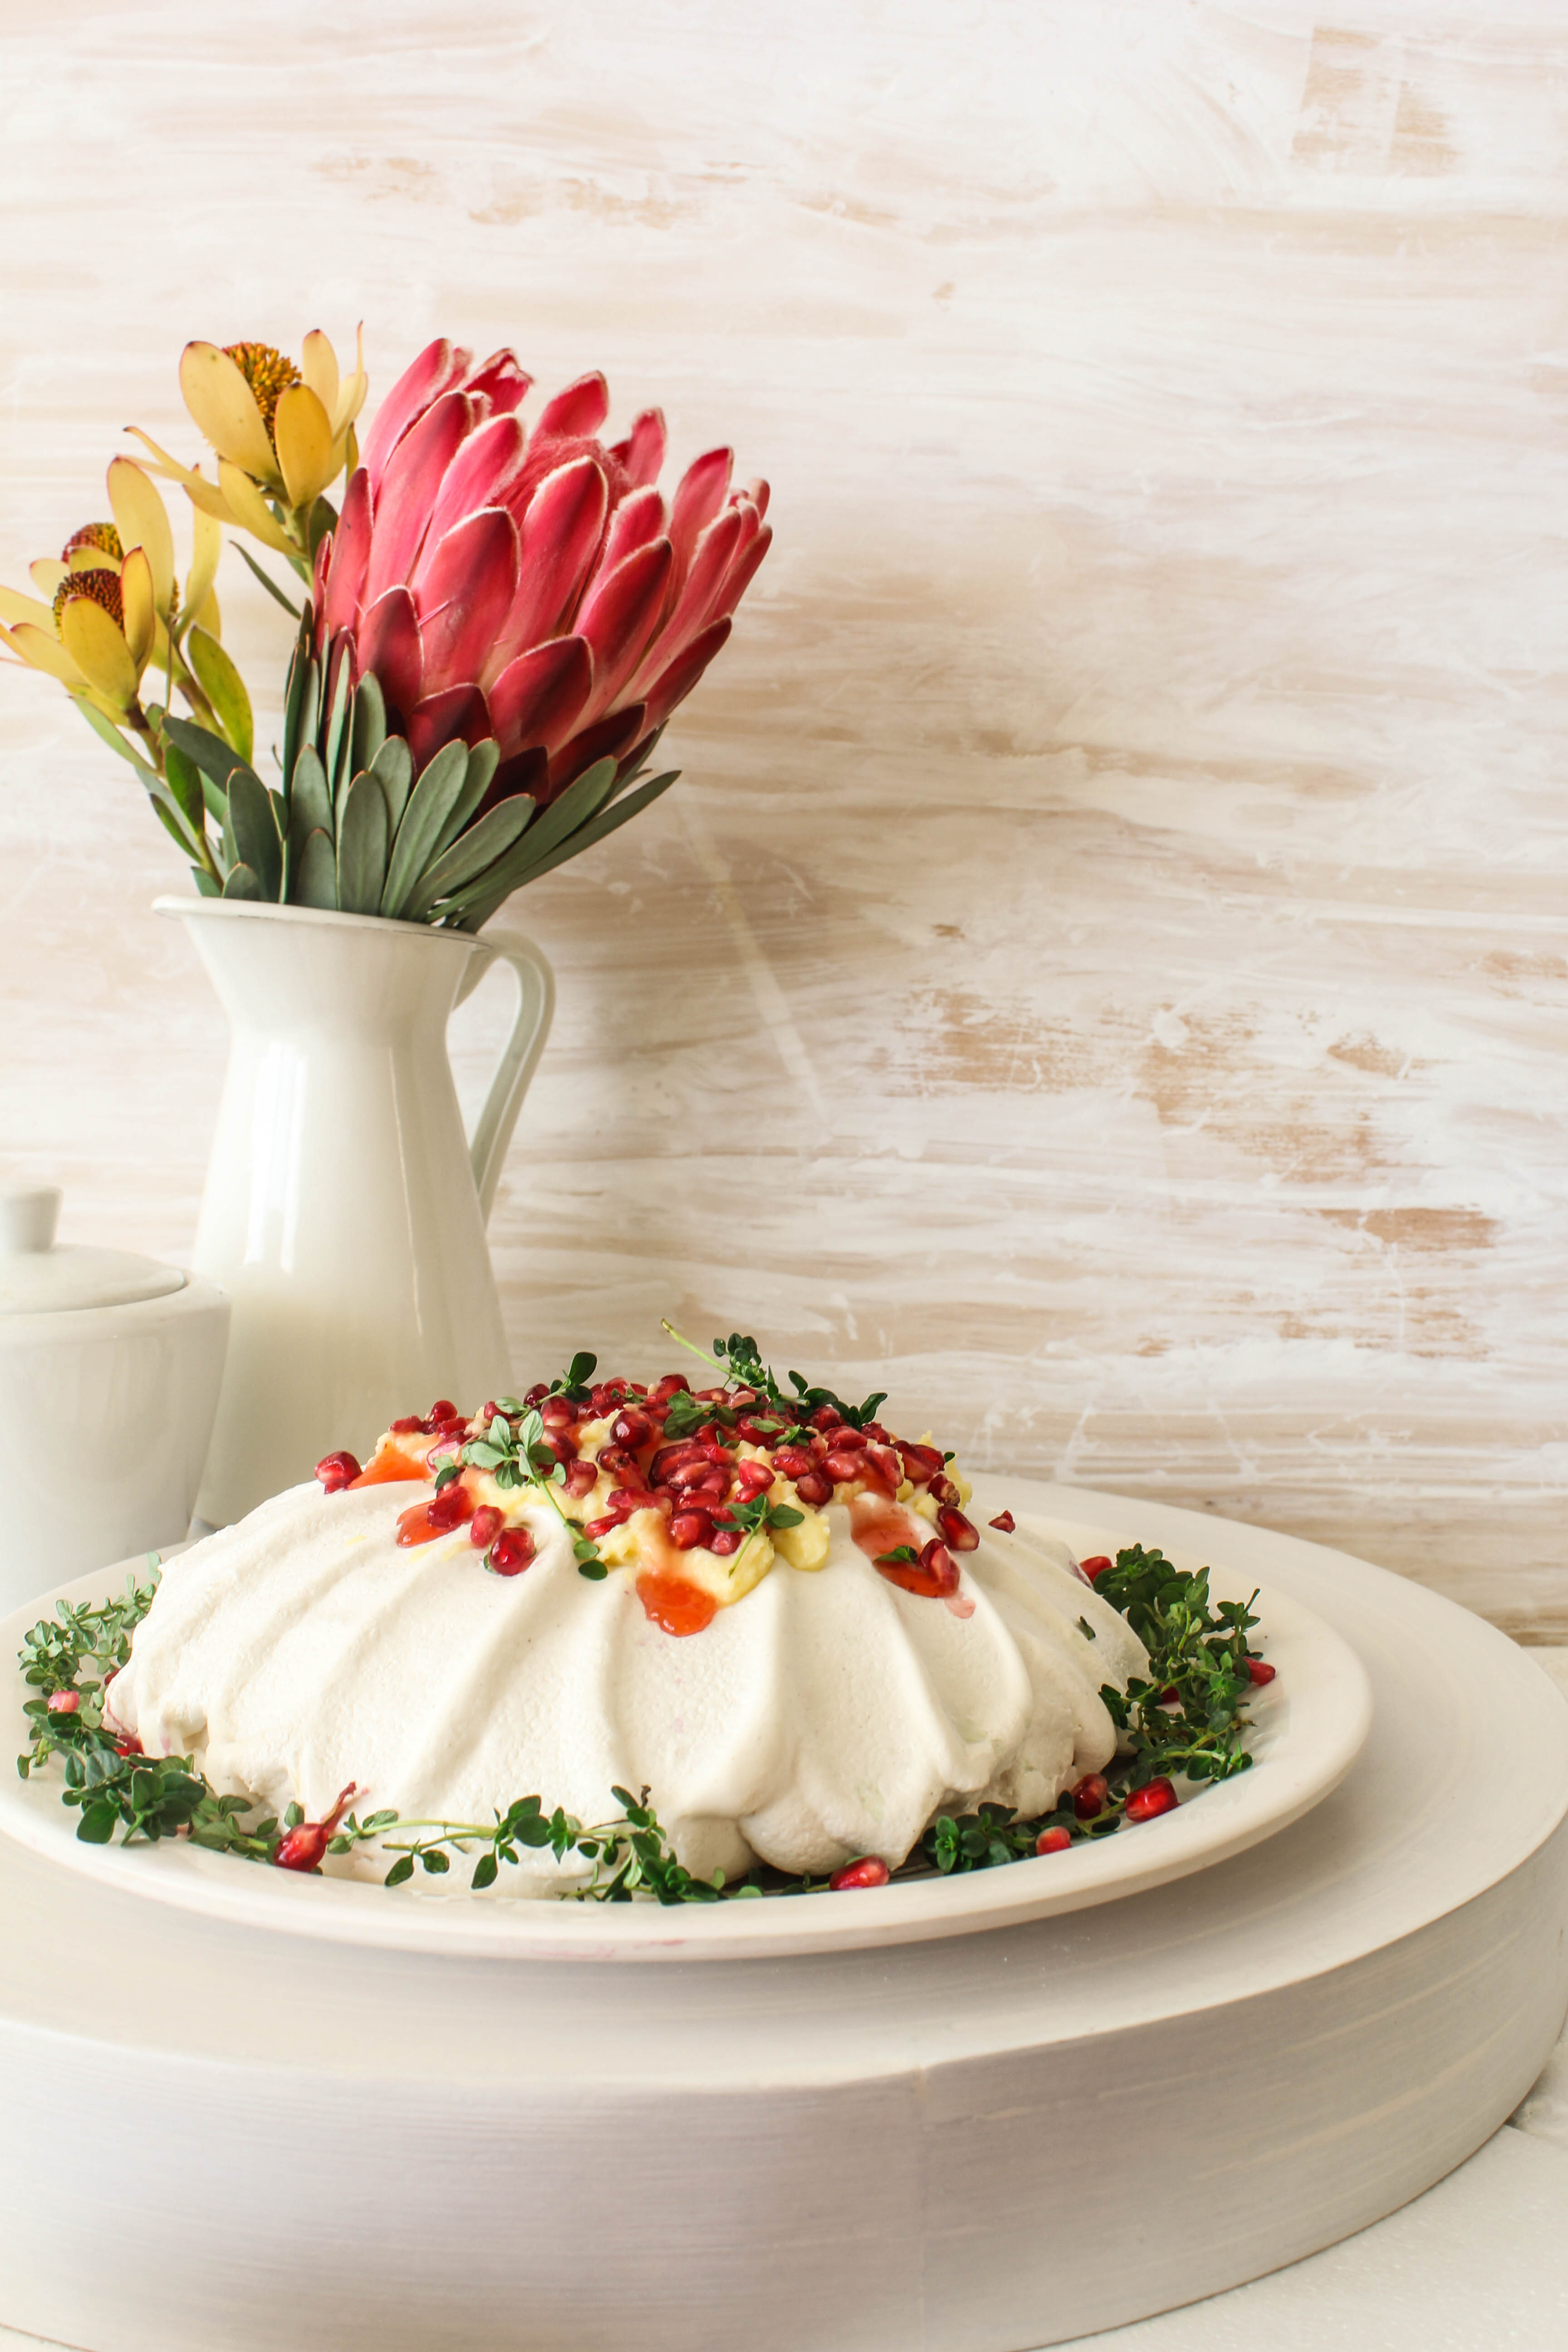
Pavlova with Mascarpone, Pomegranate and Lemon Thyme

18|09|2014

Talk about inspiration! It peeks right through my window. It stares me in the face and then disappears on a whim. Dreamy clouds, cotton candy clouds, dark stormy clouds, invisible clouds, cloud babies (that one is a contribution from the boys) and wispy clouds. Clouds are a constant companion in my new high-rise home. I don’t know about you but I find them enchanting and magical. As a little girl, I was fond of a book called ‘The Faraway Tree’ by Enid Blyton. Most of you would have loved it as dearly as I did but in case you enjoy a bit of nostalgia, this was a story about a giant tree in the woods, inhabited by fairy-folk. The topmost branches of this tree lead up to the clouds beyond which exists magical lands. The story is about 3 children who come to live near the tree, the lands they explore and their magical adventures. I read this book over and over again, almost slept with it every night and re-read it as an adult deriving the same thrill and happiness that I felt as a child. Call me a child-at-heart. A romantic, maybe? I am fine with that.

IMG_2414-2

As a person who eats, dreams and loves pastry, clouds remind me of meringue. You know I love meringue. If you share the love, type ‘meringue’ in the search tab on the right sidebar and you will find a host of meringue based treats. Just like the clouds in the sky, meringue is my mood-uplifter, my spring-in-the-step bringer, my pastry love. I can make meringue every day. And store away the egg yolks in different containers to be forgotten and only during a fridge clean to be reminded how many egg-whites I have cooked with in a month. A pavlova was long due on the blog after this one.

IMG_2423


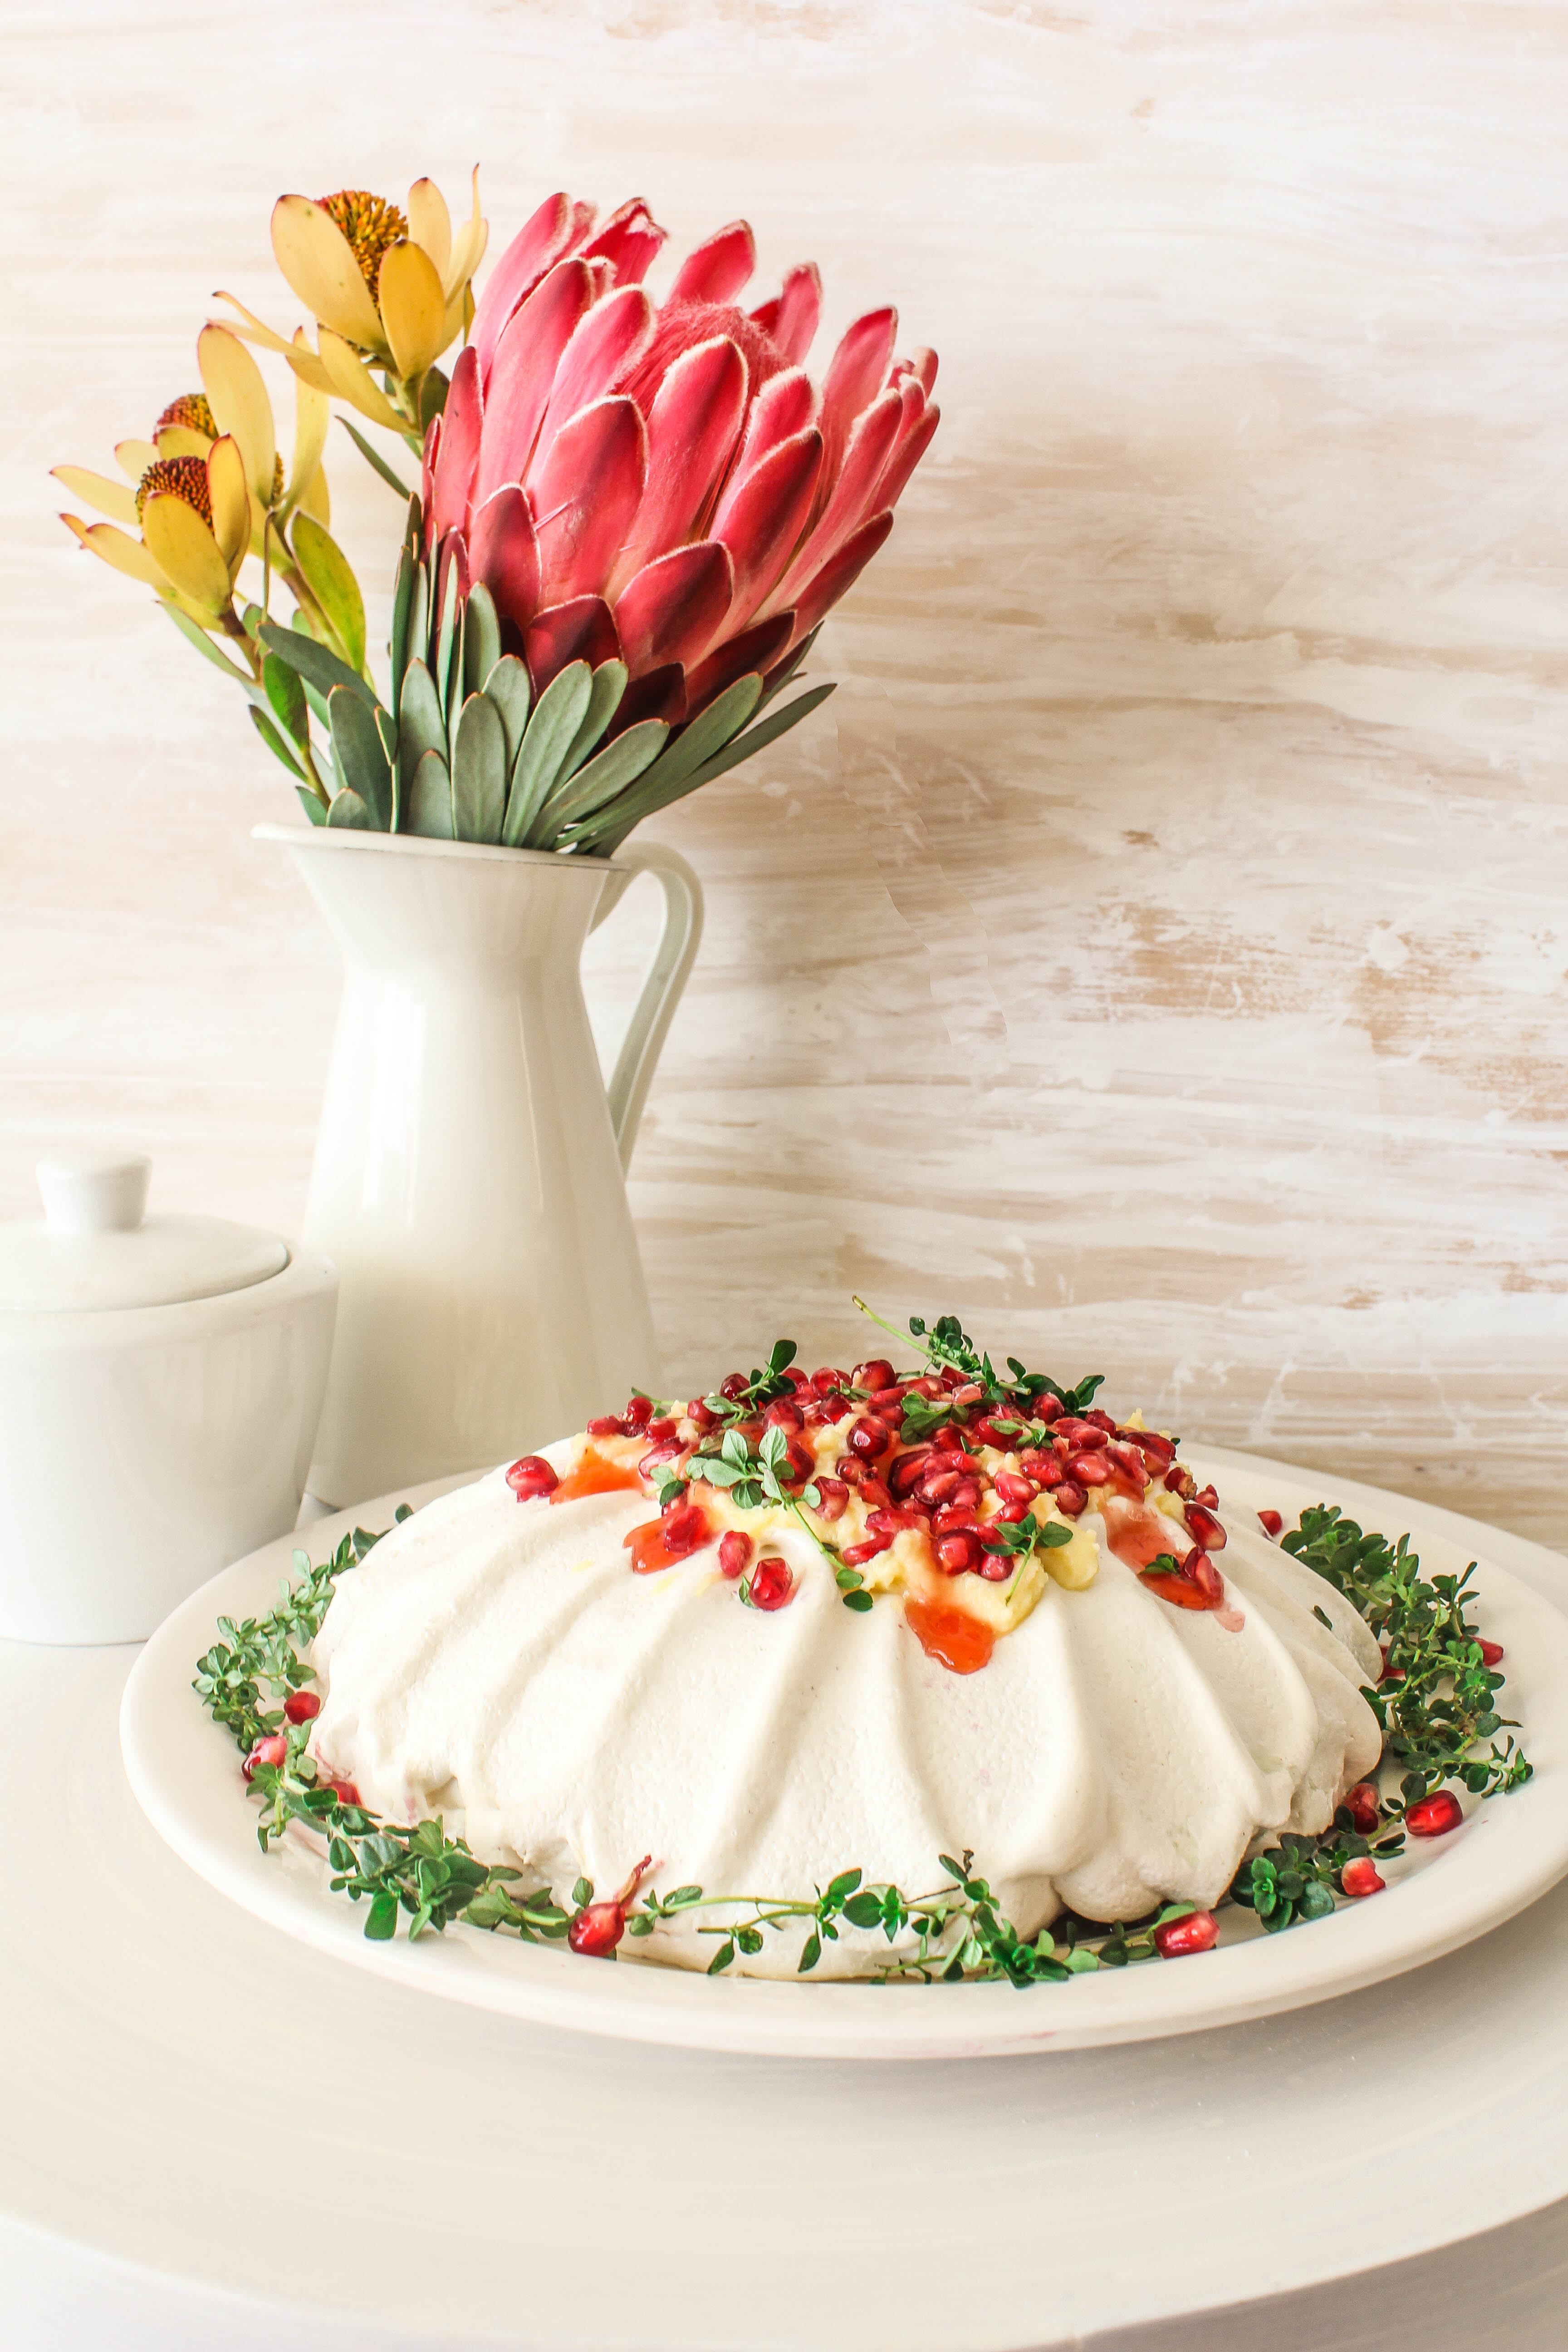
IMG_2437I went to pick up beautiful nectarines that are flooding the markets right now but came back with a pomegranate instead. On an impulse I decided to pair pomegranate, lemon thyme and mascarpone. It turned out to be a great combination of crunchy, marshmallow-y, creamy, tangy goodness. You can do so much with a Pavlova. Load it up as you like, shape it into the shapes of your dream without a cake pan for support and crack open its exterior to discover secrets inside.
If you don’t have mascarpone, you can use double the amount of whipped cream and of course, decorate it with any fruit of your choice. This is a great gluten-free alternative to a celebration cake.

IMG_2419


Pavlova with Mascarpone, Pomegranate and Lemon Thyme
Serves 6-8

11/2 cups castor sugar
11/2 teaspoons corn flour
1/2 teaspoon ground cinnamon
5 large egg whites (or 6 regular egg whites)
1/2 cup heavy cream, whipped to soft peaks
3/4 cup mascarpone cheese, softened
2 tbsp. icing sugar
1 pomegranate, seeds removed
a few sprigs, lemon thyme
Berry Sauce, 2 tbsp. (optional)

Preheat oven to 130 degree C. Line a baking tray with baking paper. Draw a 20cm (diameter) round on the paper and place the paper pencil side down on the tray.

Combine sugar, corn flour and cinnamon in a bowl.

Using electric beaters, whisk the egg whites in a clean, dry bowl until firm peaks form. Gradually add the sugar mixture, 1 tablespoonful at a time, until the sugar dissolves and the mixture is thick, glossy and holds stiff peaks. Spoon the meringue onto the prepared tray within the circle traced earlier. Shape the meringue with the back of the spoon, leaving a hollow in the centre for the filling. Bake for 1 hour, then leave to cool in switched-off oven for 1 hour. Remove from oven and cool completely.

Combine cream, mascarpone and icing sugar in a bowl. Stir gently to combine (do not over-mix, or mascarpone will curdle). Gently fold in half the pomegranate seeds and torn lemon thyme leaves. Spoon mixture onto the meringue shell. Sprinkle with rest of the pomegranates and lemon thyme leaves. Top with berry sauce if using. Serve.

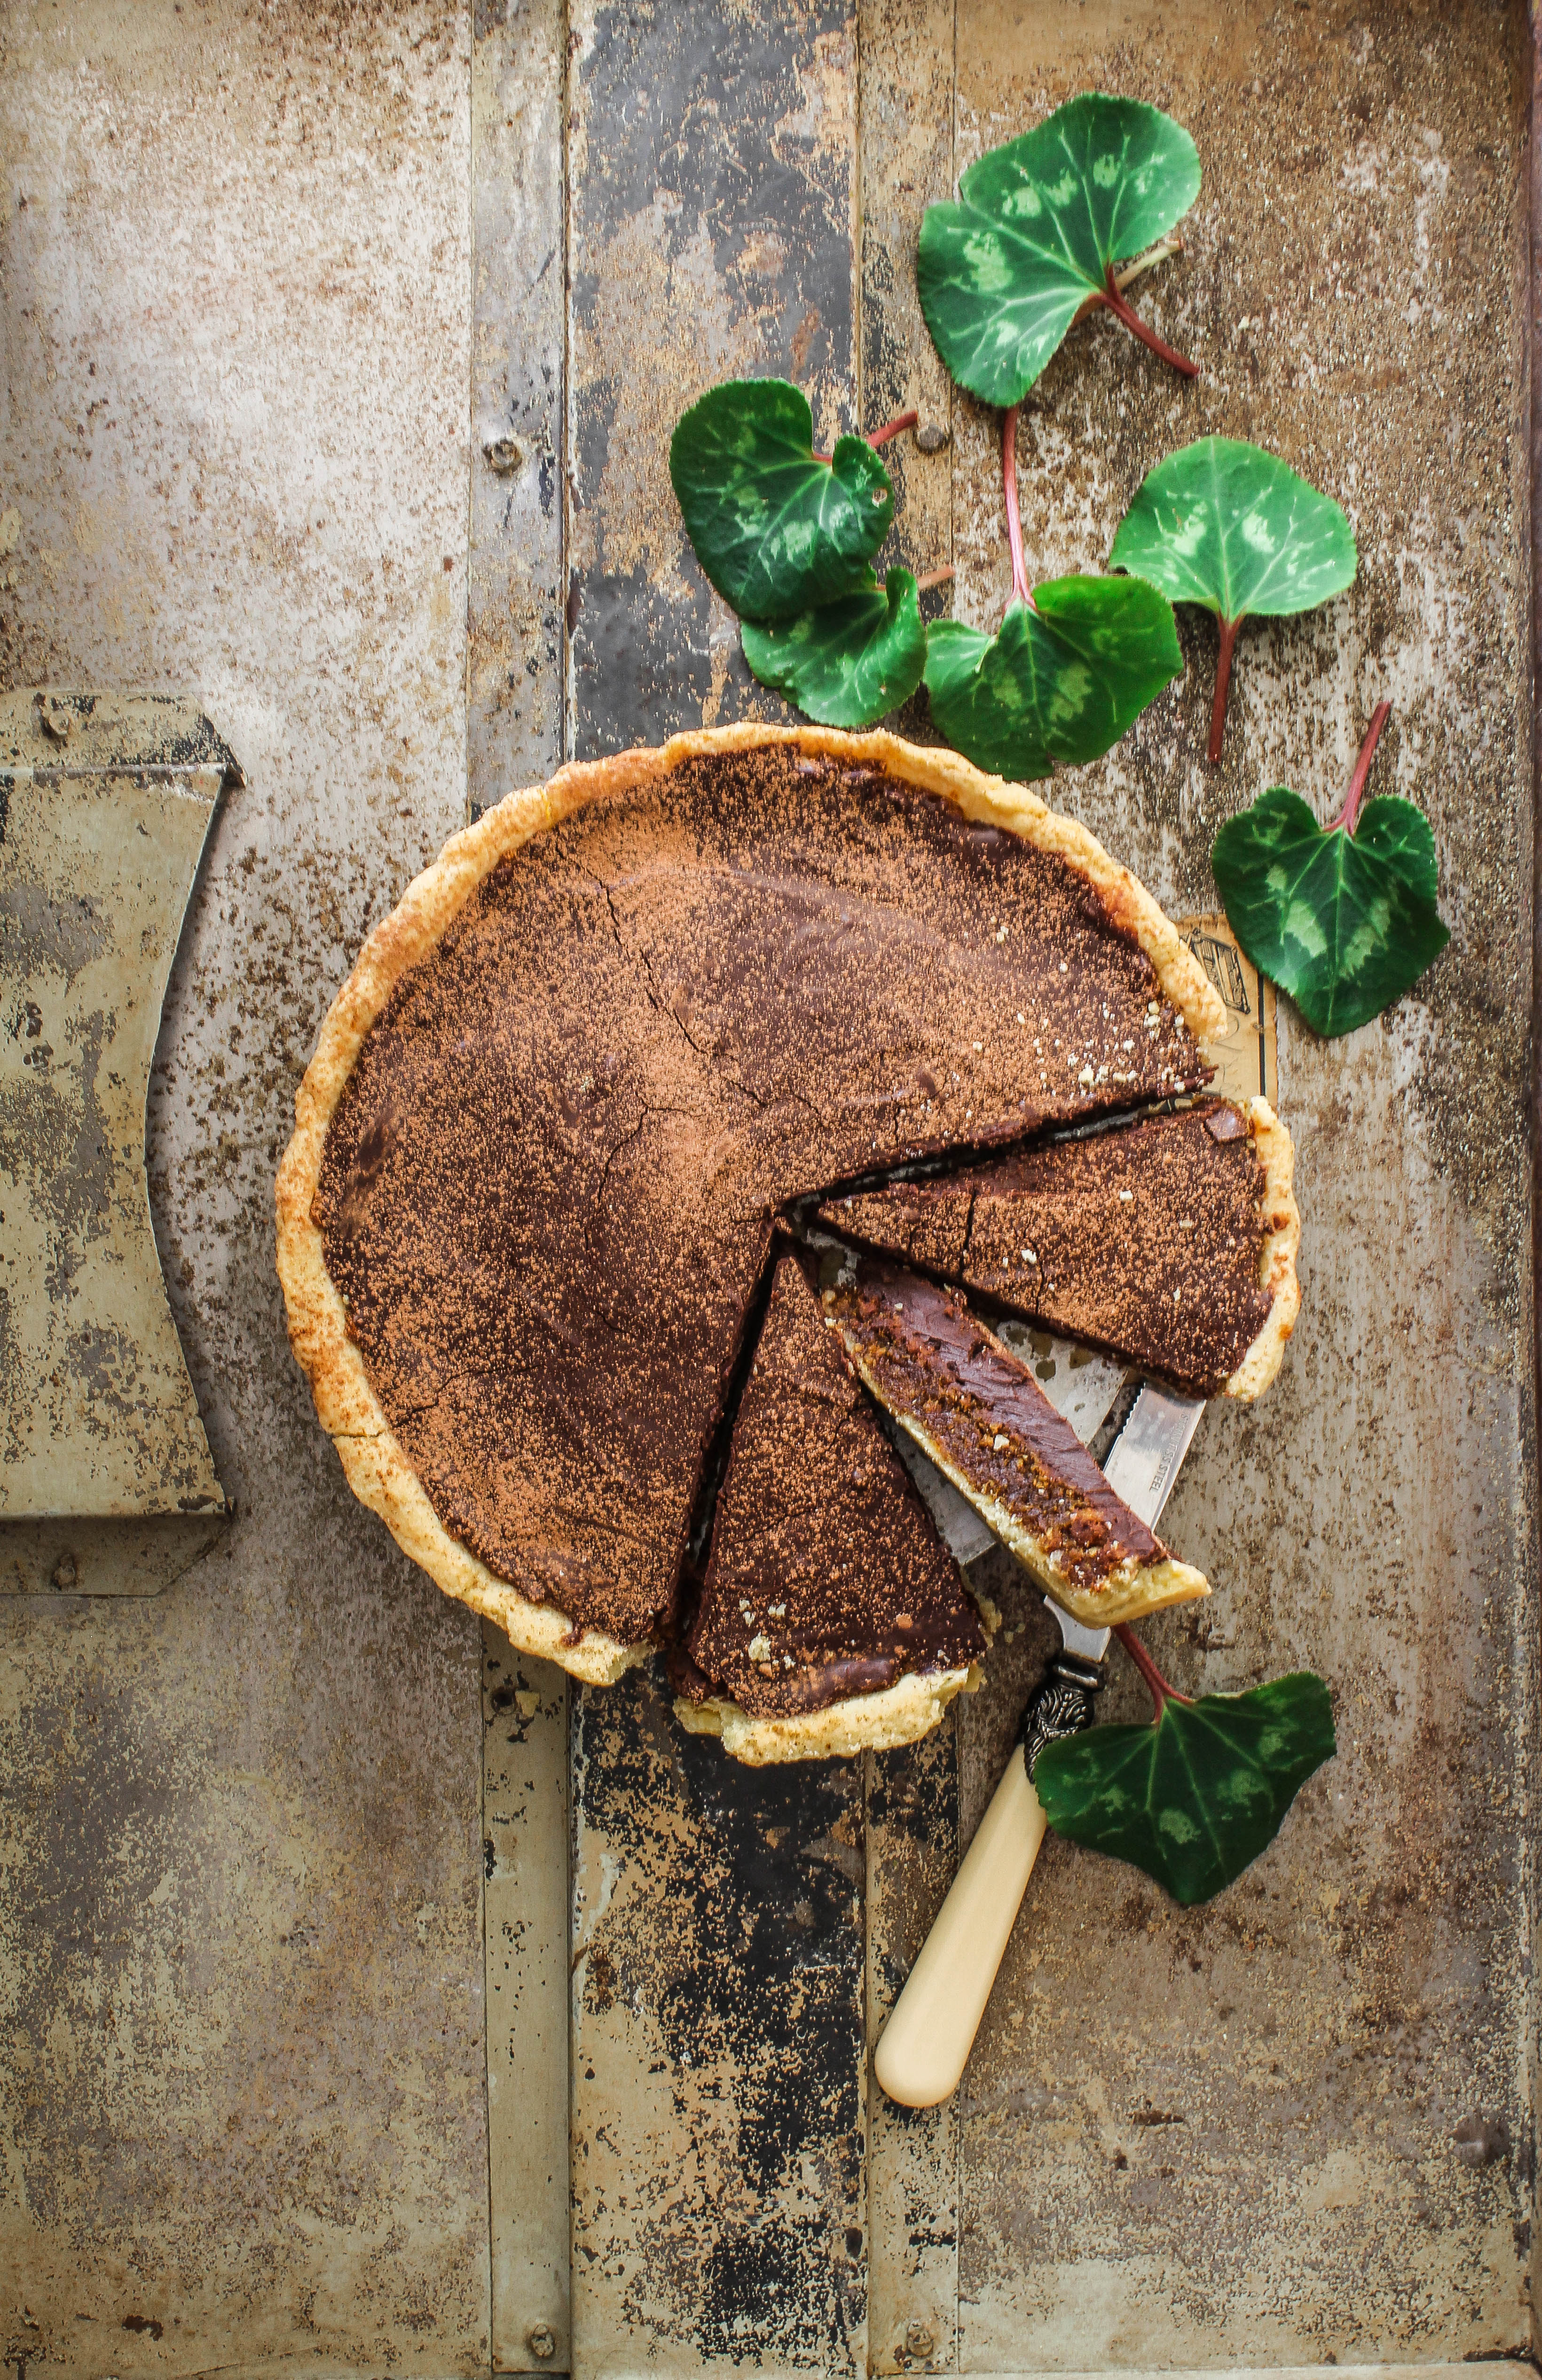
Chocolate Treacle Tart

15|09|2014

Would it be so clichéd if I told you how much I love sugar? All forms of sugar. The spoon-able sprinkle-able kind is of course the one I use more often but the other forms intrigue me as well. On the topic of sugar sprinkling, I am crazy for that famous shot where sugar is being sprinkled from a height. It comes through controlling the shutter speed in your camera, something which I am trying to master and have messed up my kitchen table and the floor this weekend, much to the amusement of my baby boys. But we ended up having a lot of fun. The sugar formed a slate for us to write on. We scribbled names, drew faces and laughed while the camera was completely forgotten. It feels amazing to let go when you are with children and bask in the joy of the moment without having to worry about the world around you.

IMG_2212-3


Back to the forms of sugar, I am equally smitten by the other forms of its existence. Golden syrup, honey, treacle, molasses, glucose syrup and so on. Some of these are not direct by-products but they are related in some way. They are gorgeously sticky, luscious and take your desserts to the next level. The intensity and depth of flavour that these impart cannot be achieved by regular sugar or for that matter even brown sugar. I love to work with them and you may find quite a few recipes in my archives that use them. So what is a treacle tart? Simply put, it is a mixture of breadcrumbs and golden syrup baked within a pastry shell. It is so simple yet so gorgeous in the way it looks and tastes. Something unique. With golden syrup, how can you go wrong! Technically the recipe should use treacle, but you will find most out there using golden syrup. I have experimented with both individually and a combination but I think the flavours are better with the former. Plus I believe it is easier to find golden syrup in certain places than treacle.

IMG_2225-3


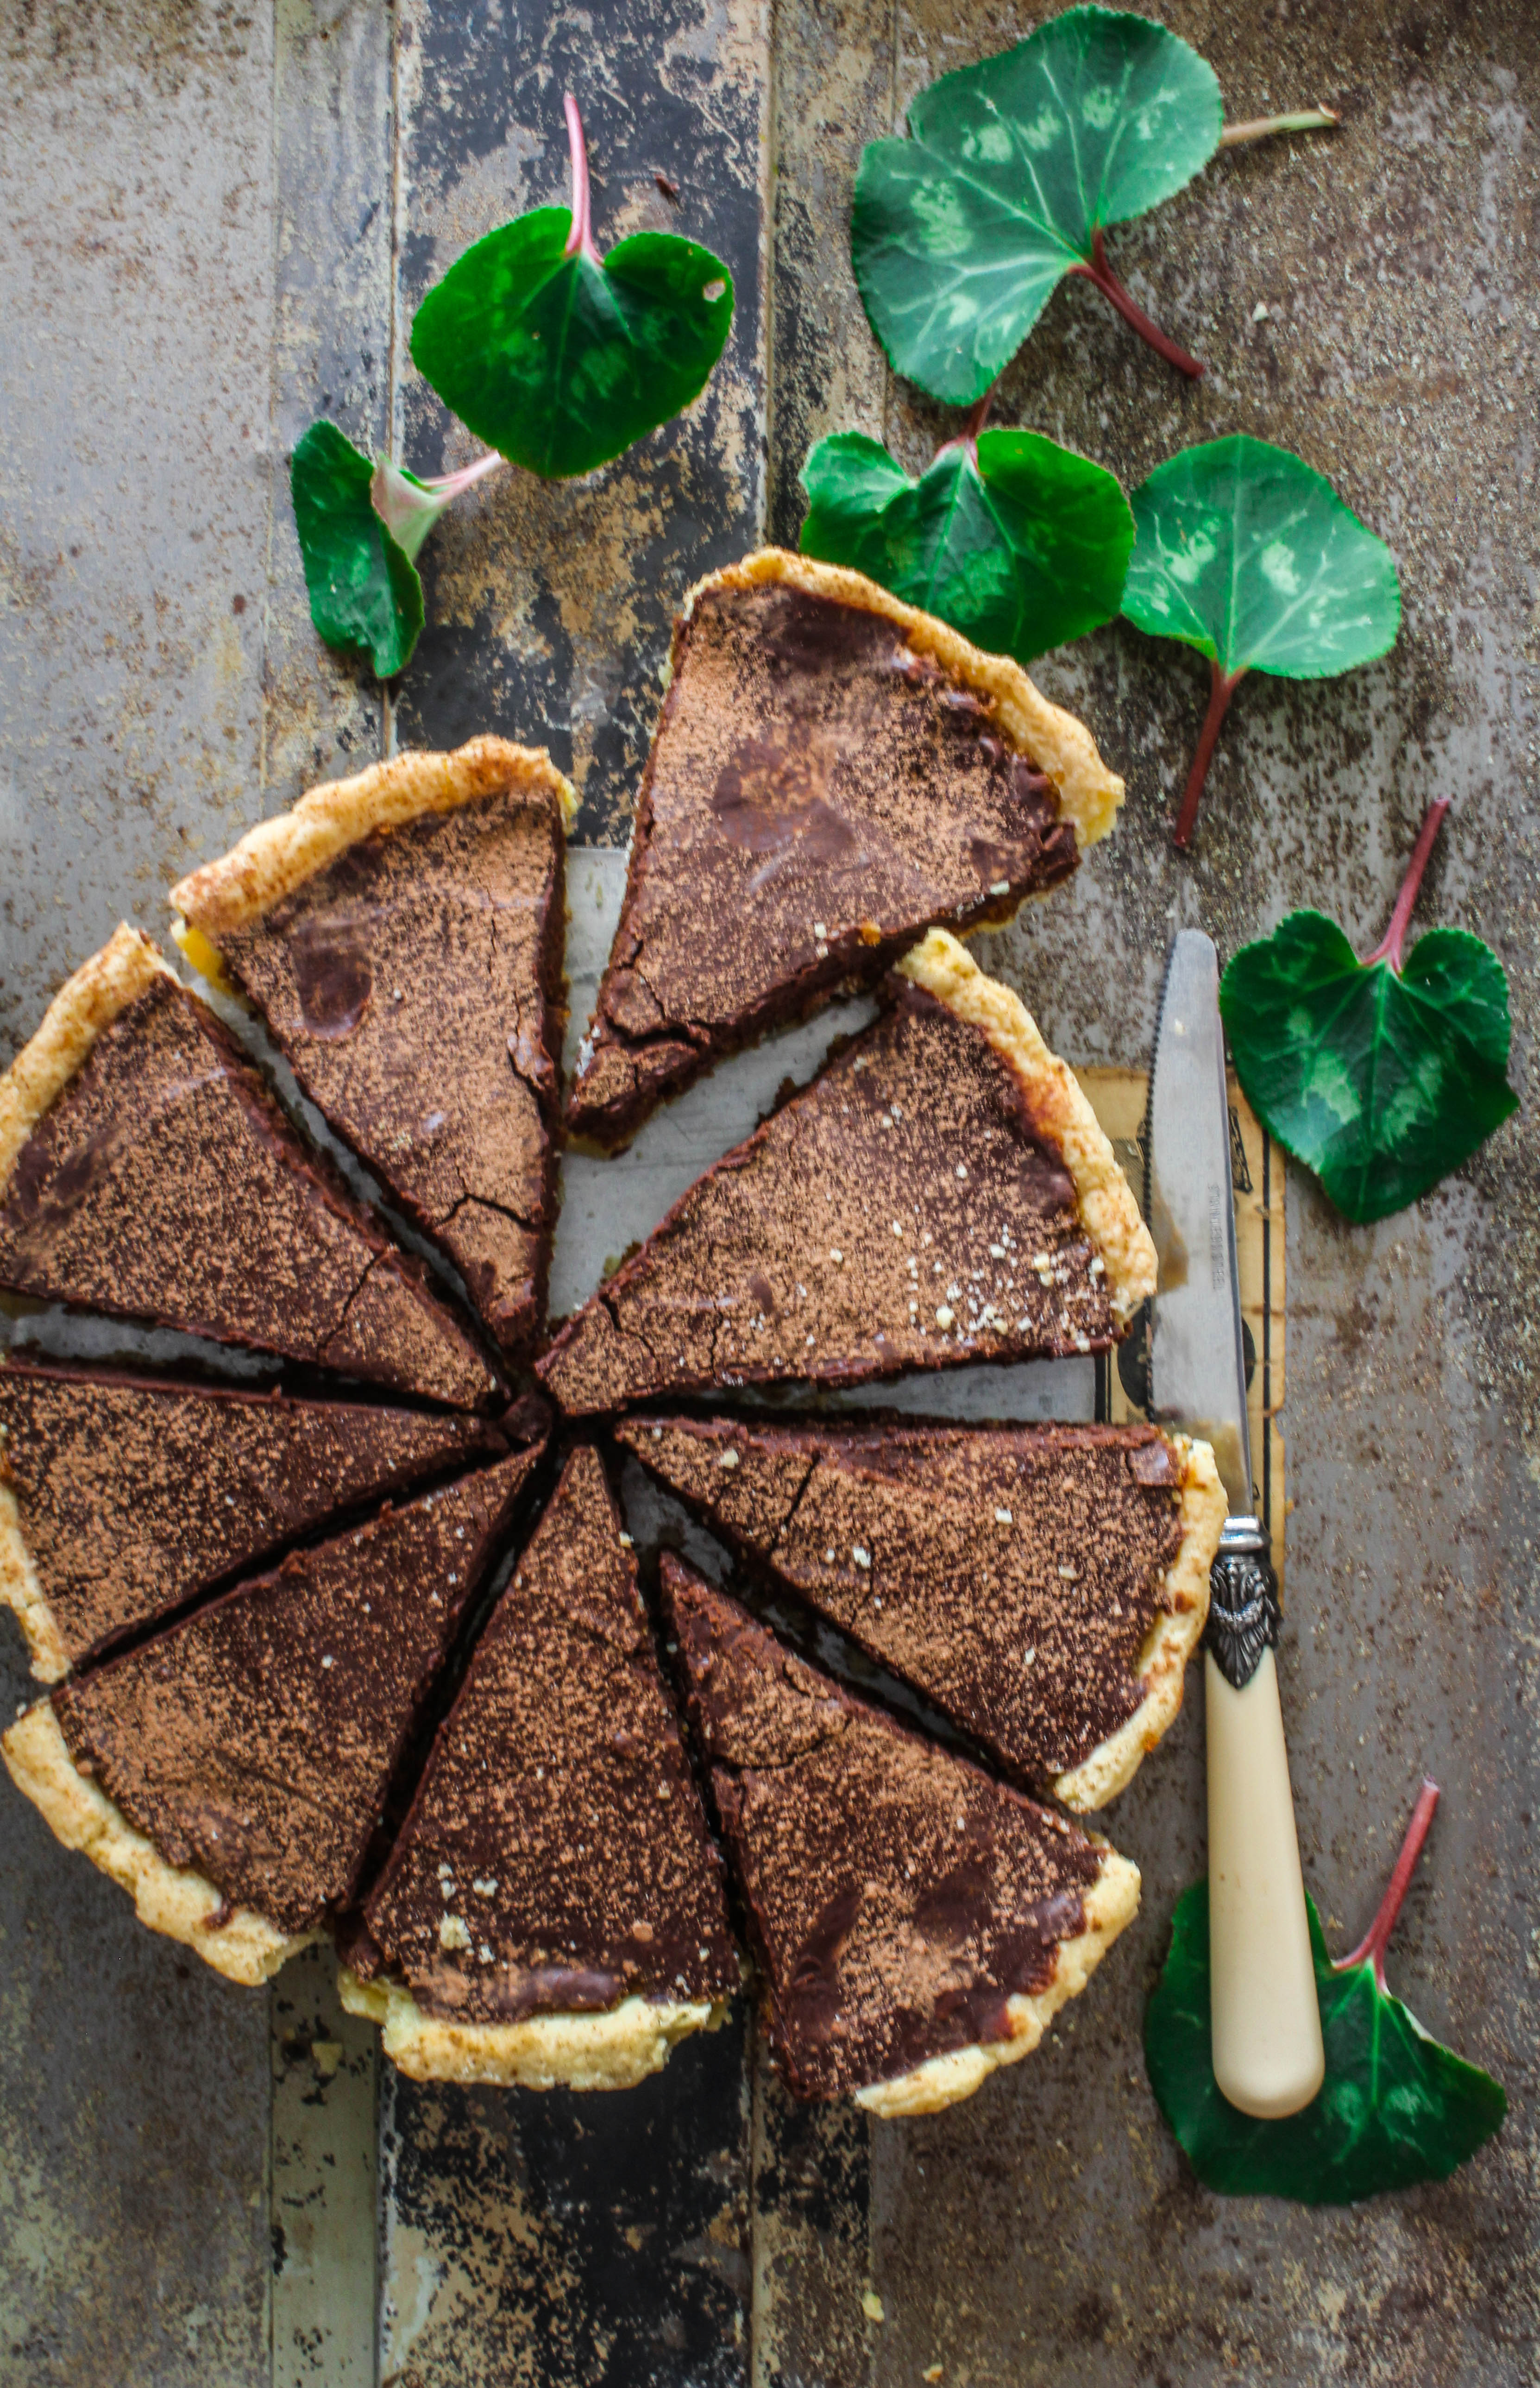
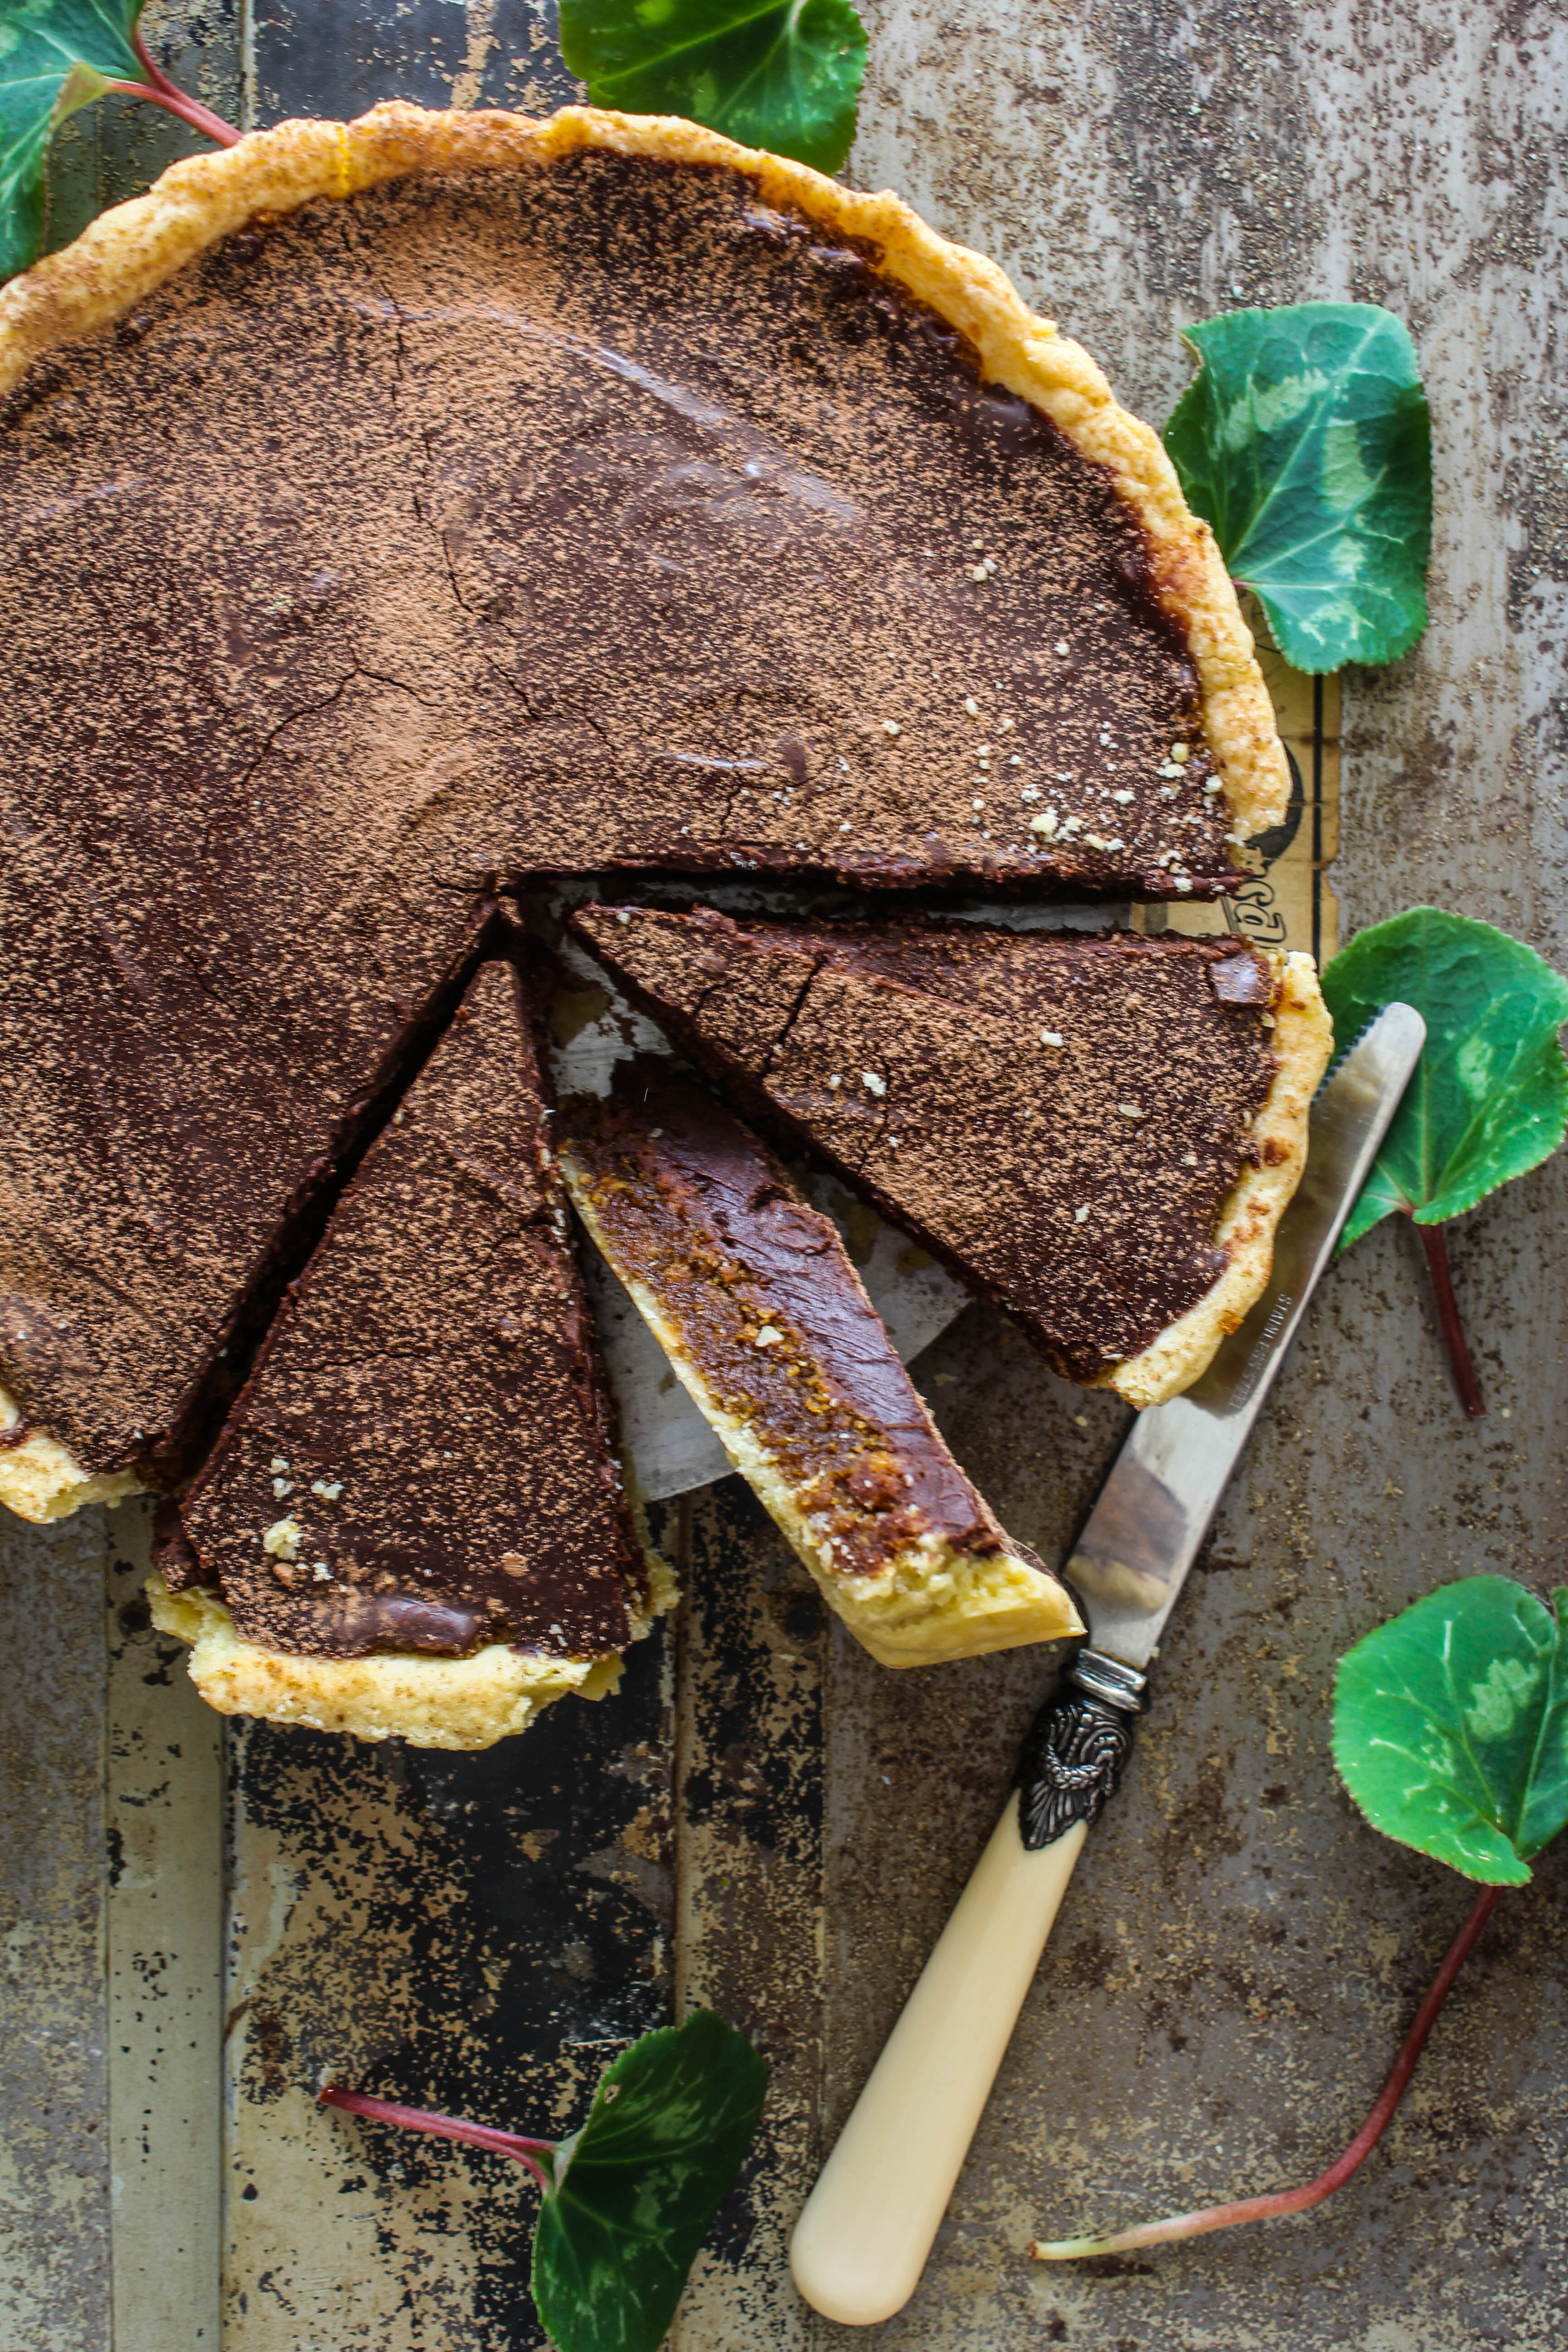
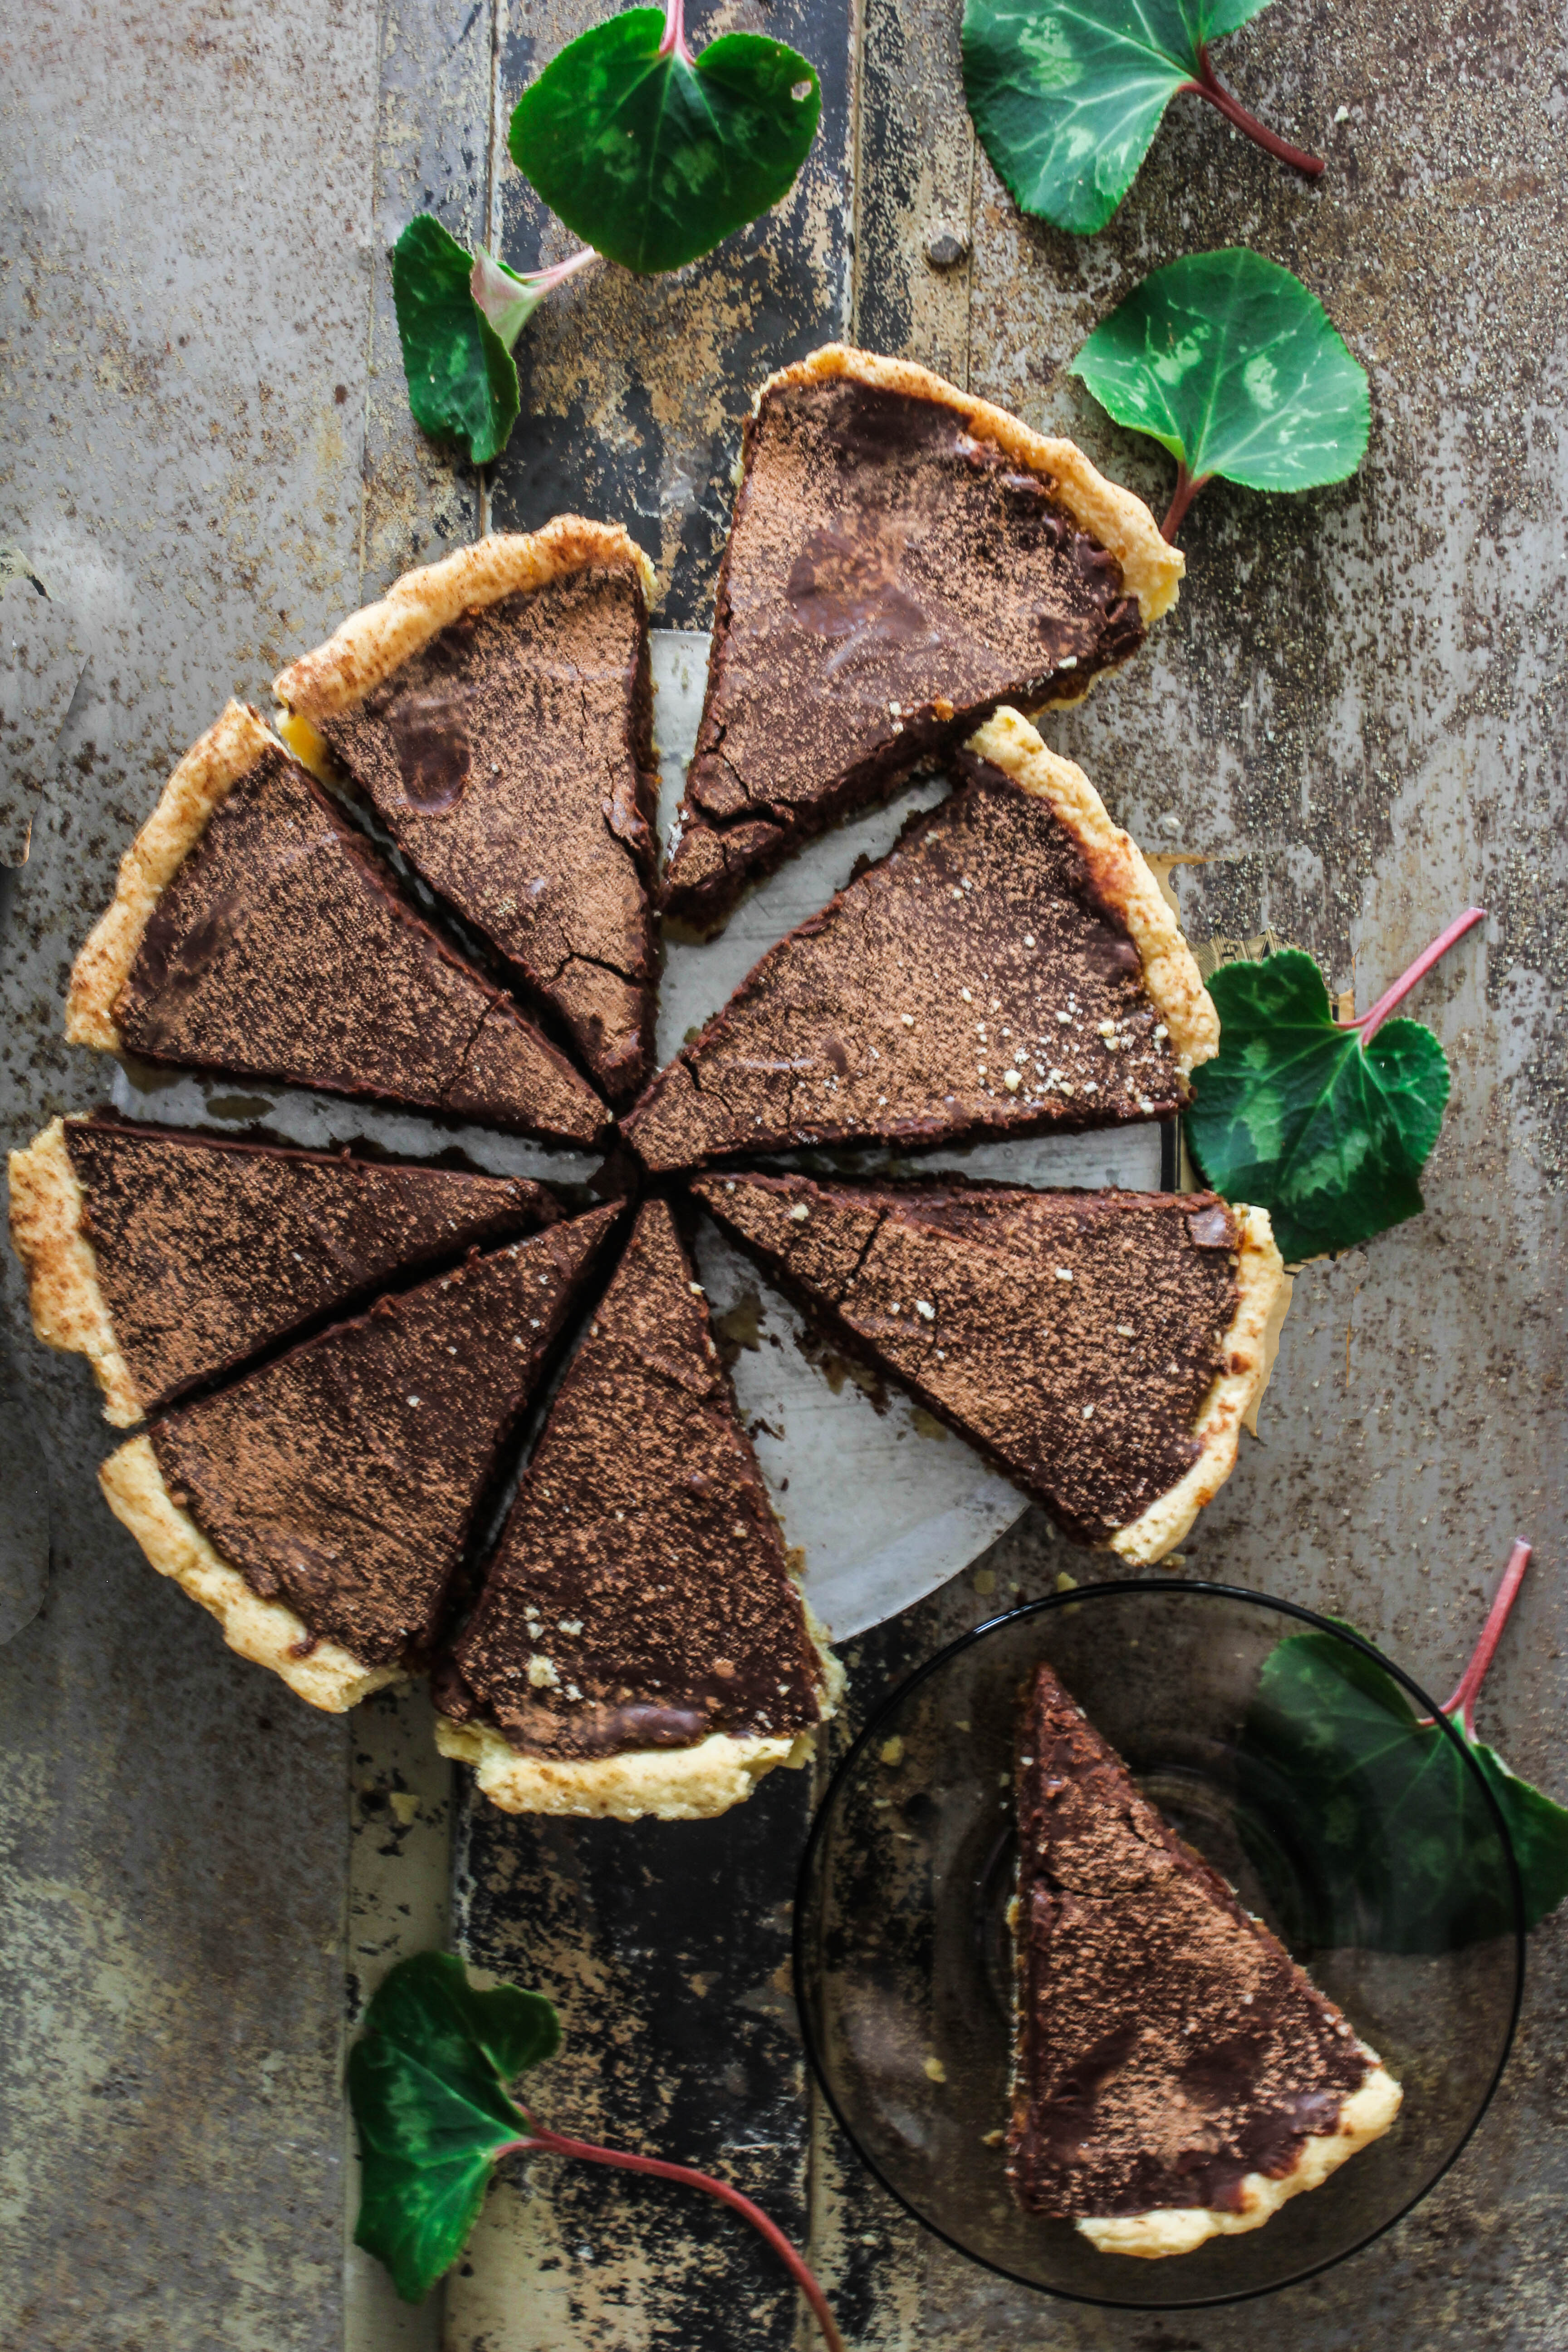
IMG_2195To make things more decadent, I have covered the treacle tart in bittersweet chocolate ganache. It works like magic to complement the rich sweetness of the golden syrup mixture. Once the tart bakes, you make a simple ganache with chocolate and cream and it gets poured onto the tart.
The treacle tart is great on its own. a beauty of simple ingredients. But it’s nice to have some variety and options, especially if it involves good old chocolate. If you love caramel, this is a must try. It is close to a bi-layered chocolate caramel tart but richer in texture. You will taste a crunchy caramel-like base and a soft luscious chocolate topping. So good!

Like I always say, if you find pastry intimidating, get a store-bought crust and try out the filling. You’ll be inspired to make your own.

IMG_2235

Chocolate Treacle Tart

1 1/2 cups (225g) plain flour
1/3 cup (50g) icing sugar
125g unsalted butter, chilled, cut into small cubes
1 egg
400ml golden syrup
150g fresh white breadcrumb
grated zest of one orange/lemon

For the Dark Chocolate Ganache
200 g dark chocolate, roughly chopped
2/3 cup heavy/thickened cream

Place flour and icing sugar in a food processor, whiz to combine, then add butter and process until mixture resembles fine breadcrumbs. Add egg and process until pastry forms a smooth ball. Cover with plastic wrap and chill in the fridge for 30 minutes

Preheat the oven to 170 degrees C. Roll out pastry on a lightly floured surface and use to line a greased, 23cm loose-bottomed tart pan. Keep in the fridge till you make the filling.
Place golden syrup in a pan over low heat to warm through, add the breadcrumbs and orange zest, then stir to combine. Remove from heat, cool slightly (about 5-7 minutes) Pour into tart shell and bake for 45 minutes to 1 hour until set and pastry is slightly brown. Remove from oven and cool the tart to room temperature.

Make the ganache : Place the chocolate in a heat-proof bowl. Heat the cream over medium heat in a saucepan. When it just comes to a boil, remove immediately and pour over the chocolate. Stand for 5 minutes. Stir with a spoon until fully blended. Pour warm ganache over the tart. Set in the fridge for 30 minutes.

Remove from fridge at least 30 minutes before serving. Serve with whipped cream or vanilla ice cream on the side.


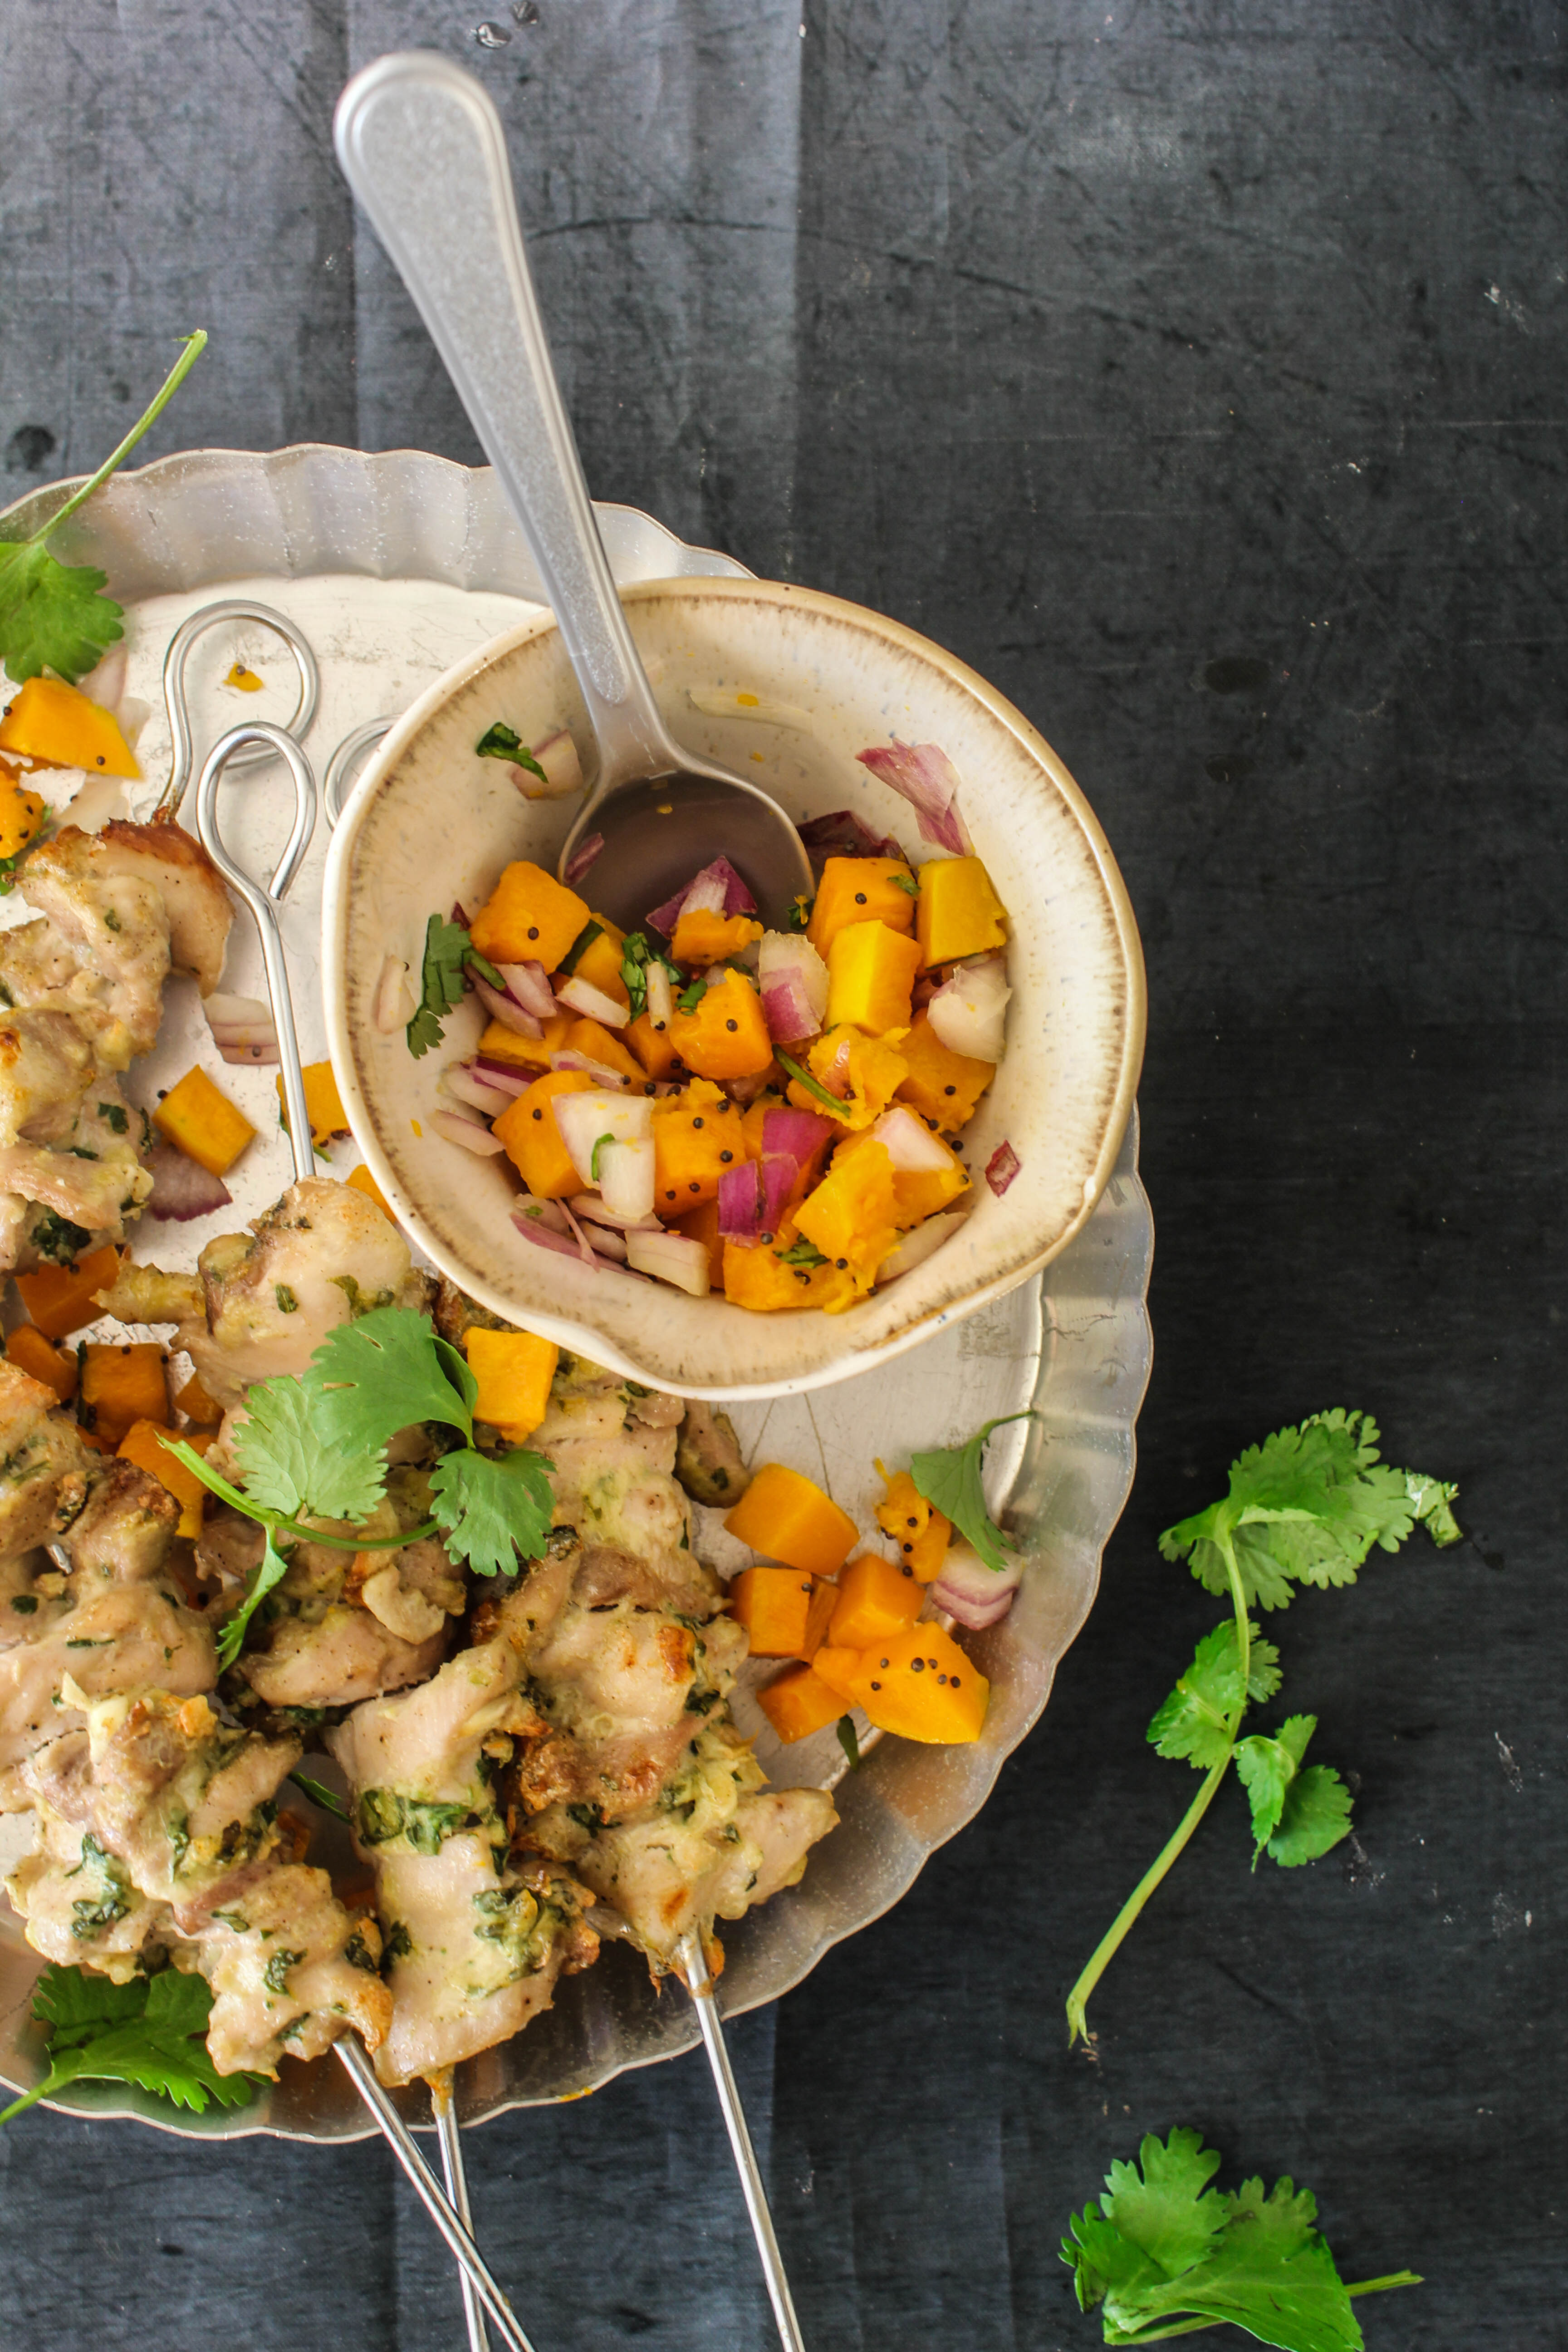
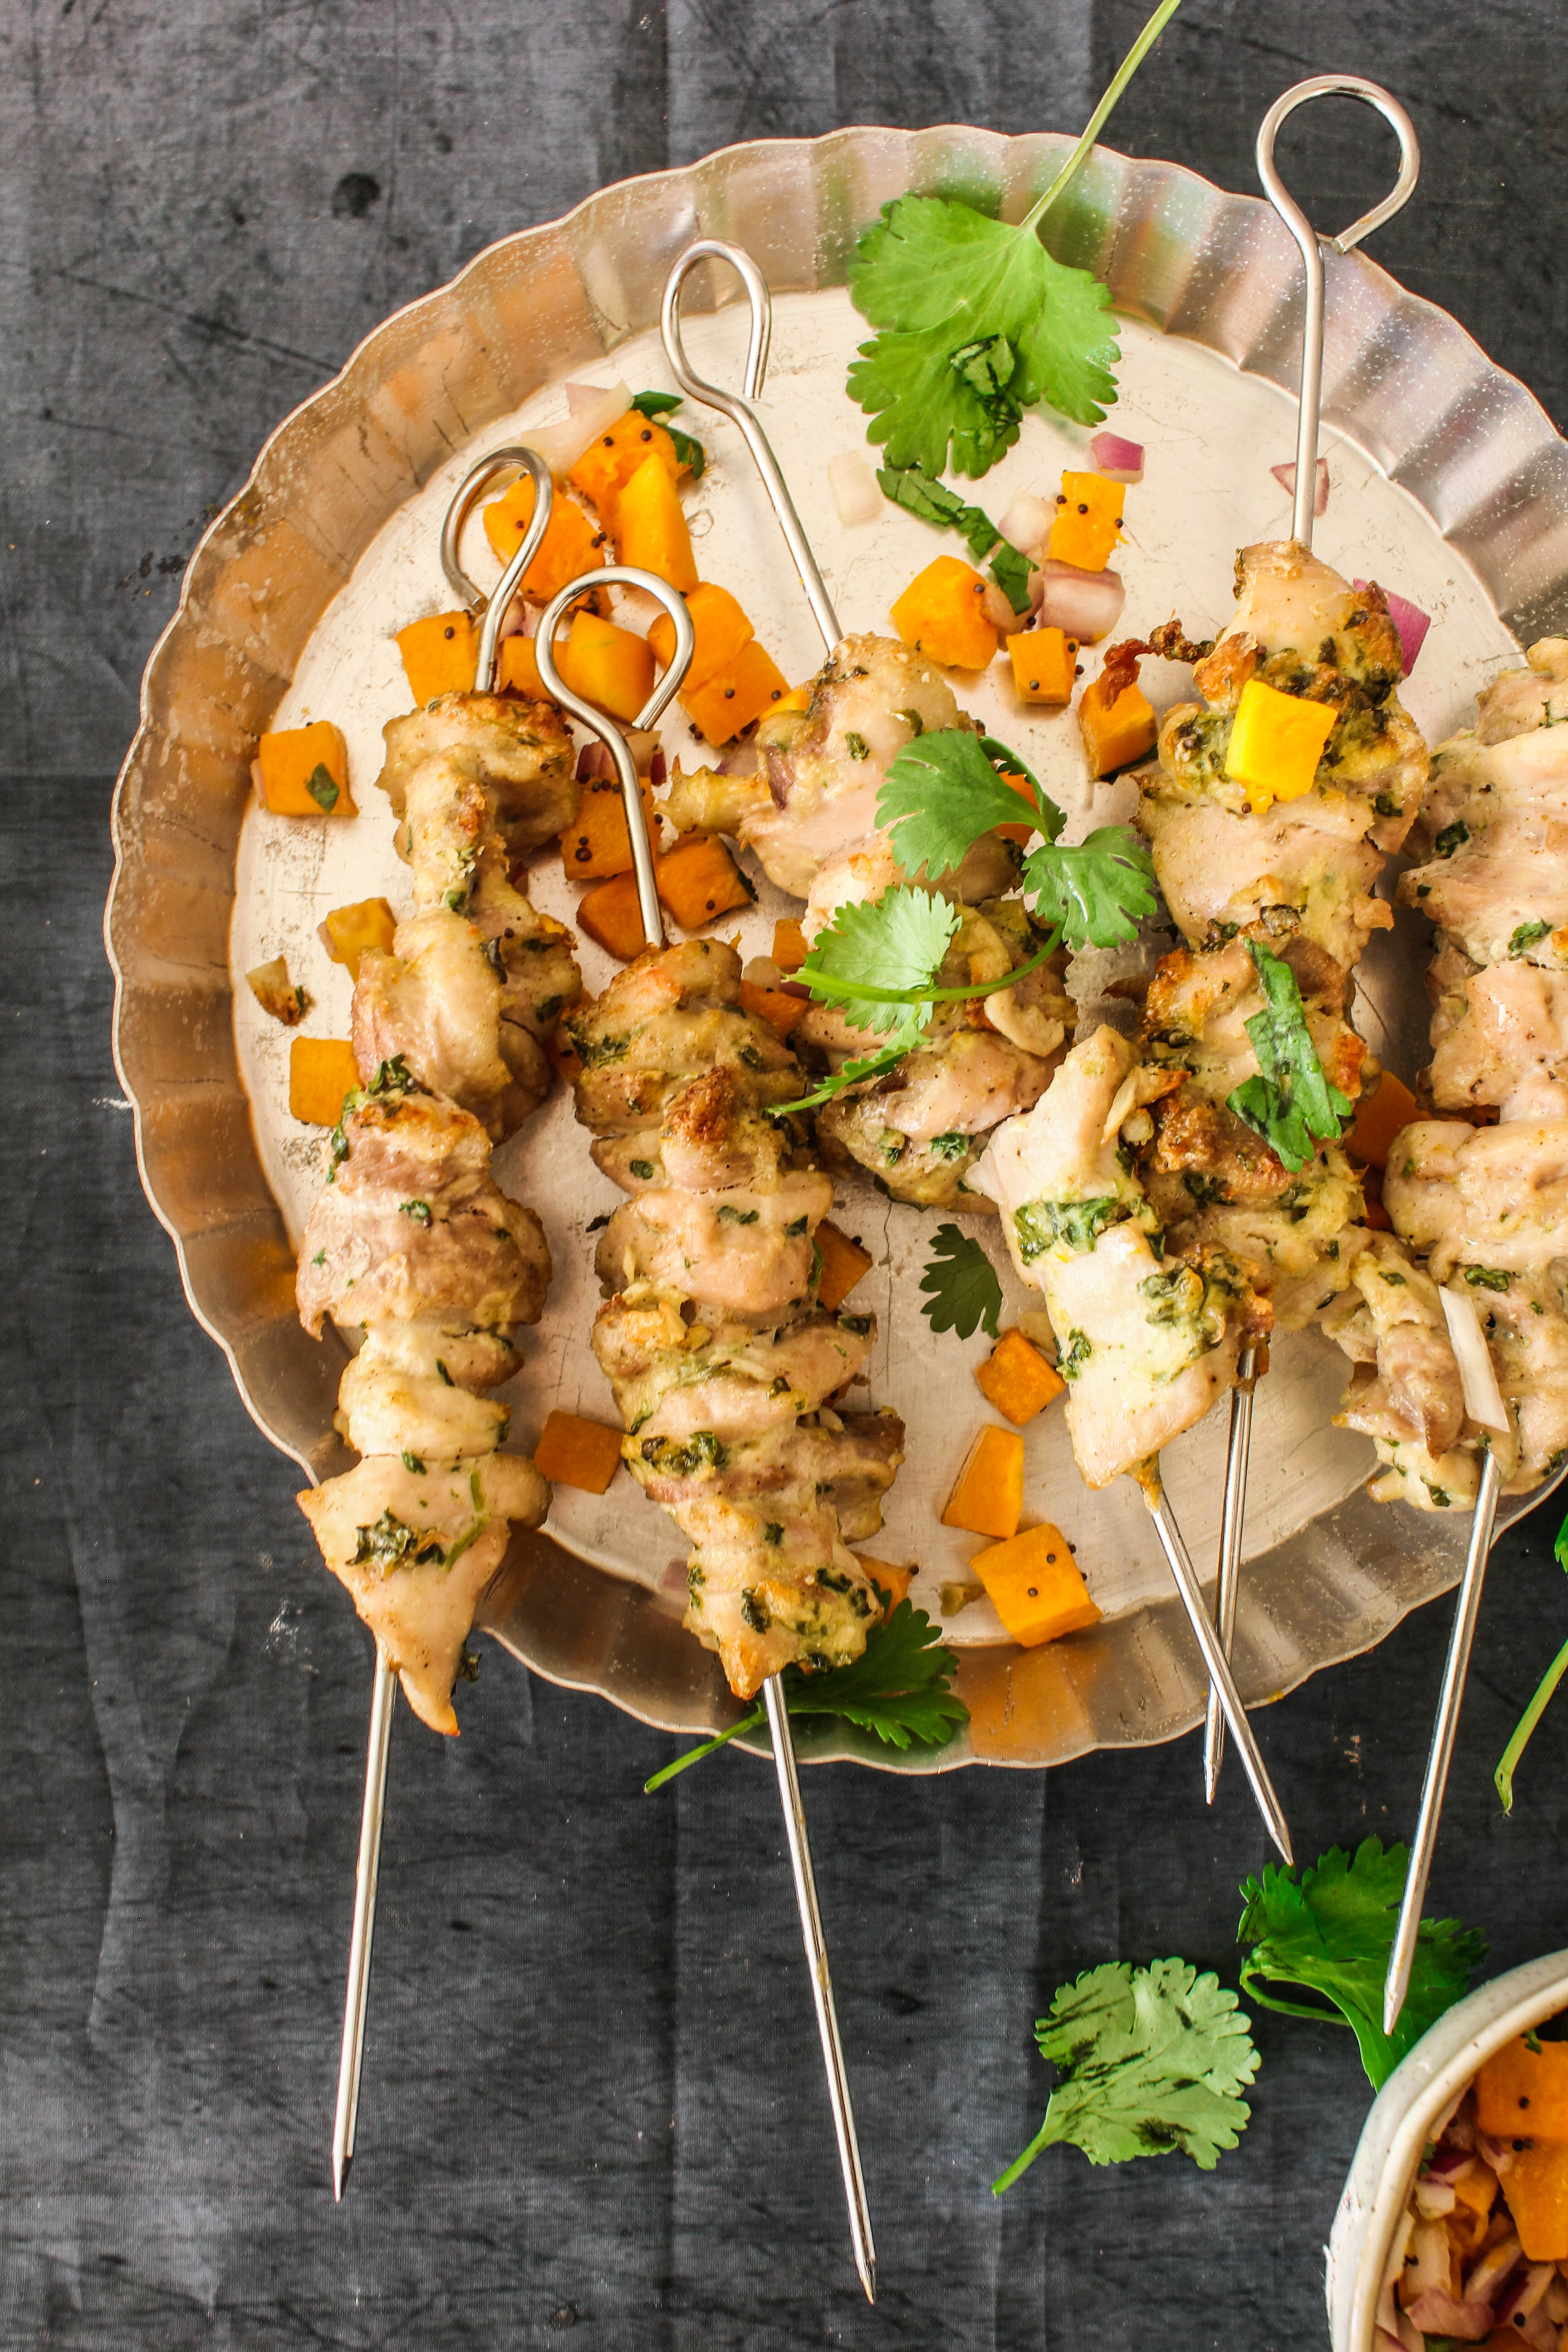
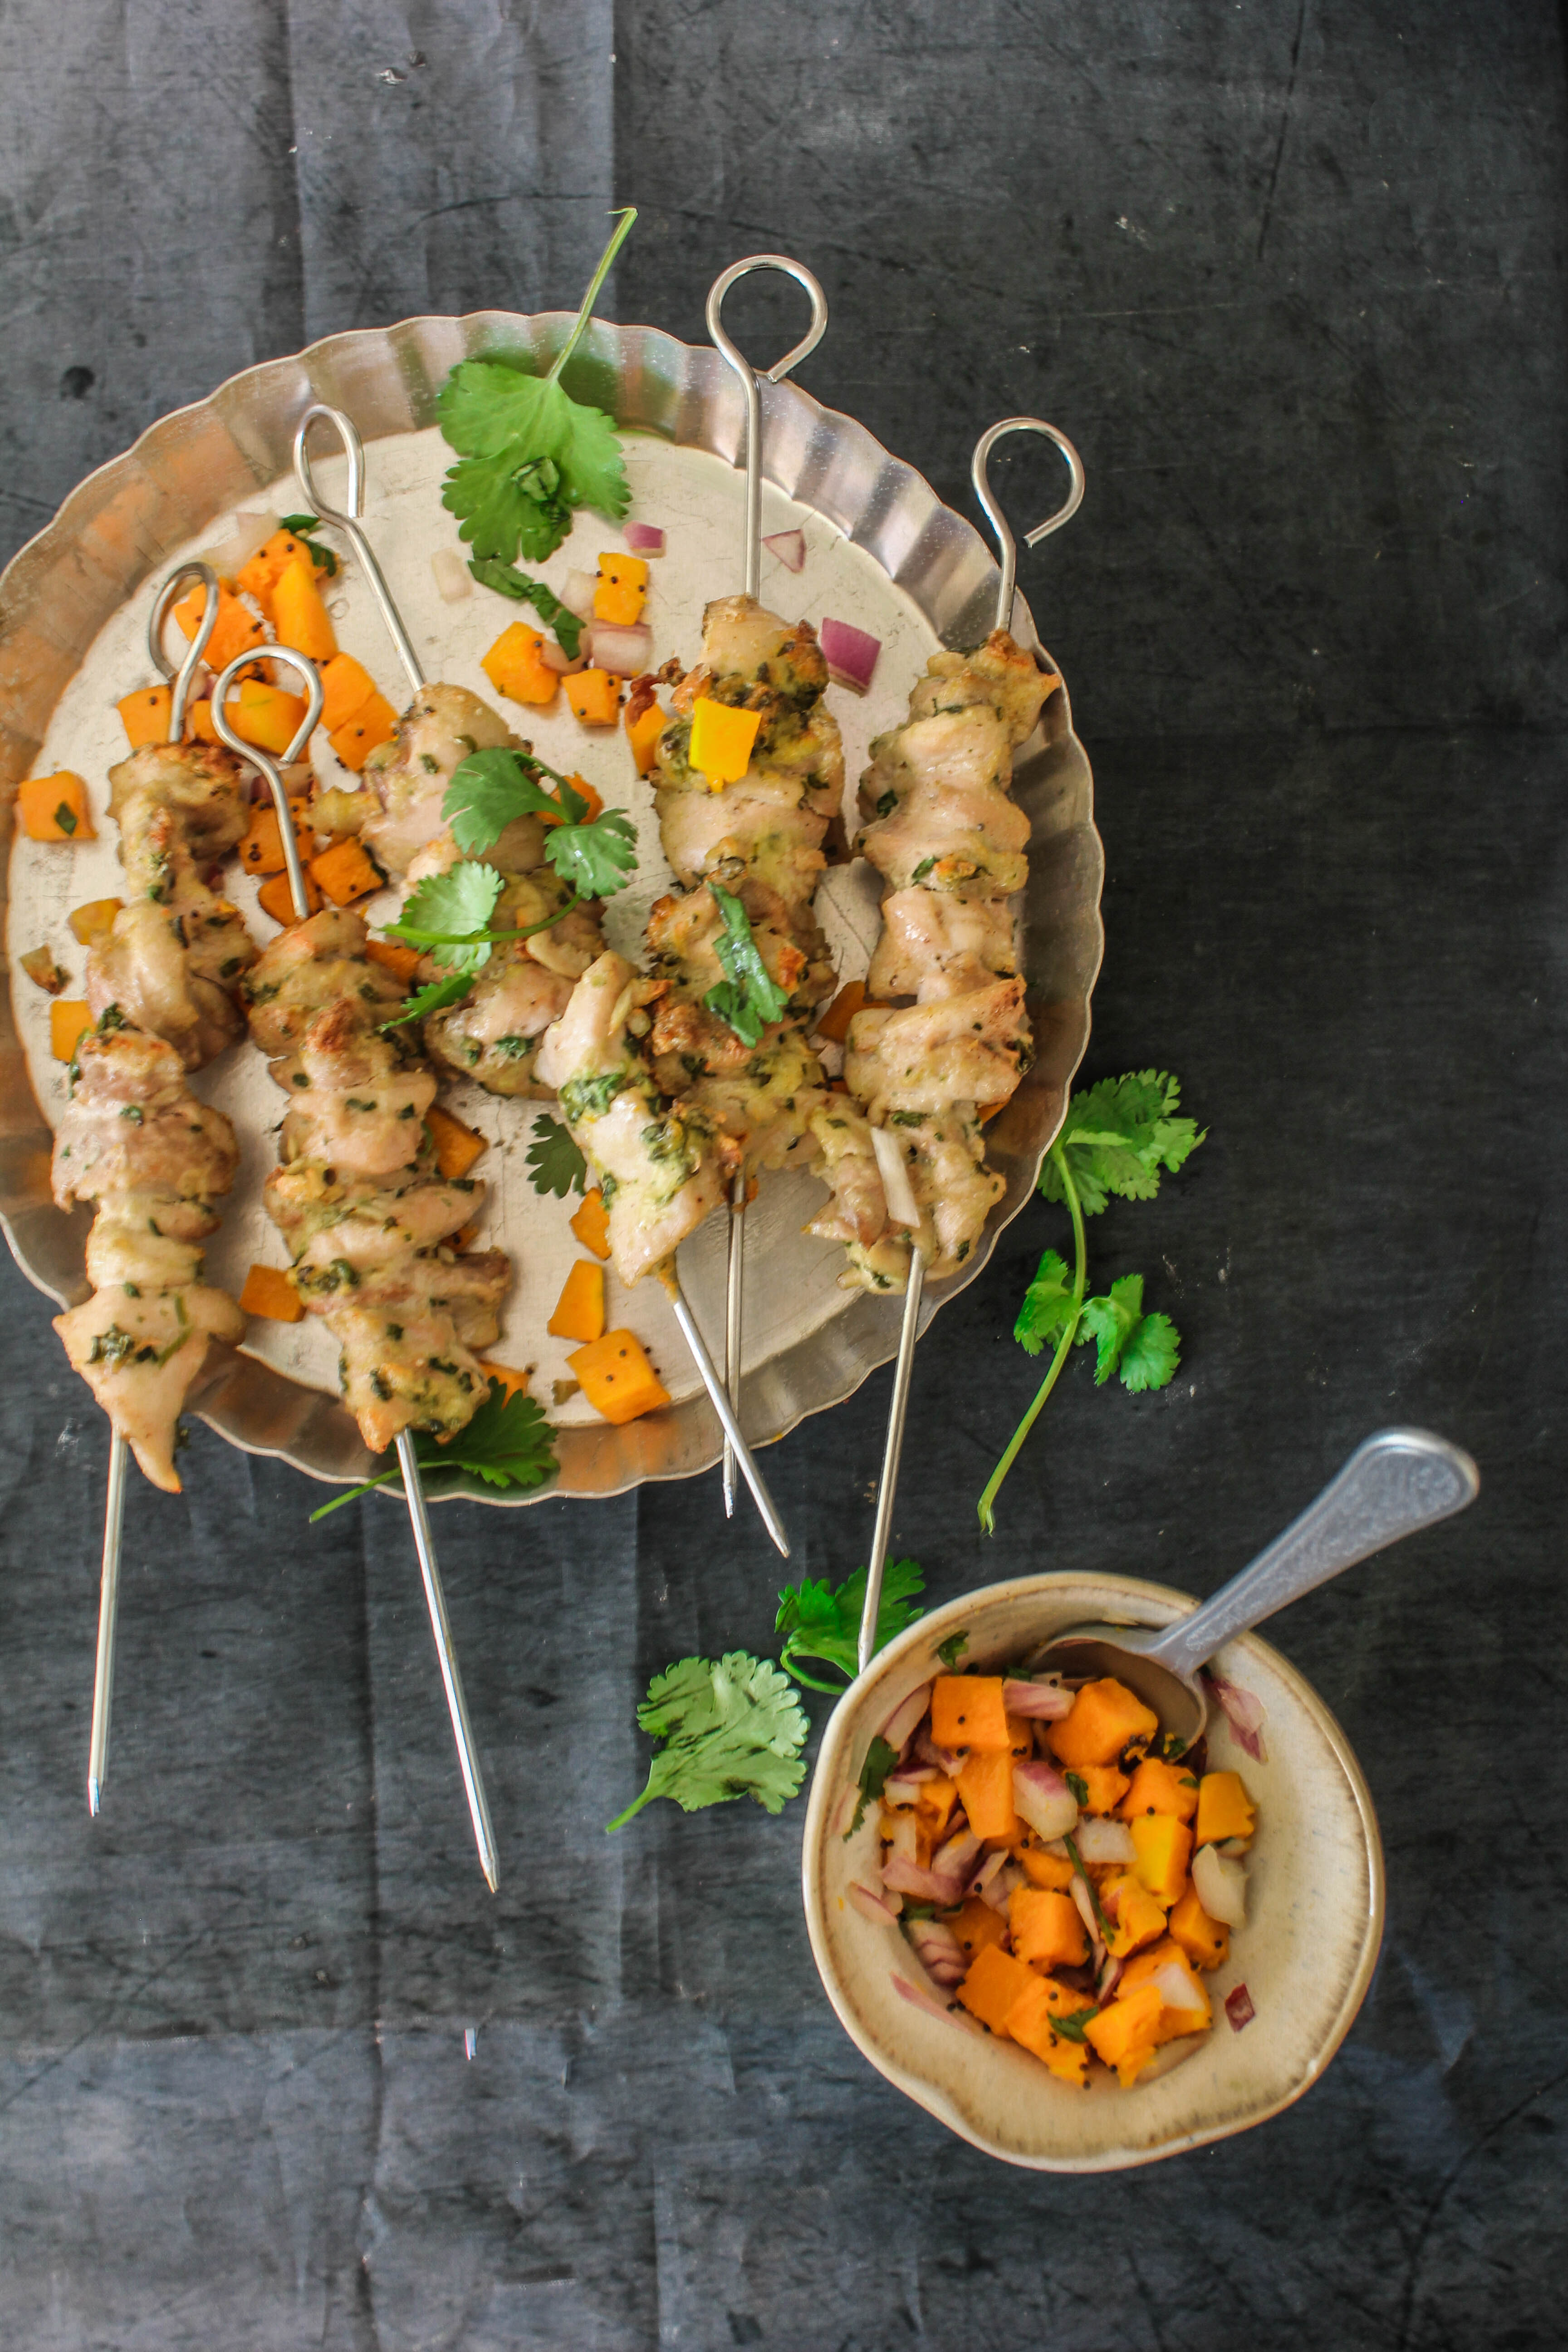
Cardamom Chicken Skewers with Pumpkin Salsa

10|09|2014

Little pods of cardamom are powerhouses of flavour and aroma. Bruise a couple of them and add to milk and you will know what I am talking about. They are like vanilla essence or pods in baked goods for me…they make everything better. Sweet or savory, the warm earthy tones can complement both flavour profiles. As a little girl, I enjoyed the addition of cardamom in almost all Indian dishes but I also vividly remember how I much disliked if I happened to bite into one. It tasted strong…too strong for my liking and would always make me wonder why it could not be removed once it’s role in the dish was over. Then I discovered ground cardamom. I found it more convenient and the flavour more intense to work with. Simply by cracking the pods open and passing the seeds through a food processor, you have a magical ingredient to liven up your food.

IMG_2096

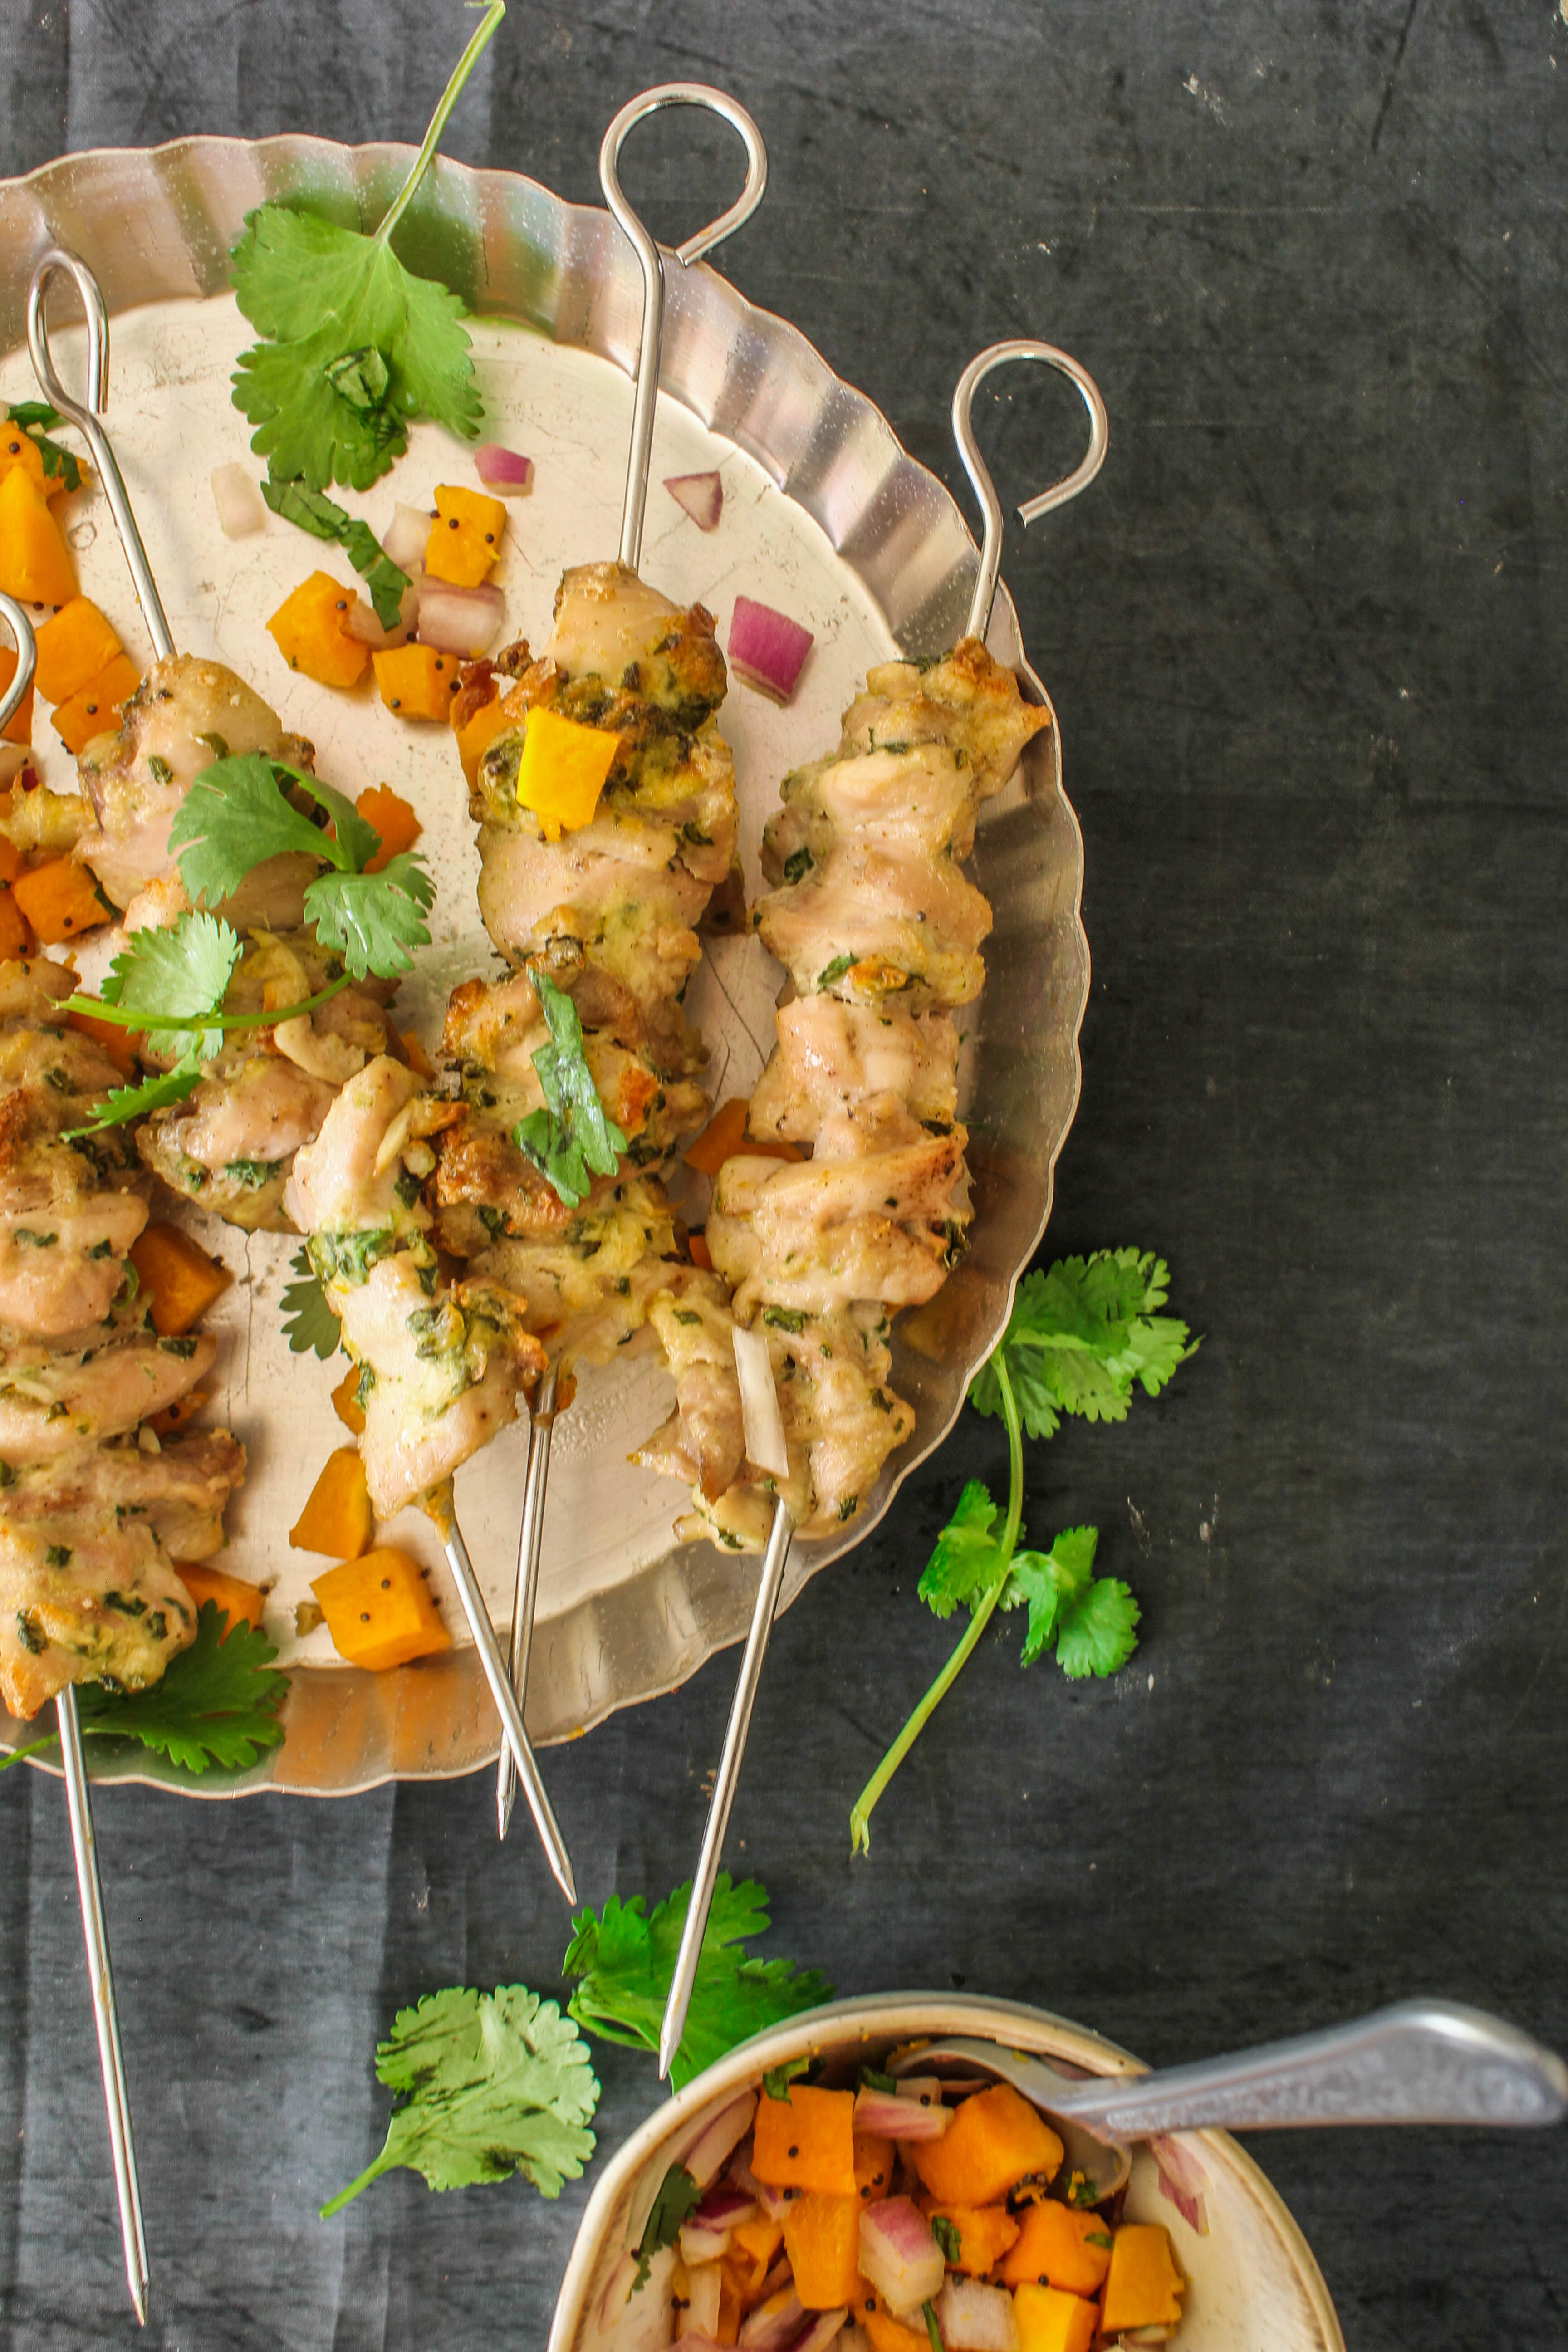
The flavours in these chicken skewers are subtle. They are meant to be like that. But the chicken is soft to the point of falling off the skewers. The marination tenderises the meat while leaving behind soft notes of cardamom and a creamy base to flavour it.

IMG_2084IMG_2099

The salsa is great accompaniment to the chicken with relatively bold flavours. This reminds me of a pumpkin-potato stir fry my mother makes with mustard seeds. Mustard seeds have a lovely nutty taste. You could substitute with cumin seeds if not available at hand.
Ground cardamom is mostly available in India supermarkets. Making it at home is easy as well by crushing the seeds in a food processor. Use the skins to flavour tea.

IMG_2094-2

Cardamom Chicken Skewers with Pumpkin Salsa
Serves 4

Chicken thigh fillets 500 g, chopped into cubes
3 cloves garlic, finely chopped
1 inch ginger, finely grated
1 tbsp. green cardamom powder
2 tbsp. sour cream
2 tbsp. tasty cheese/mozzarella, grated
1 tbsp. corn starch
1 green chilli, finely chopped
1/2 cup coriander leaves, finely chopped
Salt for seasoning

Pat the chicken dry with a paper towel. Add the garlic, ginger and cardamom powder and mix together with the chicken so it is evenly coated. Cover and refrigerate for 20 minutes. Remove from refrigerator and add in the sour cream, cheese, corn starch, chillies, coriander and salt. Mix gently until the chicken is evenly marinated. Refrigerate for an hour for the flavours to develop.

Preheat oven to 200 degrees C. Line a baking tray with aluminium foil. Thread chicken onto skewers.(If using bamboo skewers, soak skewers in cold water for 30 minutes). Bake for 25 minutes, turning the skewers once in between.

Pumpkin Salsa (adapted with variation from Taste.com)

500g butternut pumpkin, chopped into small cubes
Olive oil cooking spray
2 teaspoons brown mustard seeds
1 red onion, finely chopped
2 tablespoons red wine vinegar
2 tablespoons olive oil
coriander leaves, to serve

Preheat oven to 220 degrees C. Line a large baking tray with baking paper. Arrange pumpkin, in a single layer, on prepared tray. Spray with oil. Bake for 20 minutes or until pumpkin is tender
Meanwhile, place mustard seeds in a frying pan over medium-high heat. Cook for 2 minutes or until seeds begin to pop. Combine seeds, onion, vinegar and oil in a bowl. Stand for 20 minutes to let flavours develop. Place pumpkin in a bowl. Add the mustard and onion mixture. Stir to combine.


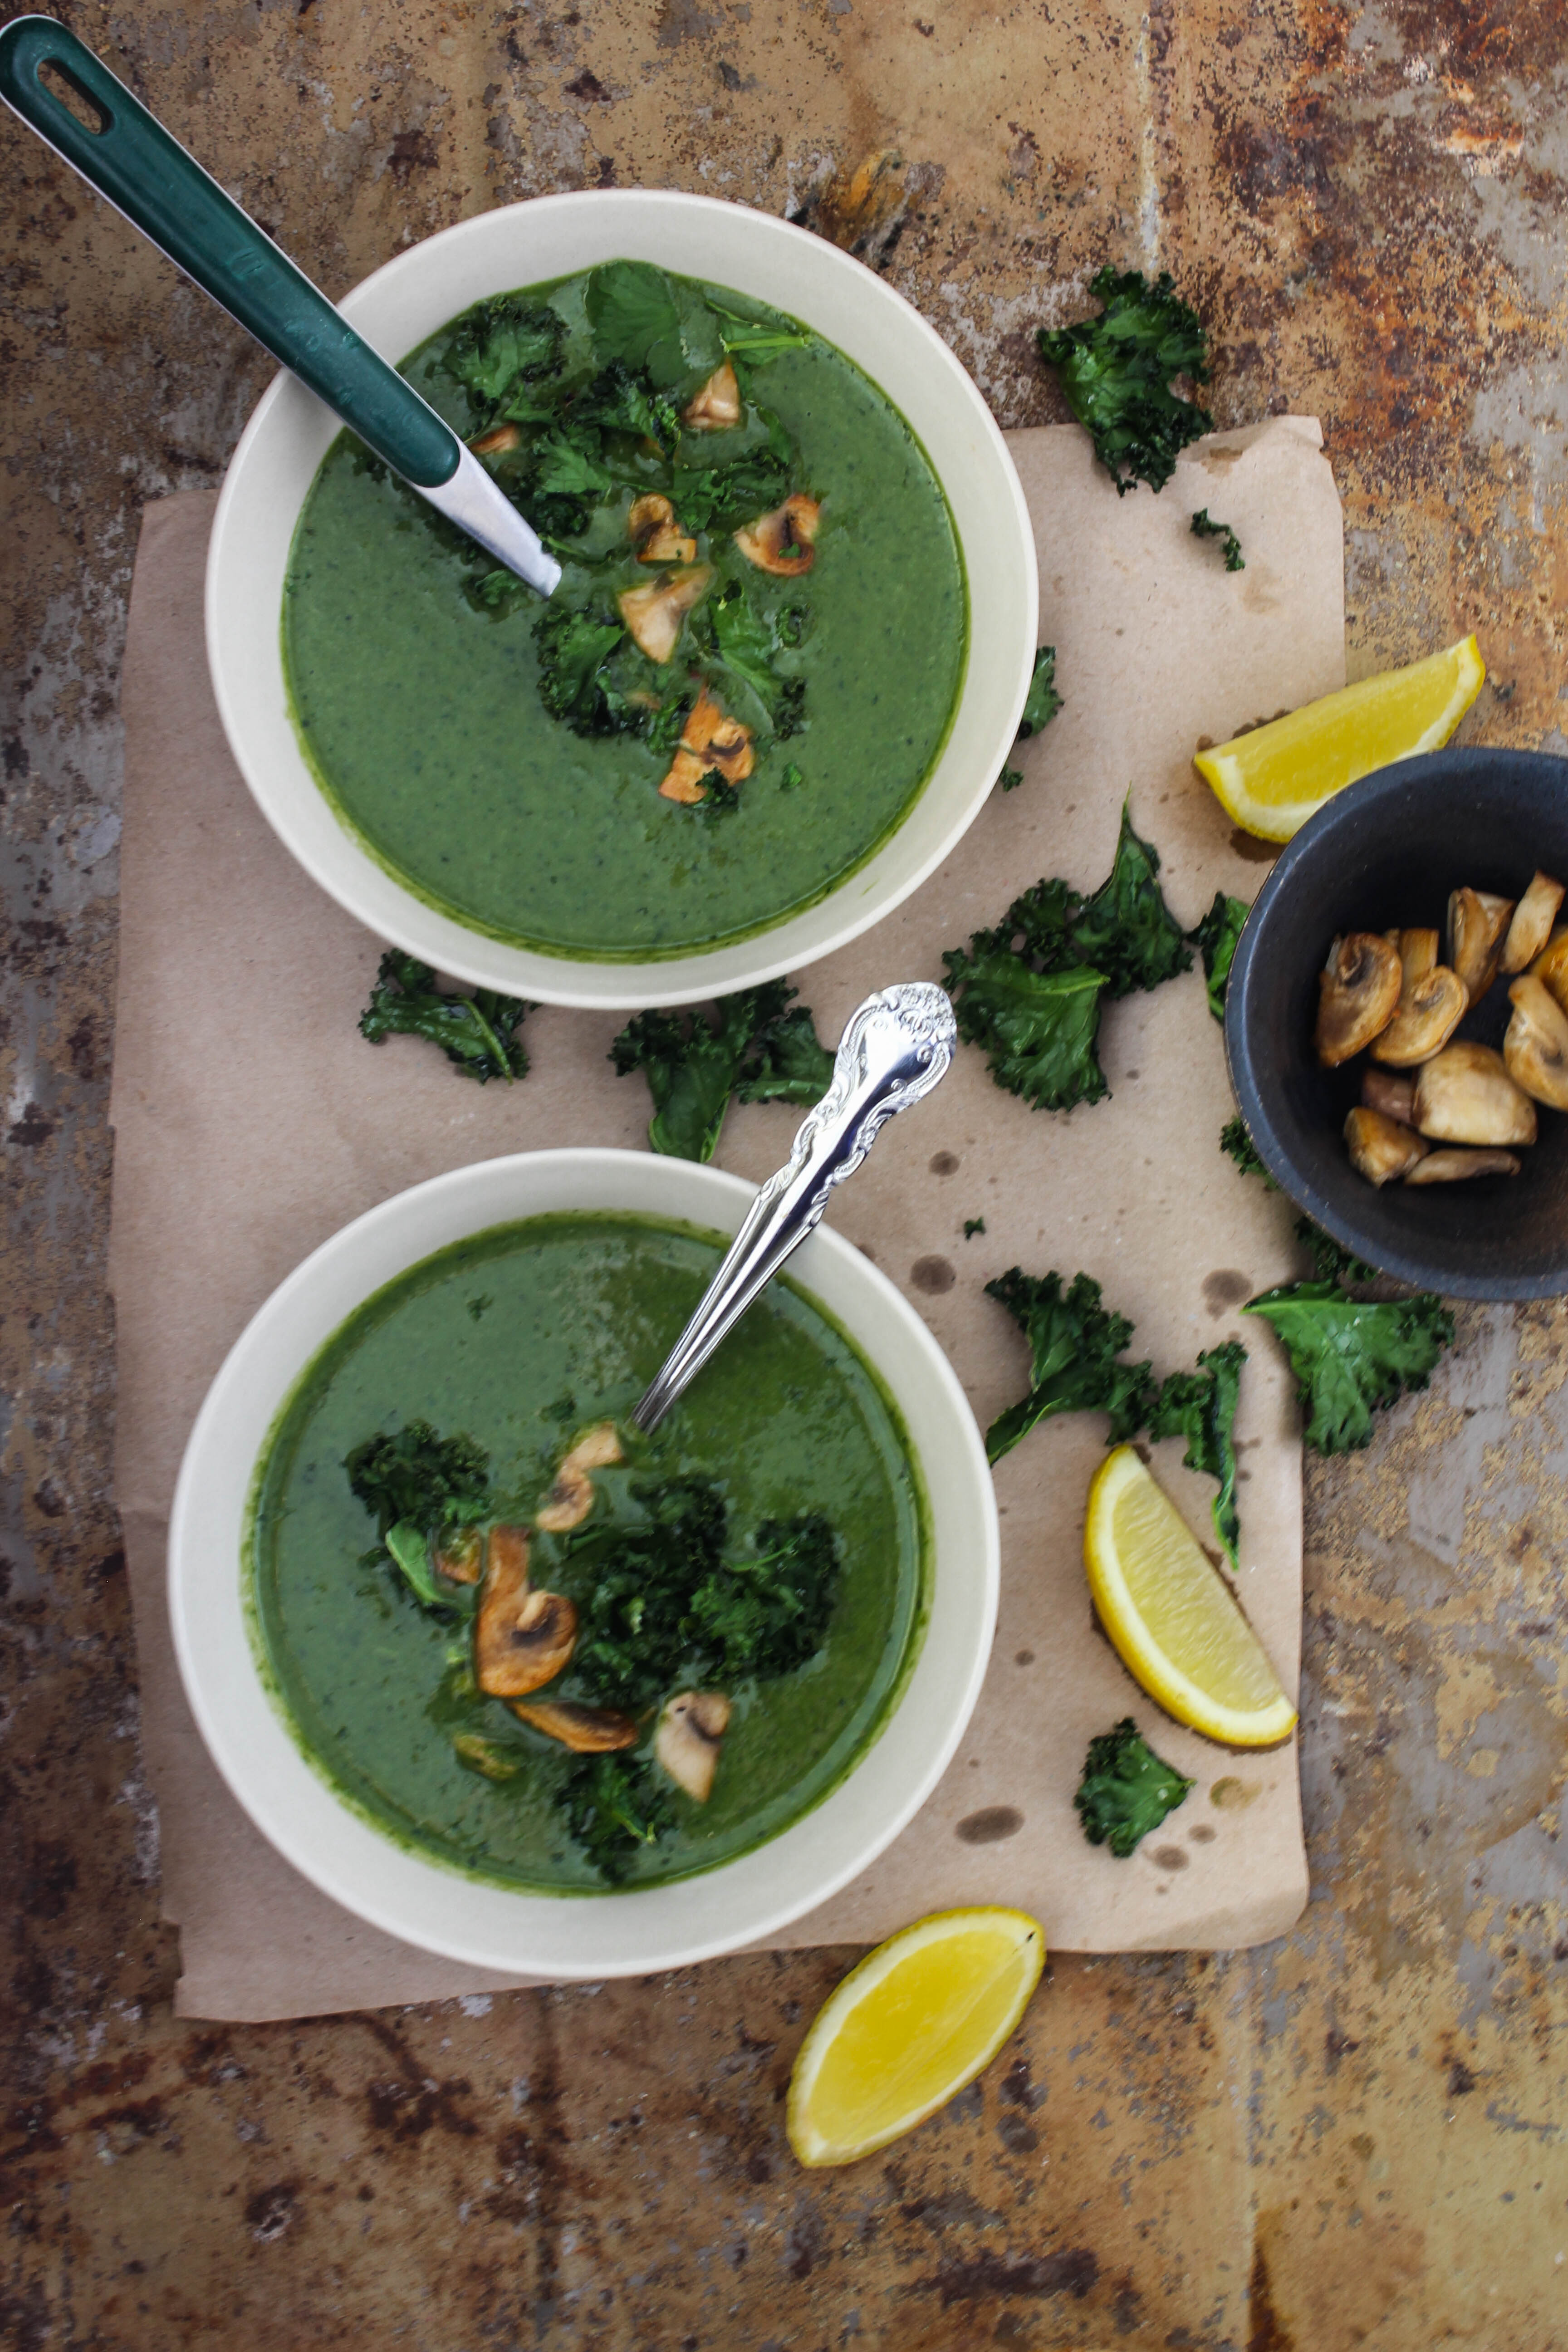
Asian Kale Coconut Soup

6|09|2014

If I had pick and choose one thing that I enjoy doing the most on the blog, it has to be, pairing flavours. Combining the best of different culinary worlds. I like to call it ‘intuitive cooking’. The best thing about food is that there are no hard and fast rules. When your taste buds are exposed to a multitude of cuisines and flavours from years of cooking or eating, they become like feelers. That respond instinctively to taste, smell and textures. The food blogging community are an amazing lot who do this on a frequent basis. A creative network that take a fresh and fun approach to all things food. Who make dinners exciting and cooking inspiring. Who supply Google and other search engines with the most amazing database of recipes every day. A community that I am proud to be a part of.

IMG_1940

Apparently the cold weather has decided not to leave us. Nor the rain or the strong winds. Together, they are a bad combination. It is Spring with little or no Spring-like changes yet. So soups are still part of our menu and my creative ventures. Actually, I don’t mind that. I could eat soup even on a hot, sunny day. Especially if it has a touch of Asian . Infusions that form the base for sweet, spicy, tangy flavours that are unique to Thai cuisine. I chose Kale because it is healthy and takes on flavours well.

IMG_1955-2

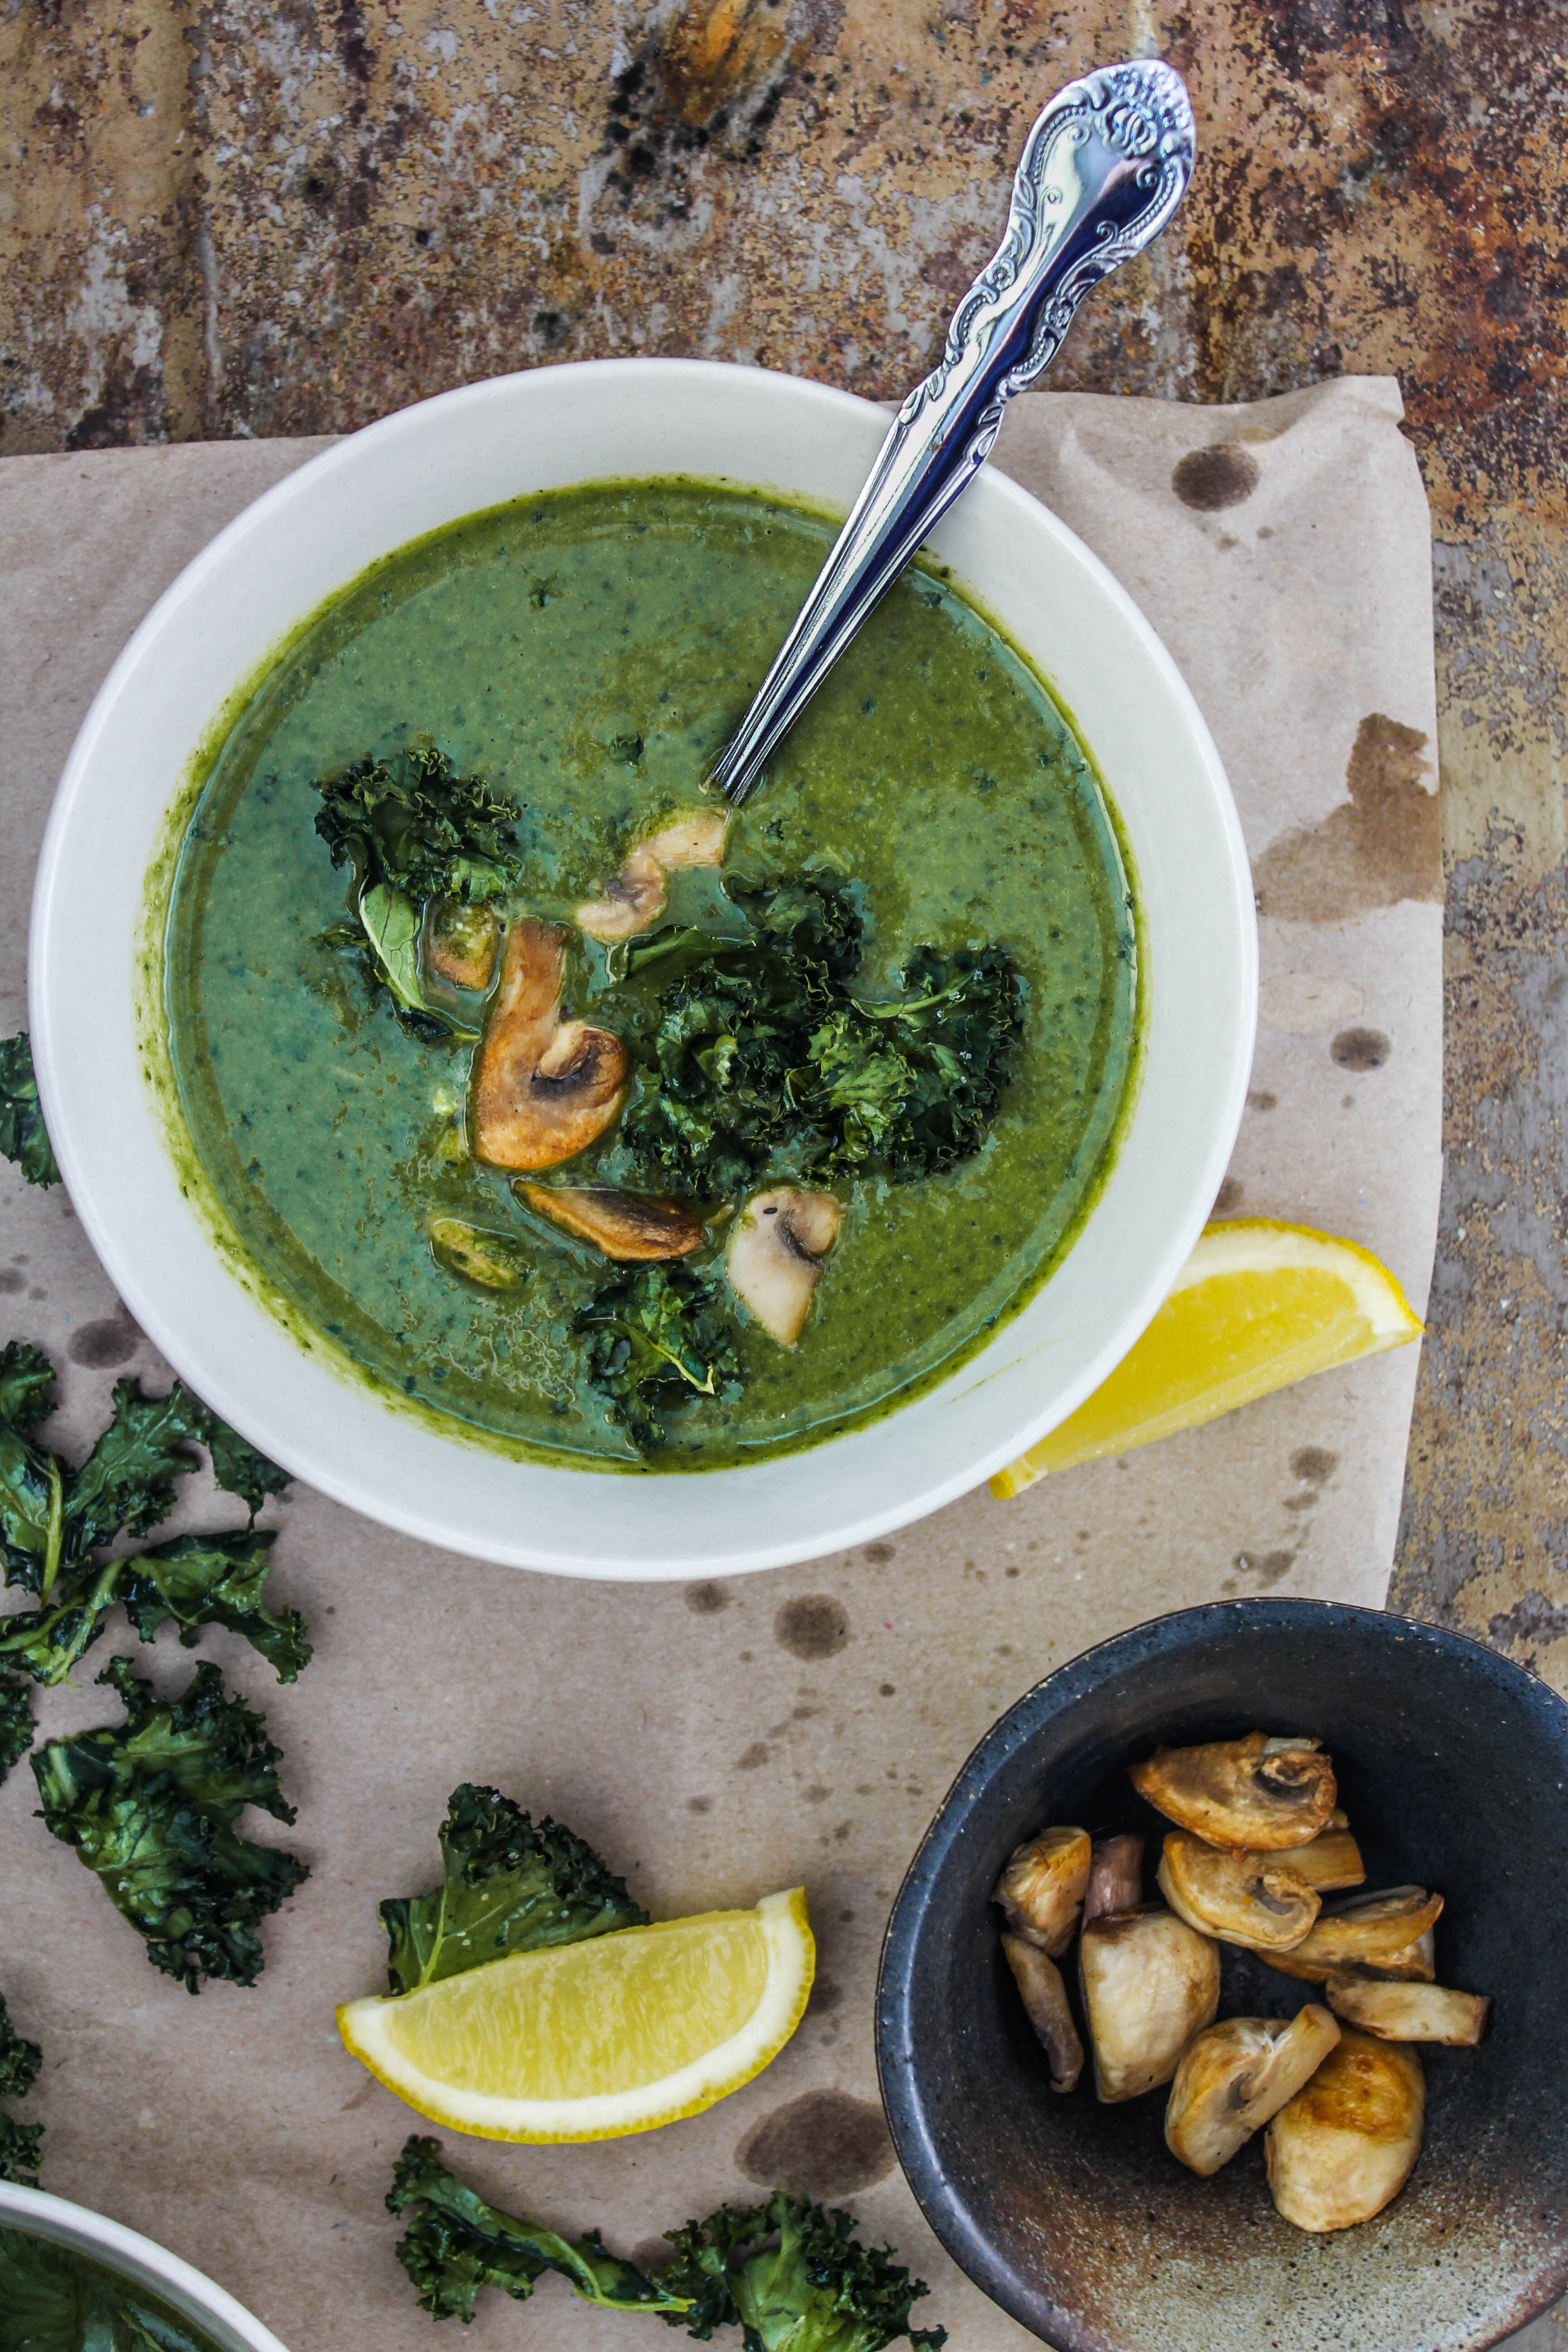
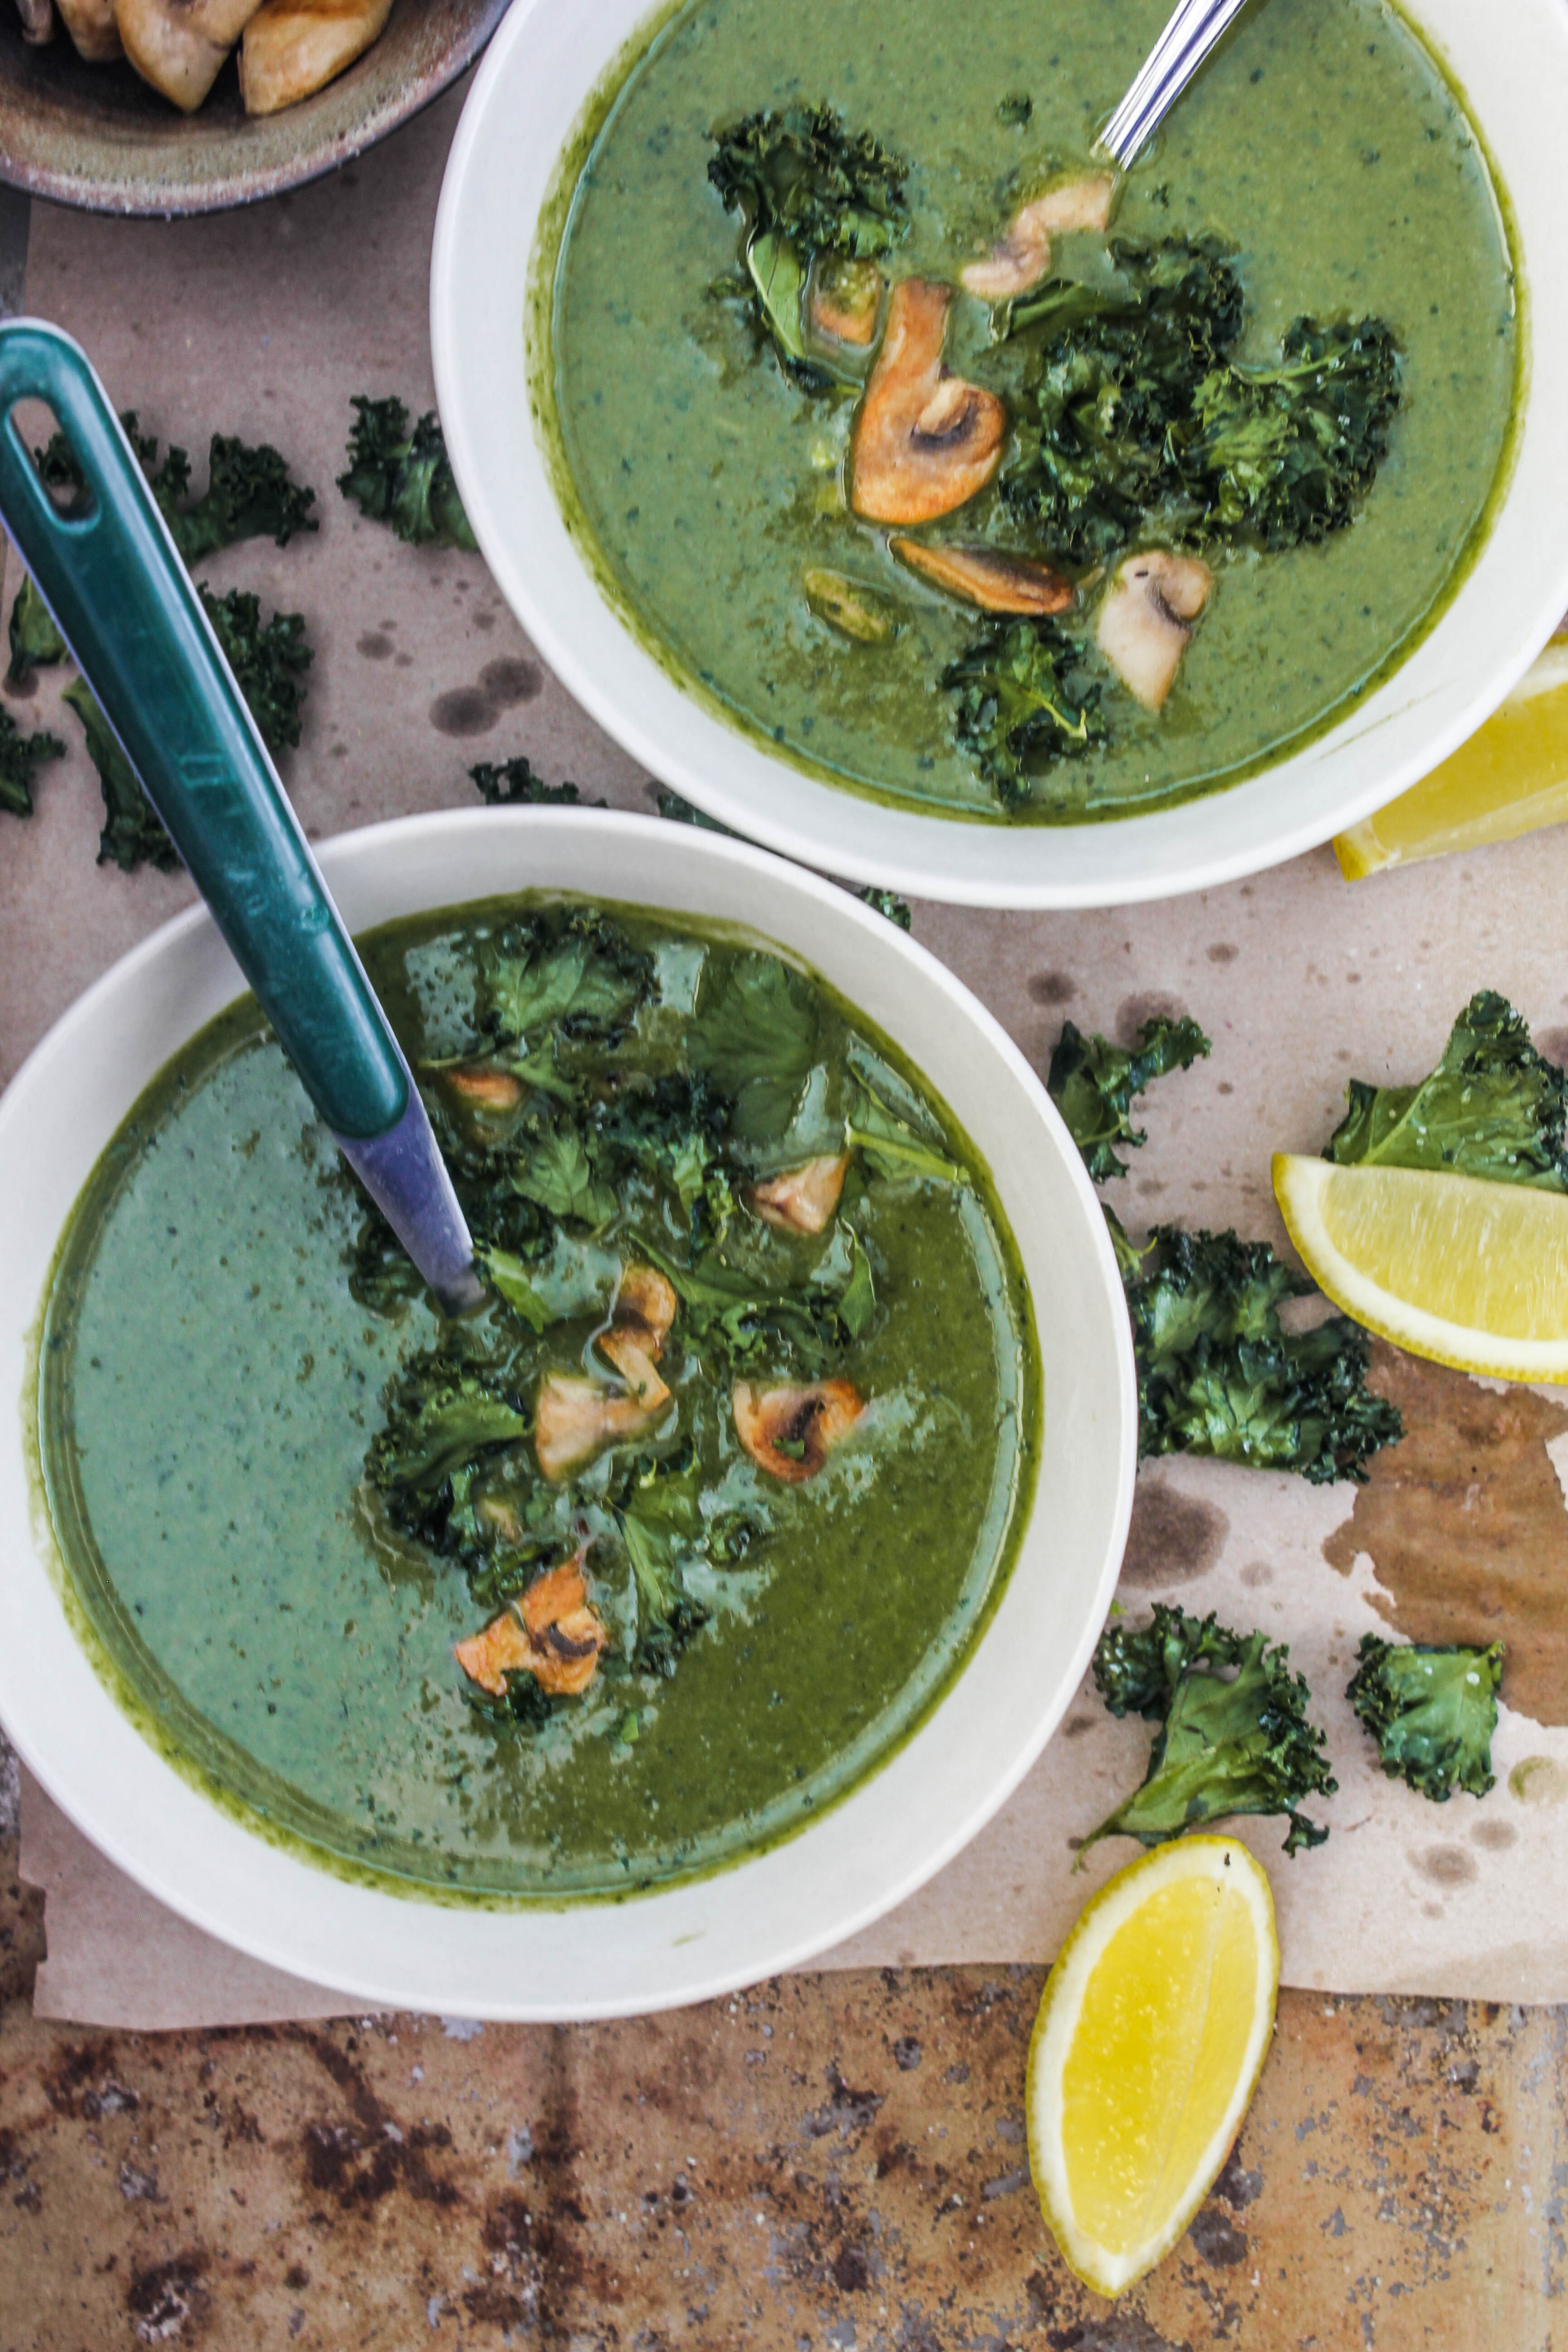
The soup is mildly spicy, slightly sweet with a curry like kick from the green curry paste. Coconut milk gives it body and a creamy texture. I love kale chips and they hardly require any effort so I served it with kale chips and lightly sautéed mushrooms.

IMG_1962-2


Asian Kale Coconut Soup

Serves 4

1 bunch curly kale, stems removed and leaves roughly chopped into 1 inch pieces
2 tbsp. olive oil
2 cloves garlic, finely chopped
1/2 red onion, thinly sliced
1 tbsp Thai Green curry paste
1/2 cup vegetable stock/chicken stock
1 can coconut milk (400 ml)
salt, to season
1 tbsp grated palm sugar/ brown sugar
1 tbsp lemon juice
1 cup button mushrooms, roughly chopped and lightly sautéed and seasoned, to serve

Preheat oven to 150 degrees C.

In a bowl, toss half of the kale with 1 Tbsp. of the olive oil and season with salt. Place on a baking sheet. Transfer to the oven and roast, stirring once halfway through, until the kale is crispy, 26 to 28 minutes.

Meanwhile, heat the remaining 1 tbsp oil in a medium saucepan. Add the garlic and onions and fry for a minute over medium heat. Add the green curry paste and fry till aromatic (about 1 minute). Stir in the remaining kale and sauté for a minute. Add the vegetable stock and coconut milk. Increase the heat to medium high and bring the mixture to a simmer. Cook for about 10 minutes or until the leaves soften. Remove from heat.
Working in batches, puree the soup in a processor until smooth. Return the soup to the saucepan and add salt, palm sugar/brown sugar and lemon juice and reheat over low heat. Ladle the warm soup into individual bowls. Top with crispy kale chips and sautéed mushrooms.

  • « Previous Page
  • 1
  • …
  • 29
  • 30
  • 31
  • 32
  • 33
  • …
  • 45
  • Next Page »
Hey Sugar
Cake
Link to my Facebook Page
Link to my Instagram Page
Link to my Pinterest Page
Link to my Mail Page
Subscribe to this site
Fresh Awards
2019 Aus mumpreneur
2019 aus mumpreneur
Mumbrella

Copyright © 2026 · Sugar Et Al · Designed by Smitten Blog Designs · Log in