• Home
  • Recipe Index
    • Recipe Index
    • Breakfast/Brunch
    • Cakes and Puddings
    • Chocolate
    • Cookies and cupcakes
    • Custard and Mousse
    • Gluten Free
    • Ice Cream
    • Mains
    • Other Sweet Treats
    • Snack/Appetizers
    • Soups and Salads
    • Tarts and Pies
    • Vegetarian
  • About
  • Cookbook
  • Portfolio
  • Store
  • Press
  • Work with Me

Sugar et al

Because Life is a blend of flavours...

Easy Pistachio Cake

1|06|2024

This Easy Pistachio Cake is the most amazing thing I baked recently. With a hint of rosewater and a beautiful crumb, owing to the addition of nutty pistachios and almonds, this cake is a keeper. What makes it even more special is that there is no flour or butter in the cake. Just a handful of ingredients and a simple process to put together a treat as lovely as this one.
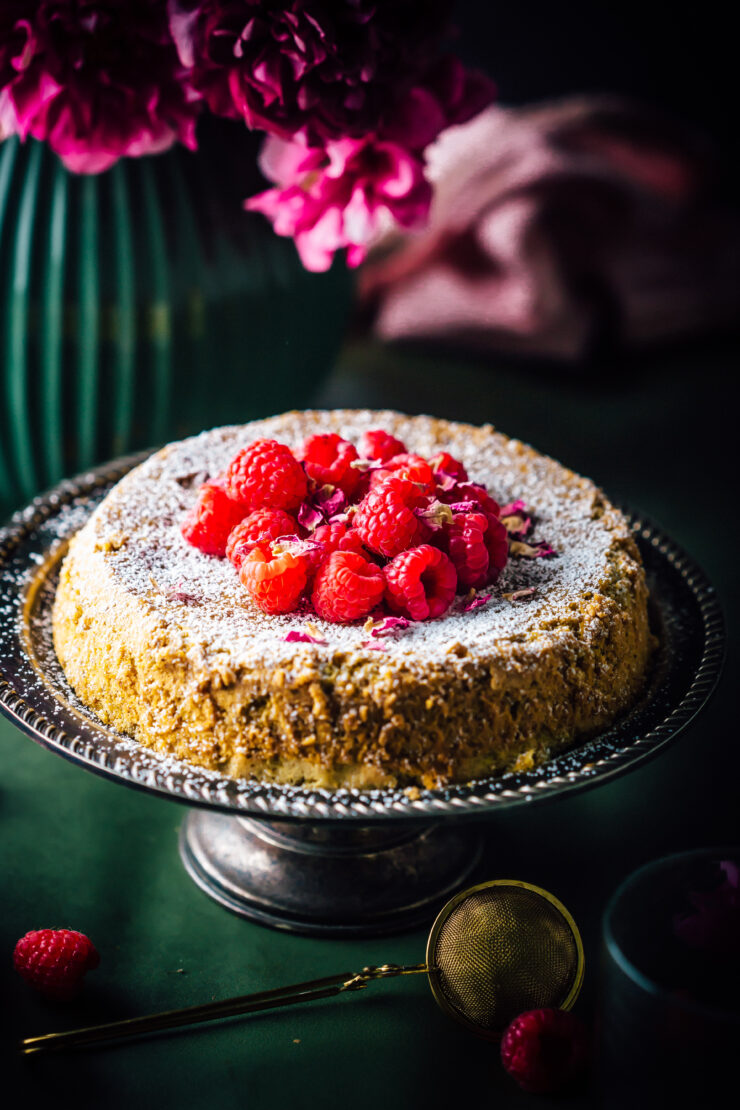
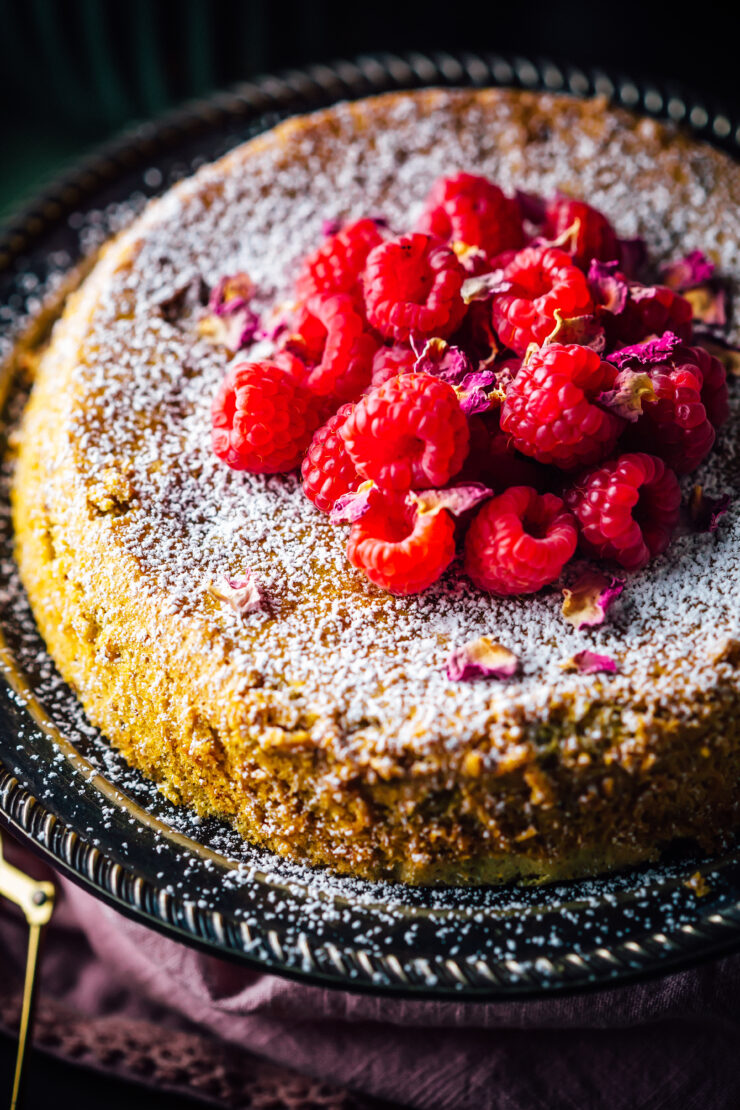
Easy Pistachio Cake

I have used a mix of pistachio and almond meal as I didn’t have enough pistachios at home. But you are free to be as creative as you like. You could make it with just the pistachios or sub any nut of your choice. Initially I wanted to decorate the cake with a ricotta frosting. Upon baking I felt that this Easy Pistachio cake was pure joy and needed nothing else. A dusting of icing sugar and some fresh raspberries to serve, that’s it!
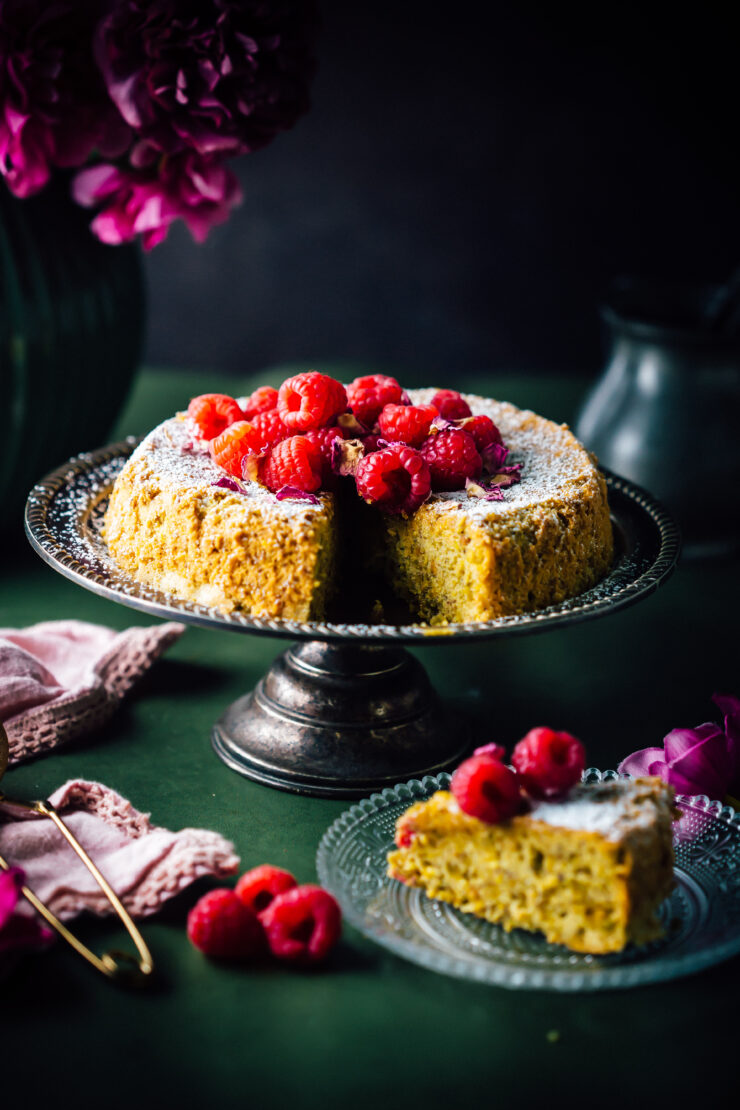
Easy Pistachio Cake

If you love the combination of pistachio and rose, you will love my Rosewater Semolina Cake
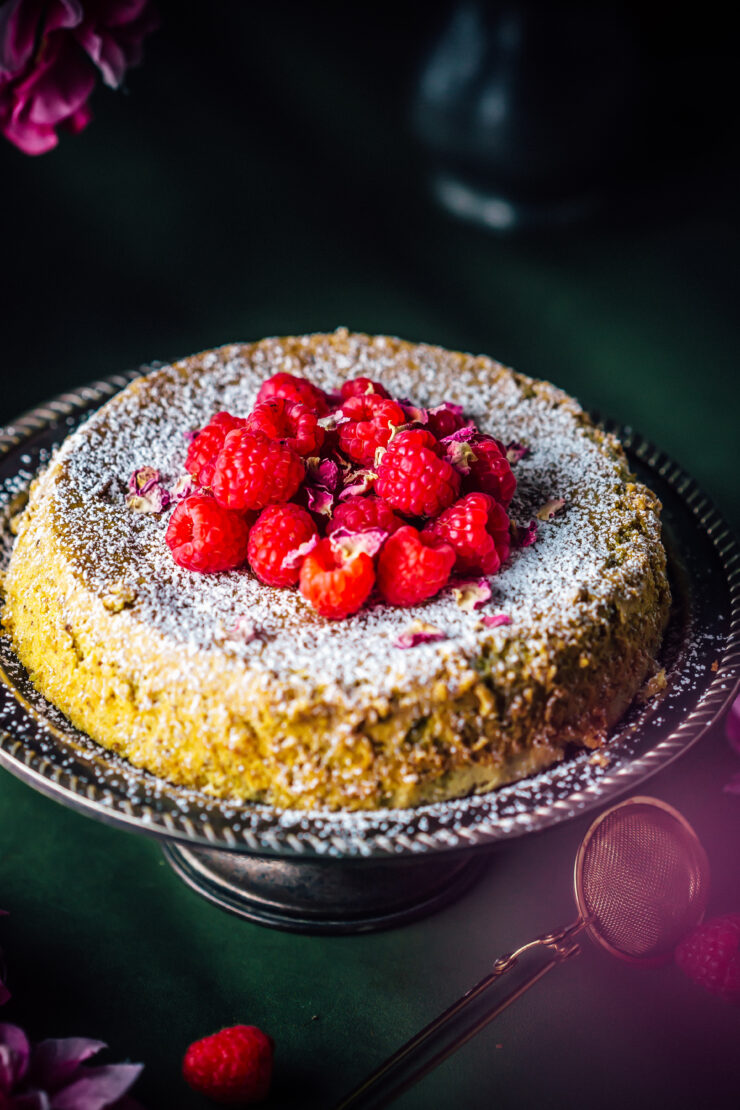
Easy Pistachio Cake
Makes a 7 inch round cake

4 eggs, yolks and whites separated
3/4 cup granulated/castor sugar
1 tbsp rosewater (or use vanilla essence)
1 cup raw, shelled, pistachios, ground to a coarse meal
1/2 cup almond meal
icing sugar, to dust
fresh raspberries, to serve

Preheat oven to 180 degrees C (350 degrees F). Grease the base and sides of a 7 inch round pan and line the base with baking paper.

In a medium bowl, place the egg yolks, sugar and rosewater together and whisk until combined. Add in the pistachio meal and almond meal and mix well. Mixture will be quite thick.

In a separate bowl, beat the egg whites until stiff peaks. Fold in the egg yolk mixture, a little at a time, trying not to deflate the egg whites until the entire mixture has been combined.

Pour into the prepared cake pan. Bake for 35-40 minutes or until cooked through (do not overcook or it will turn out dry) a skewer inserted in the middle of the cake, comes out clean.
Remove from the oven, leave aside for 10 minutes. Run a blunt knife around the edges to loosen the cake. Gently turn onto a wire rack to cool completely. Once cooled to room temperature, dust with icing sugar.
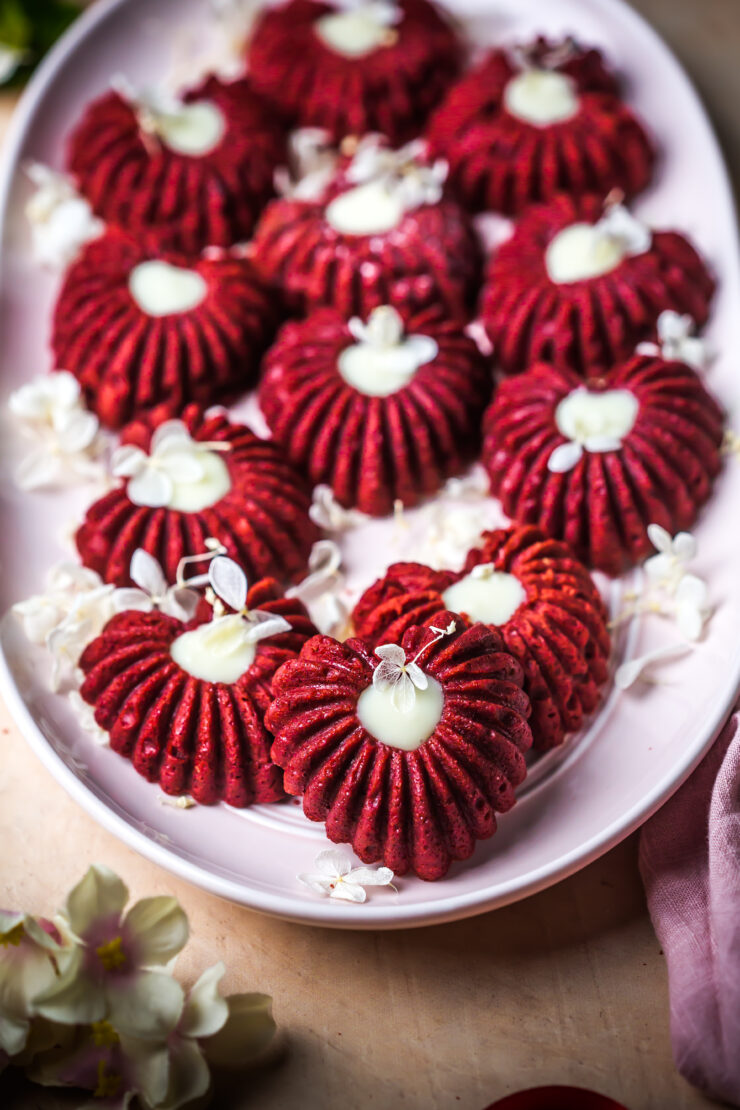
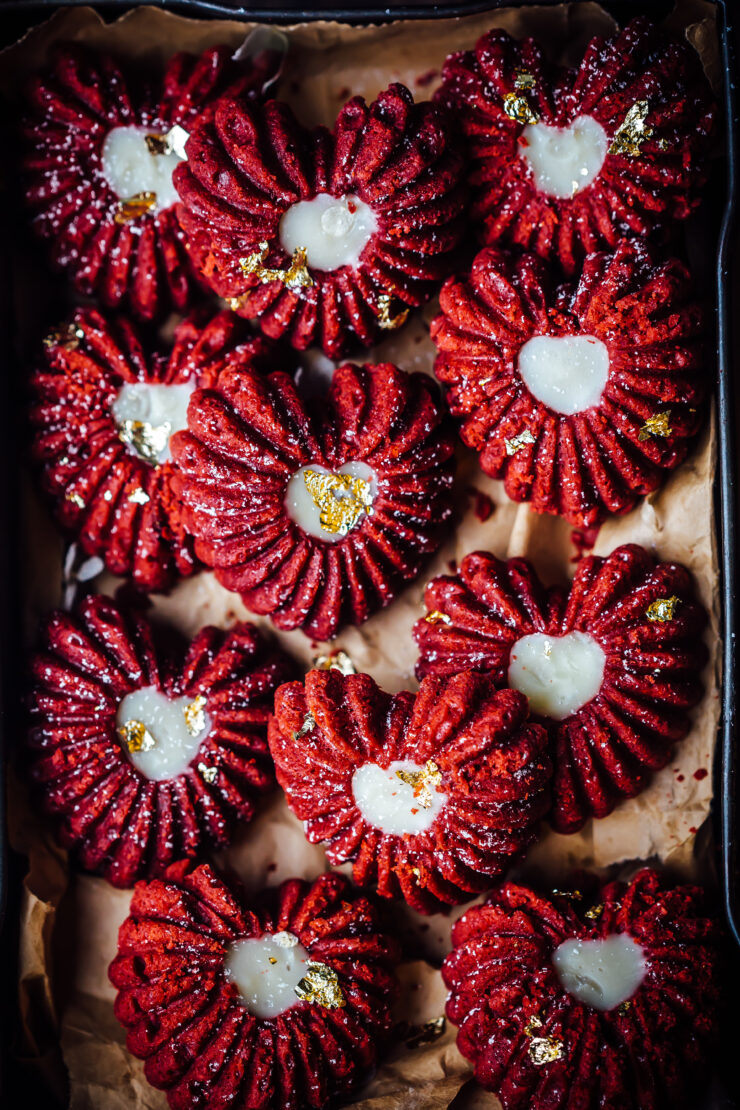
Red Velvet Cookies

11|05|2024

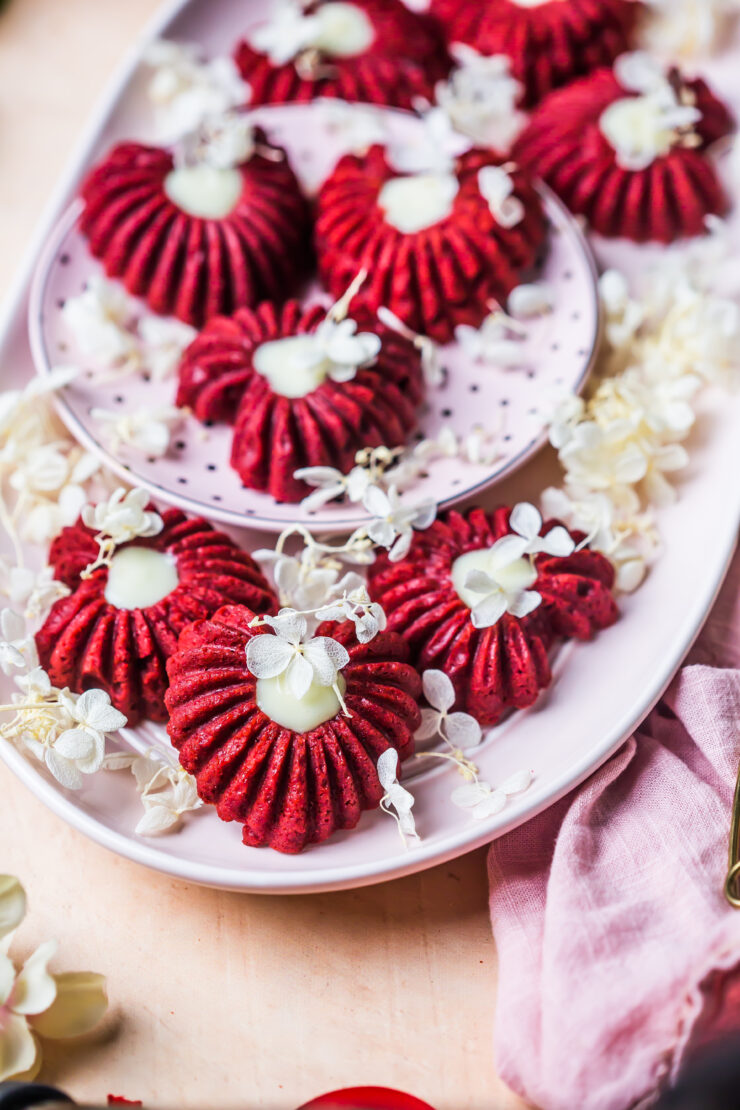
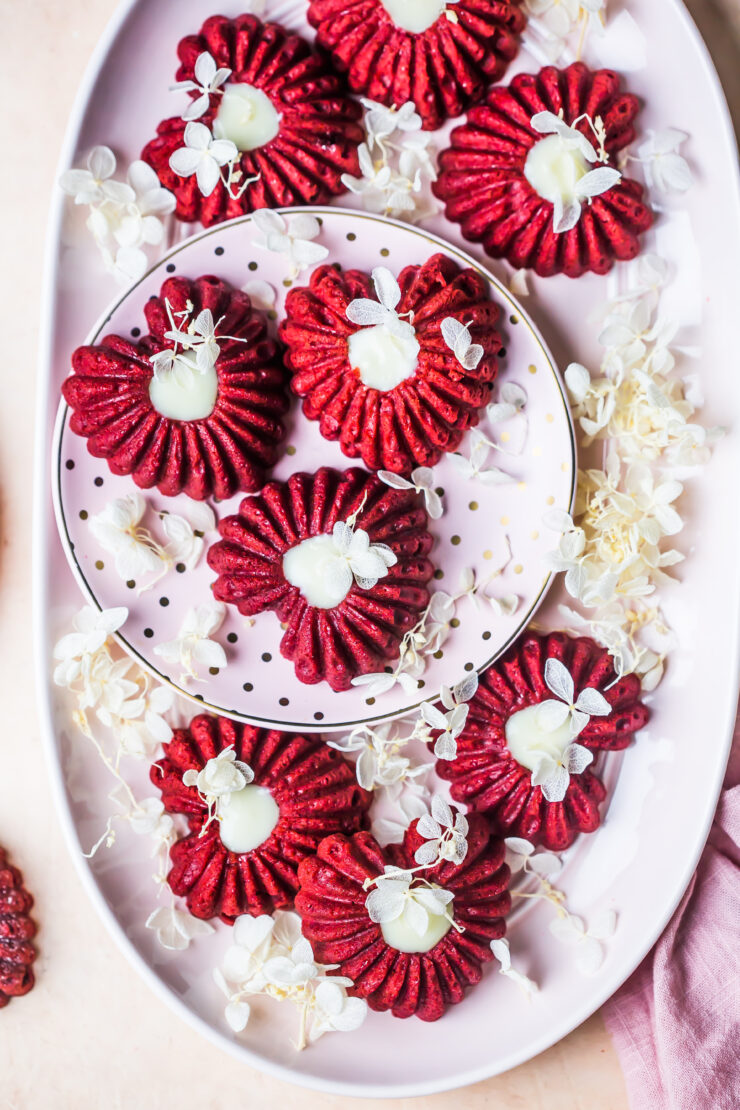
Who doesn’t love Red Velvet Cookies? There are two occasions when i bake them every year. During Chrismas and during Mother’s day. There is something so elegant about the colour and the taste of a red velvet dessert. It has an underlying taste of chocolate but not very chocolate-y.

Red Velvet Cookies

Because these were meant for Mother’s day I baked them in my favourite molds for the beautiful heart shape. Link here. The centres have been filled with a delicious cream cheese icing that is quick to make.

I hope you enjoy a beautiful Mother’s day with your family. If your Mum is far away like mine, make sure you tell her how much you miss her and definitely bake something for her when you see her, What I would do to share my treats with my Mum right now! Someday soon.

Red Velvet Cookies

Looking for more heart shaped treats, try these Blueberry Friands/Financiaers.

Red Velvet Cookies
Makes 12 heart shaped cookies

1 cup (125 g )plain flour
2 tbsp (11 g) Dutch processed cocoa powder
1/4 tsp baking powder
1/4 tsp baking soda
1/2 cup (114 g) unsalted butter
1/2 cup (100 g) castor/granulated sugar
1 egg
1 tsp vanilla extract
red gel food paste
gold leaf, to decorate
icing sugar, to dus (optional)

Cream Cheese Icing
1 tbsp cream cheese, room temperature
3 tbsp icing/confectioner’s sugar
1/2 tsp vanilla essence
1 tsp milk

Method : Preheat oven to 180 degrees C (350 degrees F). Lightly grease a sillione mold and set aside.

In a medium bowl place the flour, cocoa, baking powder and baking soda tpgether and mix. In a large bowl, beat the butter and sugar together until light and fluffy (about 2 mins). Add the egg and vanilla and beat until combined.

Fold in the flour until just combined. Mix in the food colour until the desired shade is achieved. If the dough appears too sticky to work with, place in the fridge for 15-20 mins. Otherwise, working quickly, scoop out 1 tbsp of dough and place in the hole of each mold. using the bag of a spoon or with your fingers, press the dough lightly to take the shape of the mold. You don’t have to be perfect as the dough will rise and spread slightly to fit the molds.

Bake for 15-20 miuntes or cookies are lightly browned and feel firm to touch. Remove from oven, allow to cool in mold for 2 minutes, then gently turn the mold tray over for the cookies to slide out. Allow to cool completely before icing.

To make the cream cheese icing, place all the ingredients in a small bowl. Stir well to combine.

To assemble, pipe or fill using a small spoon, the cream cheese icing in the centre of the cookie. Allow to set until firm, about 30 mins. Decorate with gold leaf. Dust with icing sugar if desired.

Vanilla and Raspberry Madeleines

6|05|2024

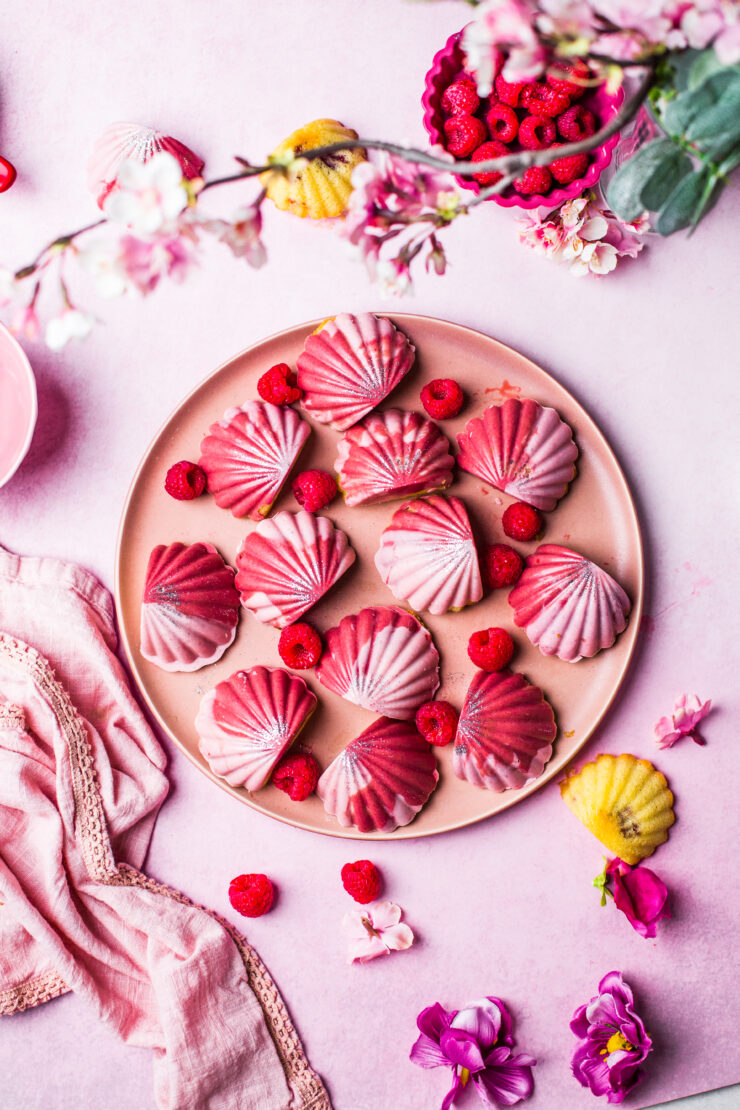
I like baking treats and gifting edible things for my Mum friends on Mother’s day. I beileve it is my favourite holiday, partly because I get to celebrate my own Mum and also feel spolit and partly because the nature of treats are dainty, pretty and precious just like Mum. Raspberry madeleines have been on my mind for a while as I wanted to create the beautiful cakes with a filling in them.

Vanilla and Raspberry Madeleines

I used homemade raspberry jam within the raspberry madeleines. I also stuffed a few with fresh raspberries but I think I liked the jam ones better. The two tone effect is simply by placing white chocolate that is colored in two different shades in the hole of the madeleine mold. I used this seashell mold for the design.

I’ve been on a baking spree last week and quite happy with all the cookies and mini cakes I baked up. Stay tuned, I’ll share as many recipes as I can this week.

If you a Madeleine lover like me, check out these Rosewater and Cardamom Madeleines and these Chocolate-Orange ones too.

Vanilla and Raspberry Madeleines

Vanilla and Raspberry Madeleines
Makes 12 -15 madeleienes

3/4 cup (94 g)plain flour
1/4 tsp baking powder
2 eggs
1/2 cup (100 g) caster/granulated sugar
1 tsp vanilla extract
1/2 cup (114 g) unsalted butter, melted and cooled
1/4 cup raspberry jam (home made or store bought)
100 g white chocolate, melted
gel food colours of your choice

Method : Place the flour and baking powder in a medium bowl and mix to combine.

In a large bowl, place the eggs, sugar and vanilla. Using an electric mixer beat until thick, pale and doubled in volume (about 5-6 mins). Batter should fall back in a thick ribbon when beaters are lifted. Fold in the dry ingredients. Gently fold in the butter. Cover the bowl and place in the fridge for 30 mins.

Preheat oven to 200°C. Grease well, a 6 or 12-hole madeleine mold. using a spoon or piping into the mold, place half a tablespoon of batter. Place about 1/2 a tsp of raspberry jam. then cover with more batter until about 2/3rd full. Bake for 10-12 minutes or until golden and cakes spring back when pressed in the centre. Allow to remain in the mold for 1 min, then gently unmold. Place on a wire rack to cool completely.

Divide white chocolate between two small bowls. Colour the chocolate into your choice of colours using gel paste food colours. I’ve used pink and red for these madeleines. Pipe (or spoon) small amounts of melted chocolate into a clean mold. You could use both colours together for this effect (place pink on one side and red on the other) .Place madeleines over the chocolate, allowing some of it to come up the sides. Place mold tray in the fridge to set. Repeat with remaining madeleines. Madeleines should easily come off the molds. Using a brush, decorate madeleines with glitter or gold leaf. Store in an air tight container in room temperature.

Biscoff Thumbprint Cookies

1|05|2024

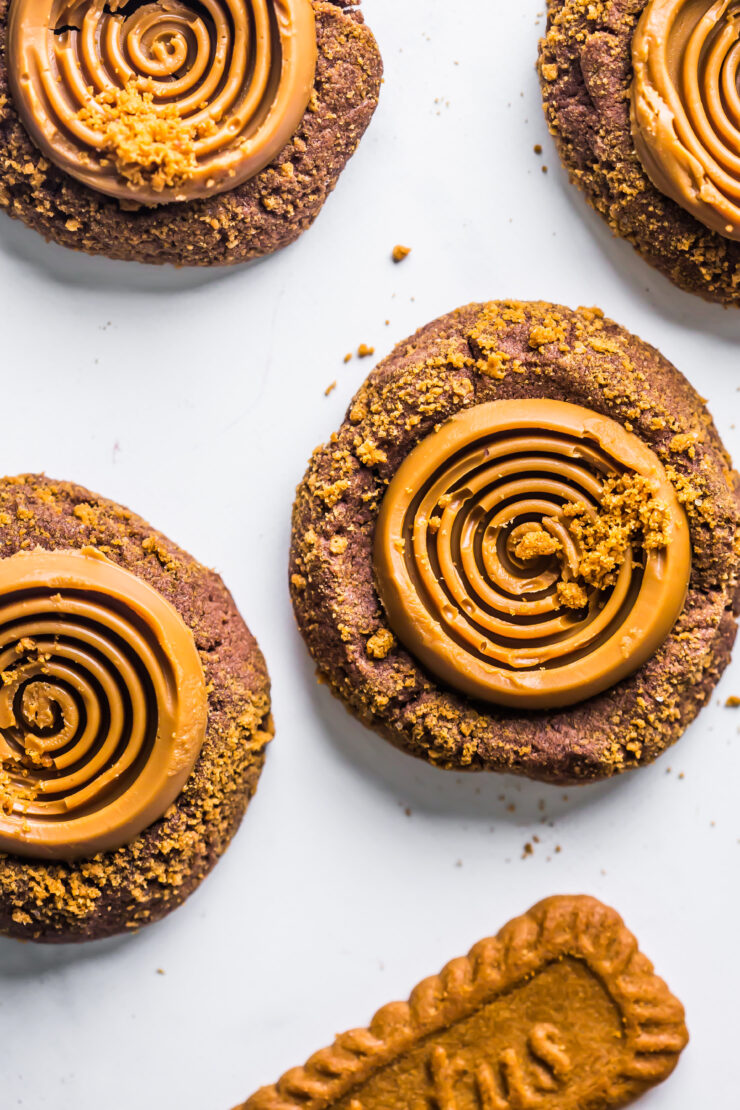
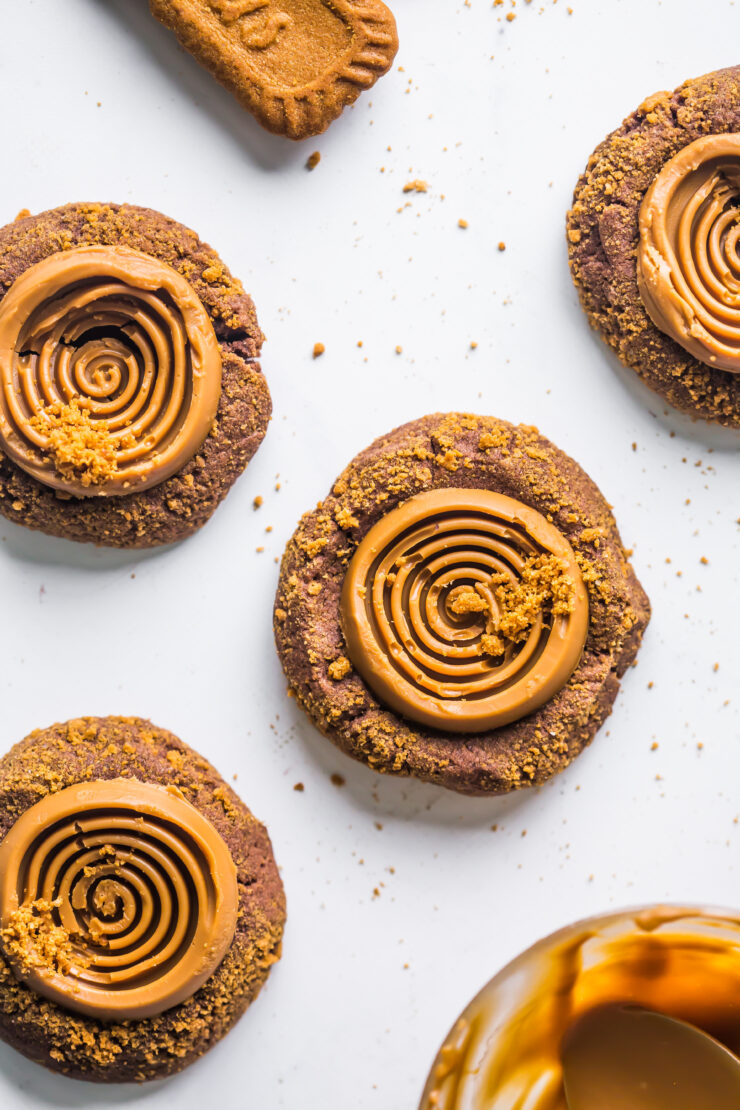
Biscoff thumbprint cookies are the next level treats in cookie universe. Biscoff on it’s own is a cookie spread, then imagine putting that spread on a chocolate cookie base that is rolled in Biscoff biscuits. All I can say is that this triple dose of cookie magic is every bit amazing.

Biscoff Thumbprint Cookies

I used a spiral mold for the Biscoff centres. All it requires is to pour melted Biscoff spread in the mold and freeze them. If you don’t have a mold, you can just add melted Biscoff in the indentation once the cookies are baked. My favourite part has to be the chocolatey edges covered in Biscoff crumbs and gooey middle. If you’re wondering if freezing Biscoff spread and allowing it to come to room temperature will alter the taste or texture, the answer is no. It doesn’t affect anything and the shape is retained very well.
I’m excited to try a Nutella version of these in the near future.

Biscoff Thumbprint Cookies

Love Biscoff? You’ll love this No bake Biscoff cheesecake

Biscoff Thumbprint Cookies
Yields 12-15 cookies

1/2 cup Biscoff cookie spread, melted in short bursts of 5 seconds in the microwave
1 cup (125 g) plain flour less 1 tbsp
1 tbsp (8 g) corn starch
1/4 cup ( 22 g) Dutch processed cocoa powder
a pinch salt 
1/2 cup (100 g) castor/granulated sugar
1/2 cup (114 g) unsalted butter, room temperature
1 medium egg
1 tsp vanilla extract
5-6 Biscoff biscuits, crushed

Pour melted Biscoff spread in molds. Freeze until firm (about 30-40 mins).

In a medium bowl, whisk together flour, corn starch, cocoa powder and salt.
In a large bowl, beat the butter and sugar together until combined (do not over mix). Add the egg and vanilla. Beat to combine. Add the flour mixture and beat at low speed (approx 30 seconds).

The dough is ready when you’re able to easily form balls with your hands. If it’s too sticky or dfficult to handle, place in the fridge for 15-20 mins.

Preheat oven to 180 degrees C (350 degrres F), Line two baking sheets with baking paper. Place the crushed biscoff biscuits on a shallow plate. Scoop out about 1.5 tbsp of dough into balls, roll in crushed Biscoff biscuits and place on lined trays. Using a spoon, make an indentation in the middle.
Bake for 12-15 mins or until slightly golden and set.

Remove from oven. While cookies are still warm, use the spoon again to make a wide hole in the middle, in the size of the biscoff spirals. Be careful not to go all the way through. Allow cookies to cool down, Unmold the frozen Biscoff spirals and place in the space created for them. The biscoff will stick to the cookies as it keep thawing to room temperature.

Chocolate and Orange Madeleines

28|04|2024

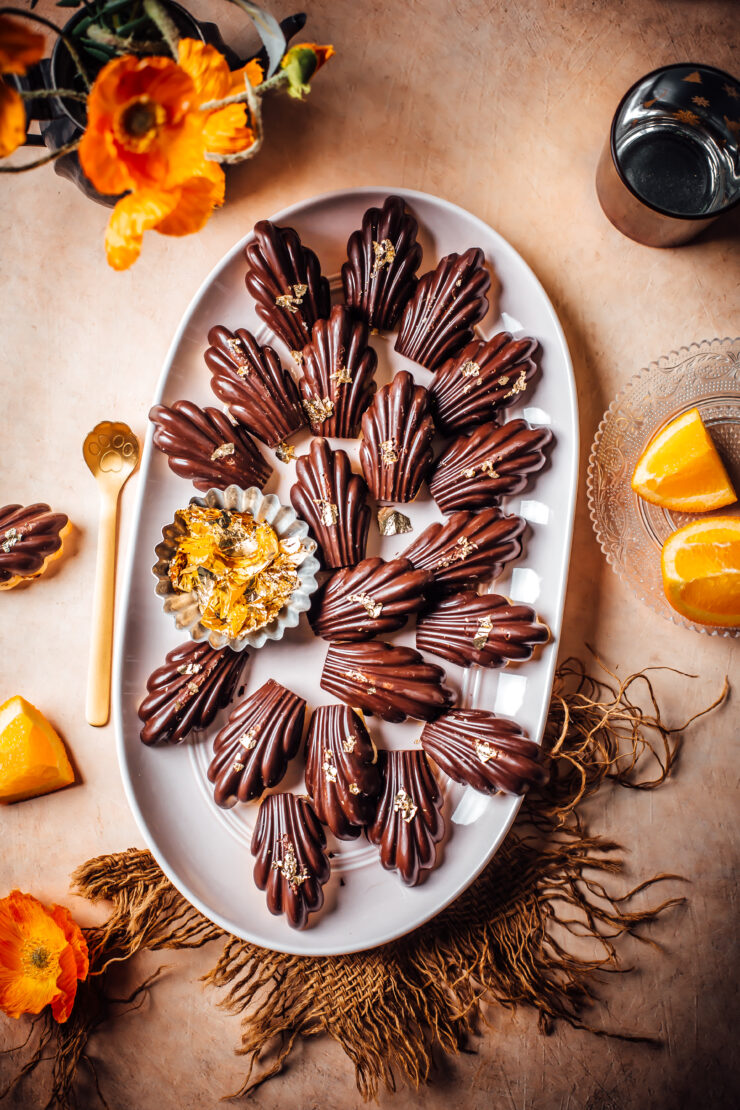
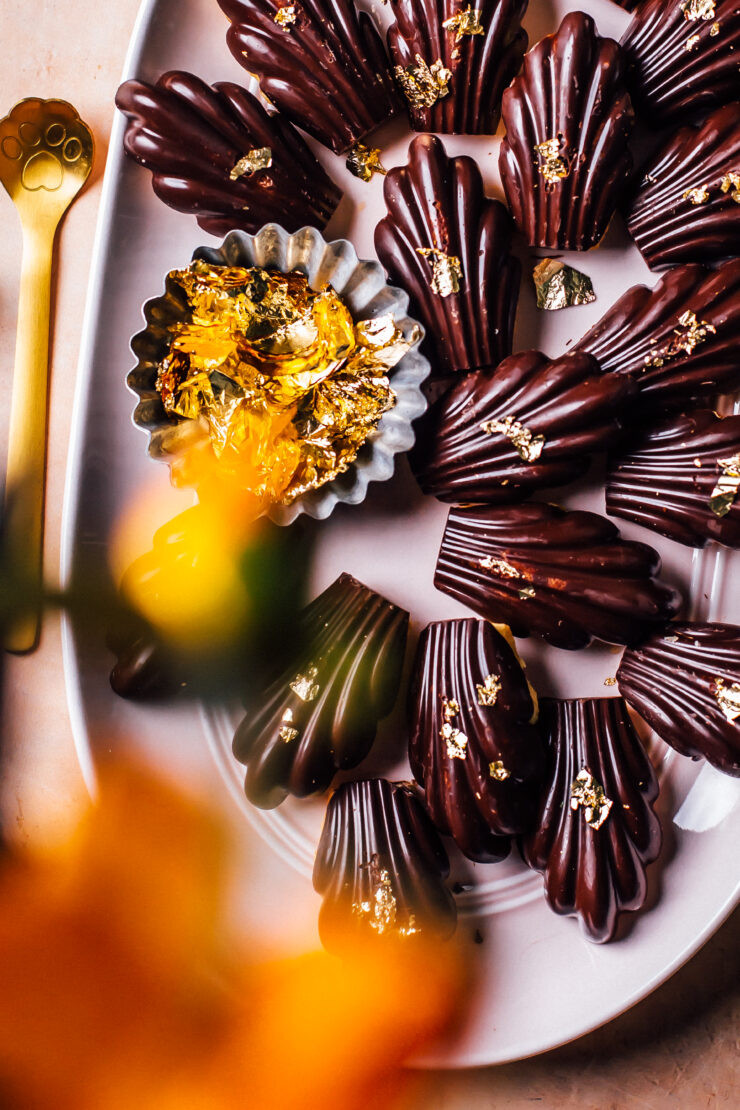
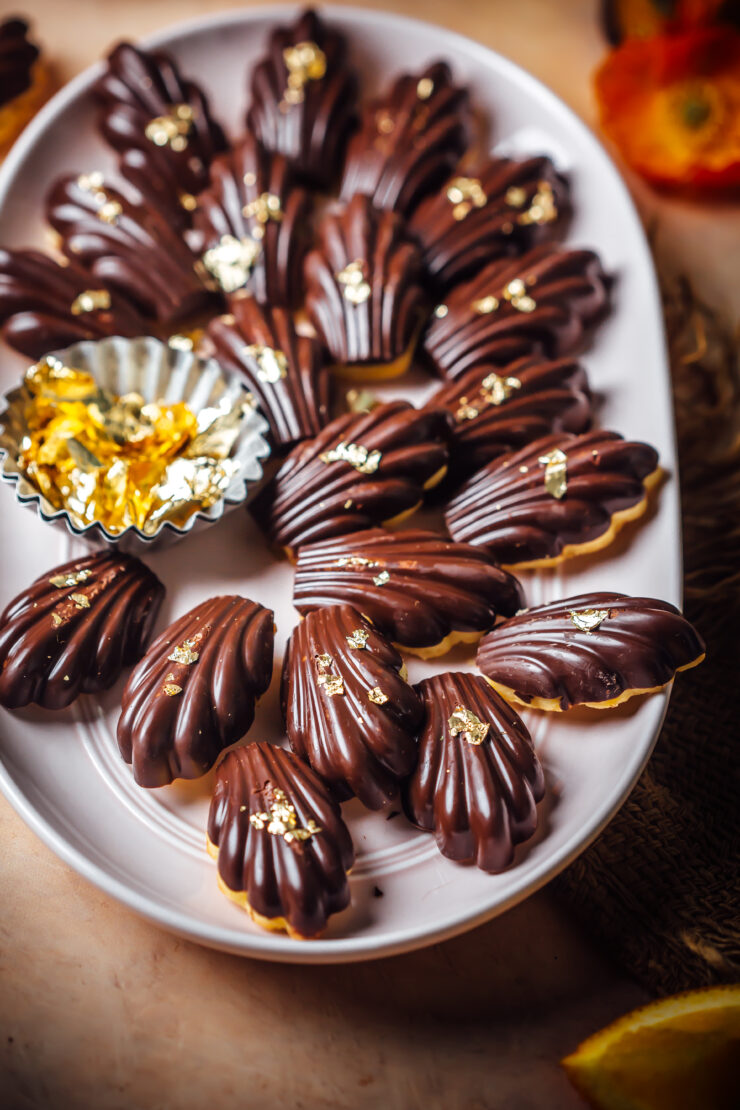
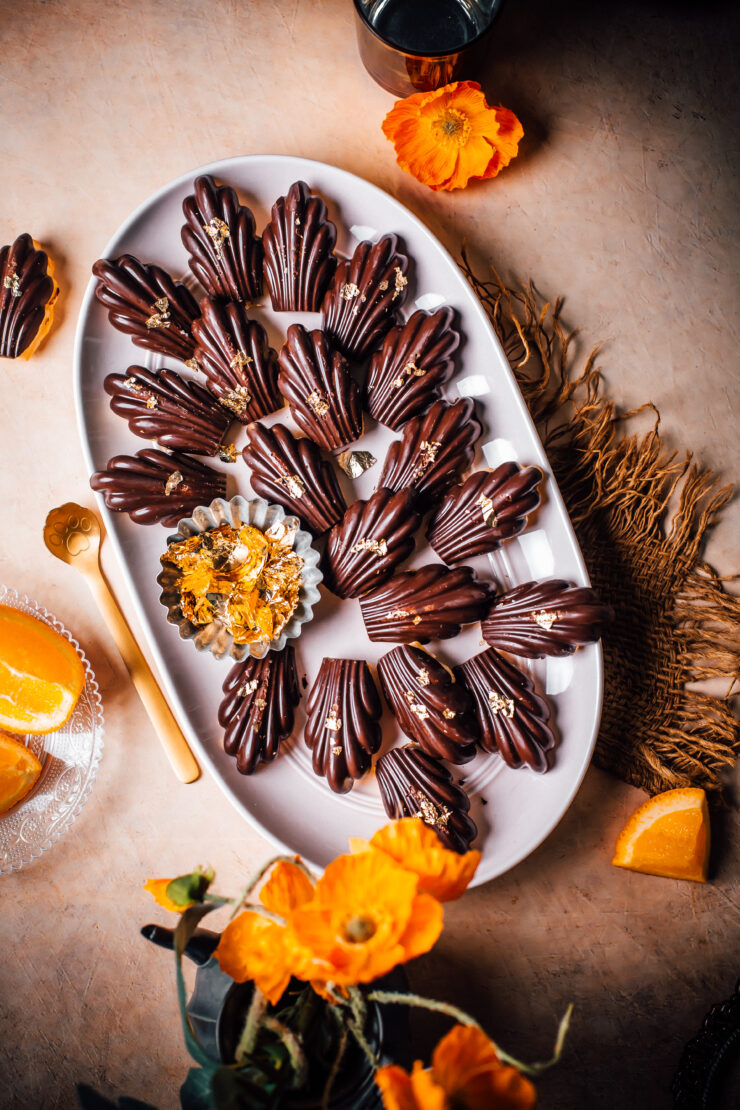
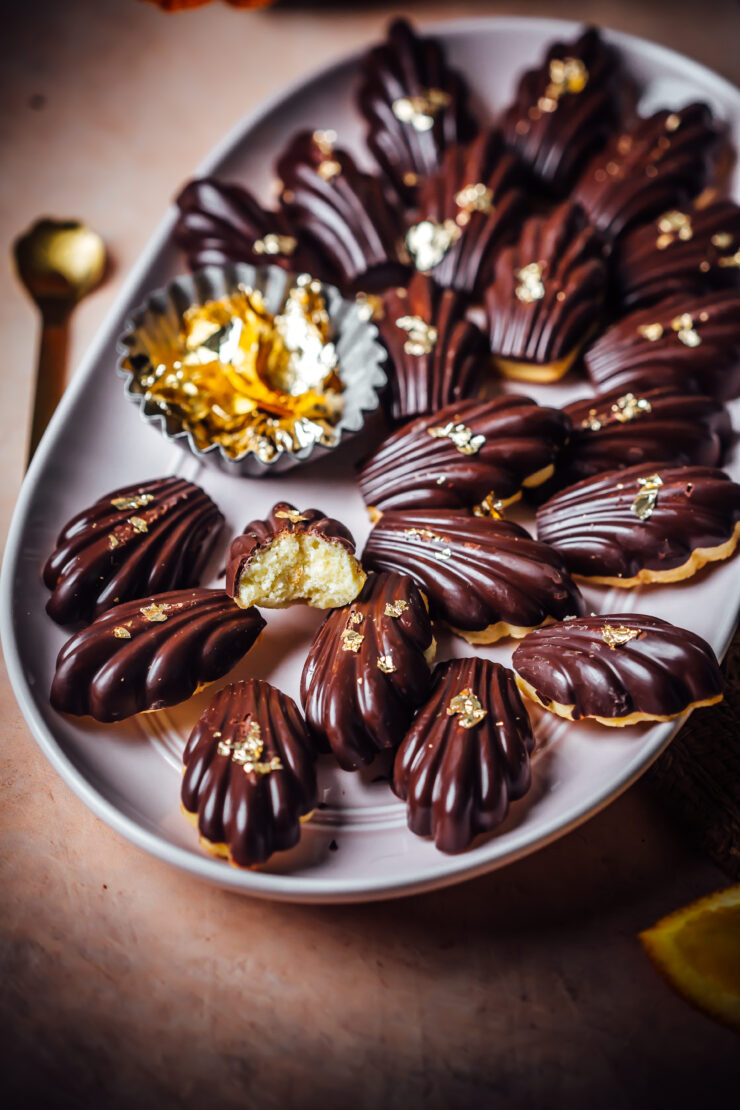
Who doesn’t love a madeleine? These light airy french treats, fall between a cake and a cookie. There are many madeleine recipes on my blog but the classic combination of Chocolate and Orange Madeleines has to be my favourite.

Chocolate and Orange Madeleines

Bursting with the flavour of zesty oranges while you bite into a crisp dark chocolate exterior, these chocolate and orange madeleines are not only perfect for afternoon tea or a ladies gathering, but they’re the most beautiful edible gifts that can be created in your kitchen.

As always, I’ve used sillicone molds for the beautiful shape. They are so easy to make and unmold. They don’t stick to the mold and fall out easily with a smooth shine on the surface.

If you’re a fan of madeleines dont forget to check out my Homemade madeleines with rosewater and cardamom.

Chocolate and Orange Madeleines

Chocolate and Orange Madeleines
Makes 12 -15 madeleienes

3/4 cup (94 g )plain flour
1/4 tsp baking powder
2 eggs
1/2 cup (100 g) caster sugar
1 tbsp freshly grated orange zest
1/2 cup (114 g) unsalted butter, melted and cooled
100 g dark chocolate, melted
gold leaf, for decoration

Method : Place the flour and baking powder in a medium bowl and mix to combine.

In a large bowl, place the eggs, sugar and orange zest. Using an electric mixer beat until thick, pale and doubled in volume (about 5-6 mins). Batter should fall back in a thick ribbon when beaters are lifted. Fold in the dry ingredients. Gently fold in the butter. Cover the bowl and place in the fridge for 30 mins.

Preheat oven to 200°C. Grease well, a 6 or 12-hole madeleine mold. Place tablespoons of mixture into prepared madeleine moulds. Bake for 10-12 minutes or until golden and cakes spring back when pressed in the centre. Allow to remain in the mold for 1 min, then gently unmold. Place on a wire rack to cool completely.

Pipe (or spoon) small amount of melted dark chocolate into a clean mold. Place madeleines over the chocolate, allowing some of it to come up the sides. Place mold tray in the fridge to set. Repeat with remaining madeleines. Madeleines should easily come off the molds. Using a brush, decorate madeleines with gold leaf. Store in an air tight container in room temperature.

Blueberry Friands/Financiers

19|04|2024

Blueberrry Friands

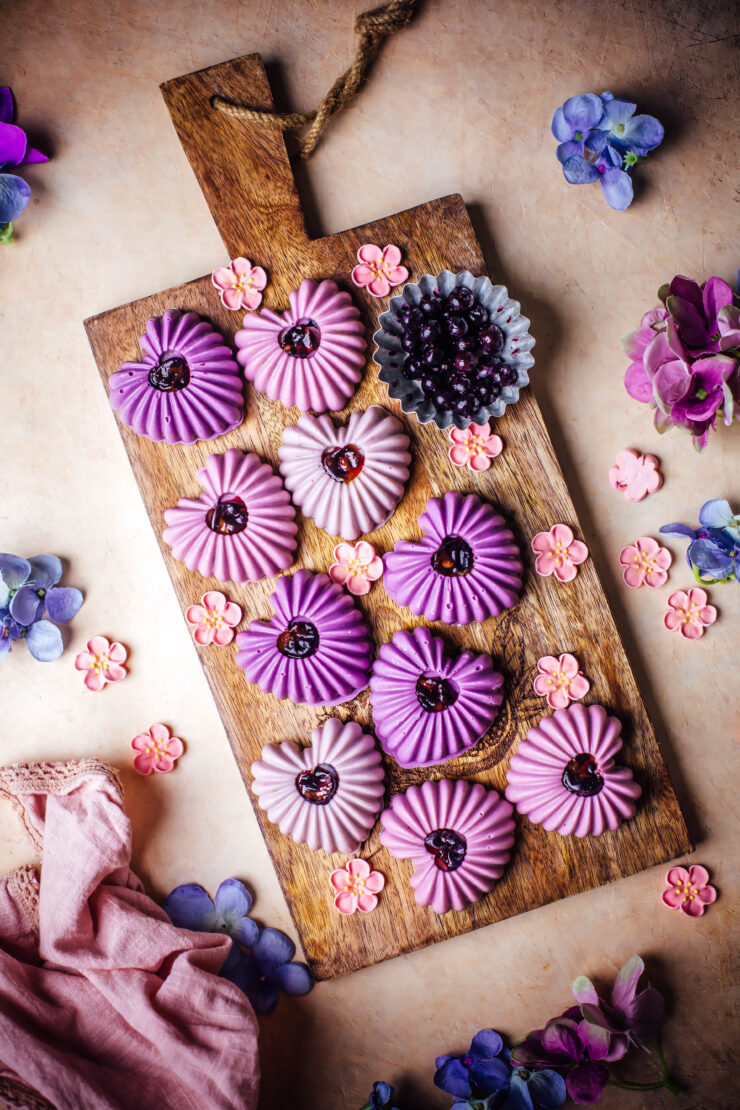
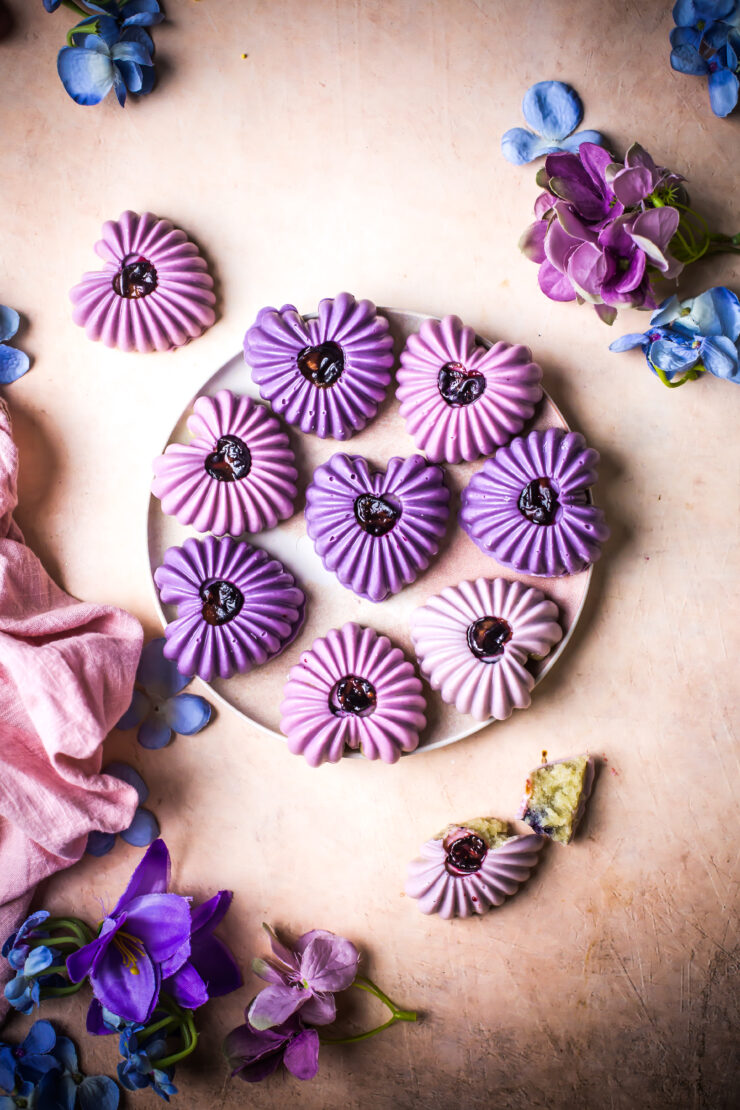
Egg whites are never wasted at my place because the quickest, easist and most delicious way to use them up is my baking friands. Blueberry friands are by far the favourite at home. If you’ve never heard of friands, they are nothing but french financiers. They are popularly known as friands in Australia. There are barely any cafes that don’t sell them in Sydney and I love having them with my coffee.

Blueberrry Friands

These blueberry friands obviously don’t look like the traditional ones that are larger in size. These are coated in white chocolate and made in special molds to create the heart shapes. You could bake them in a muffin pan too and leave out the coating if you’re after a tea cake sort of thing. The coating of course elevates the apperance and gives it a fancy high-tea look. The white chocolate layer also complements the juicy blueberries within the friands.

If you like Blueberry desserts don’t forget to checkout this Skinny Blueberry Cheesecake or these Mini Blueberry Cakes

Blueberry Friands/Financiers
Makes 10-12 small friands

3 egg whites, lightly beaten with a fork
100 g butter, melted and cooled
3/4 cup pure icing sugar
1/4 cup plain flour
75 g almond meal
1 tsp vanilla essence
1/2 cup fresh or frozen blueberries

150 g white chocolate melts, melted
purple gel food colouring

Preheat oven to 180 degrees C.  Lightly grease a madeleine mold (I used a 6 capacity mold) or any other sillicone mold.  Place the egg whites, butter, sugar, flour, almond meal, vanilla in a large bowl and beat until combined (about 1-2 mins). Fold in the blueberries.

Spoon batter into molds until 2/3rd full. Bake for 20-25 mins or until friands are golden and cooked through. Remove from oven, allow to rest for 2 mins, then gently unmold onto a wire rack to cool completely.

Colour the white chocolate with 1 drop of purple food colouring. Pipe (or spoon) small amount of melted white chocolate into a 3-4 holes of a clean mold, gently press friands over the chocolate. Refrigerate for 30 mins or until set.
Add 2 more drops of food colour to the chocolate for a darker shade (if starting to solidify, warm to melt again). Repeat with remaining friands. Friands should easily come off the molds. Store in an air tight container in room temperature.

Banana Malteser Cake

11|04|2024

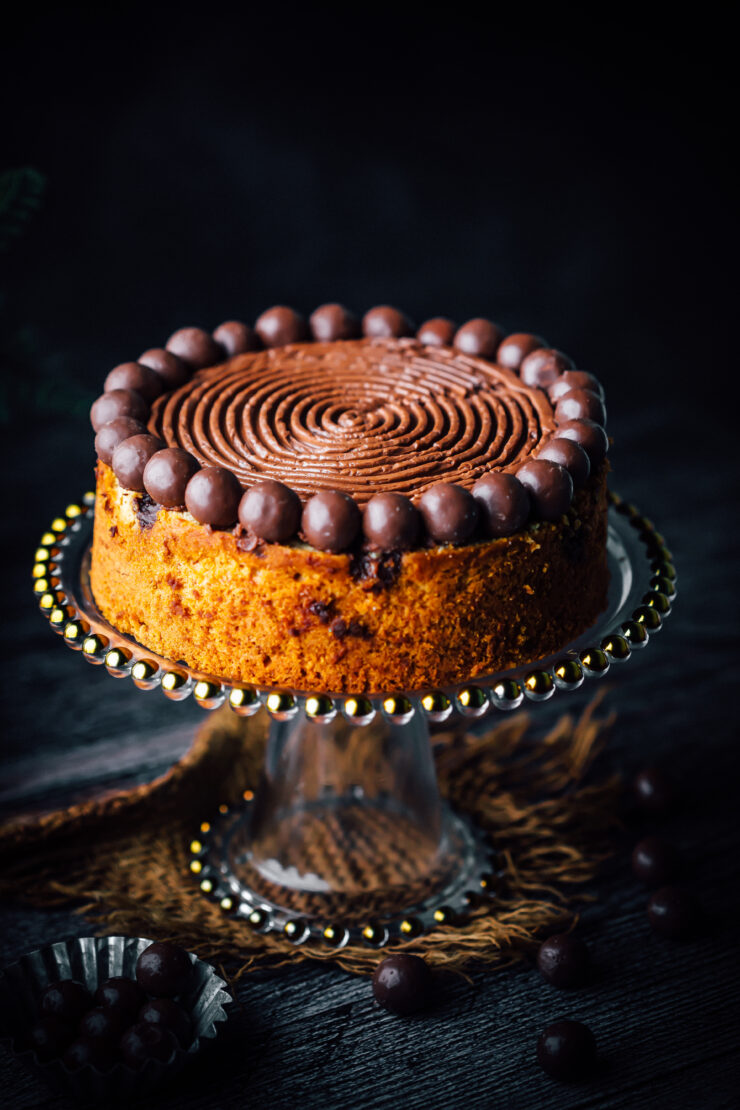
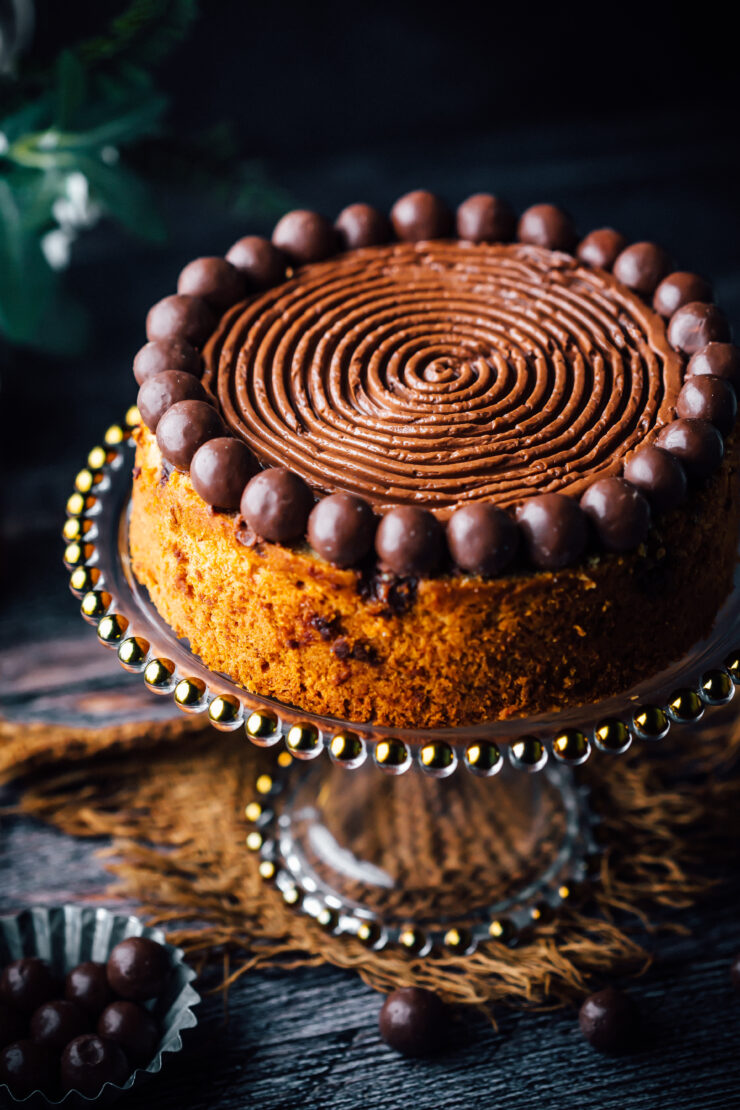
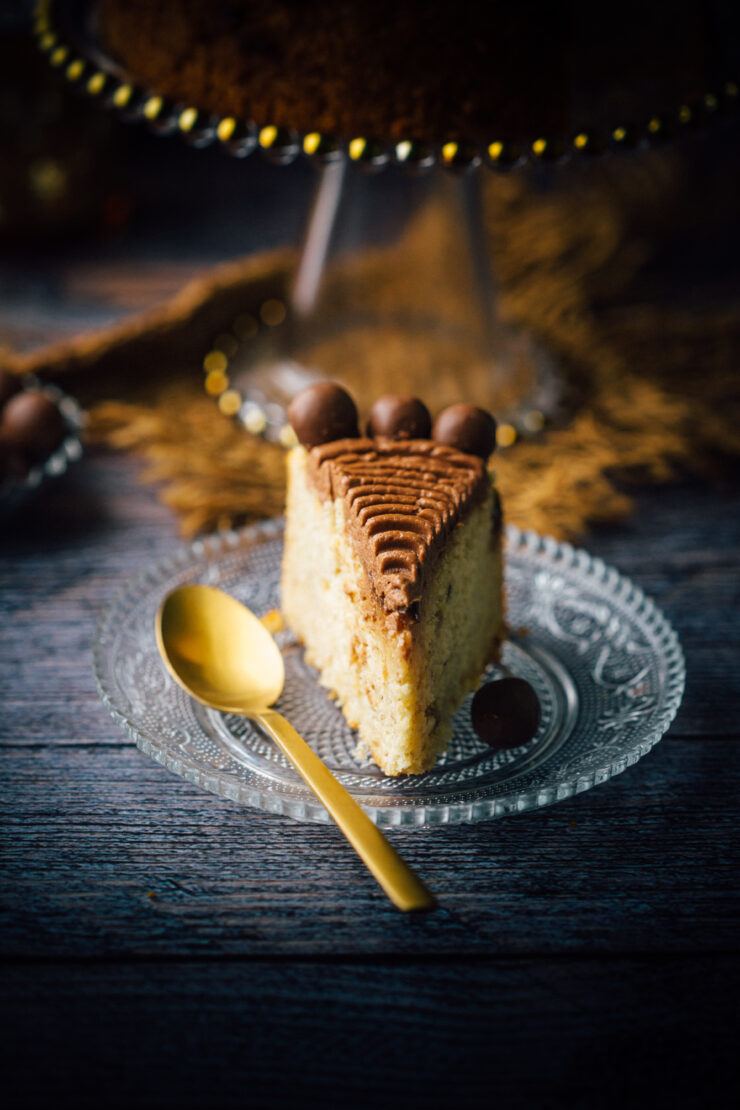
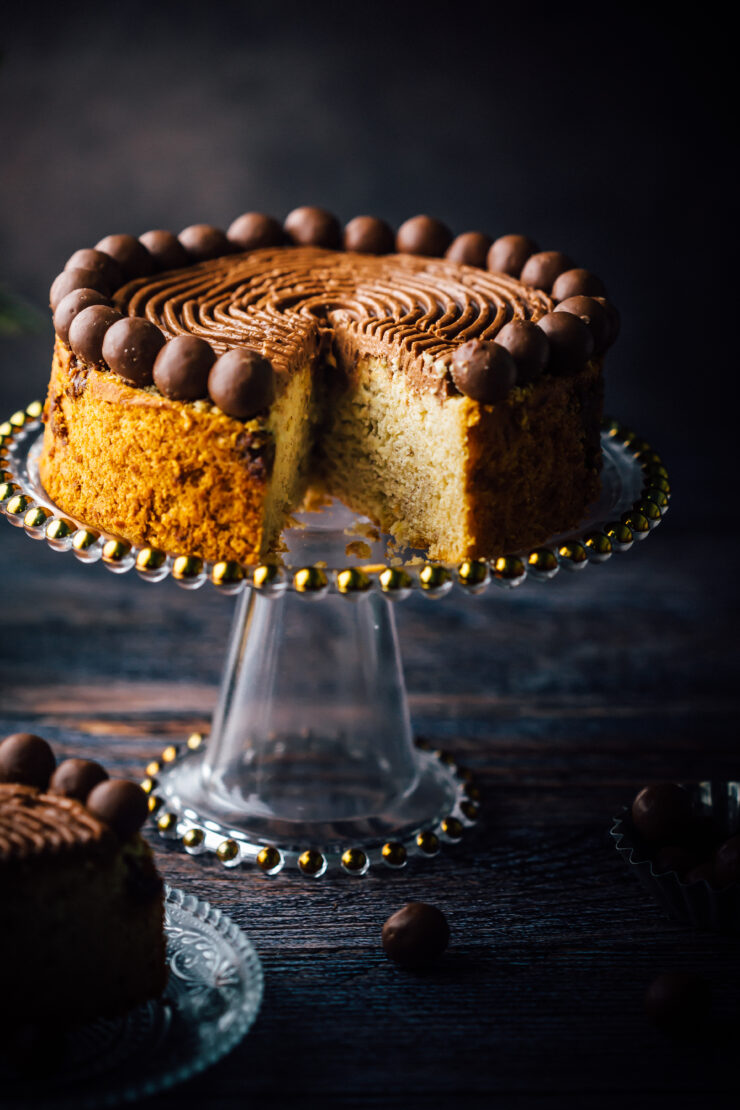
I’ve had a glut of bananas at home this season. Everyone was snacking on peaches and berries and the poor bananas were neglected. I have enough banana recipes on the blog so I wasn’t intending on creating another one but this was so good. Who knew just the addition of crunchy maltesers in this Banana Malteser Cake would make such a delicious difference.

Banana Malteser Cake

The other reason why I made the Banana Malteser Cake was to experiment making beautiful buttercream designs using silicone molds. If you follow me on Instagram, you may have noticed that I’ve tried this method on cupcakes and they turned out amazing. It was time to try out a design on a cake. all I did was spread buttercream in the mold, smoothen the surface with an offset spatuala, then freeze the mold with the buttercream in it. Once set, all you do is you unmold and place it on the cake. in case you’re wondering, it doesn’t alter the taste or texture and retains the shape really well.
You are of course, free to pipe buttercream as an alternative or decorate as you like.

Banana Malteser Cake

I used this mold for the design on the top.

If you like banana cakes you’ll love this Easy Banana Cake with Tahini Frosting

Banana Malteser Cake
Makes a 7 inch round cake

Banana Cake
114 g (1/2 cup) unsalted butter, softened
3/4 cup (165g) brown sugar
2 Eggs
2 large (or 3 medium about 125 ml) mashed over ripe bananas
2 cups (250 g) self-raising flour
1/2 cup (120ml/g) sour cream
1/2 cup malteser chocolates, extra for decoration

Cocoa buttercream
114 g (1/2 cup) unsalted butter, softened
11/2 cups (180 g) icing/powdered sugar
2 tbsp (10 g) cocoa powder (preferable Dutch processed)
1 tbsp milk (30 ml), more if required
1 tsp vanilla essence

Preheat the oven to 350°F (177°C). Grease the base and sides of an 7-inch (18-cm) round pan with 3-inch (8-cm) height and line the base with baking paper.

In a large bowl, beat the butter and brown sugar until pale and fluffy. Add the eggs one at a time, beating well after each addition. Add the banana and beat until just combined. Gently, fold in the flour and sour cream. Fold in the malteser chocolates

Pour the batter into the prepared pan. Bake for 45-55 minutes or until a skewer inserted into the middle of the cake comes out clean.

Remove the cake from the oven. Leave it aside for 5 minutes, then carefully turn it onto a wire rack.

Make the buttercream : Using an electric mixer or a hand mixer beat the butter until pale and fluffy. Add the sugar, a little at a time beating well until fully incorporated. Add the cocoa powder, vanilla and milk and beat again until no white streaks appear and buttercream is fluffy. If it is too thick, add another tbsp of milk to lighten up.

Assemble : While the cake is cooling, spread buttercream onto a turbullion mold, freeze for 30-45 mins. Unmold and place on cake. Alternatively, you can pipe buttercream directly on to the cake. Decorate the edges with malteser chocolates.

Ferrero Rocher Chocolate Cake

28|03|2024

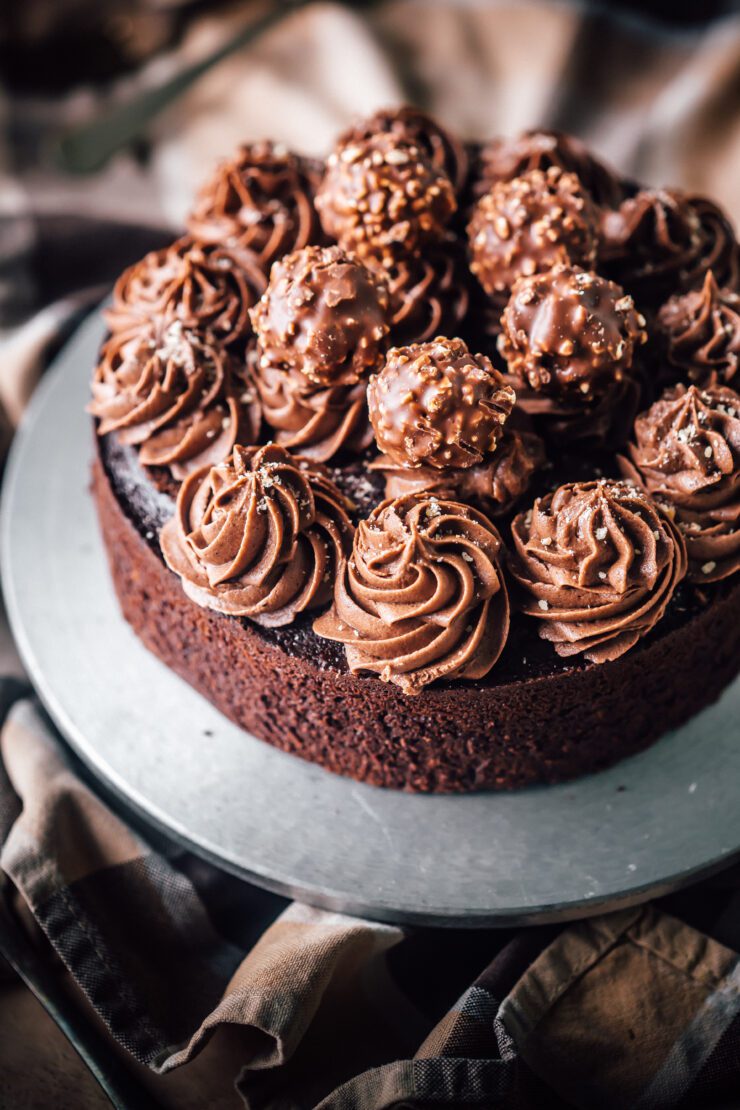
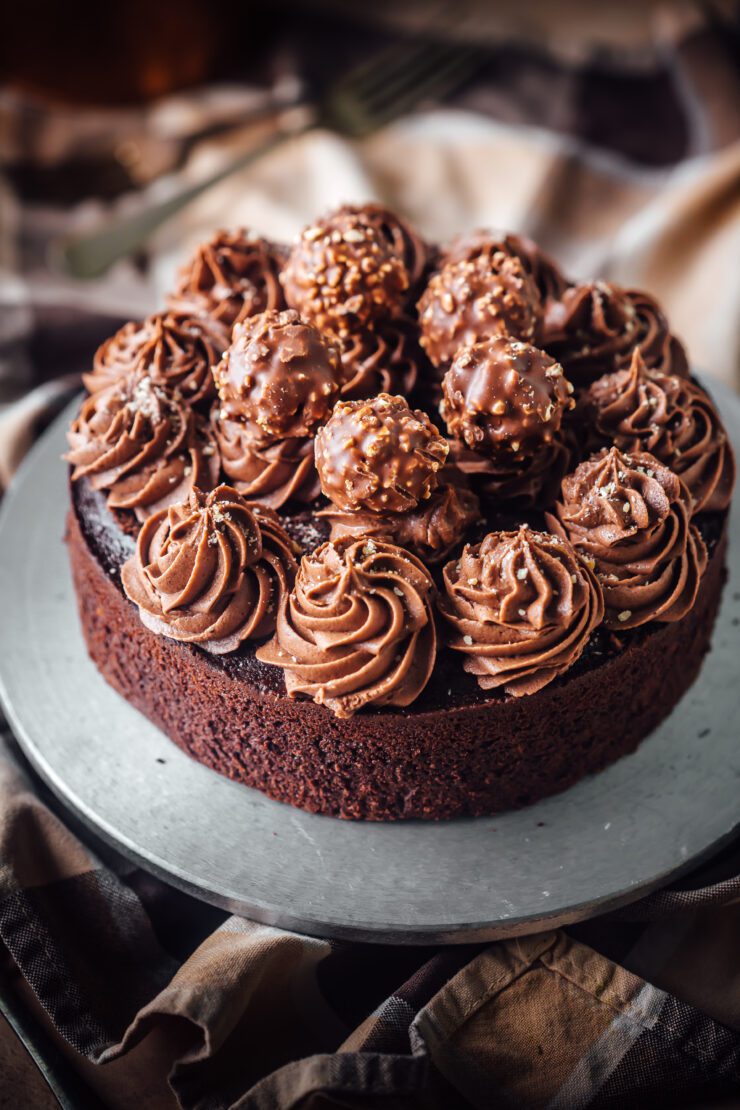
With all the candy and chocolate eating during Easter, I reckon a Ferrero Rocher Chocolate cake is a must. Especially since it’s a no fuss, very simple cake with delicious results. The cake has a chocolate hazelnut flavour which is probably a match made in heaven!

The Nutella frosting is so delightful that you could just keep eating it by the spoonful. It’s a rich cake so a small slice goes a long way.

Fereero Rocher Chcolate Cake

Happy Easter to you and your families. Hope you enjoy the long weekend with amazing food and company.

If you love Ferrero Rocher cakes, dont forget to checout this Ferreo Rocher Mousse Cake

Ferrero Rocher Chocolate Cake
Makes a 7 inch round cake 

Cake
160 g unsalted butter, room temperature
1 and 1/2 cups brown sugar
3/4 cup milk
1/2 cup cocoa powder
1/2 tsp bicarbonate soda
1 cup self-raising flour
1/4 cup hazelnut meal (ground hazelnuts)
3 eggs, lightly whisked
Ferrero Rocher chocolates, to decorate
Extra hazelnut meal, to decorate 

Nutella Frosting 
120 g cream cheese, room temperature 
60 g unsalted butter, room temperature 
1/4 cup Nutella
1/2 tsp vanilla extract 
1 cup icing sugar 
2 tbsp Dutch processed cocoa powder

To make the cake : Preheat oven to 180 degrees C. Grease the base and sides and line the base of a 7inch round baking pan.

In a large saucepan, place the butter, sugar, milk, cocoa powder and bicarbonate soda and cook over low heat until butter has melted and mixture is smooth.

Remove from heat and leave aside for 10 minutes to cool.
Add the flour and hazelnut meal. Mix. Add the eggs and mix till incorporated.
Pour the mixture into the prepared pan. Bake for 69-75 mins or until a skewer inserted in the middle of a cake comes out clean.

Remove from oven. Leave aside for 10 minutes. Run a blunt knife around the sides to loosen the cake, then turn onto a wire rack to cool. Once cool, decorate with Nutella frosting. Sprinkle hazelnut meal. Top with Ferrero Rocher chocolates. 

To make the frosting : Beat the cream cheese and butter until smooth. Add the Nutella and vanilla, beat until just incorporated. Add the sugar and cocoa powder, a little at a time until well combined and frosting is smooth. 

Biscoff and Mini Eggs Cheesecake

11|03|2024

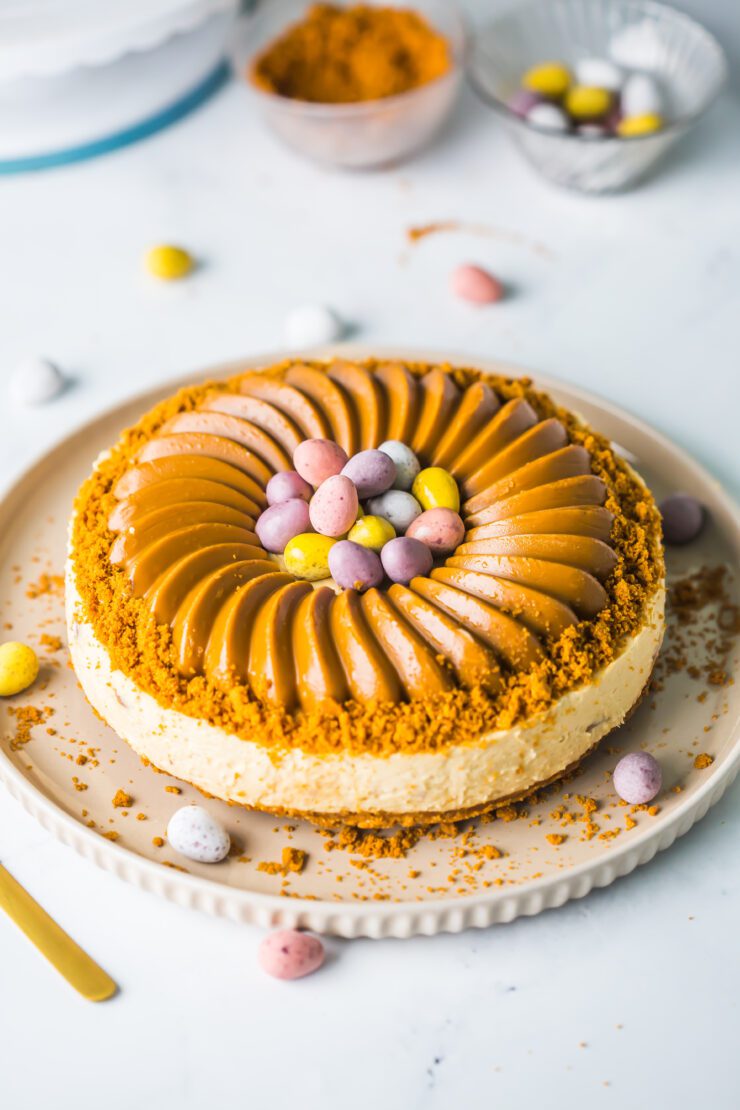
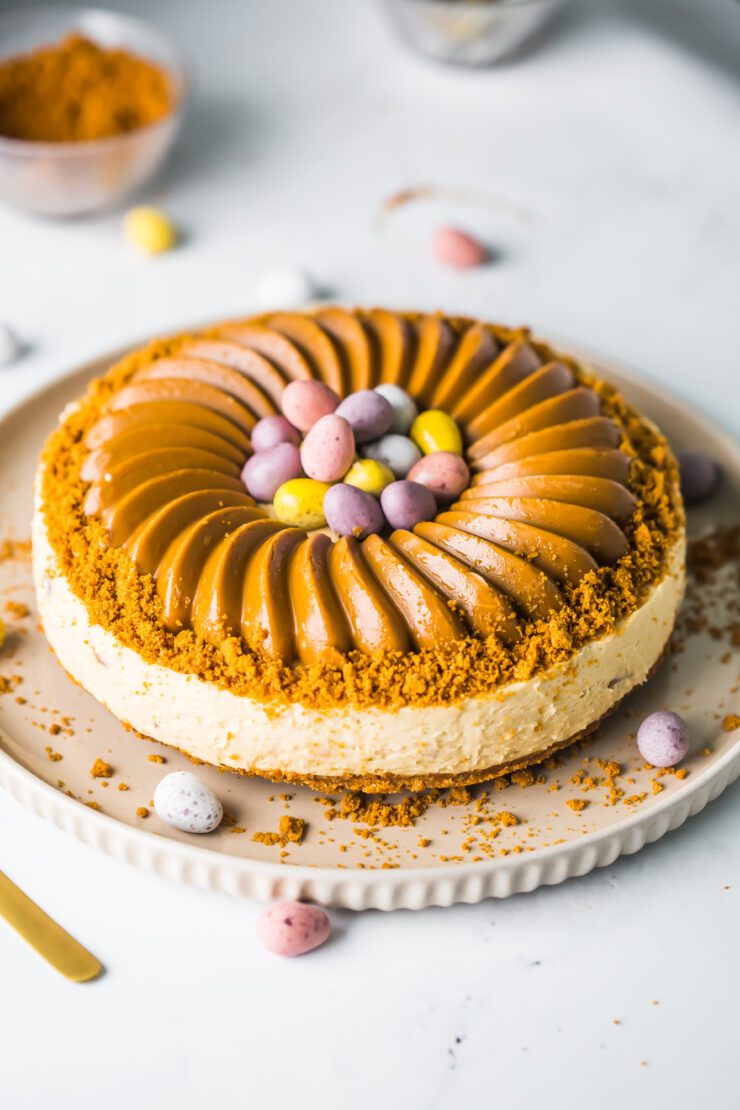
What can be more decadent and festive than a no bake Biscoff topped Mini eggs cheesecake that is really easy to make and just insanely delicious. Easter is just around the corner and a lot of chocolate eggs have made it into my kitchen. I love that the mini eggs are coloured and they add vibrancy to the treats

Biscoff and Mini eggs Cheesecake

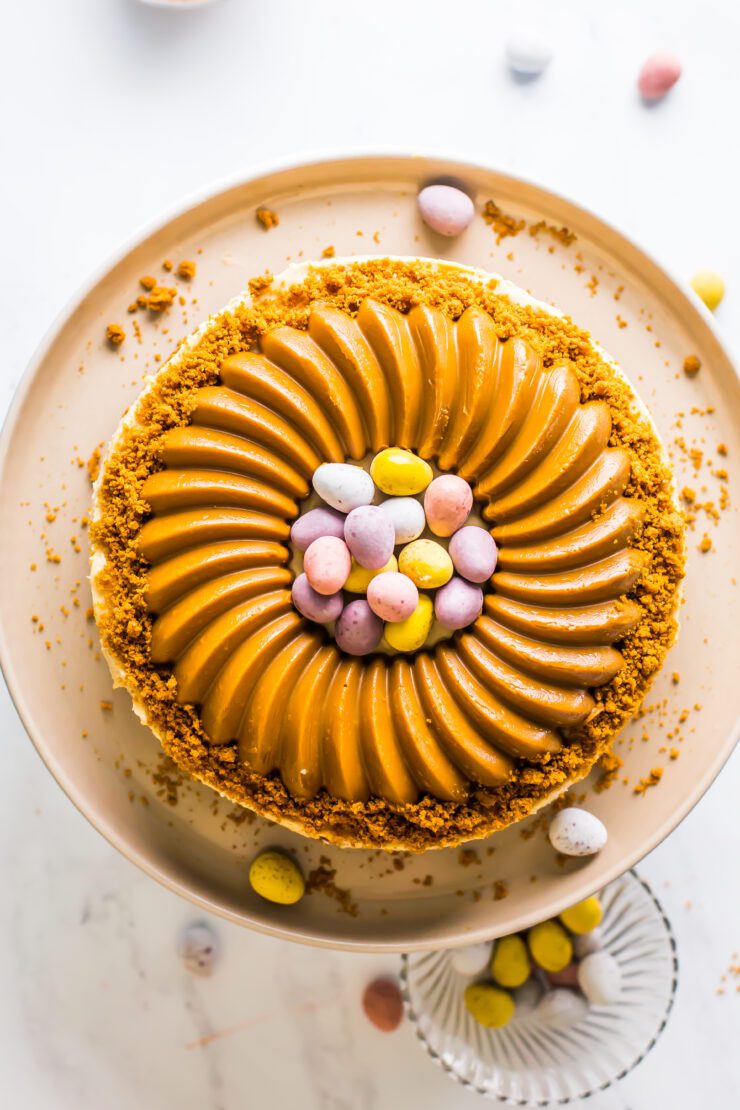
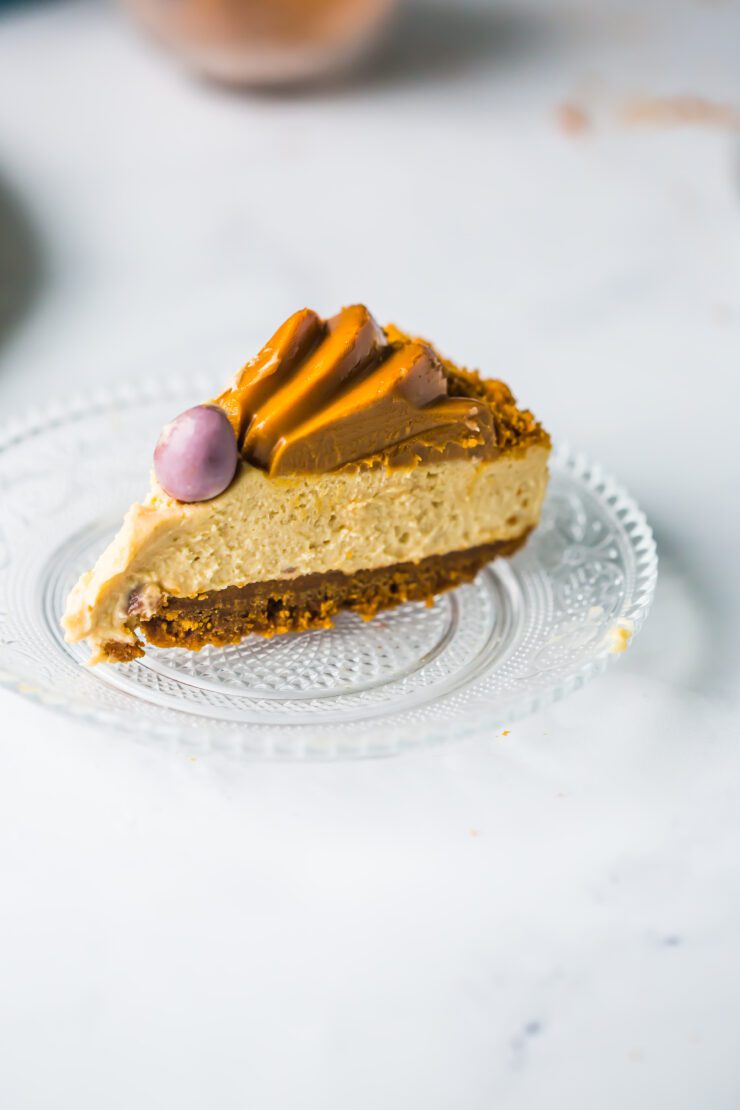
The Biscoff and Mini eggs cheesecake has a Biscoff cookie crust, a smooth Biscoff filling encasing crushed mini eggs and the best part is the topping. Many have asked me how I acheived the beautiful design, but it’s actually just melted Biscoff that has been frozen in a mold. In fact the swirl design mold is a best seller from my store. It adds a touch of style and very eye catching no matter how you use it. You could also use Nutella the same way in the mold. If don’t have a mold, just spread melted Biscoff which is not very hot over the cheesecake and allow it to drip over the sides.

Biscoff and Mini eggs Cheesecake

This is a truly decadent and unforgettable treat, that people are going to thank you for. The fact that there is no gelatine and no eggs makes it available to a wider palate. Now the question is, which one do you love more? Biscoff or Mini eggs?

Biscoff and Mini eggs Cheesecake

Love cheesecake? You will love my Skinny Blueberry Cheesecake or Baked Ricotta cheesecake

Biscoff and Mini Eggs Cheesecake
Makes an 8 inch round cheesecake

200 g Biscoff cookies
75 g unsalted butter, melted
312 g (11 oz) full fat cream cheese, room temperature
2/3 cup castor/granulated sugar
1/2 cup smooth Biscoff spread
1 tsp vanilla extract
1 cup (240 ml) thickened cream, whipped to stiff peaks
1/2 cup Mini eggs, chopped

Topping
1/2 cup Biscoff, melted (more if desired)
Mini eggs, to decorate

Make the cheesecake crust: Grease the base and sides of an 8 inch (20 cm) spring form pan with 3 inch (8 cm) height and line the base with baking paper. Place the spring form pan on a baking sheet for ease of movement, in and out of the fridge.

Place the Biscoff cookies in a food processor and process until they resemble fine crumbs. Remove 3 tbsps of the crumbed cookies and set aside for decorating later.
Add the butter and process briefly until combined. Press the biscuit mixture evenly over the base of the prepared pan. Place the pan in the fridge for 30 minutes to chill.

Make the cheesecake filling : In a large bowl, beat together cream cheese and sugar until smooth. Add Biscoff spread and vanilla and beat until well combined. Fold in the whipped cream, little at a time until no white streaks appear and the filling is smooth. Fold in the mini eggs.

Pour or dollop the cheesecake filling over the prepared crust. Gently tap the pan a few times on a flat surface to ensure the filling is evenly distributed withing the pan. Smoothen the surface with an offset spatula. Place the pan in the fridge for about 5-6 hours, preferable overnight.

Make the Biscoff topping : Pour melted Biscoff into the mold that has been placed on a flat tray for ease of movement. Tap the mold a few times so that the Biscoff is spread nicely into the design of the mold. Freeze for about an hour or until completely set.

Assemble : Unmold the frozen biscoff topping and place on the set cheesecake. Allow the frozen Biscoff to thaw in the fridge for a couple of hours. If desired, decoate the edges of the cheesecake with biscoff crumbs. Top with mini eggs. Slice and enjoy!


Peanut Butter Mini Cheesecakes

5|03|2024

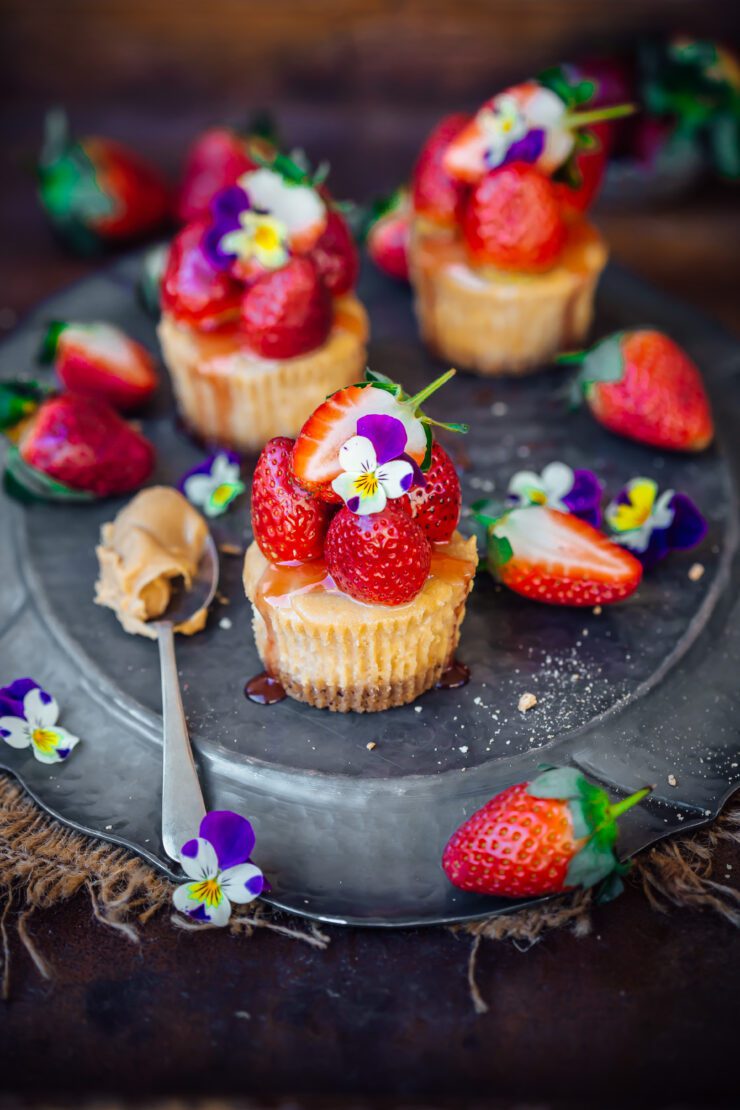
This is an oldie but a goodie that I realised I haven’t shared on the website though it was shared on my Instagram account many times. Since these are baked in a muffin pan, these peanut butter mini cheesecakes are perfectly portioned and very easy to make and serve.

Peanut butter mini cheesecake

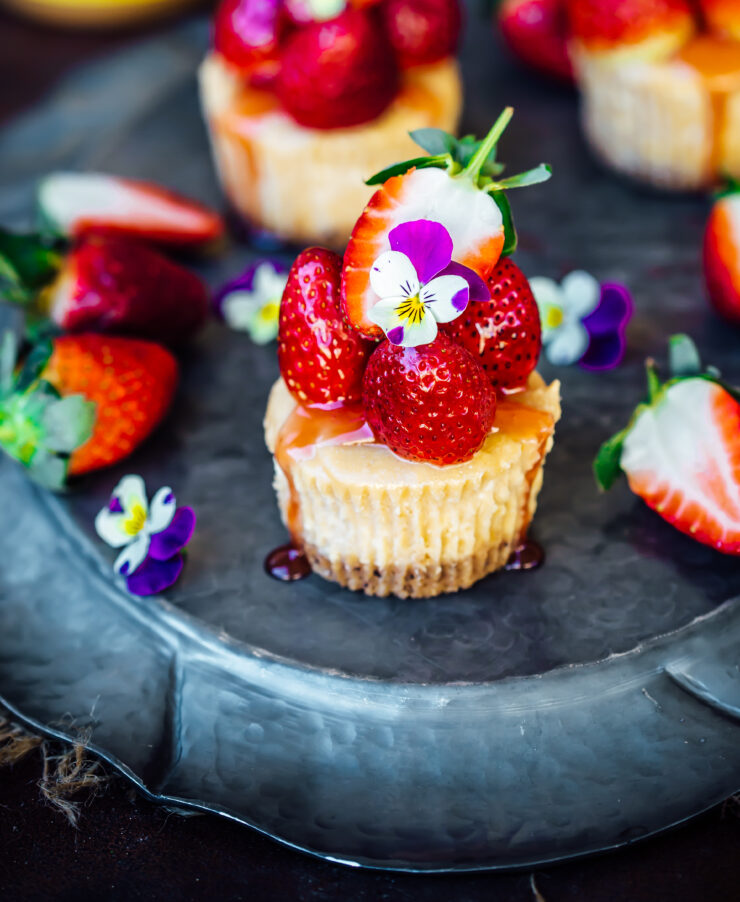
Since the combination of peanut butter and jam is classic as well as irresistible, I topped the cheesecakes with fresh strawberries brushed with melted jam. Overall, it’s melt in your mouth nutty goodness that’s hard to forget.

Other combinations would be, topping the cheesecakes with chocolate ganche or Nutella.
You could also make them in silicone molds directly without using muffin liners.

Peanut butter mini cheesecake

If you love cheesecakes, you may also like my Skinny Blueberry Cheesecake or my Baked Ricotta Cheesecake

Peanut Butter Mini Cheesecakes
Makes 8-10

120g digestive biscuits 
75g unsalted butter, melted
250 g cream cheese 
1/2 cup granulated/castor sugar
2 eggs, room temperature
1/4 cup sour cream
1/2 cup smooth peanut butter
Strawberry jam, melted (optional)

Preheat oven to 160 degrees C. Line a 12 hole muffin pan with muffin liners.

Process biscuits until they resembles fine breadcrumbs. Add melted butter. Mix to combine. 
Divide amongst the muffin liners, pressing the crumbs with the back of a spoon to form a crust. Refrigerate until needed.

With an electric mixer or by hand, beat the cream cheese and sugar till light and fluffy. Add the eggs, beating well after each addition. Fold in the sour cream and peanut butter and stir till blended. 

Pour into muffin liners and bake for 20-25 minutes or until just set (centre is still jiggly). Switch off the oven with the door ajar and let cheesecakes cool to room temperature. Refrigerate for 3-4 hours. 

Top peanut butter mini cheesecakes with melted jam/strawberry syrup and fresh strawberries. Enjoy!

  • « Previous Page
  • 1
  • 2
  • 3
  • 4
  • 5
  • …
  • 45
  • Next Page »
Hey Sugar
Cake
Link to my Facebook Page
Link to my Instagram Page
Link to my Pinterest Page
Link to my Mail Page
Subscribe to this site
Fresh Awards
2019 Aus mumpreneur
2019 aus mumpreneur
Mumbrella

Copyright © 2026 · Sugar Et Al · Designed by Smitten Blog Designs · Log in