• Home
  • Recipe Index
    • Recipe Index
    • Breakfast/Brunch
    • Cakes and Puddings
    • Chocolate
    • Cookies and cupcakes
    • Custard and Mousse
    • Gluten Free
    • Ice Cream
    • Mains
    • Other Sweet Treats
    • Snack/Appetizers
    • Soups and Salads
    • Tarts and Pies
    • Vegetarian
  • About
  • Cookbook
  • Portfolio
  • Store
  • Press
  • Work with Me

Sugar et al

Because Life is a blend of flavours...

Spiced Orange Almond Cake

18|12|2013

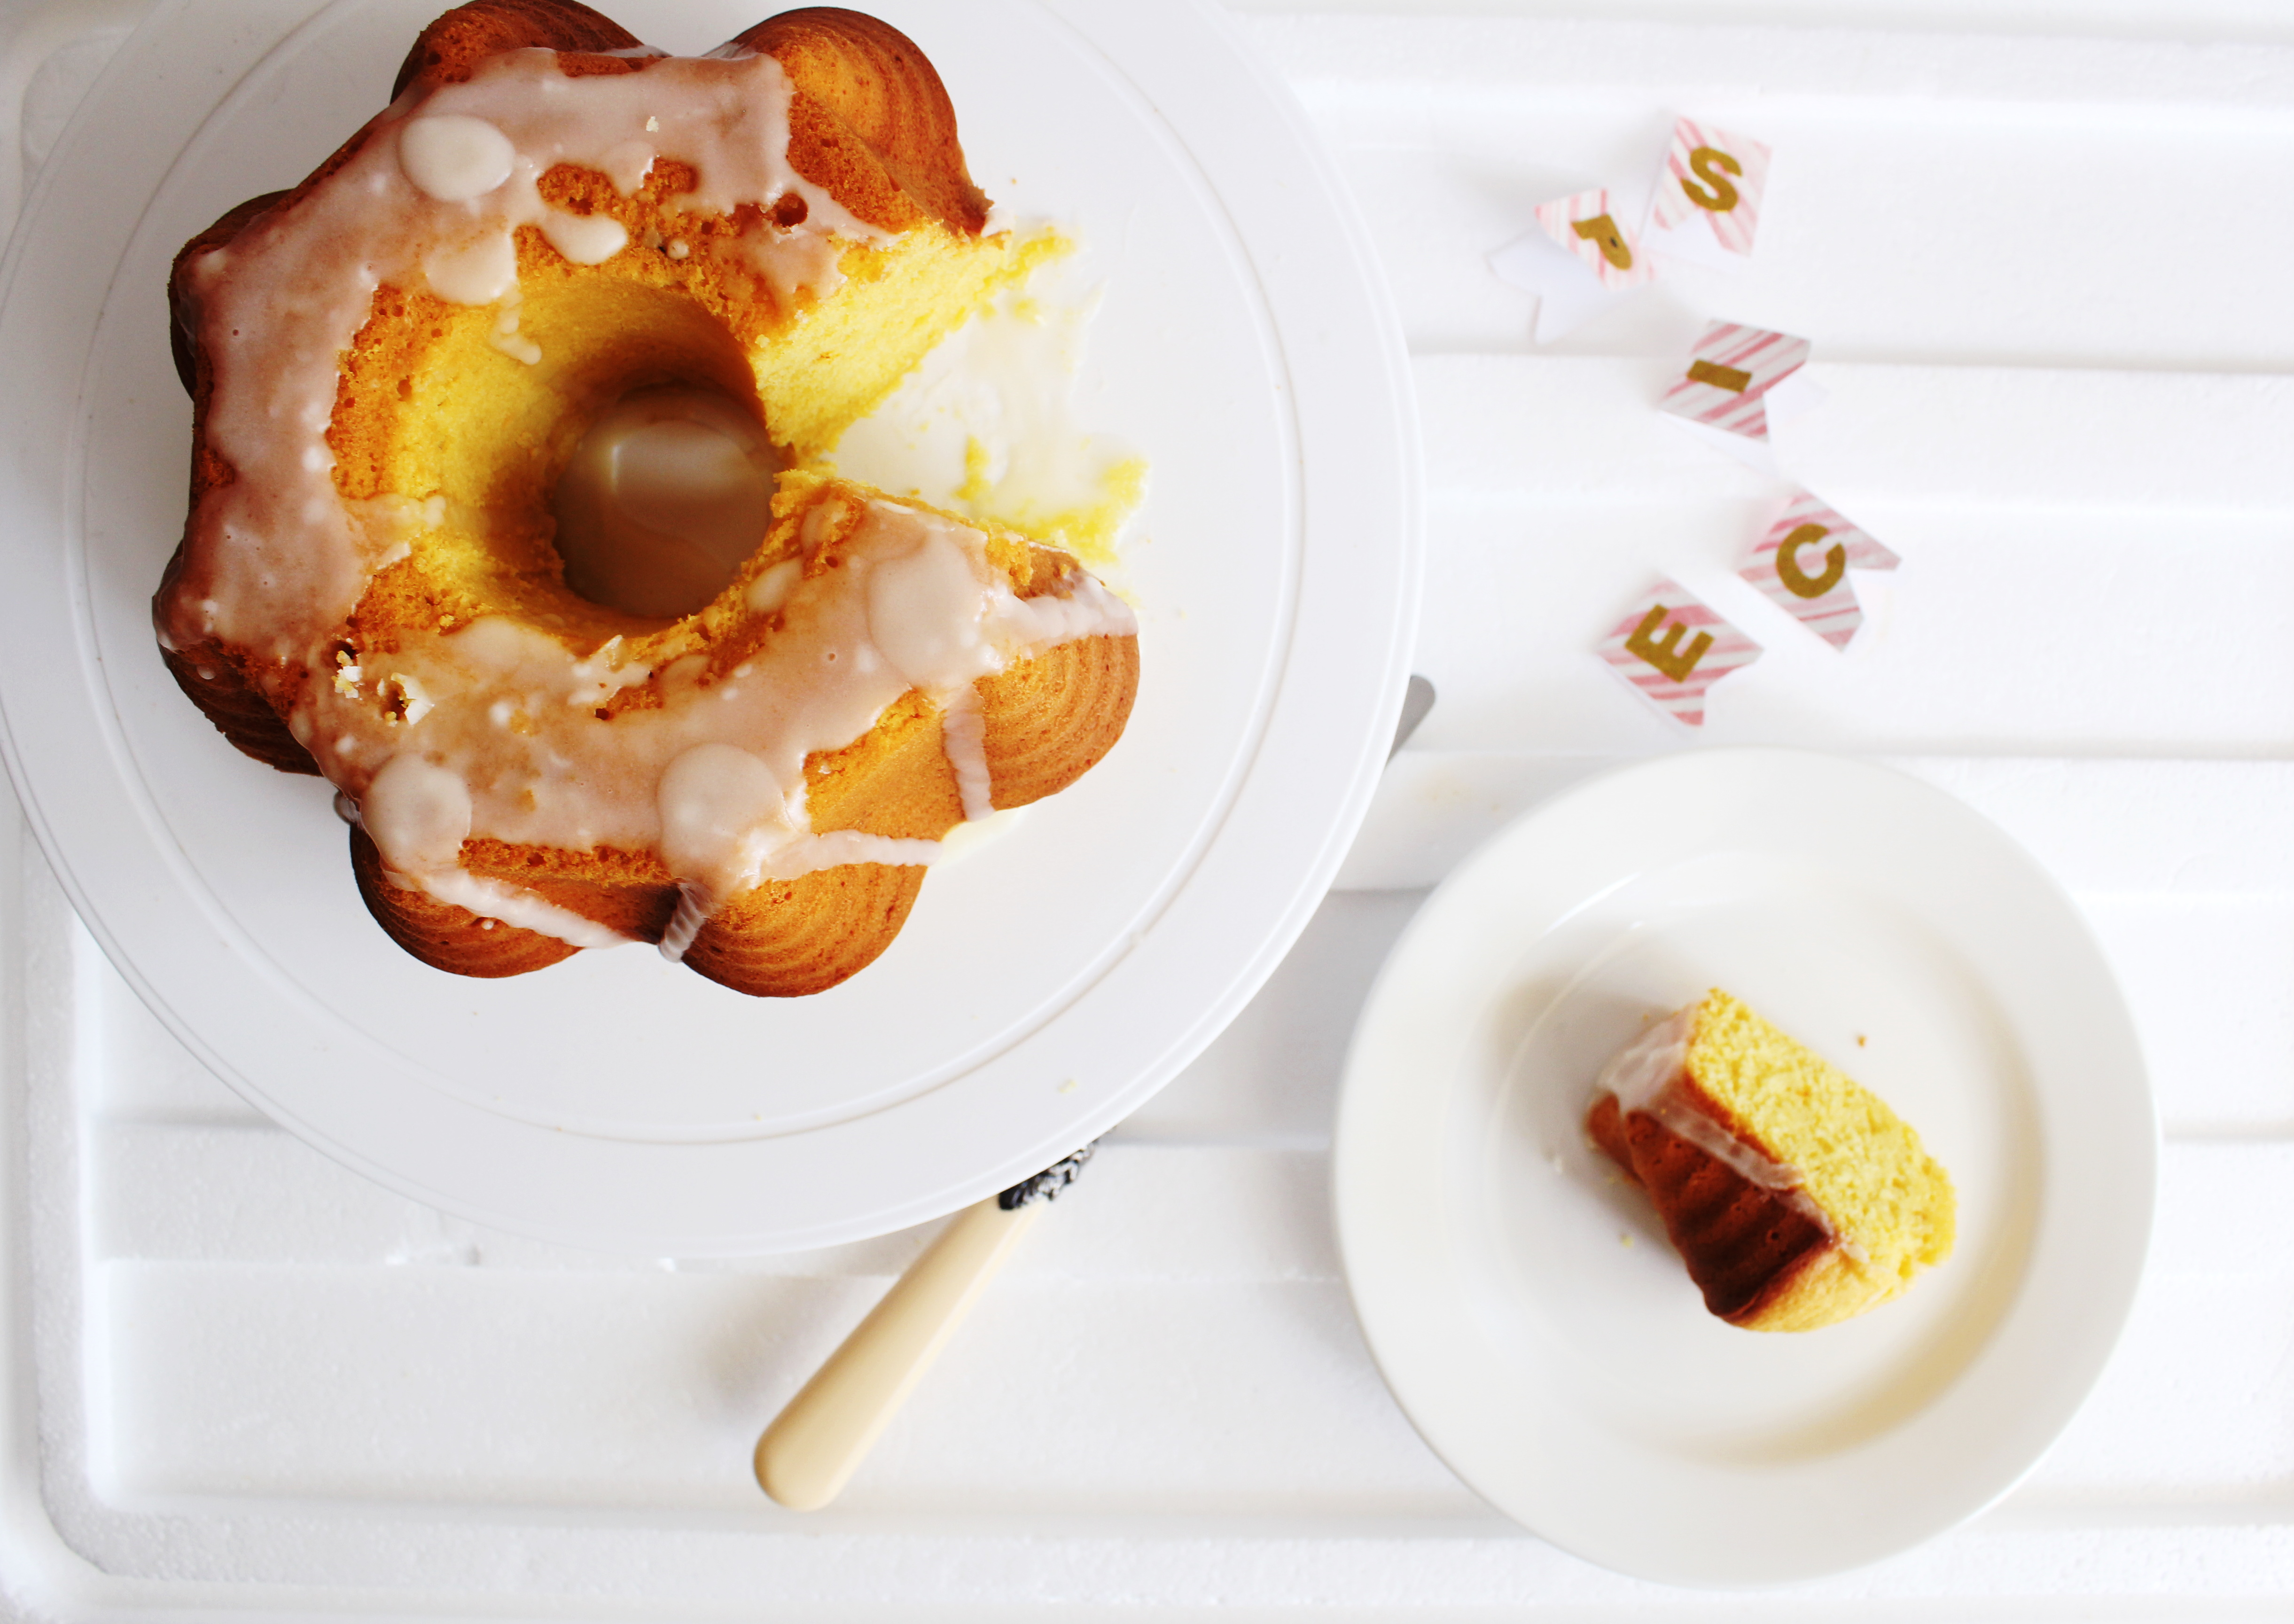
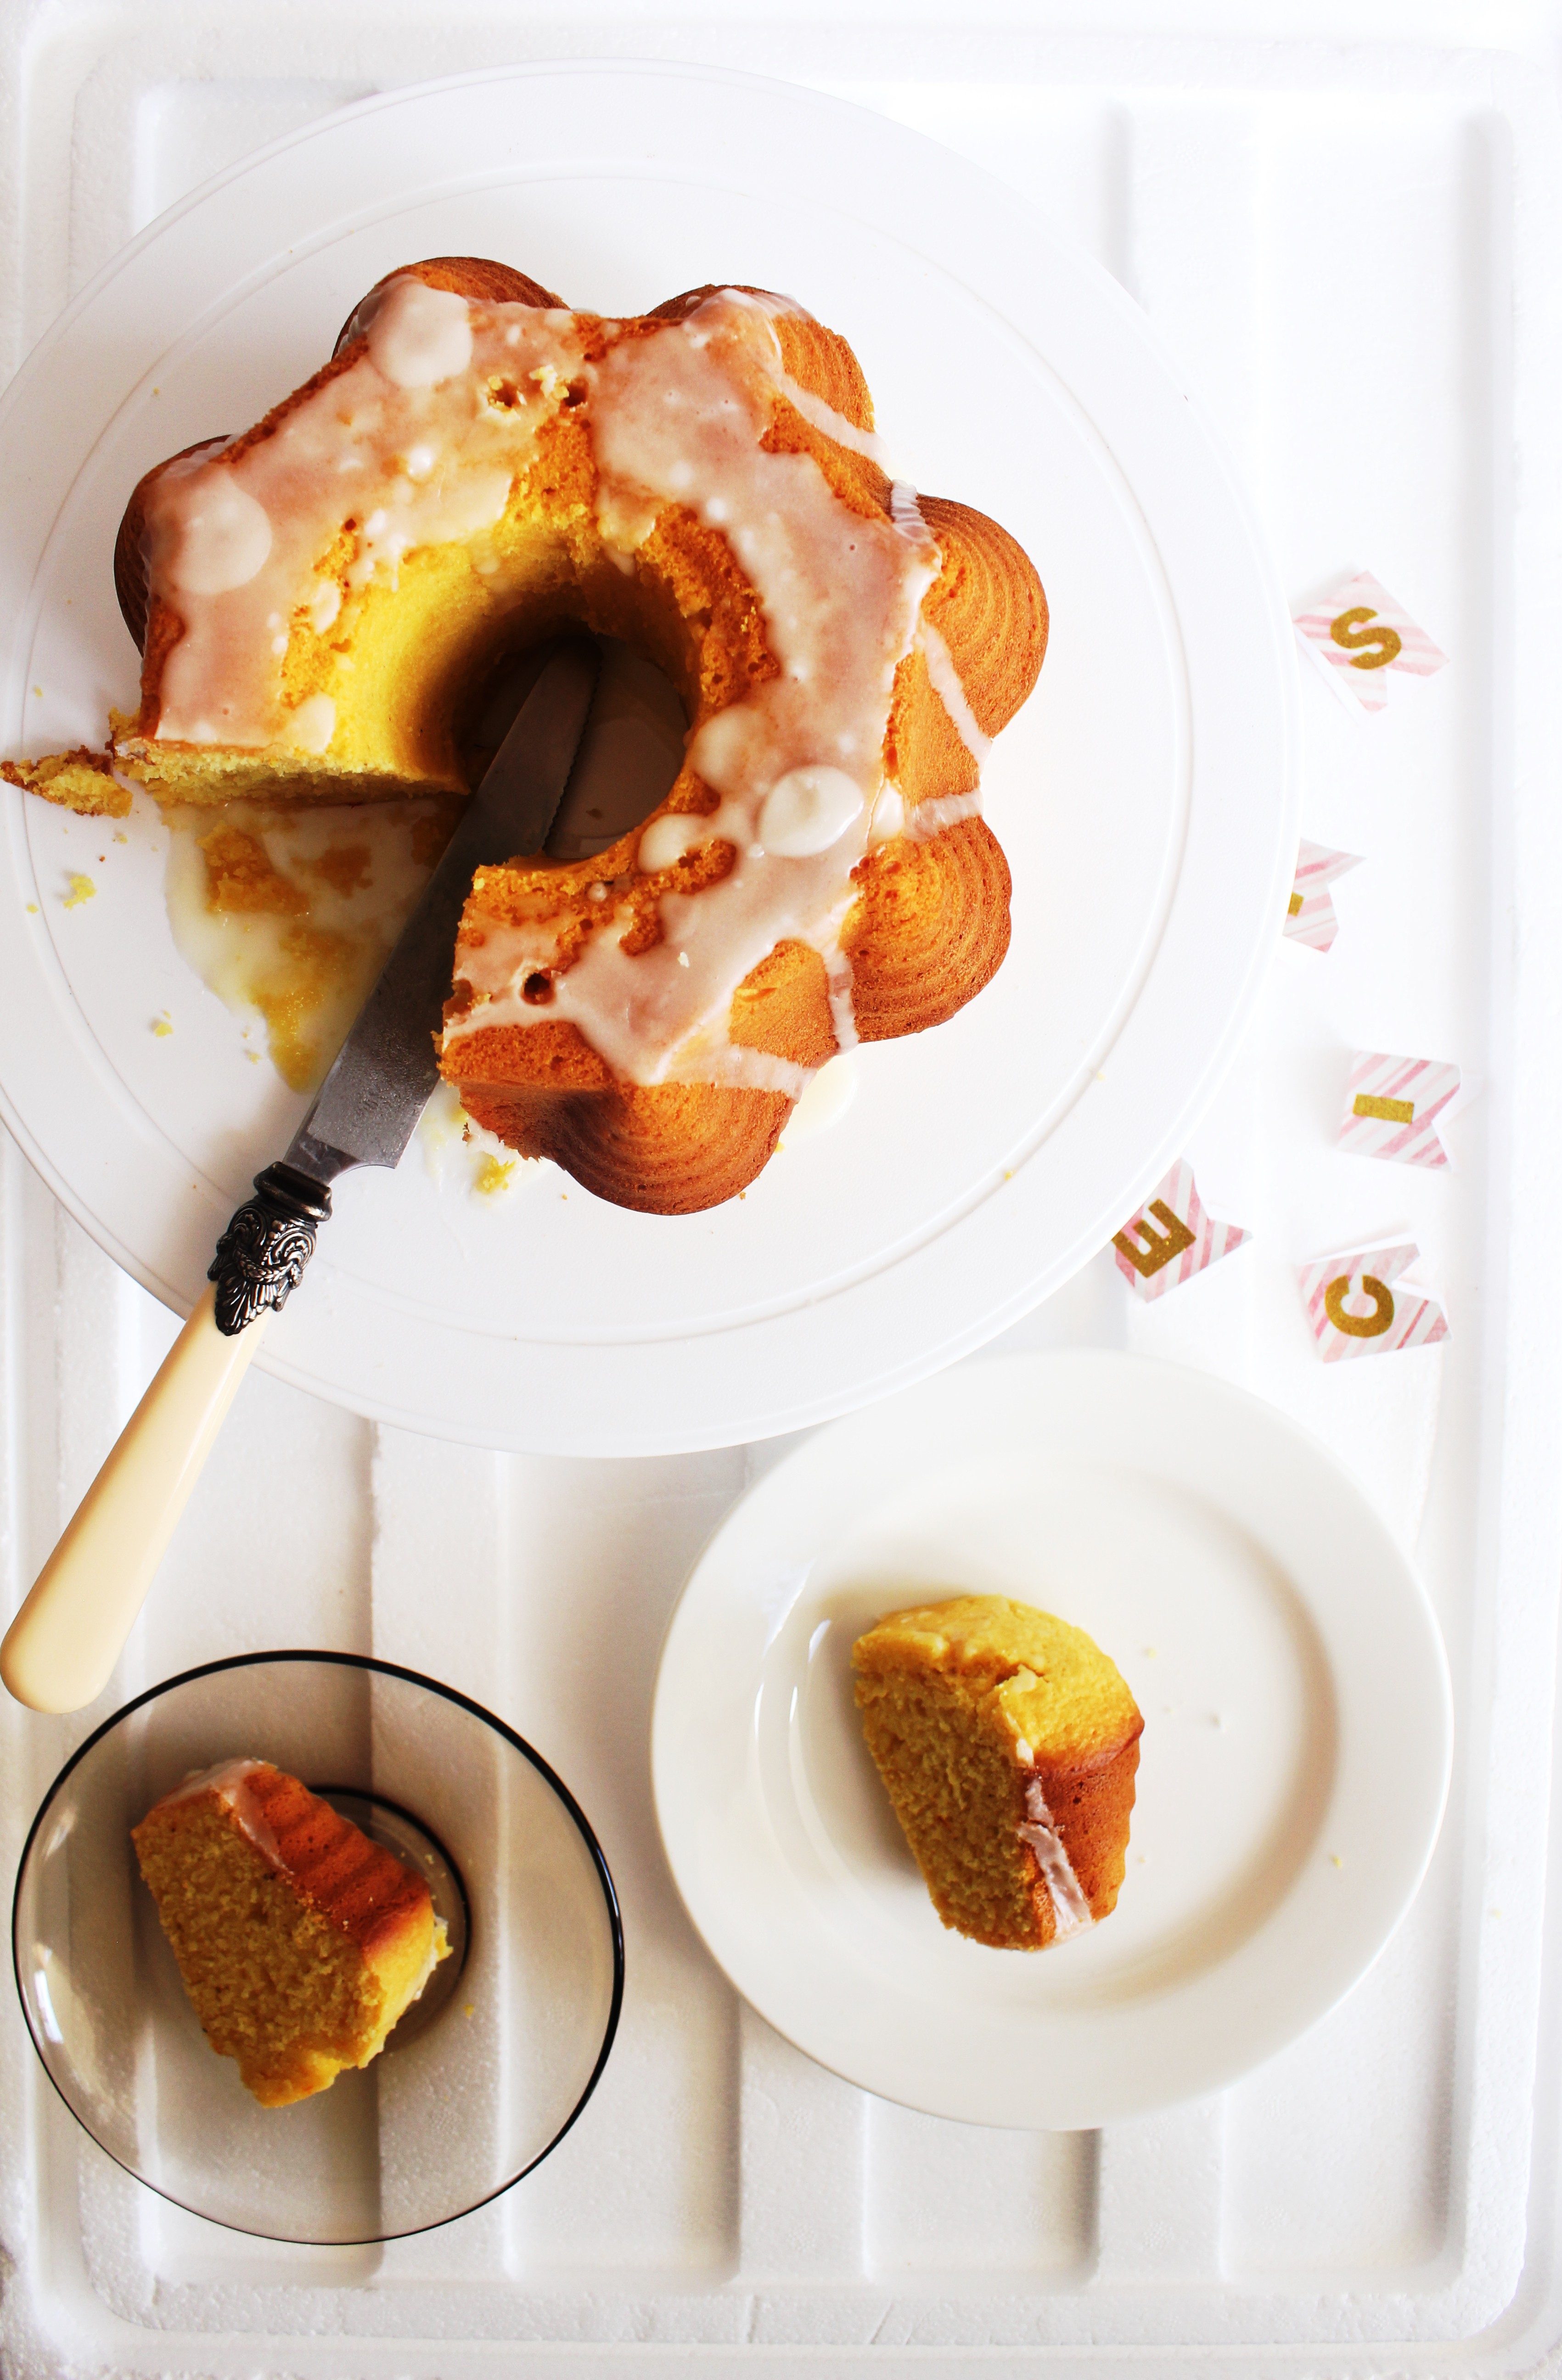
I’ve been wanting to make an Orange cake this month. Though Orange is not our seasonal best at the moment, it is still abundantly available. All throughout my growing up years in India I have associated Oranges with colder months and though the seasons have been reversed now that I am in the southern hemisphere, I continue to have a soft spot for Oranges around this time. As far as my experience goes with Citrus cakes, they always taste delicious and appeal to most people. And they smell amazing too. Remember my Gluten Free Whole Orange Almond Mini Cakes…I’ve made it a number of times and I wanted to experiment with spice this time.
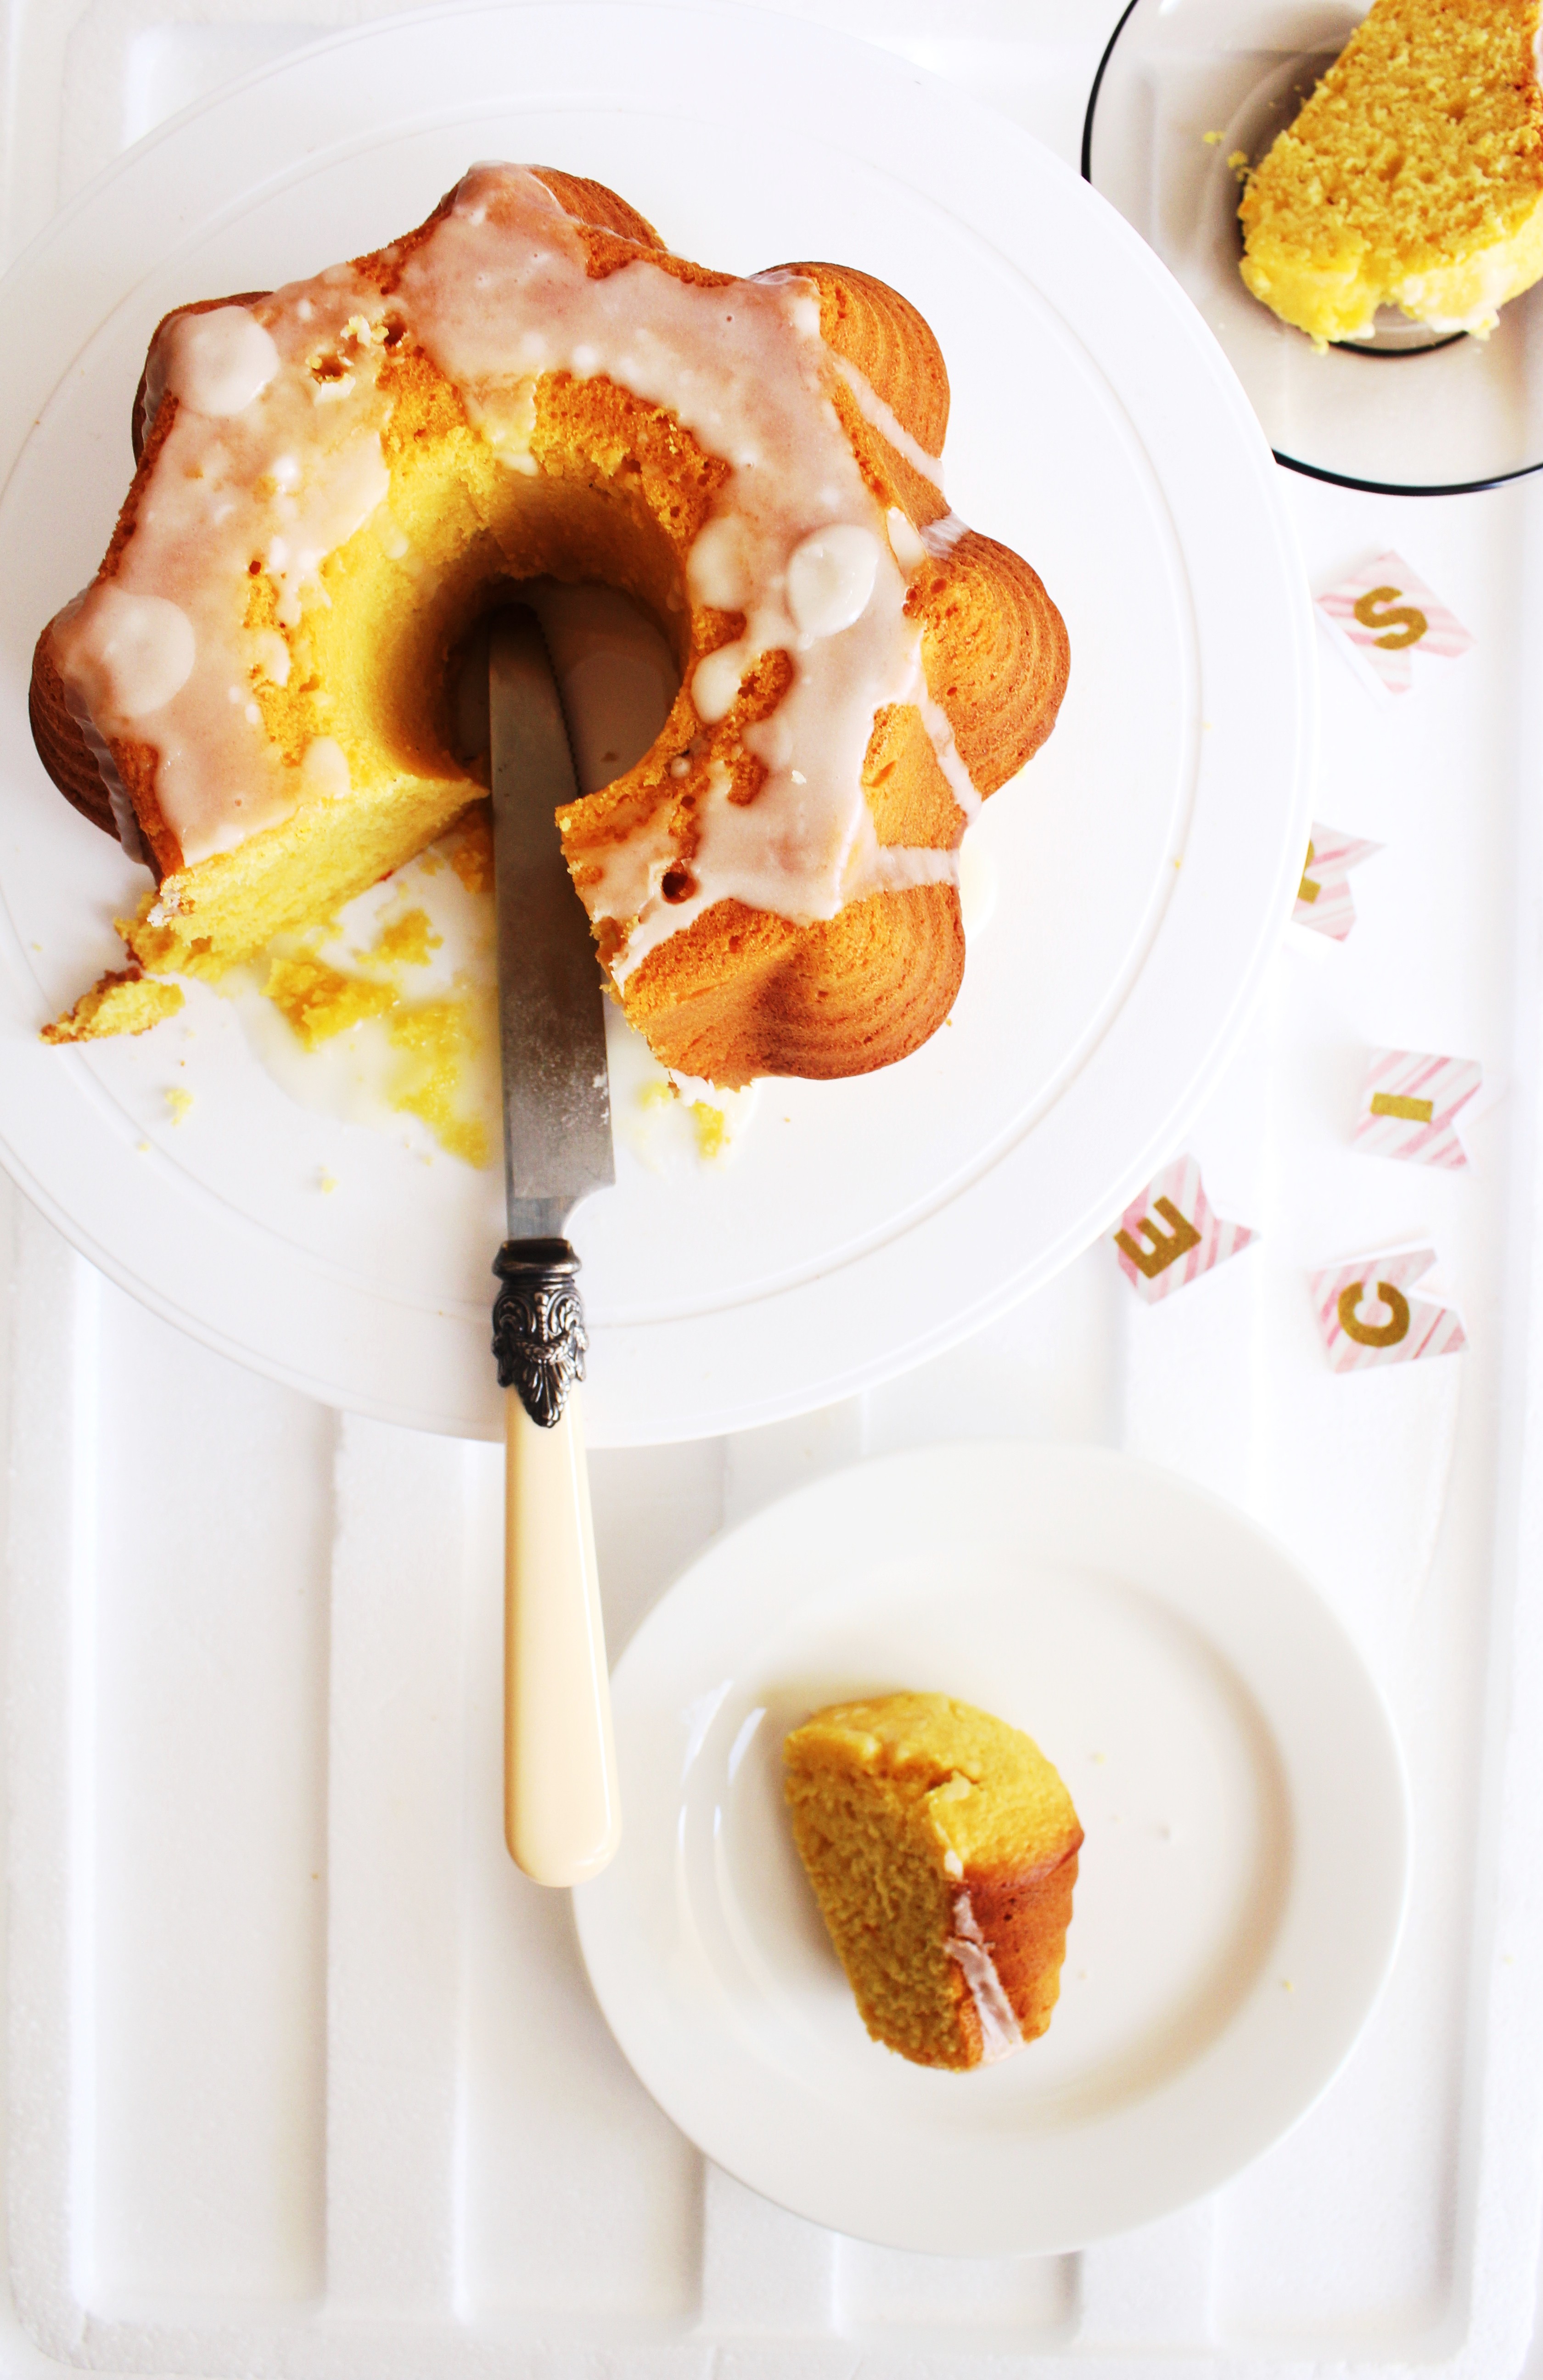
IMG_6988 (2)So I played around with a few recipes and came up with this one. I can rarely find myself baking a cake and not adding a nut meal to it. I find the texture so beautiful and nutty. But never rich. I also did not want a completely fudgy cake that would not work with my bundt pans. I made adjustments accordingly and the cake turned out just the way I wanted it to be. You can taste the orange, spices and the almonds that go so well together. Overall, it is a simple recipe with great results.
IMG_6961 (1)

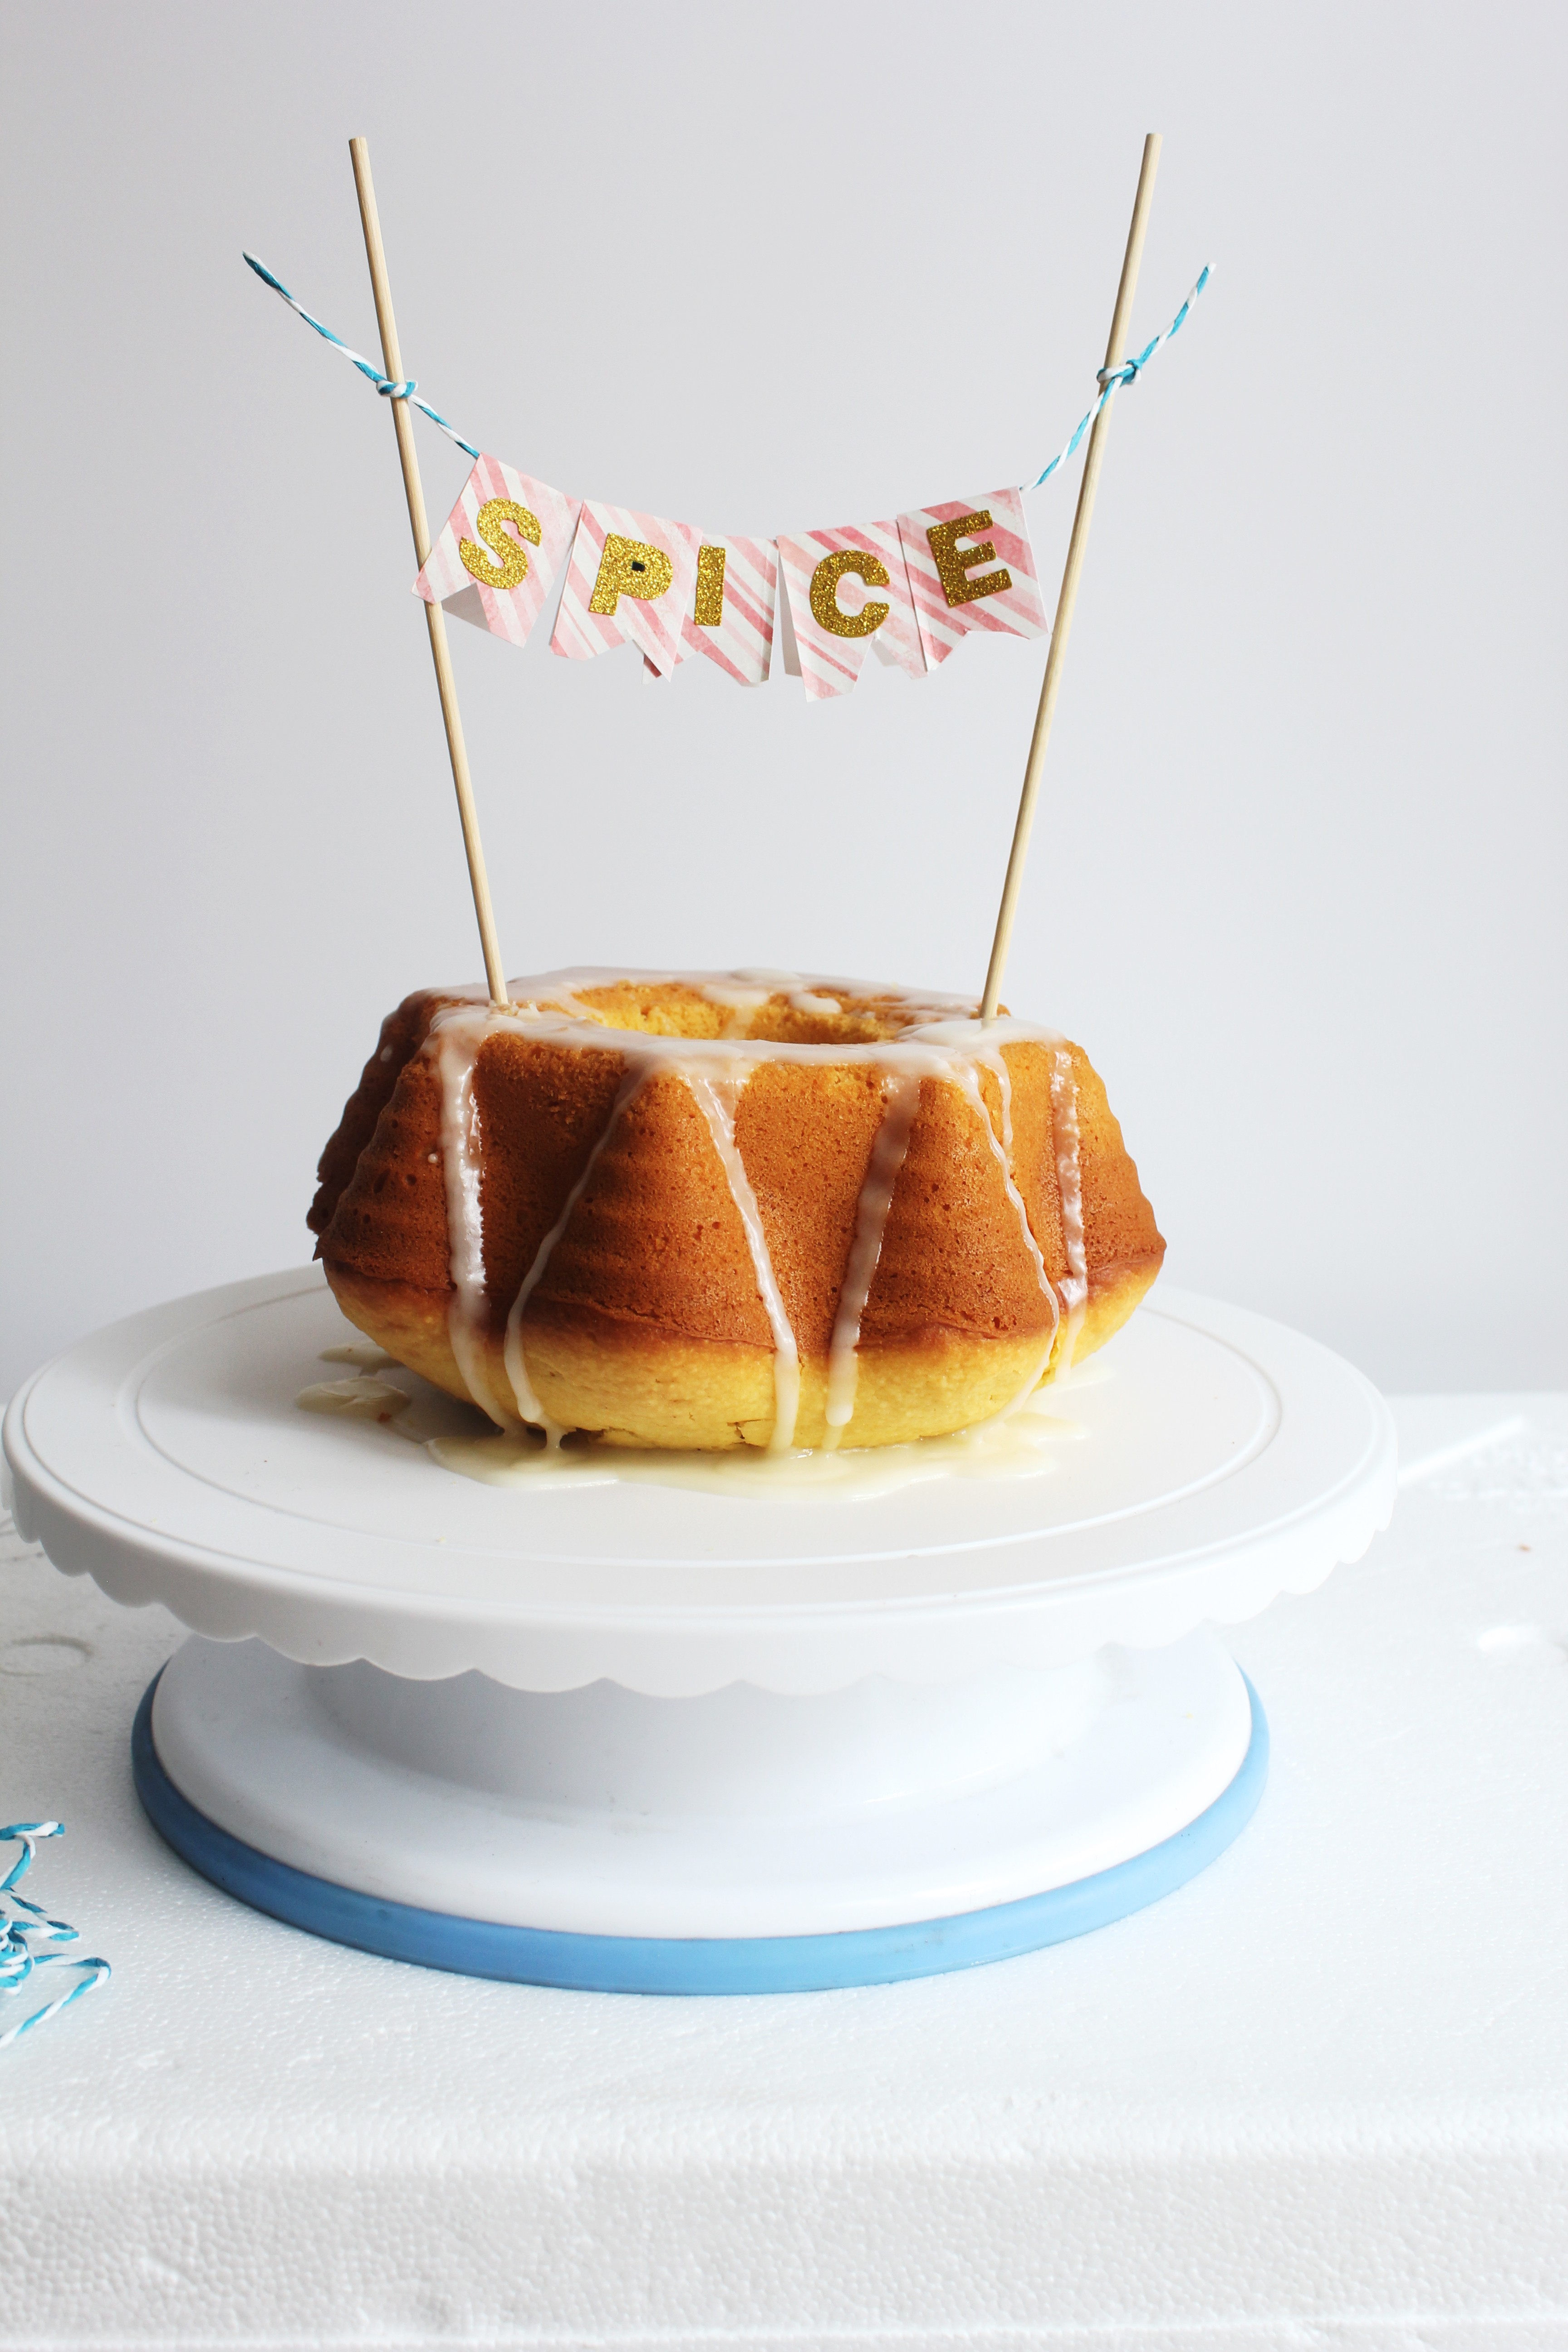
As you can see, I have used a thin glaze. I didn’t want to overload it with sweetness as it was great on its own. If you do not have the individual spices, you can replace with 1 teaspoon of all spice. This recipe makes a 8 inch bundt cake which is not too big (my cake did not reach the full height of the pan.). I wanted to test out the recipe on a smaller cake. You can double up the recipe for a 9 inch round cake.
IMG_6981 (1)

In other random news, we will be beginning the new year in our new house. Some of you will remember that I had moved houses a while back. Well, a few things worked well..others did not.  And then with children, priorities keep changing. So moving again! With bigger and more boxes. I don’t believe in 8 months I have acquired so much stuff (blame it on the blog). But I do look forward to moving right next to the harbour side. If you have visited Sydney, you would know that we have some very beautiful beaches and harbours. You know I’ve been meaning to share photographs with you but every time I intend to, I think twice. The blog has grown so much over the months and apart from my regular readers, there are a lot of people visiting the site in search of recipes who may not enjoy the additional content. I will probably figure out some other way.
I had a great time this weekend visiting a lavender farm nearby and spending the day with a wonderful elderly couple learning about different varieties of lavender and how they are grown. I hope to write about that once I develop a recipe around edible lavender.

And I had another feature on the Kitchn! So, you know why I am so critical of myself and my blog lately.
IMG_6985 (1)


Spiced Orange Almond Cake
Makes a 8 inch bundt cake

For the Cake
125 ml (1/2 cup) freshly squeezed Orange juice
1 tbsp. finely grated orange zest
2/3 cup castor sugar
11/3 cup self-raising flour (11/3 cup plain flour + 1 tsp baking powder), sifted
1/2 tsp powdered ginger
1/2 tsp powdered nutmeg
1/4 tsp powdered cinnamon
11/2 cup almond meal (ground almonds)
2 medium eggs
60 g unsalted butter, melted

For the Glaze
1 cup icing sugar, sifted
2 tbsp. freshly squeezed orange juice

Preheat oven to 180 degrees C. Lightly grease a 8 inch bundt cake pan. Place the sifted flour, ginger, nutmeg, cinnamon together in a bowl and stir to mix. Keep aside.

In an electric mixer or with a hand mixer, beat the eggs and sugar till light and creamy. Fold in the flour mixture, ground almonds, orange juice, orange zest and melted butter until just combined and the mixture is smooth. Spoon the mixture into the prepared cake pan.

Bake for 30-40 minutes or until a skewer inserted into the centre of the cake comes out clean and edges turn golden brown. Leave in the pan for 15 minutes and then turn the cake onto a wire rack to cool completely. Once cooled, pour over the glaze all over the cake.

To make the glaze, in a small mixing bowl whisk the sugar and orange juice together till smooth.

 

Marshmallow Sandwich Cookies with Home made Marshmallows

15|12|2013

Holding on to the last two weeks of a beautiful year. And I cannot find a better way of bidding farewell to it than filling it with some more sweet treats. You know all the joy and cheer of the holiday season makes it harder to say goodbye. You really don’t want the party to end…when you are enjoying so much. Almost makes me sad. But there will always be good memories to take forward…some learning..a lot of hope AND a thousand ideas to work on for my dear little blog.

IMG_7062 (1)

I’ve been meaning to make marshmallows at home since months. I made them a couple of years back and promised myself never to get store-bought ones again. But when something is so easily available you don’t give much thought to recipes however simple they may be.

IMG_7054 (1)

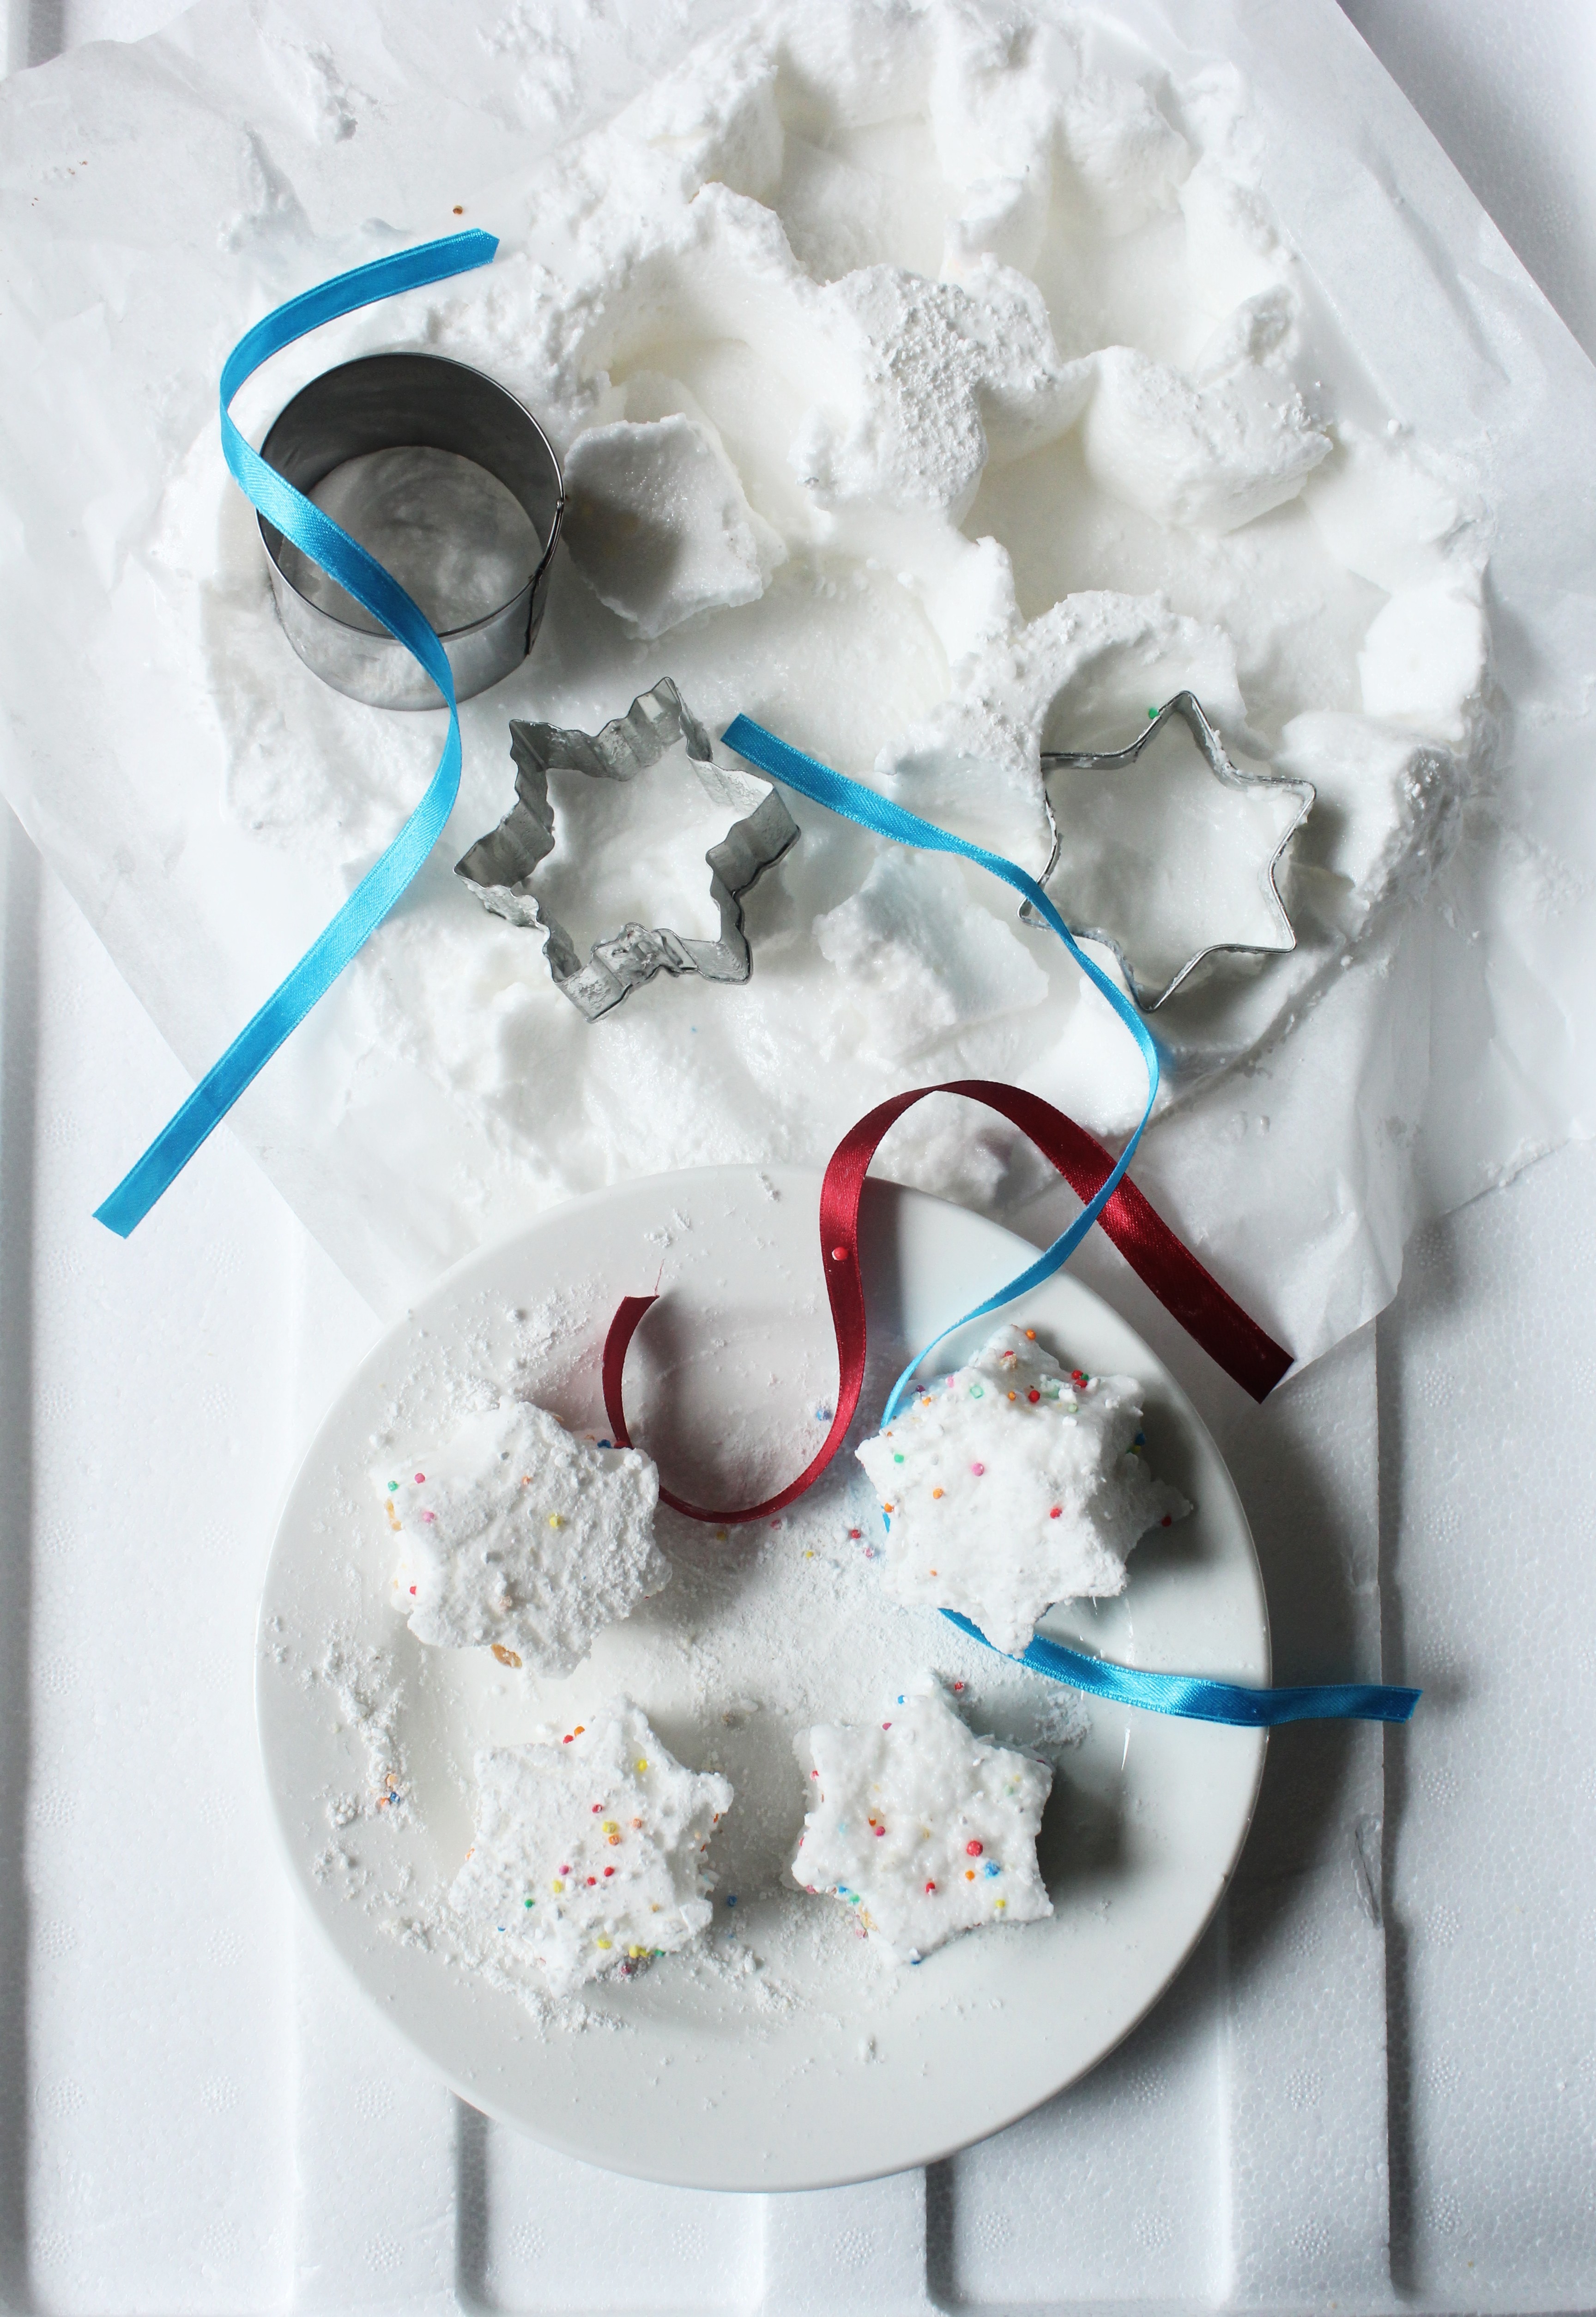
Home made marshmallows not only taste better than the store-bought ones, you can do so much with them. Colour them, flavour them, cut them into any shapes…coat them with your favourite candies. And just 2 basic ingredients. It can’t get easier than this. I have used a 5 cm round cutter to cut out rounds and sandwiched them between store-bought biscuits. If you want to make the biscuits from scratch, you can use any basic cookie recipe (that is not crumbly) or similar cookies with this recipe. The best part is that they are gluten-free and if you sandwich them between gluten-free cookies, they will make a lovely gluten-free gift too.IMG_7052 (2)

A few things to note about the recipe. Do make sure you beat the sugar mixture till it is really thick..it should somewhat hold its shape for a few seconds when you lift the beaters. You can coat them in dessicated coconut or equal parts of corns starch and icing sugar.  After 3-4 hours if you find the marshmallow too sticky to work with, put the tray in the refrigerator for an hour. Dust your cookie cutter or knife with the sugar- corn starch mixture each time you cut into the slab of marshmallow. Tying ribbons around the cookies not only makes them look festive and pretty but keeps them intact.

IMG_7146 (1)

Marshmallow Sandwich Cookies with Homemade Marshmallows (Marshmallow recipe adapted from here)
Makes 12-14 sandwich cookies

1 1/2 cups castor sugar
2 tablespoons gelatine
1 teaspoon vanilla extract
1 cup icing sugar and corn starch mixture (equal parts)
Cookies (home-made or store-bought) to sandwich the marshmallows
1/2 cup of either melted chocolate, nutella or jam of your choice

Grease a 3cm deep, 16.5cm x 26cm (base) slab pan. Line base and sides with baking paper, allowing a 2cm overhang at both long ends. Combine sugar and 2/3 cup hot water in a saucepan over medium heat. Cook, stirring, for 3 minutes or until sugar dissolves and syrup is clear.

Using a fork, combine gelatine and 2/3 cup cold water in a jug. Pour into hot syrup. Cook, stirring, for 2 to 3 minutes or until gelatine has dissolved and mixture is clear. Pour into bowl of an electric mixer. Set aside to cool to room temperature (about 30 minutes).

Using an electric mixer, beat sugar and gelatine mixture on high for 6 to 10 minutes or until very thick. Add vanilla and beat for 1 minute. Spread into prepared pan. Smooth top. Set aside, at room temperature, for 4 hours or until set. Lift onto a board. Using a round cutter that is dusted with a mixture of icing sugar and corn starch, cut out round marshmallows (depending on the size of the cookies).

Sieve 1/2 cup icing sugar and 1/2 cup corn starch in a large bowl. Place 1 marshmallow at a time in the bowl and gently toss in the mixture to coat. Remove to a wire rack. Set marshmallows aside until surfaces feel dry (about 1 hour). Meanwhile, apply a little melted chocolate or Nutella or jam on the under side of each cookie and keep aside. Once the marshmallows are dry to touch, sandwich between two cookies and press firmly. To retain shape, you can tie them up with kitchen strings or ribbons.


Pea, Potato and Prosciutto Soup

11|12|2013

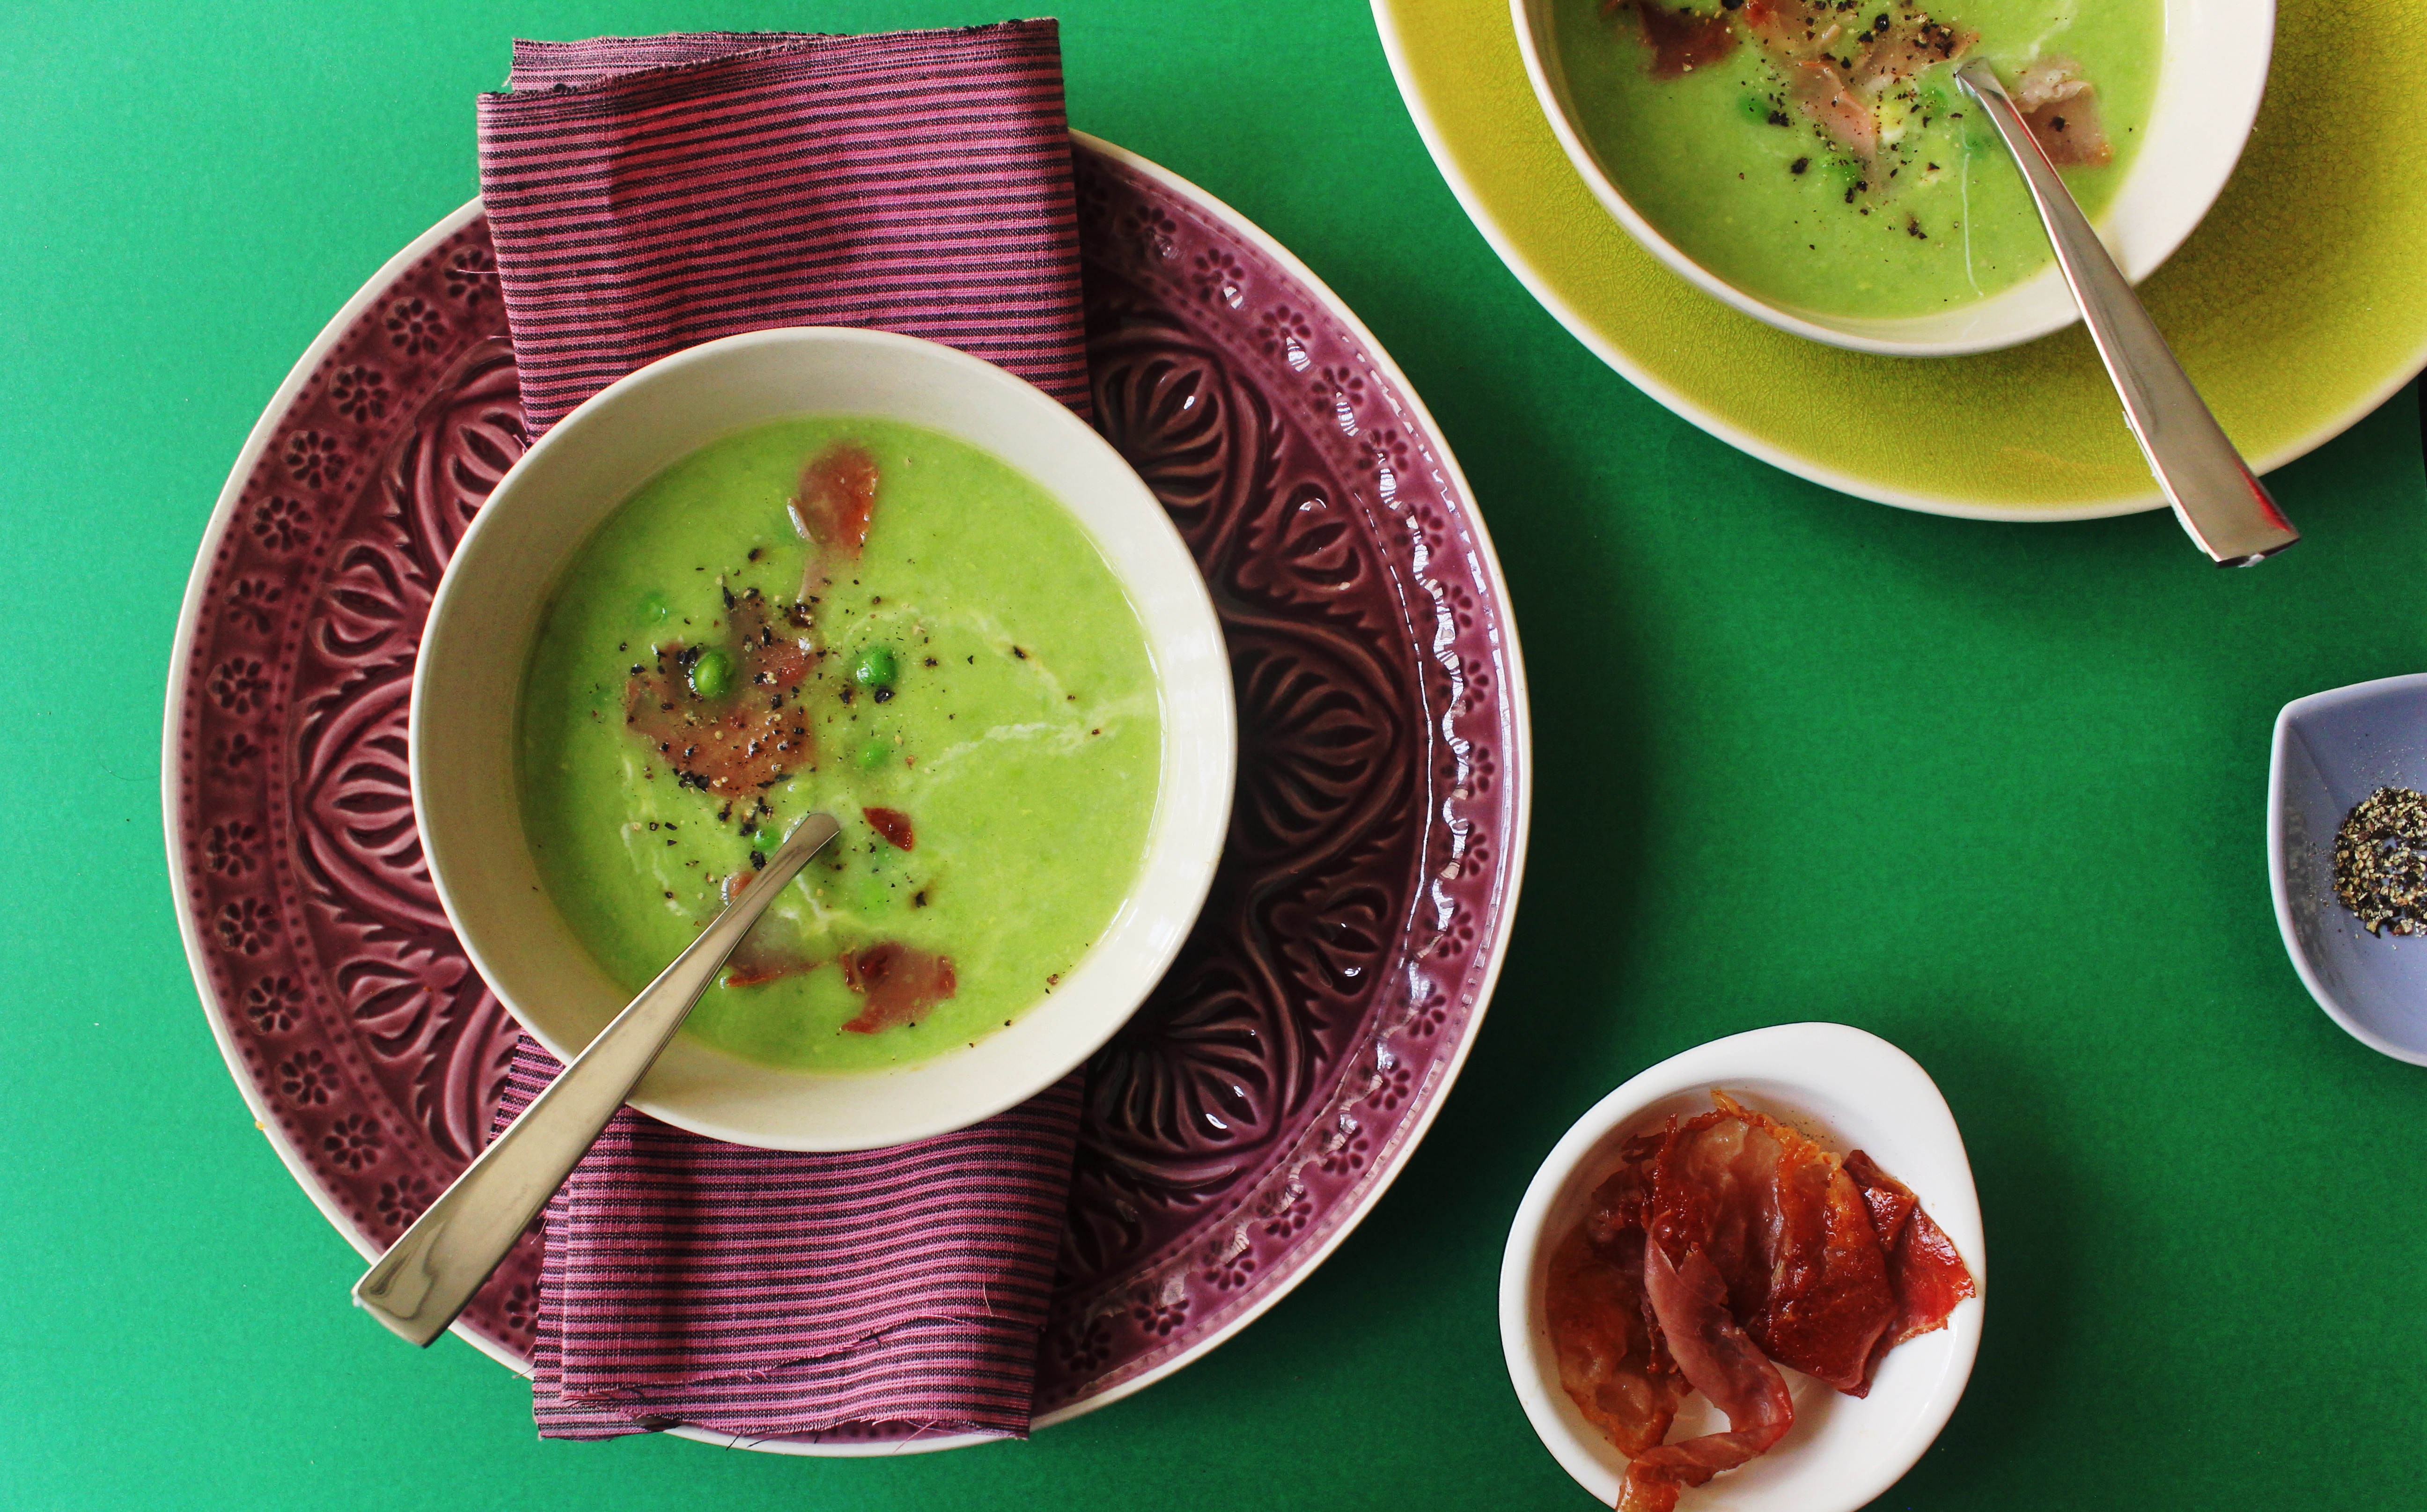
I had to make room in my freezer to put in the tubs of ice cream I bought this morning. A big pack of frozen peas prevented the freezer door from closing. So that resulted in a few curried pea stuffed flatbreads and this soup. You might be wondering, on a hot sunny afternoon, wouldn’t it make sense to finish the ice cream than go through the trouble of making and eating a soup. It would. If along the way, I had not pictured  myself cutting though layers of ice cream cake covered in pretty swirls of raspberry puree and adorned with juicy fresh berries. We’ll keep the ice cream cake for later.
The flatbreads disappeared leaving no scope for photography. I took a few quick pictures of the soup while nibbling on a flatbread. Nobody complained about a not-so-warm soup anyway.

IMG_6808 (1)
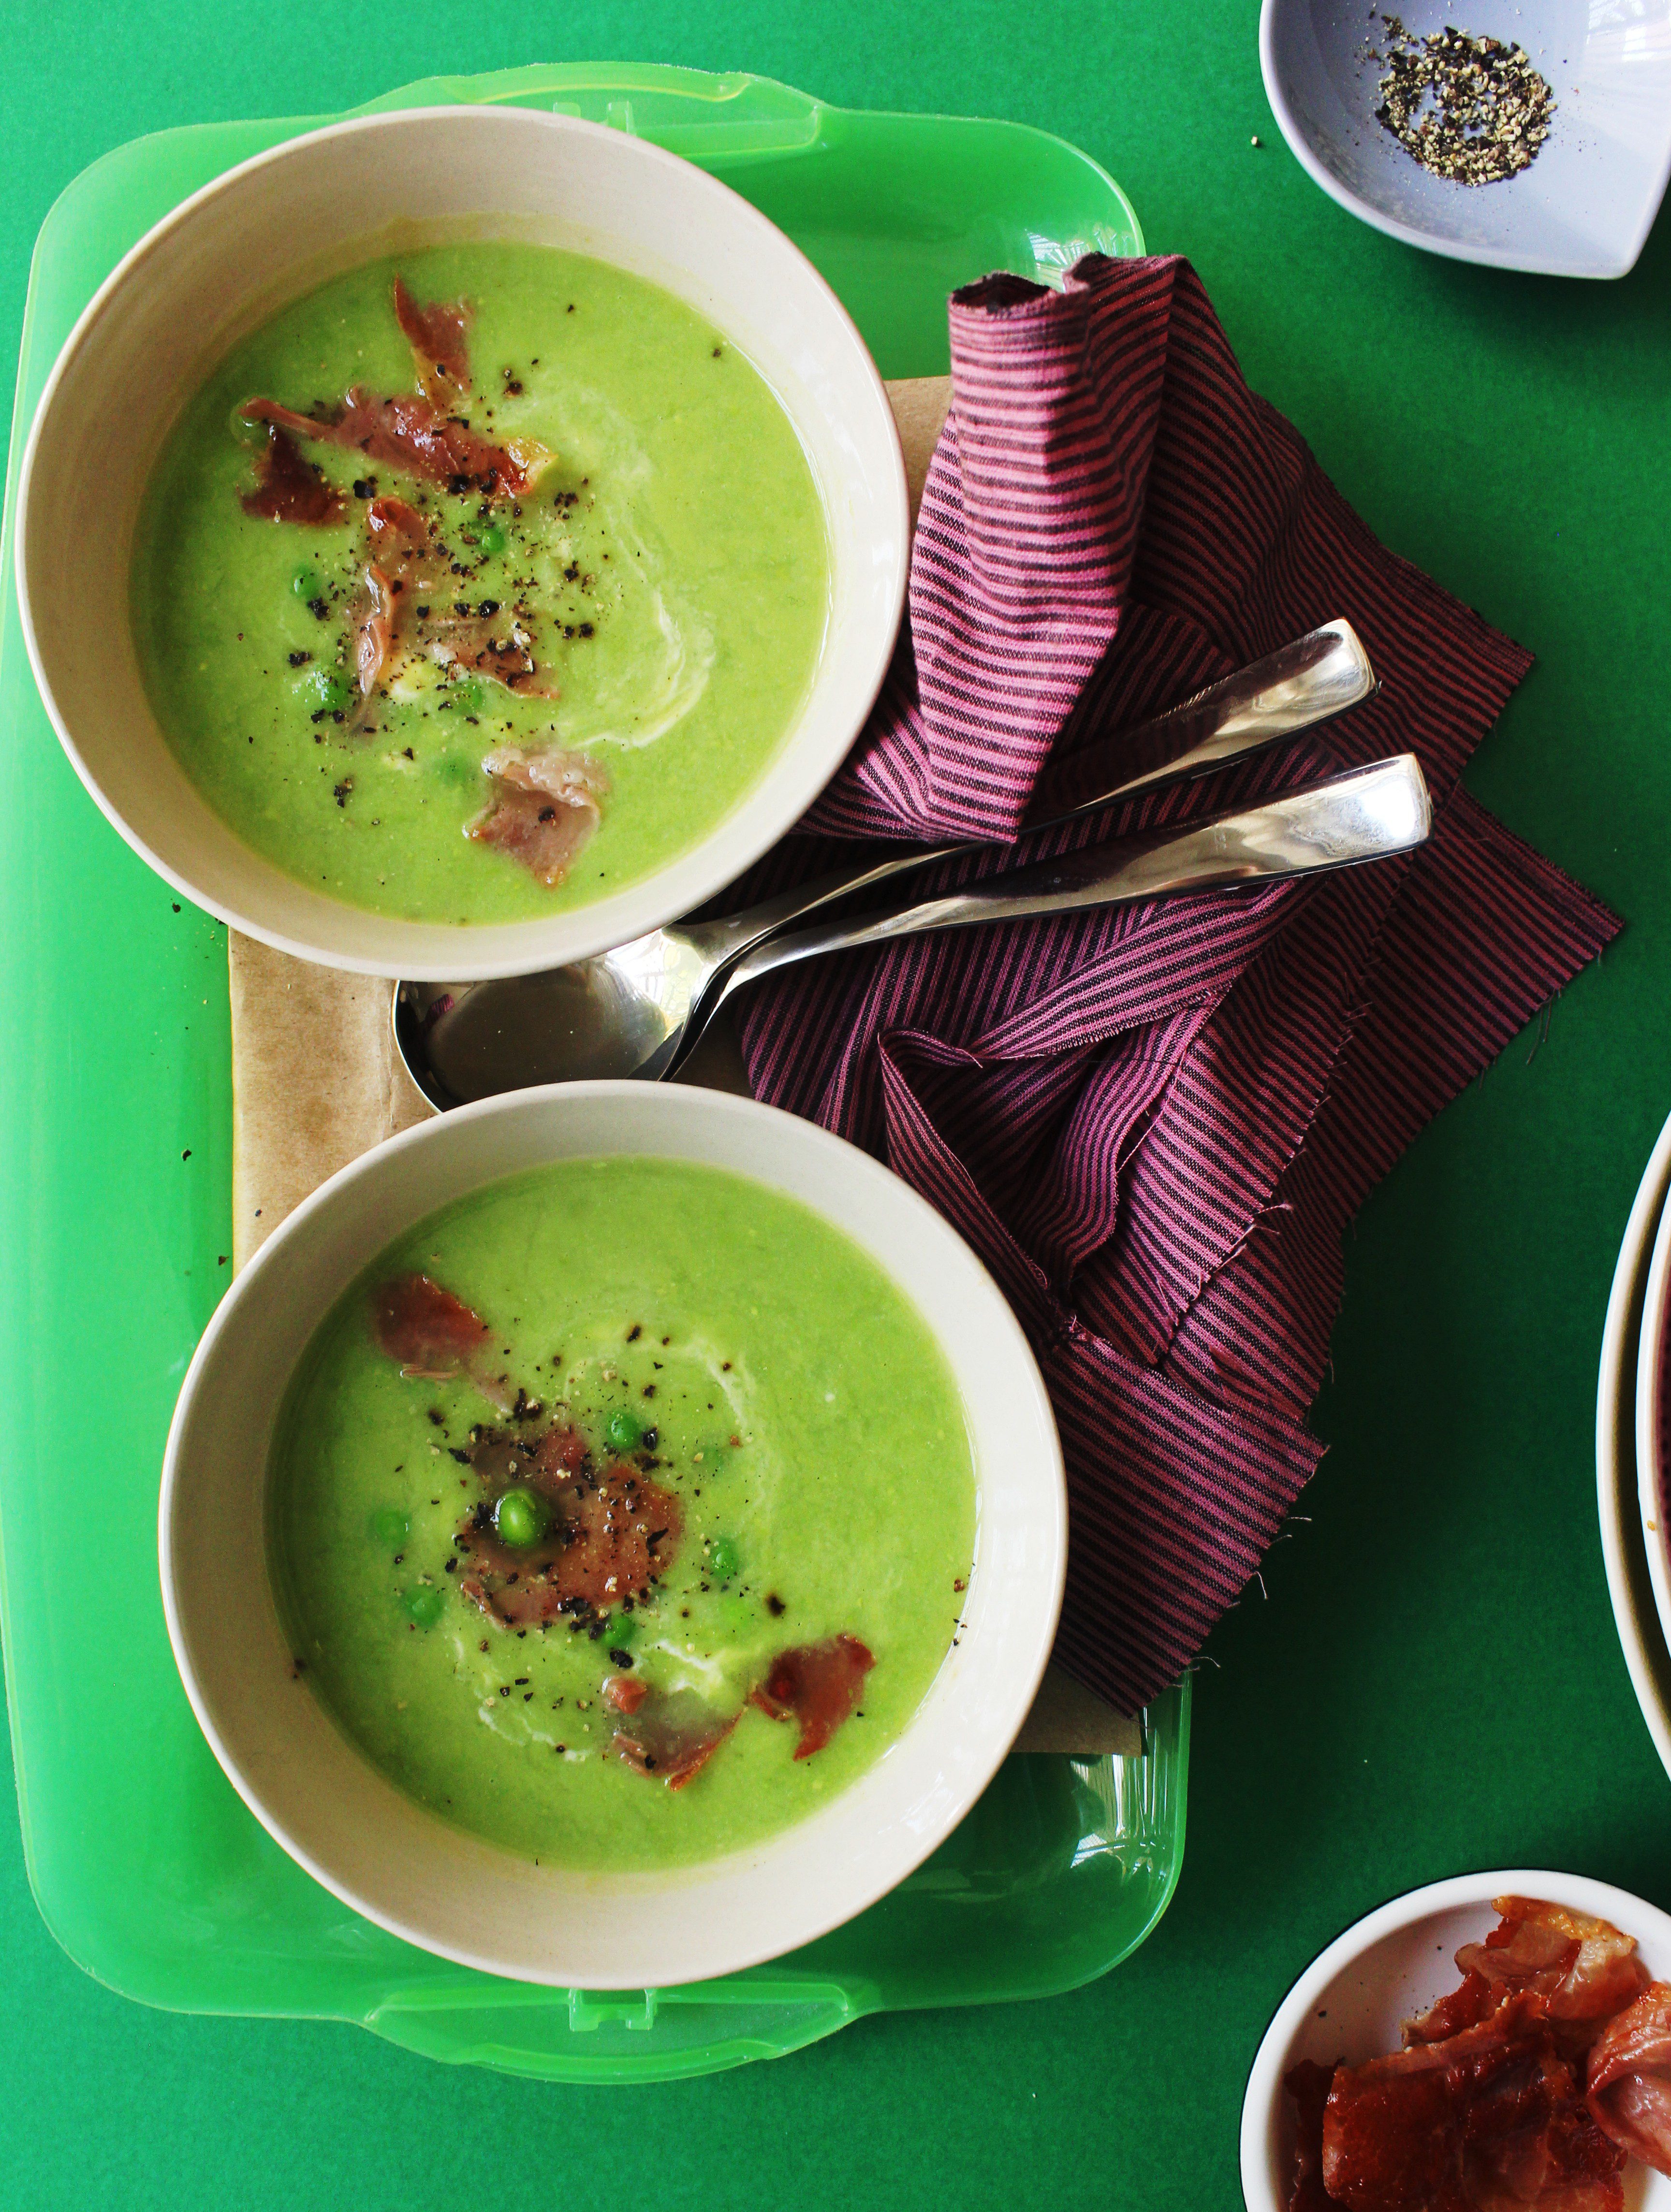
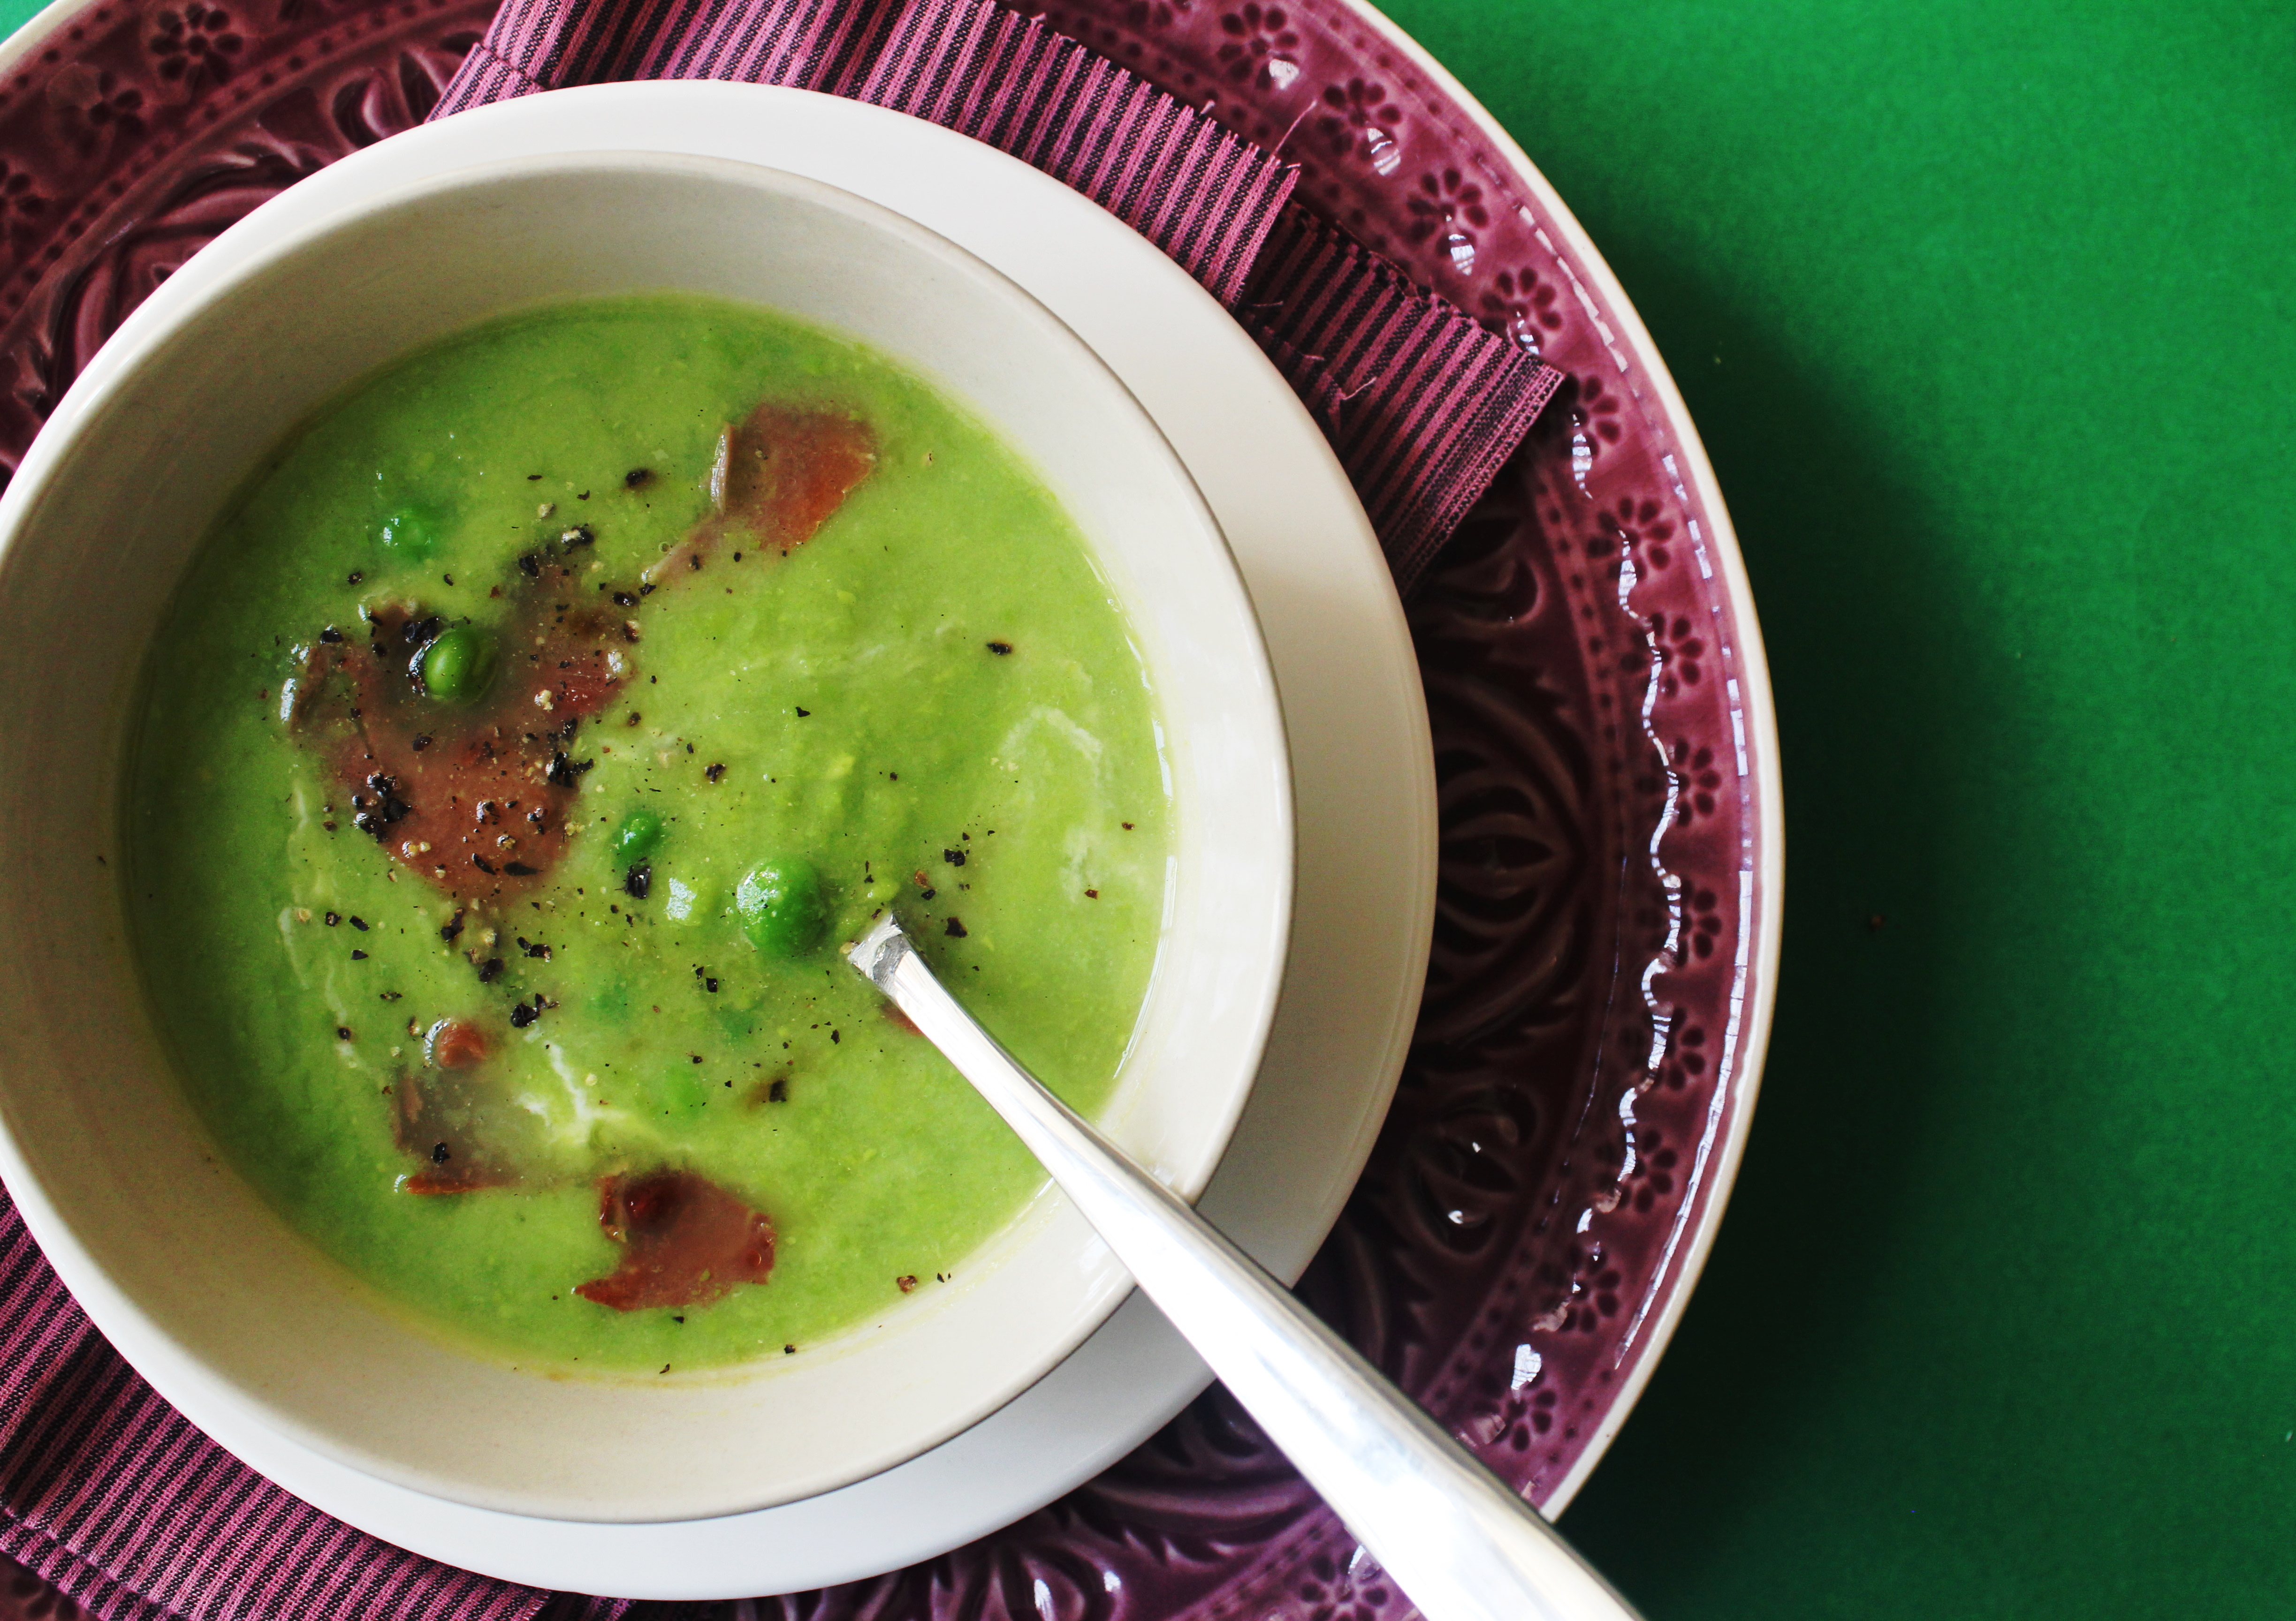
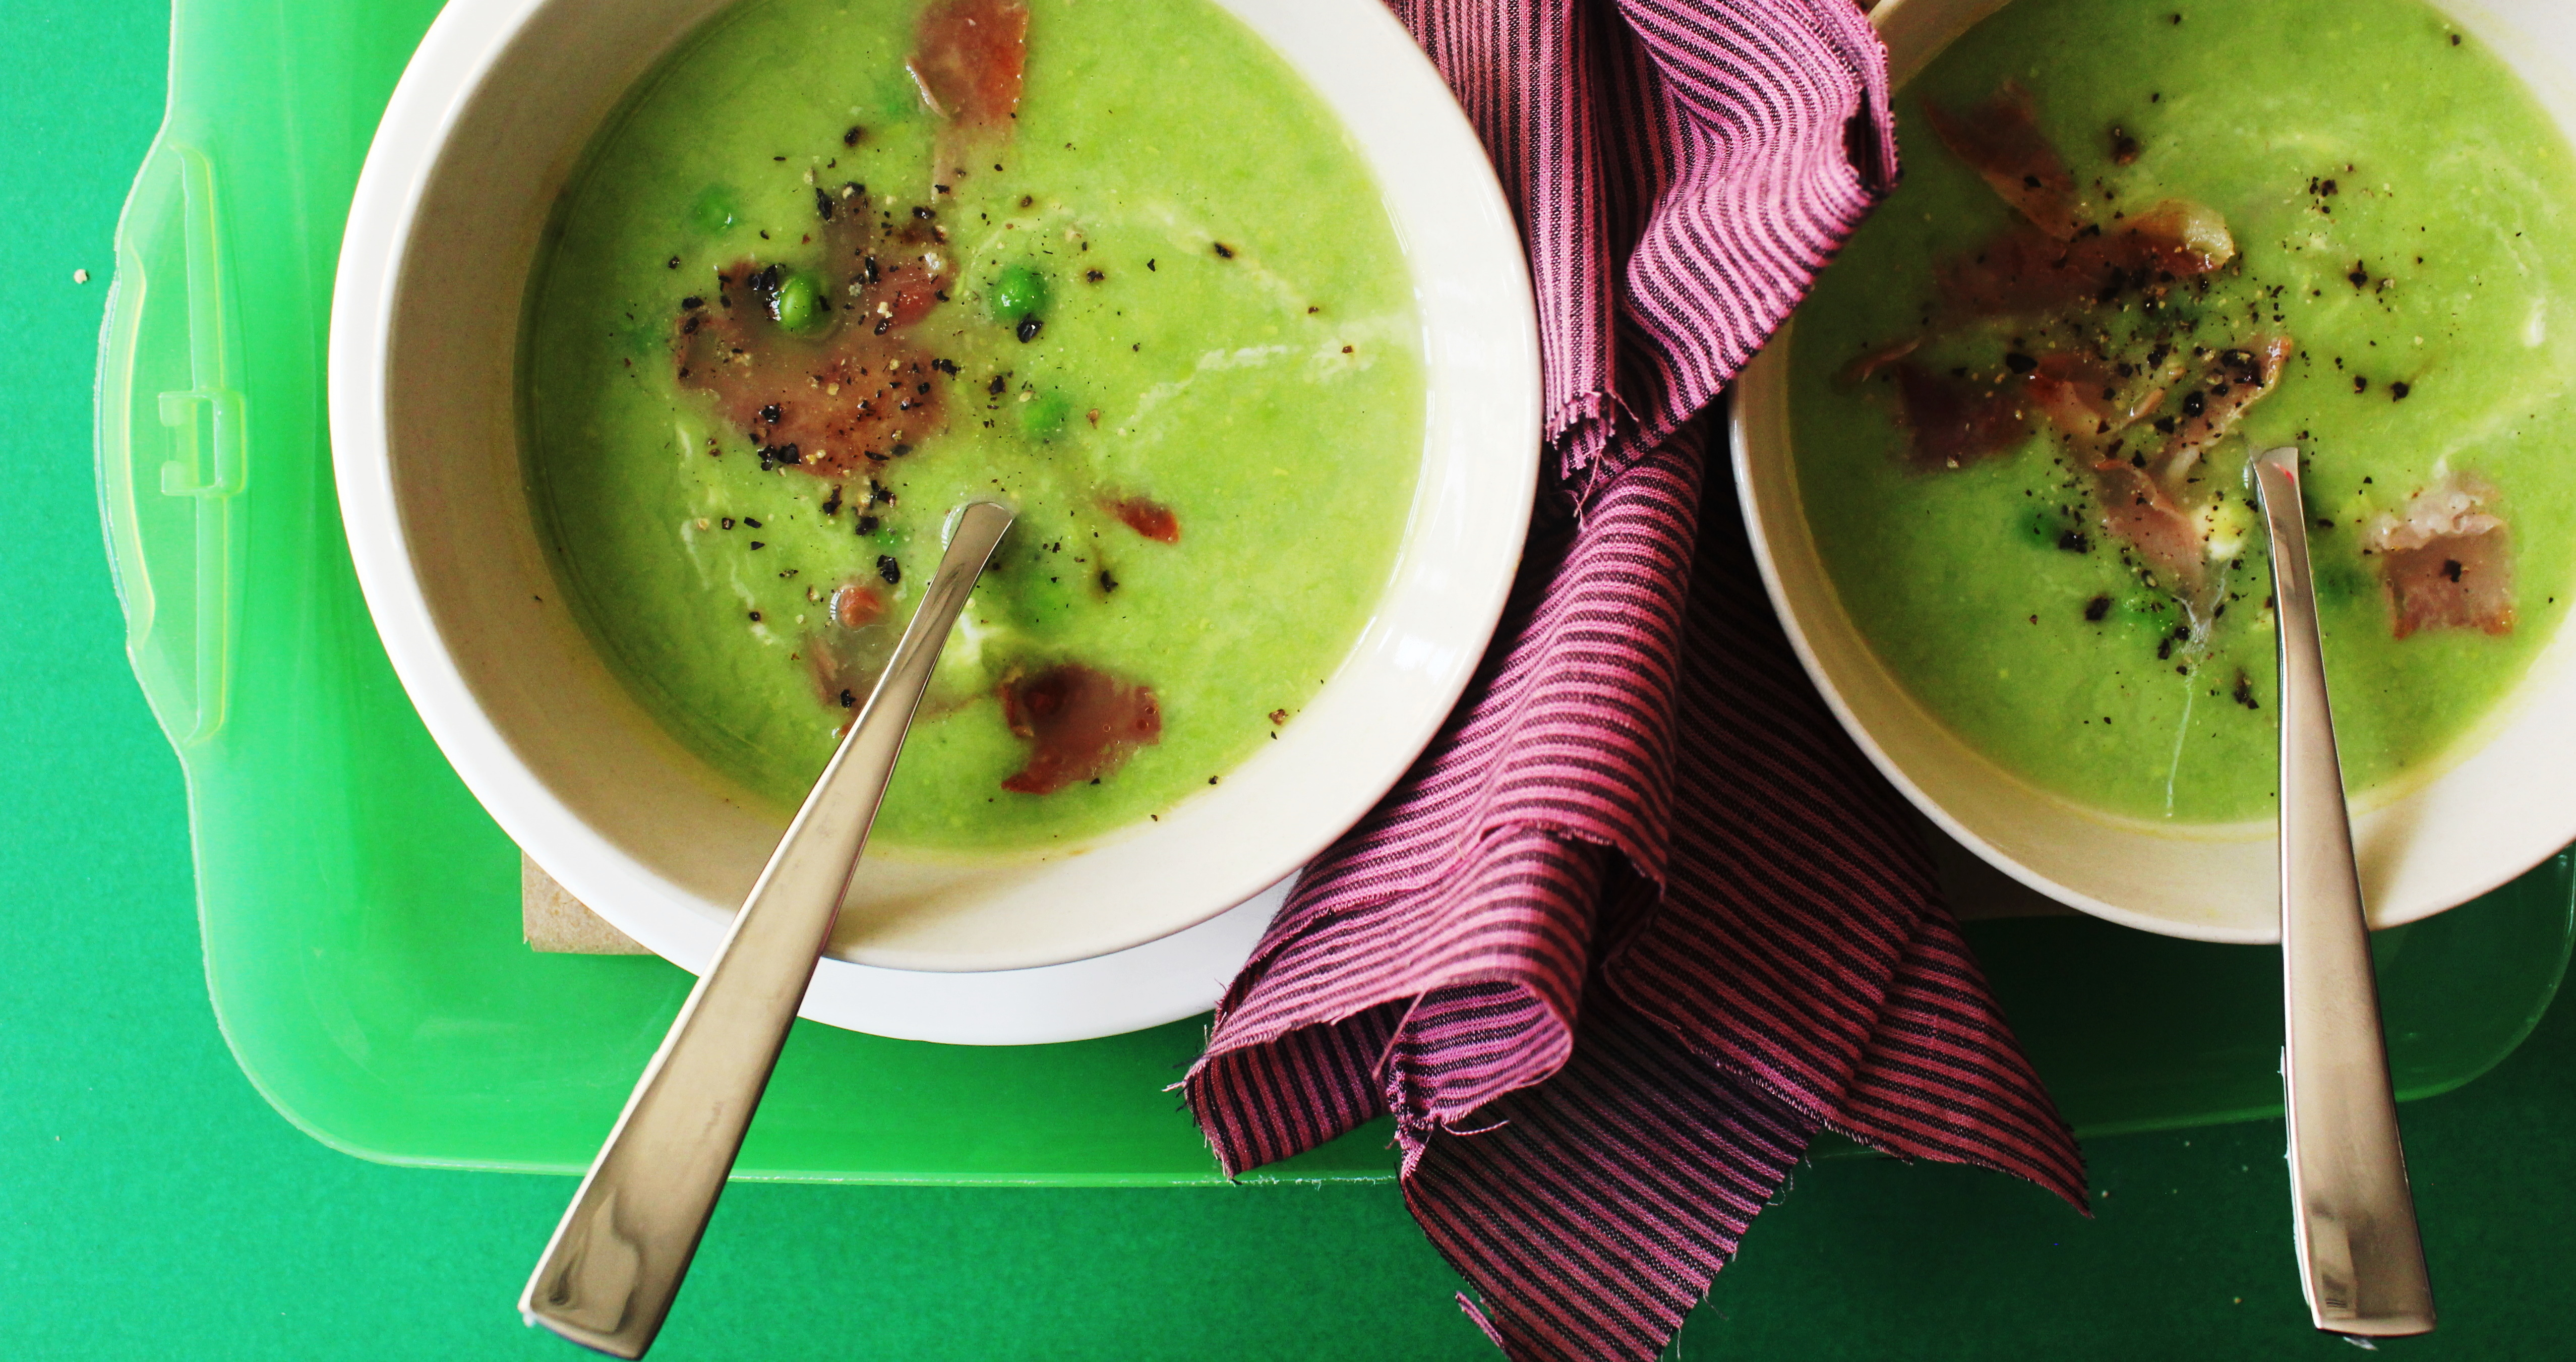
This soup goes down really well with my children mainly for its colour and the crispy prosciutto on the side. I have figured out a an easier and quicker way of making soups that involve potato. Instant mashed potato flakes. This is pretty much available in any supermarket and saves you the work of boiling and mashing potatoes. It acts as a great thickening agent too. All you do is add it to the pea and stock mixture and you have a thick soup in minutes. I would generally not use it as a substitute for the real potato mash but in soups, you can barely notice the difference.

IMG_6824 (2)

Prosciutto can be substituted with bacon if that is your preference. Vegetarians can omit it altogether and add croutons instead for a little crunch and replace the chicken stock with vegetable stock. If you do not want to use Instant mashed potatoes, you can use 1 medium potato, peeled and grated.

IMG_6822 (3)IMG_6814 (1)

Pea, Potato and Prosciutto Soup
Serves 4

I onion, finely chopped
2 tbsp olive oil
3 cups frozen peas
3 cups chicken stock
1/2 cup instant potato mash powder
1 cup water
5-6 slices of proscuitto
salt and cracked pepper to serve
a dollop of sour cream to serve

Heat a saucepan over medium heat. Add 1 tbsp of olive oil and the onion and cook till soft. Add the peas, stock, water and instant mash (or grated potato if you are using one) and stir to mix. Cook till peas become tender and the soup thickens.

Meanwhile, heat the remaining oil in a large frying pan over medium-high heat. Add the prosciutto and cook for 2-3 minutes each side or until crisp. Transfer to a plate lined with paper towel. Set aside to cool.

Transfer the pea mixture to the bowl of a food processor or the jug of a blender. (If you have a stick blender, you can blend it directly in the saucepan). Process or blend until the mixture is smooth. Transfer the soup to a clean saucepan over medium heat and stir until heated through. Taste and season with salt and pepper.
Ladle the soup among serving bowls and dollop the sour cream. Break the prosciutto into large pieces and arrange on top of the soup to serve.

Garlic and Chilli Prawn Spaghetti

8|12|2013

I could eat cookies for all meals and still have an appetite for more. But in a house full of boys that may not be the ideal scenario. They are on the look out for ‘real food’ and sadly cookies don’t fit into that category. So a tiny little break from Cookies!

IMG_6880 (1)

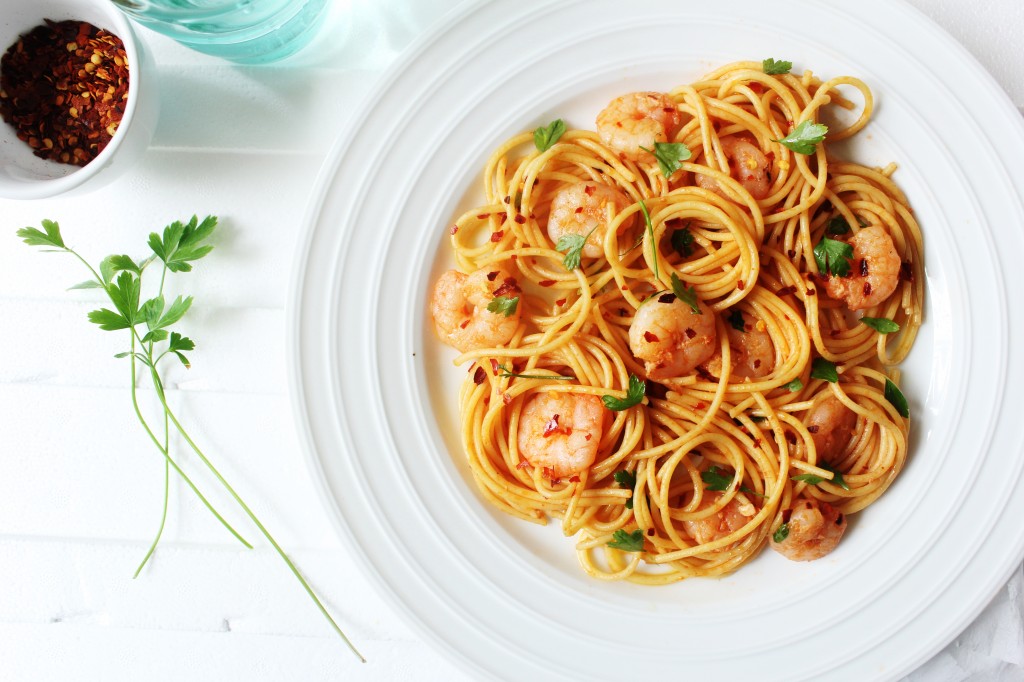
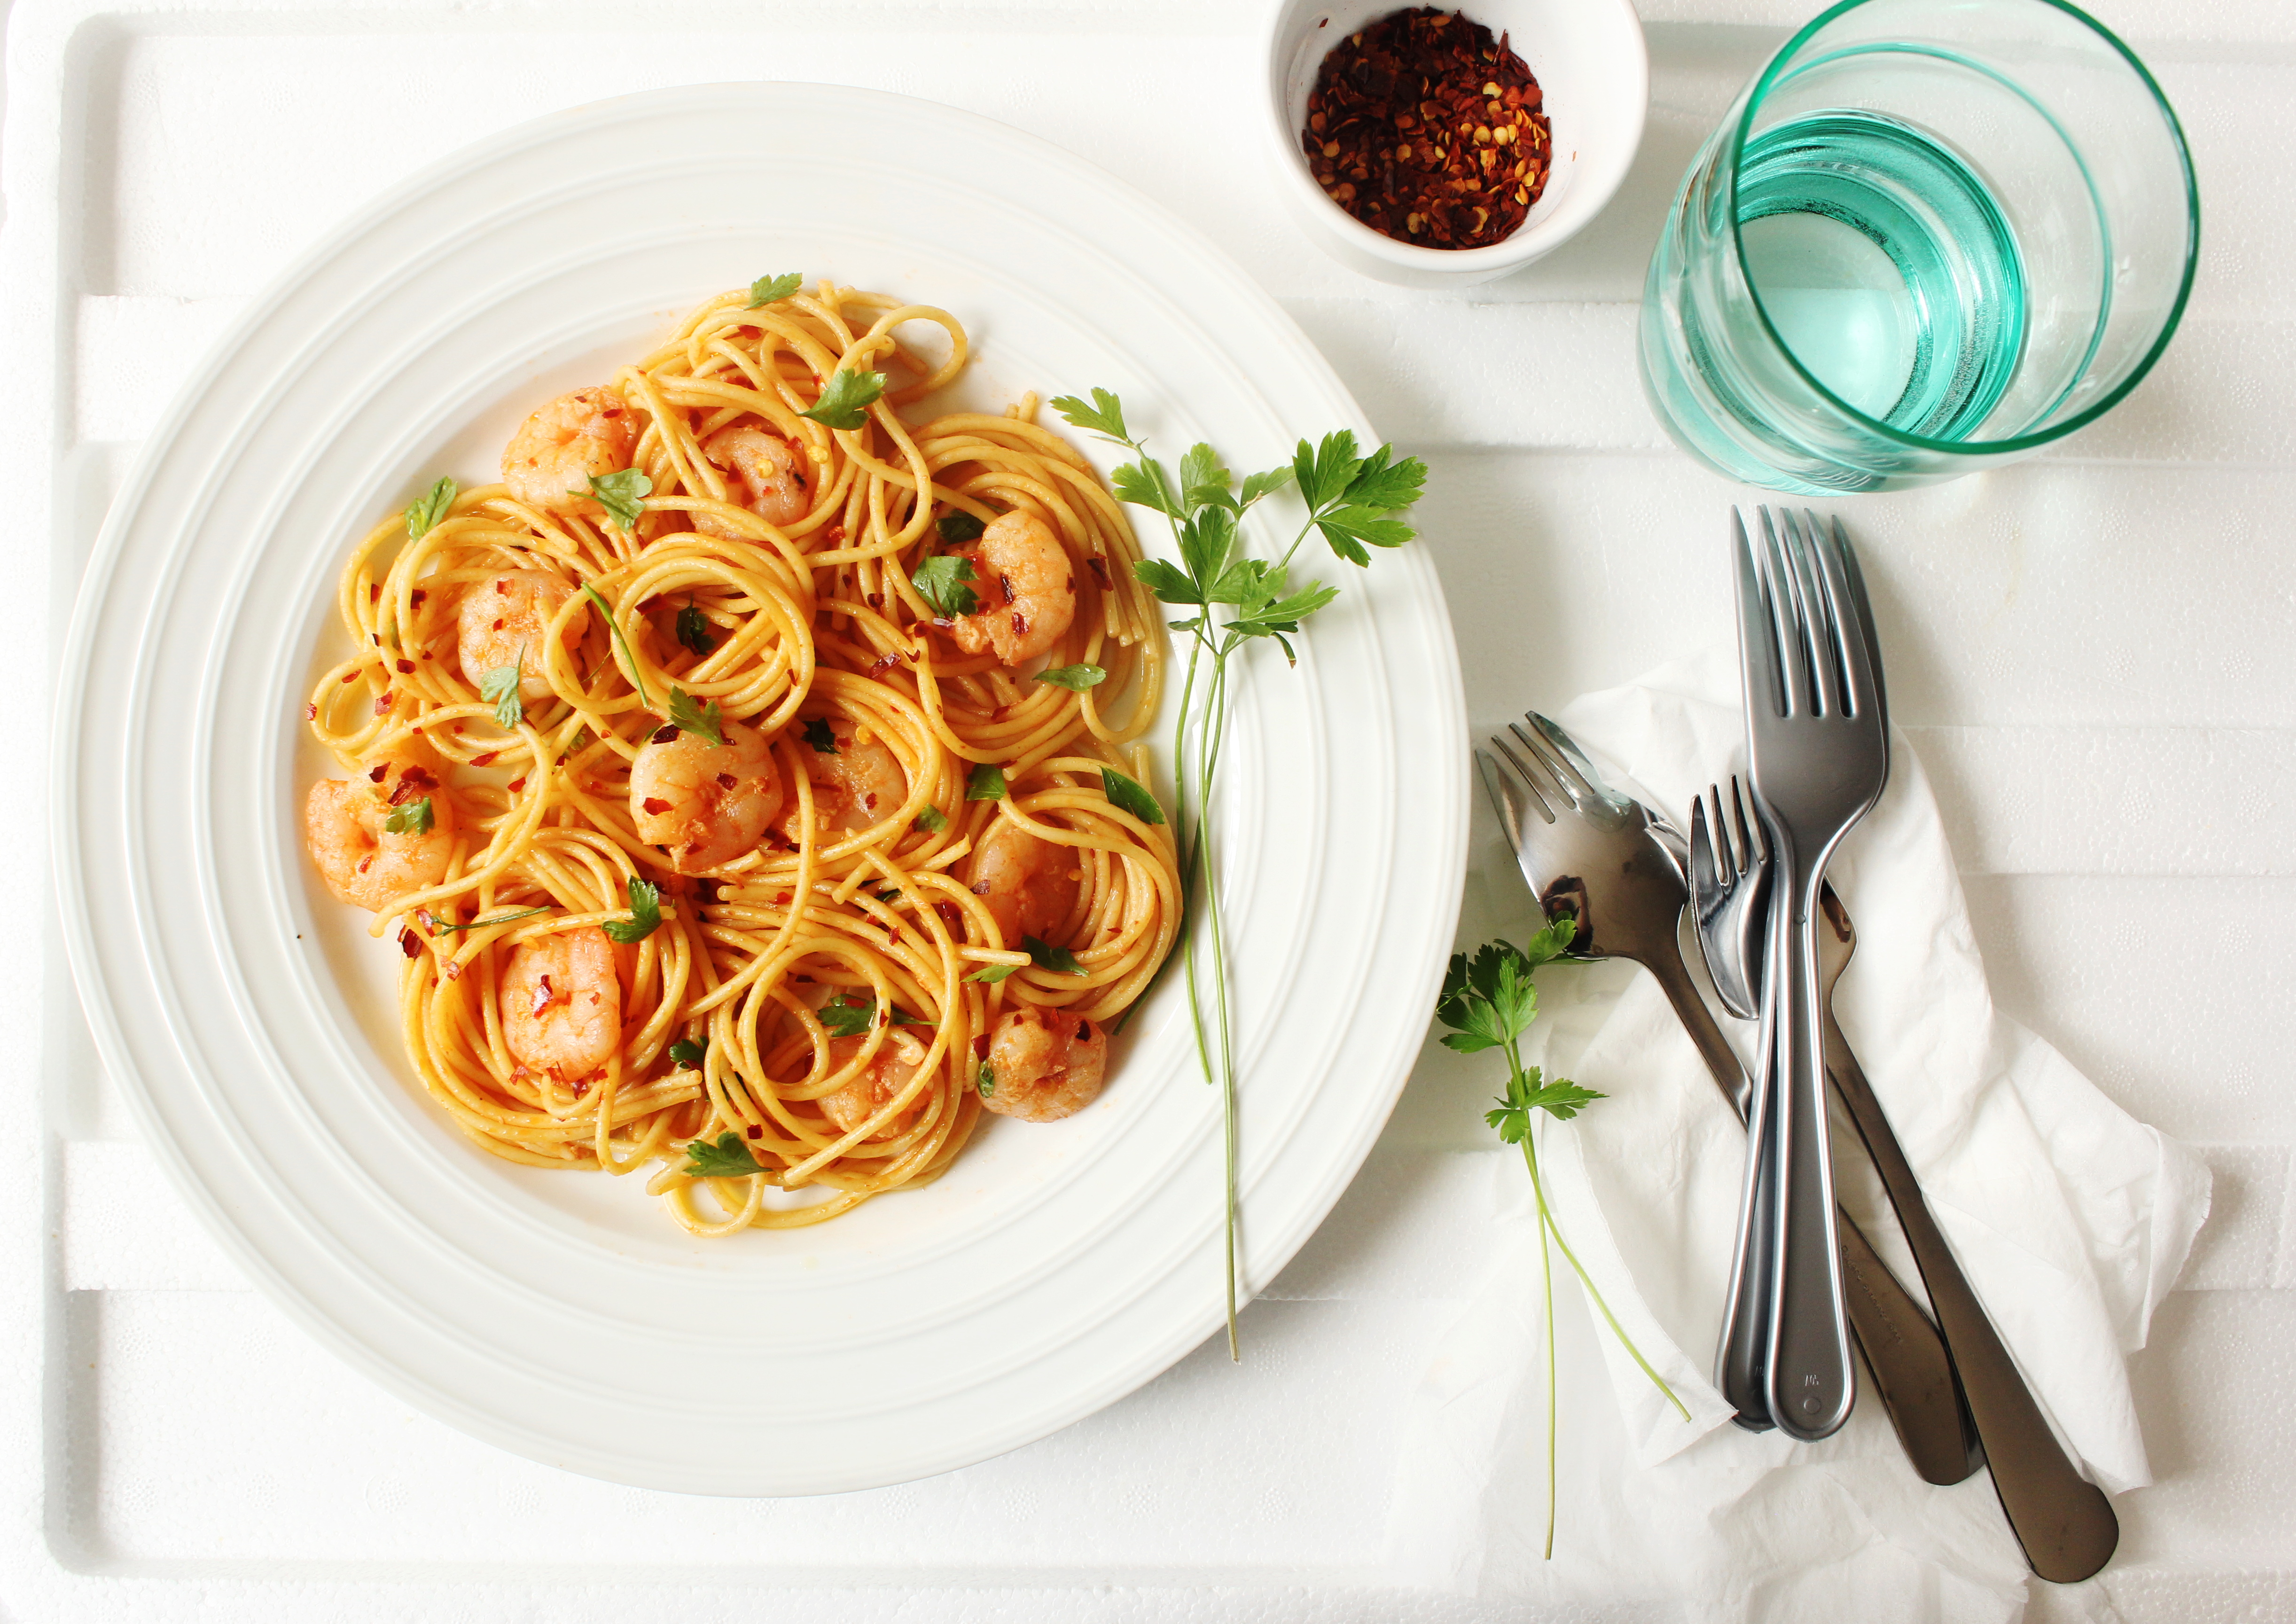
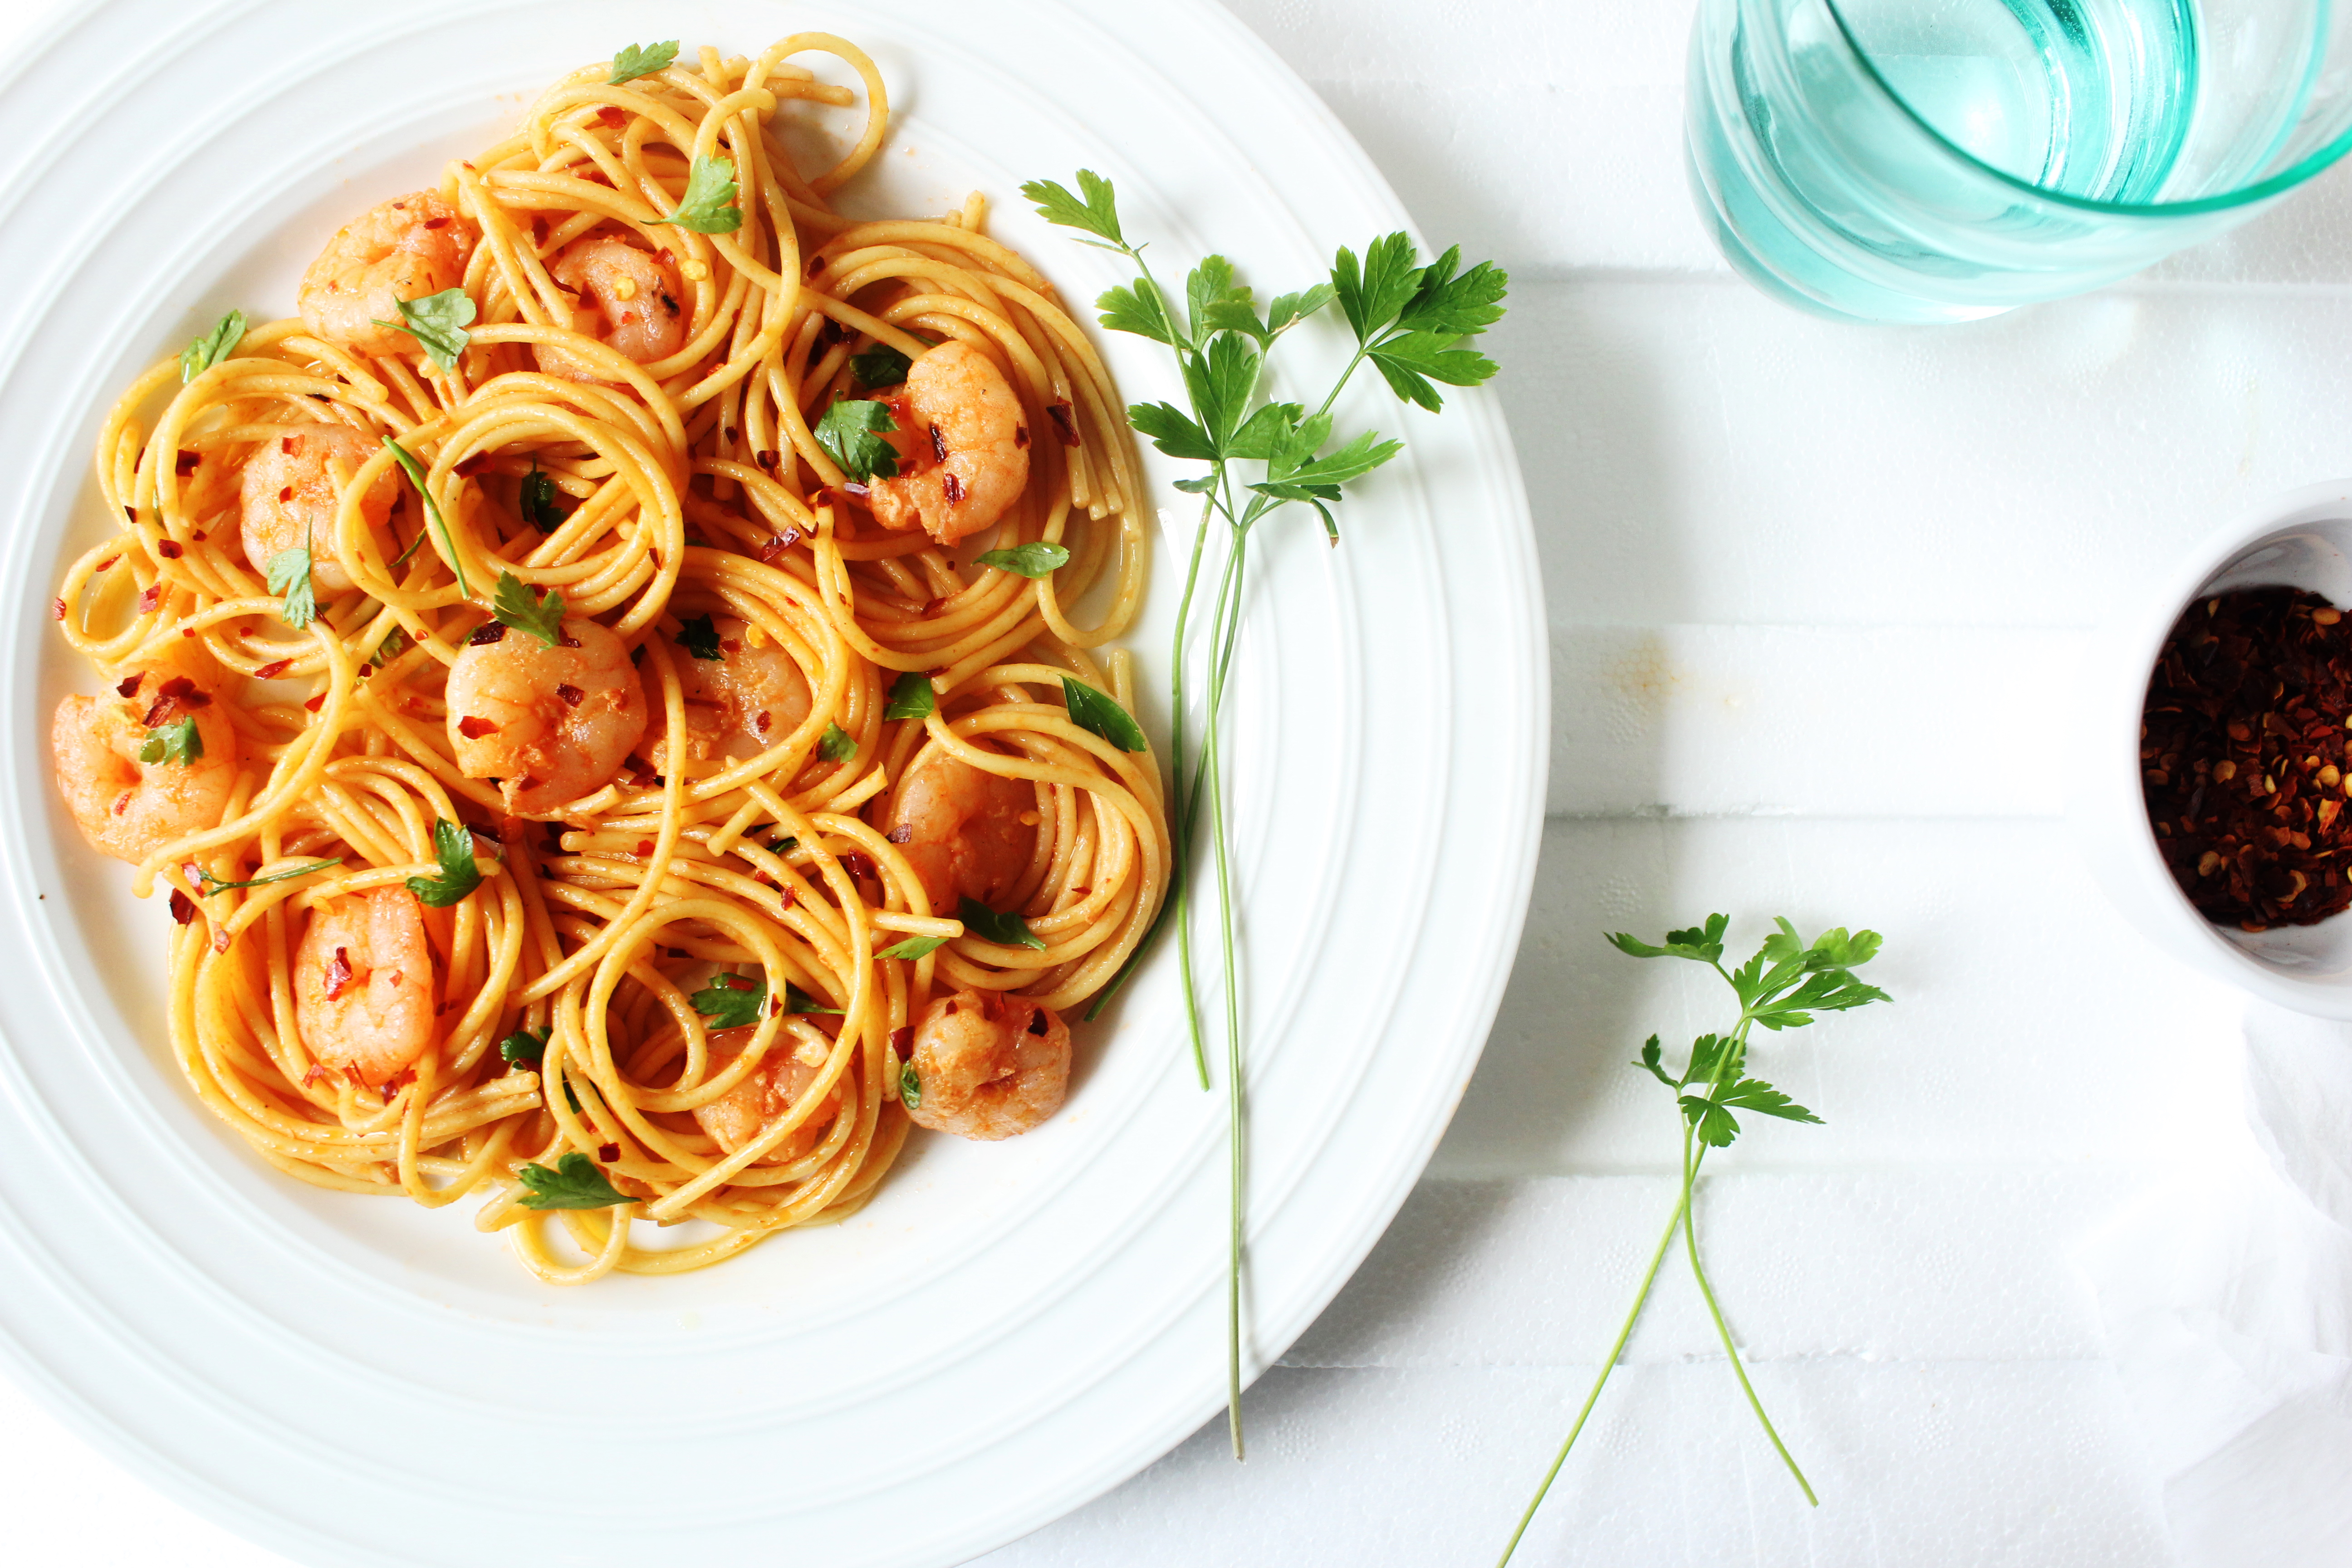
By now, you already know how much we love noodles and such things. Whether in Asian recipes or in its Italian form…noodles/pasta are a staple in our house. Though personally I prefer the fettuccine or pappardelle over spaghetti, it is the most obvious choice for kids. So we have a kid friendly version of this recipe minus the chillies and really hot one with lots of dry chilli flakes for the adults.
IMG_6886 (1)

This is again a recipe that is ready under 15 minutes and yet filling and full of flavour. And this dish just confirm the fact that you don’t need a lot of ingredients to come up with a tasty meal. Substitute the prawns with your favourite meat if you want to and adjust the heat to your liking. You could use fresh red chillies too. I like to add dried chilli flakes for texture and I find it easier to include it in a meal at the last-minute.

IMG_6882 (1)


Garlic and Chilli Prawn Spaghetti
(adapted with variation from Donna Hay, Fast, Fresh, Simple)

Serves 2-3

200g spaghetti, angel hair or linguine
1tbsp butter
1 tbsp. olive oil
4 cloves garlic, sliced
1 tsp dried chilli flakes
10-15 small uncooked prawns (fresh or frozen), cleaned
1 tbsp. lemon juice (optional)
2 tbsp. tomato puree or passata
a few flat leaf parsley leaves, roughly torn
salt and cracked pepper for seasoning

Cook the pasta in a large saucepan of boiling water for 8-10 minutes or until al dente. Drain and keep warm.

While the pasta is cooking, heat a frying pan over medium-high heat. Add the butter and olive oil and cook until butter has melted. Add the garlic and chilli and cook for two minutes. Add the prawns and cook, stirring for 3 minutes or until prawns are tender. Add the tomato puree, pasta, lemon juice, salt and pepper to the pan and toss to combine. Serve warm.


Coffee Pecan Cookies

5|12|2013

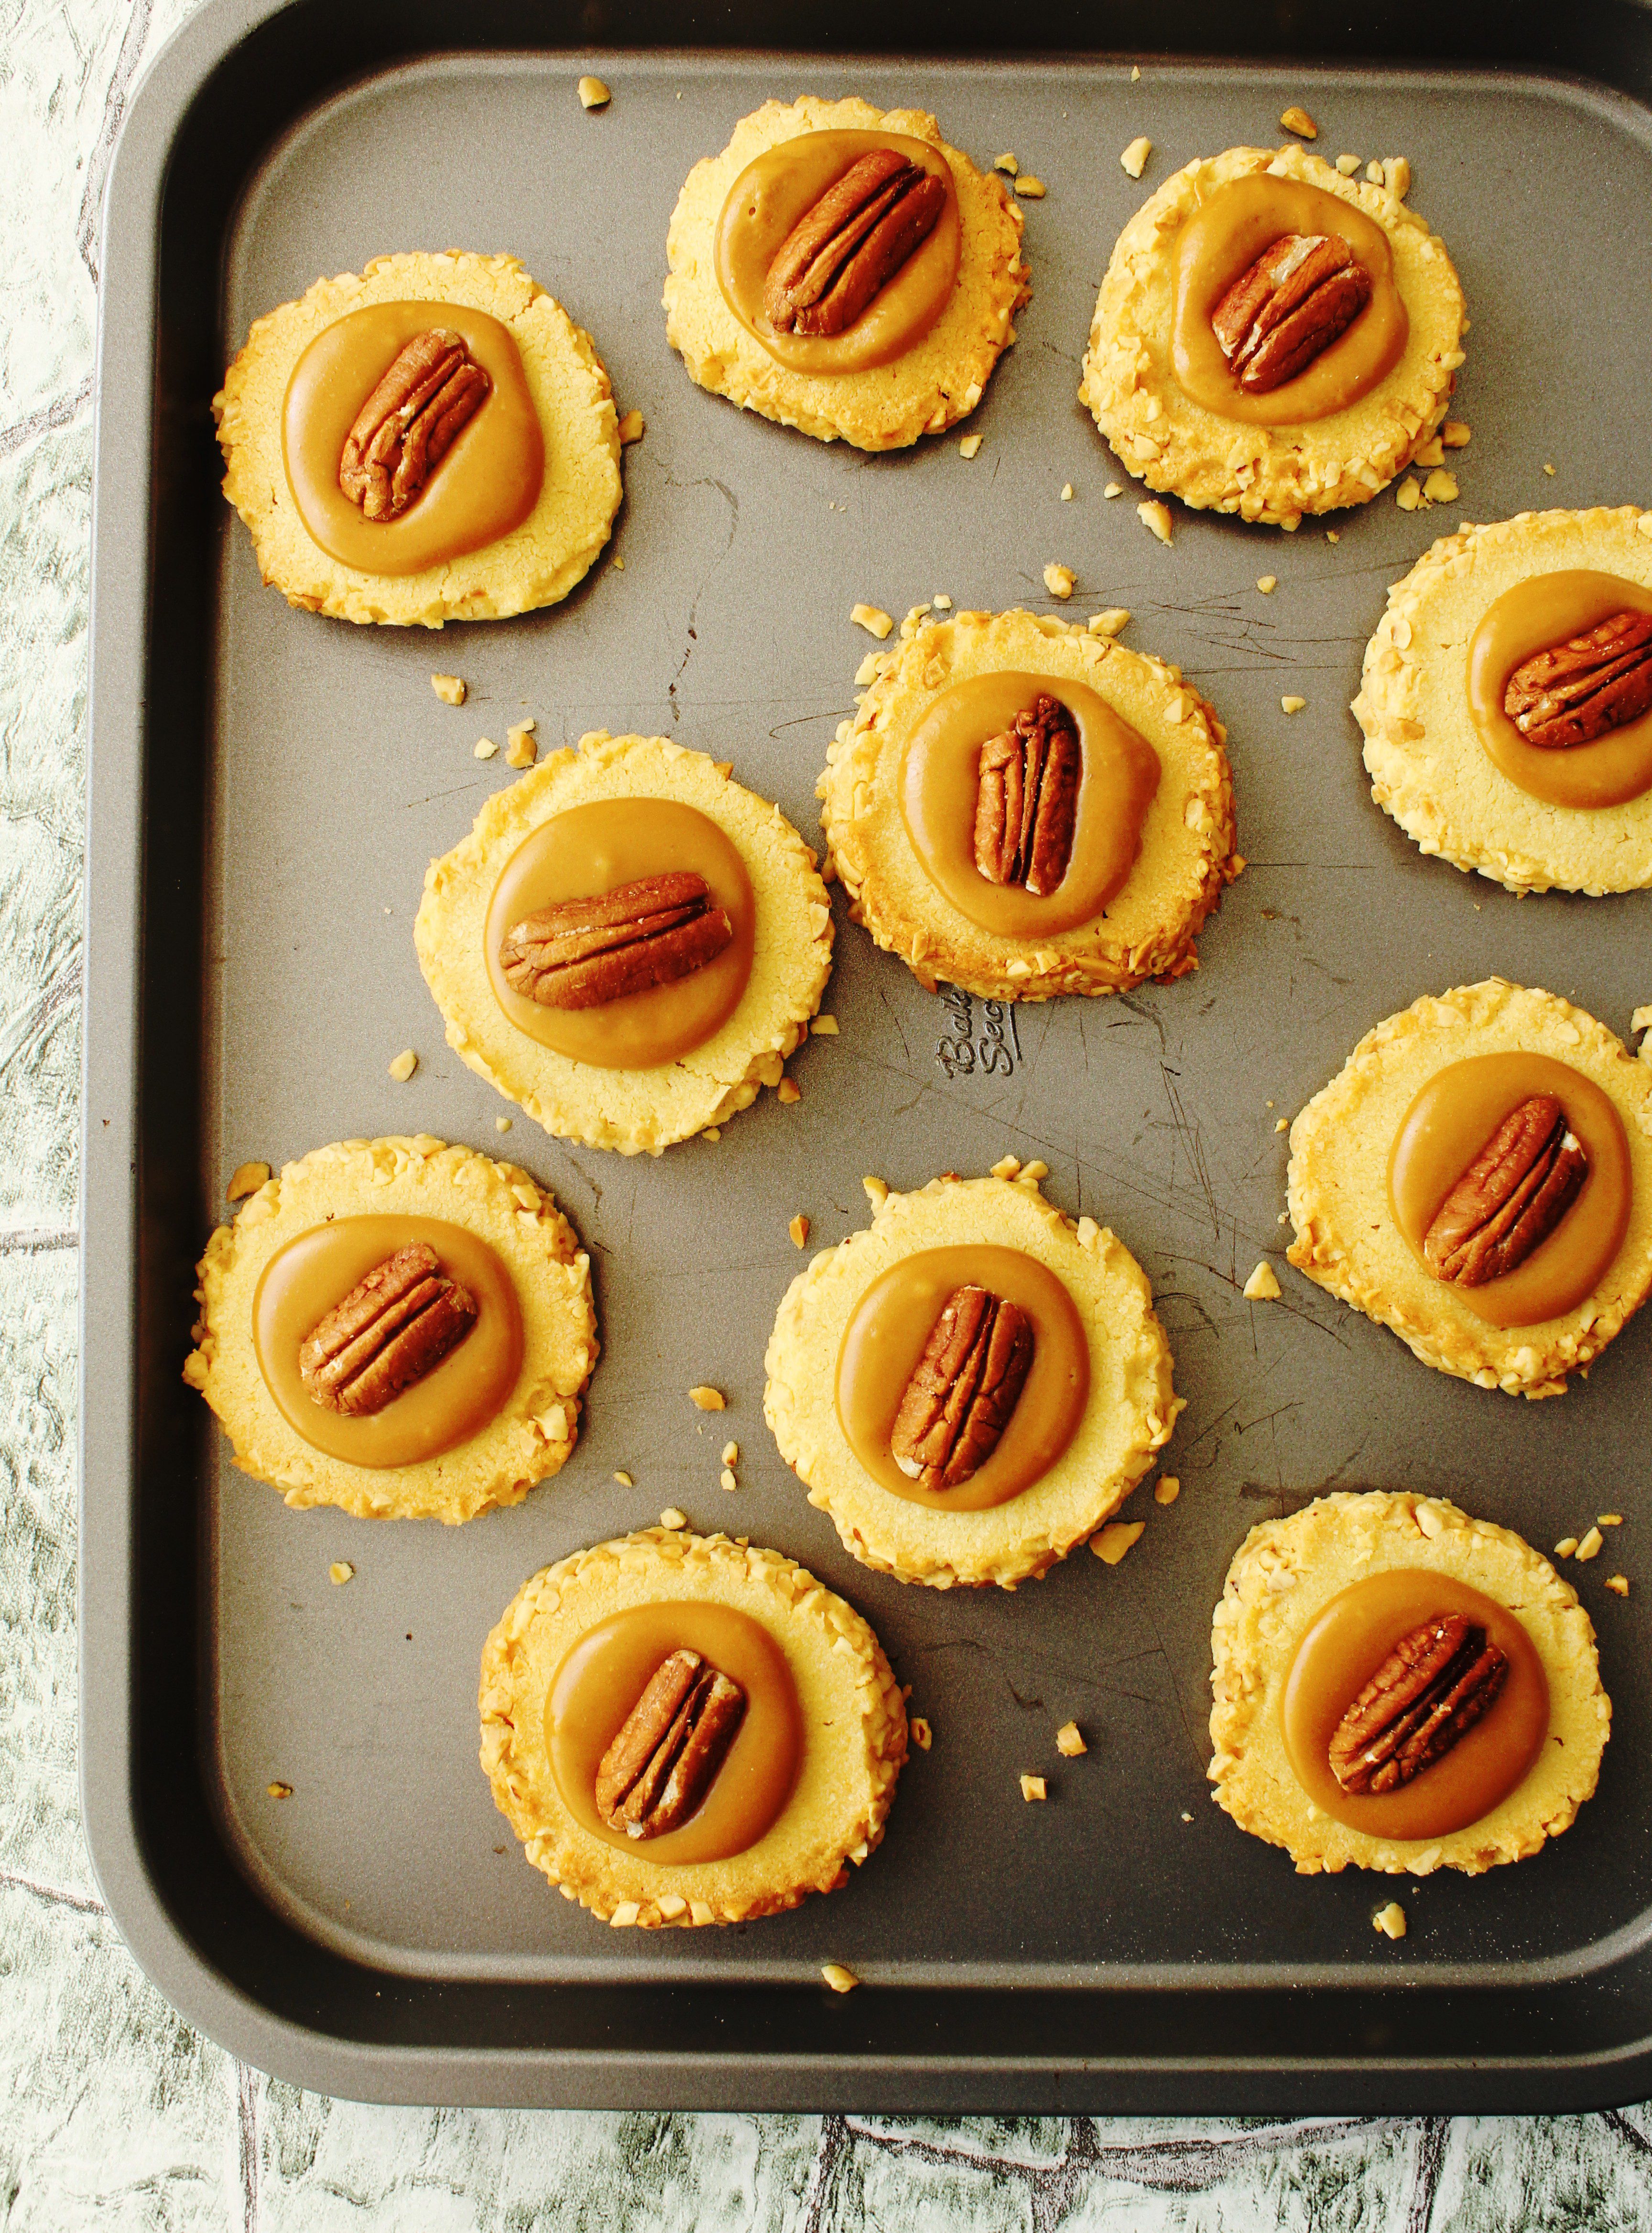
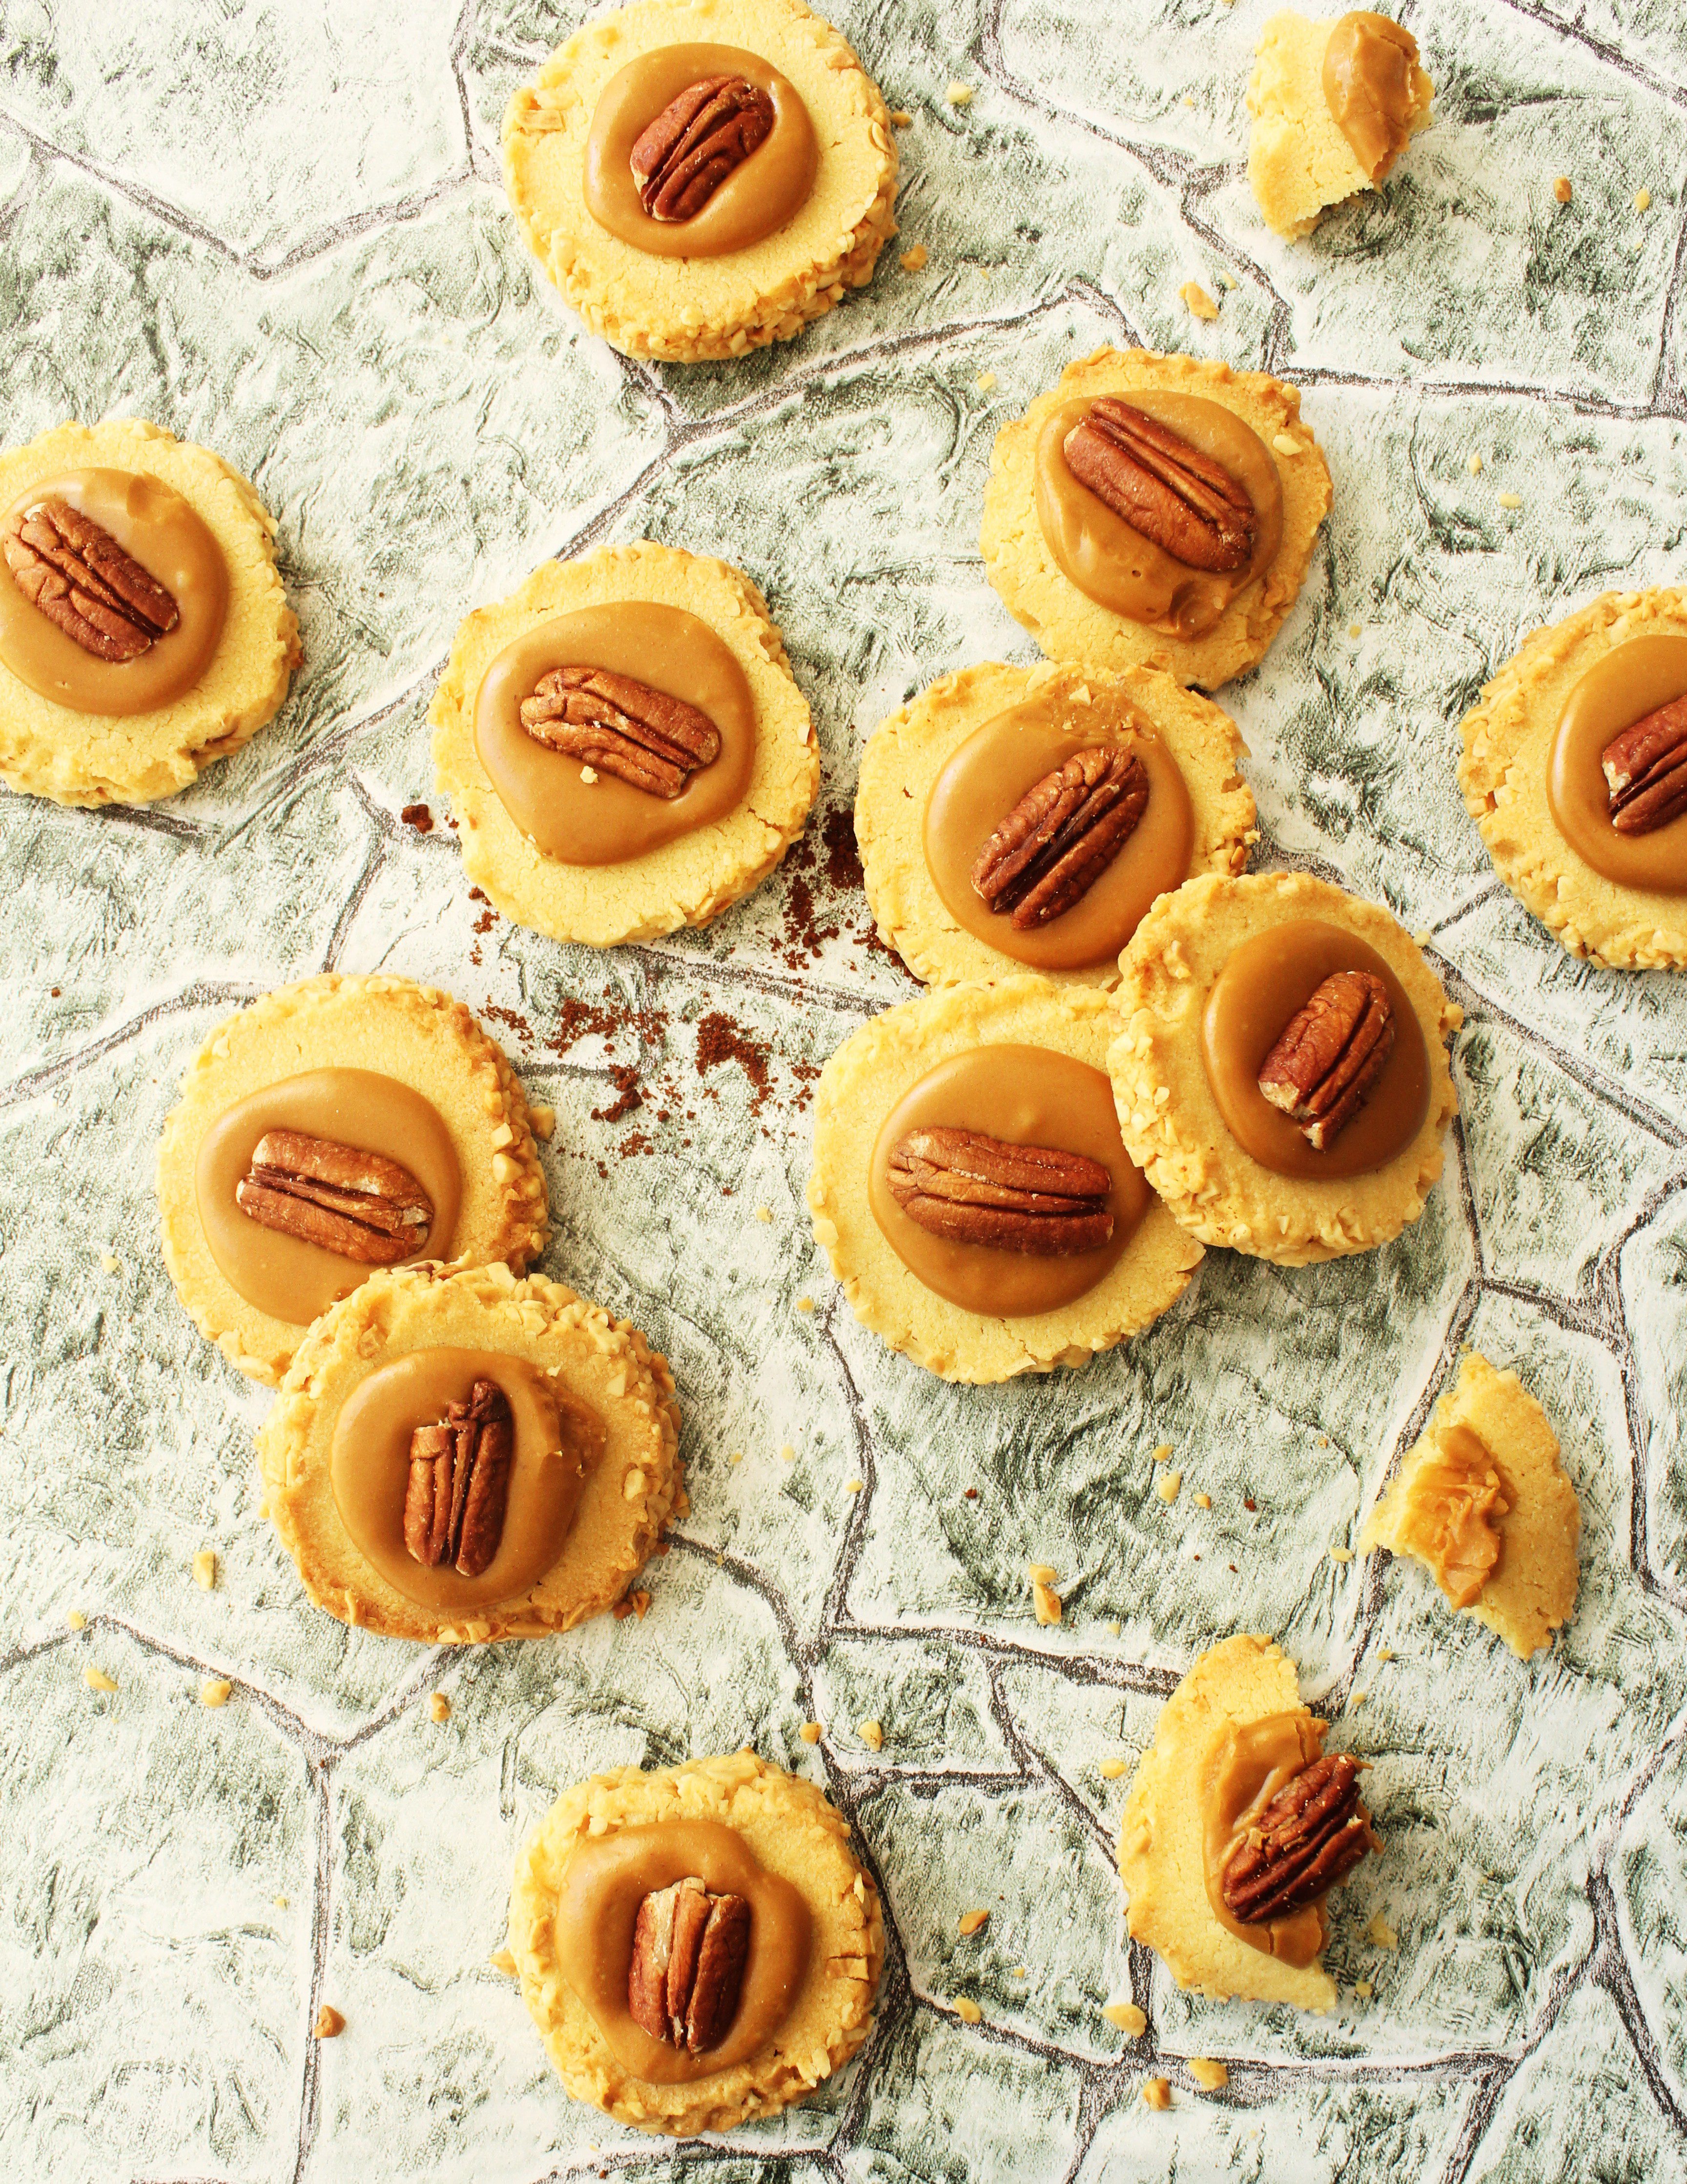
So I’m back! With more Cookies, of course.  Sooner than you had imagined? You see, when you were reading all about the Nutella filled Linzer cookies, I was already baking a batch of these and making the tastiest glaze ever to decorate them with. You guessed it! I used the same dough to make these.

IMG_6901 (1)

In fact after making about 12 Linzers, I rolled the dough into a log, covered it in plastic wrap and refrigerated it. Later on I rolled the log on chopped nuts to get a nice nutty coating around the circumference of the cookie when sliced. Then it was a matter of just baking them and dropping a spoonful of coffee glaze on to them. The glaze is super simple and ready in 2-3 minutes. Though in doubt about the quantity of coffee to add to the glaze, I am glad I went with my instincts. The glaze is gorgeous and so strongly tasting and smelling of coffee which is why I loved it all the more.

IMG_6903 (1)

Isn’t it fantastic that you can get two completely different cookie recipes…both tasting and looking great from the same dough. And quite a generous number of cookies too. I got 12 Linzers and 14 of these. I thought it would make such a great gift idea when you are looking to simply things and yet come up with an assortment of cookies.
Think about it…12 Linzer cookies, 6 filled with Nutella, 6 filled up with jam or lemon curd. And 14 of these cookies, 7 with a coffee glaze and other 7 with some other flavour…probably peppermint considering the season. A few drops of pink food colouring would do the trick with peppermint. And there you have it…a box of different flavoured, colourful looking cookies. You can play around with different ideas, I guess.
Please note, the recipe below is for the entire dough. You can halve it accordingly.

IMG_6923 (1)

These cookies are by far the best I have made this year. And that’s not small because I bake at least 3-4 different cookies every month. I love baking cookies and gifting them to my friends. I do it all the time.
I think the best way to tell someone that you like them is to make them a cookie.

IMG_6918 (2)


Coffee Pecan Cookies
Yields 28 large cookies

For the Cookies
1 cup hazelnut meal/ground hazelnuts or any nut meal of your choice
2 cups plain flour
1/2 tsp ground cinnamon
1/2 teaspoon salt
1 cup (226 grams) unsalted butter, room temperature
3/4 cup castor sugar
1 tsp vanilla extract
2 egg yolks
3/4 cup pecans or any nut of your choice, finely chopped
Pecan halves, for decoration

For the coffee glaze
adapted from Taste.com

3/4 cup icing sugar mixture
1 tbsp boiling water
1 tbsp butter, softened
2 tsp espresso coffee powder

In a bowl whisk together the flour, cinnamon and salt.

In the bowl of  your electric mixer (or with a hand mixer), beat the butter and sugar until light and fluffy (about 2-3 minutes). Beat in the  vanilla extract and egg yolks. Finally, beat in the ground hazelnuts and then the  flour mixture.

Divide the dough in half, roll each piece of dough into a 5 cm diameter log. Cover in plastic wrap and refrigerate until firm.

Once the log is firm, take it out and keep aside for 5 minutes. Unwrap and lightly roll in the chopped nuts till evenly coated. Wrap each log in plastic wrap tightly again and refrigerate for 30 minutes. This step ensures that the nut coating adheres to the cookies while baking.

Preheat oven to 180 degrees C. Line two baking sheets with parchment  paper.

Using a sharp knife, carefully cut logs into 1.5cm-thick slices. Place on lined baking trays. Bake for 15-20 minutes, swapping trays over in oven in between (baking time will depend on the size of the cookie. Mine took 20 minutes as the cookies were large) Bake till crisp or until edges begin to turn light brown. Allow to cool on trays for 5 minutes. Transfer to wire racks to cool completely.

To make the Glaze, sift icing sugar into a bowl. Combine boiling water, butter and coffee powder in a separate bowl and stir until coffee is dissolved. Add to icing sugar and stir until mixture is smooth.
Drop 1 teaspoon of glaze onto centre of each cookie. Top with 1 pecan. Allow icing to set. Serve.

Nutella Filled Linzer Cookies

3|12|2013

When I look at the recipes I had bookmarked to try this year, I wonder if I will ever be able to reach the end of my list. Actually, is there an end…will there ever be one! No…not for me! I feel I am just getting started. The holiday season is bringing plenty of excitement to my baking repertoire and my oven is doing a bit of over time already.

linzer cookies

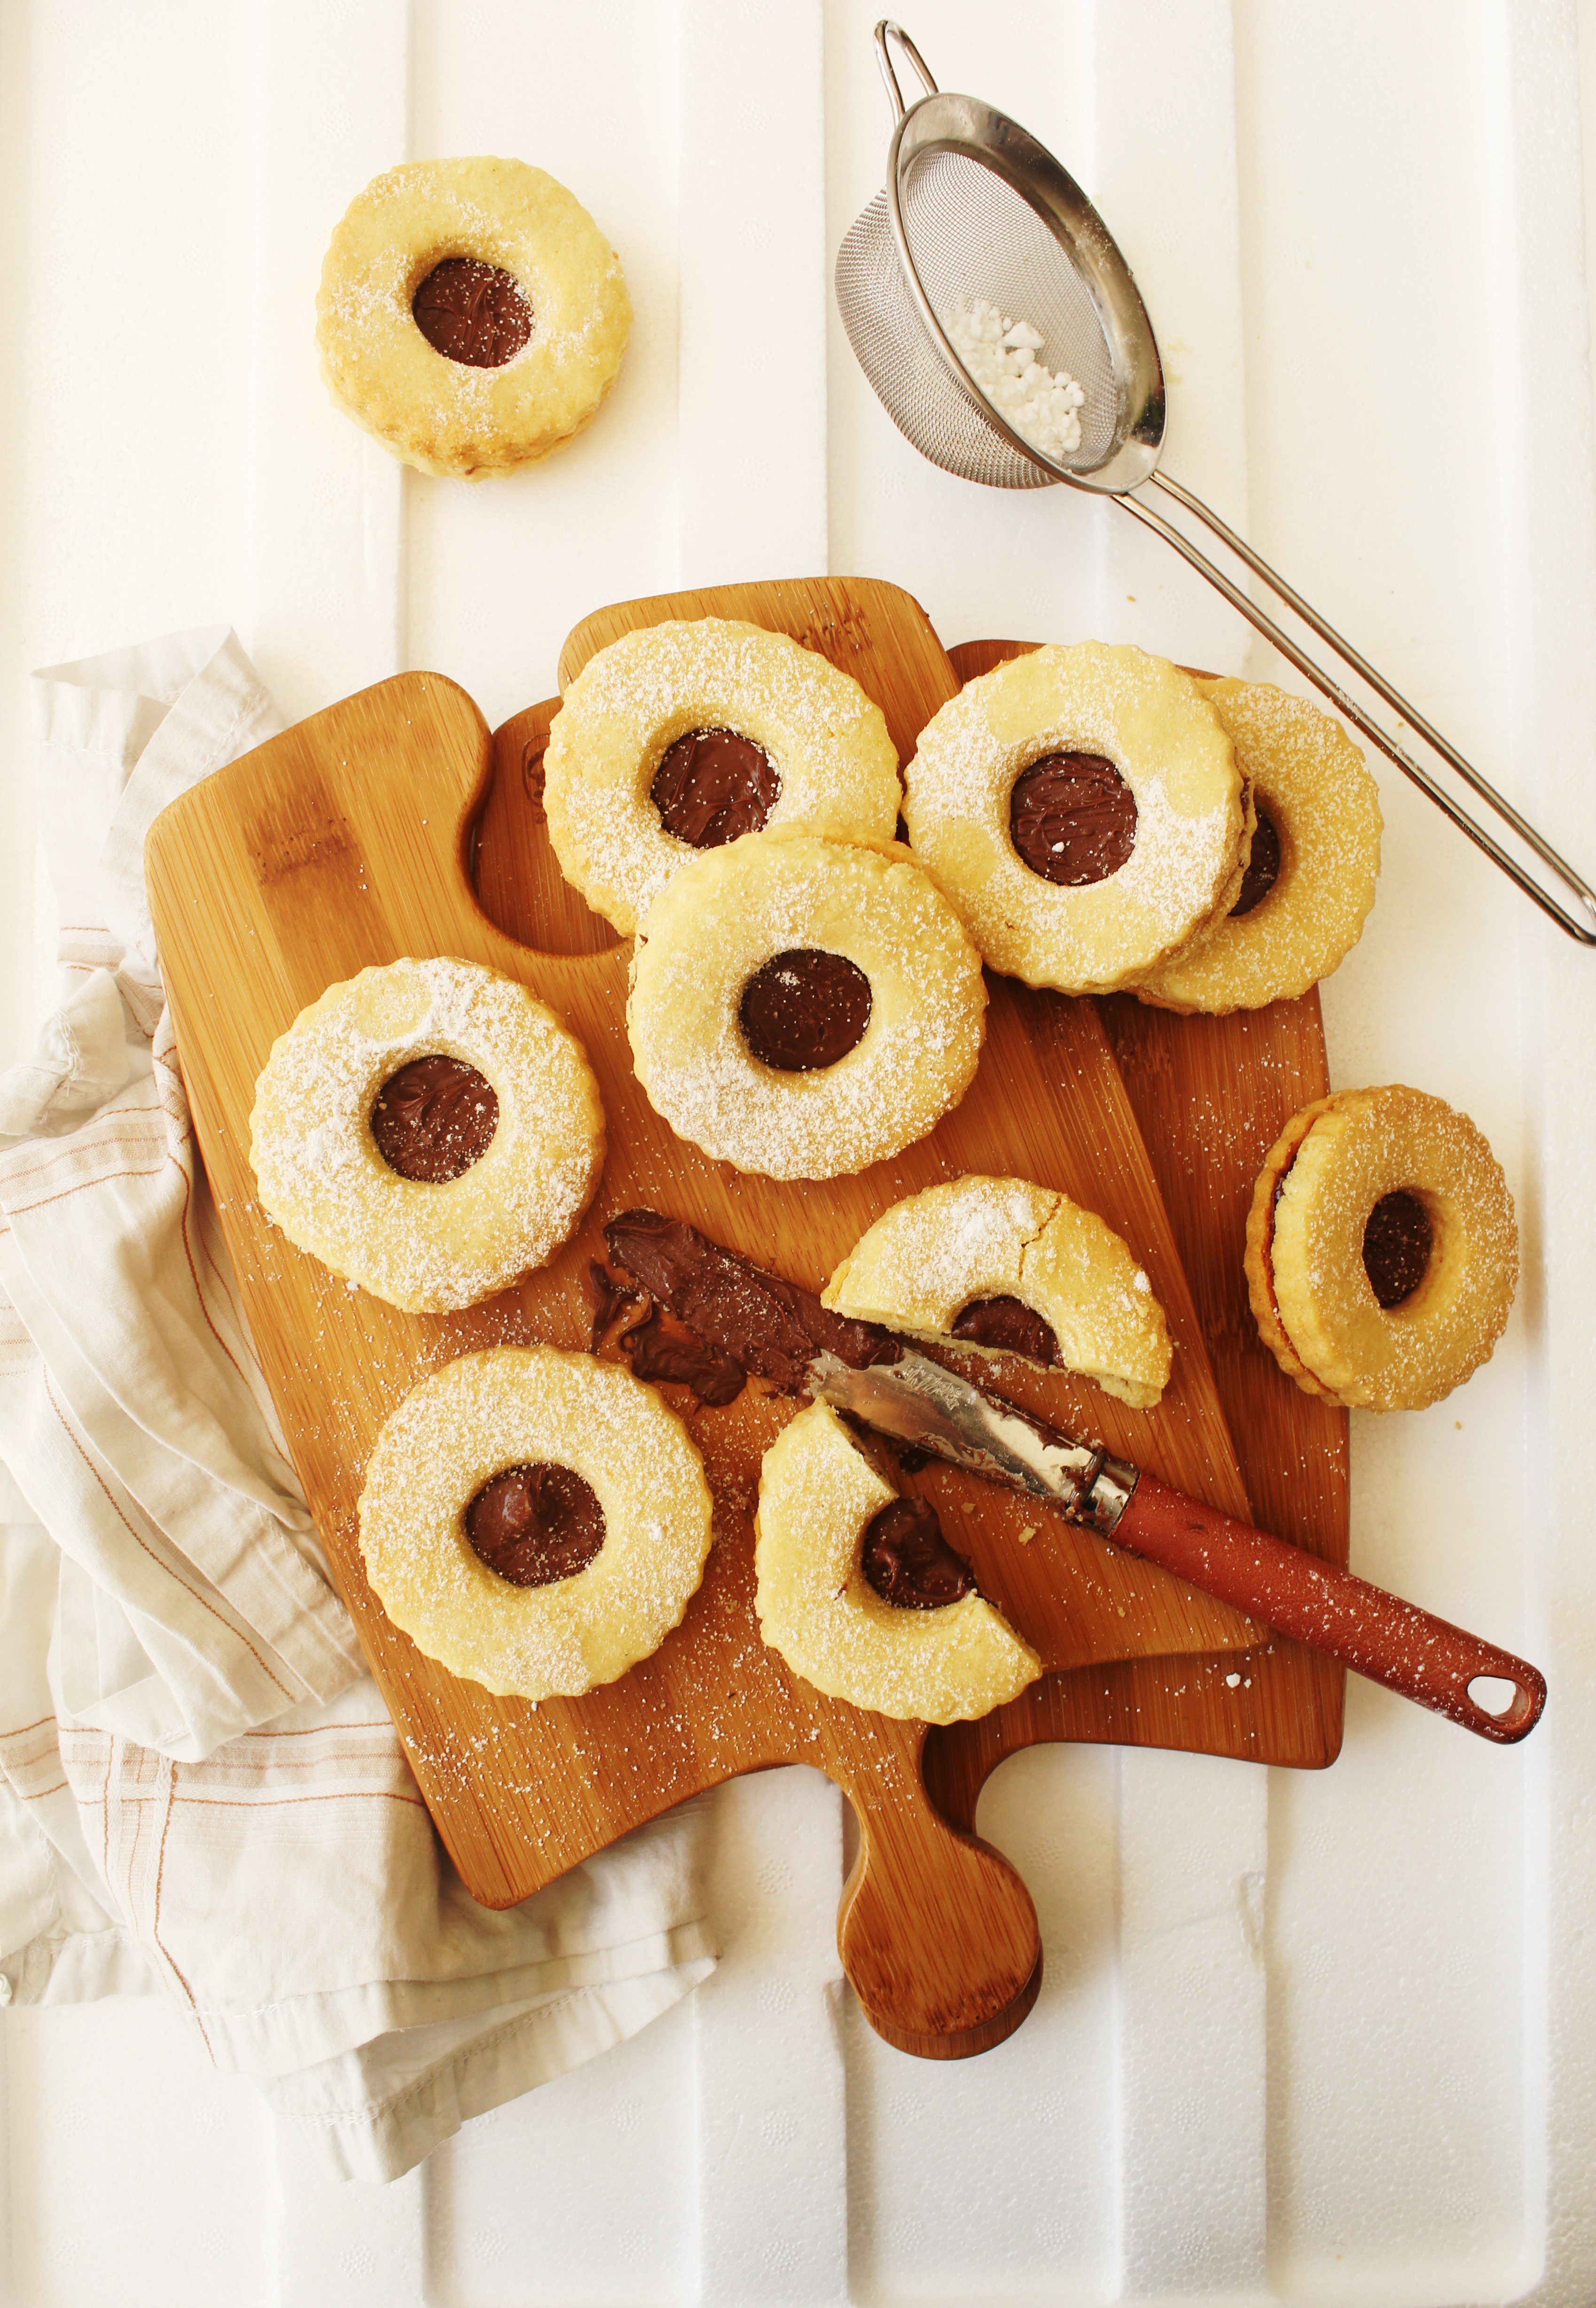
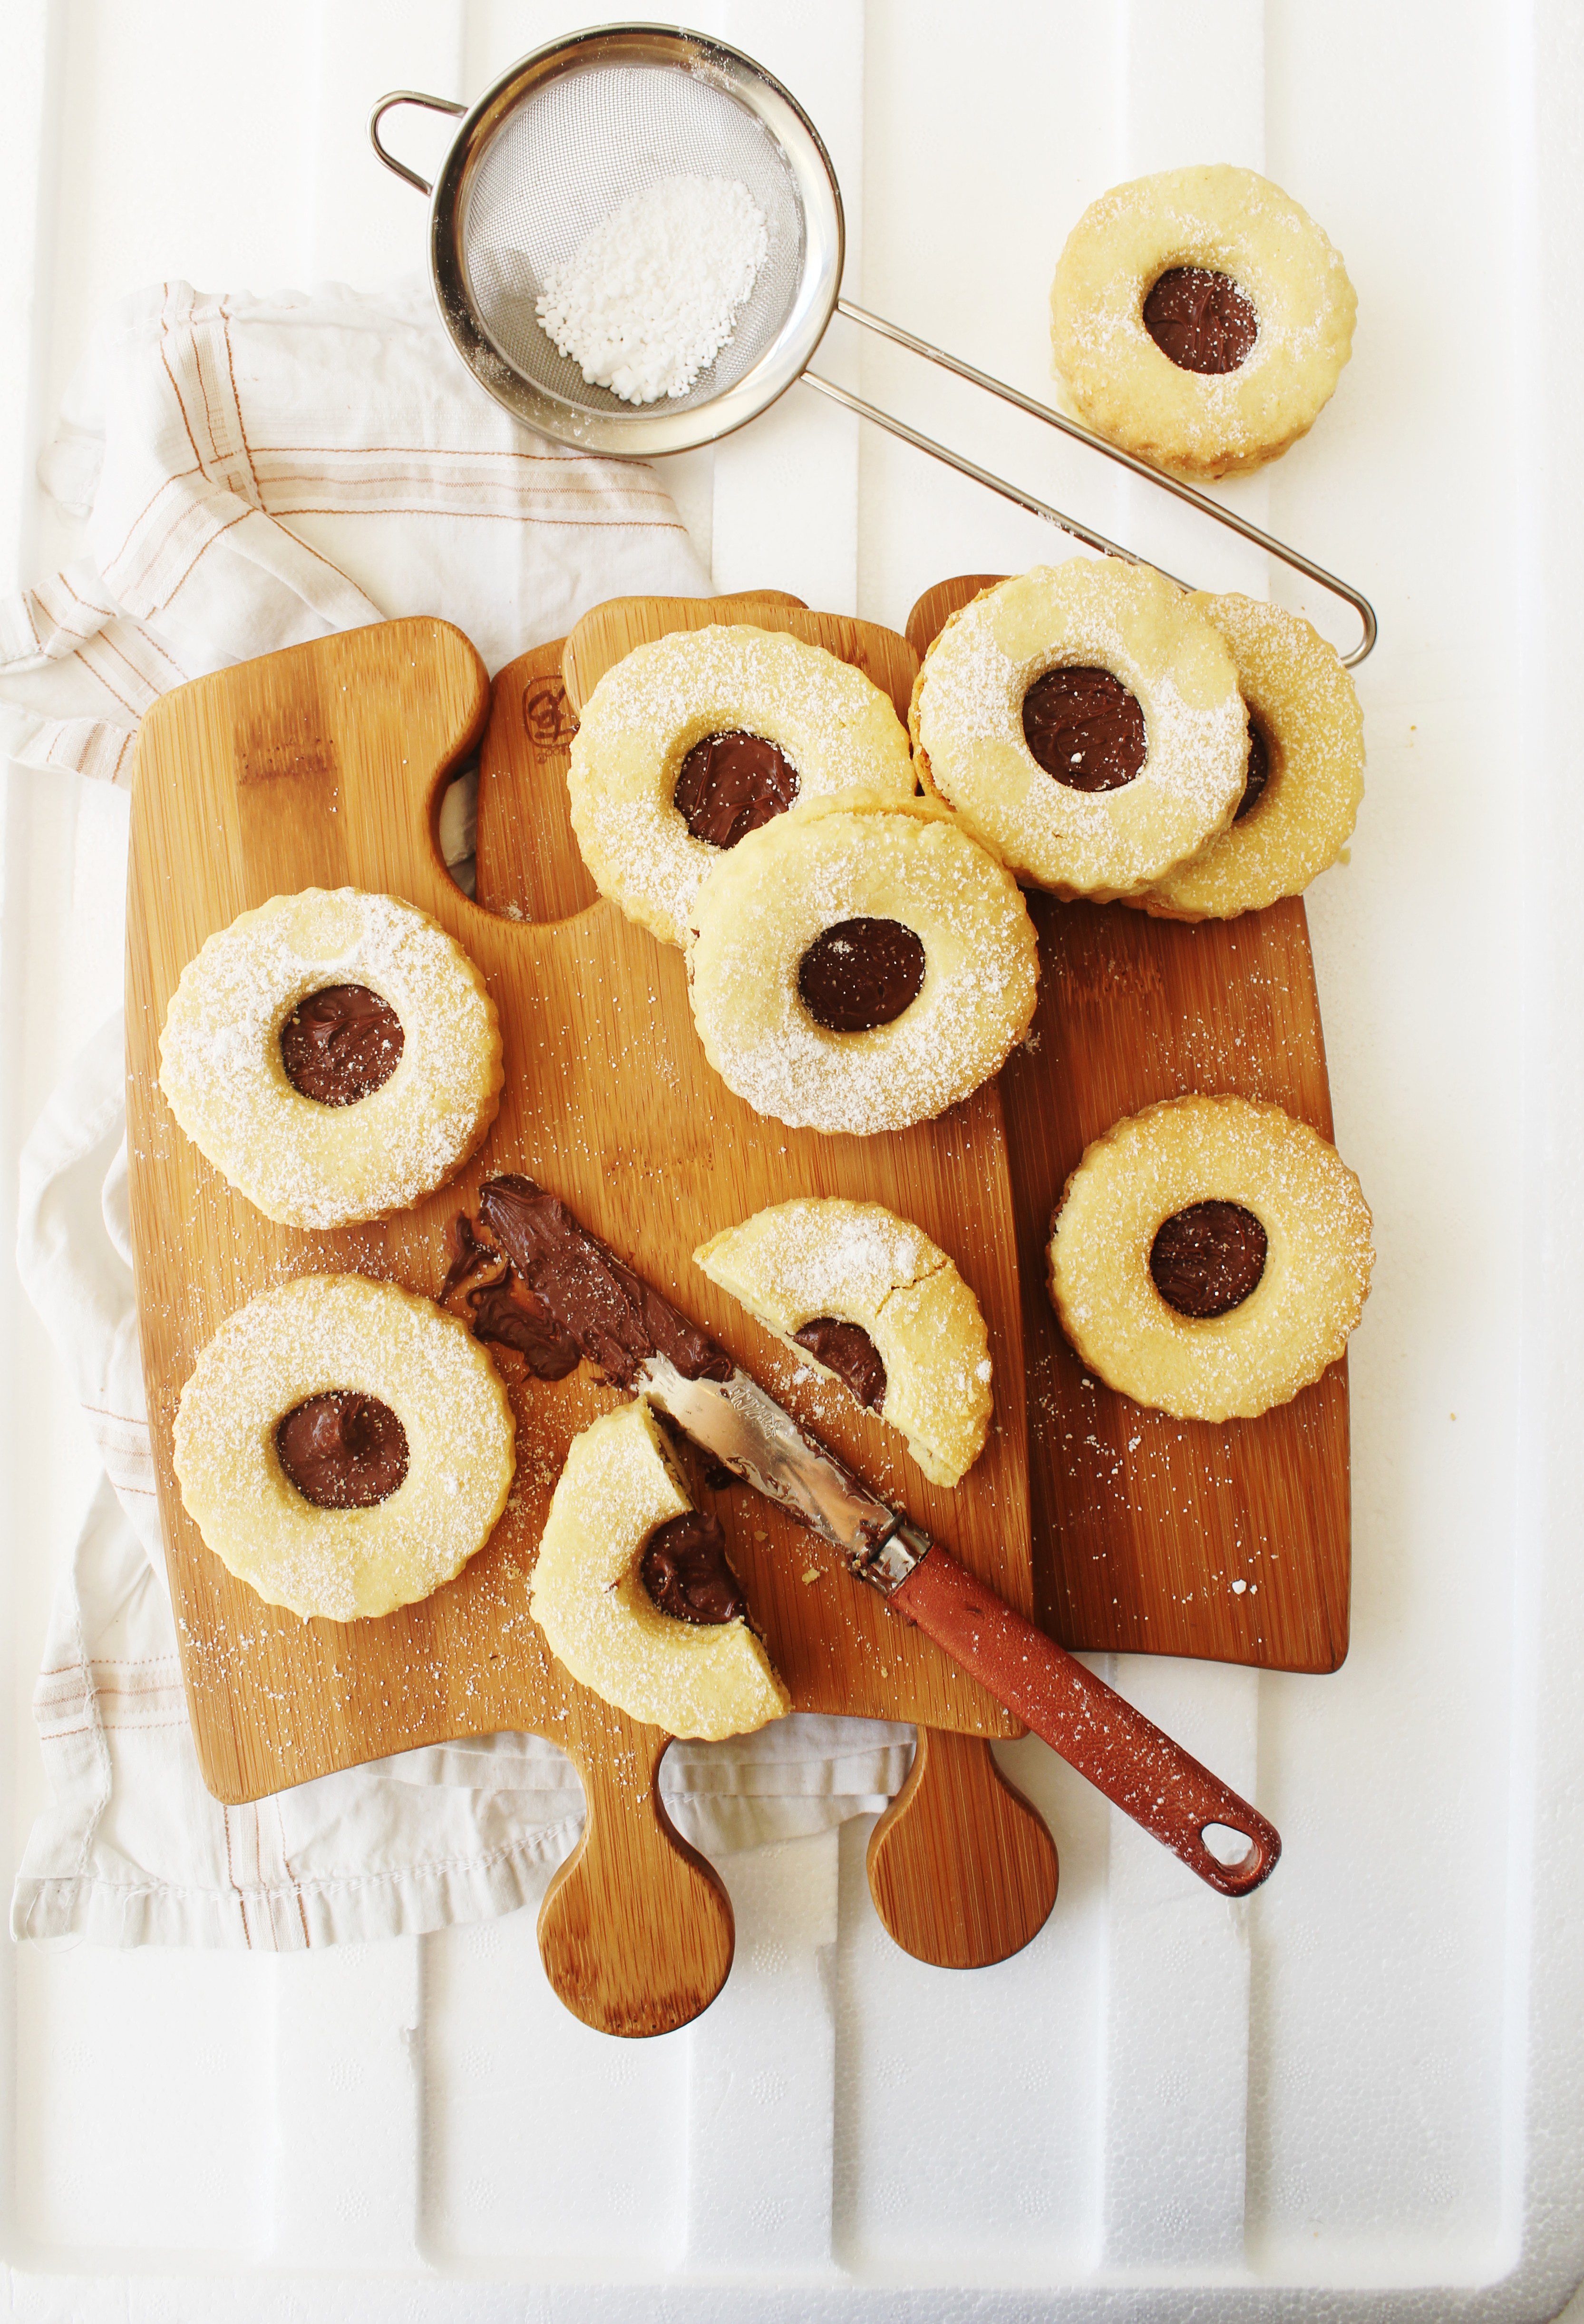
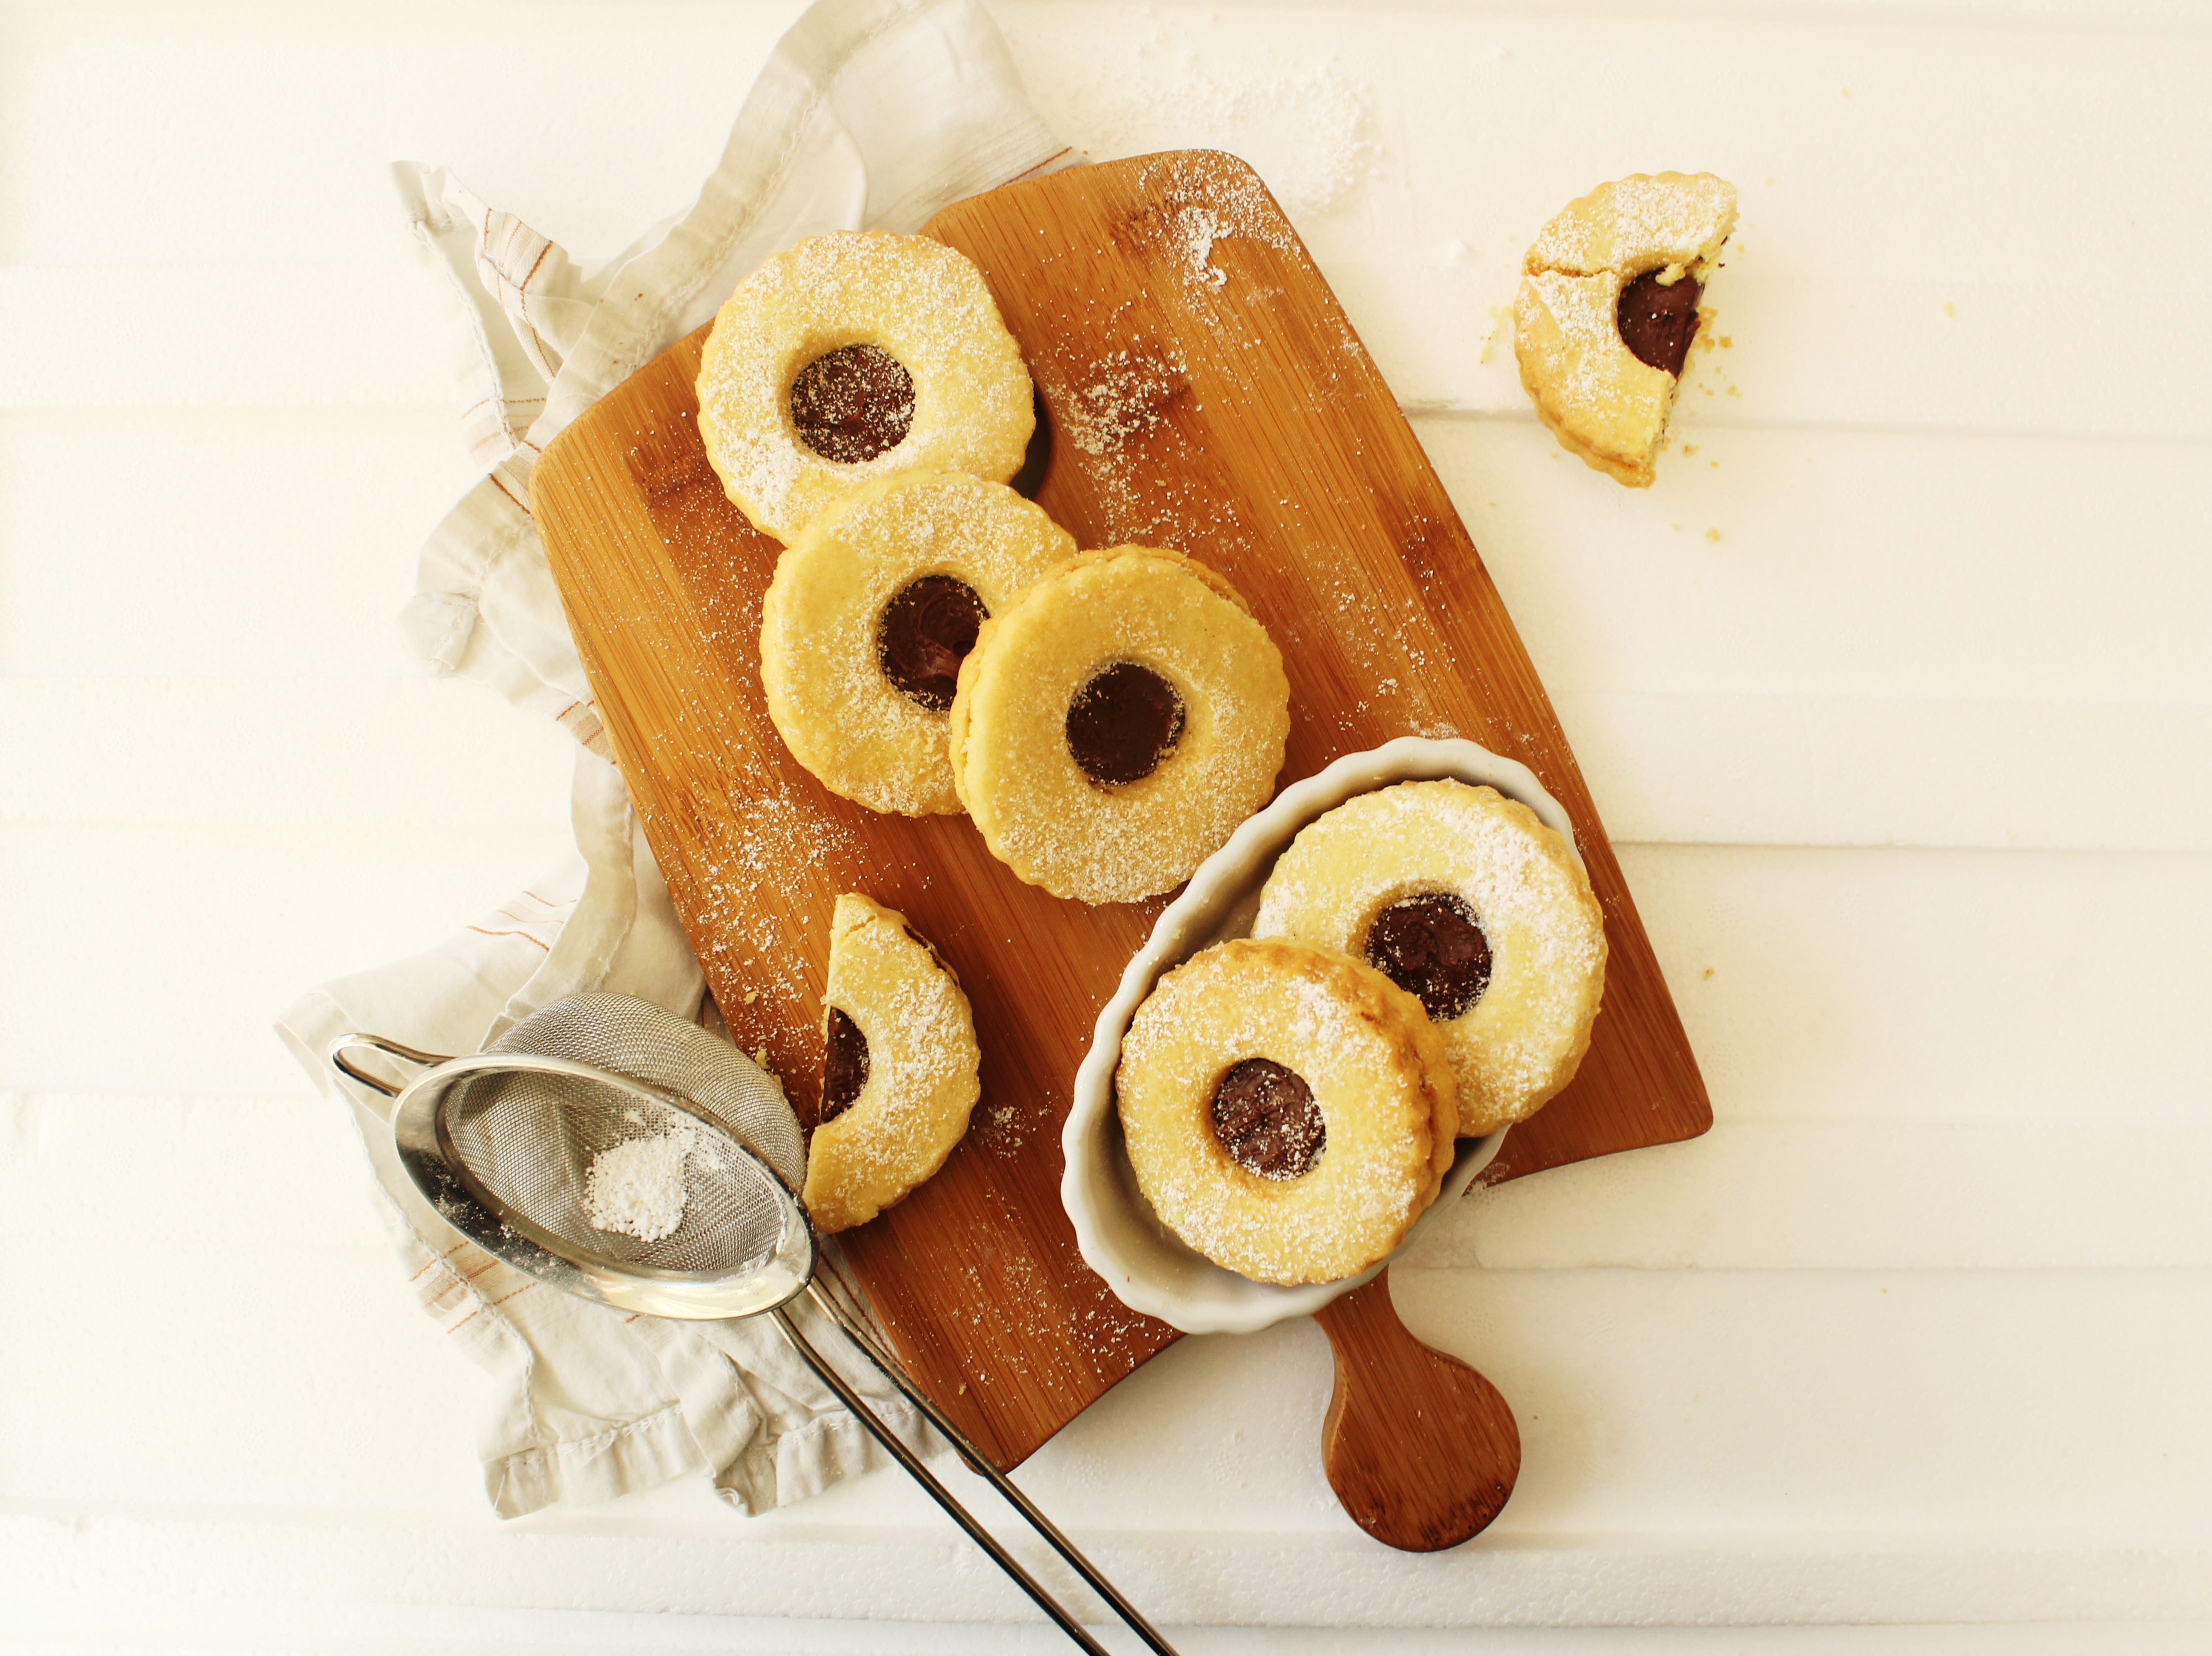
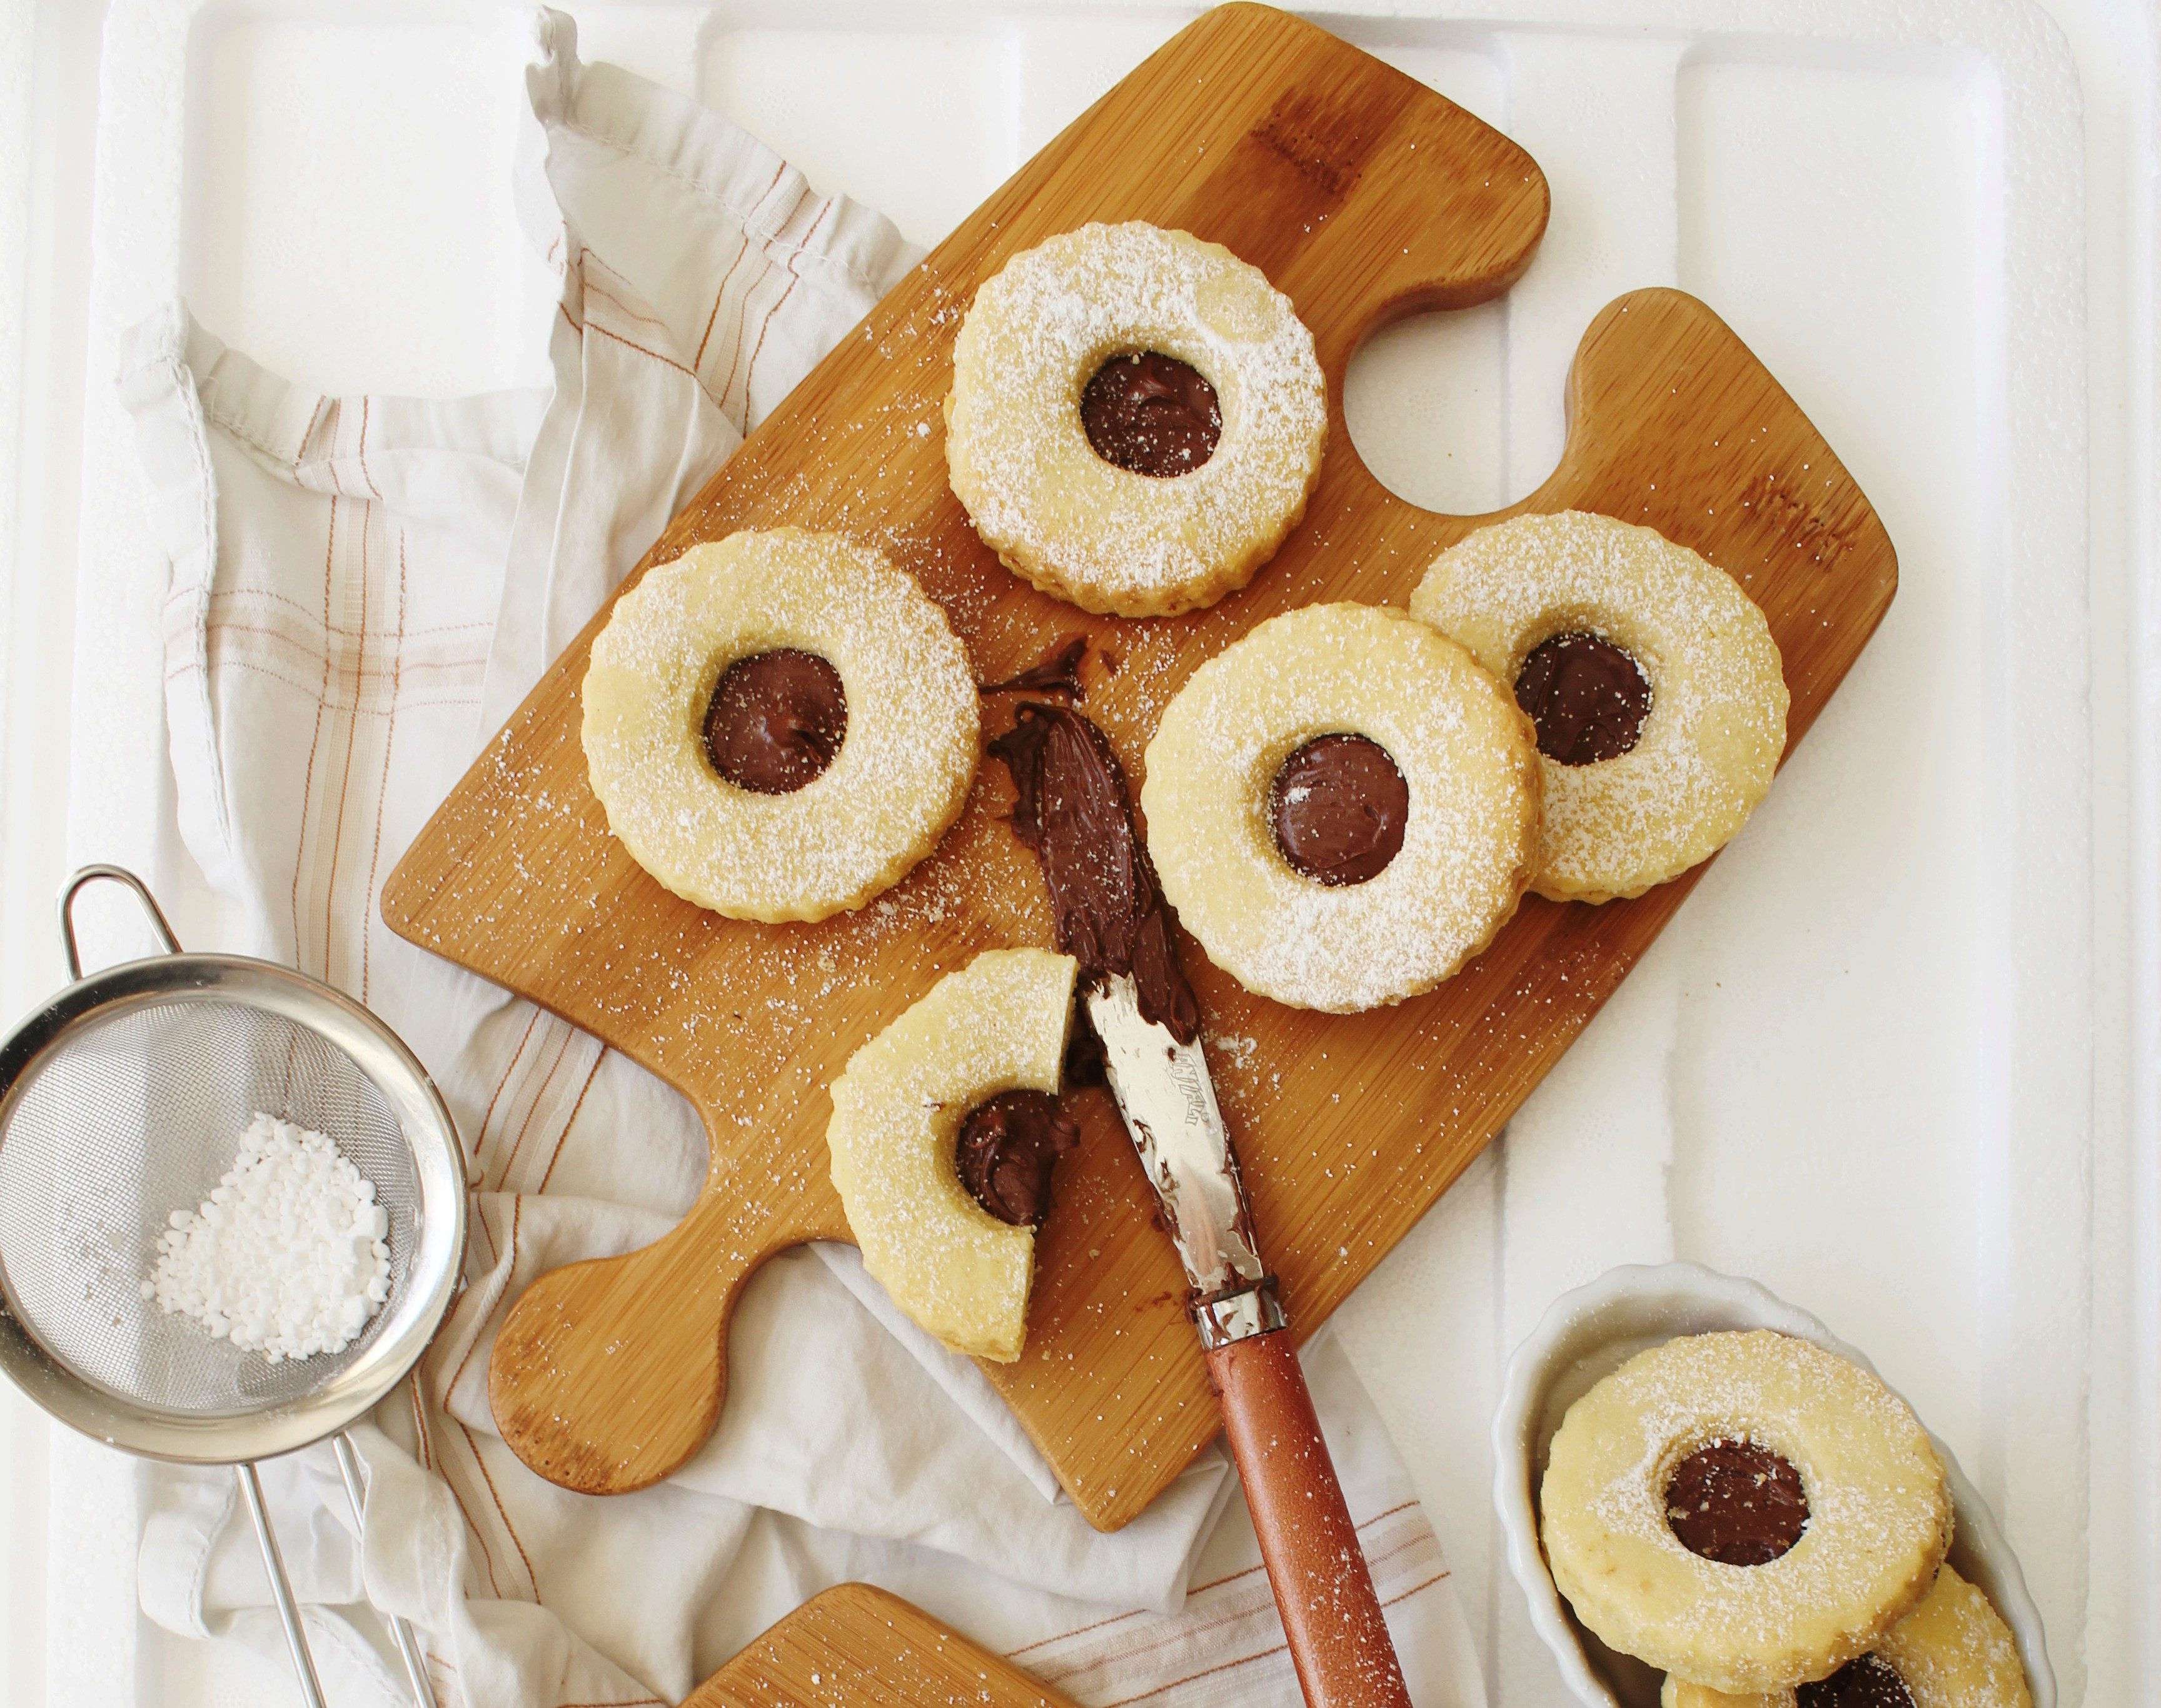
Can you believe it, I have not posted a single Nutella recipe till now. So without wasting a moment, I made these Nutella Linzer Cookies. I love everything about these cookies..the nutty texture, the chocolale-y centre and the various shapes and sizes you can do with them. You can also fill them up with jam, the way it is done traditionally or any other filling like lemon curd, ganache etc.

linzer cookies

I have used ground hazelnuts in the mix to complement the Nutella filling. Any nut meal will work. These are put together pretty much like any other cookie. The only tricky part is to get the shapes out intact after rolling out the dough. To ease the process, I roll out the dough on a baking paper and then place my cookie cutter all over the dough to make the cookies. Then I remove the balance dough from around the cookies and place the baking paper on a baking tray to bake. I do this twice. Once for the bottom cookie and a second batch for the tops with the centres cut out.

linzer cookiesThis post is also my contribution to my favourite Chocolate Party with the theme for December being Chocolate Cookies. Do check out the other creations at the end of the post.

linzer cookies


Nutella Filled Linzer Cookies
Makes 20 sandwiched cookies

1 cup hazelnut meal (ground hazelnuts)
2 cups plain flour
1/2 tsp ground cinnamon
1/2 teaspoon salt
1 cup (226 grams) unsalted butter, room temperature
3/4 cup castor sugar
1 tsp vanilla
 extract
2 egg yolks

1/2 cup Nutella, for the filling
Icing Sugar, to dust

In a bowl whisk together the flour, cinnamon and salt.

In the bowl of  your electric mixer (or with a hand mixer), beat the butter and sugar until light and fluffy (about 2-3 minutes). Beat in the  vanilla extract and egg yolks. Finally, beat in the ground hazelnuts and then the  flour mixture. Divide the dough in half, cover each half with plastic wrap,  and refrigerate until firm (30-60 minutes, or up to two days).

Preheat oven to 180 degrees C. Line two baking sheets with parchment  paper.

Remove one ball of  dough from the refrigerator. On a lightly floured surface roll out the dough  until it is about 1/4 inch (.5 cm) thick. Using a 3 inch (7.5 cm) cookie cutter  (round, square, heart, etc.) cut out the cookies. Place the cookies about 1  inch (2.5 cm) apart on the prepared baking sheet. Use a smaller cookie  cutter to cut out the centers of half of the cookies on the baking  sheet. Re roll any scraps and cut out the remaining cookies. Repeat  with the second ball of dough. (Note: If you find the  cookies are soft, place the baking sheets with the unbaked cookies in the  refrigerator for about 10 minutes to chill the dough. This will prevent the  cookies from spreading and losing their shape when baked.) Bake the cookies for about 12 minutes or until lightly browned around the edges. Remove from oven and place on a wire rack to  cool.

Place the cut out cookies  on a baking sheet and lightly dust the tops with  icing sugar. Spread a thin layer of Nutella on the bottom surface  of the full cookie. Place the cut-out cookie on top and gently sandwich them together.


[inlinkz_linkup id=344954]

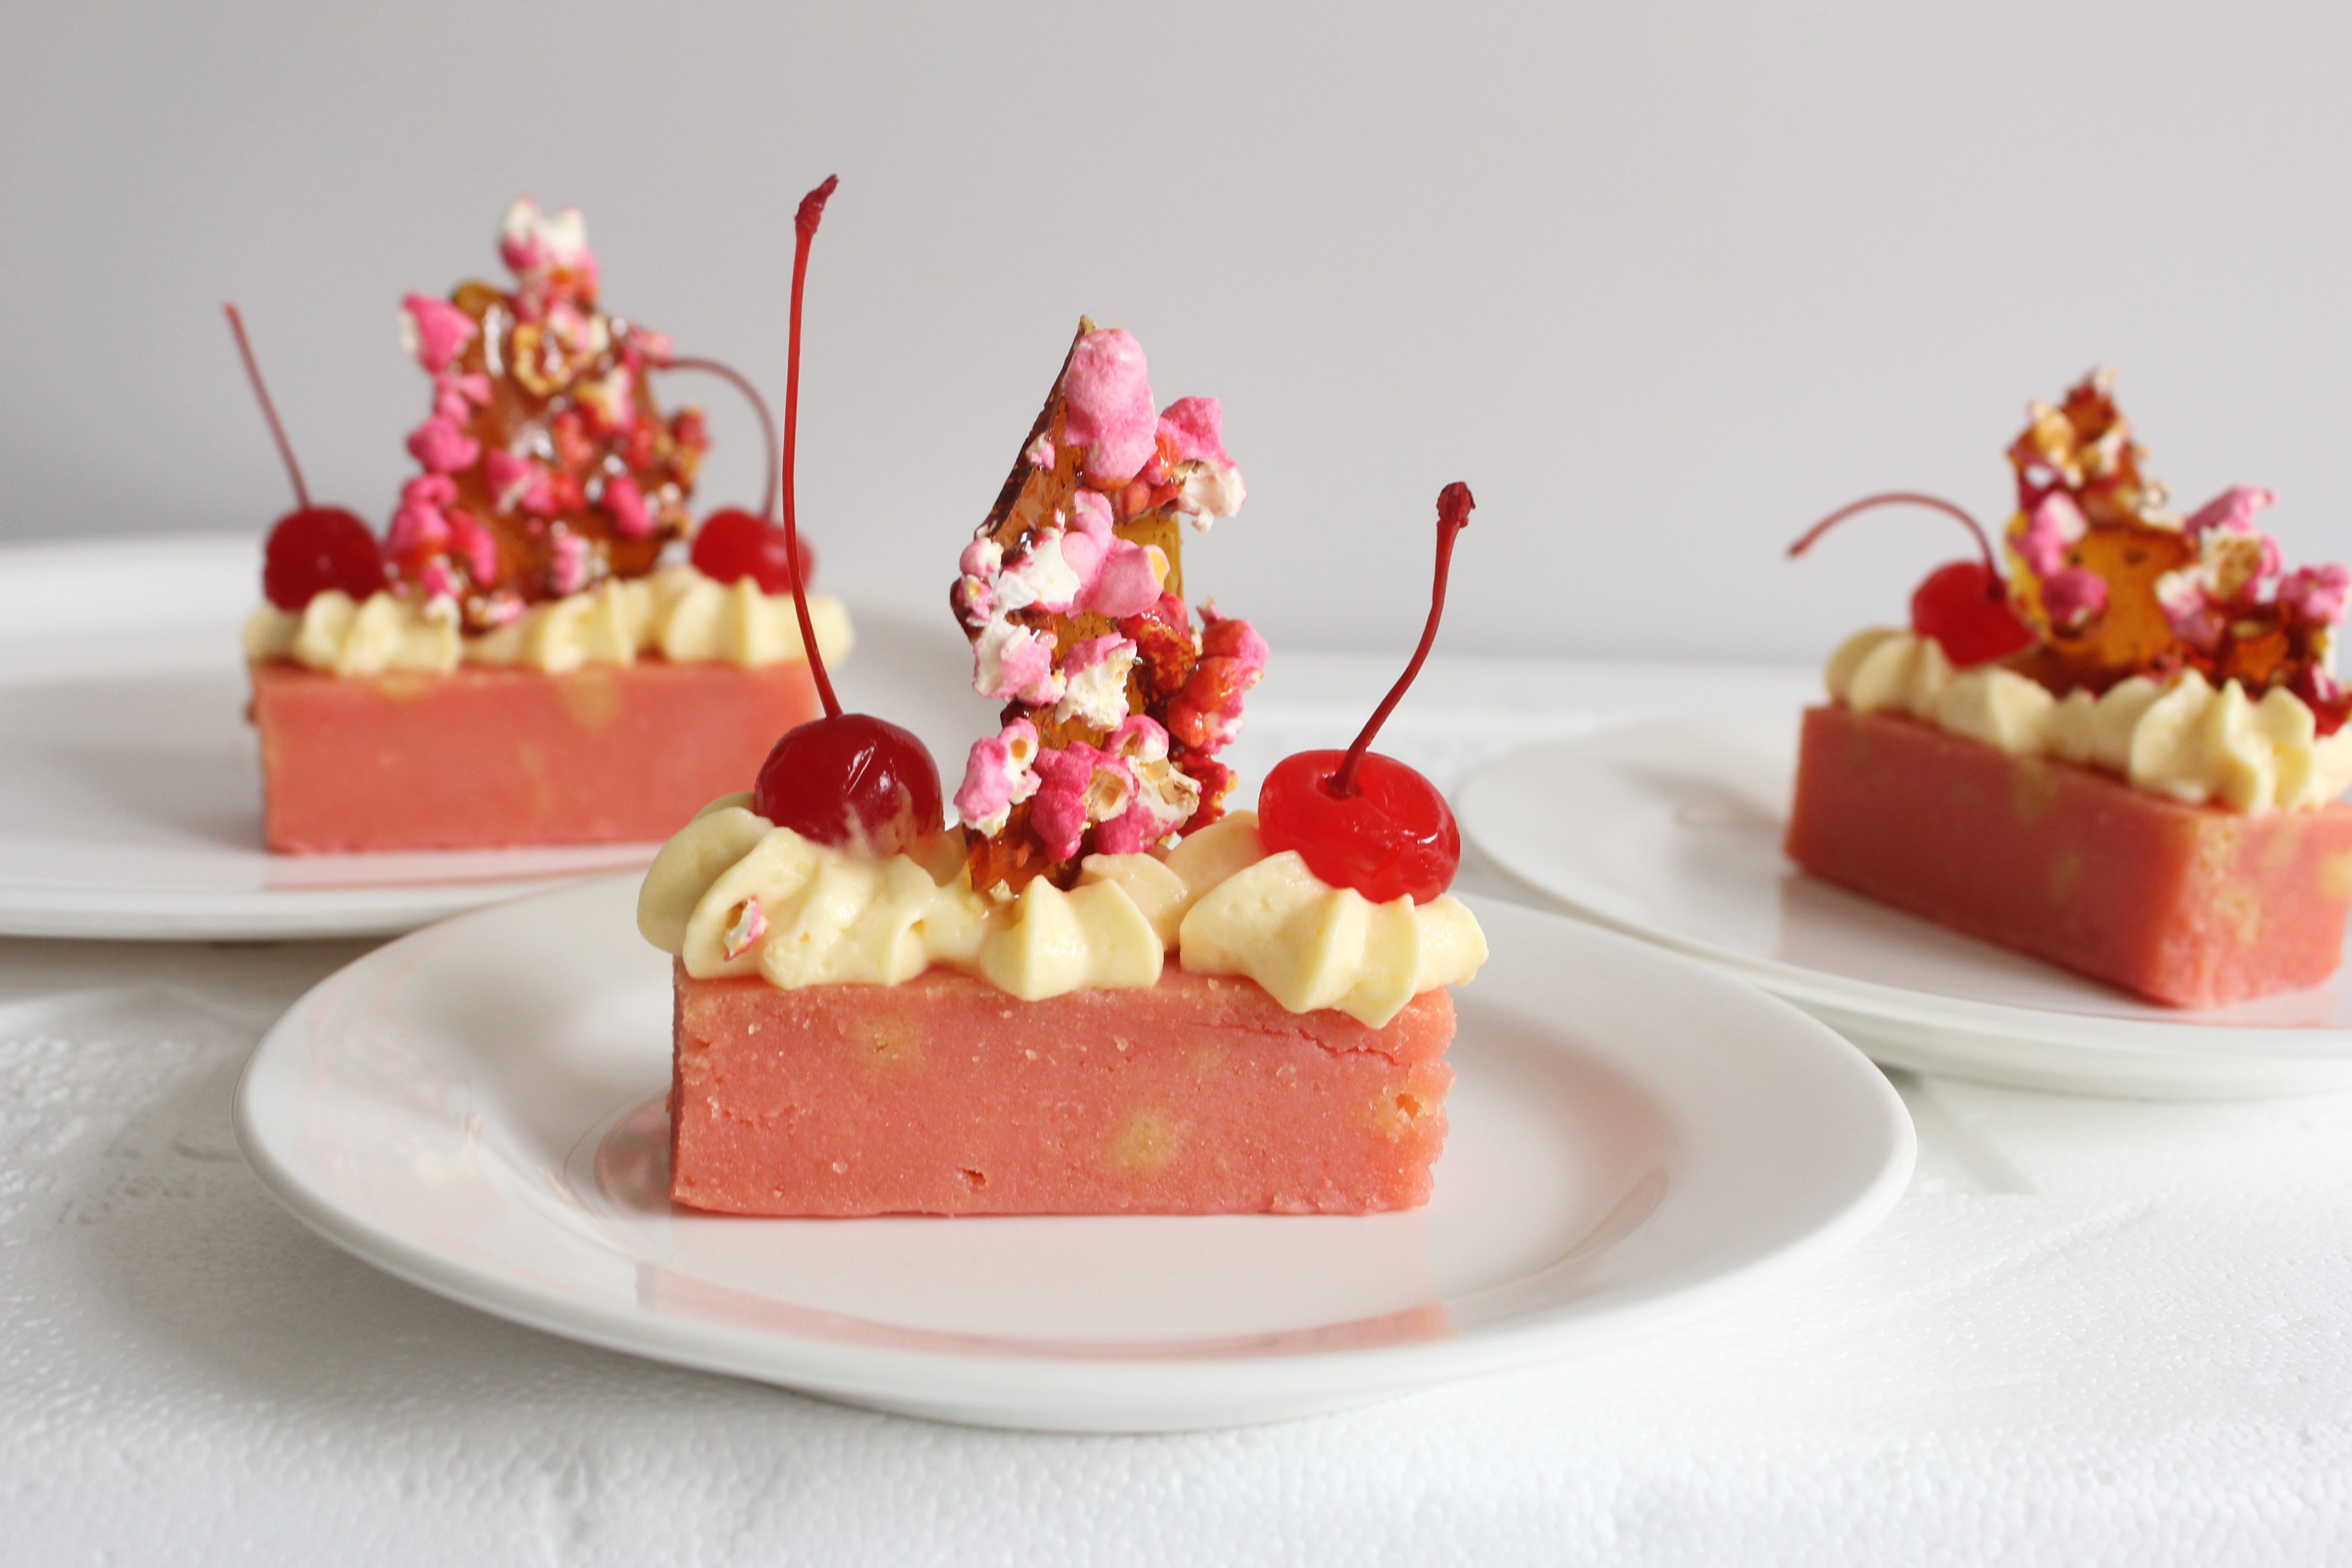
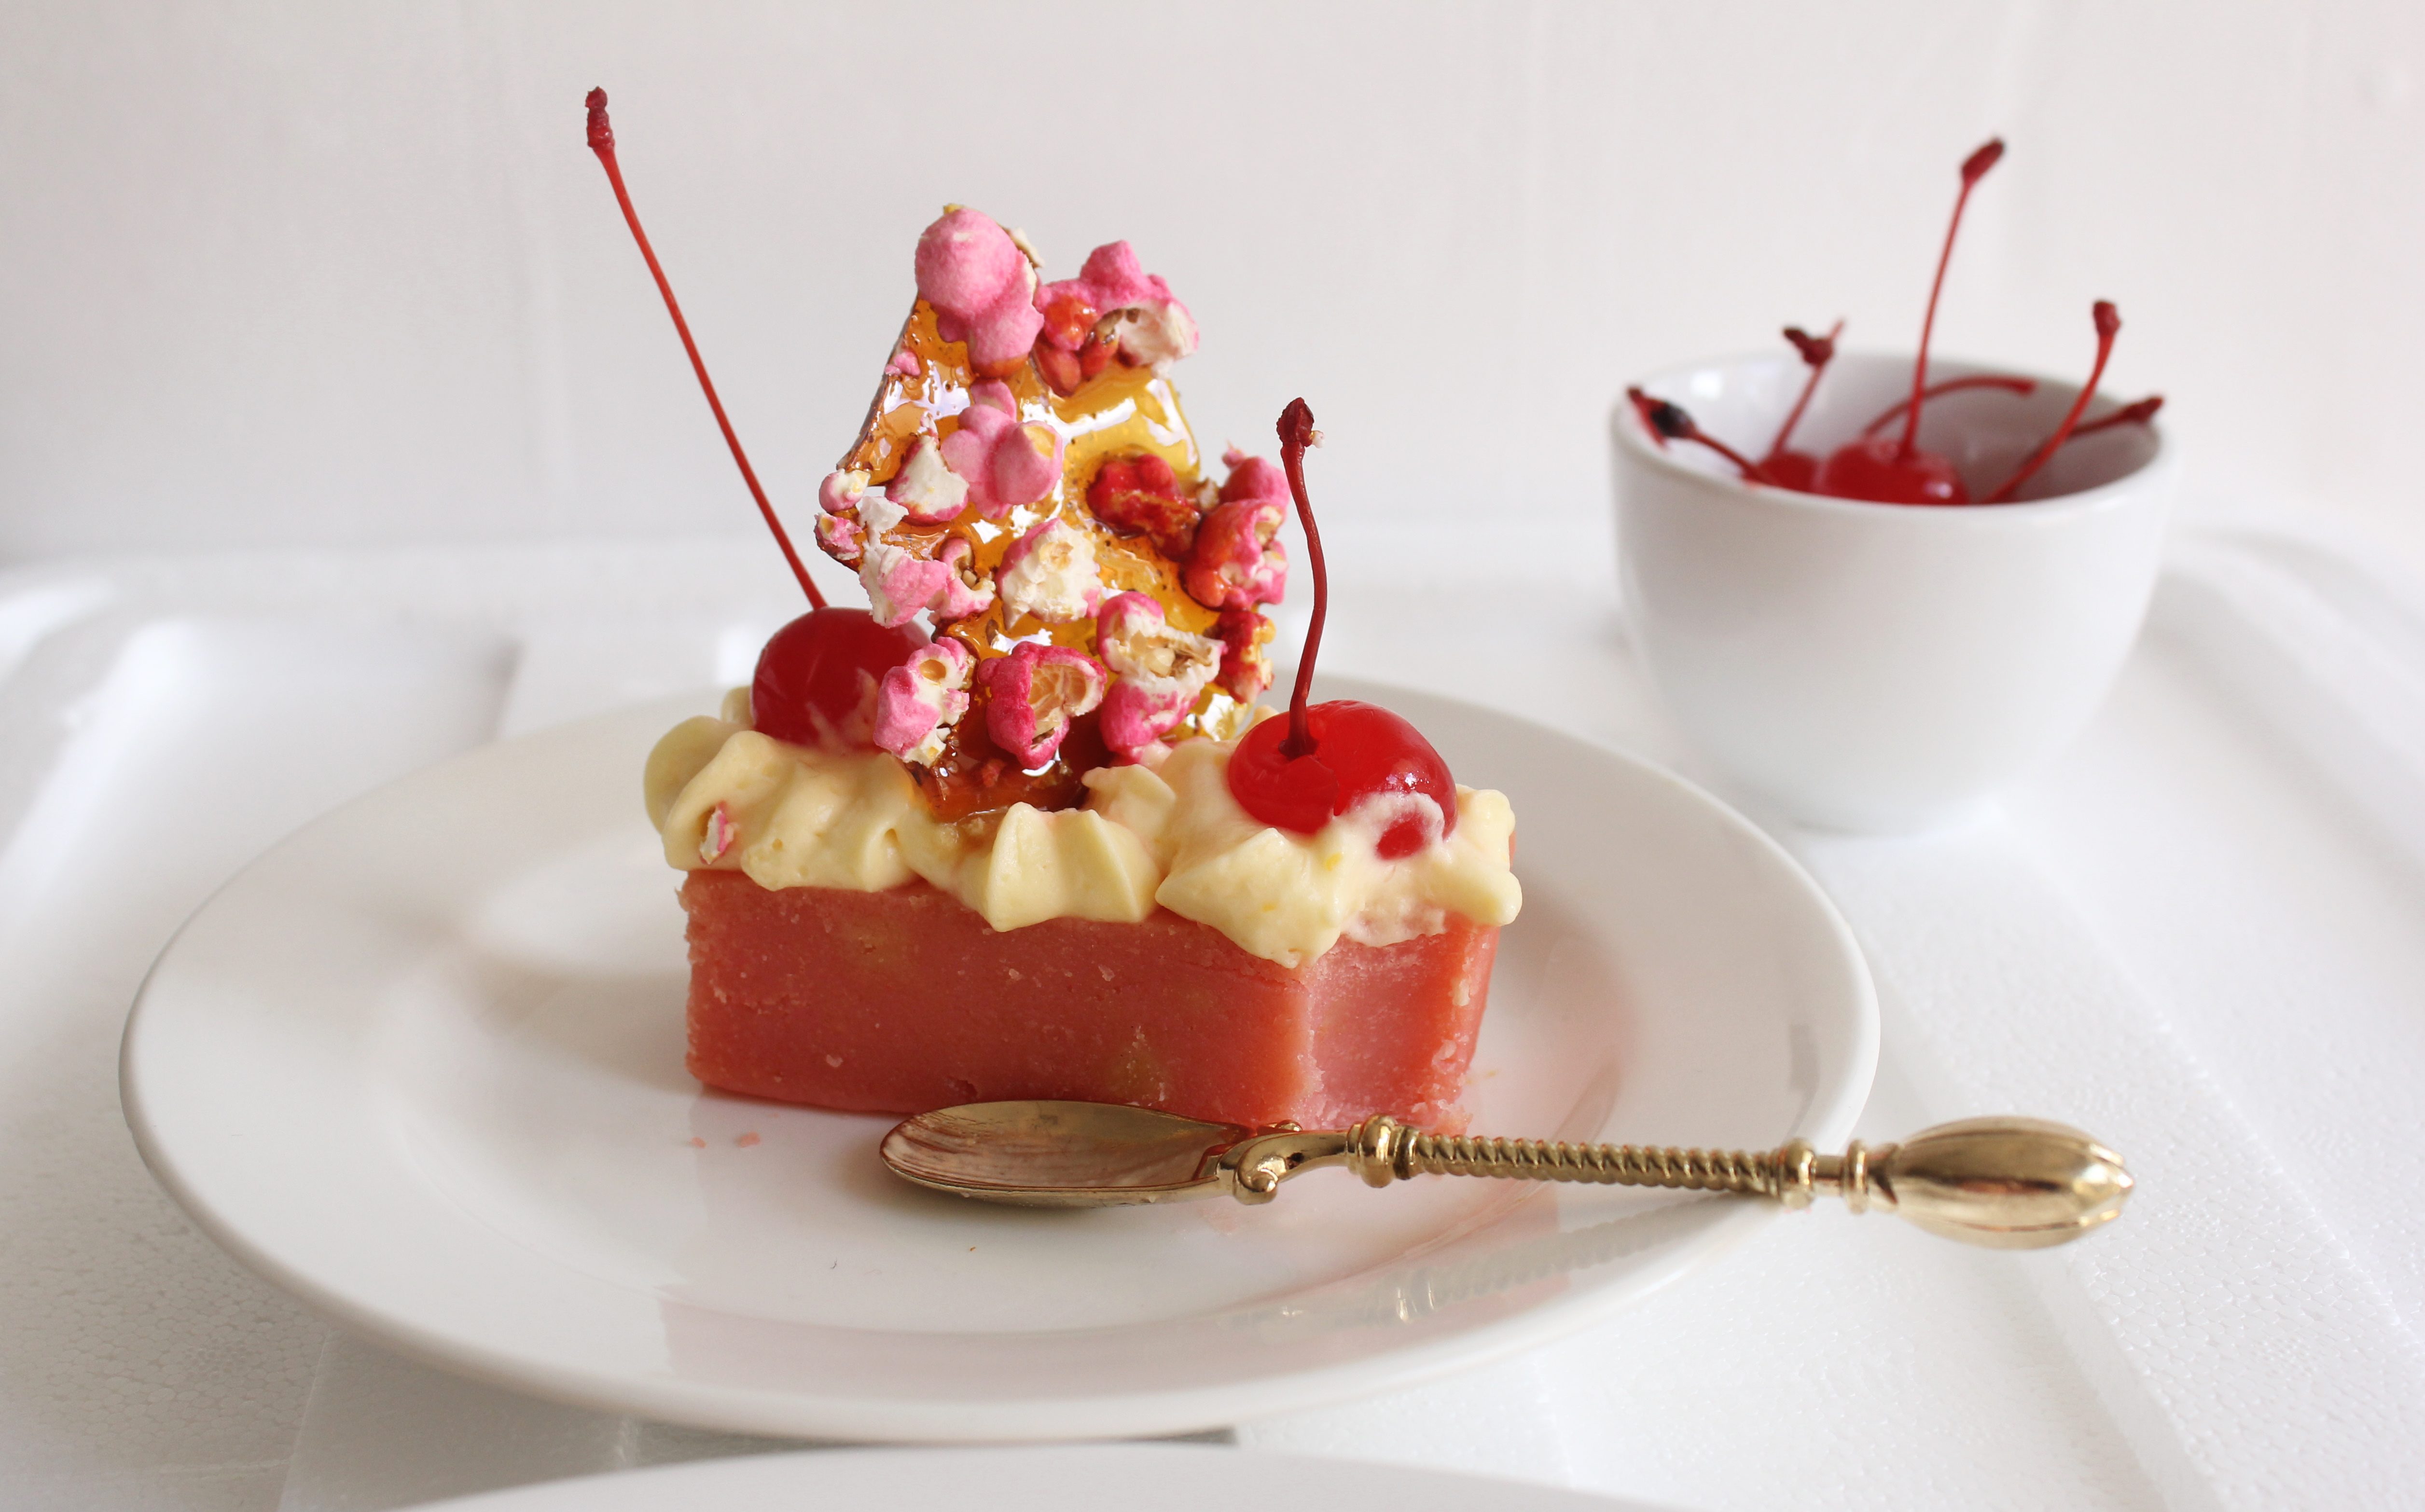
Pretty In Pink. White Chocolate Cherry Mud Cake, Lemon Mousse, Pink Popcorn Glass

29|11|2013

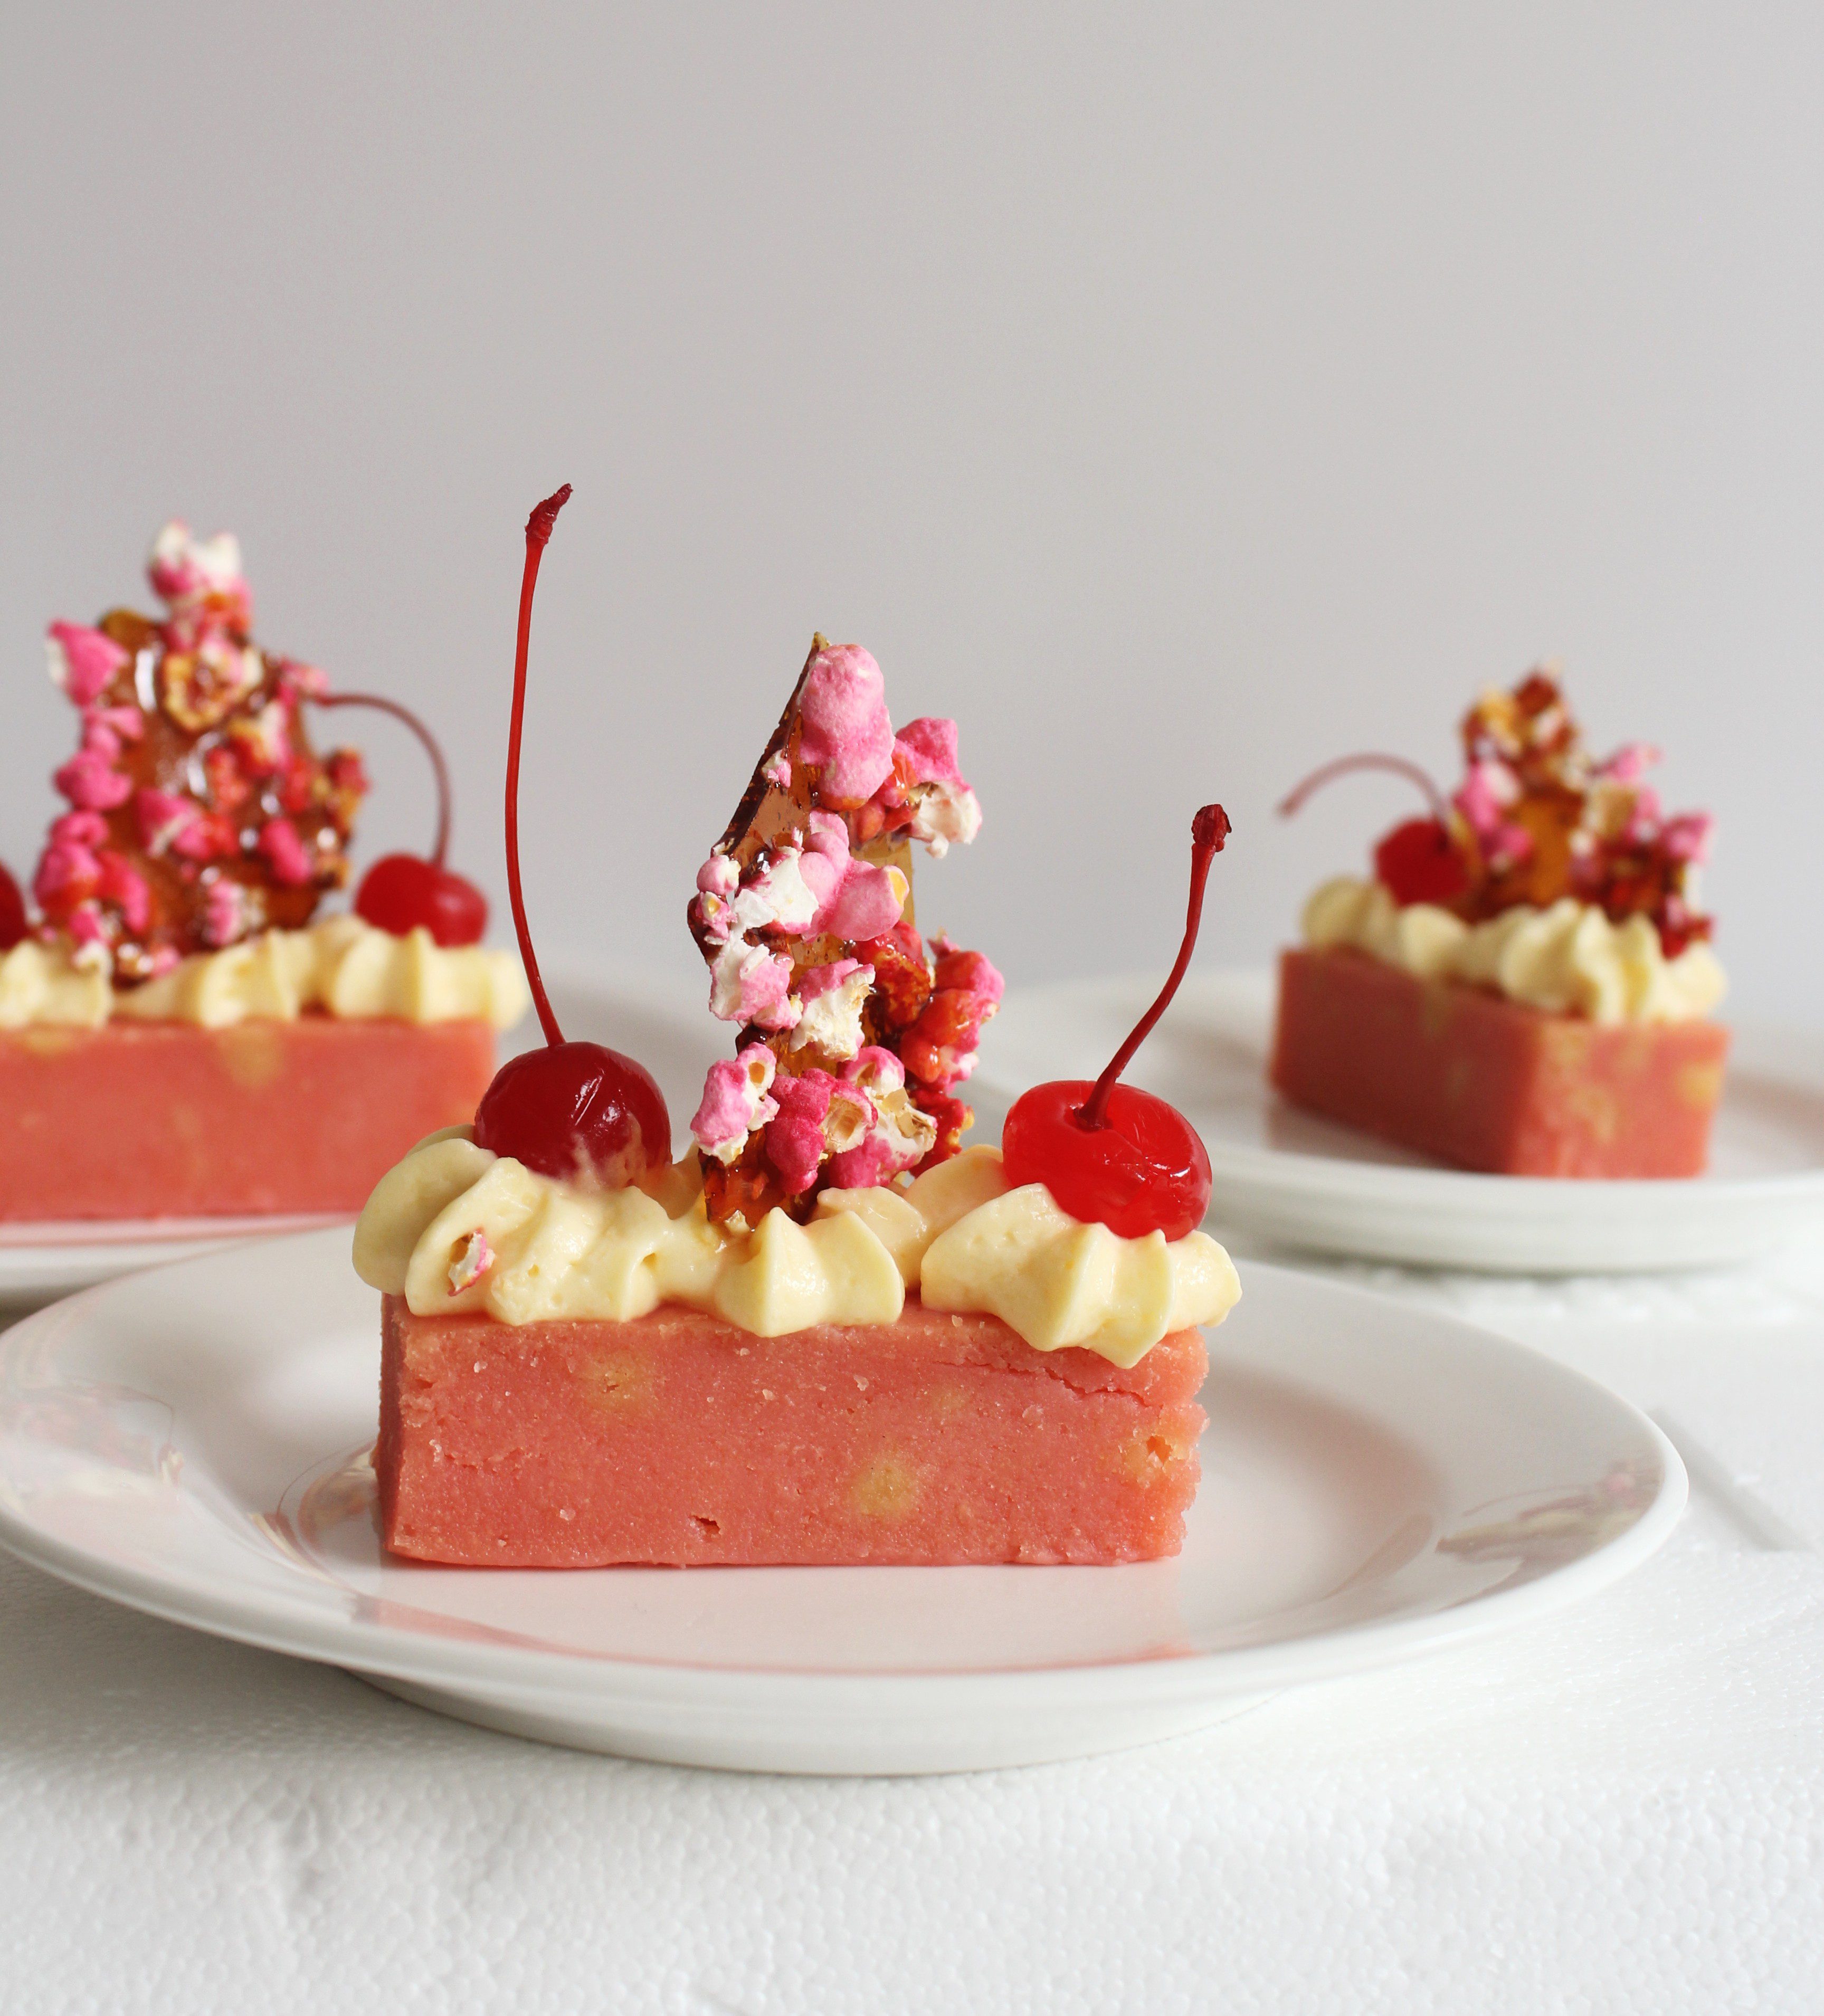
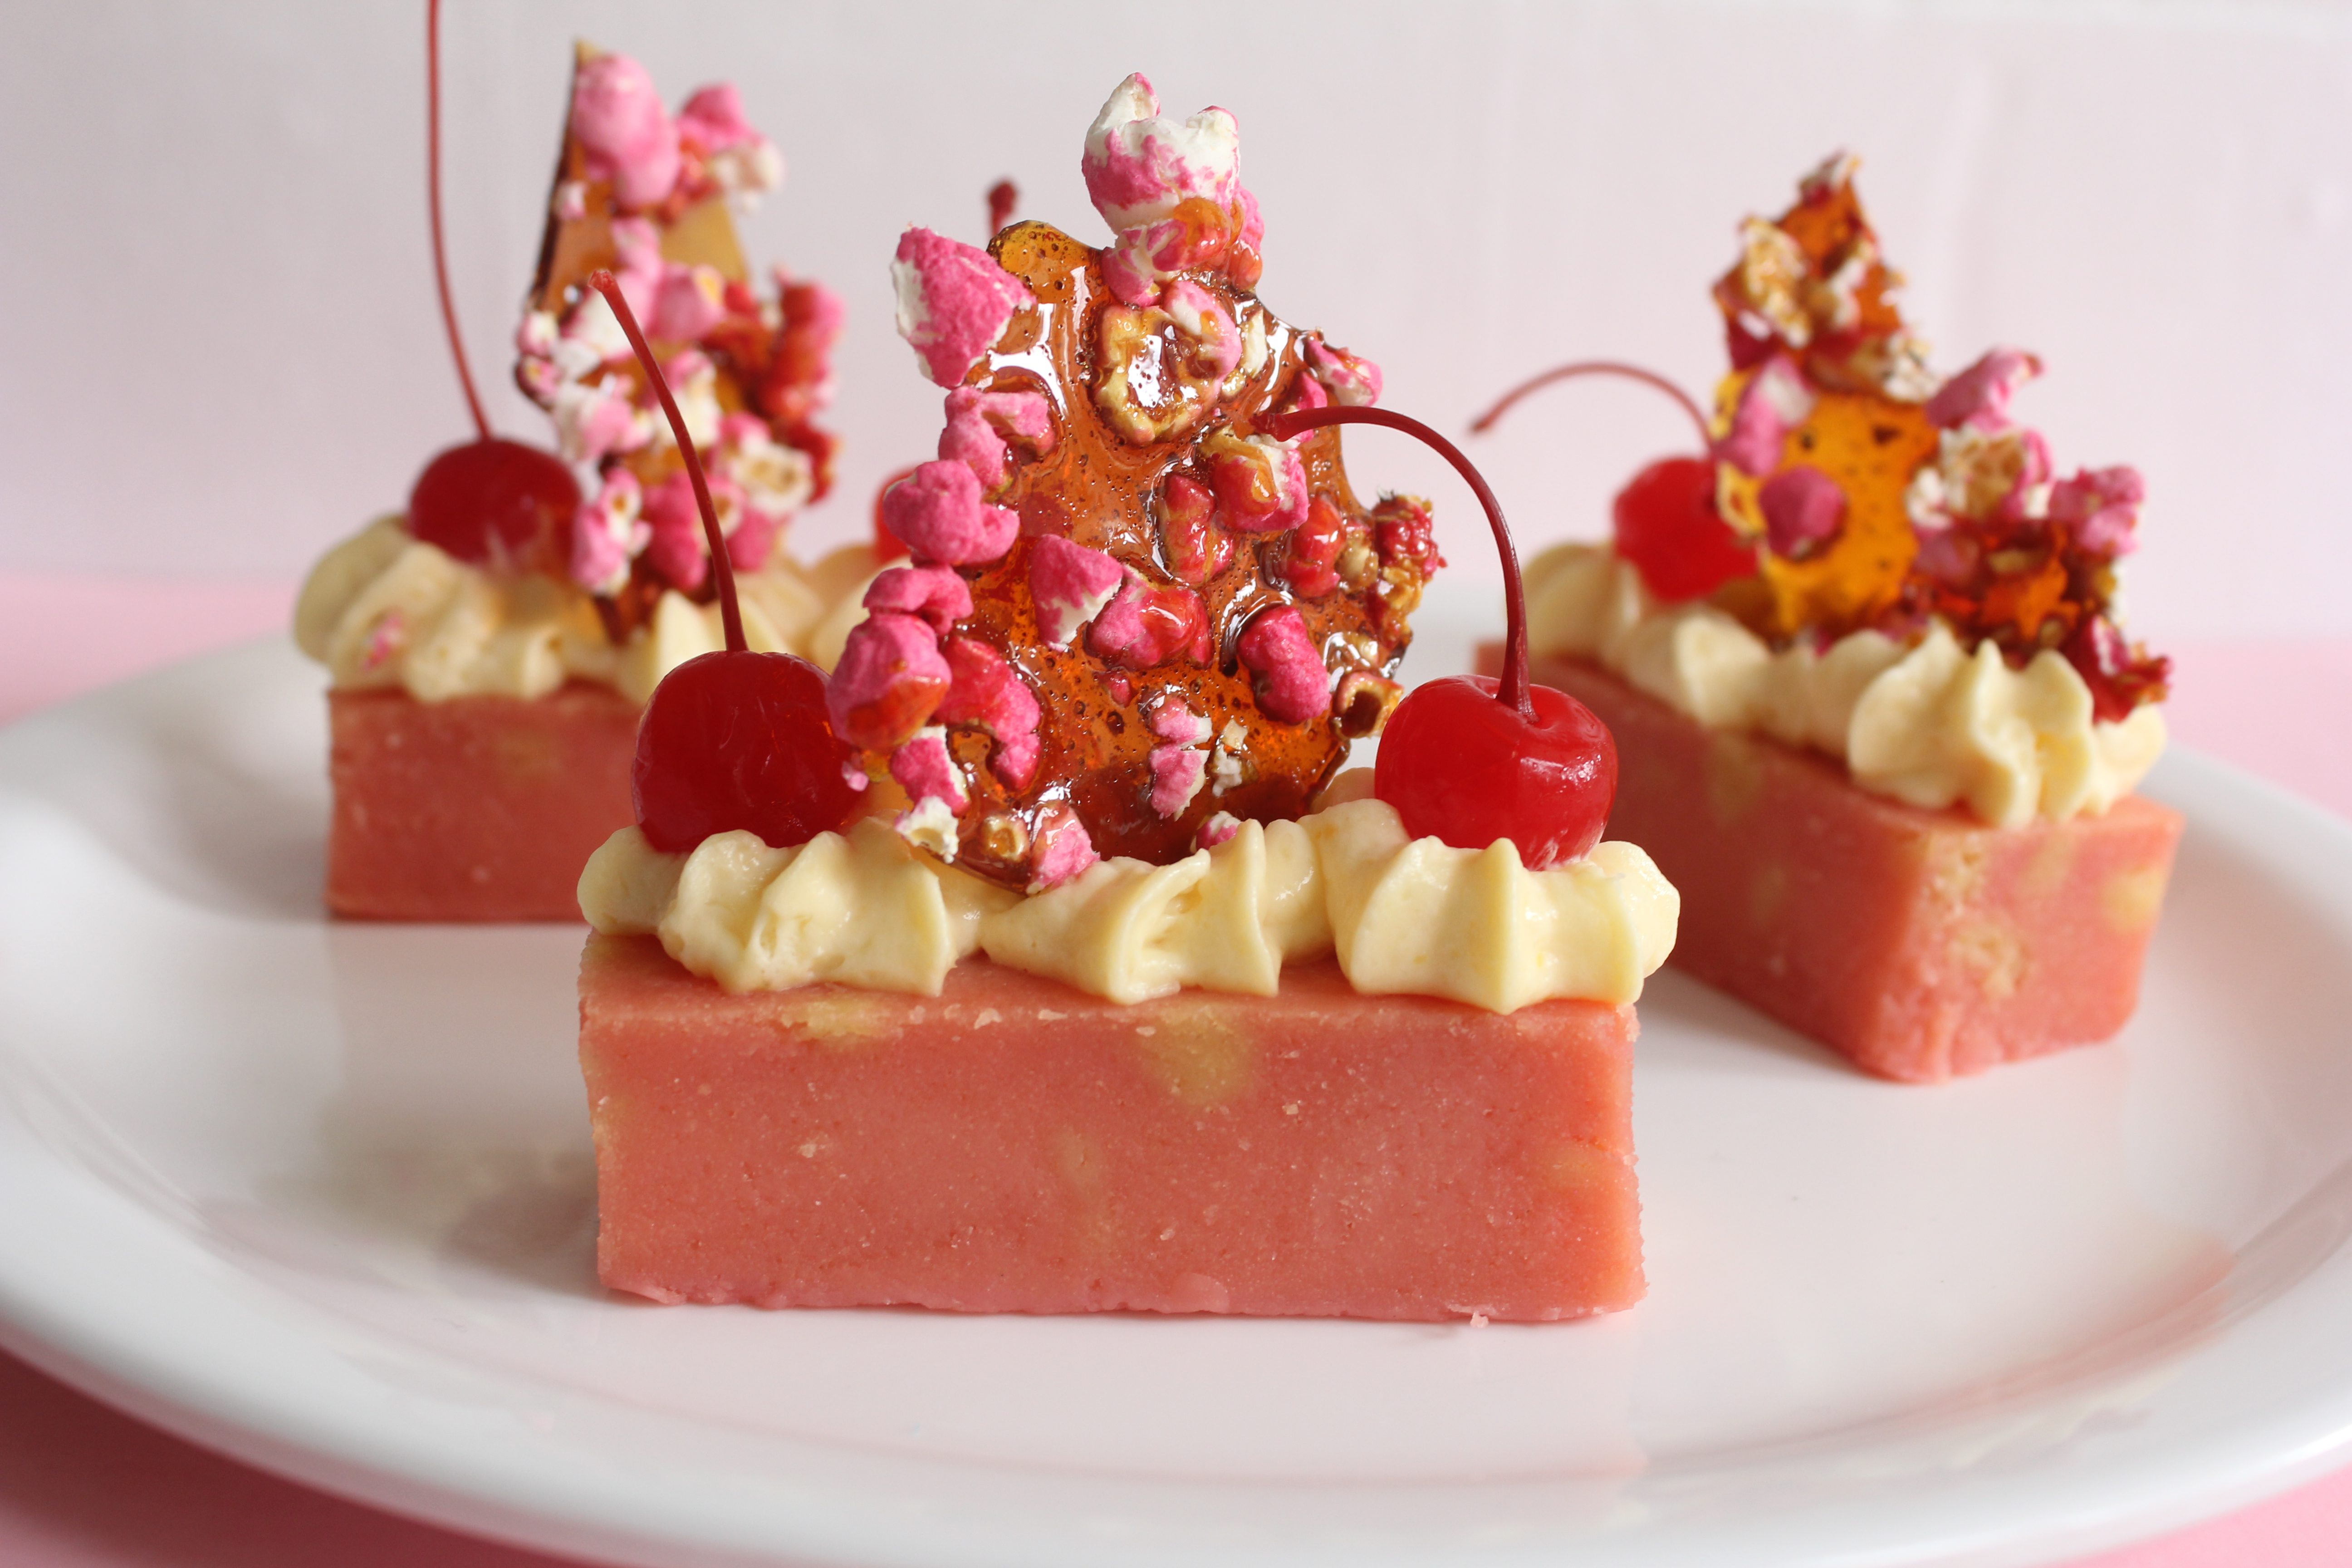
It has been a while since I made a proper dessert. I mean.. like something different…not the usual. Delicate, multi layered, different elements, fancy garnishes. You know the kind.. when you look at the dessert, you immediately want to take out your mobile phone a snap a picture. The one that makes you hesitate a little bit because you think it’s too pretty to eat.

Yes, I am talking about the reactions to this one when I brought this to the table for my guests.

IMG_6834 (1)I have taken to pink lately (you know, right?). So it was a choice between raspberry, strawberry or a cherry based dessert. I chose the last one as I had a jar of maraschino cherries so if you want to make this you don’t have wait till berry or cherry season.

IMG_6765 (1)

When I make such desserts with the cake as a base, I prefer a dacquoise or a mud cake. If mud cake is new to you, it’s a dense, slightly heavy cake that doesn’t crumb easily and is incredibly easy to make. We get chocolate and caramel versions everywhere in Australia. I made adjustments to my dark chocolate mud cake recipe by replacing it with white chocolate and the cherry syrup inside the jar. For the lemon mousse, I’ve added a little extra gelatine to my usual mousse recipe so it would hold together while piping.

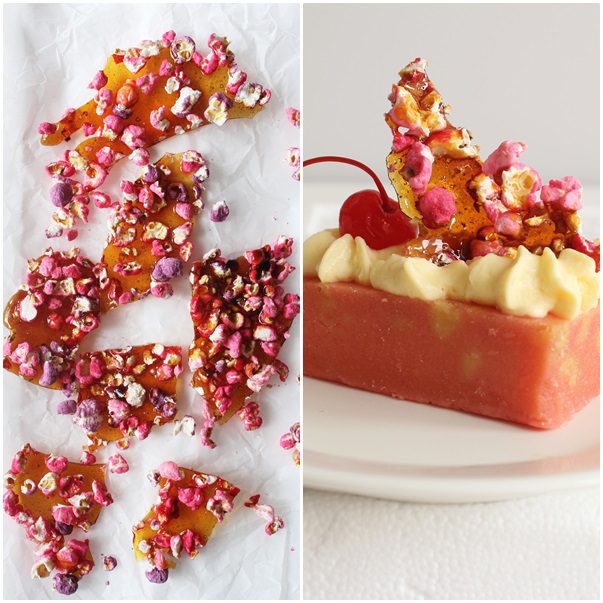
The popcorn glass is a variation to a praline or a brittle. Instead of nuts, I’ve used crushed pink popcorn (store-bought). For me, the garnish is of utmost importance as that is what gives a dessert the ‘wow’ factor. If you are making this, try to use a mix of white and pink. It looks pretty that way.

IMG_6756

page

By no means is this a light dessert. It is rich but oh so delicious! Sweet fudgy cherry cake, tangy creamy lemon mousse, crunchy bits of toffee and juicy plump maraschino cherries.

I haven’t been able to find a suitable name for this one. Any suggestions?
Also if you like this, you may want to check out this chocolate dessert and this duo.

IMG_6764 (1)

IMG_6775 (1)


White Chocolate Cherry Mud Cake, Lemon Mousse, Pink Popcorn Glass
Makes 6

White Chocolate Cherry Mud Cake

125 g butter, roughly chopped
100g white chocolate, roughly chopped
1 cup castor sugar
1/3 cup water
1/4 cup cherry syrup (from the jar)
1 cup plain flour
1 tbsp self-raising flour
1/4 cup buttermilk
2 medium eggs, lightly whisked
3-4 drops pink food colouring

Preheat oven to 160 degree C. Brush a 7 inch square or round cake pan with melted butter. Line the bases and sides with non-stick baking paper.

Combine the butter, chocolate, sugar, water and cherry syrup in a heatproof bowl over a saucepan of simmering water. Stir until the mixture is smooth. Remove from heat and let cool for 10 minutes. Whisk in combined flour. Stir in buttermilk and egg. Add the pink food colouring and mix till uniformly coloured. Pour into prepared pan and bake for 1 hour or until a skewer inserted into the centres comes out clean. Set aside for 10 minutes to cool slightly then invert onto a wire rack to cool completely.
Once cooled, cut into rectangles of 3 by 1.5 inch and keep aside.

Lemon Mousse
(
this will make a lot of mousse. The recipe can either be halved or served as a dessert on its own)

1 cup lemon curd (store-bought or home-made, recipe here)
3/4 cup whipping cream
1/4 cup powdered sugar
2 tsp powdered gelatine
1 tbsp water

In a small bowl mix the gelatine and water and set aside for 5 minutes for the gelatine to bloom. Either in the microwave or using the double boiler method, gently heat the mixture so that the gelatine dissolves completely. Cool to room temperature.

Whisk the whipping cream and sugar till you reach soft peaks. Fold in the lemon curd gradually. Add the gelatine mixture and fold through. Refrigerate for at least 4 hours, preferably overnight.

Pink Popcorn Glass

1 cup sugar
1/4 cup water
1 cup pink popcorn, crushed

Line a baking tray with non-stick baking paper. Spread the popcorn over the tray.

Combine the sugar and water in a small saucepan. Stir over low heat until the sugar completely dissolves. Bring to the boil. Boil, without stirring, occasionally brushing down side of the pan with a wet pastry brush, for 10-12 minutes or until golden.

Pour toffee evenly over the popcorn in the baking tray. Set aside for 10 minutes to set. Break into shards.

To serve : Fill up a piping bag with the lemon mousse and pipe swirls on a mud cake base. Repeat with the remaining bases. Top with Maraschino Cherries and popcorn glass.


Candy Cane Cupcakes. White Chocolate Cupcakes with Peppermint Buttercream

26|11|2013

I know I am starting early but it’s hard to resist with all the inspiration around. The shelves at the stores are filled with sweet holiday inspiration…Candies, cookies, puddings and so on..I am excited just looking at them. I so love this time of the year. And I plan to do a lot of baking in the next few days leading up to New Year’s.

IMG_6755 (1)

IMG_6745 (1)

I intended to post this along with my children’s favourite recipes last week but couldn’t do so. Kids and candies..classic pairing! So I had to do at least one candy based recipe. I’ve come across a lot of candy cane cupcakes mostly using dark chocolate, therefore I made mine using White chocolate. The frosting is a simple buttercream flavoured with peppermint extract. There is a subtle caramel flavour from the white chocolate in the cupcakes. I wouldn’t say I was blown away by the pairing, but it tasted good.

IMG_6737 (1)

I have used my basic vanilla cupcake recipe (from Joy of Baking) with a little melted white chocolate added to it. I love the pink colour in the frosting…actually I love pink desserts. Which means you need to watch out for what is coming up next. Or can I say I have been painting the town pink.

I will be back with more of my pink creations shortly!

IMG_6748 (1)


Candy Cane Cupcakes. White Chocolate Cupcakes with Peppermint Buttercream
Yields 12

White Chocolate Cupcakes

1/2 cup unsalted butter (113 g), room temperature
1/2 cup castor sugar
3 large eggs
100 g white chocolate, melted
11/2 cups all-purpose flour
11/2 tsp baking powder
1/4 tsp salt
1/4 cup milk

Preheat oven to 180 degrees C and line a muffin tray with 12 paper liners. In the bowl of your electric mixer or with a hand mixer, beat the butter and sugar until light and fluffy. Add the eggs, one at a time, beating well after each addition. Add the melted white chocolate and stir to combine. In a separate bowl, whisk together the flour, baking powder and salt. With the mixer on low speed, alternately add the flour mixture and milk in three additionss, scrape down the sides of the bowl as needed. Evenly fill the muffin cups with the batter and bake for about 15-20 mins or just until set and a toothpick inserted into a cupcake comes out clean. (Do not over bake or the cupcakes will be dry). Remove from oven and place on a wire rack to cool. Once the cupcakes have cooled completely, frost with icing.

Peppermint Buttercream

2 cups icing sugar, sifted
1/2 cup unsalted butter, room temperature
2 tbsp milk
1 tsp peppermint extract
3-4 drops pink food colouring

In an electric mixer or with a hand mixer, cream the butter until smooth and well blended. With the mixer on low-speed, gradually beat in the sugar. Scrape down the sides of the bowl. Add the milk and beat on high-speed until frosting is light and fluffy (about 3-4 minutes). Add a little more sugar or milk as needed. Add the peppermint extract. Tint with pink food colouring.


Ginger and Chilli Chicken Dumpling Soup

23|11|2013

Every time I talk about rains in my posts, it is followed by comfort food. Today is no different. It has rained all of this week keeping us indoors, craving for some fresh air. The little sunshine that followed almost tricked me into believing that the weather has improved and twice I found myself caught in the middle of a heavy downpour, racing home to save my head.
IMG_6655 (1)

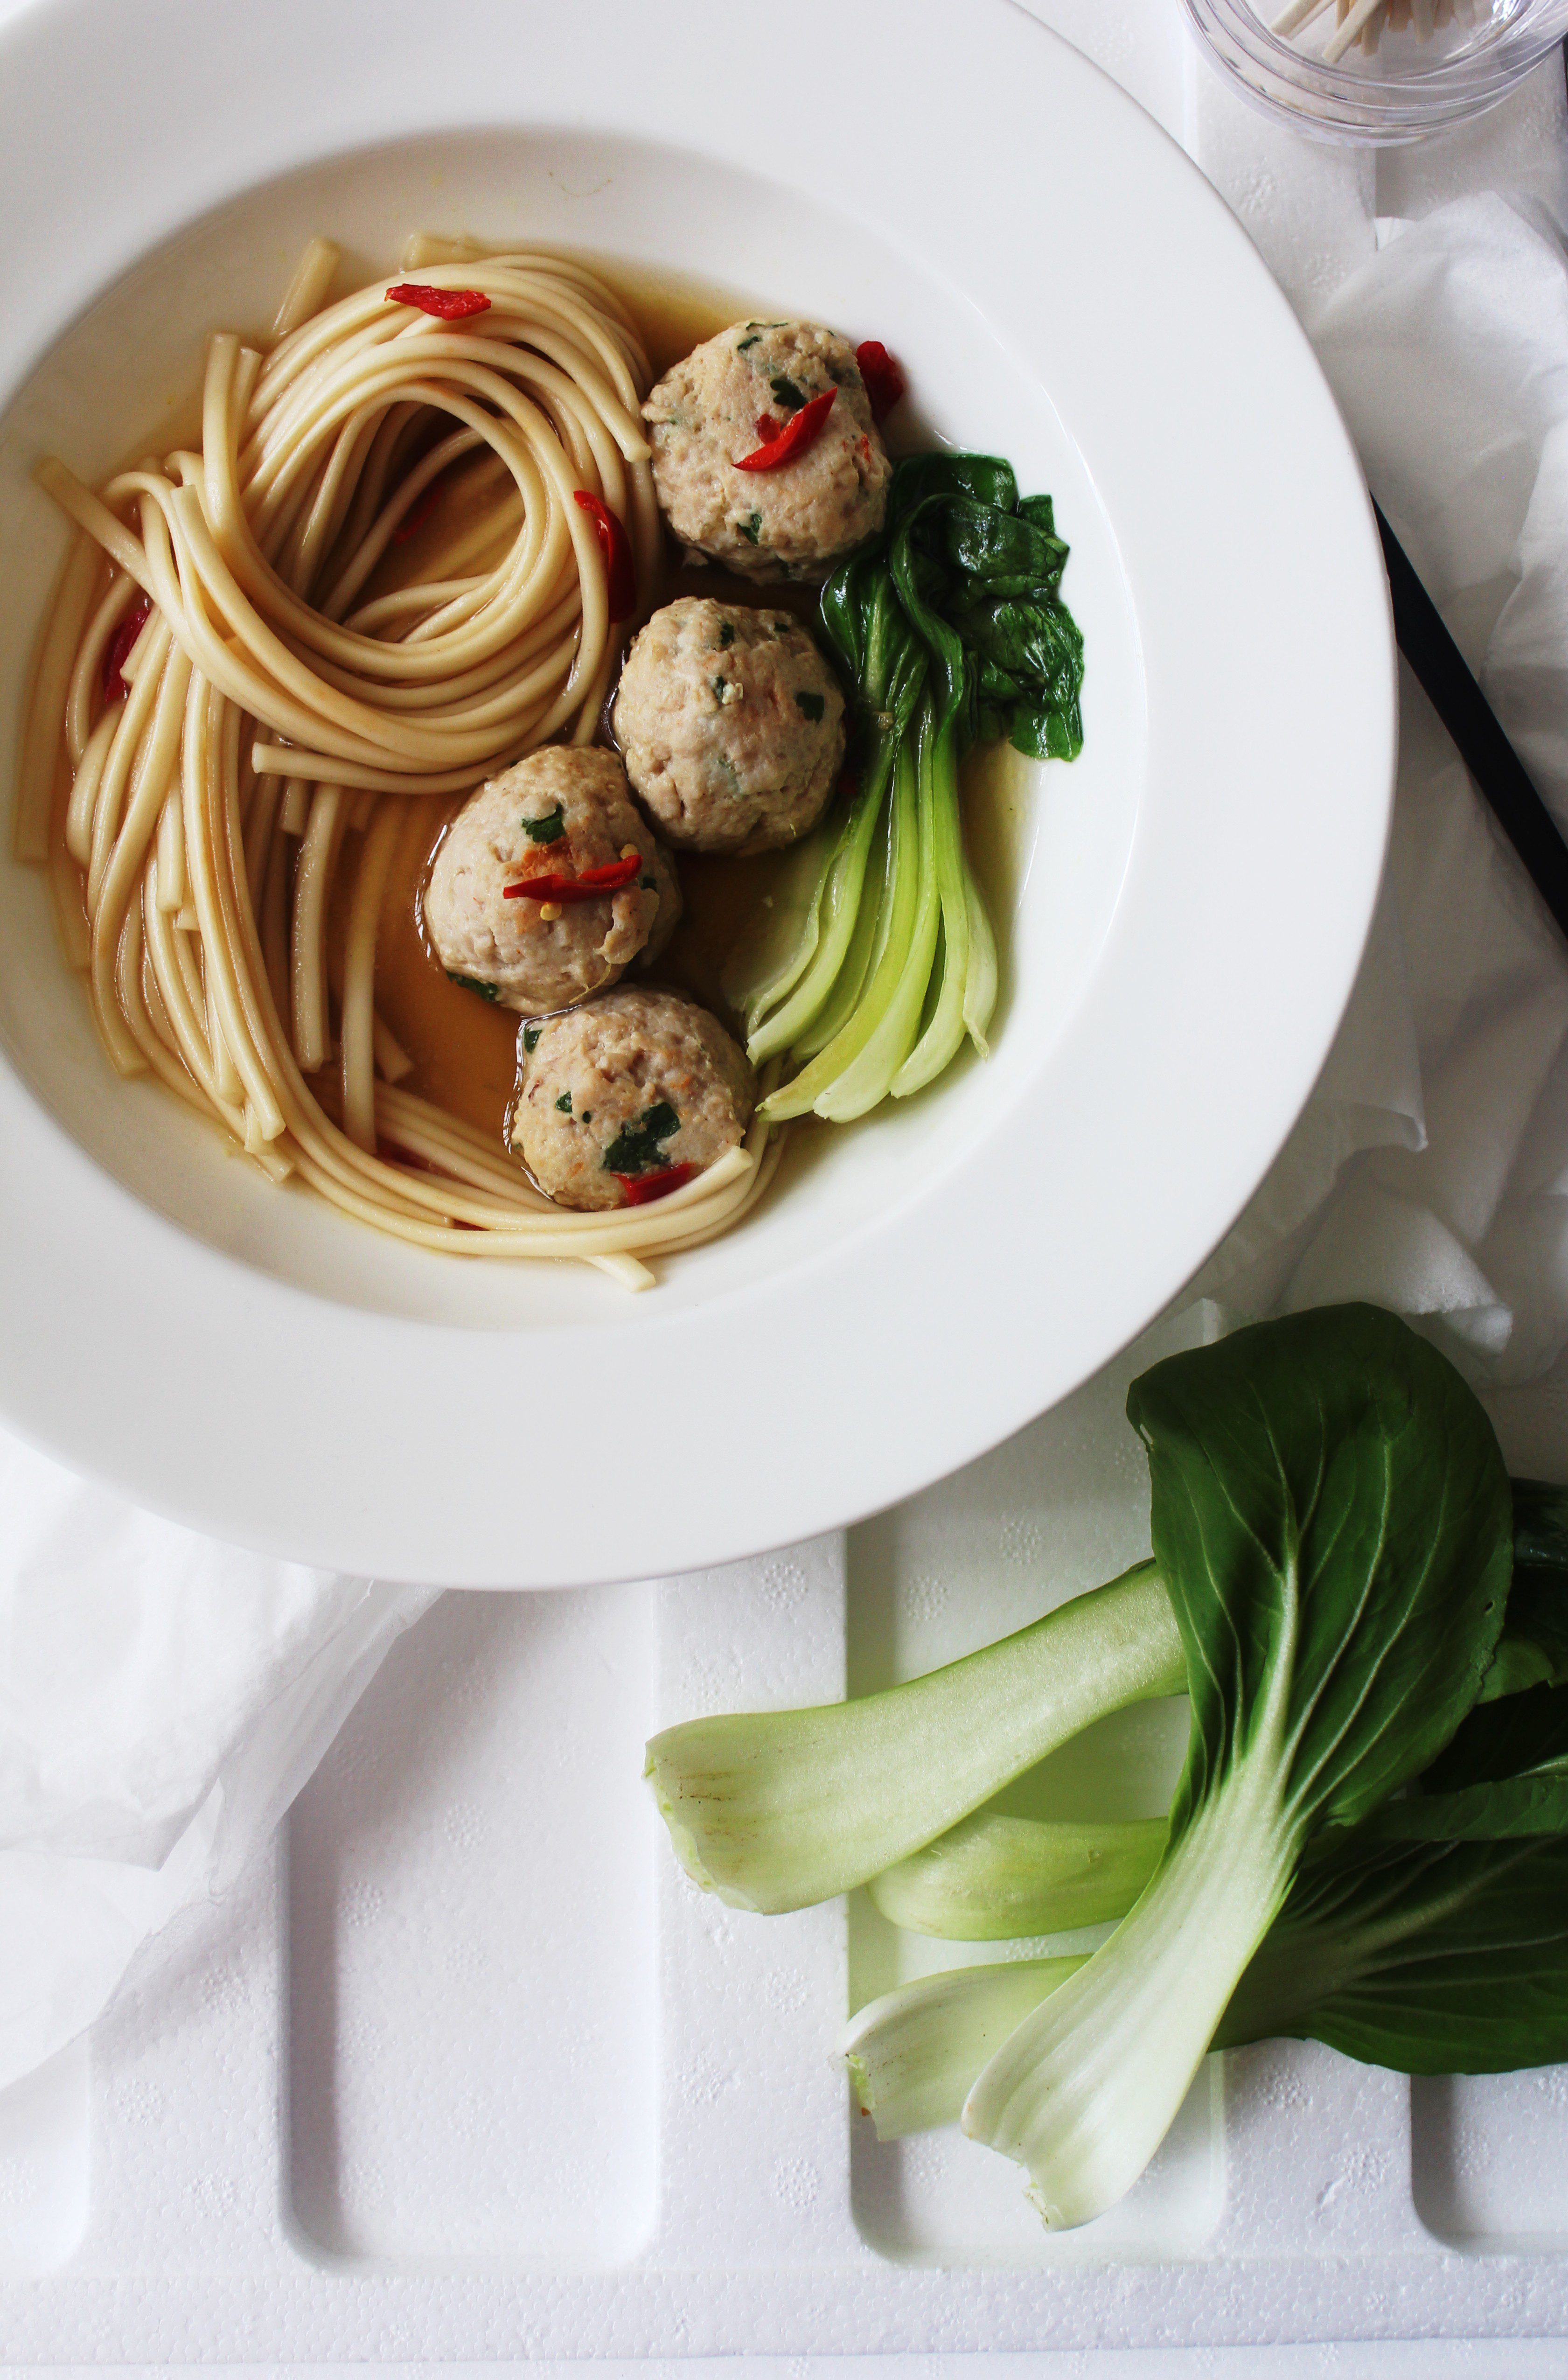
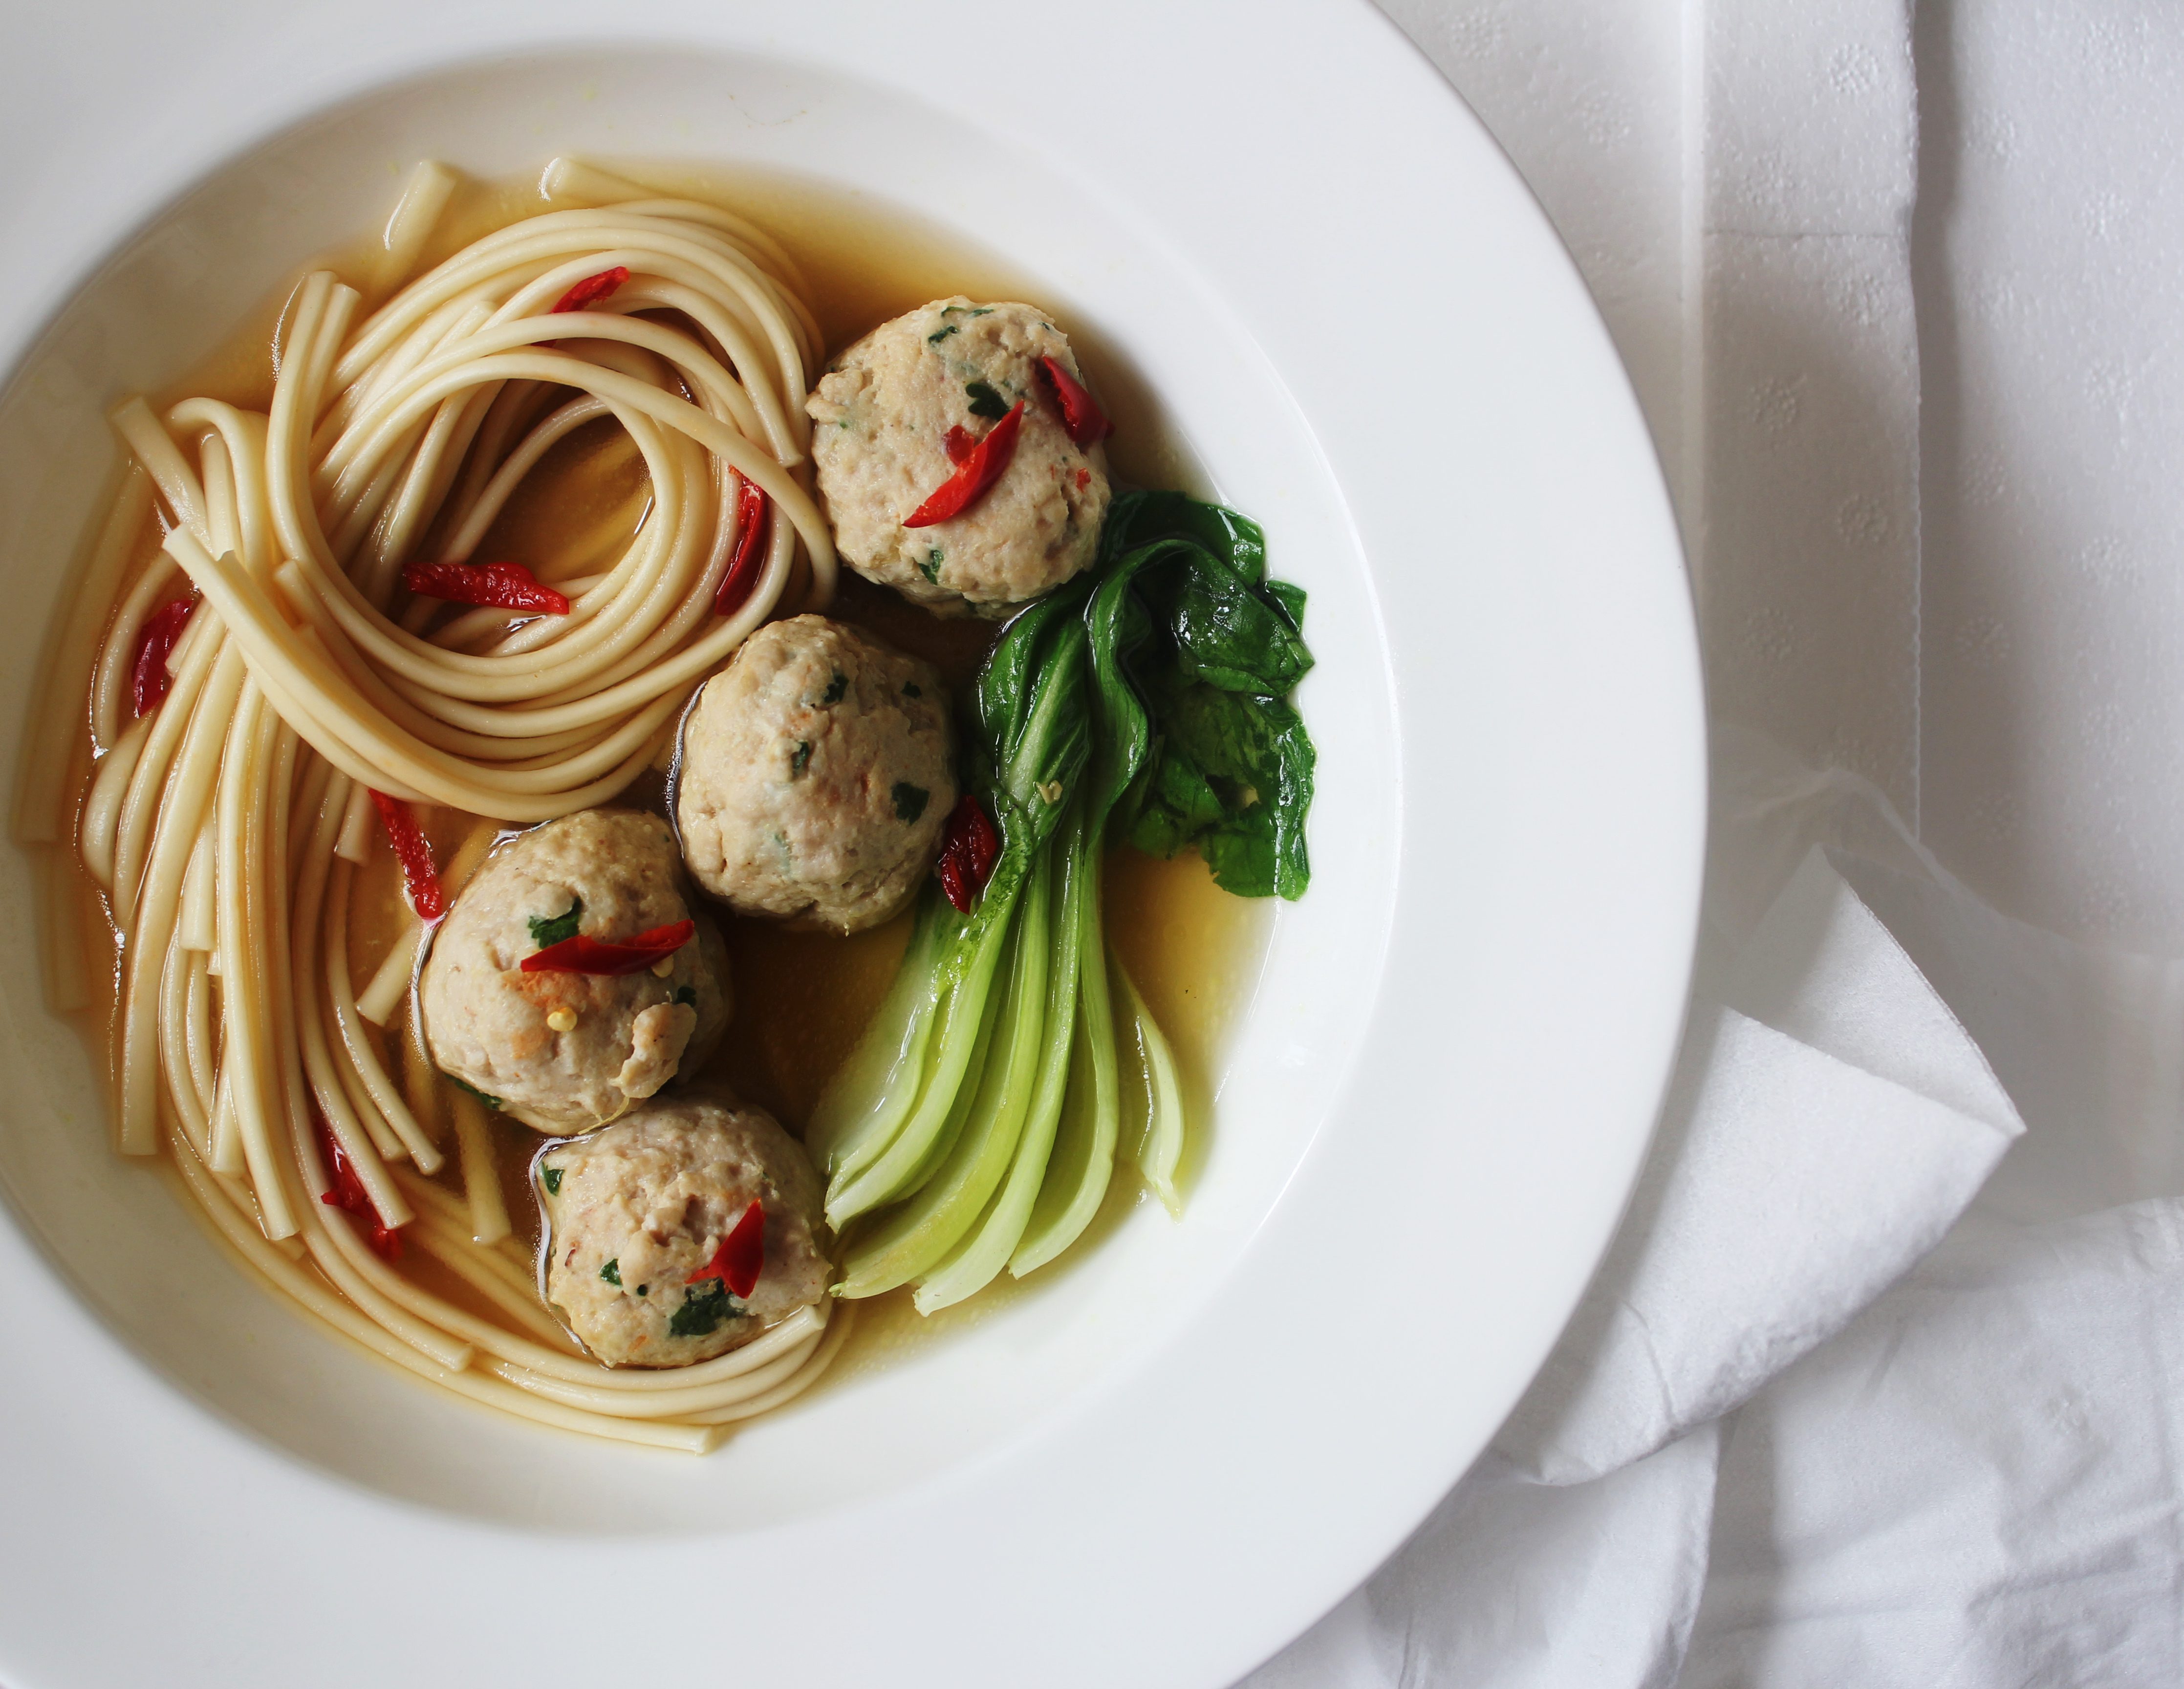
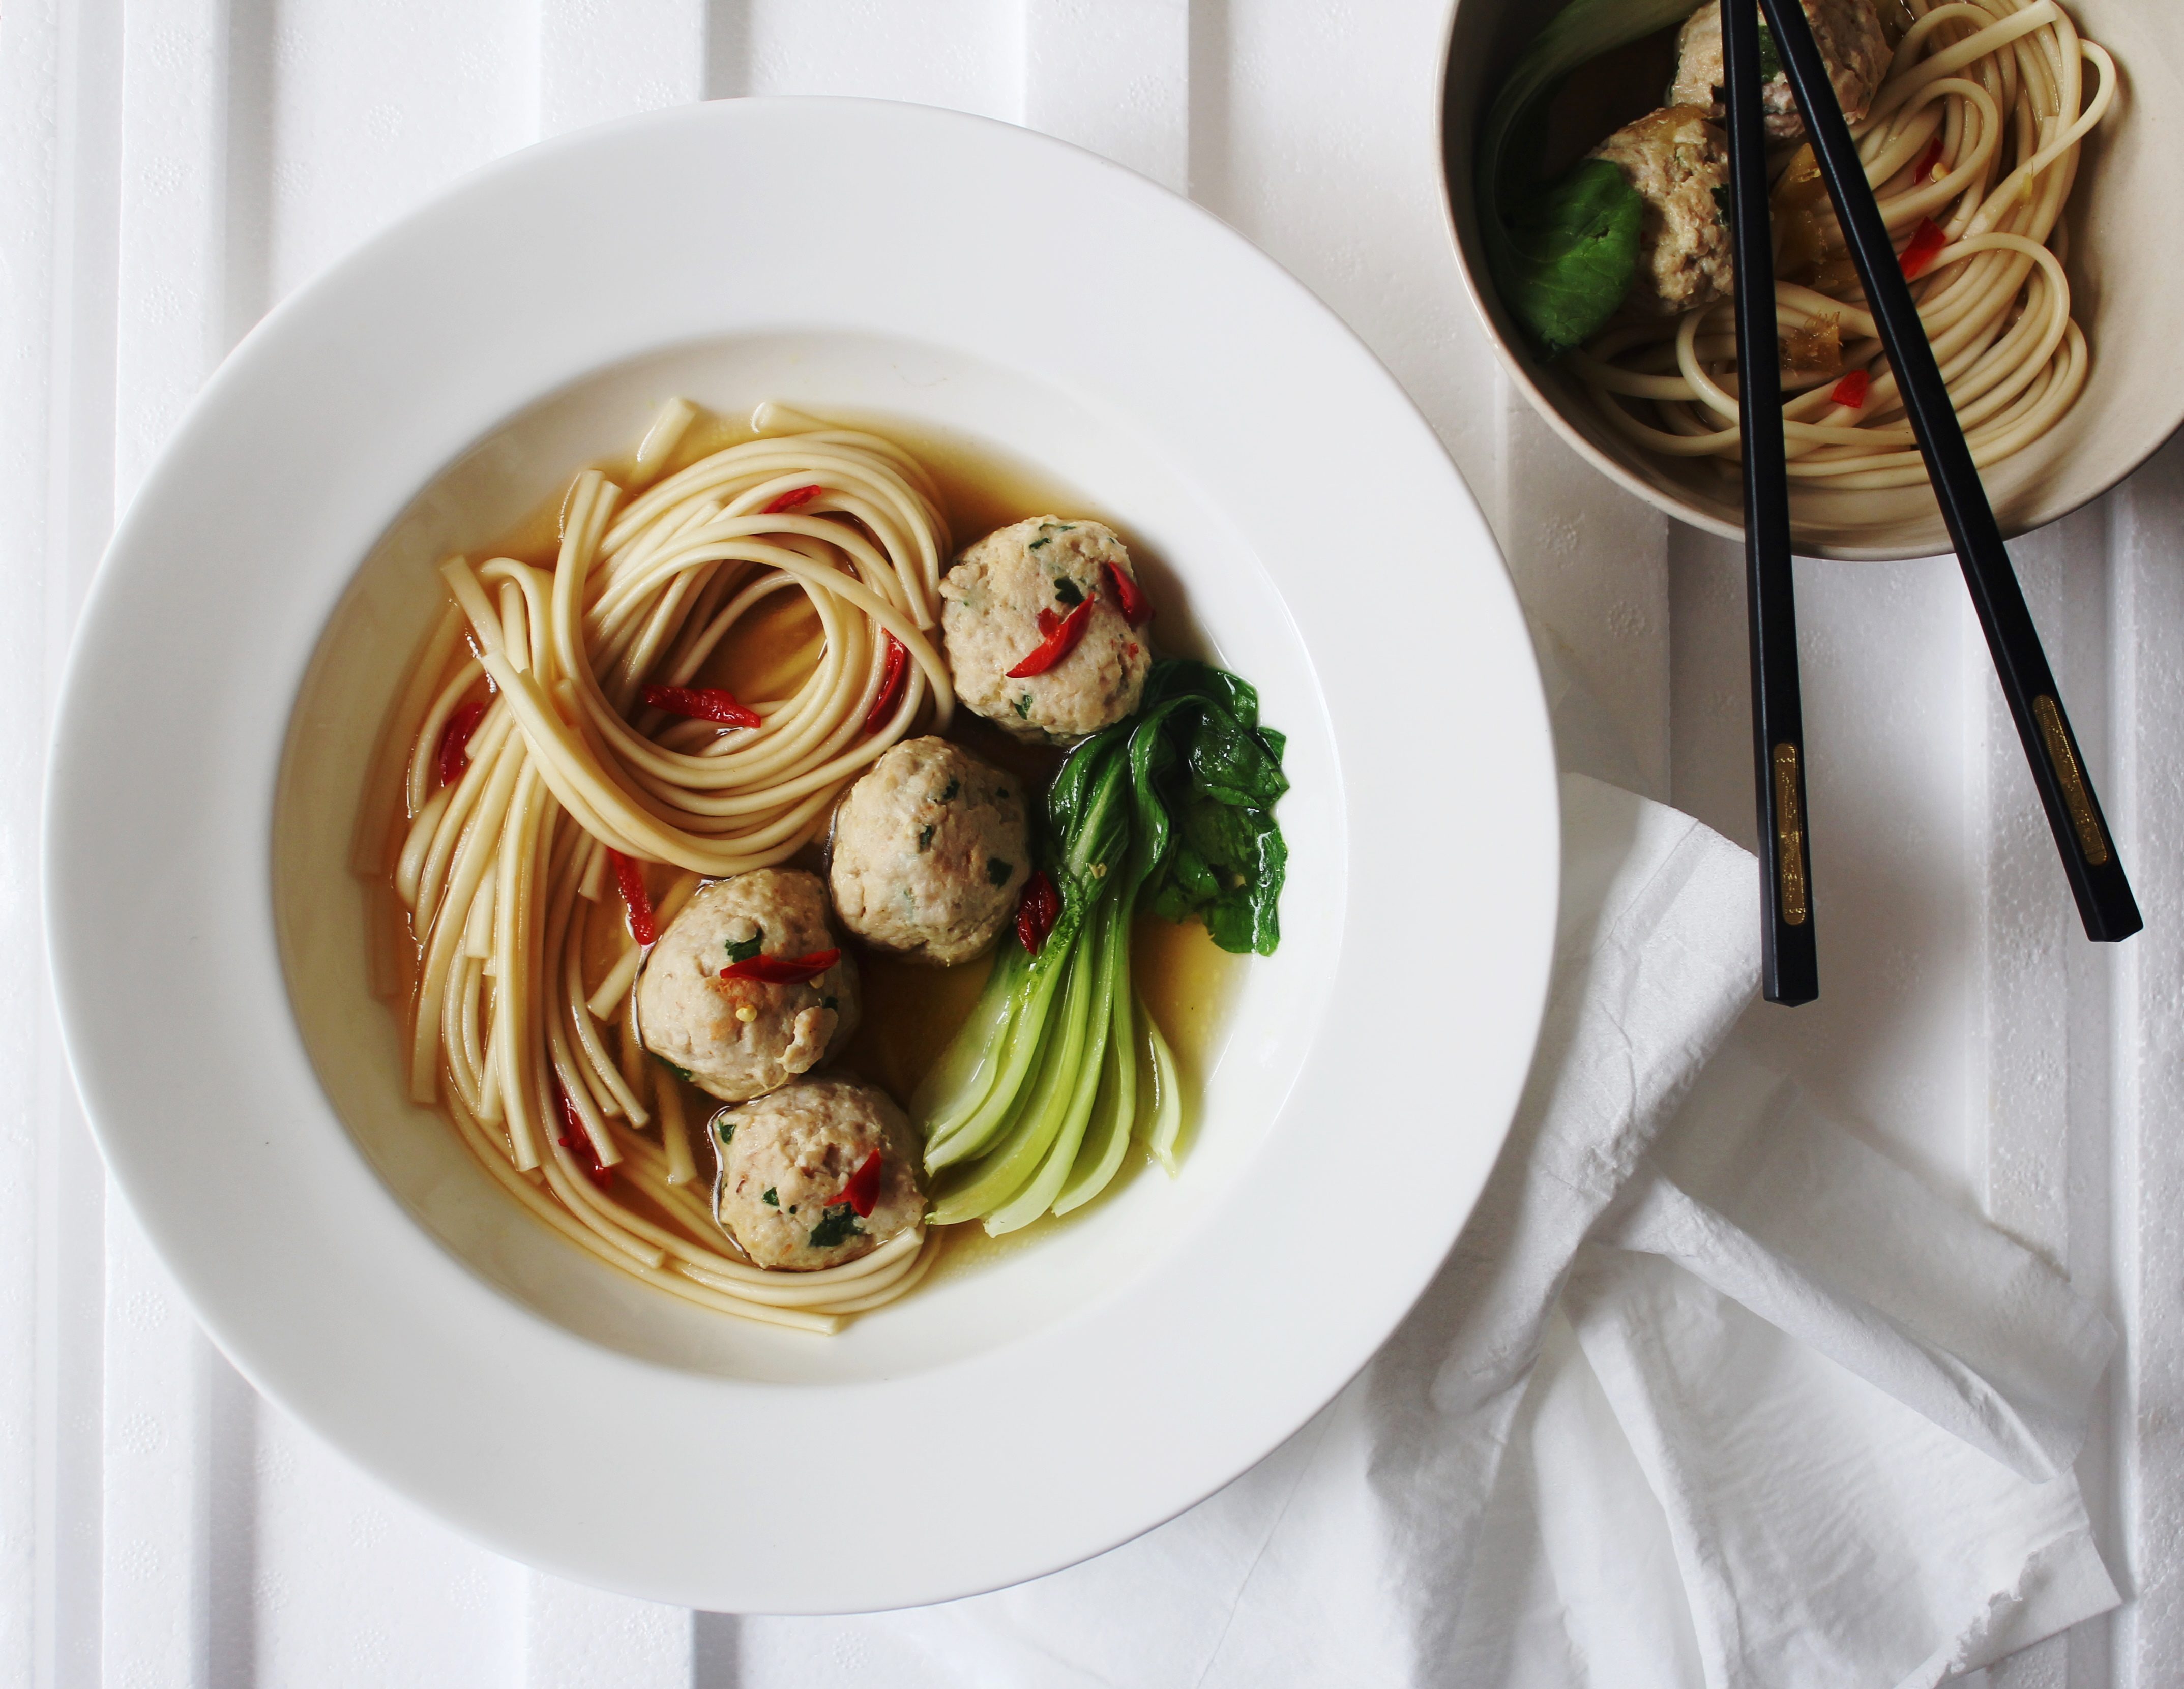
In such situations, I have learnt to treasure a warm bowl of soup. Especially the ones which make a meal by itself. More importantly, the ones that come together quickly. This Asian flavoured soup has no added fats…the chicken dumplings are put together in minutes and poached in the broth. I did tell you how much I rely on minced meat or chicken to come up with simple and quick meals. While I am making the dumplings, the noodles gets cooked on another burner…drain, rinse and add to the broth. That simple. The flavours are gorgeous..ginger-y…so refreshing and warm.

IMG_6641 (1)

If you are sharing this with children, remove the chillies. Add them separately to your meal like I do. If you find the mince mixture too soft to shape into dumplings, add a tbsp of rice flour. The dumplings cook pretty fast. Take care not to overcook them. 3-4 minutes on either side should do. You can break open one to check. If cooked correctly, they will be juicy and soft. Kecap Manis is a sweet Indonesian Soya Sauce..if not available at hand, you can use equal measures of regular soya sauce and palm sugar or honey. Bok Choy also referred to as Chinese cabbage is extensively used in Asian cuisine. If you do not have access to it, substitute with spring onions, basil or coriander.

IMG_6643 (1)


Ginger and Chilli Chicken Dumpling Soup
Serves 4

For the dumplings
400 g chicken mince
1 tbsp grated ginger
2 tbsp sweet chilli sauce
1 egg white (small)
a handful, coriander leaves, finely chopped

For the broth
4 cups chicken stock
1 tbsp grated ginger
1 tbsp red chillies, finely sliced
1 tbsp lime juice
1 tbsp Kecap Manis
Salt to taste

To Serve
Noodles (Udon or rice noodles cooked as per instructions on the pack..I used Udon Noodles)
4 baby Bok Choy, leaves separated
Extra red chillies, to serve

Prepare the noodles following packet directions or until tender. Drain.

Meanwhile, place the chicken, egg white, ginger, coriander and sweet chilli sauce together in a bowl. Using wet hands shape a tablespoon of mixture into a ball. Repeat with the remaining chicken mixture.

Place the stock, lime juice, Kecap Manis, ginger, sliced chilli, in a large saucepan over medium-high heat. Bring to the boil. Reduce heat to medium-low. Add the chicken balls gradually and cook turning once in between (3-4 minutes on each side) or until cooked through.

Add the Bok Choy to the pan and cook for 30 seconds or until Bok Choy just wilts. Divide the noodles and dumpling soup among serving bowls. Garnish with extra chillies. Serve immediately.


Croissant Pudding

20|11|2013

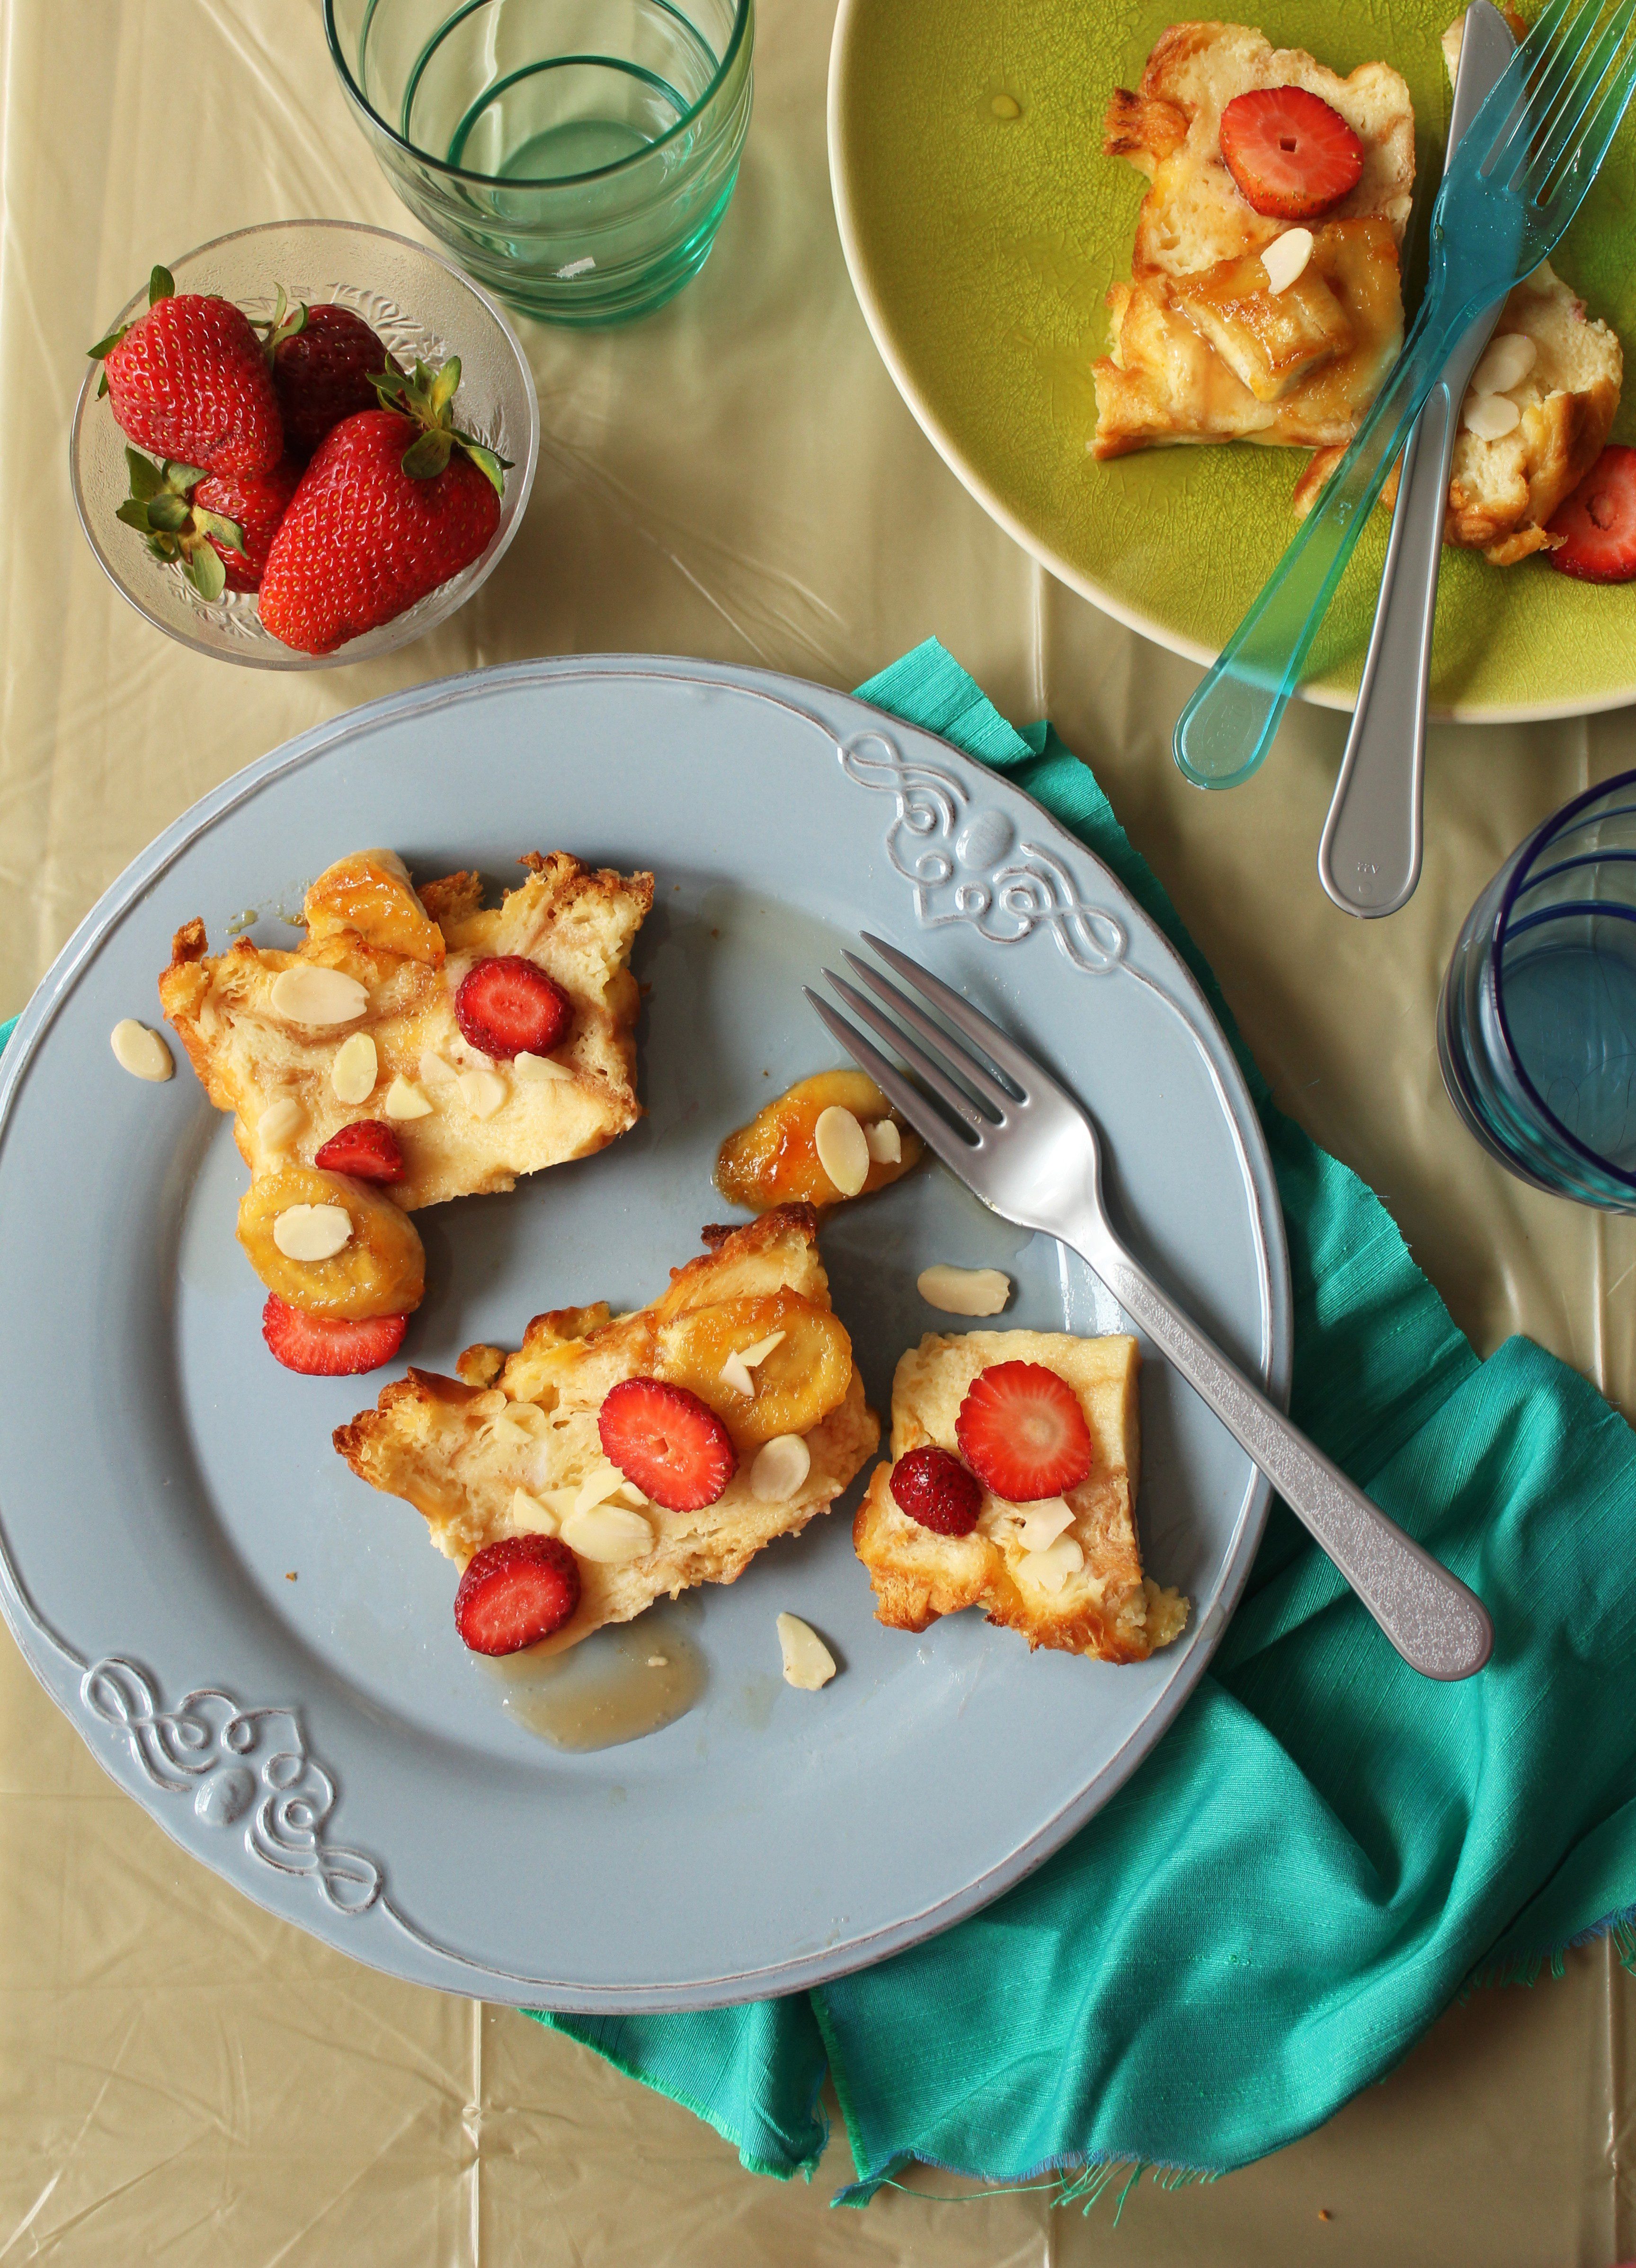
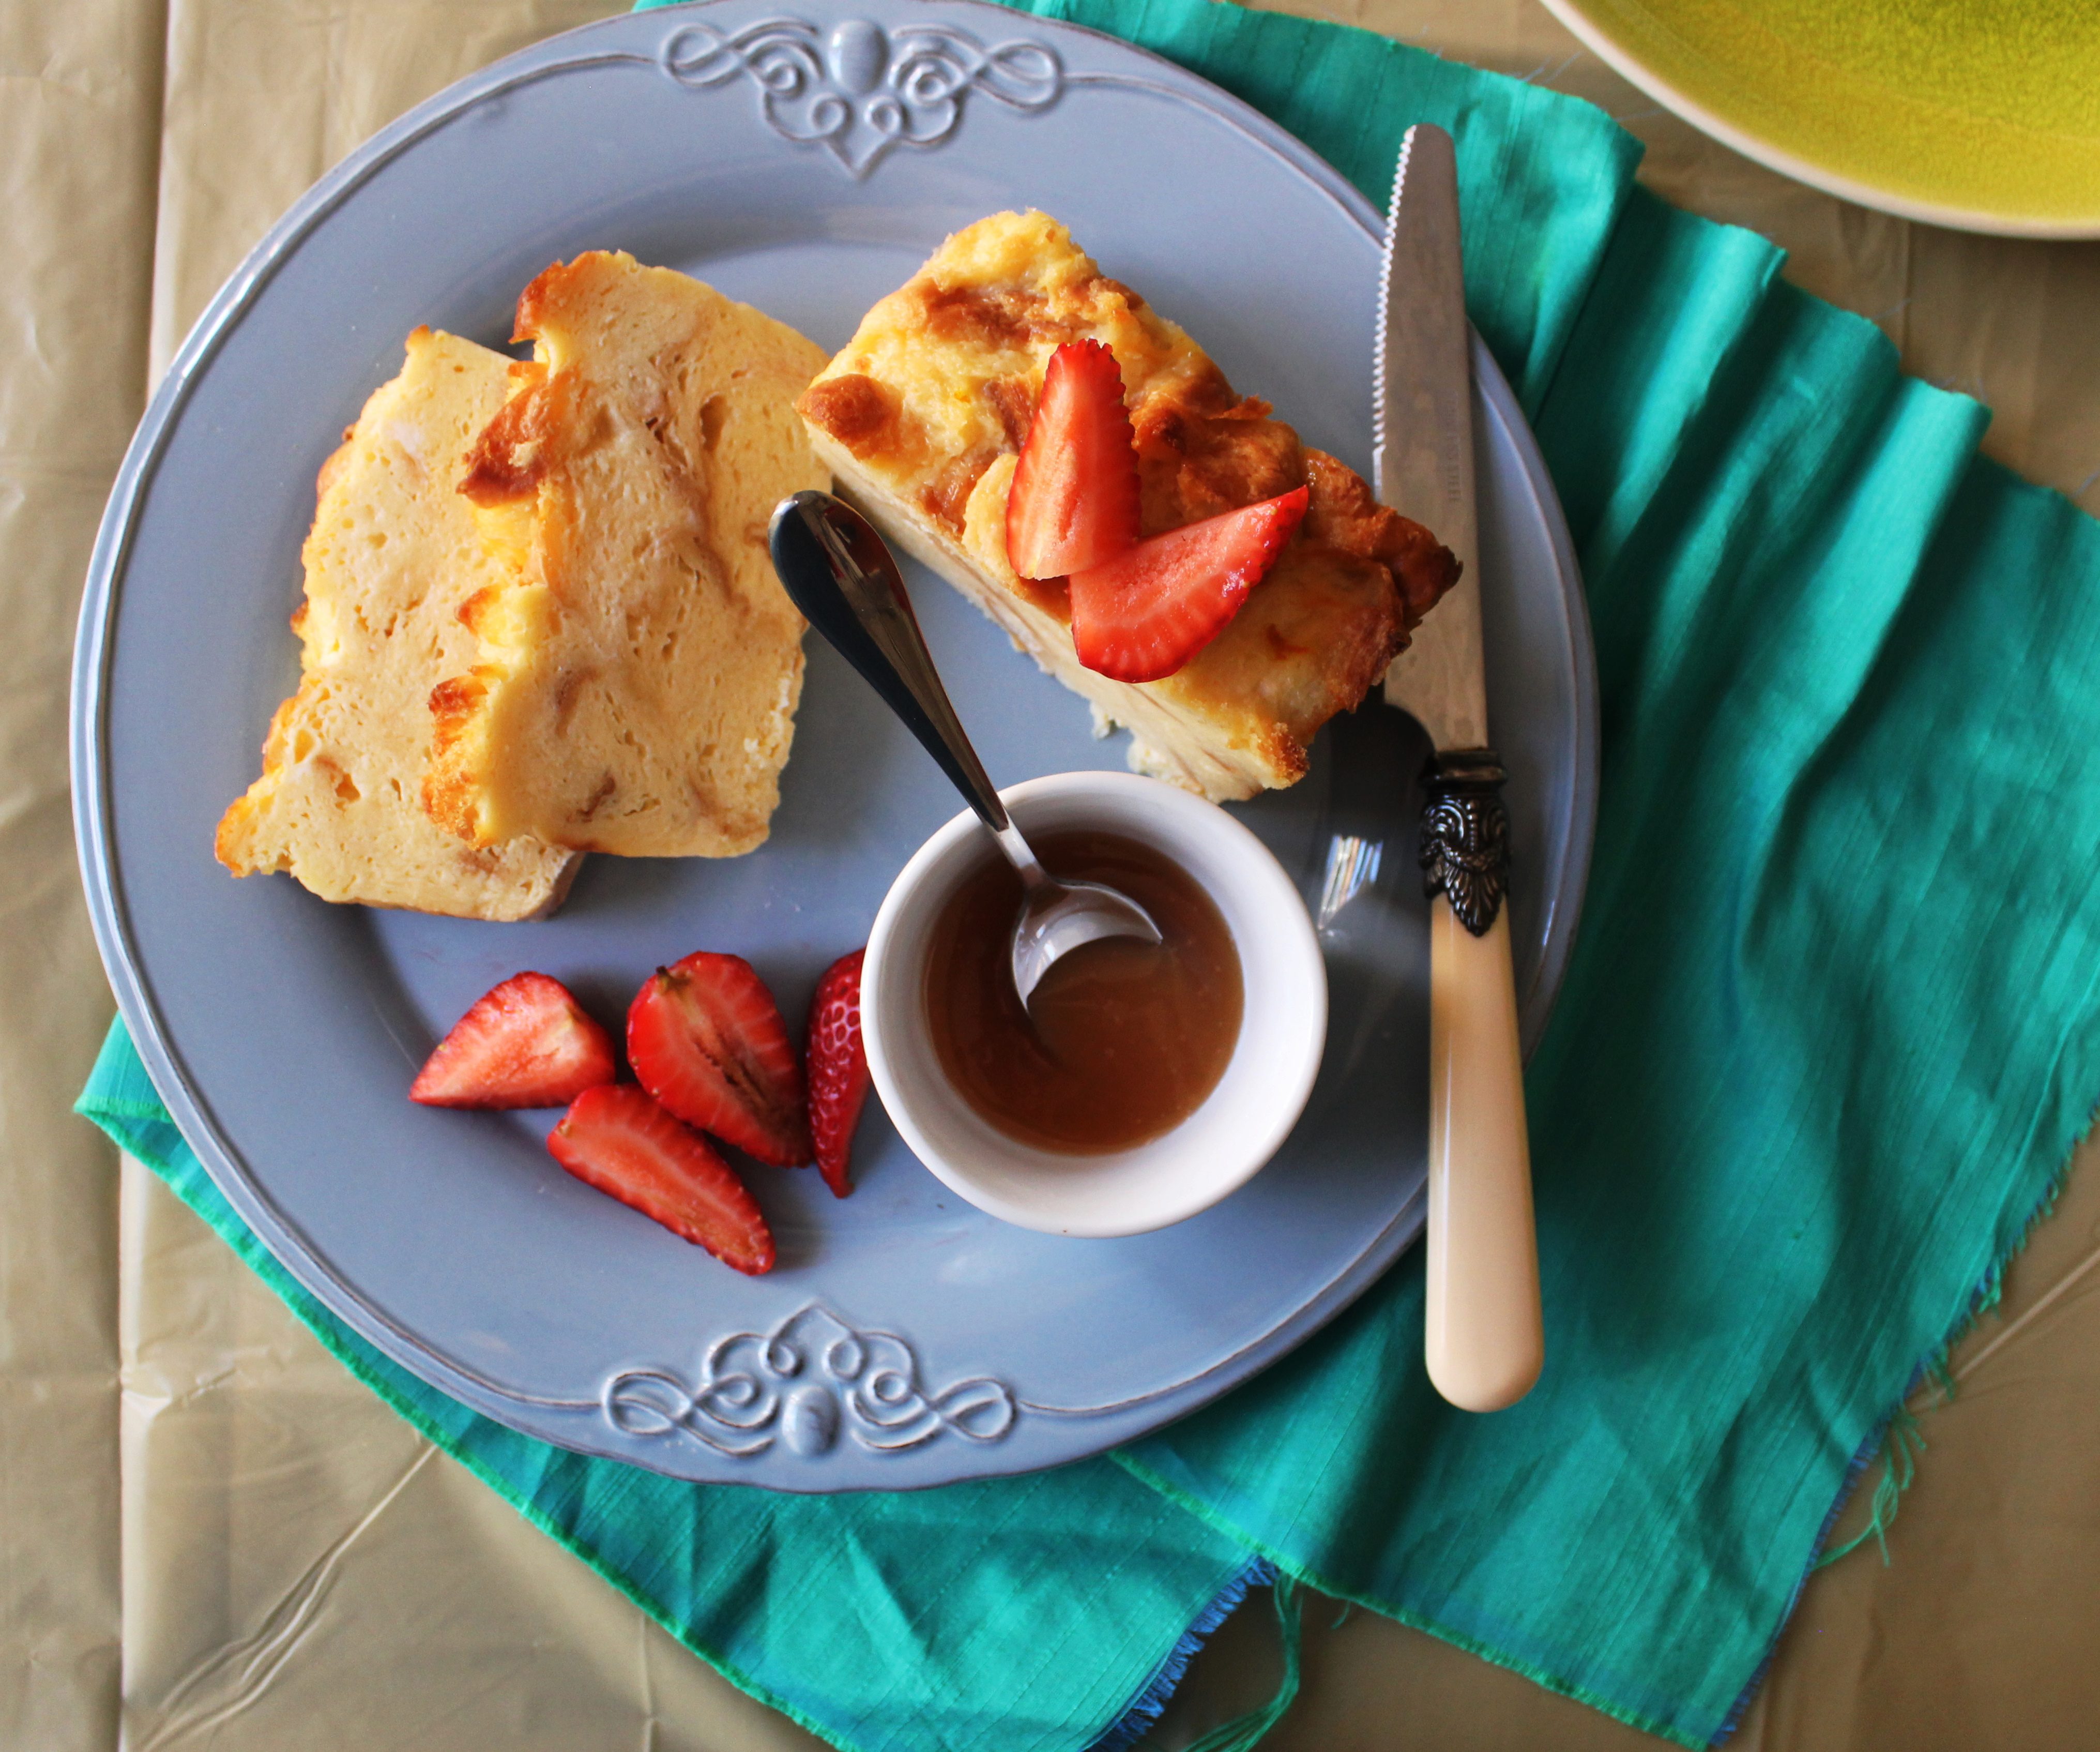
There is not much to write about a Bread and Butter Pudding since it is so popular and probably one of the simplest recipes that exist. I make it all the time for my kids with different fruits, nuts and accompaniments. It is one of those recipes that you make and eat without giving much thought to. Then one day while flipping through a cookbook, the words ‘Croissant Pudding’ caught my eye…actually it was the picture that got my attention. Neat slices of pudding cut and served onto a plate. The idea instantly appealed to me. After all looks do matter and variety is the spice of life! And for some reason nothing excites me more than a recipe makeover.

IMG_6607 (1)

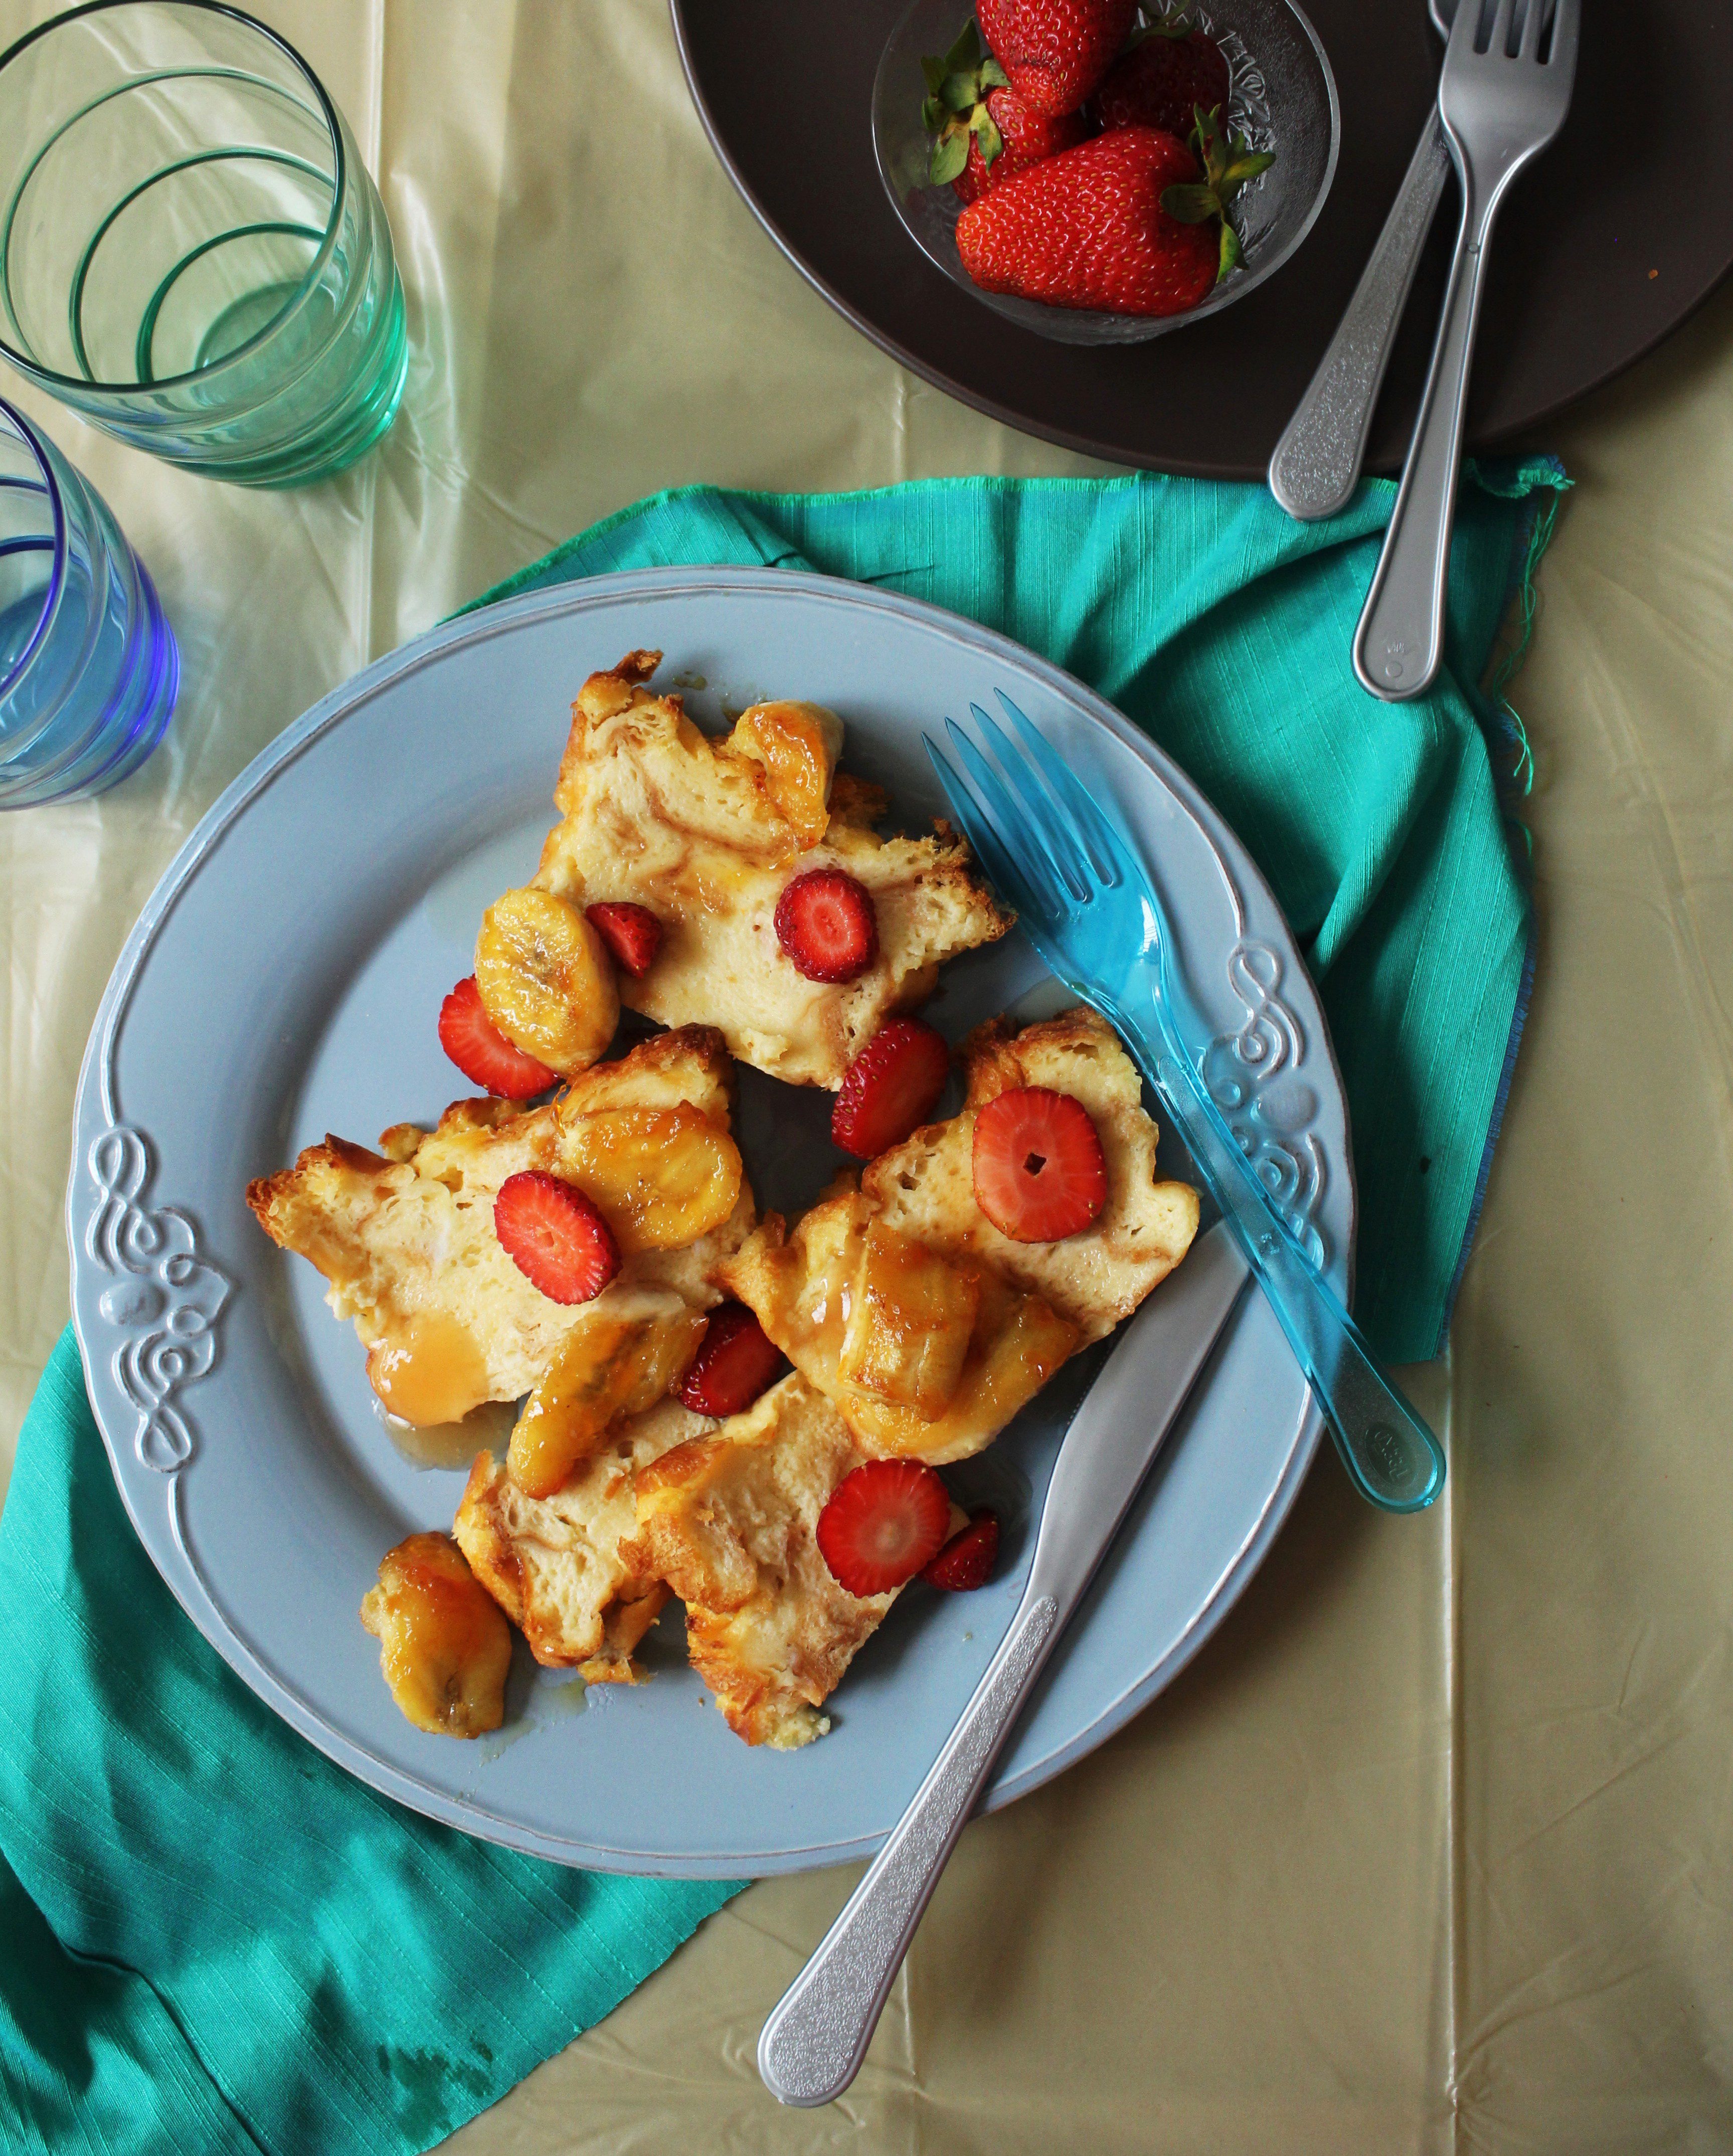
We are big fans of Croissants so the hardest part is to let it stale for a day. My husband was quite disappointed when he found out that they were meant for a sweet recipe and not being served with afternoon tea. However, the kids loved it and went back for seconds. The pudding is not too heavy or rich on account of soaking the croissants in custard for about an hour, as the original recipe stated. Serve it with fruit or cream or even caramel sauce. The best thing about this pudding is that it tastes great, warm or cold.

IMG_6618 (1)

It has been a busy week for me and our weather has not exactly been the best. But I have been feeling happy planning my boy’s birthday and on account of a few things that have been happening to my blog lately. My Cauliflower and Broccoli Gratin was featured on the Huffington Post and that made my weekend. This was exactly a month after the Golden Apple Ginger Cake was featured on the Kitchn. There have been others too but now I really don’t intend to blow my own trumpet. I just wanted to say that it means a lot to me to see all the hard work I do being recognised and appreciated. And to know that so many people out there give me their time…reading through my posts or pinning my pictures…following my recipes…I am overwhelmed…I am moved and I am ever so grateful.

IMG_6599 (1)
Croissant Pudding (adapted with variation from the Delicious Cookbook)
Serves 6-8

4 croissants (preferably day-old), torn into large chunks
4 eggs
1/2 cup (110 g) castor sugar
300 ml milk
300 ml pure (thin) cream
1 tsp vanilla extract
Finely grated zest of 1/2 orange
Caramel sauce, to serve
Toasted flaked almonds and seasonal fruit, to serve

Grease the base and sides of a 1-litre terrine or loaf pan and line with baking paper. Pack the croissants into the terrine or pan, then set aside.
Whisk the eggs and sugar together in a large bowl until just combined. Place the milk, cream and vanilla pod and seeds in a saucepan over low heat and bring to just below boiling point, then gradually pour the warm milk mixture into the egg mixture, whisking constantly. Add the orange zest and whisk well to combine, then pour the mixture over the croissants in the pan and stand at room temperature for 1 hour to allow the custard to soak in – this will make for a lighter pudding.
Bake the pudding for 45 minutes until just set and golden on top (cover with foil if it’s browning too quickly). Remove the pudding from the oven, allow to cool slightly, then turn out and slice. Place on a serving platter and drizzle with caramel sauce and scatter with almonds and fruits.


  • « Previous Page
  • 1
  • …
  • 37
  • 38
  • 39
  • 40
  • 41
  • …
  • 45
  • Next Page »
Hey Sugar
Cake
Link to my Facebook Page
Link to my Instagram Page
Link to my Pinterest Page
Link to my Mail Page
Subscribe to this site
Fresh Awards
2019 Aus mumpreneur
2019 aus mumpreneur
Mumbrella

Copyright © 2026 · Sugar Et Al · Designed by Smitten Blog Designs · Log in